换一换
换一换 


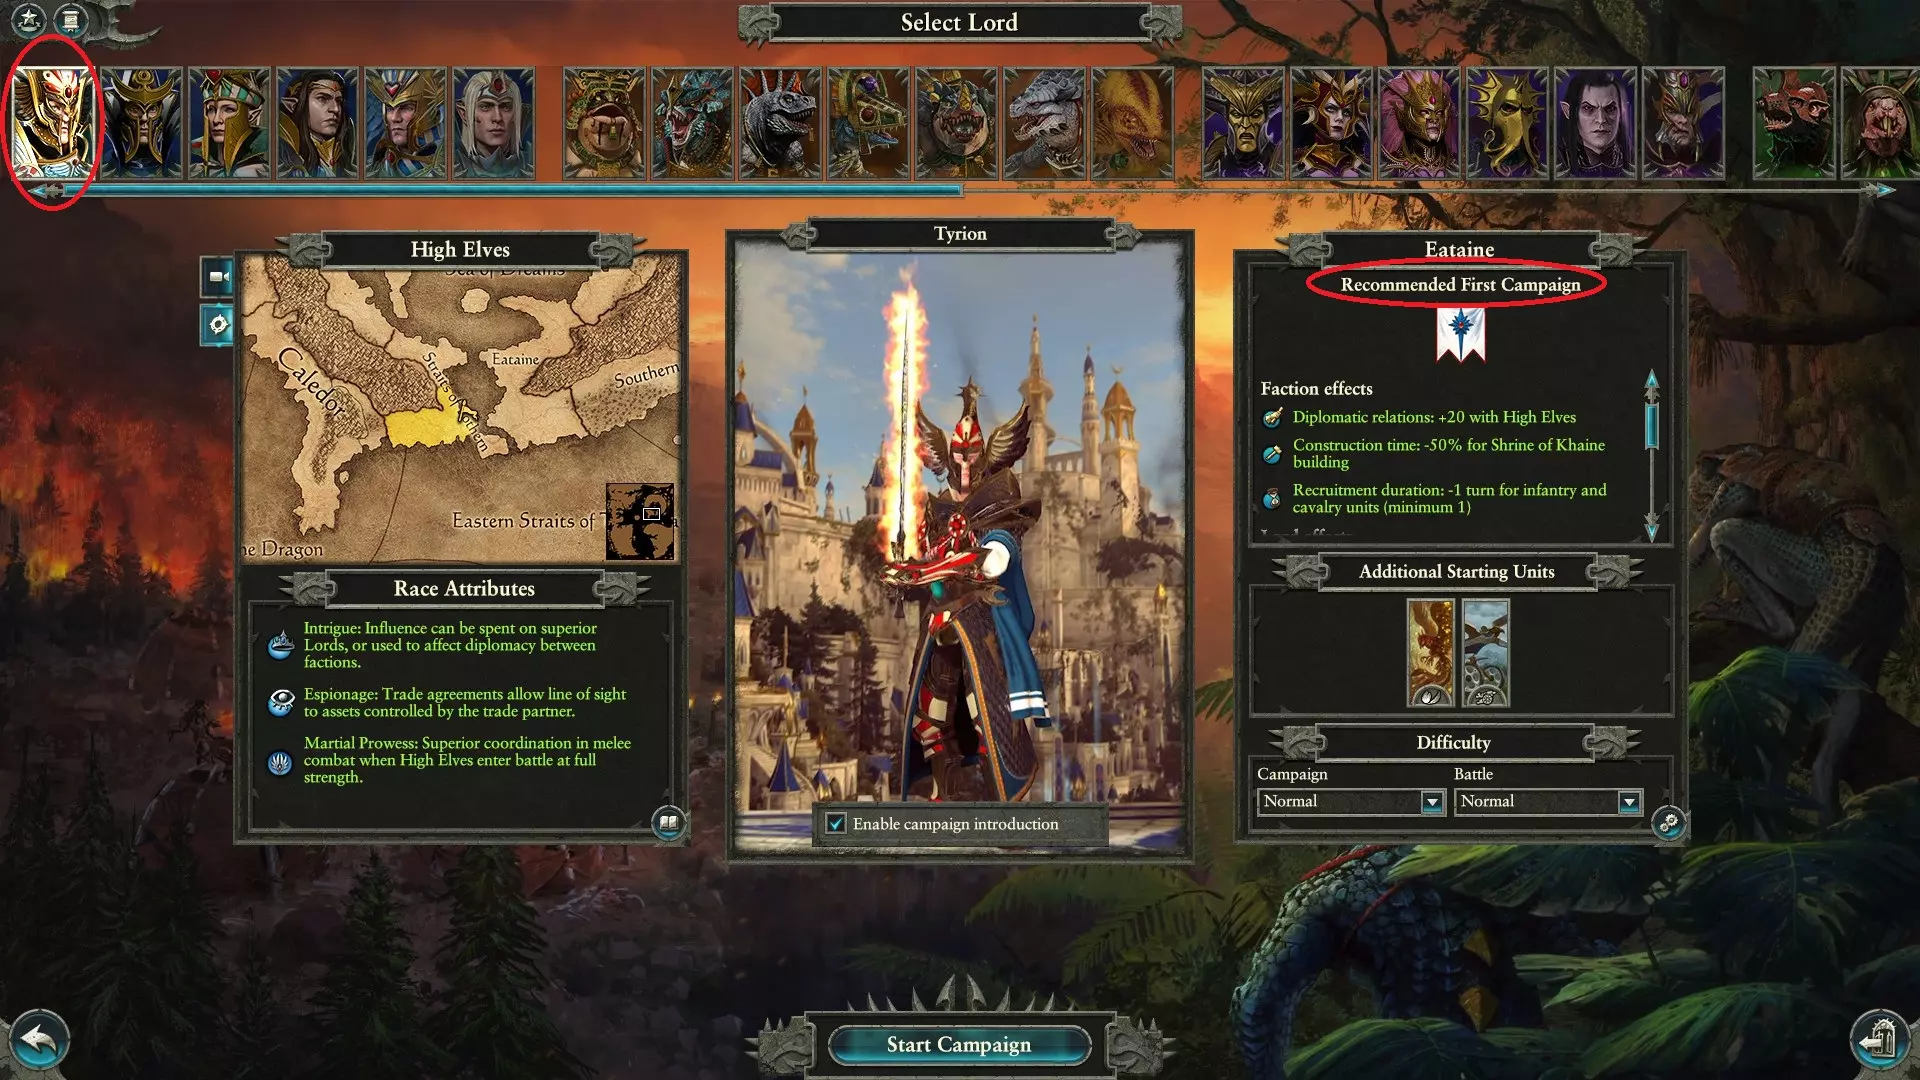
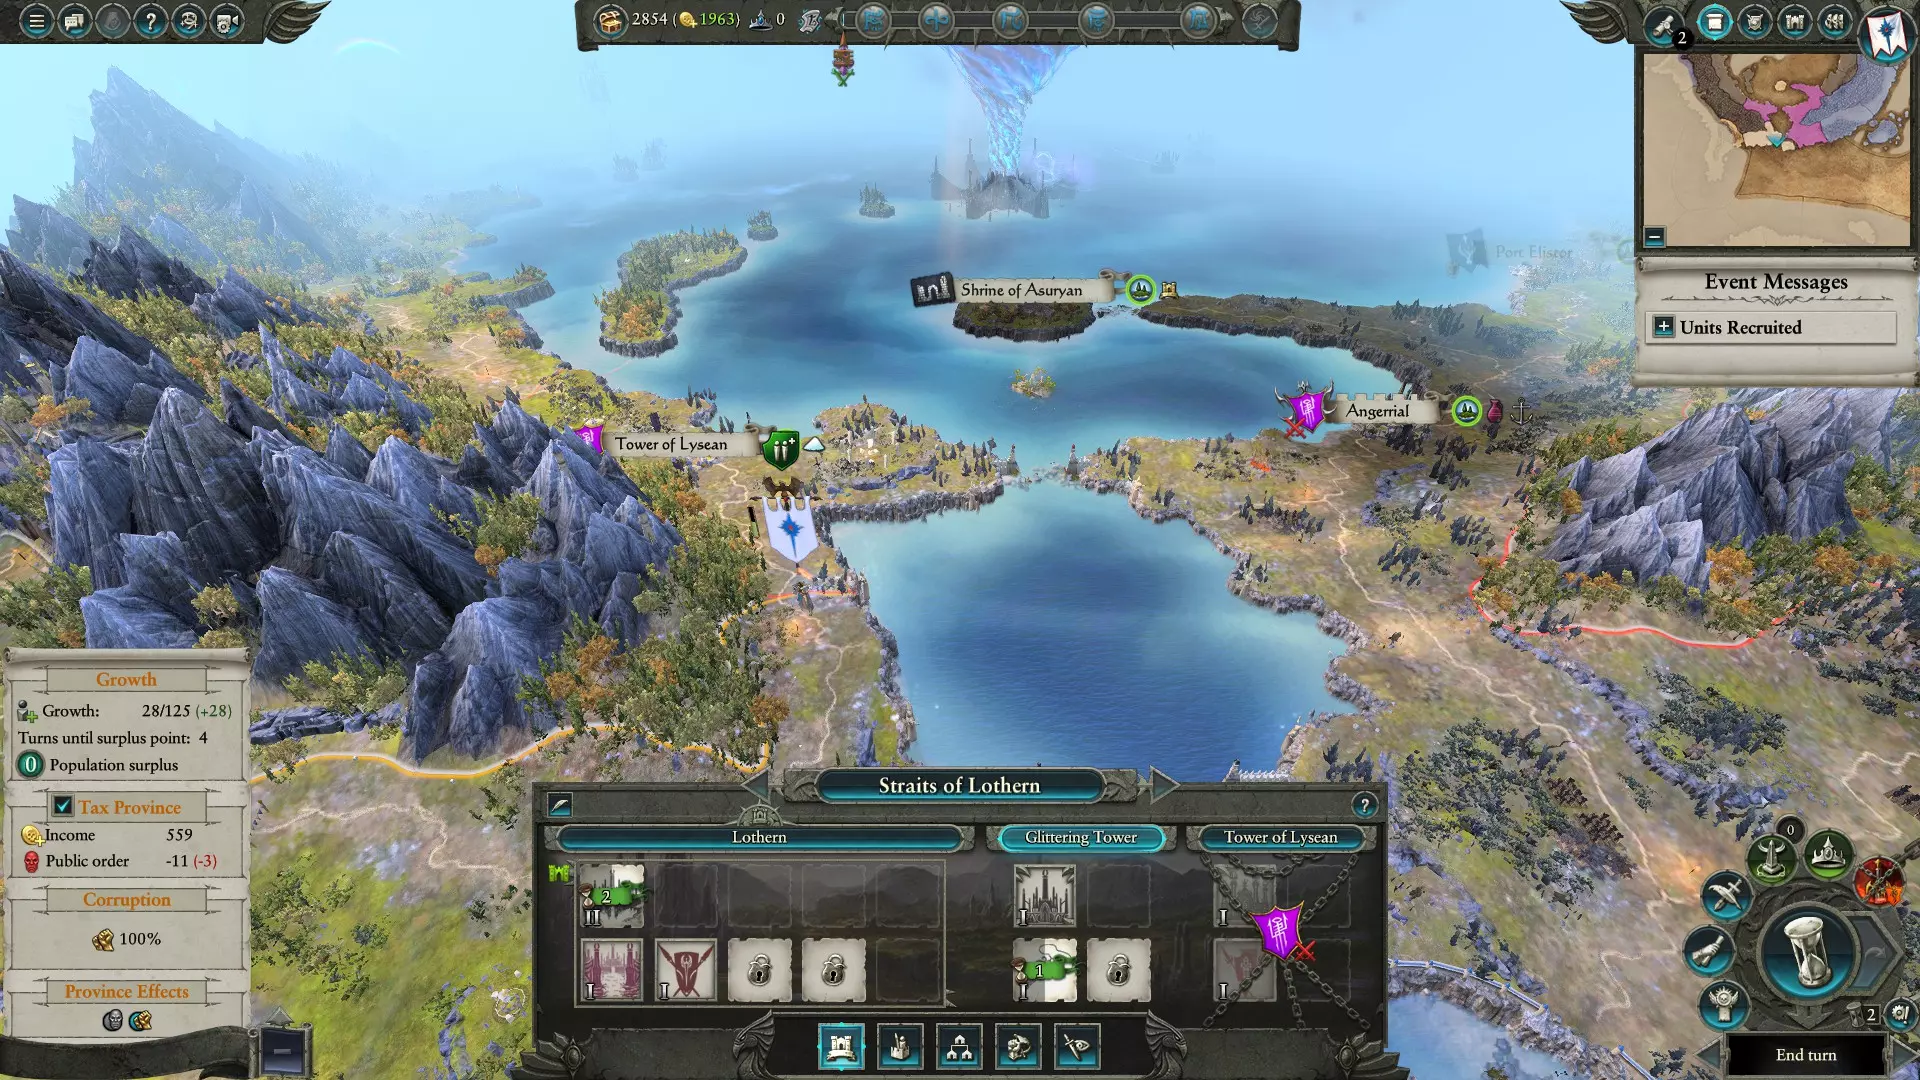
本指南汇集了我给几位新玩家的建议。我开启了一个高等精灵(HE)战役,并摸索出如何快速高效地实现良好开局。我在战斗中使用基础战术,且没有过度滥用AI机制。 本指南将按回合划分章节,说明每回合需要做什么以及如何去做。指南末尾会提供一些“后续发展方向”的选择。 完成本指南后,你应该已稳固控制两个行省,达成多项贸易协定,并为战役打下良好基础。 基本概述 本指南主要涵盖《全面战争:战锤2》凡世帝国(漩涡)战役中,洛瑟恩(泰瑞昂)势力的前15回合内容。每个章节将简要总结该回合的行动要点。最后,我会为新玩家提供一些战斗战术建议。 这并非一份全面或完美的指南。我不常玩精灵派系,更多是帝国/矮人玩家,但对于只购买了《全面战争:战锤2》的新玩家来说,这个核心种族或许是最佳的入门选择。 我正在针对“格罗姆/艾萨里昂”DLC更新这份内容。我会包含关于绿皮潜在威胁的信息,以及在游戏开始大约15回合临近结束时该做什么的通用建议。 缩写指南: NAP:互不侵犯条约 TA:贸易协定 LL:传奇领主 第一回合前 开始游戏前,你需要了解精灵的基础知识。他们是一个全面的种族,拥有一些非常有趣的派系可供游玩。 所有单位都能从【战斗 prowess】中获益,这意味着只要他们的生命值保持在50%或以上,战斗能力就会更强。这使他们在战斗中具备不错的持续作战能力,因此即使是基础步兵也能坚守阵线。 他们的基础步兵相当可靠,而精英单位(剑大师和凤凰守卫)是游戏中最优秀的单位之一。 骑兵表现尚可,速度和强度足以让你在游戏的早期和后期都能运用锤砧战术。 英雄们在不同程度上都很有用,但贵族在基础战斗之外还有特殊用途。这一点稍后再详细说明。他们的法师可以使用一些非常有用的法术派系(学派/类型)。 他们的巨兽单位很有趣。有些实际上相当强大,但要到游戏后期才能获得。不过泰瑞昂初始就拥有一只火焰凤凰,所以你会经常用到它。 他们的炮兵是唯一的短板。并非毫无用处,但可能是游戏中最差的。不过在游戏初期还是相当有用的。 第一回合 选择泰瑞昂,听他说“为了更伟大的利益”,然后做决定:是否开启教程? 如果你勾选了教程框,就需要忍受大约30分钟的介绍教程。老顾问会给出建议并指导你的前几个回合。为什么要这么做?因为你会获得额外两队银盔骑士。它们可以让你的游戏初期轻松不少,但也会产生额外的维护费用。 我写这份指南没有按小时收费,所以我跳过了教程,在没有教程加成的情况下用一支军队撰写了这份指南。如果你选择完成教程,只需尽可能采纳本指南的建议,并运用指南末尾描述的锤砧战术即可。 回合1: 与尽可能多的高等精灵派系签订互不侵犯条约和贸易协定(例如伊瑞斯、艾里昂、科提克、萨菲瑞等)。每与一个派系签订贸易协定,你都会获得更多的地图视野,改善与该派系的关系,并能让你更专注于附近的敌人。 唯一不友好的高等精灵派系是卡勒多。不必担心他们,他们很快就会自食其果。处理好外交事务后,每回合你应该能额外获得200-250+金币!很好。现在进入战争部分。直接率领军队向东南方向移动,进攻【闪耀之塔】定居点。 本指南默认你玩【全面战争】系列是为了体验战斗。我打的所有战斗基本都是手动操作,因为自动结算算法并不完全公平。具体原因你可以自行研究。 与驻军进行手动战斗,并按以下方式部署你的部队:
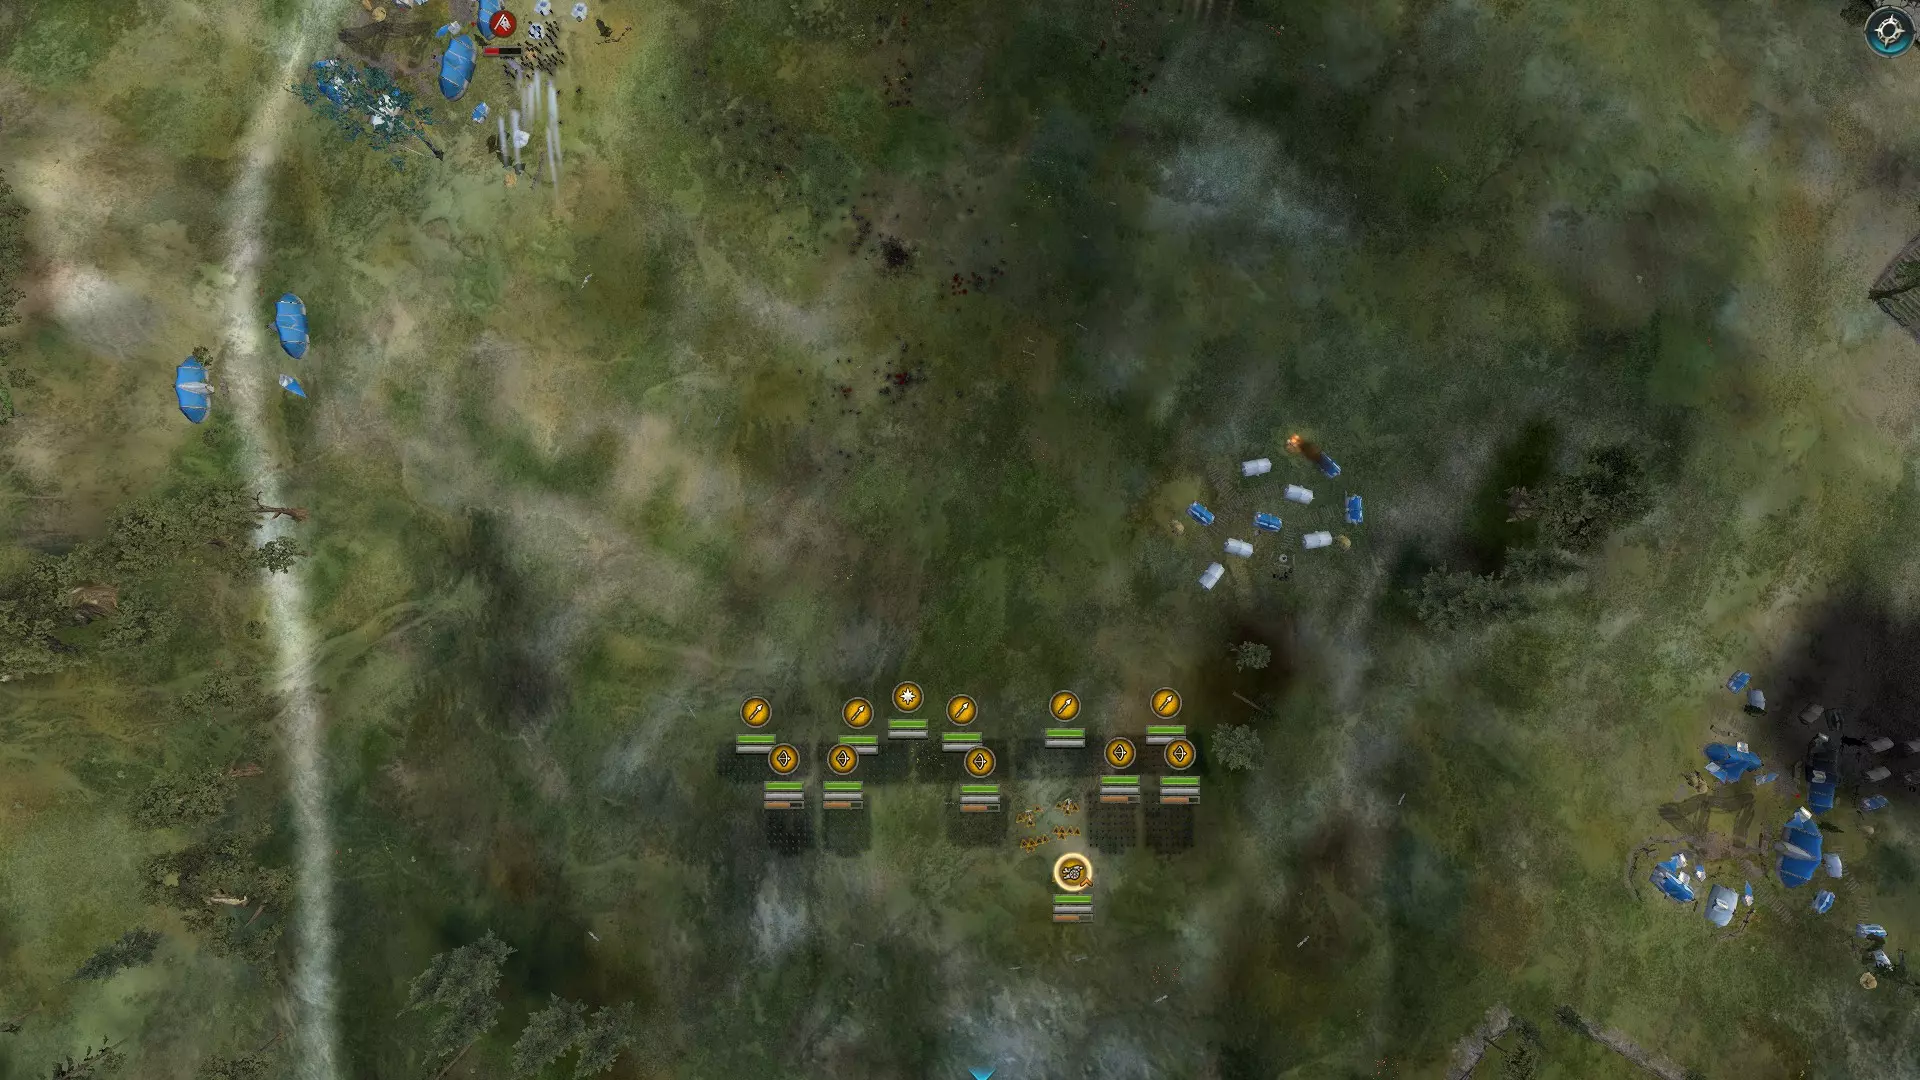
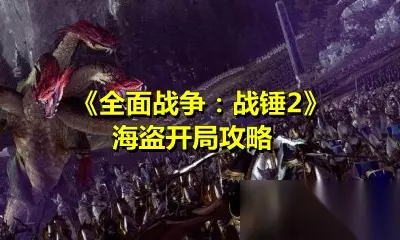
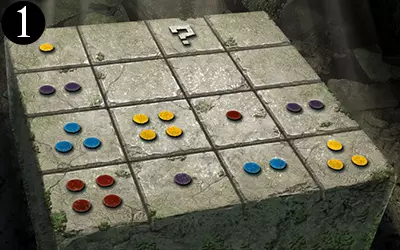
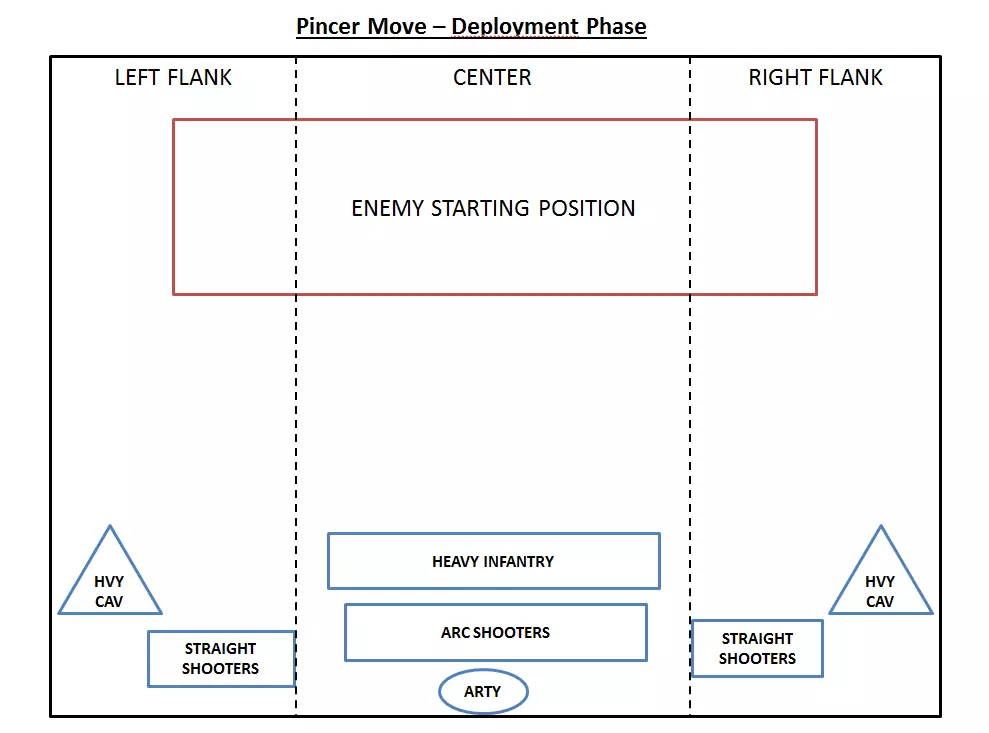
前排部署长矛兵,两端部署弓箭手集群,炮兵则安全部署在后方。 使用炮兵的【散射射击】模式(该选项位于屏幕左侧),并集中攻击【敌方领袖单位】。该单位有明确标记,若能将其重创,将严重打击敌方士气。 使用你的凤凰单位(未在图中显示)对接近的敌方阵型进行【火焰轰炸】。一旦敌方步兵与我方步兵接战,让凤凰单位攻击敌方的弓箭手单位。确保你的弓箭手在敌方接近时集中攻击步兵,随后切换目标攻击敌方弓箭手(但不要攻击凤凰正在对抗的那些,请注意避免友军误伤)。 在上面的图片中,守军甚至没能抵达我的前线。
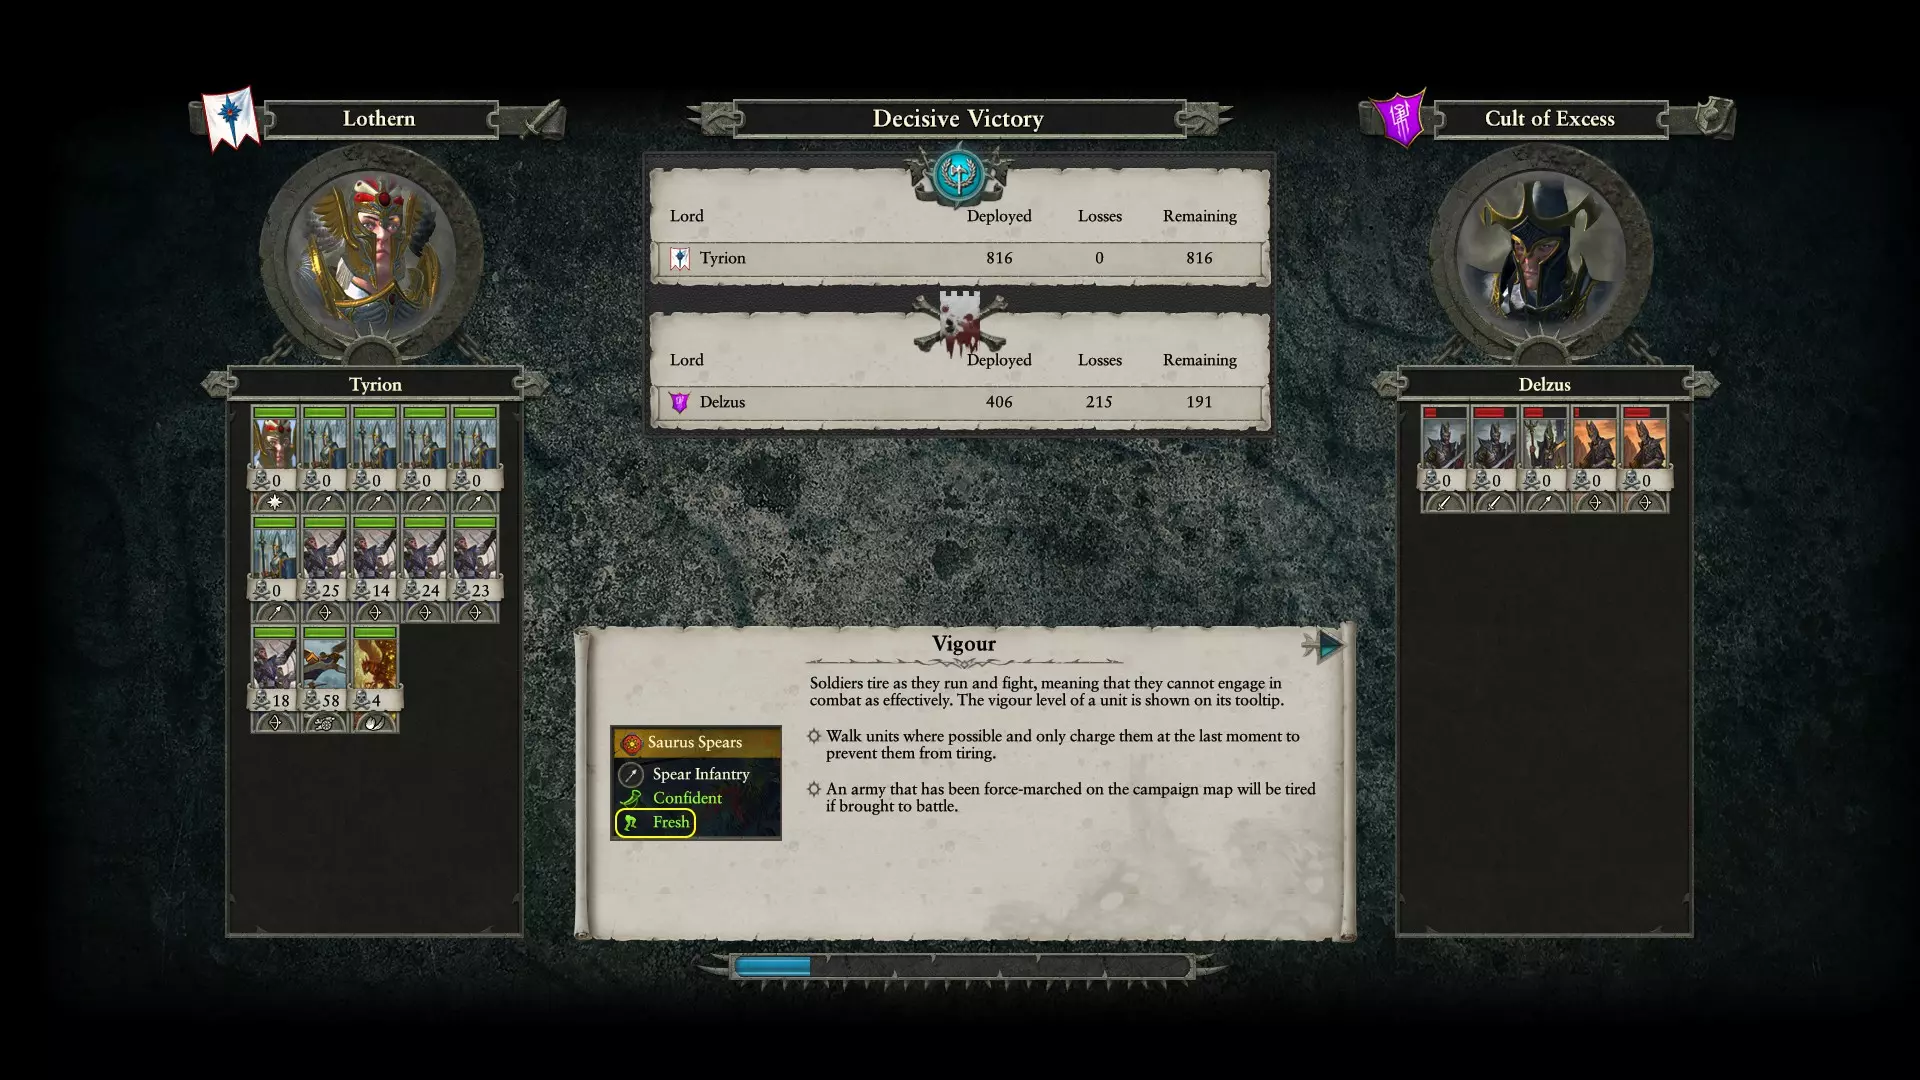
战后选择占领(而非掠夺后占领)。将你的第一个传奇领主点数投入【行军路线】——这是一个蓝色技能,能增加你的 campaign 行军距离。你需要这个技能来快速移动并确保达成目标。 招募两队矛兵和一队弓箭手(或一队矛兵和两队弓箭手,取决于你的偏好)。 在【璀璨塔城】建造贸易建筑(每回合提供金币和一些精灵饰品)。 恭喜,你大致上已经步入正轨了,差不多吧。 注意:此步骤基本保持不变。精灵友方派系的可能性相当大,但有时某些派系就是会讨厌你,不愿意进行贸易或签订互不侵犯条约。对此你无能为力。只需尽快与尽可能多的派系保持友好关系,同时避免实际结盟。 注意2:他们已修改了高等精灵的科技树。现在获取基础科技不再需要升级步兵建筑了(谢天谢地)。所以你实际上可以在第一回合拆除首都的该建筑,这样第二回合就能获得一些额外资金。你最终可能需要重建它,但我更喜欢使用长矛兵和基础弓箭手(这两种单位现在都由定居点建筑招募)。 第二回合 移动到洛瑟恩和莱西安之塔之间的边境(洛瑟恩东北方向)。即使有移动力也不要越过边境。你需要在本回合进行招募。
尽可能获取更多贸易协议。必要时,如果敌人与你相距甚远,可以同意加入战争(例如:如果你加入查瑞斯对抗凯恩之邪教黑暗精灵派系的战争,他们可能会同意签订贸易协议)。 招募2名矛兵和1名弓箭手,或者1名矛兵和2名弓箭手。实际上,与上一回合的招募相反即可,你需要让军队保持一定的平衡。 注意:除非你在第一回合拆除了兵营,否则本回合无需改变。如果拆除了兵营,请在首都建造一个增长类建筑,这将有助于部队补充和快速发展。 第三回合 再次检查外交界面,寻找签订贸易协议的机会。地图视野、额外资金以及关系提升都将帮助你在未来避免不必要的冲突。 攻击并占领莱西安之塔。再次强调,手动操作才能以最小损失确保胜利。 将你的第二个传奇领主点数投入【剑术】。提利昂将是整个游戏中极为有用的战士。你可以在游戏初期用他将敌人聚集在弓箭手前方,轻松获取击杀。反正他热爱战斗,这简直是刻在他骨子里的。 恭喜,你现在已控制第一个行省。记住,本指南结束时你将拥有两个行省,所以你已完成一半! 发布行省法令(点击一个定居点,查看左下角的蓝色按钮)。选择【建筑成本降低与增长】法令。这将有助于游戏初期的基础设施建设。 再招募3个单位,单位类型由你选择。我通常在招募6-8名矛兵后会专注于弓箭手。 在利西安建造贸易资源建筑。 注意: 情况开始变得复杂。纵欲教派的领主强行行军至距离晶辉塔大约一半路程的地方。我面临一个选择:继续让泰瑞昂推进,在他们升级首都前占领安格瑞亚,或者撤退防御。我选择了激进路线。 我招募了一位新领主,生命系法师,并让她招募了三名弓箭手。她的魔法、部队以及驻军(仍在从占领晶辉塔的战斗中恢复,但至少有一半生命值)将作为我的防御力量。这可能会失败,但我不会浪费一个回合。同时,拆除利西安的集结地(兵营),并尽可能优先建造经济和发展类建筑。第四回合 向东移动至利西安东部的安杰里尔
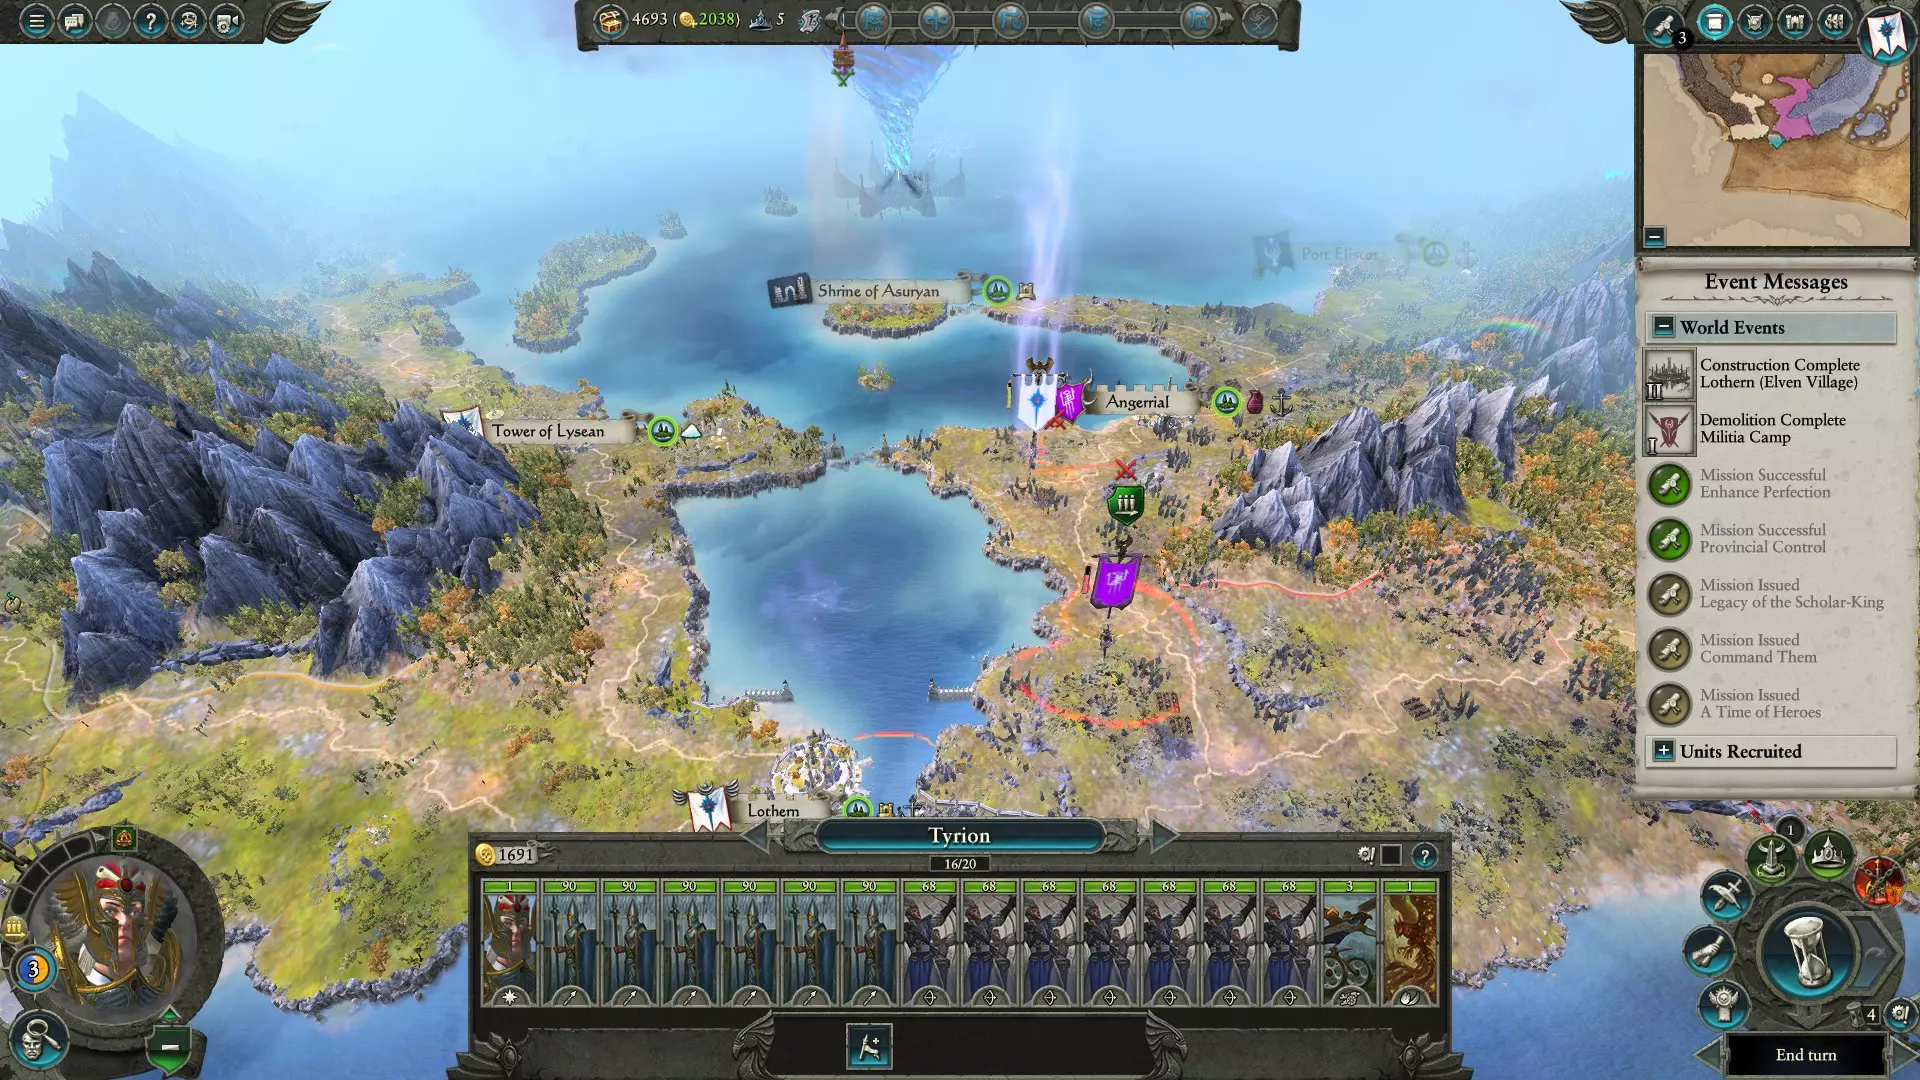
纵欲教派可能会派遣一支军队前往洛瑟恩。不必惊慌,你的驻军足以抵挡他们,而且他们很可能无论如何都会来攻击你。 建造贵族招募建筑和公共秩序建筑(可能是散步道?广场?这类建筑有大约五级)。 你需要这两座建筑才能招募贵族英雄,这对获取影响力点数很有用,同时也能提升公共秩序(这也是一个任务的要求)。 结束回合。 【注意:纵欲教派可能会从洛瑟恩掉头,转而攻击泰瑞昂的军队。他们可能会与你开战。不要惊慌。我损失了189人,而他们损失了800人。这简直是免费的经验和金钱!】
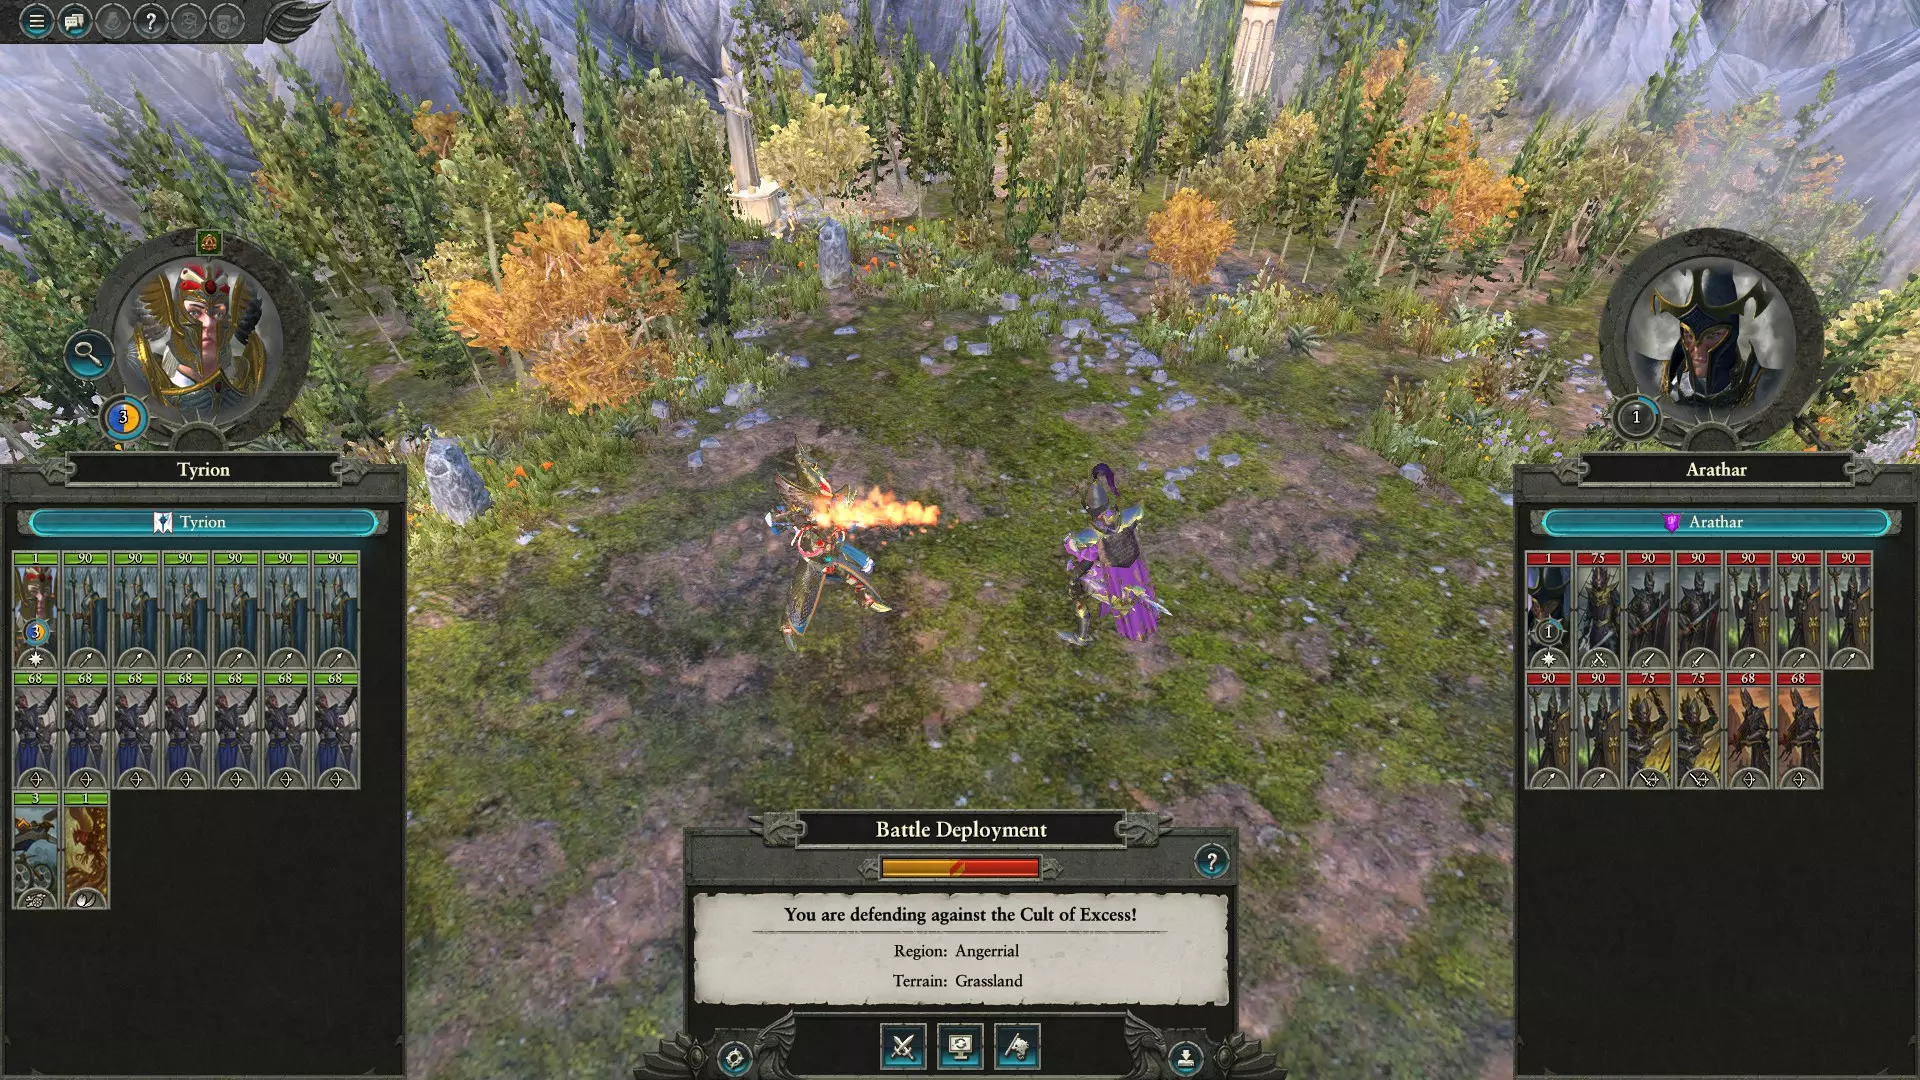
NOTE: Yeah, the Cult Lord is still heading to the Glittering Tower BUT he'll have a hard time taking it. Tyrion going for Angerial may make him rush back though Turn Five If you were attacked by Cult of Excess during their turn, congrats on Tyrion's new level and put his point into "Speed of Asuryan." Attack the Cult of Excess army and in this case, because of your superior numbers and their (hopefully) massive losses from the earlier fight, you auto-resolve to wipe out the entire army. Merge units to save some income. Losses should be minor so far, so you'll only lose maybe one or two units and the rest should be mostly okay. Move toward Angerrial. NOTE: So yeah, The Cult attacked the Glittering Towers in this run through. My Archmage and her three archer battalions made full use of the garrison fource (three damaged spearmen and two damaged archers). But we snagged a heroic victory. Basically I used the Lore of Life Earthblood and Awakening (AoE burst of damage) to keep my front line from being overwhelmed. Meanwhile, my archers did a bulk of the killing and focus-fired on the enemy archers/corsairs. once those broke, I moved my archers in behind the enemy frontline and shot them in the back with arrows. Lots and lots of arrows Dude basically lost EVERYTHING. I got a free 500 gold and a level for my new mage. She has a -15% speed trait, but she'll do as a filler lord until I get some influence farming done. I won't give her a full stack because that's crazy expensive. Probably just a 7-8 unit defensive force to move as needed. I've also named those three archer battalions "The Glittering Host" so they don't get accidentally disbanded in the future. They deserve to be respected for that accomplishment. Turn Six Congratulations! Your Rally Field is now upgraded. You can recruit different units now but more importantly, you can.... RESEARCH STUFF. Start with the basic one turn research for the military. This will complete a quest and get you some easy cash/influence. Fight the Angerrial Battle. Use the blind spot on the left side of the map and set up your army. Use your archers and artillery to punish the idiots on the way. Have your Phoenix deployed on the opposite end of the map and have him swing in behind. He can fire bomb units along the wall and once empty, prepare to swoop in once Tyrion and his spearbois get sent in. I usually wait until after my archers and bolt thrower are all out of ammo, but you can use your own judgement here. It's a hard fight but your have massive superiority and you can rear charge your phoenix into fights your spear men are losing. You'll lose some soldiers but wipe out of the Cult in this battle. No worries. Finish the battle and put your LL point into "Hard to Hit" to improve Tyrion's sustainability. Upgrade the Public Order (PO) building in Lothern. Look for more TA. I got Tirana to join me for a total of six TA by turn six. Turn Seven Congratulations, you've just gotten the first research quest done. Now choose what you'd like to research. I usually opt for "Archery Prowess" which gives boosts to your ranged unit reload speeds. Force March your army toward the Shrine of Asuryan. You'll be colonising it soon. Offer some small gifts (400-500 GP) to any HE factions that are resistant to NAP or TA. Caledor are probably busy dealing with Count Noctilus of the Dreadfleet. Good. They should be too busy to declare war on you for the time being. You may get offers for "Defensive Alliances" or even "Military Alliances" with some of the HE factions. This is a terrible deal because AI allies tend to drag you into their wars. We don't want enemies who are close enough to actually fight you. Politely show them the door but give them a small gift as consolation. Might help them fend off Norscans and Pirates. With definitely help improve your relationship with them. You may be able to hire a hero at this point. You can look at your options. You may have enough influence saved up from various scenarios the game offers you or from quest completion. If you do, buy a noble for 15 influence points. If you don't have enough for that, buy a scrub hero. HE need influence points to hire decent heroes/lords. The reason for this is because HE people tend to get really spoiled and arrogant living on their bubble continent of Ulthuan. Living for thousands of years tends to leave people with some personality issues. To show this in game, 'scrub' heroes cost you zero influence but they have negative traits (like penalties to upkeep, public order, etc.). Decent heroes and lords may cost 15 influence. BUT the expensive ones for 45 or 60 influence points are almost as good as proper Legendary Lords. So it's a mixed bag. Regardless, buy a noble if you can, then get ready to send him abroad. He'll be "securing" influence from our Caledorian brothers to the West. Turn Eight Secure more TA with other HE factions. I know this sounds repetitive but your race gains vision of trade partners AND you can improve your relationships in the process. The income isn't great (only 55-65 per agreement) but as you gain territory and build more trade resource structures, you'll quickly jump up the pay scale. Here you need to make a choice: Search ruins or colonise? I prefer the searching option for the extra cash to cover next turn's colonisation and also the potential for a nice new item. NOTE: if Saphery has an army nearby, don't search; colonise. Those Lore Master snobs may try to steal that city from you next turn. If there are not other HE armies nearby and you think you have time, search! The puzzles aren't that hard and I'll give you a quick explanation here: - dice puzzle: common sense, use some logical to figure out what symbol goes on that face of the die. -sudoku puzzle: look up how to play Sudoku. Basically you need a 1, 2, 3, or 4 in each column or row but you can't have two of the same number in a single row or column. Take a minute to figure out which number you need, then check the colours For this puzzle, you need to choose a colour that isn't in that row or column. Figuring out which number leaves you with two options and then you just choose the correct colour Easy peasy -the dial of the old ones: this one is a little annoying, but not that hard. Use your spatial reasoning skills or just count spaces between the outer symbols and the different number lines. If the red lines need 3 spaces for one and a symbol on the opposite side, check the options you have at the bottom of the screen. If those symbols aren't in that pattern, it probably isn't the red lines. Try the other colours Maybe it's more than a little annoying. But you can snag some cool items from these runes. I got a rare one that gave me vanguard deployment for spear men! You can build anything you want from this point on, but I usually prioritise growth buildings (Wheat fields, I think) and walls for minor settlements. Send that Noble west to either search that ruin, Caledor's Repose, or to secure influence from it if it's been settled. This second option might hurt your relationship with Caledor but they're going to hate you no matter what. Changing their opinion of you would require WAY too much time and influence points. Besides, they should still be busy with the pirates. If the Noble is successful, he should level up. Put your first three points with this guy into "Specialist." This lowers the cost of hero actions by -40% at its third level and it doesn't require higher levels. This means you can spam hero actions, gain influence faster, and level your noble up faster. After Specialist is full, you can throw points into "Secure Influence" and "Wound/Assassinate". The first option increases the amount of influence you gain for each successful action against a settlement. The second one increases your heroes chance of success. Both are useful but slower to upgrade because they require your hero to be a certain levels to add more points. You can later add points to other abilities as you see fit. You can eventually add this hero to your army and have him fight alongside a Lord. IF he is one of the "scrub" options though, you may not want to keep him forever. Your choice. Turns Nine to 12 (ish) T9- Colonise and merge units. The cost of colonisation should be off-set by the cash you gained from the ruins. You may lose a bunch of troops but you can easily recruit higher ranked later, so don't worry about merging most of them. You'll save a bunch of upkeep in the next couple of turns and you can't recruit until you get back to Lothern province anyway. DON'T MERGE YOUR CAVALRY UNITS. They're actually harder to replace since you don't have a cavalry recruitment building yet. Your phoenix and artillery should be fine. Use hero to secure influence. T10- Move your army to Angerrial. Build a wall in Glittering Towers. Change the commandment in Lothern province to the one that improves recruitment. Use hero to secure influence. T11- Move to the Tower of Lysean. Recruit more units. By this time you should know which units you enjoy using and can use effectively. Read more about managing your army in battle in the later "Tactics" section. Use hero to secure influence. T12 and beyond... Keep recruiting units until you have a full army. Keep using your noble to gain influence. Once he is experienced enough, you can use him to wound/assassinate enemy heroes. Keep building up your settlements with walls in minor and growth/trade buildings in others. Keep Lothern as your main recruitment centre until you can specialise other Ulthuan provinces for specific unit-types (Chrace has bonus to the White Lions, Saphery has bonuses to Loremasters, etc.) And so it begins... Congratulations. Seriously. You have two provinces, a decent economy, good relationships with MOST of your neighbours, and a good start to a campaign. I bet you're asking yourself, "Where next, Mr. Argo? What will I do without your guidance and kind words of encouragement? How will I unite Ulthuan and drive out all the invaders who plague our lands?" Very slowly, my readers, very slowly. You'll struggle to deal with certain aspects of managing your first empire. You'll fail to anticipate betrayals and sudden invasion. But remember....you can always start this campaign again. Seriously though, you should consider one of two options: East or West? Some say west is best because Caledor will always hate you so you might as well invade them while you have the time. A valid argument and one you should consider. Build some bolt throwers to counter Vampire Coast monsters, maybe some cavalry to rear-charge, and head west. But I generally push East. Caledor can usually do okay-ish against Noctilus and that silly Count will sometimes go North instead of East, giving Tirana/Ellyrion a hard time. Which is actually good for you because if they're weak but on good terms with you, you might be able to absorb them more easily. To the East, there is trouble... Aranessa Saltspite, daughter of the Sea God, is a pain. She invades Southern Yvresse and starts spreading corruption along the SE coast of Ulthuan. You gotta knock her down a peg or you'll regret it later. She usually takes out Yrvresse's main army, so look to confed them as soon as possible. Defeat Aranessa once and she'll probably sue for peace. You might even convince her to go after Dread Fleet or the Skaelings instead of you. Or you can go after her hard and take out Sartosa. Leave it in ruins if you don't feel like dealing with the corruption. While you're confeding, consider leaving a token force of a decent lord (15 influence or higher) with a few spear men, Lothern Sea Guard, and or archers. Those guys plus a garrison should hold back MOST enemies and deter invasions. I think I only recruited one other lord for the first 25-40 turns. Not because I couldn't afford more, but because I had built enough security/relations that I could rely on those to protect me. Tactics Okay, so you may have skipped ahead to check this before doing your first battle. Let's do some review. In typical ancient combat, two groups of warriors (usually underpaid dudes from different cities) ran at each other and tried to stab each other until one group said "F*** this" and ran away. Obviously someone needed to innovate and the world got to see some really basic tactics, like lines of dudes marching into each other, THEN stabbing each other for a while. Some dudes in the Middle East/Egypt invented chariots, which spiced things up a bit, then King of Phil of Macedon decided to mess with infantry. Super long spears and super deep spear formation meant his men could 'pin' other infantry groups, which means CAVALRY could win the day. This brief and superficial overview of our world's history has two purposes. First of all, no matter how new you are, you can't be a bad as our earlier war leaders. Secondly, just read up on stuff that famous generals did and copy their tactics. That's what they did to become awesome (they obviously changed some stuff after a while to keep things exciting). So, basic tactics we can use in this game? Well, first go into the options section, and turn OFF skirmish mode by default. Turn ON guard mode by default. More on why later. Hammer and Anvil: Spear men in a line. Cavalry on the wings. Archers behind, near the left and right sides. SSSSSSSS C AA AA C Your archers shoot at approaching enemies, then exchange arrows with enemy archers. Your CAV can swing around the sides (flanks) and slam into the enemy archers or into the backs of the enemy infantry. The spear men are the anvil (solid, unmoving, etc.) and the CAV are the hammer (powerful, decisive, etc.). This tactic will be your best friend until you learn a few handy tricks. You'll screw it up a lot by forgetting to move your CAV or by allowing your spear men to move out of position. But you'll learn from every mistake, so it's okay. Your spear men and archers should be on guard mode to keep them in position and prevent them from chasing. You can click off guard mode to encourage them to chase if you're winning a lot. For CAV, turn OFF guard mode at the beginning of battles. Anvil and ThowkThowk: This is basically Hammer and Anvil without CAV. You may not have the building or starting units, so make do with this variant. SSSSSSSS AA AA AA Spear men engage (or wait for enemy to engage with them). Archer pepper enemy until front lines meet, then left and right groups begin to swing around the wings. Center group continues to trade with enemy archers. When left and right groups move into position, start firing into the backs of the enemy front line. This minimizes friendly fire for your team and prevents the enemy from using their shield (which have a chance to deflect incoming arrows if you're firing at them head-on) This works a hilarious amount of the time. Obviously, you can't do this if the enemy have CAV, but you can wait to move your wings until after you've turned enemy CAV into pincushions. The Anvil, Whatever, and Moving ThowkThowk: Do the same thing as above, but with a couple of Ellyrian Archers sent ahead. These guys are mounted archers and they suck in melee. BUT they can harass like nobody's business. If the enemy army is light on actual archers, your Ellyrian Archers can be tasked as skirmishers and placed on opposing flanks. They'll draw off at least one enemy unit each, maybe more. They'll continue to move whilst firing, which may or may not kill the enemy, but at the very least it'll distract them for a while. This doesn't sound like much, but it can REALLY help you by lessening the pressure on your anvil and allowing your lord more time to wade through chaff. MORE INFO LATER.