换一换
换一换 


本指南将为你介绍《简单红2》中的一些技巧、可操作内容以及彩蛋“Yay!”。由于《简单红2》并非所有可操作内容和机制都会在游戏内教程中展示,本指南将帮助你了解并尝试运用它们。本指南由Morning Asia、Sans和Ostrich制作。 休闲玩家设置 坦克还活着吗? 我打光了4个弹匣,那家伙死了吗? 准星到底在哪儿? 听着,各位休闲玩家们(包括我在内),有个办法能解决所有这些问题,当然这可能会破坏你的真实沉浸感。 进入选项/设置并启用: 显示准星 显示击中标记 显示装甲穿透 这样你就能知道AI是否已被消灭,以及你的枪正瞄准何处。游戏模式 目前《轻松红2》有两种可用游戏模式:行动模式和推进前线模式。 行动模式: 在此模式中,一方队伍将作为进攻方,另一方作为防守方,通过一系列阶段的争夺来获取胜利。 - 阶段与占领点 任务会被划分为多个阶段。每个阶段都有需要占领的占领点(目标),以进入下一阶段。需要或可以占领的占领点会在屏幕上以交叉剑图标显示,已拥有/已占领的占领点则以旗帜图标显示。 阶段也可能需要占领多个占领点才能获胜。当存在多个占领点时,防守方可以随时夺回已被占领的占领点。如果所有阶段都被攻克,进攻方获胜。防守方只有在进攻方的兵力耗尽时才能获胜。【票数】 进攻方初始拥有一定数量的票数,每次部署小队或载具时票数会减少。当票数归零时,进攻方输掉比赛。每赢得一个阶段,进攻方将获得票数奖励。防守方可通过占领据点查看进攻方剩余票数,进攻方仅能在 spawn 菜单中查看自己的票数。 【推进前线】 在此游戏模式中,双方队伍将争夺一系列阶段的胜利。正如模式名称所示,双方均为进攻方,会积极地将对方击退。 【阶段与据点】 此游戏模式从中间阶段开始。双方队伍将进攻各个阶段的据点。赢得一个阶段的队伍会将对方队伍击退一个阶段。当一方队伍将另一方队伍逼至其最后一个阶段,或当任意一方队伍赢得(任务总阶段数×2)个阶段时,赢得比赛。 推进前线游戏模式中没有票数机制。 除“反击”和“日本反攻”外,所有基础游戏战役任务均为“行动”。 额外士兵控制 部分控制可在键位设置中查看(注:键位设置有多个页面,可再次按箭头查看更多内容)。 以下是一些可能被忽略的额外控制: 1. 按B键无需打开背包即可使用绷带,前提是背包中有绷带。 2. 瞄准时长按 sprint 键可屏息,减少武器后坐力并放大瞄准镜。 3.在低矮障碍物或打开的窗户旁按空格键进行翻越。
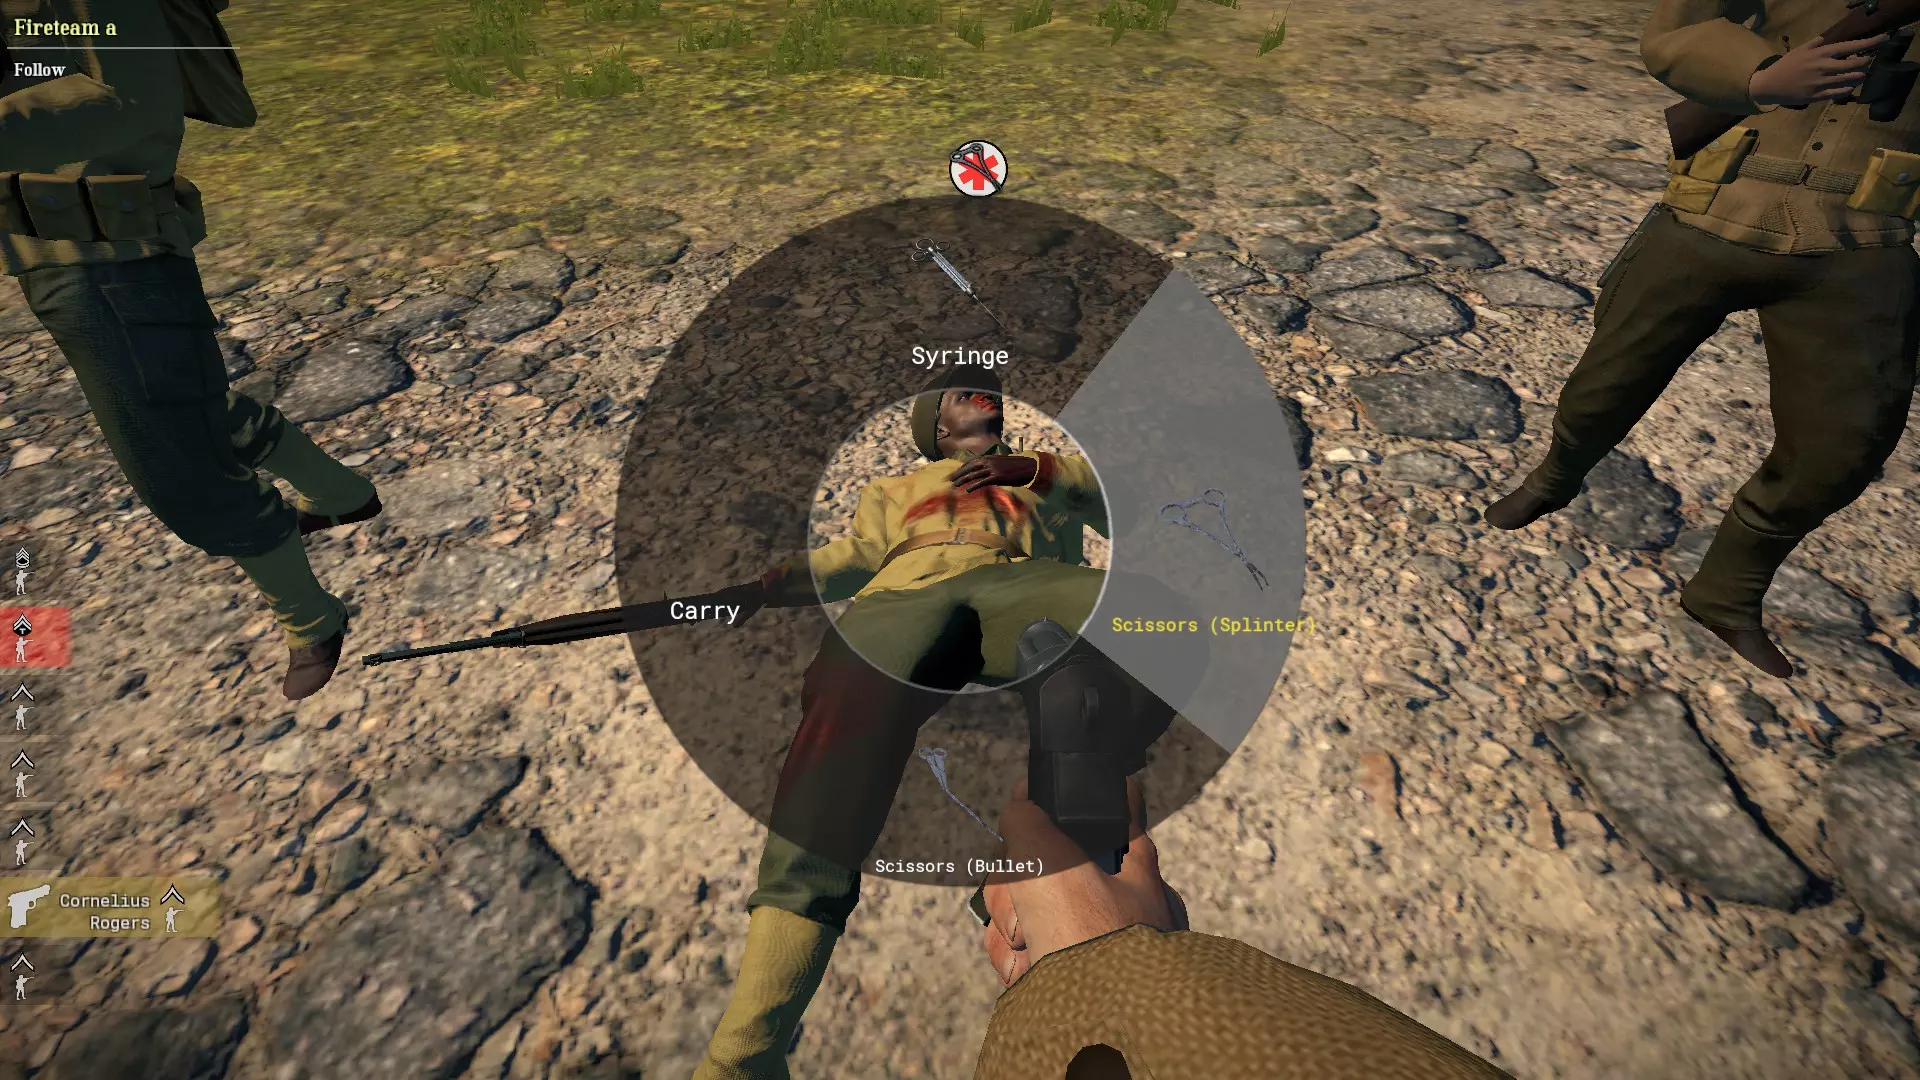
4. 按C键卧倒或按住蹲伏键。 5. 卧倒或蹲伏时, sprinting会使角色站立起来。 6. 按住F键对着受伤士兵,然后将鼠标悬停在【搬运】上即可拖拽。根据要求的治疗方式选择其他治疗选项来救治他。
按H键投掷烟雾弹。只要物品栏中有烟雾弹即可使用。
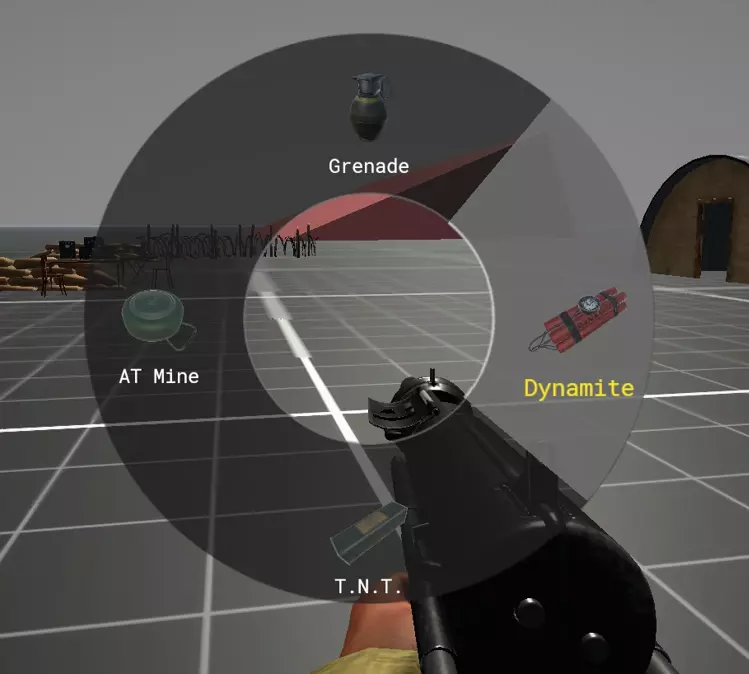
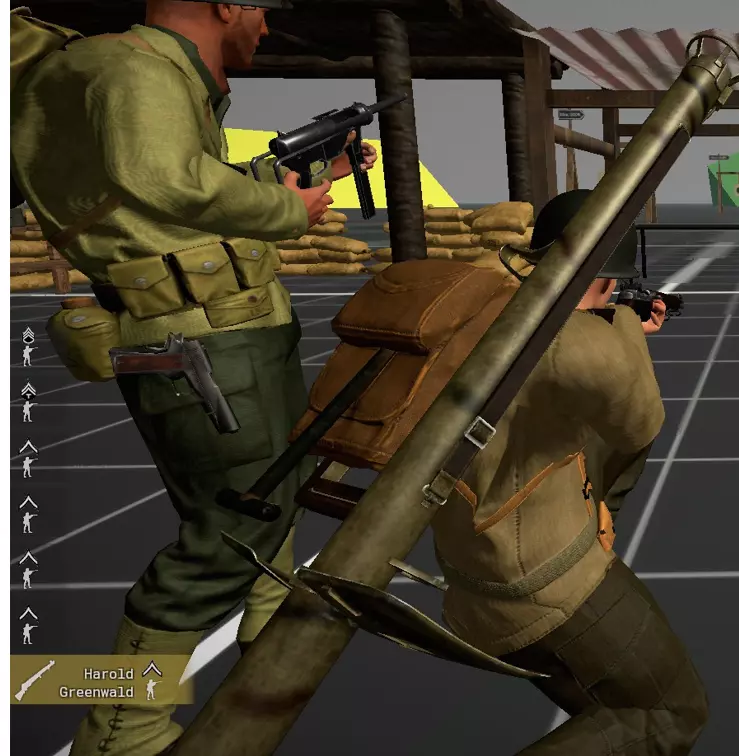
8. 按住G键打开已拥有的手雷类型轮盘菜单。按G键可直接投掷基础手雷。可选择的其他投掷物包括:【烟雾弹】、【炸药】、【反坦克手雷】、【TNT】、【弹药箱】、【反坦克地雷】 9. 鼠标滚轮可切换至副武器。再次滚动滚轮可切换回主武器。也可使用武器切换键(2)切换主武器和副武器。副武器示例:【火箭筒】和【手枪】
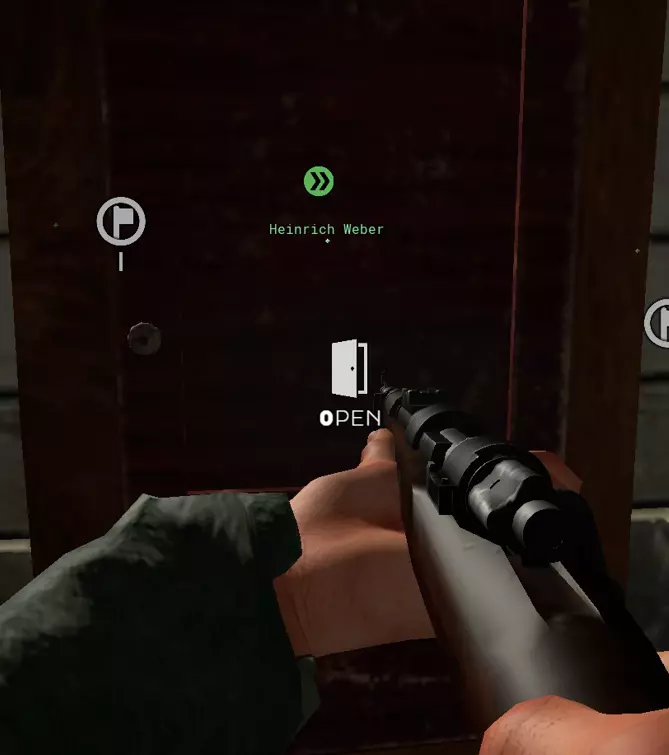
10. 按M键打开地图。游戏会自动生成地图。 11. 对着窗户和门按F键可以打开它们。
12. 按下0键可切换武器的射击模式。大多数武器仅支持全自动和半自动模式,除了BAR(勃朗宁自动步枪)可在快速全自动和慢速全自动之间切换。成功切换射击模式后,武器会有小幅动作。 支持射击模式切换的武器列表:(汤普森冲锋枪、汤普森M1928冲锋枪、BAR(勃朗宁自动步枪)、布伦轻机枪、MP40冲锋枪、MP44突击步枪、FG42伞兵步枪、MAB 38冲锋枪) 13. 按住R键打开轮盘菜单,选择要装填的弹匣或弹夹。例如,这在鼓式弹匣和直弹匣之间切换时非常有用。
14. 当你只有空枪和一发适配该枪但没有弹匣的子弹时,部分枪械可以进行手动上膛。按下装填键会取一发适用口径的子弹,仅装填一发。
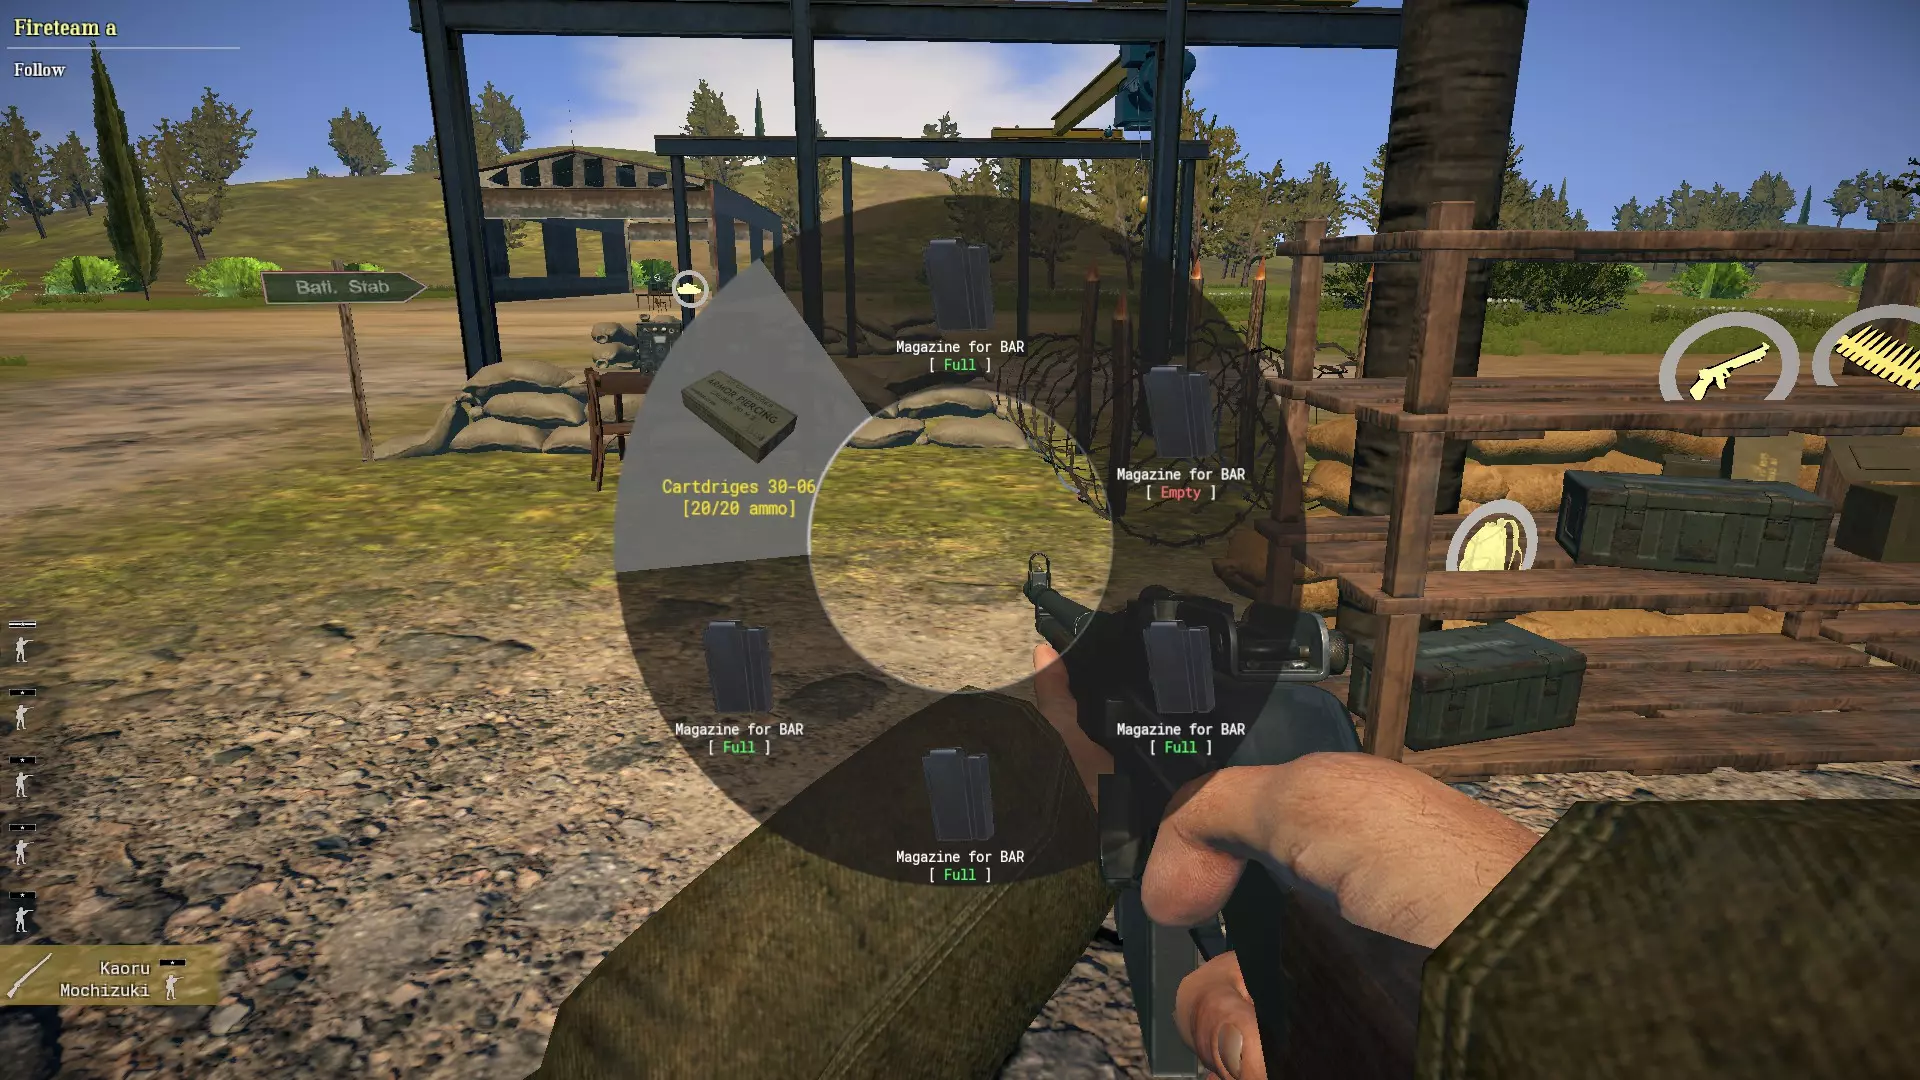
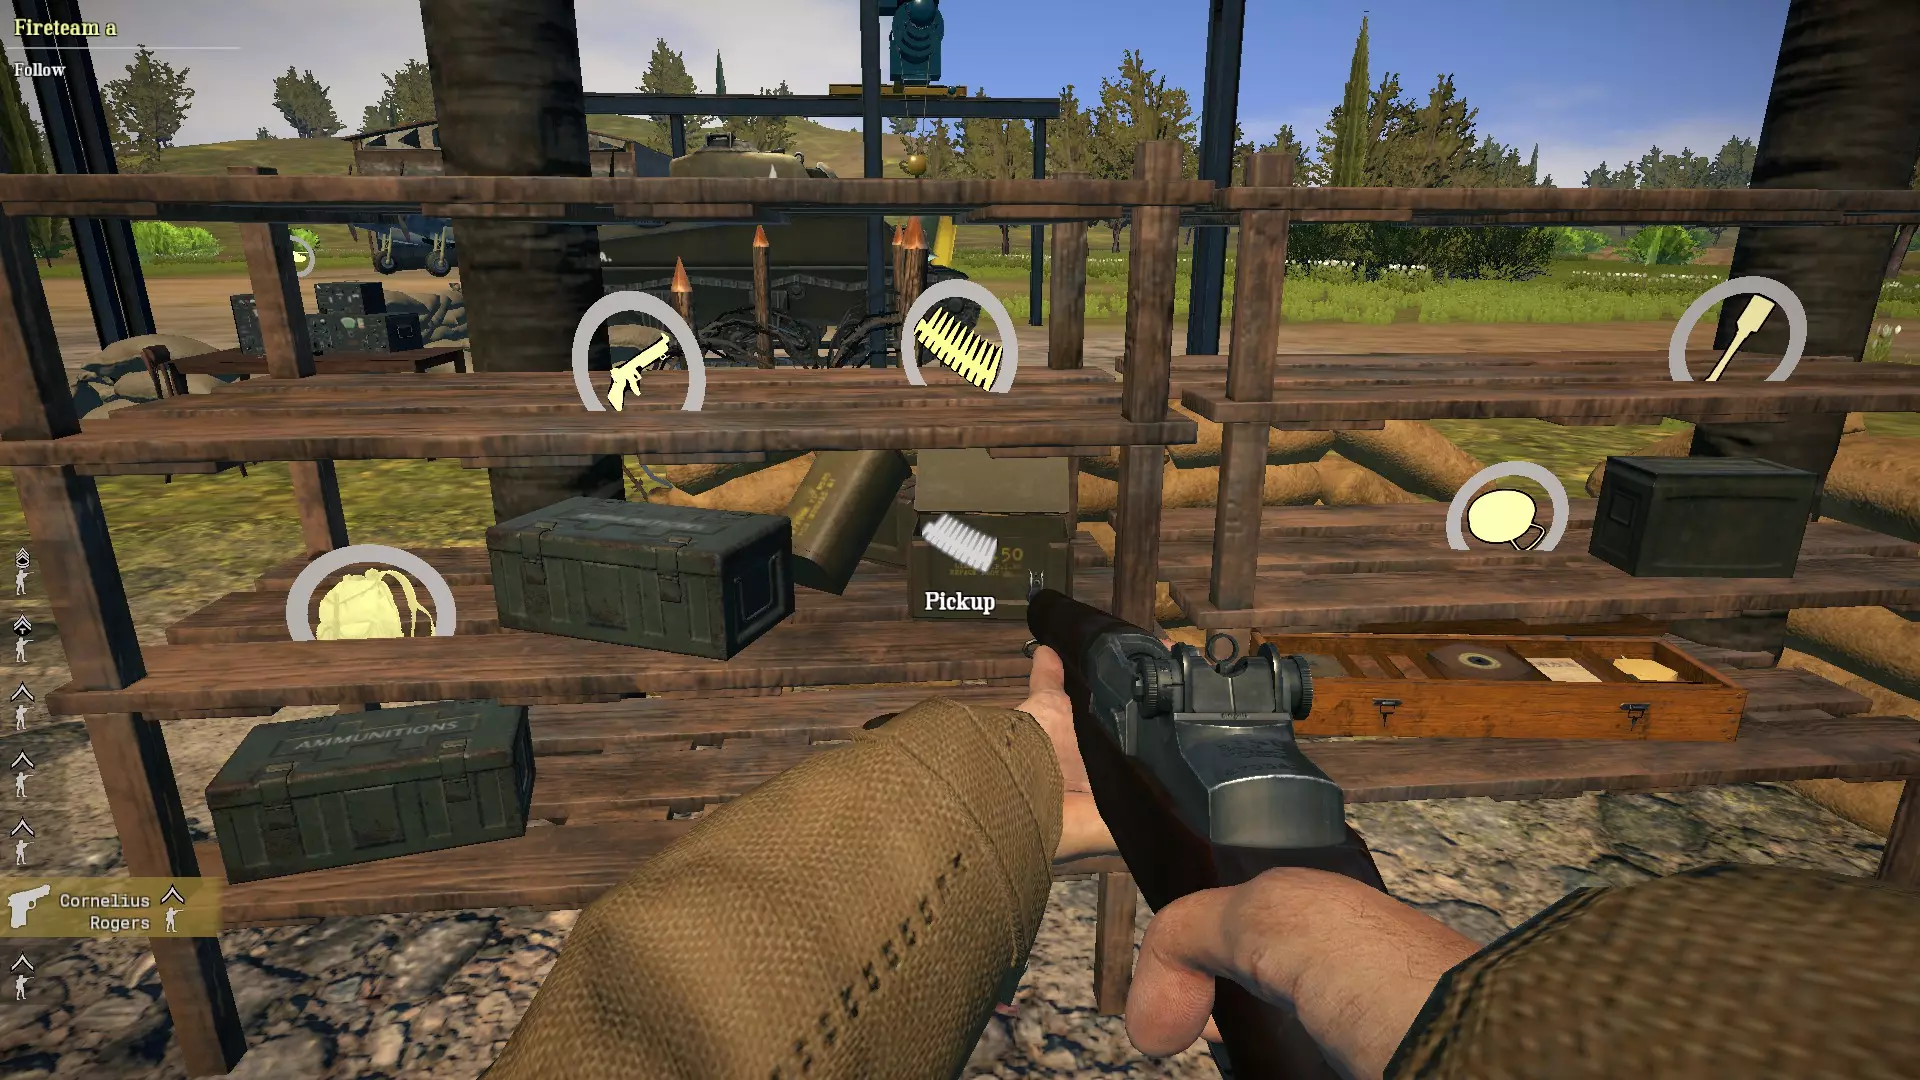
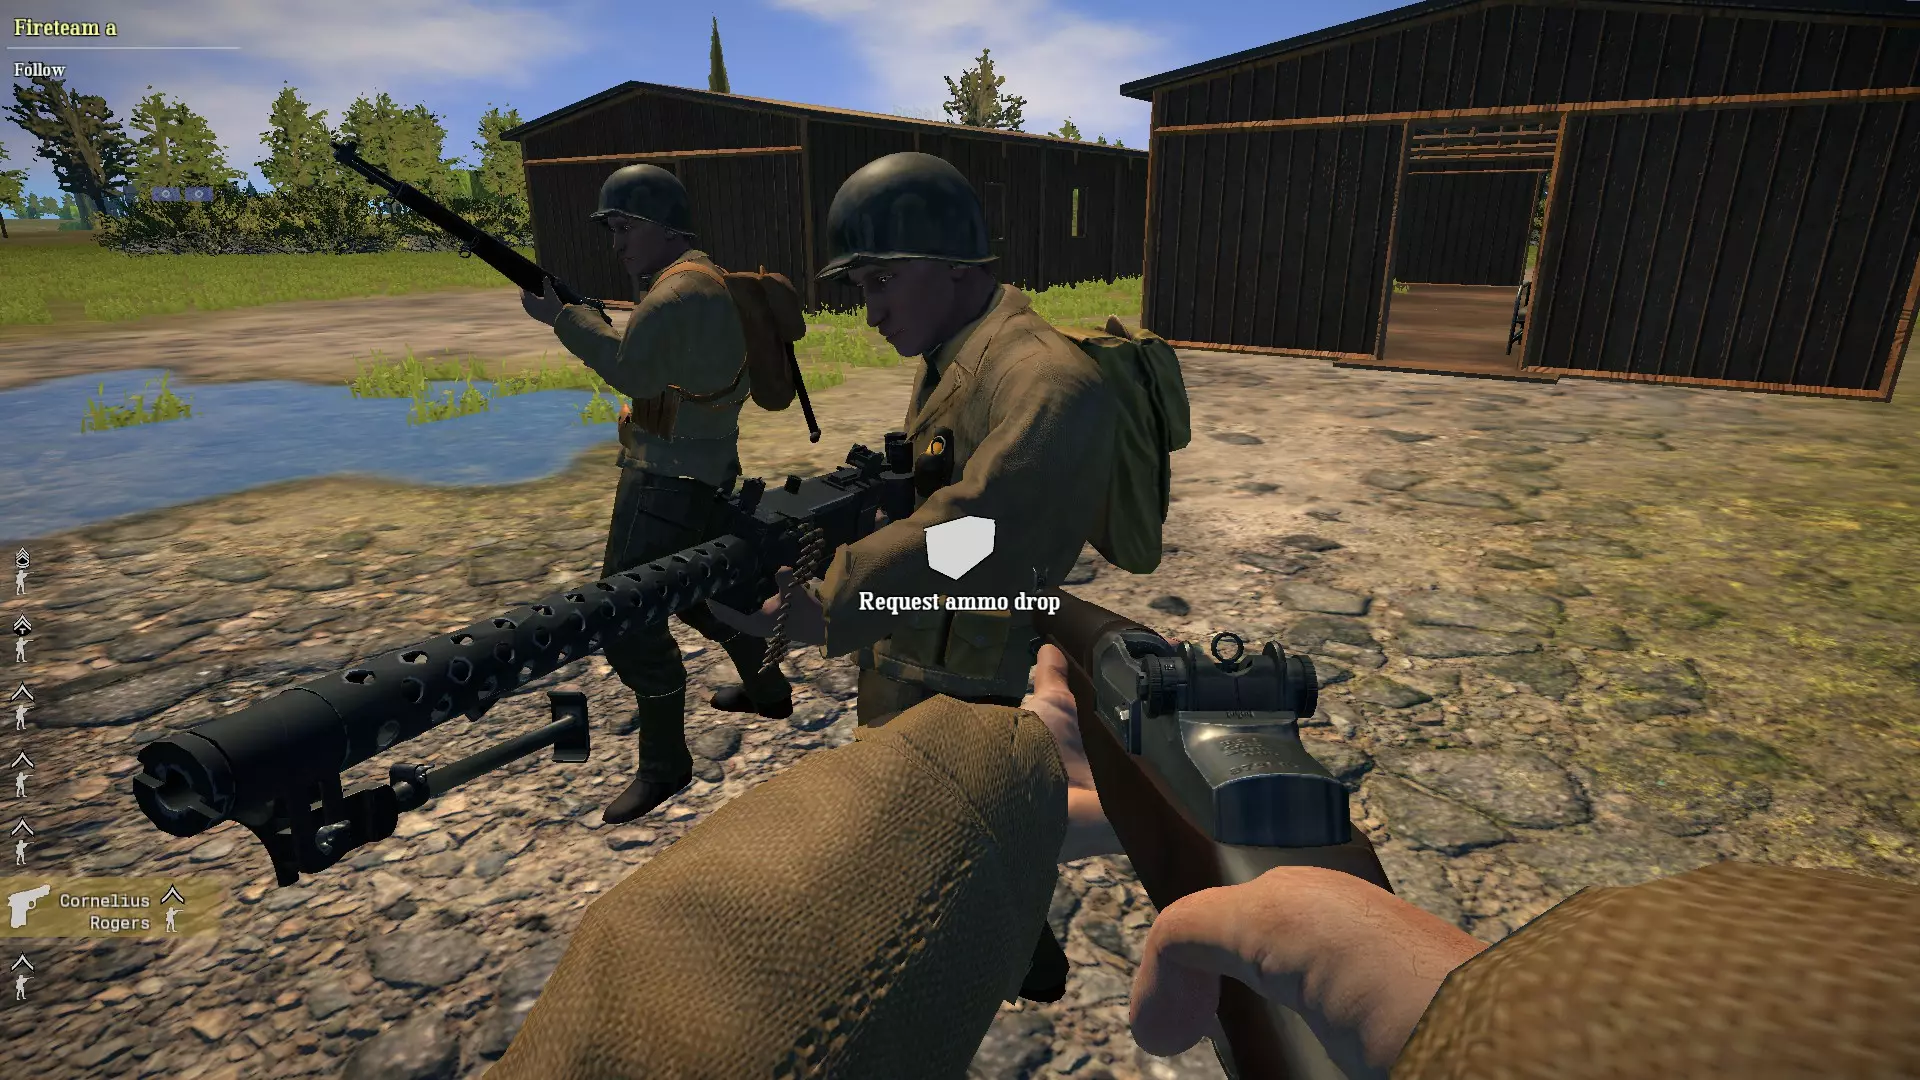
15. 对着医疗兵或机枪兵按F键,可部署2个绷带或弹药箱。按一次弹药箱可补充弹药,再按一次可收起弹药箱。弹药箱可使用3次。 16. 战场上散布着预先放置的弹药箱、手榴弹箱和反坦克武器箱。对着箱子按F键即可获取物品,箱子会在一段时间后重新补充物品。
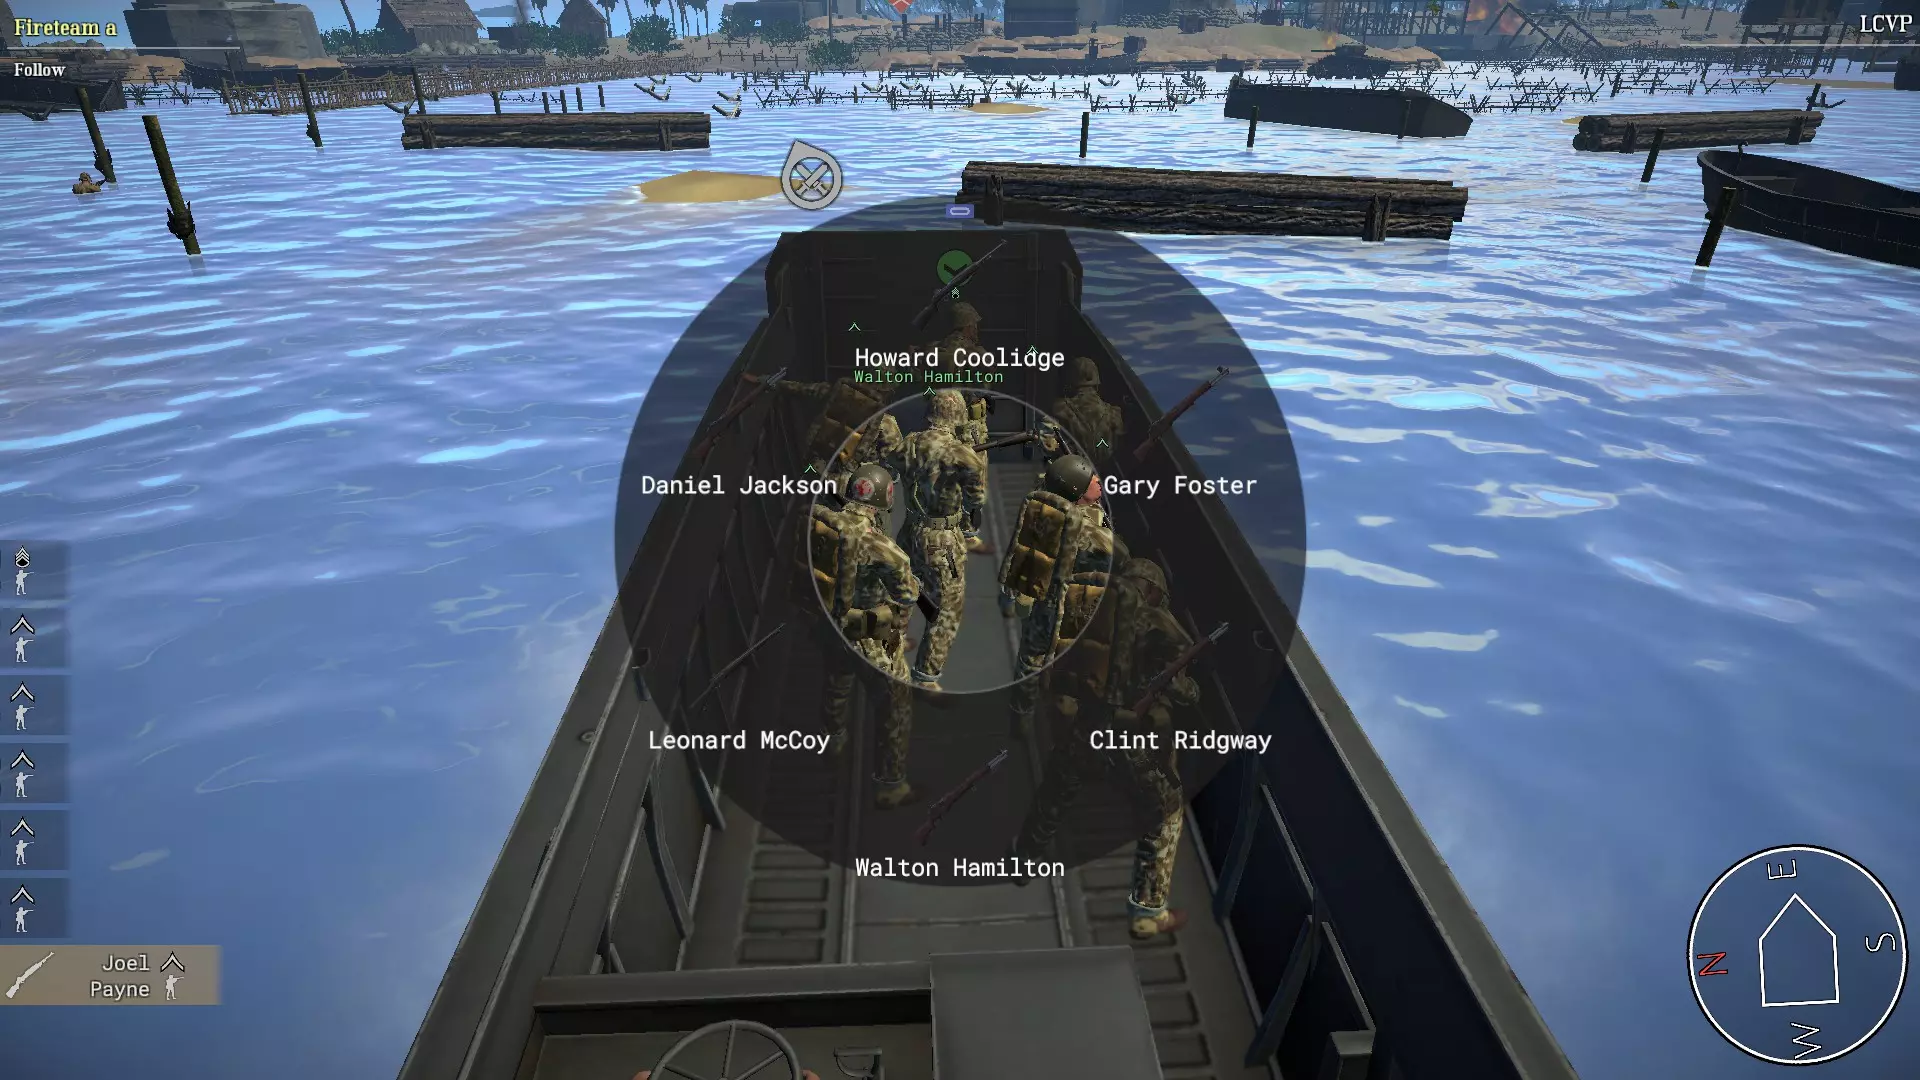
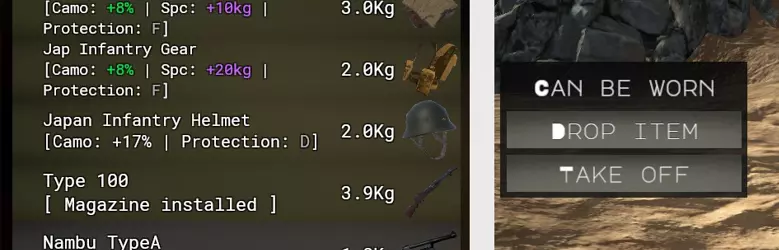
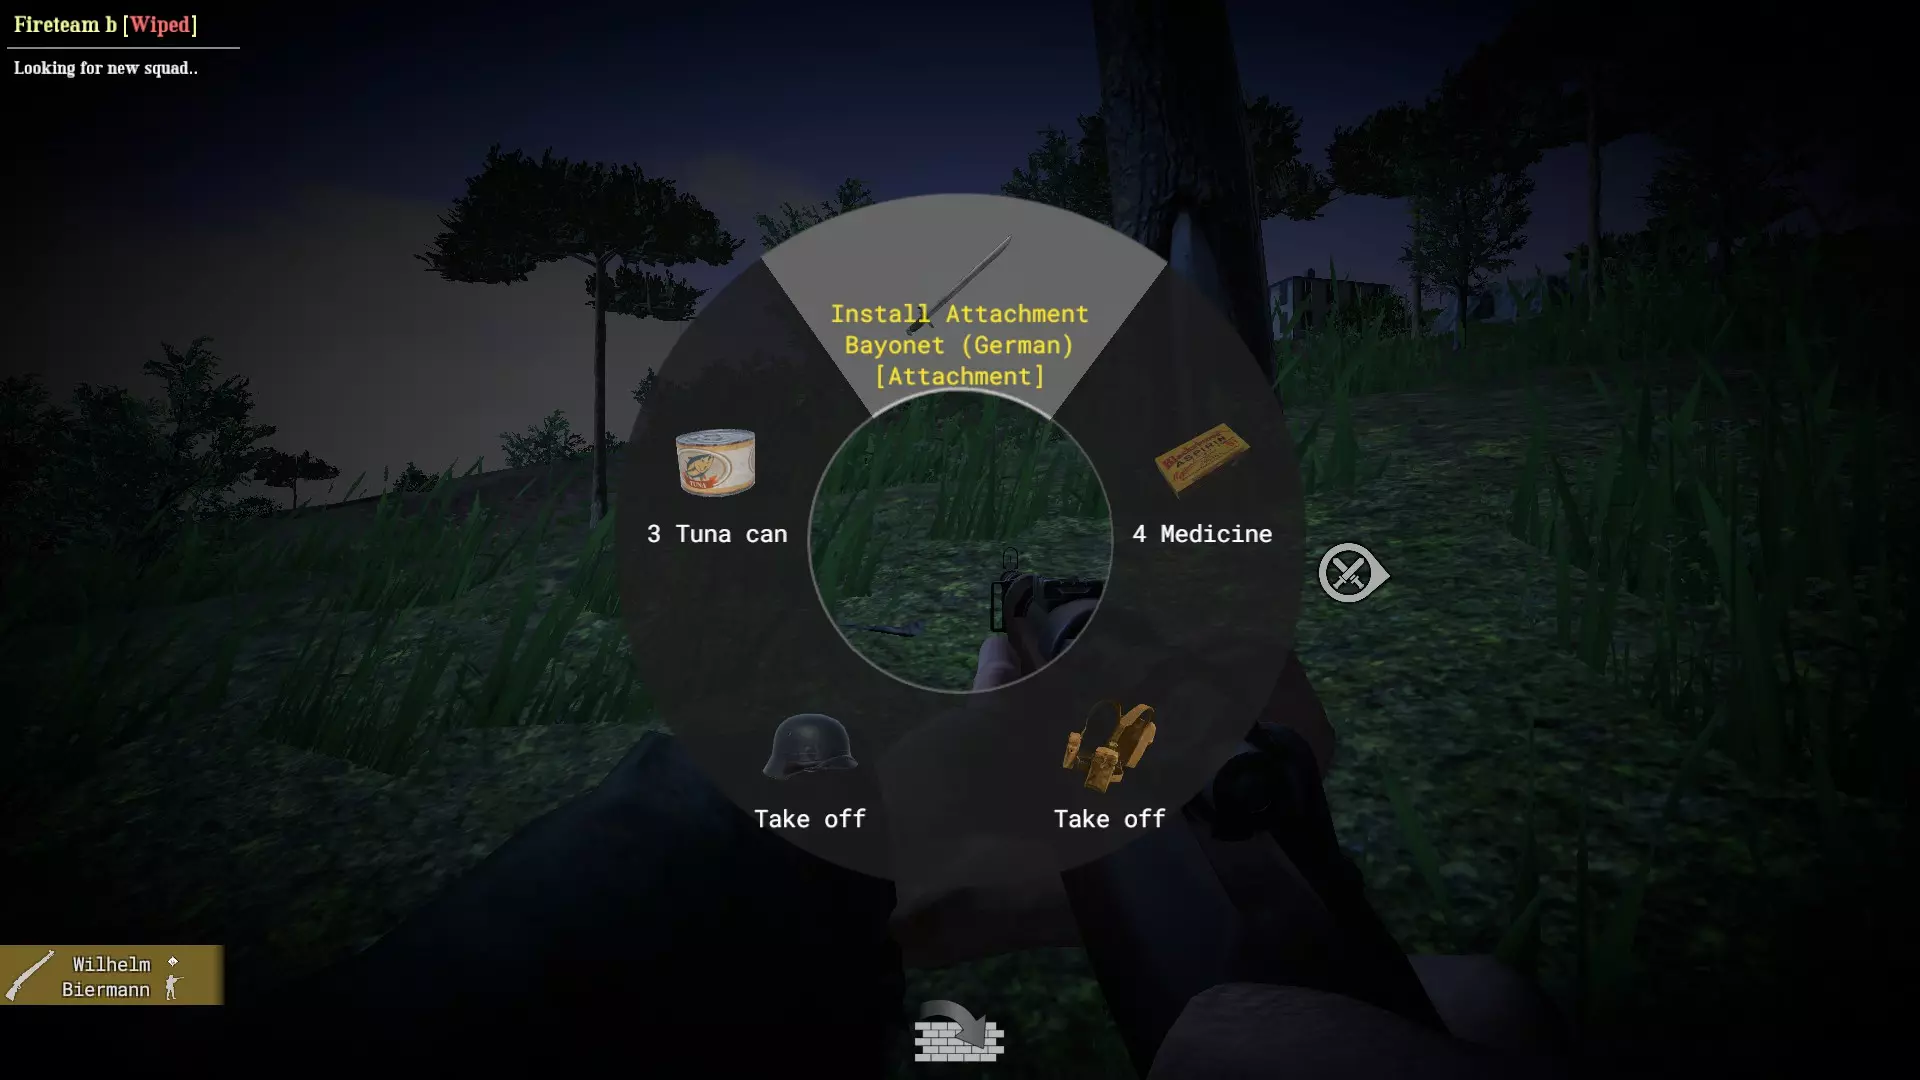
17. 按住I键(物品栏键)可打开快速物品栏操作的环形菜单。可执行的操作包括:安装和拆卸枪械配件、穿戴和脱下制服/装备,以及使用食物或药品。 18. 按住X键(切换成员键)可打开环形菜单,以切换你控制的小队成员。
19. 按Page Up和Page Down键可调整瞄准镜射程(归零)。 20. 区分副武器和主武器。若要从物品栏中拾取枪械,点击该枪械会出现两个选项:拿起或拿至右手。选择“拿起”会将枪械放入副武器槽,并替换该槽中原有的枪械(若有)。选择“拿至右手”会将枪械放入主武器槽,并替换该槽中原有的枪械(若有)。对着地面上的枪械按F键会执行“拿至右手”操作。物品栏管理部分也对此进行了说明。 21. 解救投降士兵。靠近投降的友方士兵,当出现“解救”选项时按F键。他们会自动装备手枪并继续战斗。近战 这是《红色行动:轻松版》中我总是忘记存在的功能,因为我还没靠近敌人就会被自动瞄准攻击5秒钟。 如果你想使用近战攻击,只需按下“V”键。 默认情况下,左右挥击两次近战攻击可以击杀/击伤敌人。不过,装备刺刀后可以提升为一击击杀/击伤。 刺刀可以安装在适用的枪支上,也可能初始就已装配。 如何安装刺刀: -打开背包(I键) -点击刺刀 -选择安装配件 -如果有适用的枪支,刺刀将会安装在该枪支上。适用枪械列表:M1903春田步枪、Kar98k、李-恩菲尔德Mk 3、李-恩菲尔德Mk 4、三八式步枪、M91卡尔卡诺步枪、M1加兰德步枪、M1卡宾枪、兰彻斯特冲锋枪、百式冲锋枪、九九式轻机枪、FG 42伞兵步枪、温彻斯特M12霰弹枪、莫辛纳甘M91/30步枪、莫辛纳甘M38卡宾枪 另有一种安装刺刀的方法:按住I键(物品栏按键)并将鼠标悬停在安装刺刀选项上。这称为快速物品栏操作,在物品栏管理部分也有说明。 作为小队队长下达冲锋命令时,所有队员若持有刺刀,将会自动安装刺刀。配备刺刀的武器配置: - 日军步枪兵、医疗兵、通信兵和神射手的初始三八式步枪附带刺刀 - 苏军步枪兵、医疗兵和神射手的初始莫辛纳甘步枪附带刺刀 - 德军空降兵机枪手的物品栏中有FG 42刺刀 - 日军班长的物品栏中有百式刺刀 - 美军通信兵的物品栏中有温彻斯特M12刺刀 - 英军通信兵的物品栏中有兰彻斯特刺刀 - 所有步枪使用者的物品栏中均有刺刀,医疗兵和狙击手除外 - 日军机枪手的初始九九式轻机枪附带刺刀
第三人称视角 这是《轻松红2》中的一个休闲玩家功能。我也不太记得这个功能了,因为我每场比赛都会被AI打得落花流水。 按“T”键即可进入第三人称视角。 按Q和E键(侧身键)可以切换第三人称视角的方向。 听着,傻瓜,第三人称视角一点也不破坏平衡,除非你使用载具。 两脚架 问:为什么我不能用机枪和反坦克步枪进行瞄准? 答:因为你需要使用两脚架才能进行瞄准。 两脚架是一种附件,部署后可以降低枪支的后坐力。 将枪支对准表面或卧倒在地,两脚架就会展开。如上所述,部分枪械必须部署脚架后才能进行瞄准,这些枪械包括:MG 42、勃朗宁30口径机枪、博伊斯反坦克步枪、Panzerbuchse 39反坦克步枪、PTRD 41反坦克步枪以及九七式反坦克步枪。 配备脚架的枪械列表:BAR自动步枪、勃朗宁30口径机枪、MG 42通用机枪、FG 42伞兵步枪、布伦轻机枪、DP 28轻机枪、九九式轻机枪、博伊斯反坦克步枪、Panzerbuchse 39反坦克步枪、PTRD 41反坦克步枪、九七式反坦克步枪、PIAT反坦克发射器(默认未装配脚架) 你可以通过点击枪械并选择【拆卸配件】来卸下脚架,也可以点击配件并选择【安装配件】重新装上脚架。 一些小技巧: -在栅栏上部署脚架时,先蹲下并走向栅栏。脚架部署后,你就可以站起来开始射击。这种方法可以减少在尝试部署脚架时站立而被击杀的风险。站起来后脚架会保持部署状态。
物品栏管理
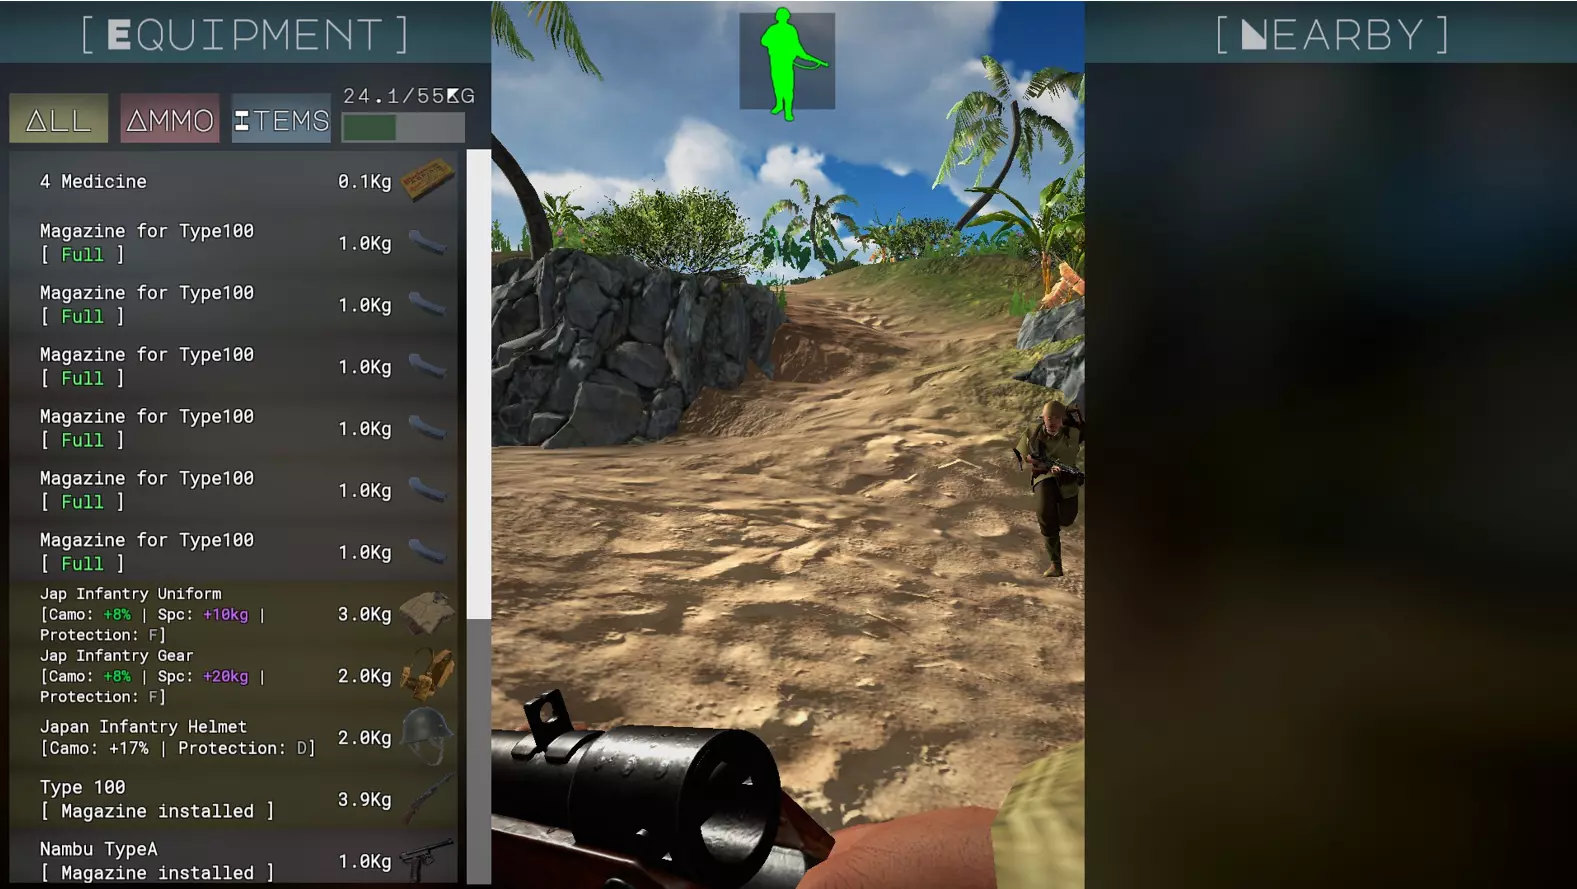
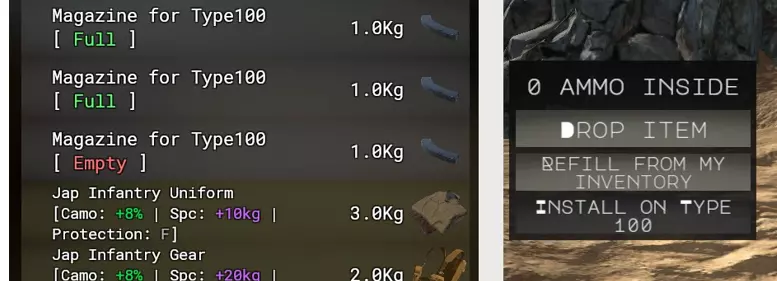
按I键打开物品栏。对着尸体按F键会同时打开尸体的物品栏和玩家的物品栏。靠近尸体后按I键打开物品栏也可以进行搜尸。 物品栏菜单中可进行的操作: - 装填/卸下弹匣。卸下弹匣会将子弹取出,你可以使用相同类型的子弹将其重新装填到不同的弹匣中,或装填回原弹匣。

脱下并穿上制服。高亮显示的制服为当前穿着状态。头盔在战斗中被子弹击中时有时会掉落,因此你需要重新佩戴。如果拾取到火焰喷射器却无法射击,这意味着你没有背包或燃料。拾取火焰喷射器燃料、火焰喷射器背包并穿上,然后装备火焰喷射器软管即可使用火焰喷射器。
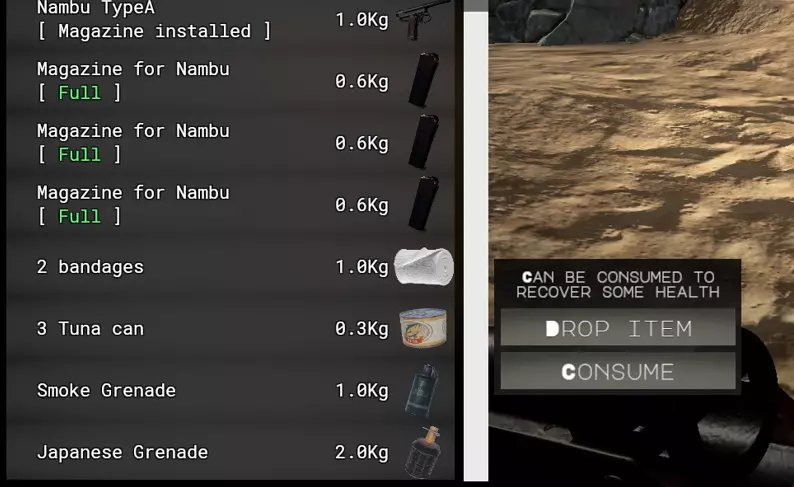
-查看顶部中间的彩色士兵图标以了解生命值情况 -消耗食物和药品来恢复生命值。绷带仅能止血。
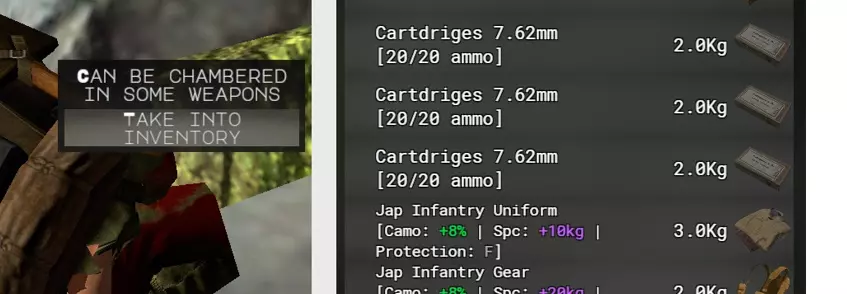
- 搜刮尸体:查看尸体的物品栏后,点击你想要的物品并选择【放入 inventory】。点击【右手拿起】可将当前持有的武器切换为所选武器。点击武器的【放入 inventory】可将其装备到副武器槽。 如果搜刮到武器后无法装填弹药,说明你没有该武器对应的弹药。此时可以搜刮武器主人的尸体,获取其所有该类型弹药,或者寻找弹药箱补充。
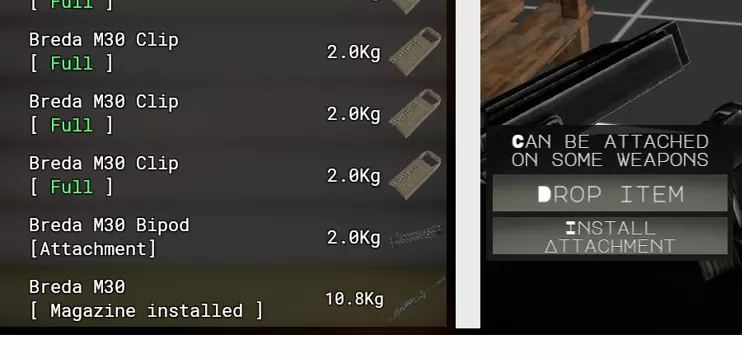
安装和移除配件。部分职业(德国伞兵领袖和机枪手)的物品栏中会出现未装备的配件。
- 手动使用手榴弹:你可以点击物品栏中的手榴弹并选择投掷。由于实用性较低,不推荐此操作。你也可以对弹药箱执行类似操作,选择丢弃。 - 丢弃物品:选择物品后点击丢弃物品即可。当仅打开你的物品栏时,双击物品也可丢弃。 - 重量:你需要留意左上角物品栏的重量。如果物品栏超重,玩家将无法奔跑。 - 你还可以通过双击物品在物品栏之间快速转移。当仅打开你的物品栏时双击物品,该物品将被丢弃(作为快速丢弃功能)。 - 快速物品栏操作:无需打开物品栏即可快速执行某些操作。这些动作包括:安装和拆卸枪支配件、穿戴和脱下制服/装备,以及消耗食物或药品。控制方式为按住【I】键打开轮盘菜单,然后将鼠标移至所选动作上。
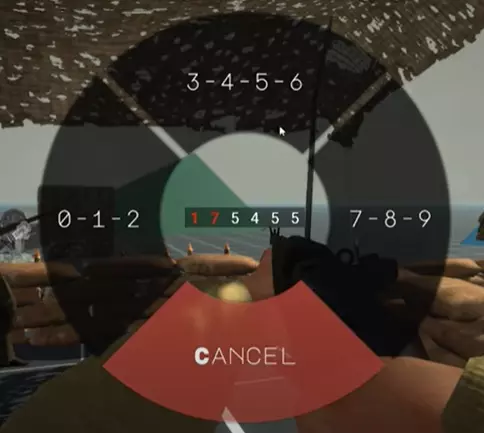
呼叫与操作火炮 “长官,您的火炮请求已被拒绝,祝您在20名敌人向您冲锋时度过愉快的一天。” 为什么无法呼叫火炮打击?要么是没有可用的火炮,要么是无线电兵已全部阵亡。 友方火炮标记为中间带圆圈的蓝色方块。如果在某处看到此标记,通常在该方向且远离地图的位置有一门火炮。 无线电兵是发起呼叫的关键。如果他牺牲了,就无法进行呼叫。无线电兵不能担任 squad leader,所以不要试图通过成为无线电兵来请求支援。不过,作为 squad leader,您可以拾取无线电并背在背上,从而能够进行请求和呼叫。 作为无线电兵: 收到请求后,按一次 tab 键打开无线电界面。点击包含当前高亮数字的正确数字组,以正确呼叫火炮。
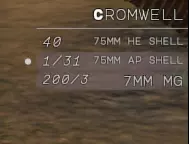
如果你获得了任何火炮,你可以进行直瞄射击或等待坐标。当无线电员确认炮击后,你的屏幕上会出现一个炮弹图标。将火炮对准炮弹图标,然后查看炮弹图标下方的数字。抬高火炮,使瞄准具上的数字与图标下方的数字相匹配。游戏内的教程任务也会教授这一内容。 炮弹 千万不要使用高爆弹,因为它在这款游戏中表现很差。高爆弹有时不会造成显著伤害,有时甚至完全不会造成伤害。 进入坦克或火炮后,你可以查看右上角的列表,了解所有可用的炮弹或攻击类型。使用上下方向键或鼠标滚轮选择它们。点击炮弹以确认装填该炮弹。如上所述,高爆弹(HE)仅适用于对付步兵,需要在目标附近或爆炸半径内引爆才能造成伤害。但高爆弹有时无法对载具造成伤害,因此不要使用它。 穿甲弹(AP)是坦克对战的主要弹药。每辆坦克的不同部位都有不同的装甲值。应将穿甲弹瞄准敌方坦克的薄弱部位,以有效造成伤害。不建议用穿甲弹击杀步兵,因为需要直接命中,除非你喜欢看步兵被击飞的场面。 穿甲高爆弹(APHE)类似穿甲弹,但也具备高爆弹的爆炸效果。部分载具可使用该弹药。 炮塔机枪是坦克内对付步兵的最佳方式。机枪的弹药可能会略微偏离坦克瞄准镜的左右方向,并且不同坦克的情况有所不同。炮塔机枪与主炮不共享弹药,因此它会始终处于装填状态,无需确认装填。
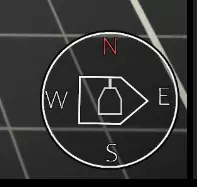
载具 坦克 坦克操控: -若启用第三人称视角,按T键切换 -前后移动控制坦克前进和后退 -左右移动控制坦克转向。静止时也可转向 -按键盘数字键或左右方向键切换座位 (驾驶坦克时座位无关紧要。只要驾驶员座位有AI,玩家即可从任意座位驾驶坦克,AI不会控制驾驶) 炮塔座位操控: -使用鼠标瞄准炮塔。有时难以分辨炮塔朝向和车体方向,可查看右下角指南针。指南针上的炮塔图标指示炮塔朝向,炮塔图标下方的形状指示车体方向使用第三人称视角将更容易保持方向。
Turret heading north while hull heading east in this image -{(look at shells section) Use scroll wheel or up and down arrow key to change ammo types. Click to confirm reload turret then you can use the different shell. Turret mg doesn't need reload tho upon changing.} -Left click to shoot and right click to aim. Commander seat controls: -Use the mouse to look around. Usually commander get the best view. -Click on enemy to spot them. About tank weakspots, see weakspots category All tanks in game and where to find them: American tanks: -M8 Greyhound (Mission 4 Anzio) -M3 Stuart -M5 Stuart (Mission 5, 8, 9 Anzio; Mission 2 Kwajalein; Mission 4 Roi)) -M5 Stuart Flamethrower (Mission 2 Kwajalein) -M8 Scott (Mission 2 Kwajalein; Mission 4 Roi) -M4 Sherman (Mission 3 Anzio) -M4 Sherman Flamethrower -M4 Sherman Calliope (Mission 3 Anzio) -M3 Lee (Mission 8 Anzio) -M10 Wolverine (Mission 3 Anzio) -M36 Jackson -M7 Priest (Mission 9 Anzio; Mission 6 Kos) -M12 GMC -M3 Half-Track (Mission 4, 8 Anzio) -M3 Half-Track AA (Mission 2 Kos) -M3 Half-Track Hospital -Willys Jeep (Mission 2, 4, 6 Kos) -Willys Jeep with MG German tanks: -Sdkfz 232 Puma (Mission 4 Anzio; Mission 2, 6 Kos) -Sdkfz 232 Puma Open-Topped (Mission 2 Anzio) -Panzer III (Mission 5, 6, 8, 9 Anzio; Mission 2, 6 Kos; Mission 3, 6, 7 Stalingrad) -Stug III (Mission 3, 5, 9 Anzio) -Panzer IV E (Mission 3, 6, 7, 8 Stalingrad) -Panzer IV G (Mission 3, 5, 6, 8, 9 Anzio; Mission 3, 6, 7 Stalingrad) -Panzer IV H -Panzer V Panther (Mission 3, 9 Anzio) -Panzer VI Tiger I (Mission 3, 9 Anzio) -Flakpanzer IV Wilberwind (Mission 2 Kos) -Sturmpanzer I Bison -Sdkfz 251 Half-Track (Mission 2, 4 Anzio; Mission 2 Kos) -Opel Blitz Truck -Opel Blitz Open-Topped -Kubelwagen Japanese tanks: -Type 93 Armoured Car (Mission 1, 2 Kwajalein; Mission 3,4 Roi) -Type 95 Ha-Go (Mission 2 Kwajalein; Mission 1,2,4 Roi) -Type 97 Chi-Ha-Kai (Mission 2, 3, 4 Kwajalein) -Type 4 Ke-Nu (Mission 4 Roi) -Type 2 Ka-Mi (Mission 2 Kwajalein) -Type 94 Truck (All Roi Missions) -Type 95 Kurogane (All Kwajalein Missions) British tanks: -Daimler Armoured Car (Mission 5 Anzio) -British M3 Stuart (Mission 6 Kos) -British M5 Stuart (Mission 6, 9 Anzio) -Cromwell (Mission 9 Anzio) -British Sherman (Mission 6 Anzio) -Sherman Firefly (Mission 3 Anzio) -British Willys Jeep Italian tanks: -M13/40 (Mission 10 Anzio; Mission 2, 6 Kos) -Semovente da 75/18 (Mission 1, 2, 6 Kos) -Fiat 626 Truck Soviet (Stalingrad DLC): -BA 10 (Mission 5, 8 Stalingrad) -BT 7 (Mission 2, 3, 6, 7, 8 Stalingrad) -T34-76 (Mission 3, 7, 9 Stalingrad) -T34-85 -KV 1 (Mission 3, 7, 9 Stalingrad) -KV 2 (Mission 3, 7 Stalingrad) -Su 76 (Mission 7 Stalingrad) -Katyusha (Mission 3, 7 Stalingrad) -Soviet M3 Half-Track -Zis Truck (Mission 6 Stalingrad) -Zis Truck with AA Gun (Mission 6 Stalingrad) Planes: Plane controls: -Press T to go third person if enabled -Move forward to increase throttle that will affect speed -Move backward to decrease throttle or speed. Decreasing speed would be useful in turning and chasing an enemy in dog fight to gain more control of the plane, cause the plane move pretty fast on full throttle. Getting too slow can make your plane fall tho.
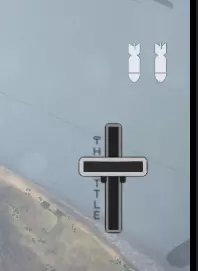
Picture of bombs HUD and throttle -Space to drop bombs. There will be indicator HUD of how many bombs on the right. You can also see how many bombs by going third person and look at the underside of your plane for visible bomb models. -Left click to shoot mg and right click to aim through the reflector sight -Move the mouse around to turn the plane When planes are on land, increase the throttle and it will fly after reaching certain speed. Go toward the white plane icon on the map to refill bombs and mg. It can be put low in some maps, so be careful not to crash. List of Planes: -) P51 Mustang (American), 2 bombs, MG -) F4F Wildcat (American), 2 bombs, MG -) P38 Lightning (American), 2 bombs, AT Bullet MG, MG -) MeBf109 (German),1 bomb, MG -) Junker Ju87 Stuka (German), 4 bombs, MG, Tail Gunner -) Junker Ju87 Stuka Auto Cannon (German), No bombs, Twin Autocannons, MG, Tail Gunner -) BF110 (German), 2 bomb, AT Bullet MG, MG, Tail Gunner -) Spitfire (British), 4 bombs, MG -) Spitfire Auto Cannon (British), 2 bombs, AT Bullet MG, MG -) Bristol Beaufighter (British), 2 bombs, AT Bullet MG, Twin Rockets, Tail Gunner -) Zero (Japanese),1 bomb, MG -) Zero Auto Cannon (Japanese), 1 bomb, Twin Autocannons, MG -) IL-2 (Soviet), 6 bombs, AT Bullet MG, MG, Few Rockets, Tail Gunner Thanks to Marco in his Easy Red 2 news https://steamcommunity.com/app/1324780/allnews/ You can find the planes in: -Shores of Nettuno (USA and Germany, first phase) -Near Tor San Lorenzo (Germany, first phase) -Near Acciarella (USA, first and last phases) -Pushing Back (Germany, first phase) -Anzio Express (Britain, first phase) -Battle of Cisterna (Germany, last phases) -Montecassino Point 445 (Germany and Britain, first phase) -Kwajalein Beachhead (USA and Japan, first phase) -Kwajalein Airport (USA and Japan, first phase) -Japan Counter Attack (USA , first phase) -Marmari Invasion (Germany , first phase) Weapons List All in game weapons sorted by nation: American: -M1903 Springfield (Scope) (Bayonet) (Bolt Action Rifle) (Caliber 30-06) -M1 Garand (Scope) (Bayonet) (Semi Auto Rifle) (Caliber 30-06) -M1 Carbine (Semi Auto RIfle) (Caliber 30-06) -M1a1 Carbine (Semi Auto RIfle) (Caliber 30-06) -M1 Carbine 1945 (Bayonet) (Semi Auto RIfle) (Caliber 30-06) -Thompson M1a1 (Semi/Auto) (SMG) (Caliber .45 ACP) -Thompson M1928 (Semi/Auto) (SMG) (Caliber .45 ACP) (50 rnds Drum/20 rnds Mag) -Thompson M1928a1 (Semi/Auto) (SMG) (Caliber .45 ACP) (50 rnds Drum/20 rnds Mag) -M3 Grease Gun (SMG) (Caliber .45 ACP) -M1918 BAR (Semi/Auto) (Bipod) (LMG) (Caliber 30-06) -M1918a2 BAR (Fast RPM/Slow RPM) (Bipod) (LMG) (Caliber 30-06) -Browning 30 Cal (Bipod) (Medium Machine Gun) (Caliber 30-06) -Winchester M12 (Bayonet) (Shotgun) (Caliber 12 Gauge) -Bazooka (Rocket Launcher) -M2 Flamethrower (Flamethrower) -M1911 (Pistol) (Caliber .45 ACP) German: -Kar98k (Scope) (Bayonet) (Bolt Action Rifle) (Caliber 7.92mm) -G 41 (Scope) (Semi Auto Rifle) (Caliber 7.92mm) -G 43 (Scope) (Semi Auto Rifle) (Caliber 7.92mm) -MP 28 (SMG) (Caliber 9mm) -MP 40 (SMG) (Caliber 9mm) -MP 44 (Semi/Auto) (Scope) (Assault Rifle) (Caliber 7.92mm) -FG 42 (Semi/Auto) (Bipod) (Scope) (Bayonet) (LMG) (Caliber 7.92mm) -MG 34 (Bipod) (Medium Machine Gun) (Caliber 7.92mm) (50 rnds Drum/200 rnds Belt) -MG 42 (Bipod) (Medium Machine Gun) (Caliber 7.92mm) (50 rnds Drum/200 rnds Belt) -Panzerbuchse 39 (Bipod) (One Shot Anti Tank Rifle) (Caliber 7.92 x 94mm) -Panzerfaust (Rocket Launcher) -Panzerschreck (Rocket Launcher) -Flammenwerfer 35 (Flamethrower) -Luger P08 (Pistol) (Caliber 9mm) -Walther P38 (Pistol) (Caliber 9mm) -C96 Mauser (Pistol) (Caliber 9mm) -C96 Mauser with Stock (Pistol) (Caliber 9mm) British: -Lee Enfield MK 3 (Scope) (Bayonet) (Bolt Action Rifle) (Caliber .303) -Lee Enfield MK 4 (Scope) (Bayonet) (Bolt Action Rifle) (Caliber .303) -Sten MKII (SMG) (Caliber 9mm) -Sten MKV (SMG) (Caliber 9mm) -Landchester (Bayonet) (SMG) (Caliber 9mm) -Bren LMG (Semi/Auto) (Bipod) (LMG) (Caliber .303) -Boys AT Rifle (Bipod) (Bolt Action Anti Tank Rifle) (Caliber 14mm) -PIAT (Bipod) (Rocket Launcher) -Smith & Wesson Victory Model (Pistol) (Caliber .45 ACP) -Smith & Wesson Victory Model Short (Pistol) (Caliber .45 ACP) Japanese: -Arisaka Type 38 (Scope) (Bayonet) (Bolt Action Rifle) (Caliber 6.5 x 50) -Type 100 (Bipod) (Bayonet) (SMG) (Caliber 8 x 22) -Type 99 LMG (Bipod) (Scope) (Bayonet) (LMG) (Caliber 6.5 x 50) -Type 97 AT Rifle (Bipod) (Semi Auto Anti Tank Rifle) (Caliber 20mm) -Type A Nambu (Pistol) (Caliber 8 x 22) Italian: -M91 Carcano (Bayonet) (Bolt Action Rifle) (Caliber 7.35mm) -MAB 38 (Semi/Auto) (SMG) (Caliber 9mm) -Breda 30 (Bipod) (LMG) (Caliber 7.35mm) -M1934 Beretta (Pistol) (Caliber 9mm) Soviet (Stalingrad DLC): -Mosin Nagant 91/30 (Scope) (Bayonet) (Bolt Action Rifle) (Caliber 7.62x54) -Mosin Nagant M38 (Bayonet) (Bolt Action Rifle) (Caliber 7.62x54) -Obrez Pistol (Bolt Action Rifle) (Caliber 7.62x54) -SVT 40 (Scope) (Semi Auto Rifle) (Caliber 7.62x54) -PPSH 41 (Semi/Auto) (SMG) (Caliber 7.62x25) (71 rnds Drum/35 rnds Mag) -DP 28 (Semi/Auto) (Bipod) (LMG) (Caliber 7.62x54) -PTRD 41 (Bipod) (One Shot Anti Tank Rifle) (Caliber 14.5x114) -TT33 (Pistol) (Caliber 7.62x25) Australian: -Owen Gun Mk1/43 (SMG) (Caliber 9mm) -Owen Gun Mk1/43 Camo (SMG) (Caliber 9mm) (need Normandy DLC) What if I loot weapon and unable to reload? That means you don't have the ammo for it. Loot the body of the gun owner and take all his ammo for it or just find ammo crate and refill from it. What if I loot flamethrower and unable to shoot? That means you don't have the backpack or the fuel. Loot the flamethrower fuel, flamethrower backpack then wear it, and the flamethrower hose then wield it to use a flamethrower. Video: Here is a video I made about all weapons available in Easy Red 2 along with their firemodes, reloading choices, type of ammo used, and attachments. https://youtu.be/RXcRdzUpYxs Role / Class Every faction has class/role such as: 1. Squad Leader American Infantry and Flamethrower: Thompson M1a1, M1911, 1 Smoke, 1 Grenade American Marine: Thompson M1a1, M1911, 1 Smoke, 2 Grenade American AT: Thompson, M1911, 1 Smoke, 1 Grenade American Tanker: M3 Grease Gun, 1 Grenade German Wehrmacht, Flamethrower, and Afrika Korps: MP 40, Luger P08, 1 Smoke, 2 Grenade German Waffen SS and Paratrooper: MP 44, Luger P08, 1 Smoke, 2 Grenade, Attachable Scope in Inventory German Tanker: MP 40, 1 Grenade British Infantry: Sten MKII, Smith & Wesson, 1 Smoke, 1 Grenade British Paratrooper: Sten MKV, Smith & Wesson, 1 Smoke, 1 Grenade British AT: Thompson M1928, Smith & Wesson, 1 Smoke, 1 Grenade British Tanker: Sten MKII, 1 Grenade Japanese Infantry and AT: Type 100, Type A Nambu, 1 Smoke, 1 Grenade Japanese Tanker: Type 100, 1 Grenade Italian Infantry and SS: MAB 38, Beretta M1934, 1 Smoke, 1 Grenade Italian Tanker: MAB 38, 1 Grenade
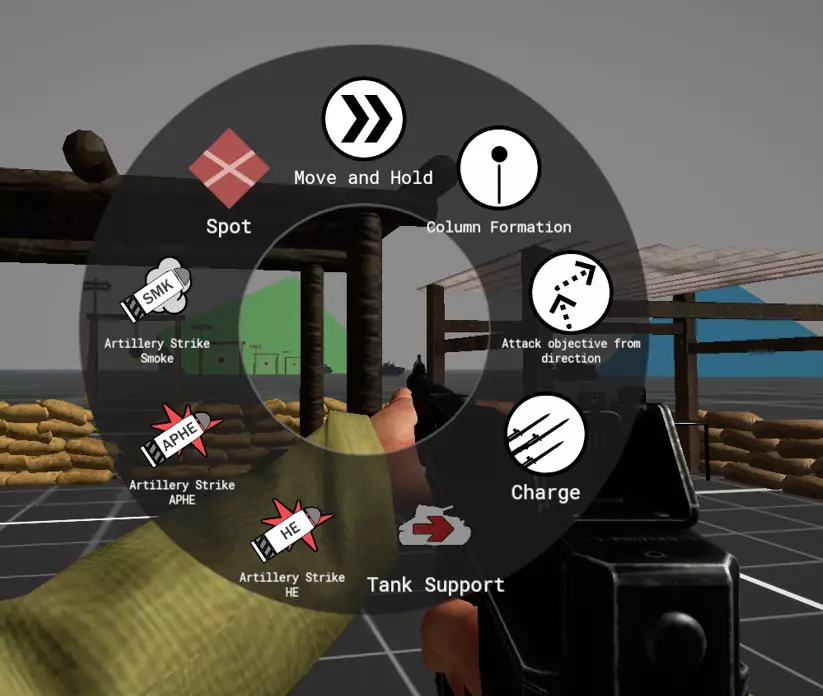
按住Tab键打开命令菜单 命令列表: -跟随(默认):所有队员将跟随小队队长 -移动并坚守:所有队员将前往选定地点 -从指定方向攻击目标:所有队员将在到达目标前先前往一个地点,以便从侧翼包抄目标 -横队阵型/纵队阵型:所有队员在跟随的同时变换阵型 -冲锋:所有队员将以最快速度直线冲向选定地点 -坦克支援:需要无线电兵批准。命令坦克前往选定地点 -火炮烟雾弹/高爆弹/穿甲高爆弹:需要无线电兵批准命令炮兵向选定地点射击 - 标记,为敌方单位添加持续一段时间的标记 - 当小队队长阵亡时,队长职位将传递给军衔第二高的成员(通常顺序为无线电员->机枪手->狙击手->步枪兵)。小队队长位置显示在屏幕左上角。
部分小队队长会佩戴独特的帽子或头盔。无线电员 美国步兵和反坦克兵:M1卡宾枪、M1911手枪、1个烟雾弹、1个手榴弹 美国海军陆战队:温彻斯特M12霰弹枪、M1911手枪、1个烟雾弹、1个手榴弹、可装配刺刀(位于物品栏) 德国国防军和非洲军团:Kar98K步枪、鲁格P08手枪、1个手榴弹、可装配刺刀(位于物品栏) 德国伞兵和武装党卫军:G43步枪、鲁格P08手枪、1个烟雾弹、1个手榴弹 英国步兵、反坦克兵和伞兵:兰彻斯特冲锋枪、史密斯威森手枪、1个烟雾弹、1个手榴弹、可装配刺刀(位于物品栏) 日本步兵和反坦克兵:三八式步枪(带刺刀)、1个烟雾弹、1个手榴弹 意大利步兵和党卫军:M91卡尔卡诺步枪、1个烟雾弹、1个手榴弹、可装配刺刀(位于物品栏) (查看呼叫炮火部分) 收到无线电请求后,按Tab键确认请求坦克支援或获取炮火打击坐标。获取坐标时会出现一个小游戏。依次点击与中间显示数字相同的数字组,且不能出错。出错会导致炮火偏移到其他地方。 担任班长时,你可以自行呼叫和确认呼叫。 无线电兵背上可看到可见的无线电背包。 3. 步枪兵 美国:M1加兰德步枪,1枚手榴弹,背包内有可装配刺刀 德国:Kar98k步枪,1枚手榴弹,背包内有可装配刺刀 英国:李-恩菲尔德MK4步枪,1枚手榴弹,背包内有可装配刺刀 日本:三八式步枪刺刀,1枚手榴弹 意大利:M91卡尔卡诺步枪,1枚手榴弹,背包内有可装配刺刀 4.工兵 美军:M3黄油枪,1个TNT炸药,1个炸药包,2个反坦克地雷,1枚手榴弹 德国伞兵:G43步枪,铁拳火箭筒,1捆反坦克手榴弹,1枚手榴弹 德国武装党卫军:MP40冲锋枪,铁拳火箭筒,1捆反坦克手榴弹,1枚手榴弹 英国伞兵:李-恩菲尔德MK4步枪,PIAT反坦克发射器,1个炸药包,1个TNT炸药,1枚手榴弹,背包内可装配刺刀狙击手 美国步兵:M1903春田狙击步枪、M1911手枪、1个烟雾弹、1个手榴弹 德国国防军与非洲军团:Kar98k狙击步枪、鲁格P08手枪、1个烟雾弹、1个手榴弹、可装配刺刀(位于物品栏) 德国武装党卫军与伞兵:G43狙击步枪、鲁格P08手枪、1个烟雾弹、1个手榴弹 英国步兵:李-恩菲尔德MK4狙击步枪、史密斯威森手枪、1个烟雾弹、1个手榴弹、可装配刺刀(位于物品栏) 日本步兵:三八式狙击步枪(带刺刀)、1个烟雾弹、1个手榴弹 由 bots 操控的狙击手拥有更高的精准度机枪手 美国步兵:勃朗宁30口径机枪,1个烟雾弹,1个手榴弹,1个弹药箱 美国海军陆战队:勃朗宁自动步枪,1个烟雾弹,1个手榴弹,1个弹药箱 德国国防军、非洲军团和武装党卫军:MG 42通用机枪,1个烟雾弹,1个手榴弹,1个弹药箱 德国伞兵:FG 42伞兵步枪,1个烟雾弹,1个手榴弹,背包内有可装配的刺刀和瞄准镜,1个弹药箱 英国步兵和伞兵:布伦轻机枪,1个烟雾弹,1个手榴弹,1个弹药箱 日本步兵:九九式轻机枪(带刺刀),1个烟雾弹,1个手榴弹,1个弹药箱 意大利步兵和党卫军:布雷达30轻机枪,1个烟雾弹,1个手榴弹,1个弹药箱 按照三脚架相关说明部署三脚架。按住G键(手榴弹键)并选择弹药箱来部署弹药箱。每个弹药箱可使用3次。按一次F键(交互键)拿取弹药,再按一次F键可再次拿取弹药箱。
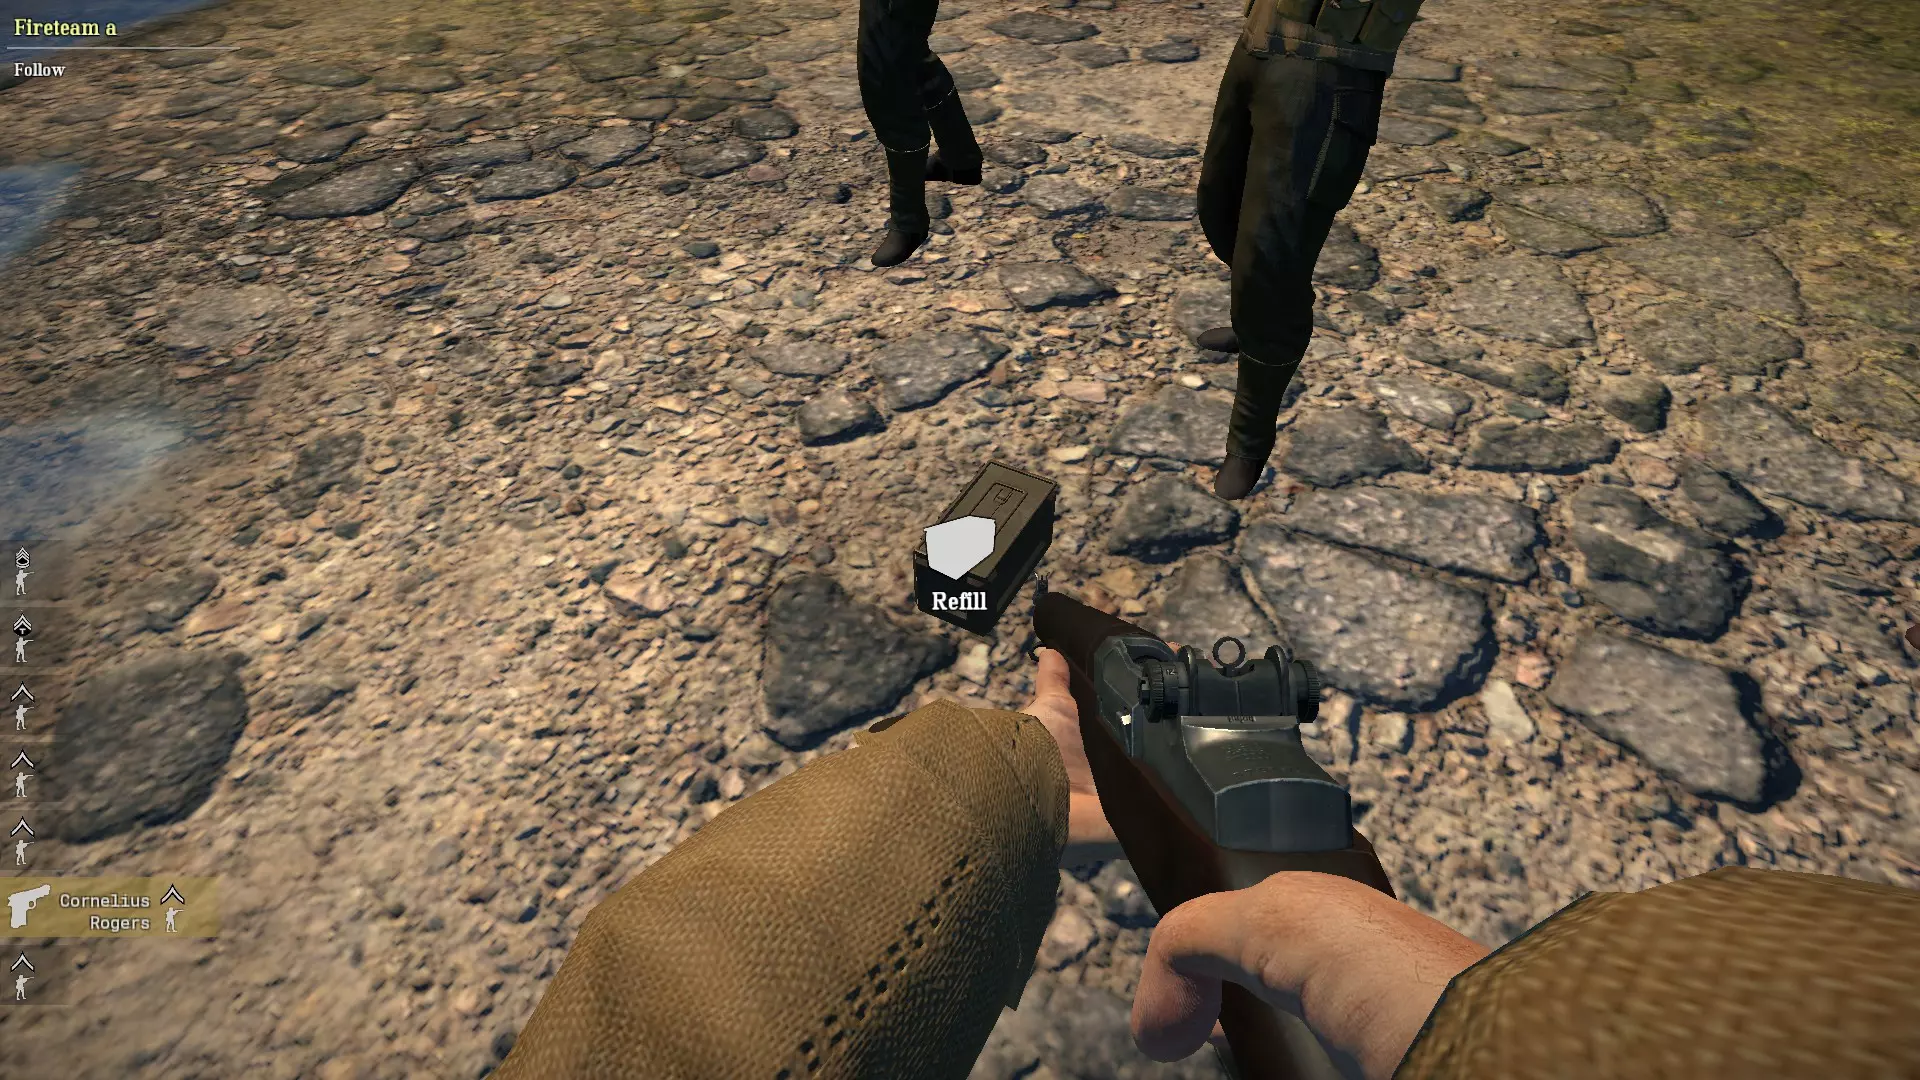
对着友方机枪手按一次F键,也会从其物品栏中掉落弹药箱。
7. 医疗兵 美国:M1加兰德步枪、1枚手榴弹、注射器、2种剪刀、可装配刺刀(位于物品栏) 德国:Kar98k步枪、1枚手榴弹、注射器、2种剪刀、可装配刺刀(位于物品栏) 英国:李-恩菲尔德MK4步枪、1枚手榴弹、注射器、2种剪刀、可装配刺刀(位于物品栏) 日本:三八式步枪(带刺刀)、1枚手榴弹、注射器、2种剪刀 意大利:M91卡尔卡诺步枪、1枚手榴弹、注射器、2种剪刀、可装配刺刀(位于物品栏) 按住F键对受伤单位进行救治,根据其头顶标记选择正确的治疗方式使其恢复行动能力。对受伤的敌人使用此操作会使其投降。
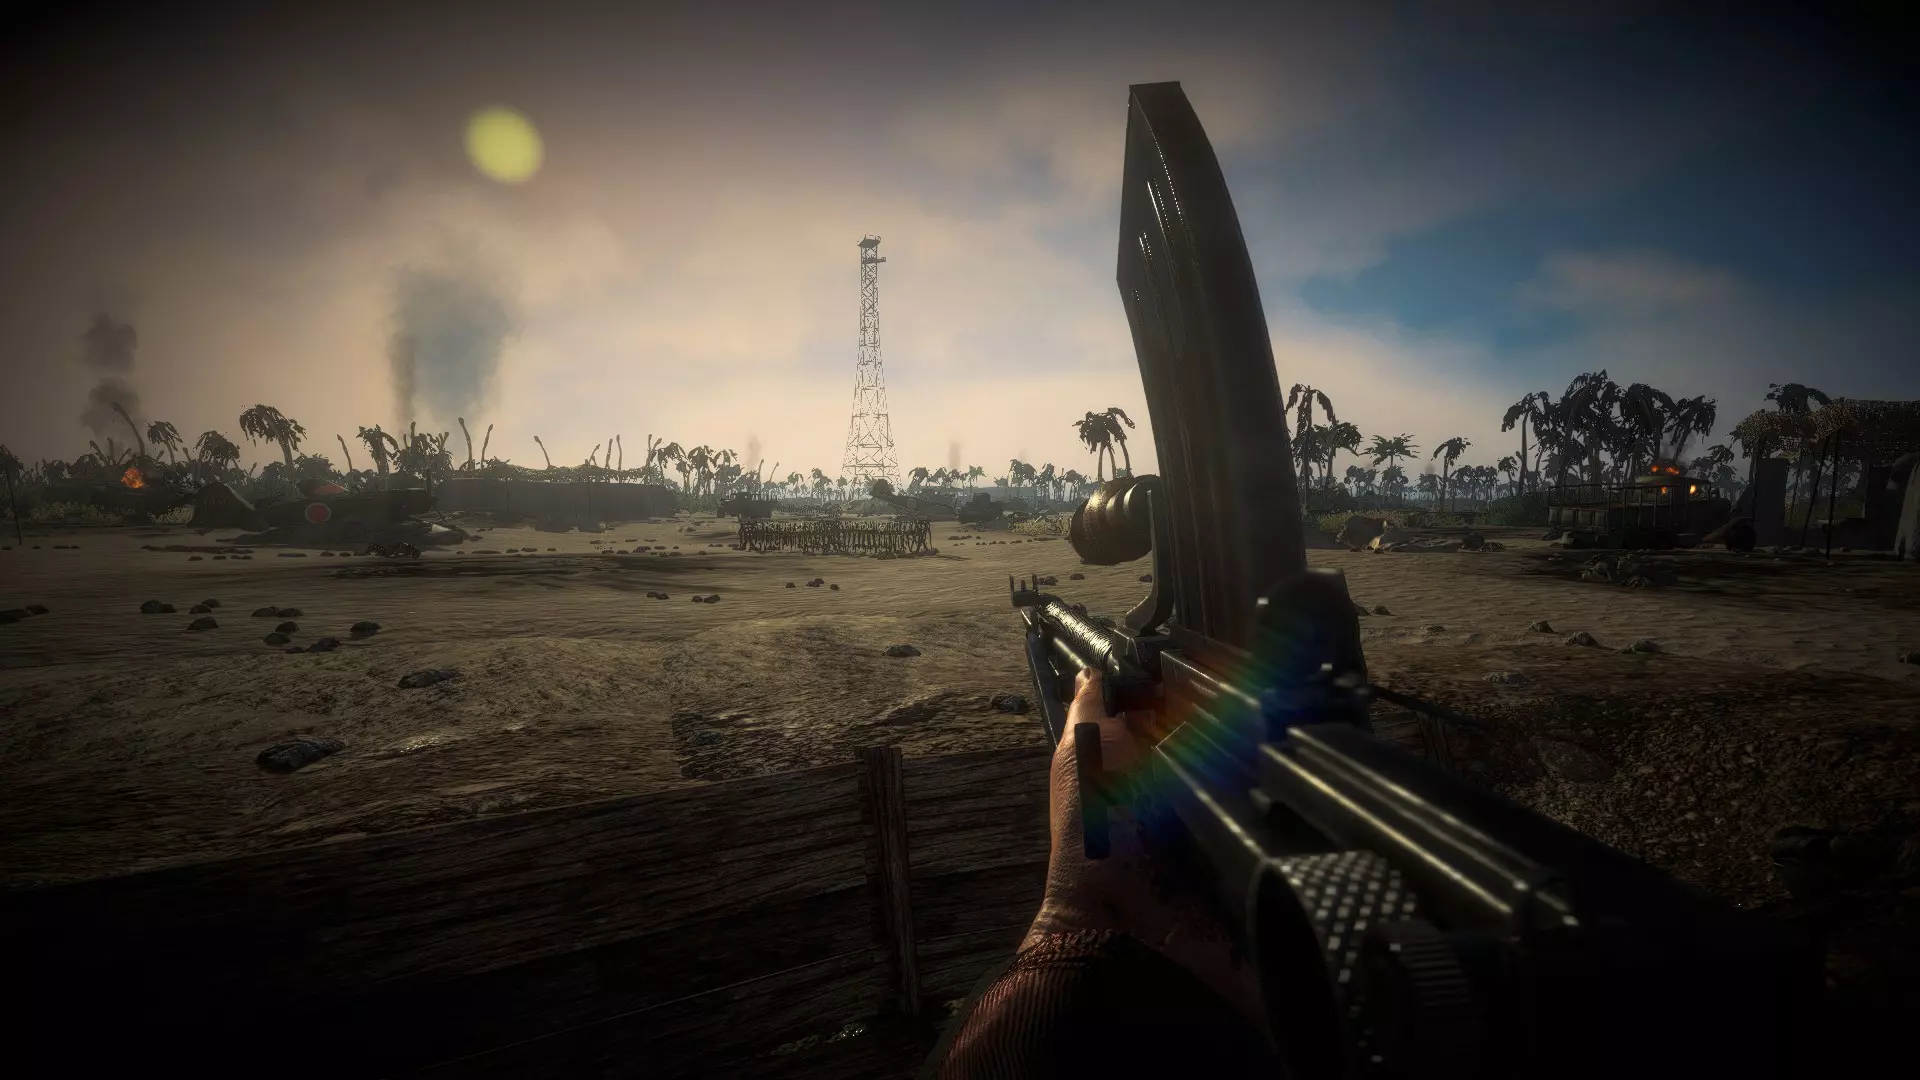
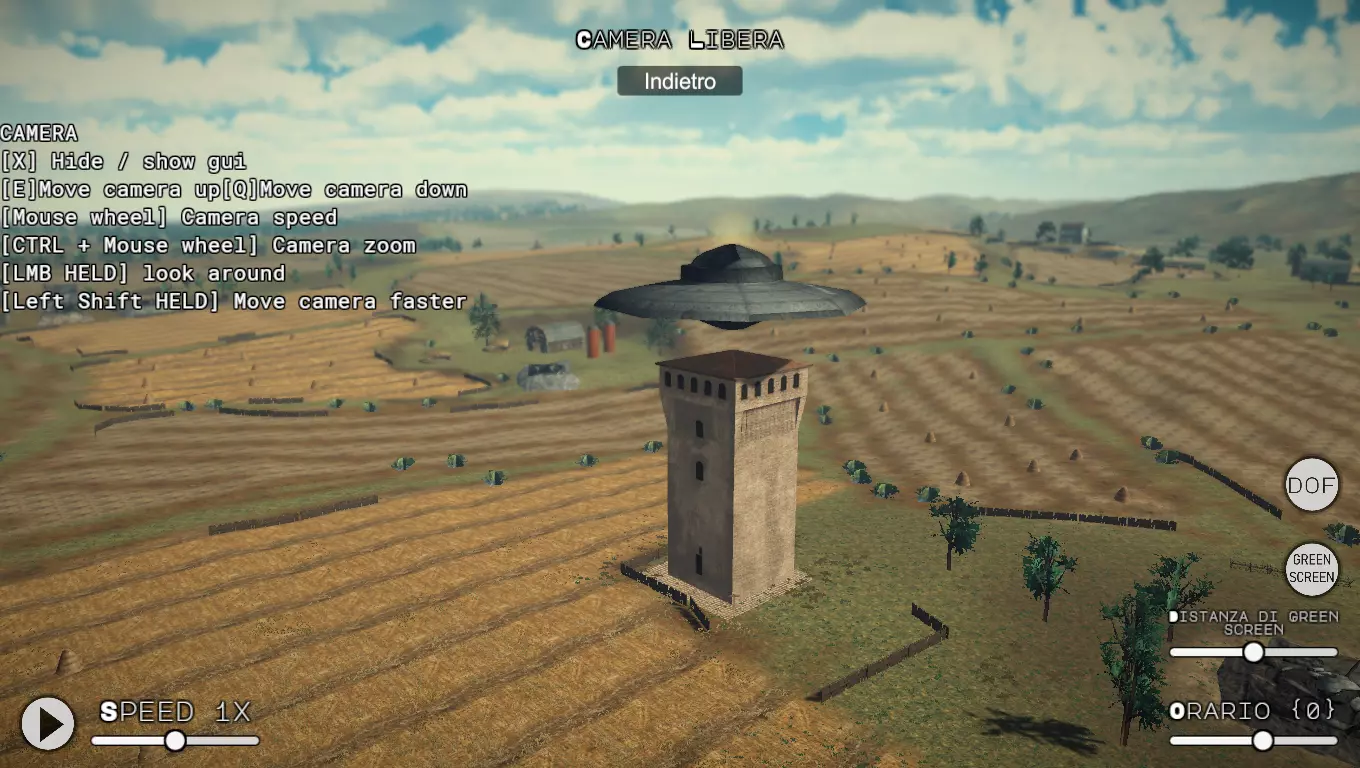
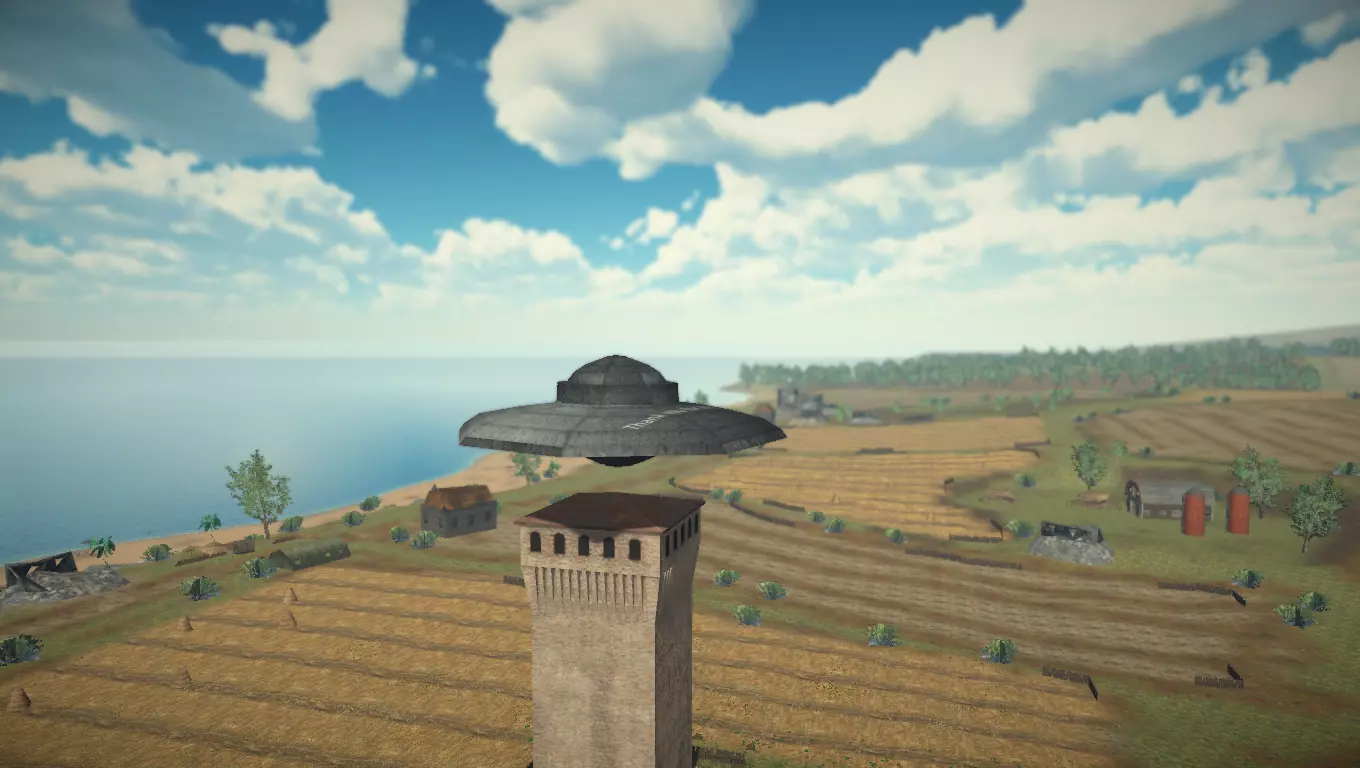
对友方医疗兵按一次F键可从其物品栏中获得2个绷带。 8. 单位配置 美国反坦克兵:M1卡宾枪、巴祖卡火箭筒、1个烟雾弹、1个手榴弹 德国伞兵反坦克兵:G43步枪、坦克杀手火箭筒、1个烟雾弹、1个手榴弹、1捆反坦克手榴弹 英国反坦克兵(部分地图):李-恩菲尔德MK4步枪、博伊斯反坦克步枪、1个手榴弹、1个炸药、物品栏内有可装配刺刀 英国反坦克兵:李-恩菲尔德MK4步枪、PIAT反坦克发射器、1个手榴弹、1个炸药、物品栏内有可装配刺刀 日本反坦克兵:九七式反坦克步枪、南部十四年式手枪、1个烟雾弹、1个手榴弹 对抗敌方坦克的方法 9. 火焰喷射器 美国火焰喷射器兵:M2火焰喷射器、M1911手枪 德国火焰喷射器兵:35型火焰喷射器 可对轻型坦克造成伤害 战斗提示 《血色东线2》中的战斗场面十分精彩且常具史诗感,但在战斗中阵亡却非常容易。我提醒你,若要将AI调至最高难度,只需在设置中进行调整。 战斗时请始终记住保持专注并寻找掩护。 切勿在友军士兵射击时走到其前方,否则他很容易误伤到你。 《Easy Red 2》与其他游戏不同,要记住你可能挨一两枪就会死亡。 以下是一些战斗场景的应对方法: 当你扮演狙击手时,尽量待在远处,并摧毁机枪或携带巴祖卡火箭筒的士兵等重要目标。 如果你是医护兵且有队友受伤,将其拖至掩护处以便安全治疗,但不要等待太久,否则他会因失血过多而死亡。 尝试通过向敌人射击来提供掩护火力,你可以使用机枪甚至手榴弹为医护兵和同伴提供掩护。如果敌人火力太猛,就绕到他们侧面,记住地图通常都很大。 在《红色行动2》中,你通常可以破坏周围的环境:树木、沙袋、铁丝网等等。 不要独自攻击敌人,等待你的同伴! 你通常可以缴获敌人的武器,比如坦克、火炮和机枪。 在《红色行动2》中,你可以从敌人甚至队友那里偷取弹药、武器、手榴弹、注射器和绷带!另外,如果你偷到注射器,就可以治疗你的同伴! 记得收集他们的狗牌。 彩蛋 不明飞行物 不明飞行物位于一个任务中:弗罗西诺内附近。游戏开始时,使用电影视角并暂停时间,然后前往地图海岸边的一座城市,在那里你会找到一座非常高的塔,塔的上方有不明飞行物。
狗牌 游戏最新添加的内容之一是狗牌。部分拥有特殊装备的机器人会特殊生成并携带独特的狗牌,收集后你就能使用它们的装备,但这些机器人不会再次生成。 目前大多数狗牌持有者都是历史上参与过战斗的真实人物。 特殊装备并非必须在首次 spawn 时使用。只要你尚未使用,特殊装备就会一直可用。每场战斗你只能使用一次特殊装备。 它们有一些特征可帮助你识别: -它们是独狼。不隶属于任何小队,独立行动。 -部分穿着与众不同的独特制服。 -部分携带任务中其他士兵没有的武器。 -部分似乎比普通士兵更耐打。似乎需要更多射击才能击倒他们。 所有佩戴狗牌的玩家每次都会在相同的任务和阶段中生成。
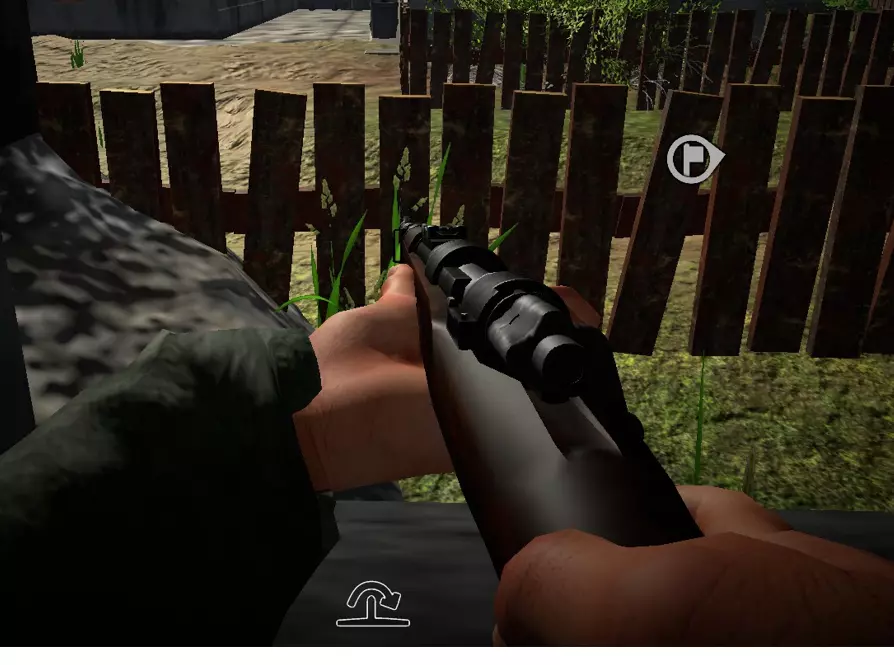
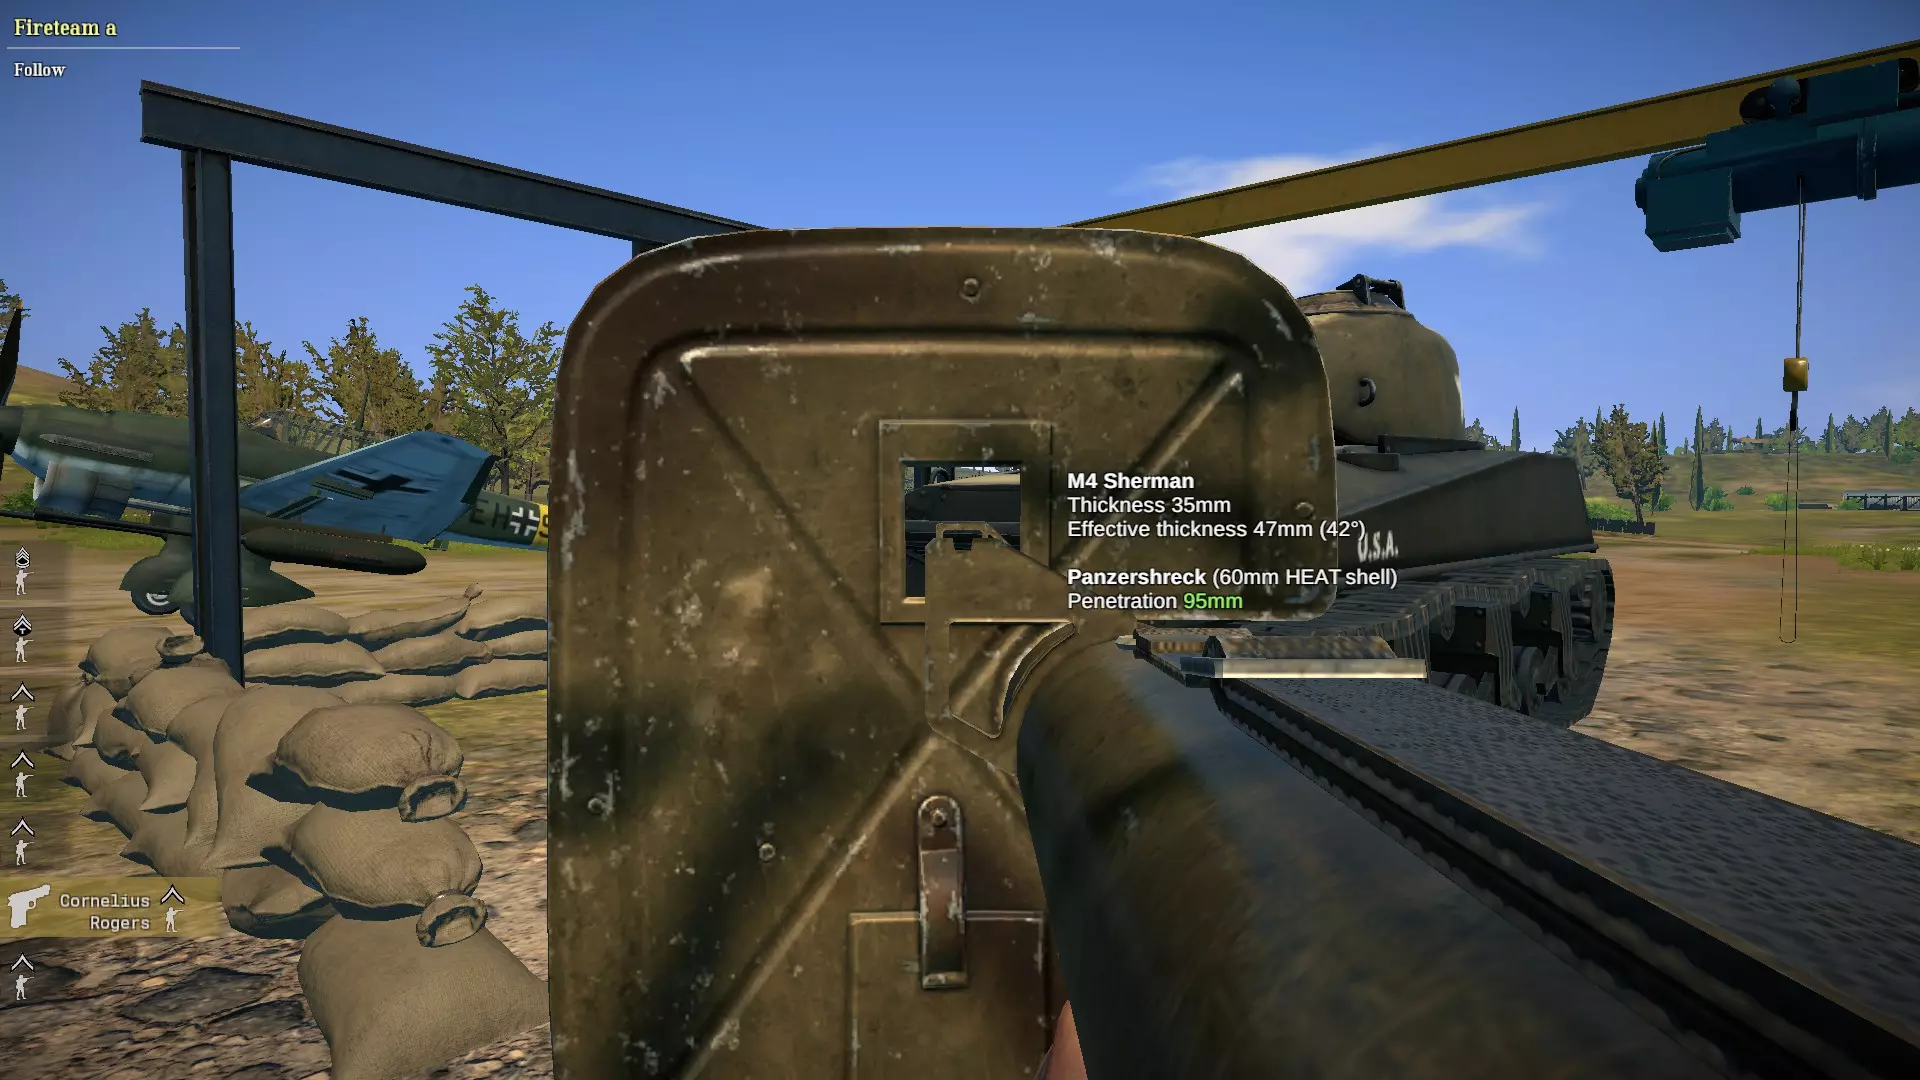
Press F on them to open inventory that automatically collect the dog tag too. Dog tags wielder after dying, will show HUD on your screen of where they die. The indicator is a yellow dog tag. Here are the list of known dog tags wielder and where to find them: US Marines (playable on all Kwajalein missions) -) Arnold J Gresser: Kwajalein Mission 1 (Kwajalein Beachead), carry m1 garand with radio backpack. Phase 4, the AA gun position with tower and T-shaped trench line, before the airfield. -) Richard Sorenson: Kwajalein Mission 2 (Kwajalein Airport), carry m3 grease gun. Phase 3, the huts complex. -) Robert McCard: Kwajalein Mission 4 (Japan Counter Attack), carry unique Browning 30 Cal among the marines. Phase 2 after start phase for American, machinegun on a desk with barbed wires around it. Japanese (playable on all Kwajalein missions) -) Monzo Akiyama: Kwajalein Mission 1 (Kwajalein Beachhead), carry type 100 and type A Nambu, wearing tank crew uniform and helmet. Phase 2, 2 huts, 1 tower, and camo net. -) Yamagata Masaji: Kwajalein Mission 2 (Kwajalein Airport), carry type 97 at rifle and type A Nambu and wear pith helmet with tank uniform. Phase 4, AA guns position with trenches and huts after tank repair depot. -) Tarokichi Aso: Kwajalein Mission 3 (North of Kwajalein), carry type 100 and type A Nambu and wear pith helmet. Phase 3, 2 concrete AA gun positions. -) Kenzo Tsuyuki: Kwajalein Mission 4 (Japan Counter Attack), carry type 99 lmg, type A Nambu, and wear pith helmet with Japanese uniform. Phase 1 after start phase for American, tank repair depot with two huts and one AT gun. German (playable on all Anzio missions except Mission 10:Fiume Liri) -) Heinrich Flugelman: Anzio Mission 1 (Shore of Nettuno), carry fg42 scoped with bayonet and wear fallchirmjager uniform with feldmutze. Phase 2, the at gun position in intial town. -) Ludwig Heilmann: Anzio Mission 4 (Toward the Apennines), carry fg42 and luger with Wehrmacht uniform and officer hat. Phase 5, across the field with church, ruined building, and mg position from the bushy entrance. -) Maximillian Becker: Anzio Mission 7 (Near Frosinone), carry mp 40, syringe, and luger with officer hat. Phase 3, after the trench line with lone house and the first long road to the objective. -) Hermann Barnbeck: Anzio Misssion 9 (Casssino City), carry mp44 and luger wear wehrmacht uniform. Phase 6, the ruined portion of the city with river in the middle. -) Sven Hassel: Anzio Mission 11 (Monte Cassino Point 445), carry mg42 and wear tank uniform with Wehrmacht helmet. Phase 4, in front of entrance to monte cassino abbey ruin with some craters. -) Julius Schlegel: Anzio Mission 11 (Monte Cassino Point 445), carry mp40 and luger with officer hat. Phase 3, a house with AA gun and a short trench line. British (playable on all British Anzio missions) -) Alphonse Juin: Anzio Mission 1 (Shore of Nettuno), carry revolver and wear British uniform with beret. Phase 5, first phase entering the second town. -) Lorne Maclaine Campbell: Anzio Misssion 2 (Near Tor San Lorenzo). carry sten mk2 and revolver. Phase 2, with tent and at gun position with two houses. -) Alan Whicker: Anzio Mission 6 (Anzio Express), carry lee enfield and m1911. Phase 3, after capturing the hill will lone house, there is a trench line to capture. -) William Sidney: Anzio Mission 6 (Anzio Express), carry Thompson and revolver wear British uniform with beret. Phase 4, after capturing the trench with at and aa gun before crossing the field. -) George Allan Mitchell: Anzio Mission 9 (Cassino City), carry lee enfield and revolver. Phase 2, 2 ruins with tank fixing depot and a short trench line. -) Kamal Ram: Anzio Mission 9 (Cassino City), carry lee enfield and revolver, wear British uniform. Phase 5, the city entrance. American (playable on all American Anzio missions) -) Thomas George Prince: Anzio Mission 3 (Near Acciarrela), carry scoped springfield, radio, and m1911 and wear British helmet with US uniform. Phase 3, the 3 ruined buildings with trench line. -) Chester Cruikshank: Anzio Mission 4 (Toward the Apennines), carry m1a1 thompson and revolver. Phase 3, the position near the mountain castle with mg and some redoubts. -) Audie Murphy: Anzio Mission 8 (Battle of Cisterna), carry m1a1 Thompson and m1911. Phase 1, 3 houses, a ruin, and AT gun position at the end of a road. Italian Waffen SS (playable on Anzio Mission 10:Fiume Liri) -) Pietro Manelli: Anzio Mission 10 (Fiume Liri), carry Mab38, m1934 pistol, and wear Italian SS uniform. Phase 2, the tents with a line of trench. Polish 2nd Corps (playable on all Polish Anzio missions) -) Emil Czech: Anzio Mission 9 (Cassino City), carry lee enfield and revolver. Phase 1, the lone house with fence across the field with lone church nearby. All dog tags are already listed. Other dog tags can be seen on "Dog Tags Part 2" Section Dog Tags Part 2 Part 2 of dog tags list Italian (playable on all Kos missions) -) Dante Zucchelli: Kos Mission 1 (Marmari Invasion). -) Felice Reggio: Kos Mission 3 (Kos Airport) -) Francesco De Giovanni: Kos Mission 5 (Mount Dikeos), carrry Breda30 and wear Italian helmet with Italian uniform. Phase 6, inside the town before the hill church. British Kos (currently not playable) -) James G. G. Gray: Kos Mission 4 (Kardamaina) -) WIlliam Patrick Reilly: Kos Mission 6 (Kos Harbour), carry lee enfield and wear British uniform. Phase 5, the phase with two cap points with flak88 each. It's the phase after entering the last town. German Kos (playable on all Kos missions) -) Sylvester von Saldern: Kos Mission 2 (Road to Mastihari), carry mp40 with luger and wear German officer hat with Gerrman uniform. Phase 2, after near the beach cap point German Stalingrad (playable on all Stalingrad missions) -) Erwin Konig: Stalingrad Mission 1 (Volga River Crossing), carry scoped kar98k with luger and wear feldmutze with German uniform. Phase 4, the ruined street after the first hill with flaks and 2 bunkers. -) Hermann Barnbeck: Stalingrad Mission 2 (City Push), carry ppsh 41 and wear officer cap with German uniform. -) Adolf Baumm: Stalingrad Mission 6 (German Advance), carry scoped g41 and wear officer cap with German uniform. Soviet (playable on all Stalingrad missions) -) Vasily Zaitsev: Stalingrad Mission 1 (Volga River Crossing), carry scoped mosin and wear pilotka with Soviet uniform. Phase 1, the boat landing but he is already on the shore trenches. -) Vasily Kvachandiratze: Stalingrad Mission 2 (City Push), carry scoped svt40 with mosin obrez and wear Soviet helmet with Soviet amoeba uniform. Phase 2, the ruined trenches. -) Yakov Pavlov: Stalingrad Mission 2 (City Push), carry ppsh41 with ptrd41 and wear ushanka with Soviet uniform. -) Mikhail Panikakha: Stalingrad Misson 3 (Towards the Industrial Area) -) Ivan Kharchenko: Stalingrad Mission 5 (Red October Factory), carry ppsh41 with mosin obrez and wear Soviet officer hat with Soviet NKVD uniform. Phase 2, the second village with flak gun before the entering the factory. -) Maksim Passar: Stalingrad Mission 8 (Near Krasny Pakar), carry scoped mosin with mp40 and wear pilotka with Soviet uniform. Phase 1, the battle to the first hill. Disabling Tanks and Weakspots There are many ways to disable a tank. 1. The use of armor piercing shells. These shells are usually available on tank turrets or anti tank guns. 2. Rocket launchers such as bazooka, piat, panzerschreck, and panzerfaust or anti tank rifle like type 97 at rifle, boys at rifle, ptrd41, or panzerbuchse 39. 3. Anti tank grenades and explosives. As infantry hold grenade key (G) to open a radial menu and hover your mouse on the preferred grenade type. The current anti tank grenades and explosives are TNT, Dynamite, At mine, Molotov Cocktail, and Grenade bundle. TNT and dynamite throw range is short and will explode after a while that deal big damage in huge area, but their fuse is long so time it right. Throw it near the enemy and make sure the enemy doesn't escape. At mine will have short throw range and will not explode unless something drive on it. Grenade bundle is thrown further than TNT and dynamite and will explode after sometime. Molotov Cocktail is thrown further like the bundle and will explode on impact into area of flame. It can damage infantry and light tanks. 4. Plane bombs, With a plane you can dive toward enemy tank marked on your screen. Align the sight on the tank while diving, then drop a bomb to destroy it (space key). Weakspots: Tanks are made of many different parts. Damage on certain parts can be bigger than on other certain parts. It's best to not shoot on the front hull, instead aim for the back that can cause enemy tank to burn and possible to get destroyed in one shot. If aiming to the back is not possible, aiming for the side would work. If you hit the side slightly around the back parts, it can cause the tank to burn too and destroyed in one shot. If back and side is not an option, aim for the turret front. It usually has thinner armor and can kill enemy crews in it. Killing crew can give a bit of delay on enemy turret. Angle of penetration also matter. 90 degree or straight to it is the best. The bigger the angle, the thicker the armor of the vehicle will be than it suppose to be. You can check on penetration value of each weapon to any vehicle in shooting range. It will be shown as a pop up, like the second image of this section below.
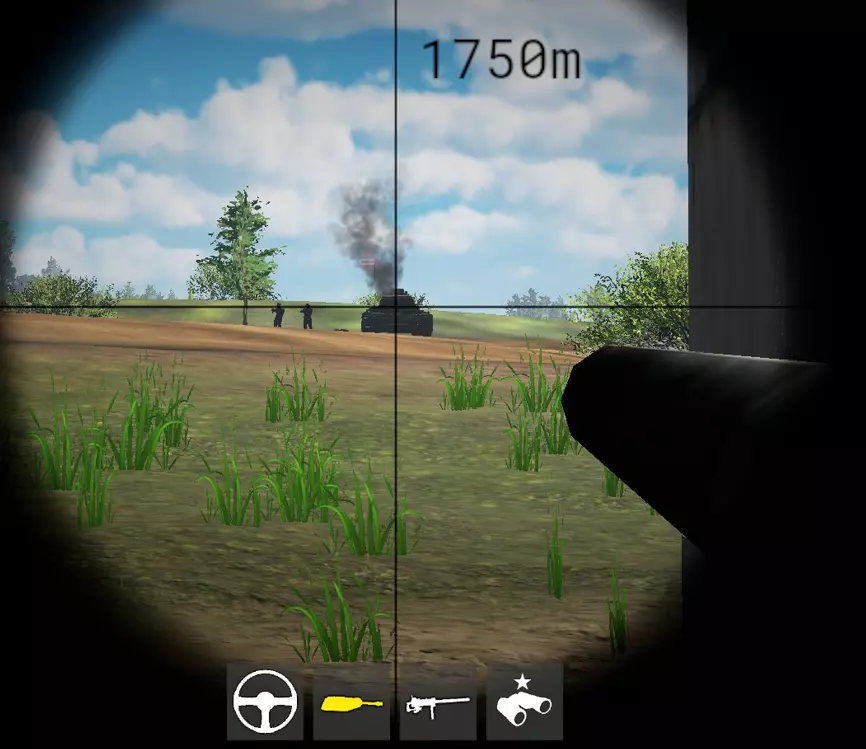
在训练场上瞄准坦克时会显示穿透数值,你可以借此测试穿透力。在这里你能看到角度对穿透力的影响。
多人模式 多人模式支持在私人或公共服务器中以玩家对战或玩家对抗环境的方式游玩战役和自定义战役。
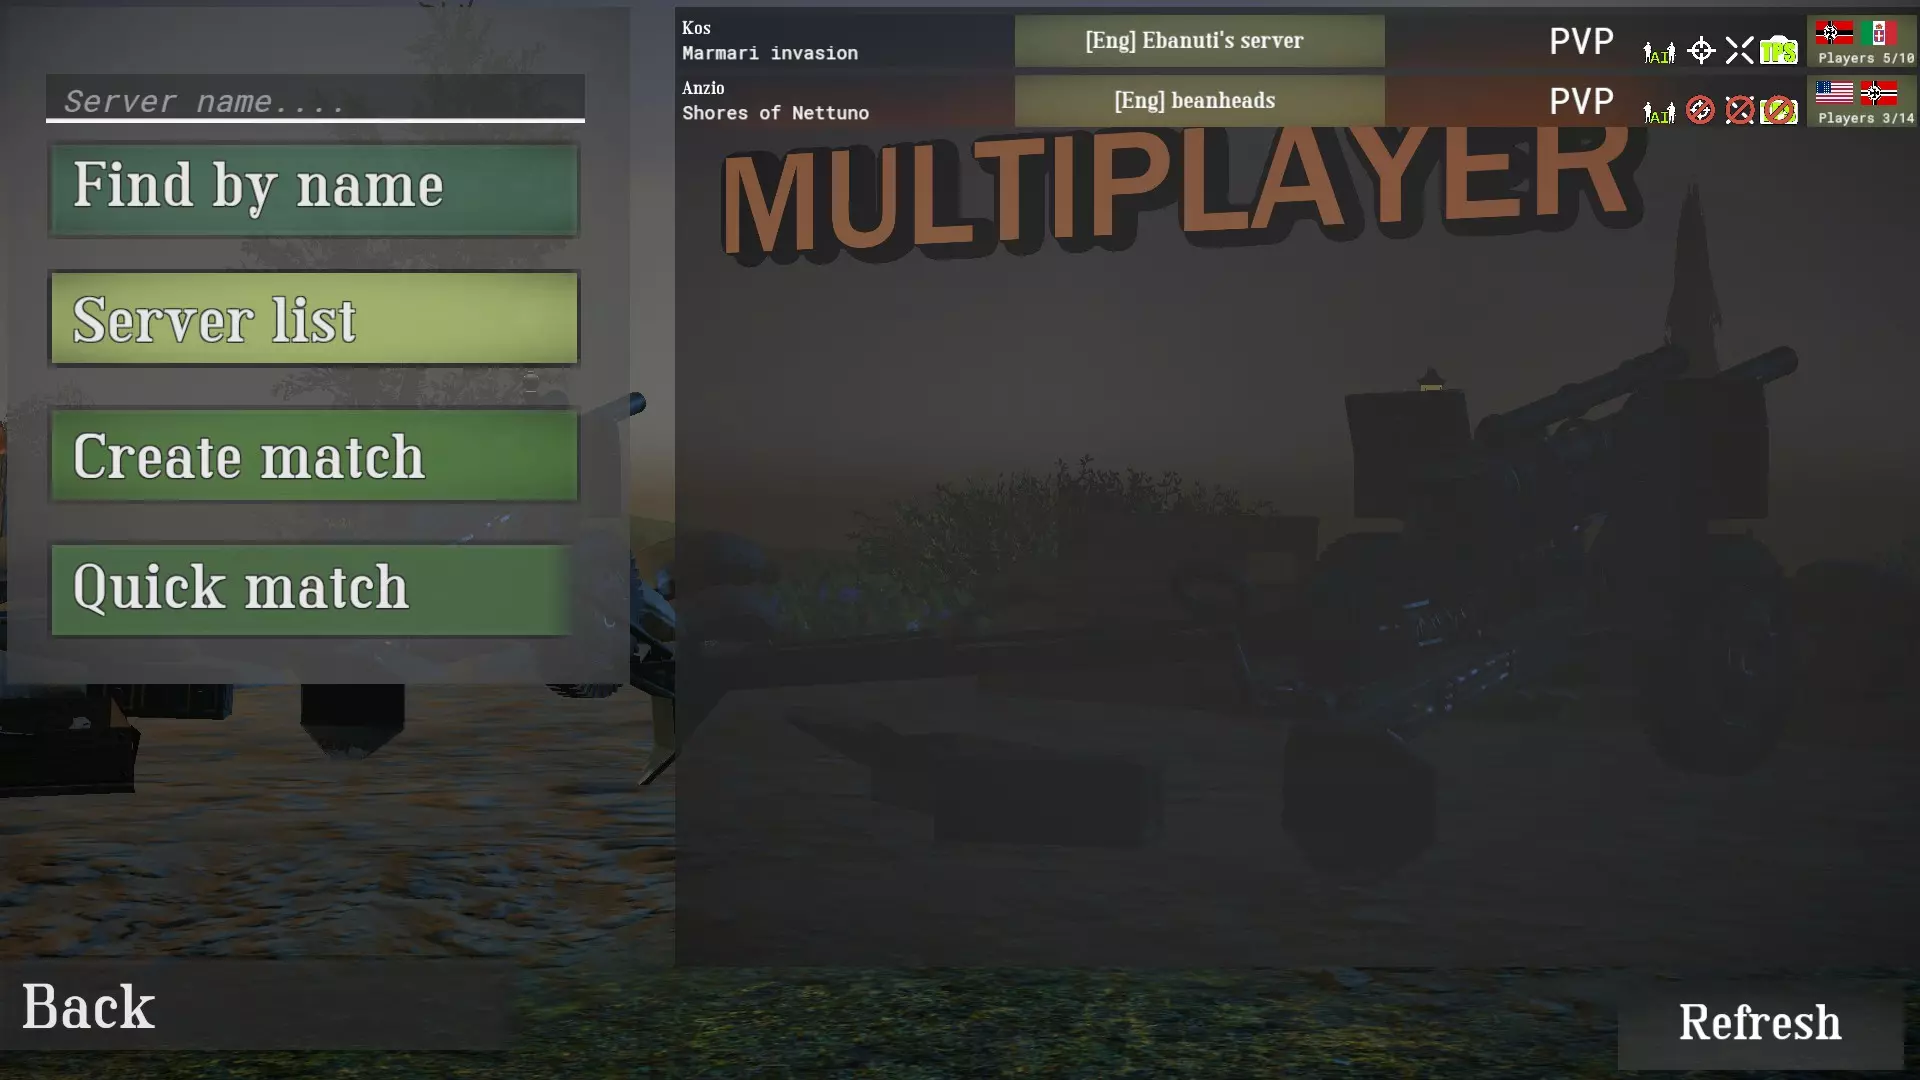
在本图中,我将从上到下说明左侧每个选项的功能。 1. 文本栏和“按名称查找”用于查找特定的公共服务器或私人服务器。有关私人服务器的更多信息,请查看“创建比赛”部分。 2. 服务器列表用于查看所有可用的公共服务器并加入它们。在此图中,服务器有许多图标。从左到右依次如下: - 【Kos Marmari Invasion】是当前正在进行的战役和任务 - 接下来是服务器名称以及括号中的服务器位置【Eng】 - 【PVP】或【PVE】取决于玩家允许加入的队伍。有关PVE或PVP的更多信息,请查看“创建比赛”部分。 - 【AI图标】表示是否存在AI - 【准星图标】表示是否允许使用准星-另一个准星图标用于显示是否允许命中标记。 -TPS视角表示是否允许第三人称视角(默认按T键切换)。 -然后是当前游玩的国家、当前玩家数量及人数限制。 3.创建比赛:用于创建自己的公开或私人服务器。 4.快速匹配:随机加入任意可用服务器。 5.刷新:刷新服务器列表。 创建比赛: 此处显示所有可用设置。

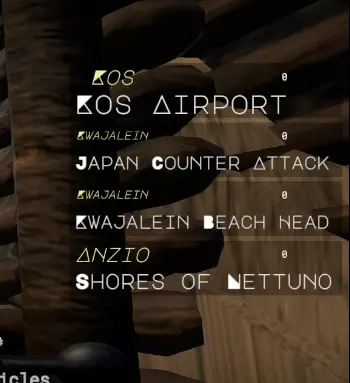
右侧是各战役的任务选择。在这里,你可以根据点击顺序选择所有希望在轮换中可用的任务。如果启用地图投票,将忽略该顺序,任务结束后,所有玩家将从所有已选任务中投票选择下一个任务。 我将从上到下介绍中间栏的所有可用设置: 1. 服务器名称 2. 难度和最大AI单位数量。在多人游戏中,你可以将最大AI单位数量设为无(即无 bots) 3. 票数倍率用于增加攻击者初始票数,以达到平衡目的 4. 最大入侵者和防御者玩家数量。最大数量为10。你可以将某一方设为0,使服务器成为PVE模式。否则,当玩家可以加入双方队伍时,服务器为PVP模式 5. 私人比赛私人比赛不会显示在服务器列表中。你需要将具体的服务器名称告知其他玩家,他们需使用搜索栏并通过完全相同的名称来找到你的服务器。 6. 地图投票与任务选择中提到的规则相同。【如果你允许地图投票,那么预设顺序将被忽略,在一局任务结束后,所有玩家将从所有已选择的任务中投票决定下一局任务。】 比赛结束时地图投票的示例。
7. 是否允许TPS视角或第三人称视角。 8. 在个人设置中是否允许准星。 9. 在个人设置中是否允许命中标记。 10. 轮换任务数量或可投票任务候选的相关信息。 11. 开始游戏 多人游戏中的部分额外控制: -M键(地图键)用于打开玩家列表和计分板(也可用于打开地图) -回车键用于打开聊天菜单并进行聊天 计分板信息:
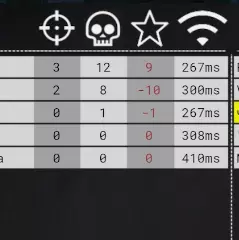
-瞄准图标代表击杀玩家数 -骷髅图标代表死亡次数 -星星图标代表击杀机器人数量 -连接图标代表延迟 观战模式
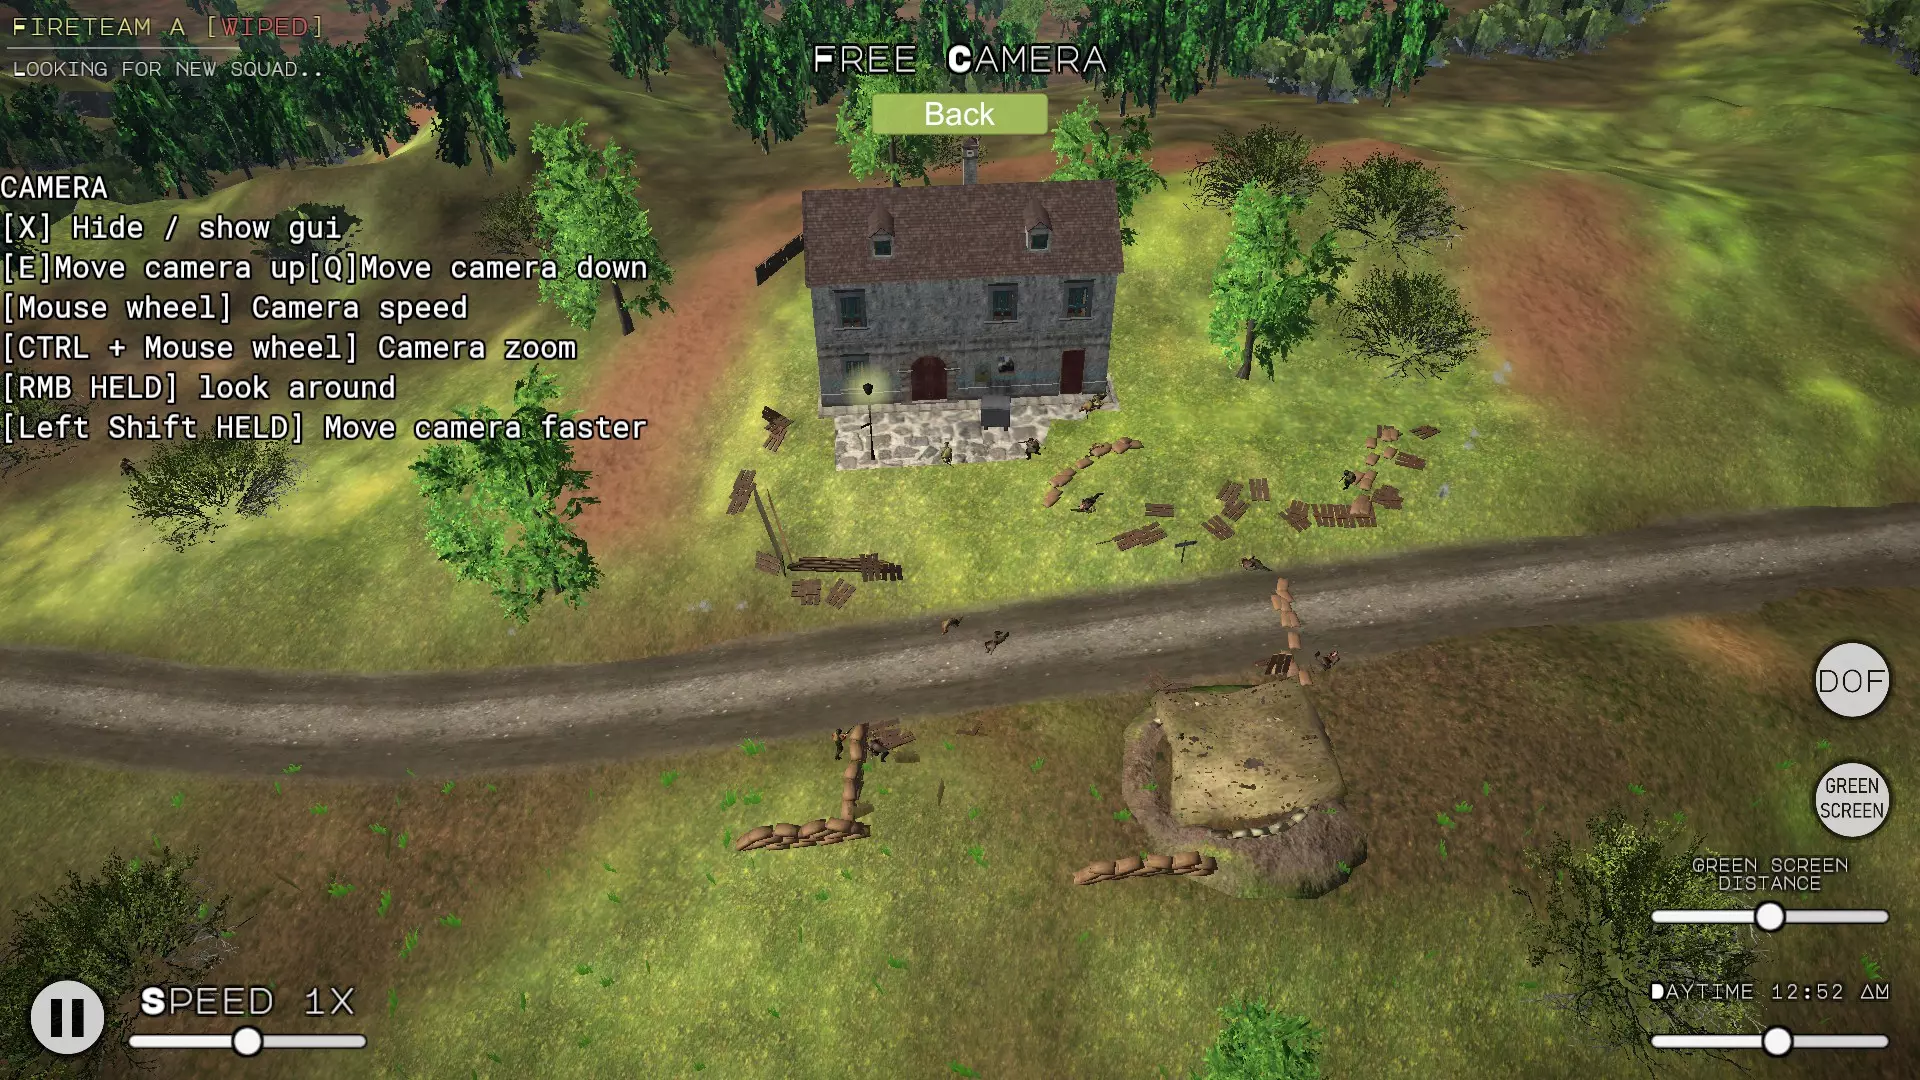
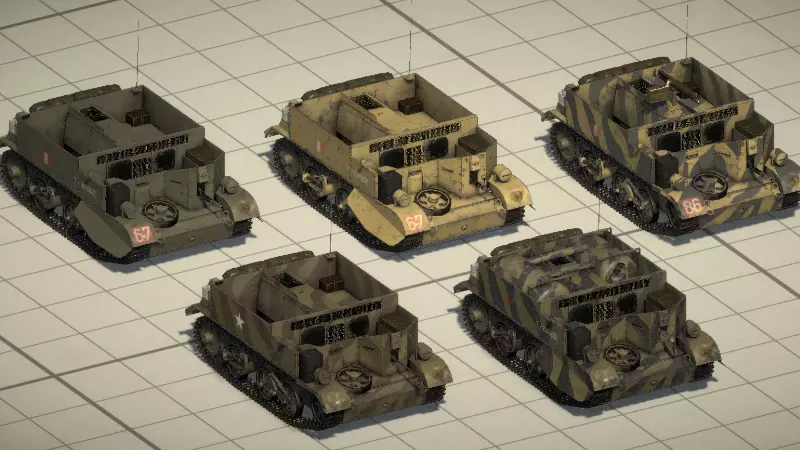
When on spawn menu, you can see a camera icon on bottom left. Click it to enter spectator mode. -WASD to move the camera around -Hold right click and move the mouse to turn the camera -Mouse scroll wheel to make camera movement faster or slower -X to show and hide the GUI -E to move camera up and Q down -Ctrl+Mouse Scroll Wheel to zoom -Hold left shift like sprinting to move camera faster -Pause and play button on bottom left -Set speed slider next to pause button -Green screen button on bottom right to add green screen -Green screen distance is to apply where the green screen appear from the camera position -Set time slider on bottom most right. You can make night mission day and day mission night Achievements Achievement guide based on how I get my achievements. Since I achieved many while the achievement is first implemented, some unlock in this guide can perhaps no longer work. What a Runner! - I achieve this by just sprinting. Hold shift to sprint by default. Could be achieved naturally by playing the game and sprint. Impignorate - I achieve this by killing the first teammate I see. Can be achieved naturally by accidental friendly fire. Gobbledygook - I achieve this by going to a surrendering enemy then melee him once without bayonet and he will say "I am hurt" in his language. Healing enemy will also make him say "Thank you" in his language then surrender. Freeze! - Have 10 enemy surrender. Can be achieved across playthroughs. Enemy surrender when it is suppressed and while inside a capture point your team just captured. You can also heal a wounded enemy and he will surrender. Wasteful Gunner - I achieve this by shooting both primary and secondary until run out of ammo. Check inventory with I key to see how many ammo you have left. A Clear Path - I don't remember exactly how I get it, but just try destroying a tank with rocket launcher, at rifle, or throwable explosive (dynamite, at grenade bundle, at mine, and TNT). It's recommended to turn on vehicle damage indicator in setting to know if it's destroyed or just damaged. Without the setting, you can know something is destroyed if you see smoke or fire coming out. Scrumptious - Open inventory with I key. Click on canned tuna then press consume to restore health. Ding! - Just shoot 100 enemies on the helmet. Can be achieved across playthroughs. Can be achieved naturally. You can also make a custom mission then put the unarmed training loadout as your enemy. Just let them spawn and shoot their helmets. Flatline - Throw a grenade to your feet then stay inside the blast. You can also crouch then with pistol, shoot your visible thigh until you die. Deadly Sniper - Kill 50 enemies as sniper. Not sure if it can be achieved across playthroughs. Radio Boy - When you see radio request received notification as radioman, press tab to open the radio radial menu. Follow the radio section in this guide to confirm a request and you get it. Another Chance - When your tank get disabled (smoking or burning and someone say "let's get out now" for American), exit the vehicle with F key then run away to the ! mark on the map. Last Fight - Empty your primary then switch to pistol and kill 10 enemies. Check inventory to see how many ammo for your primary left. You can also make a custom mission then put the unarmed training loadout as your enemy that will just stand still helplessly in front of you. I'm a Chad - Kill 250 enemies. Can be achieved across playthroughs. Granate! - I achieve this by spawning as Germans, then open menu esc key then select respawn to make the character I control surrender. I possess another in the squad then surrender near the previous guy and do it again until I have the third all nearby each other. As the fourth guy, throw a grenade to that 3 friendly surrendering Germans then you get the achievement. Can be achieved naturally by playing tho or you can also push surrendering Germans near each other than grenade them all war crime style. Emmetropia - Just use sniper and shoot someone very far away. I suggest Battle of Cisterna mission, since the engagement there is very long range. I suspect I might have achieved it with tank machinegun shooting enemy far away, not sure if it works. Let me know. Cavalry is Here - I am not sure how I get this one. But in current version, there is radio call for tank support called by infantry. Just go to a marked location (explosion icon) with your tank then kill things there until the mark is gone. I'm a Rat - Just loot any dead bodies you see until you get it. Can be achieved naturally. Press F on dead body to loot. Battlefield's Conquest - Use artillery or at cannons and destroy tanks with the ap shells. Cisterna is recommended as the Germans, since many artilleries can be found here against US tanks. Camp & Dump - Spawn in then stand still not moving at all until the game is won and don't die. You can make custom mission with 100% chance to win or you can find mission with balanced slanted toward your team. Medic Boy - Press F on 20 knocked out soldier to revive them. Knocked out soldiers will lay on the ground still moving and have medic icon on them. Dog Tag Collector - Follow the dog tag section of this guide then collect 20 dog tags. Smokephobia - Be radioman and hold tab to open radio menu. Select smoke 5 times. A Day Survival - Win all Anzio levels without dying. You need to pick the team that is more favored in a mission. Here is a list of how to play each missions without dying in my way based on balance of each mission. Nettuno: Become American on low bot amount. Just stay at the back (deserting) with a sniper rifle and kill some guys if possible. Find high ground. Tor san lorenzo: the same as British sniper. Low bot. Acciarrela: Become first phase panzer IV and find high ground and snipe enemy tanks. You can steal more ap shells from at gun or just go to the tank repair depot. Doubled bots. Appenine: Become German Sniper and get to phase 2 hill. It's the deadzone for the American. Doubled bot for more unfairness. Pushing back: become German panzer III and just be careful and snipe enemy tanks. Low bot Casteli Romani: Become British stuart and be careful of enemy tanks. low bot Frosinone: Become american sniper and stay back. Avoid phase 1. The whole map is nightmare for German. You can light the map by going to spectate mode and turn to day. Doubled bot for even more unfairness to the Germans. Cissterna: German panzer III and deal all incoming enemy and tanks from behind a house in phase 1. Be careful of tanks. Doubled bots (most bots gonna become squishy infantry) Cassino City: Become German panzer iii. Snipe tanks and find high ground. Doubled bots, since most will be squishy infantry. Unfair for Poland. Monte cassino: Become German sniper. Stay back on hills. Avoid phase 1 and phase 2 will become deadzone for any attackers on doubled bots. In all these mission, you can also just be afk or away from the battlefield while inside the team that is favored in the mission. There is also a method I am not sure if it works or not, but you can set up a multiplayer game with all Anzio missions then set bots to none. There will be some dog tags soldier to face you, but one guy is not that hard. When you spawn, you gonna spawn with friendly bots while enemy has none other than some dog tags character. Flying Ace - Destroy or kill the pilot of 5 enemy plane while using a plane in one life. Best played on Kwajalein Mission 2 "Kwajalein Airport" as Japan. The American mustang has some sight alignment problem. Watch for the Blast - Play Kwajalein campaign Mission 2 of Roi Namur. Capture phase 2 and explosion should happen that give you the achievement. Gallery (Units, Tanks, Planes) Just gallery of various units, tanks, and planes of various nations in game. Units:
美国步兵:可在(任务1、3、4、7、8安齐奥)使用 武器:M1903春田狙击步枪、M1加兰德步枪、M1卡宾枪、汤普森冲锋枪、M3黄油枪、勃朗宁30口径机枪、巴祖卡火箭筒、M2火焰喷射器、M1911手枪
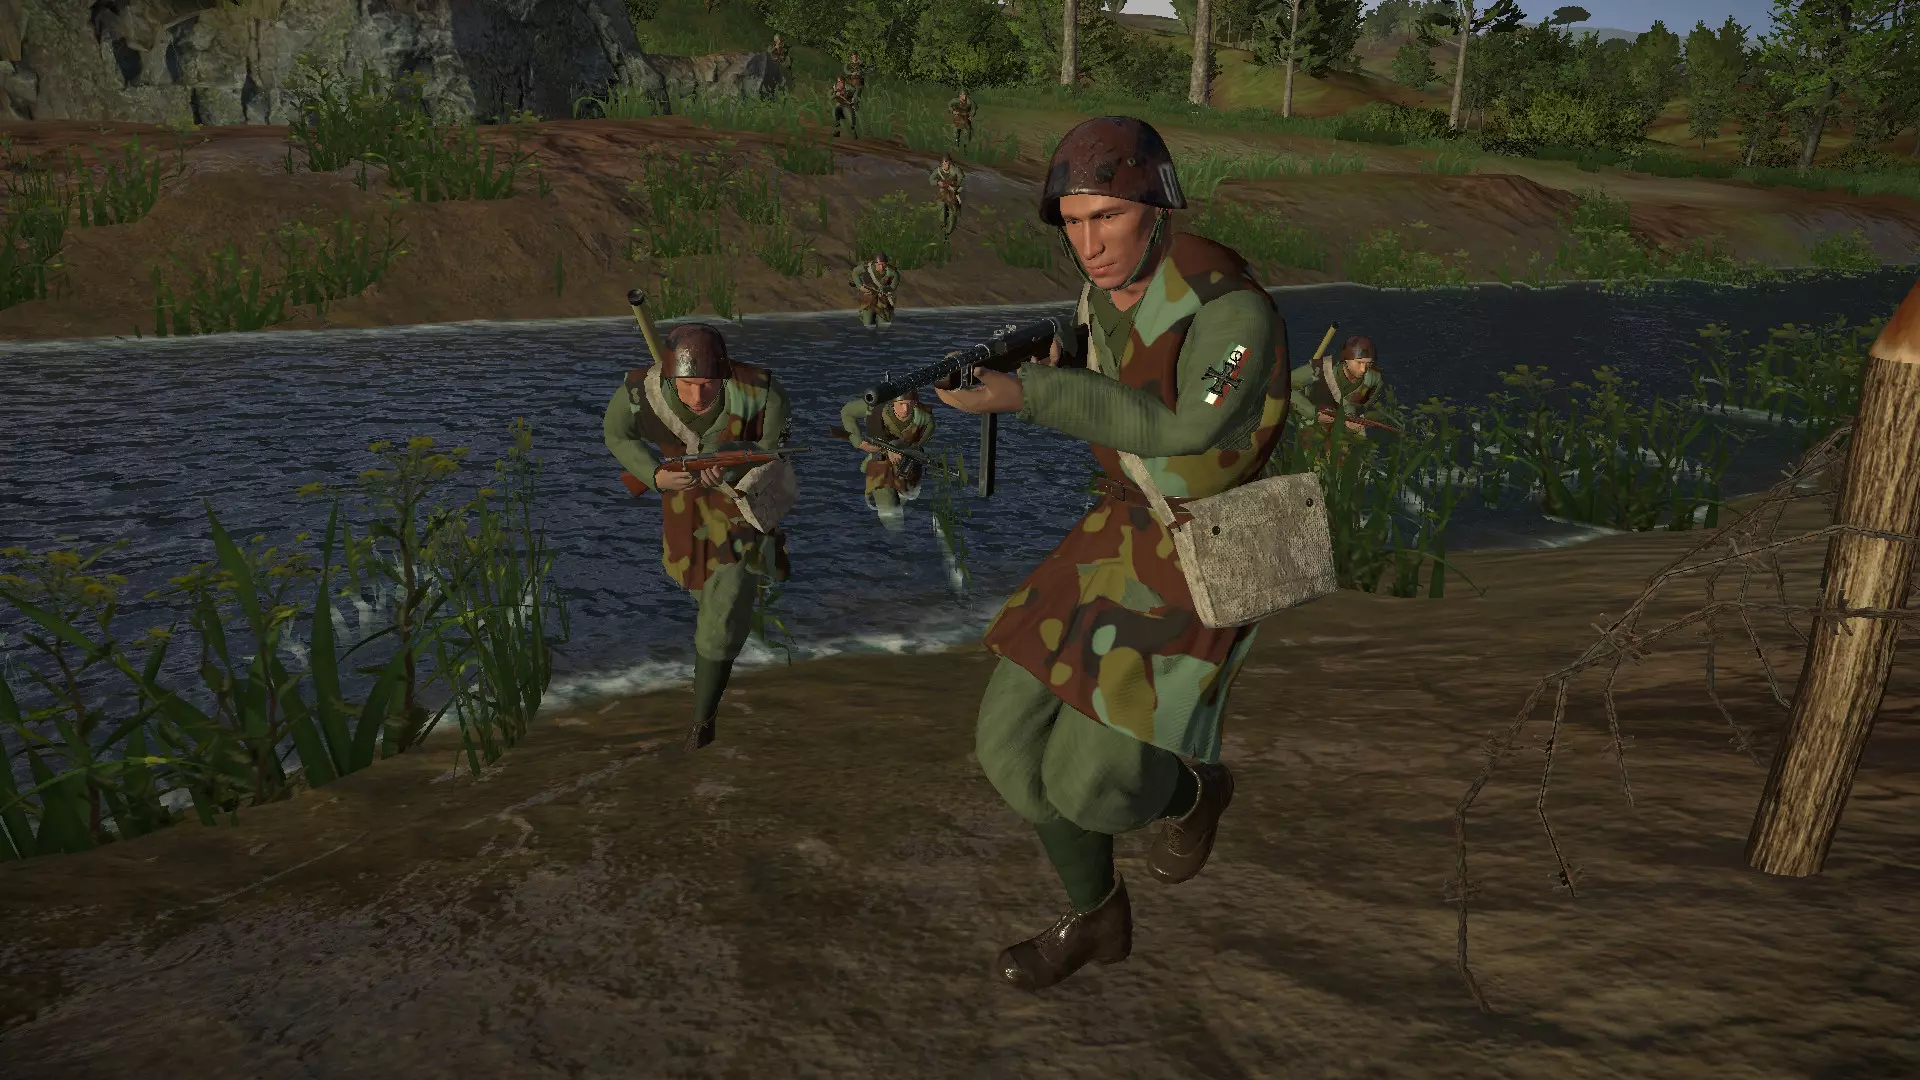
英国步兵:可在(任务2、5、6、9、10、11安齐奥;任务5、6科斯)使用 武器:李-恩菲尔德MK4步枪、李-恩菲尔德MK4狙击步枪、司登MKII冲锋枪、兰彻斯特冲锋枪、汤普森M1928冲锋枪、布伦轻机枪、博伊斯反坦克步枪、PIAT反坦克发射器、史密斯威森手枪
德国国防军:可在(任务1、2、4、5、6、7、11安齐奥;任务2、3、4、5科斯)使用 武器:Kar98k步枪、Kar98k狙击步枪、MP40冲锋枪、MG42通用机枪、35型火焰喷射器、鲁格P08手枪
英国伞兵:可在【任务10 安齐奥】和【任务3 科斯】中使用 武器:李-恩菲尔德MK4步枪、司登MKII冲锋枪、兰彻斯特冲锋枪、布伦轻机枪、PIAT反坦克发射器、史密斯威森手枪
德国空降猎兵:可在(任务2、3、6、7、8、9、11 安齐奥;任务1、2 科斯)使用 武器:Kar98k、G43、G43狙击型、STG44、FG42、铁拳反坦克火箭筒、坦克杀手火箭筒、鲁格P08手枪
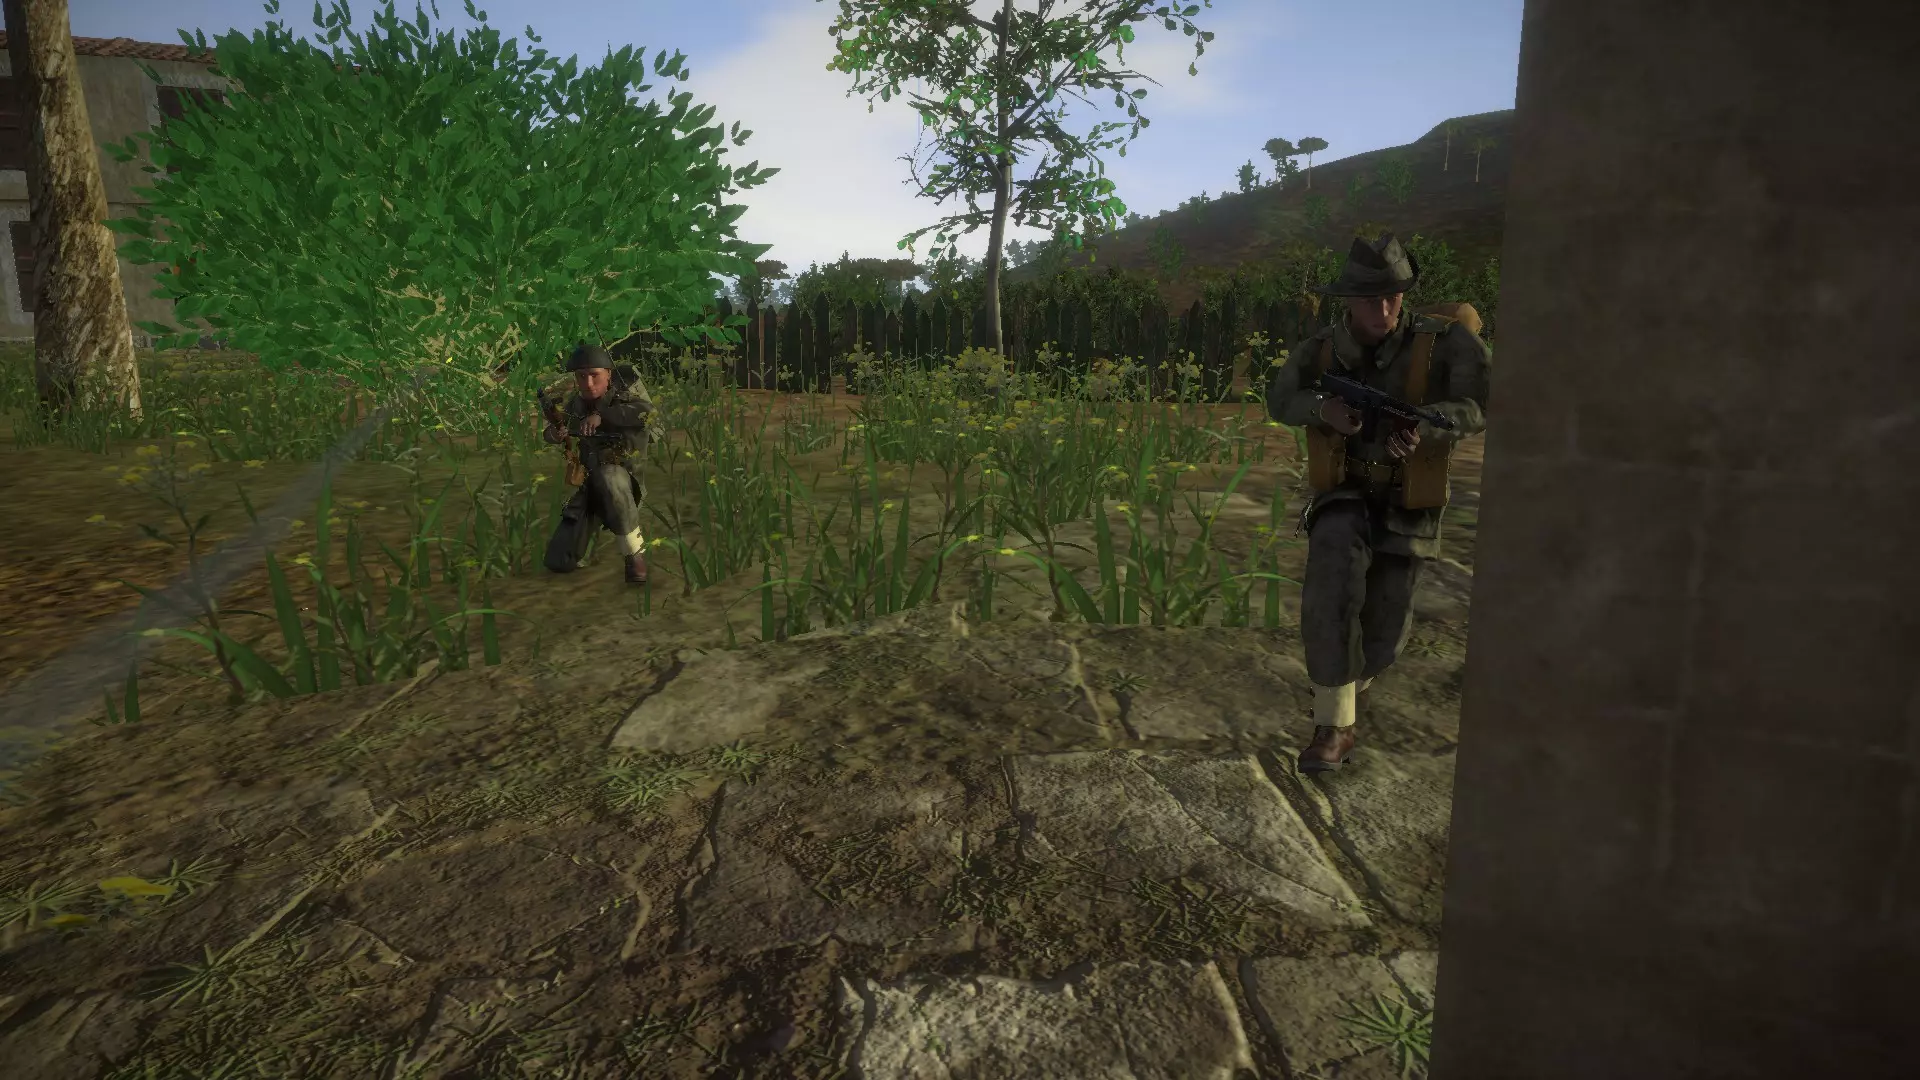
意大利武装党卫军:可在(任务1、10 安齐奥)使用 武器:卡尔卡诺M91步枪、MAB38冲锋枪、布雷达30轻机枪、伯莱塔M1934手枪
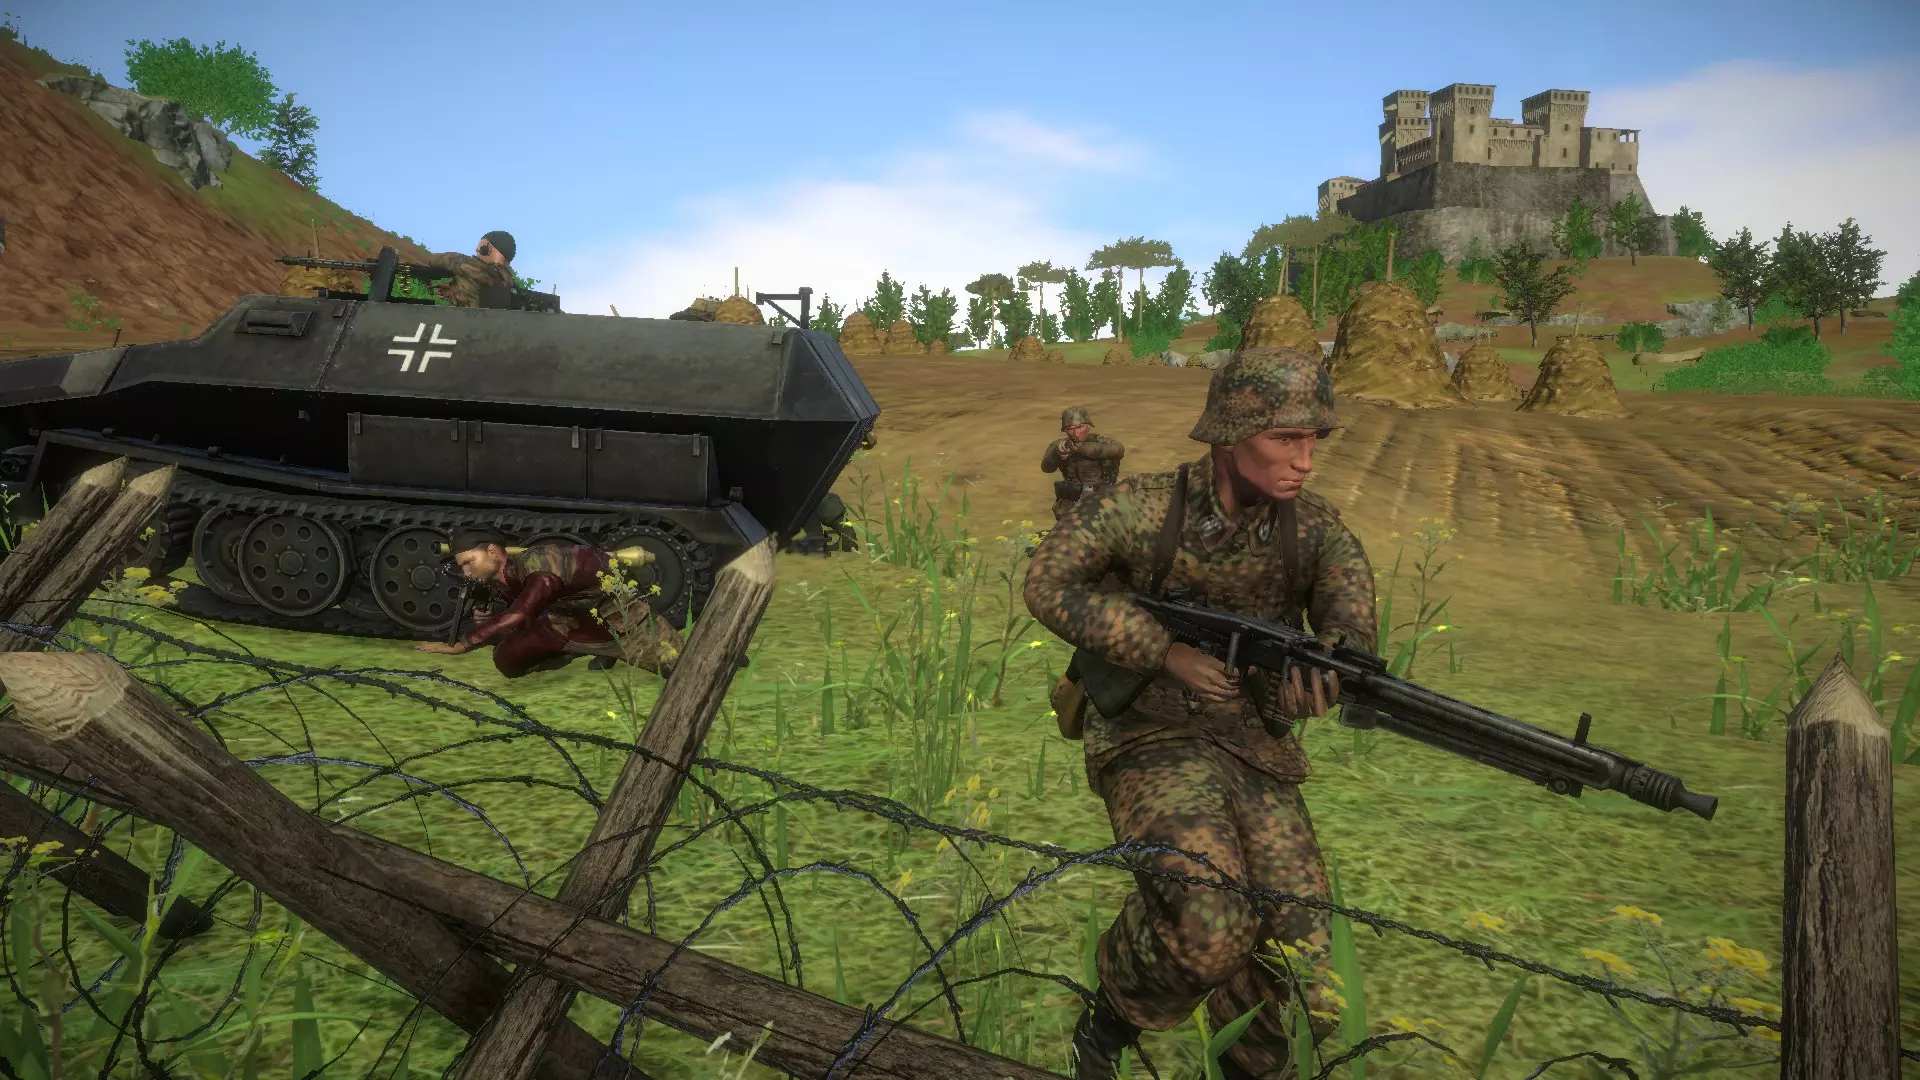
德国武装党卫军:可在【任务11 安齐奥】和【任务6 科斯】中使用 武器:Kar98k步枪、G43步枪、MP40冲锋枪、STG44突击步枪、铁拳反坦克火箭筒、鲁格P08手枪
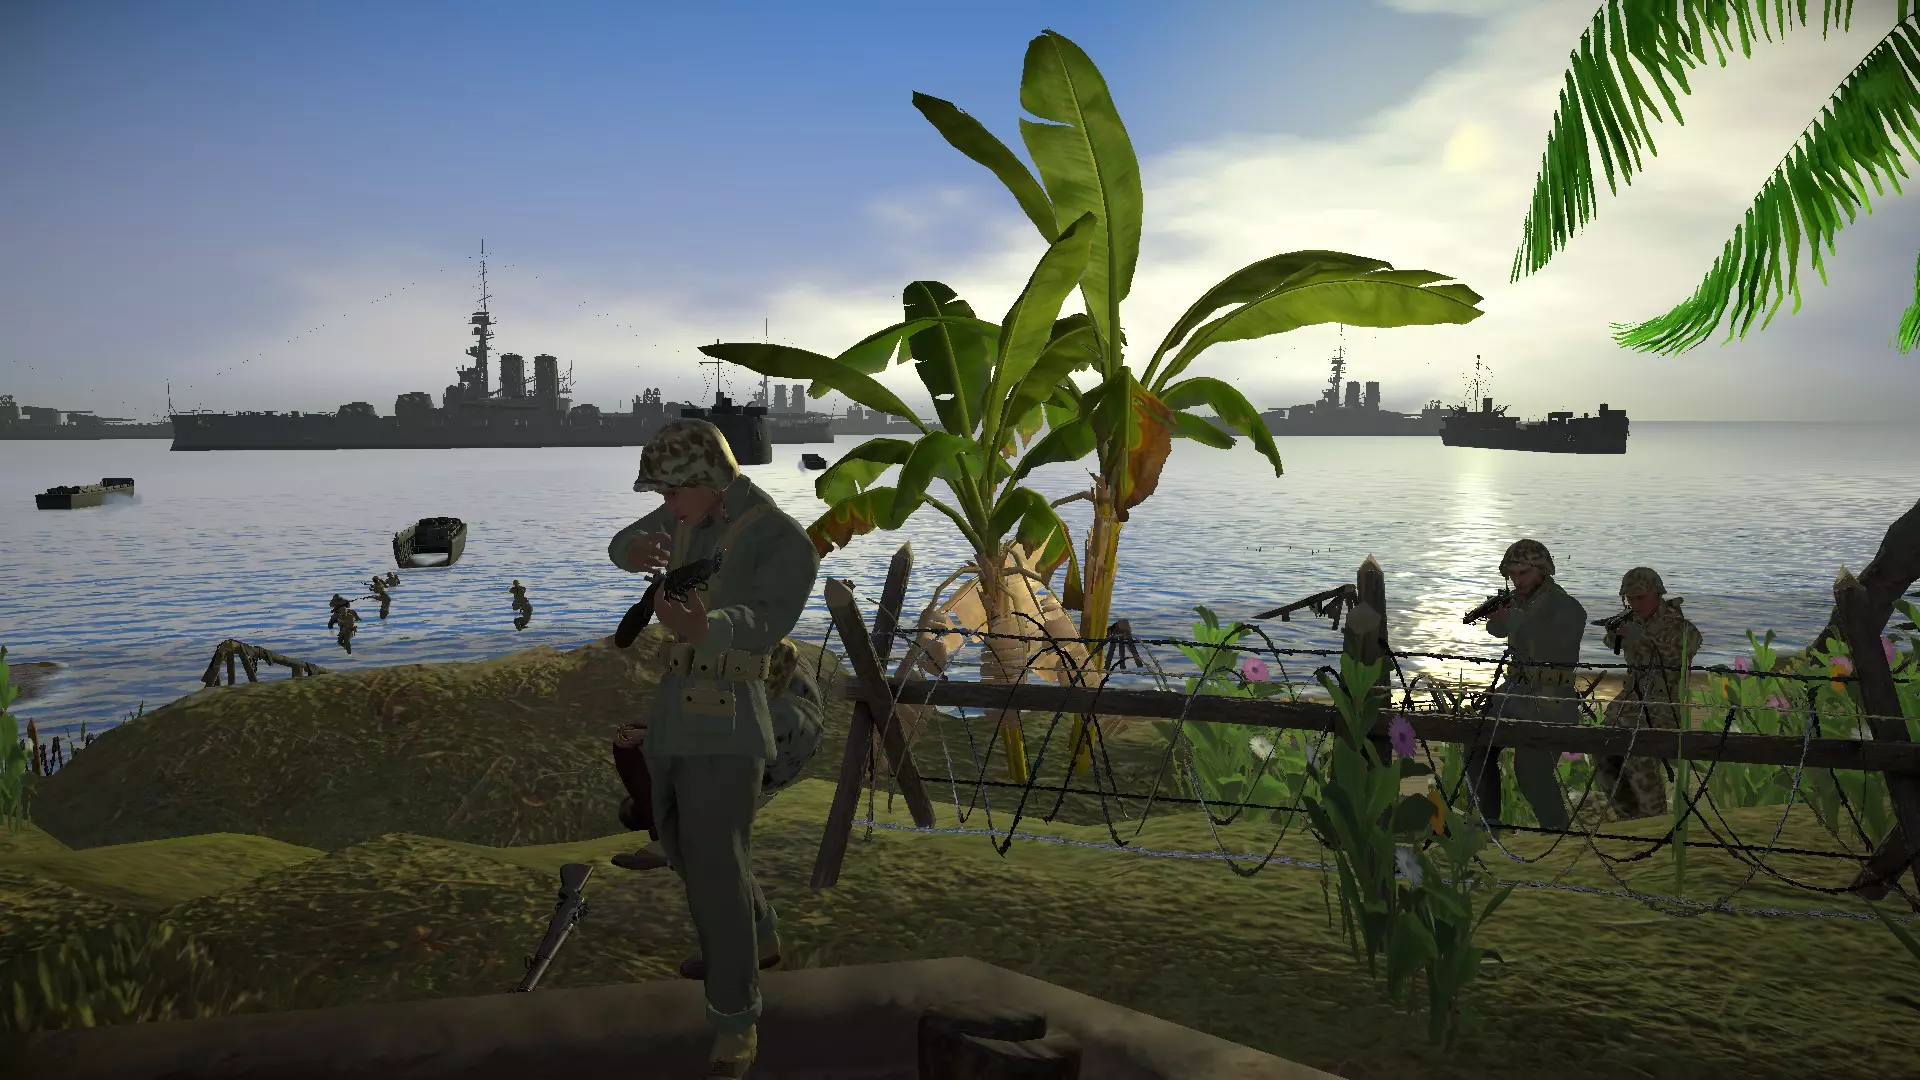
美国海军陆战队:可在(所有夸贾林环礁任务)中使用 武器:M1加兰德步枪、M1卡宾枪、汤普森冲锋枪、勃朗宁自动步枪(BAR)、M12温彻斯特霰弹枪、巴祖卡火箭筒、M1911手枪
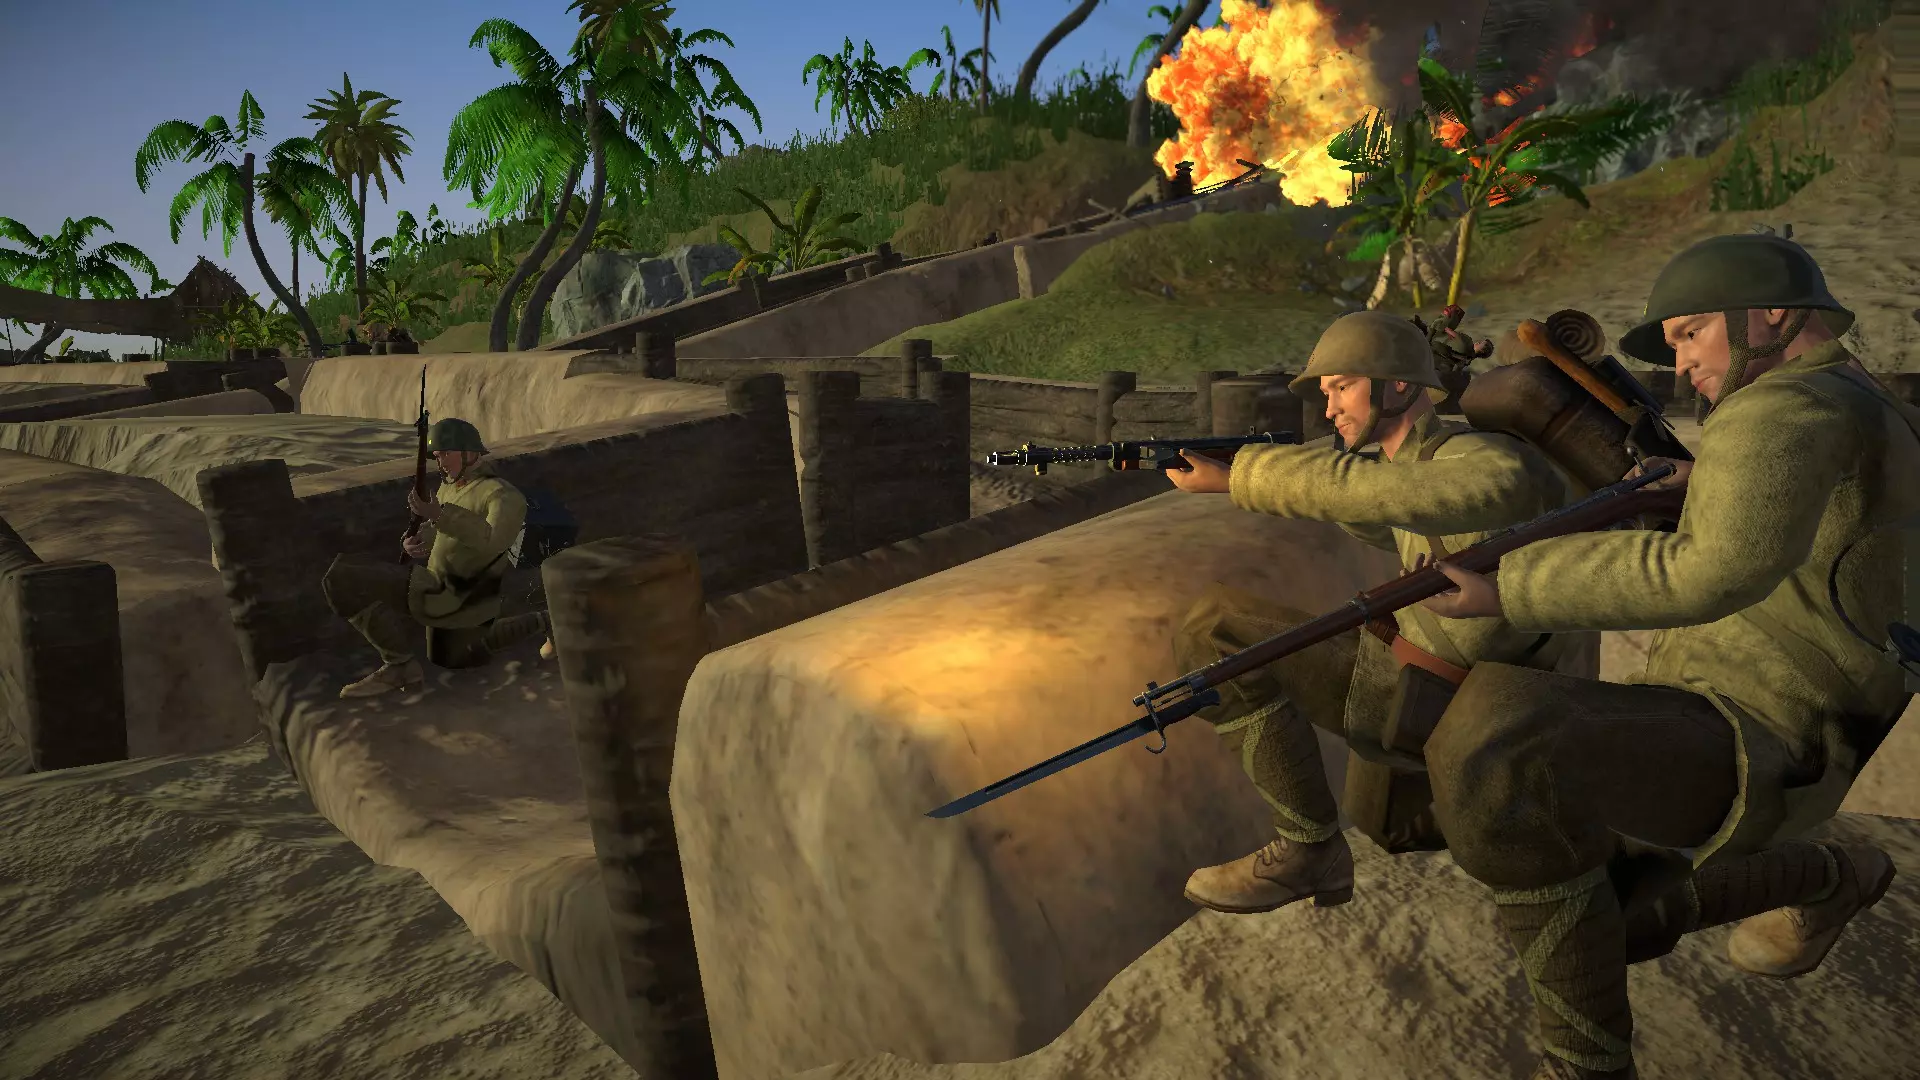
日军步兵:可在(所有夸贾林环礁任务)中使用 武器:三八式步枪(带刺刀)、三八式步枪(带瞄准镜及刺刀)、百式冲锋枪、九九式轻机枪(带刺刀)、九七式反坦克步枪、南部十四年式手枪
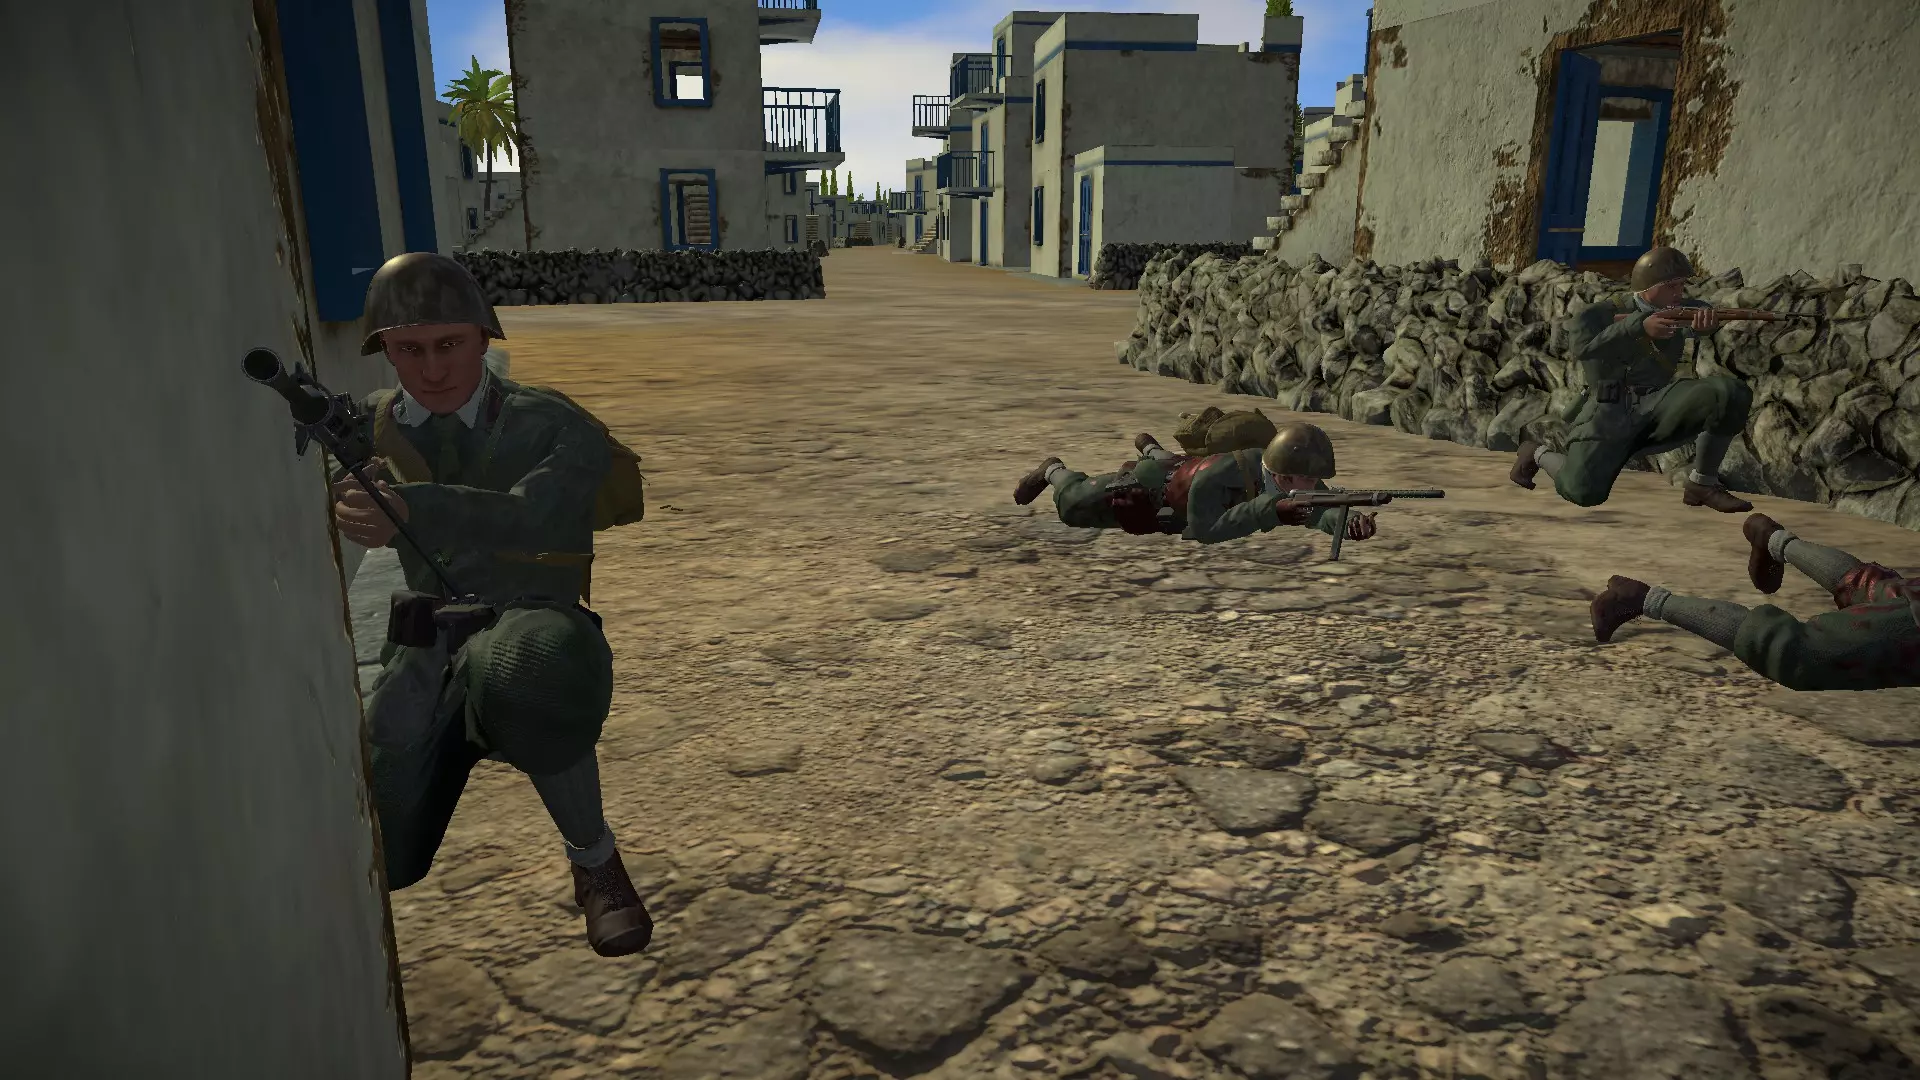
意大利步兵:可在(任务1、2、3、4、5、6科斯岛)使用 武器:卡尔卡诺M91步枪、MAB38冲锋枪、布雷达30轻机枪、博伊斯反坦克步枪、伯莱塔M1934手枪
澳大利亚步兵:可在(第九关 安齐奥)使用 武器:李-恩菲尔德MK4步枪、李-恩菲尔德MK4狙击步枪、兰彻斯特冲锋枪、汤普森M1928冲锋枪、布伦轻机枪、史密斯威森手枪 视频 此处将发布我制作的关于ER 2的视频 完整武器列表 我会像往常的枪械展示一样,列出武器的射击模式、弹药类型、装填选项、配件、归零以及动画效果。我还会列出一些枪械可执行的操作。我在视频中也制作了完整的时间戳。