换一换
换一换 


Tired of looking like a yellow piece of Lego, but the Mech Customization screen is not nearly as user-friendly as you expected? Don't fret! After reading this, you'll be able to look like a children's toy of any color and shape you want, while making your Mech stronger at the same time! Introduction To get us started, here's the first thing you probably don't know about Mech Customization in Dyson Sphere Program: Changing your Mech's shape and color can also increases its HP and make it consume more or less energy! You can increase your Mech's HP to ~6000, and even reduce it's energy consumption to 50%. Since you'll be playing Dyson Sphere Program for many hours, staring at your Mech all the time, often waiting for your energy to recover and getting shot at every now and then, you'll probably want to make your Mech cooler-looking, more durable and more energy-efficient. So, let's see how it's done. The Mech Customization Screen You didn't even know you could customize your Mech, huh? I didn't either. Ran into it by accident. Here's how to get there: - Open your "Mecha Panel" [C]; - On the upper right corner of its right-side information tabs, next to "Durability," you'll see a button called "Armor Customize;" - Click on it. From here on, it gets a little more complicated than you were probably hoping for, as a whole bunch of stuff will show up on the left side of your screen. Let's walk through them: 1.Default Parts These are the basic parts of your Mech. You cannot change their material or shapes. You can only enable or disable them (buttons right beside the "Default Parts" title) and change their "group colors" (colored pallette at the very top of the left-side menu). Those are easy to handle -- just enable/disable the parts you want to have (by clicking on the circle on the left-side of each part's name-tag) on your Mech, and paint them however you want by meddling with the color pallette above. 2.Customized Parts This is the nightmarish part. At first, you'll see nothing in there other than "Customize armor for Icarus as you like!" written on it. Don't bother clicking on it. I'll explain how to use that stuff in an "easy" way in the next section. 3.Material Reserves / Estimated Cost This area of the menu shows how much materials you'll need to build the Mech you designed. Yes -- building your dream Mech costs resources. And quite a lot of them. Once you have finished designing your Mech, you'll go here to pay for it. We'll cross that bridge later, when we come to it. 4.Mecha Properties Here you'll find some very important information that I, myself, had initially overlooked. This panel shows your Mech's Weight, Energy Consumption and Durability (your HP). As you mess around with your Mech's design, you'll notice these values change according to the Materials and Parts you selected. Obviously, you'll want the least Energy Consumption with the highest Durability. I'll tell you how to get that later on. 5.Load Mecha Blueprint Here you'll see 3 default Mech blueprints "ready" to use (not quite, because if you choose one of them you'll still have to gather the resources to pay for it). As you hover your mouse over any of the 3 Mechs' picture, a "Load" button will appear. If you click on it, the selected model will show up on your editor's main screen. The costs to build it will appear on the "Material Reserves / Estimated Cost" panel as well and, if you want to simply use one of these standard models, without changing anything, you can. But you probably won't. So, let's make our own Mech. And we'll begin to do so right here -- at the very bottom (of the editor's menu) -- with one of these default models the game provides us with. Making Your Own Mech STEP 1: Choose the default Mech provided by the game you like the most and load it up. As we're not going to create our own parts in this guide, because that's too complicated and too much work for some 99.9% of players, including myself, we'll use the "Customized Parts" the game already provides us with. Upon loading one of the game-provided Mechs, its "Customized Parts" will become available in the editor's left-side menu for you to use however you want. STEP 2: Enable/Disable the parts you want on your Mech, shaping it up. The "Customized Parts" panel is now filled up with dozens of parts exclusive to the default Mech you chose. As with the "Default Parts," clicking on the circle on any customized part's name-tag will enable/disable it. Mess around with them, until you have your Mech in the shape you want. Feel free to enable/disable any "Default Parts" you want (or don't) as well, but remember: you cannot change the material of default parts -- and the material is what mainly affects your Mech's Energy Consumption and Durability. IMPORTANT: Adding/removing default parts will affect your Mech's Energy Consumption and Durability. Adding/removing customized parts will not. Regarding customized parts, what matters is only the material they are made of -- which has no effect on default parts, because you can't change the material of these. STEP 3: Change your customized parts' materials and colors. This is the most important bit -- the customized parts' materials. To change them, click on the name-tag of any single customized part (i.e., "Chest 1"). When you do so, a new panel will pop up on the left-side menu, titled with the name of the part you just selected. In this new panel, you have the following options: Armor Overview: This is the initial selection, and it doesn't do anything. Edit Blocks: Here's what we want. When you click on this (the cube icon on the part-named panel), this will show up on your editor's main screen:
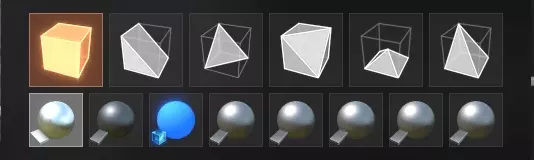
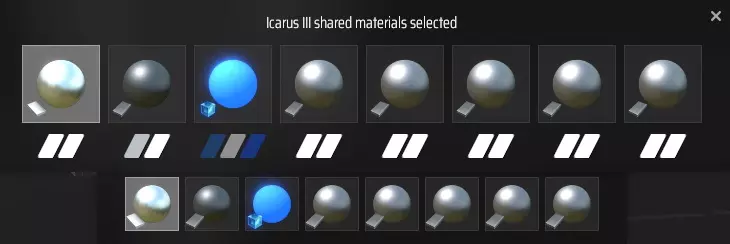
作为一个简短的补充说明,由于本指南仅旨在向你展示“基础知识”:球体上方的那些形状是供你实际构建到机甲框架上的。如果你将鼠标悬停在机甲上,会看到所选形状出现在机甲上。左键点击,形状就会被放置下来。我不会深入介绍这种“实际构建”的细节,因为我自己并没有真正尝试过——工具还不错,是可行的,但太费功夫了。 回到关键部分,你在图片中看到的那些球体是你的“材质面板”——用于机甲自定义部件的材质。 【重要提示】:此材质面板由所有部件共享。如果你在其中更改材质或颜色,将影响所有使用相同材质的自定义部件。 好了,这开始有点复杂了。不过别担心——几乎所有默认机甲的自定义部件都使用相同的材料,也就是调色板上的第一种材料。当某个部件使用多种材料时,你可以通过颜色轻松分辨哪个球体代表哪种材料(因为它会对应所选部件的某些区域)。 将鼠标悬停在调色板最左侧的球体上(我们先只使用第一个,你会明白的)。它的右上角会出现一个齿轮图标。点击该图标。 现在,你会看到以下内容:
这里是更改颜色的地方。 要更改颜色,请点击第二个调色板上任意球体下方的“颜色标记”。 重要提示:在更改颜色之前,建议先更改第一个球体的材质(这是我们的下一步操作),因为材质会影响所选颜色在机甲上的实际显示效果(一些基础材质包括金属质感、不透明、半透明等)。 因此,现在先不要选择你喜欢的颜色,将鼠标悬停在最左侧的球体上,其右上角会再次出现齿轮图标。再次点击该图标。 你将会看到以下内容:
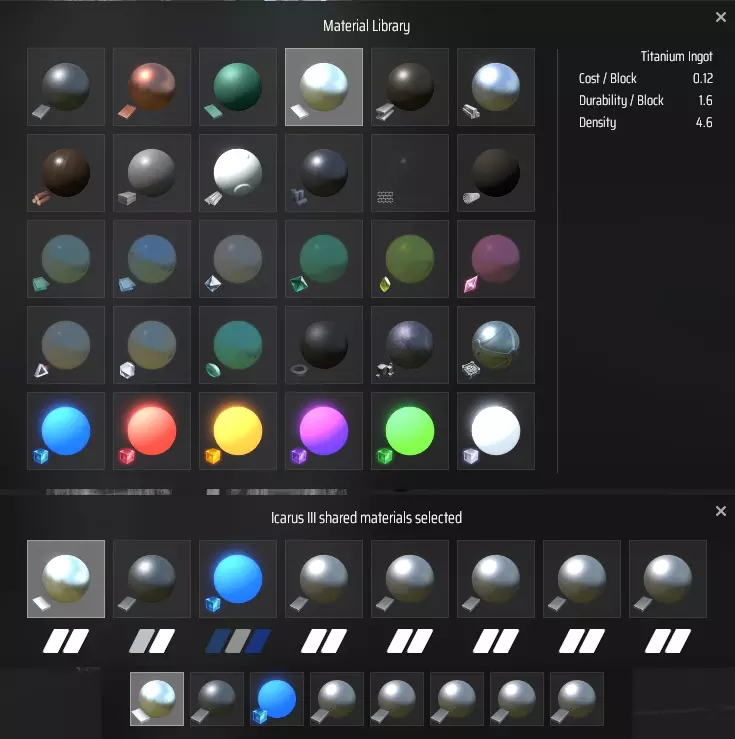
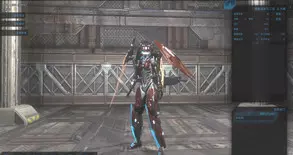
Here is where you select the materials of your customized parts. Go around clicking on them, and pay attention to what shows up on the right side of this panel: each material's Cost, Durability and Density. "Cost" means how much resources will be necessary "per block" (customized parts are technically made of dozens of "blocks") to apply the chosen material to your Mech parts. (Beware that if you pick an advanced material you'll need ~40k of its resource to apply it to your Mech.) "Durability" is how much HP that material gives to your Mech. The more, the better. "Density" is how much the chosen material weighs. The less, the better. So, in short, what you do is: ignore "cost," because you'll have to pay for what you want anyway; pick the highest "durability;" and the lowest "density." And that makes the two best material options pretty obvious: Carbon Nanotube and Frame Material. Before you have a huge, multiple-systems spanning industrial conglomerate, you won't be producing enough of these two materials to be able to afford using them. So, initially, I suggest you use High-Purity Silicon. NOTE: You'll notice the 3rd ball in the palette is a bright, colorful one, and that you can't change its color directly. That's because that ball is the material the default Mech models use for their lights. If you want to change your Mech's shining bits' color, click on that 3rd ball and change its material to one of the other research-matrices available (these always shine). Now, just to finish laying down the "Customized Part left-side menu panel:" Advanced Curve / Move / Rotate / Scale: These tools affect entire customized parts, allowing you to reshape/move/rotate/scale them. Unless you want to do the whole shebang, creating your own parts from scratch, you don't need to worry about these. As this guide is meant to deal with the basics only, which should suffice for the vast majority of players, I won't go into further details. I only dabbled with these tools a little bit myself and, for those who want to spend several hours building an entirely unique Mech, they are actually fairly straightforward and easy to understand. In other words, if you want to go this far, you won't have much problems figuring these tools out on your own. And... we're pretty much done! The real problem is finding where to alter the materials, figuring out what all those material-balls mean, how to change the color of that 3rd ball... I think I've covered all the problems you might face. But I'll sum everything up next, just in case. Summing and Wrapping Up They surely didn't make customizing your Mech very easy in Dyson Sphere Program. But, once you understand the essence of how the editor works, you can do it. Summing up: - Load up a default Mech, so that you can use its Customized Parts; - Add/remove and paint your Mech's Default Parts on the top of the left-side menu; - Select any Customized Part, click on Edit Blocks, and pick the materials and colors that will be used on all of your Mech's customized parts that use that same material slot; - If you want to actually create new parts, click on the "+" sign at the bottom of the Customized Parts panel, click on a body region, then click on this new square-part you just laid down (so you don't have to manually find it on the list), on its menu-panel go into Edit Blocks, then click on one of the shapes above the balls (don't forget to select a material-ball for it), hover your mouse over your Mech, and left-click to put it down wherever you want. As there are 8 balls in the palette, you can have up to 8 different materials/colors applied to your Mech. To get that fancy, though, you'll have to create your own parts as the game-provided ones use up to 3 or 4 at most. Just remember that the palette is shared between all parts -- you don't have to create a new one for each (and you can't exceed the limit of 8 different materials in a Mech). NOTE: when actually building custom parts, constructing it piece by piece, you select a material (material 1, material 2, material 3, ...) for each small piece you lay down, and that material will be permanently attached to that piece of the part you are creating. As the same rule applies to the game-provided Mechs, if a strut somewhere is using "Material 2" (2nd ball in the palette), unless you manually delete and rebuild it using a different material, it'll always use "Material 2." Default Parts work differently from customized ones. They can be colored, but their material cannot be changed. They only affect your Mech's Energy Consumption and HP when/if you add or remove one such part. Customized parts work the opposite way -- adding/removing them does nothing; only their material(s) matter(s). Applying what you changed: Once you have chosen all your Mech's parts, their material(s) and color(s), the resource cost to apply everything will be shown on the editor's left-side menu. Before you pay for it, though, you'll want to save your blueprint, just in case. To do so, scroll down the editor's menu until you find the "Save Mecha Blueprint" (right above the "Load Mecha Blueprint" panel), name your Mech and the Blueprint, and save it for later use. (Hold the left-click down to move the camera around to get a decent Snapshot.) To pay for your Mech, you must put the required materials into your inventory, go back into the "Armor Customize" screen, into the "Material Reserves / Estimated Cost" panel, click on the material(s) you need to add, and finally click on the button "Transfer All Items from Inventory." Once you've transferred enough resources to pay for the Mech you've created, click on "Apply Mecha Design." That's it! (Whew!) BONUS: The "Ideal" Mech Despite customizing your Mech being a bit overcomplicated, the game doesn't really give you much of a margin for improving its efficiency. Here's how to construct the "ideal" (disregarding aesthetics) Mech: - Disable all Default Parts; - Create one Customized Part -- a single square, anywhere; - Change that square's material to Carbon Nanotube. That's it -- for the impressive cost of 49 Carbon Nanotubes, you're now a flying square with 50% Energy Consumption. And 41.97 HP, which is pretty much irrelevant since you mainly use your shields to sustain damage. I used to have an image of our "ideal mech" here, but Steam randomly deleted it and I no longer have the file to re-upload it. So... just picture a tiny square with a couple of flames coming out of nowhere from a little distance away. It's totally awesome! Or not. Since aesthetics do matter to most of us, here are some pictures of the Mech I'm actually using. It's nothing too fancy either because I didn't go into making my own parts, but I'm happy with it:
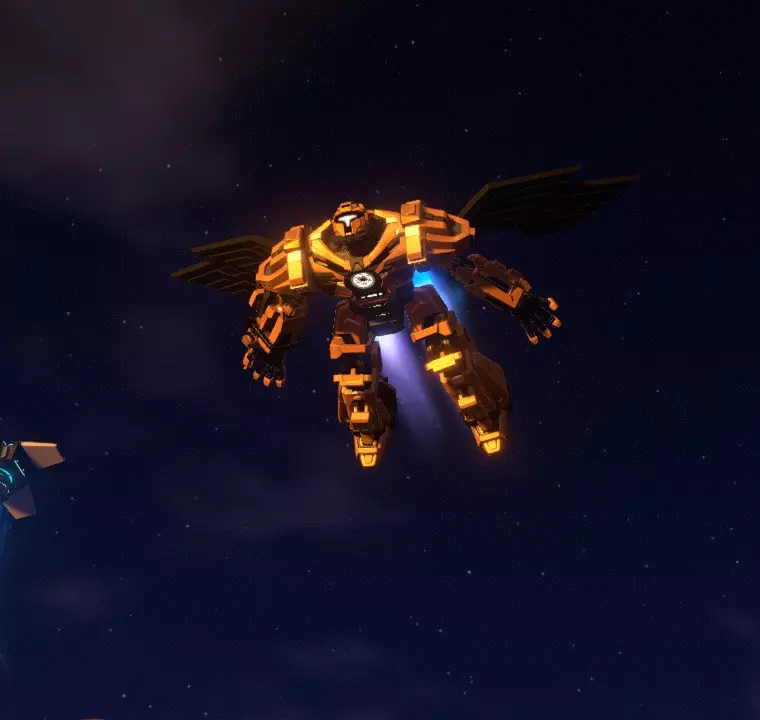
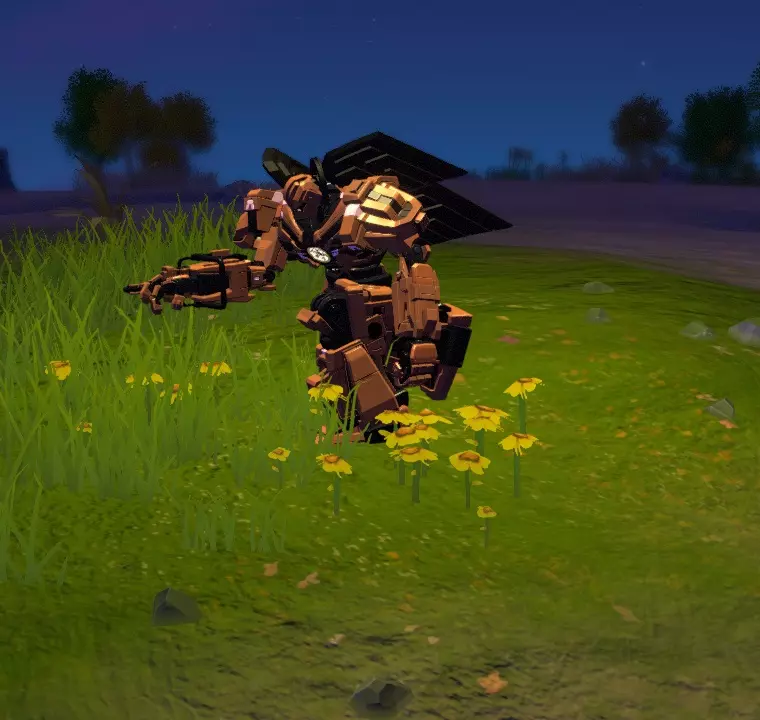
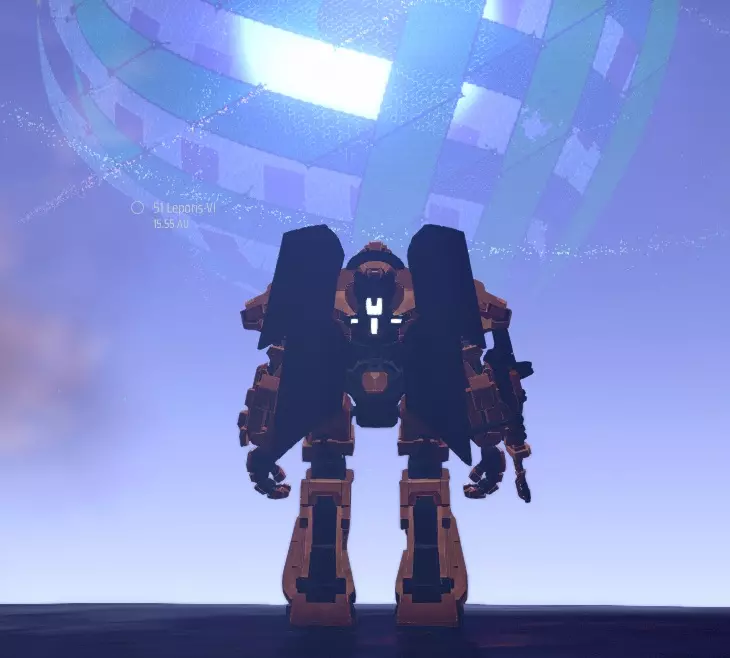
他还挺上镜的…… 总之,既然你已经知道方法了,肯定能拍出比我这张更好的照片!