换一换
换一换 


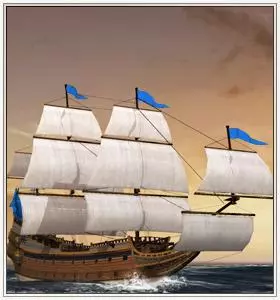
海军战斗指南,内容包括舰船数据及使用技巧;如何利用士气获得优势;能充分发挥舰船战斗效能的海军策略;炮弹类型及其使用方法与时机;以及让舰船在战斗中发挥最佳性能的通用技巧。 战列舰 战列舰通常是西方国家舰队的核心。它们的等级标志着其战力,一级舰是最重、最强大但也最笨重的舰船;六级舰则相反,相对较弱,但速度快且机动性强。

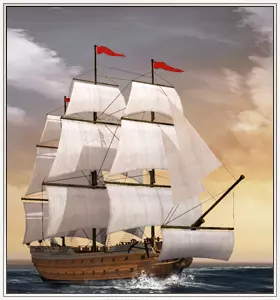
六级舰 六级舰是最小的战列舰。它比双桅横帆船和单桅纵帆船更慢、更不灵活,但其更好的战斗属性弥补了这一点:更坚固的船体和更优良的火炮配置。 船员 火炮 火力 射程 精度 装填技能 船体强度 速度 机动性 92 32 56 500 60 55 2198 18 高 提示 在游戏初期阶段,技术熟练的玩家会发现这些舰船因其灵活性而有用:如果正确利用风向,你可以轻松进行一次侧舷齐射,然后借助风力快速转向,紧接着从另一侧舷开火。 技术不太熟练的玩家会更多地将六级舰用于追击溃逃的舰船——不过这个角色很快会被其他更坚固的舰船取代。我不建议经常使用六级舰,仅在战役的极早期阶段可以考虑。它们的船员数量少且船体脆弱,这意味着任何长时间的战斗都很容易使它们受损至无法使用、溃败,甚至更糟——沉没。五级舰是更好的选择。
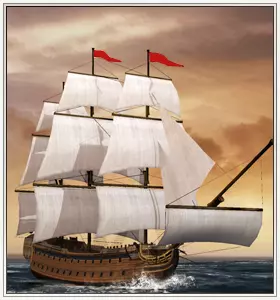
五级舰 五级舰是战役初期的均衡型舰船。它的速度足以追上这一时期的大多数船只,灵活性足以轻松摆脱所有大型舰船,并且拥有足够的火炮在战斗中自保。 船员:130 门炮:48 火力:92 射程:500 精度:60 装填技能:55 船体强度:285 速度:6 机动性:17 相当高 提示 这是我在早期(约1725年之前)最喜欢的舰船。它们价格便宜且性能全面。几乎和六级舰一样快速灵活,一旦习惯了它们的特性,你可以很容易地用五级舰施展双舷齐射技巧,并能摆脱几乎所有其他舰船——尤其是烦人的海盗大帆船。两艘五级舰可以轻松捕获一艘强大的大帆船。对抗轻型船只时,使用五级舰破坏其船帆,若对方尚未溃逃,再近距离进行几轮实心弹侧舷齐射。 对抗重型船只时,保持距离并再次尝试破坏其船帆。你的实心弹对四级舰等大型船只效果不佳,但链弹绝对有效。一旦船帆被摧毁,你可以从敌舰的船首或船尾(前方/后方)逼近,那里只有追击炮(数量少、威力弱的火炮)能对你进行反击。通常这会导致对方溃逃。 对抗任何比三级舰更大的船只时,你都应三思而后行。轻型船体、轻型火炮、少量船员——这些在面对大型船只时都极为不利。
四级舰 四级舰在各方面都比五级舰更重,但选择这艘船的优点不一定能抵消其缺点。它速度慢得多,操作也更笨重,而在火力方面的提升却微乎其微。 船员 火炮 火力 射程 精度 装填技能 船体强度 速度 机动性 152 58 297 400 40 30 415 21 4 提示 与轻型舰船相比,它的敏捷性明显不足,但凭借更强的船体弥补了这一点——实际上也就仅此而已。它的射程比五级和六级护卫舰少100,这使其处于劣势。在战役初期,我通常用这艘船来保护我的轻型舰船。然而,一旦可以招募三级舰,这艘船就几乎完全无用了。
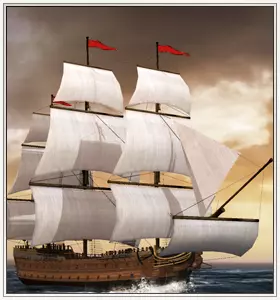
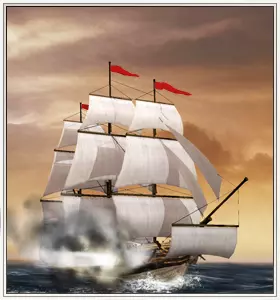
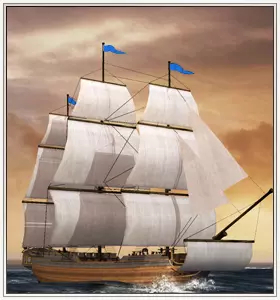
三级舰 最均衡的舰船。被英国海军广泛使用,三级舰火力强大、灵活且坚固,能以与更轻型的四级舰相同的速度航行。其装填速度也比之前的舰船更快。 人员:196 火炮:74 火力:22 射程:1400 精度:40 装填技能:30 船体强度:48 速度:18 机动性:14 平均 提示 这是我在游戏中后期最喜欢的舰船。它简直完美。建造大量此类舰船。如果操作得当,它们能很好地对抗二级舰,而且2艘或更多时,甚至能轻松击败一级战列舰!
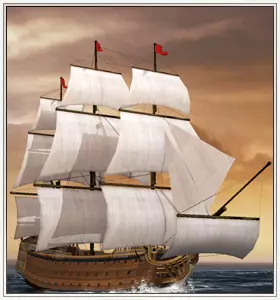
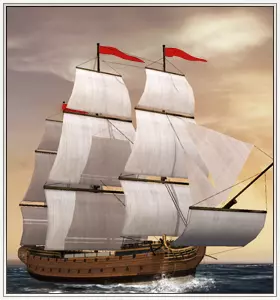
二级舰 作为三级舰的自然升级款,它拥有更厚重的船体和略多的火炮数量;但所配备的火炮威力却弱于三级舰,且船身重量使其极易被灵活绕后、重创并最终摧毁。 船员:224 火炮:86 火力:249 射程:400 精度:30 装填技能:25 船体强度:679 航速:6 机动性:12(低) 小贴士 建议还是继续使用三级舰。它可以作为坦克发挥一定作用,类似于早期游戏中五级舰搭配四级舰的用法,但这就是我发现的这艘“怪物”的全部用途了。
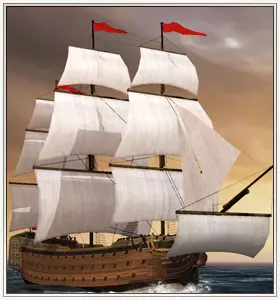
一级战舰 极其强大,也极其昂贵。其科技需求、成本、维护费用和建造时间都导致它们在游戏极后期才会出现;当然,这是好事,因为它们是战斗中的噩梦。 船员:264 火炮:106 火力:47 射程:84 精度:00 装填技能:30 船体强度:258 速度:7 机动性:7212(极低) 提示 面对这种战舰,机动性意义不大,因为一旦被这头巨兽的侧舷炮火击中,你的轻型掠袭舰就会被彻底摧毁。对抗它的最佳策略是先摧毁其船帆,然后从各个方向围攻。由于它速度极慢,你可以选择战斗的时间和地点——而且在某个阶段你必然要面对它。
一级战列舰 海上巨兽。游戏中最强大的舰船。维护成本极高,每回合高达1000金币。 船员:300,火炮:12,火力:2270,射程:400,精度:20,装填技能:20,船体强度:1004,速度:21,机动性:11 机动性:非常(非常)低 提示 没什么太多可说的。它极其强大,而且正如你所料,机动性和河马差不多。 至于如何对抗这种舰船,只需带上火炮舰——火箭舰的破坏力绝对惊人。 辅助舰船 辅助舰船通过轻型侦察舰骚扰敌人的方式为舰队提供支援。
轻型桨帆船 仅可由东部派系或拥有地中海海域 access 的派系招募。桨帆船是一种极其轻型的船只,由船桨和风提供动力——这使它们在一定程度上不受低风速的影响——并配备了威力极强的加农炮,尽管数量较少。 船员 火炮 火力 射程 精度 装填技能 船体强度 速度 机动性 16 4 200 400 50 30 57 8 12 高 小贴士 我不太喜欢桨帆船——虽然威力强大,但即便是一艘较弱的单桅纵帆船的舷侧炮击也能摧毁它们前置的火炮,使船只失去防御能力——尤其是轻型桨帆船,仅有16名船员。
单层甲板桨帆船 再次说明,仅可由东部派系或拥有地中海海域 access 的派系招募。与轻型单层甲板桨帆船相比,各方面性能均更优,但成本略高。 人员 火炮 火力 射程 精度 装填技能 船体强度 速度 机动性 74 4 200 400 50 30 103 21 2 高 提示 仍然不是很有用。更大的 crew 规模和船体强度使其在各方面都优于轻型单层甲板桨帆船;但它仍然容易失去火炮,进而只能闲置。
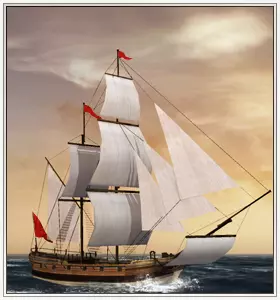
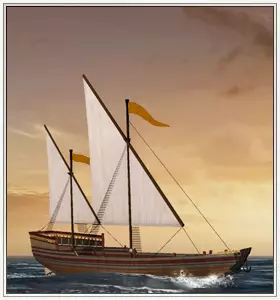
双桅横帆船 双桅横帆船是所有势力均可建造的轻型船只,无论其文化、地理位置或港口技术如何——只要拥有港口,就能建造双桅横帆船。 船员:78 火炮:26 火力:48 射程:500 精度:70 装填速度:75 船体强度:125 航速:8 机动性:22(极高) 提示 该船速度快且火炮数量可观,非常适合快速驶入阵位以摧毁敌船的船帆。凭借出色的精度和装填速度,它能迅速轻松地摧毁船帆,为大型船只靠近创造条件。然而,其缺点是船员保护不足:双桅横帆船船体低矮,导致船员大部分暴露在外,因此链弹——甚至敌方海军陆战队的流弹——对其都具有相当大的破坏力。如果有其他船只靠近到足以进行葡萄弹侧舷齐射的距离,你的双桅横帆船就可以视作被摧毁了。
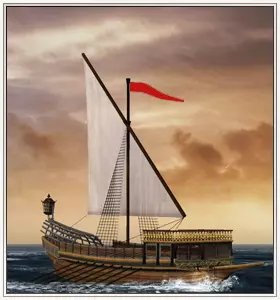
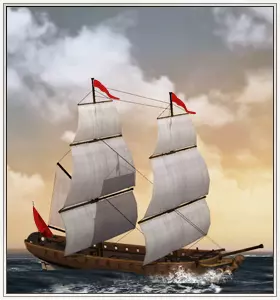
单桅纵帆船 单桅纵帆船与双桅横帆船类似,是所有势力均可建造的轻型船只,无论其文化、地理位置或港口技术如何——只要拥有港口,就能建造单桅纵帆船。 船员:62 火炮:18 火力:52 射程:500 精度:70 装填速度:75 船体强度:139 航速:62 机动性:3(非常非常高) 提示 单桅纵帆船比双桅横帆船更快、更灵活,船体也稍强,船员保护更好;但代价是火炮数量更少、威力更弱。我个人更喜欢双桅横帆船,很少建造这种船。它的机动性极高,在风向有利时能轻松完成180度转向,但火力的削弱对我来说是个太大的缺点。
卡隆炮护卫舰 拥有相比其他护卫舰更强大但射程更短的火炮,所有火炮均安装在灵活的六级舰船体上。建造需卡隆炮技术(遗憾的是,该技术仅影响此舰)。 船员:76,火炮:24,火力:62,射程:400,精度:60,装填技能:55,船体强度:285,航速:62,机动性:高 提示 我不太喜欢这艘船,主要是因为招募它需要特定技术。卡隆炮技术很糟糕,尽管其描述暗示所有舰船都能进行某种卡隆炮换装,但实际上它只赋予你招募这艘船的能力。你最好在其他领域进行科技研发。 除此之外,它是一艘不错的船(至少在游戏初期是这样)。其敏捷性几乎与六级舰相当,但拥有更强大的火炮——如果你决定入手,一定要尽早,因为一旦四级舰出现,你将在火力和战力上被全面压制。
雷塞舰 本质上是三级舰的一种变体,其三座炮甲板中的一座被“截断”,是“标准”战列舰(即三级舰)与护卫舰的混合体。它拥有较强的船体强度、中等规模的强大火炮阵列,同时还具备良好的机动性。 船员:1344 火炮:81 火力:23 射程:400 精度:60 装填技能:40 船体强度:465 速度:4 机动性:17 评级:良好 提示 关于雷塞舰,我听过很多好评,但实际上我很少使用它们。当你拥有招募雷塞舰的科技时,你和你的敌人通常也已经拥有招募重型一级舰的科技了。雷塞舰无法承受那种级别的攻击;护卫舰的时代早已过去。我使用雷塞舰的唯一用途是追击敌方舰船,因为它们在战斗中绝对能摧毁所有其他护卫舰。
蒸汽船 这是一种不符合历史但有趣的构想,本质上是一艘由蒸汽驱动的护卫舰。外观不错,大致就是这样。 人员 火炮 火力 射程 精度 装填技能 船体强度 速度 机动性 11 43 42 04 400 60 55 31 34 18 相当高 提示 它配备了一些相当强大的火炮,但用最直白的话说,这些火炮“数量稀少且分布分散”——船体中央装有一个巨大的蒸汽明轮,这意味着该区域两侧没有火炮——这是一个相当大的缺点。此外,它们的可靠性也不怎么样——作为蒸汽机,它们在受到攻击时容易爆炸,这可不是战舰所期望的特性…… 不过,作为蒸汽船,它完全不受风力影响,这至少是一个优势。我不建议建造这些舰船。 火炮舰
炸弹双桅纵帆船 这是你在战役中能使用的第一艘火炮舰,它看起来像一艘配备了迫击炮武器的单桅纵帆船,能从船头以弧线轨迹向敌方船只发射两枚爆炸性迫击炮弹。它拥有超远射程和巨大的潜在伤害——只需与敌人保持距离,并尽量避免炸到自己…… 人员:42 火炮:14 火力:13 射程:475 精度:0 装填速度:60 船体强度:35 航速:11 机动性:76 15 非常低 提示 炸弹双桅纵帆船拥有750的超远射程——超过了典型战列舰的400射程和轻型舰的500射程。它们的爆破射击有潜力摧毁敌方船员、火炮和船体,有时甚至会引发火灾——火灾会导致敌方士气大幅下降,并可能迅速导致敌人弃船,或者直接爆炸(这很有趣)。 然而,要好好支援它们,因为它们的前向射击机制和糟糕的机动性意味着很难转向以方便逃脱。一轮轻型侧舷齐射就能轻松快速摧毁这艘船的迫击炮,使其失去作用;一轮重型侧舷齐射则会同样迅速地摧毁整艘船!
火箭船 这是你在战役中可以使用的第二艘也是最后一艘火炮舰,它看起来像一艘双桅横帆船,船头装有火箭武器,可向敌方船只发射一连串燃烧的爆炸性火箭(同样是从船头发射)。这艘船拥有超远射程和更大的伤害潜力,能让海面燃起熊熊大火。不过,它和炸弹船一样脆弱。 船员:42 火炮:14 火力:13 射程:47 精度:50 装填速度:60 船体强度:35 航速:11 机动性:76 15 非常低 提示 火箭船过于强力。强到离谱。一轮齐射很可能直接摧毁一艘船,至少也会对敌舰的船帆造成巨大伤害,常常会将船帆完全烧毁,使船只无法移动。贸易船 贸易船的特殊之处在于,它们是唯一能够利用贸易节点的船只——贸易区域中【黄色标记】的贸易节点,能为控制它们的派系提供特殊贸易商品的获取途径。 《帝国:全面战争》中有4种贸易船,所有贸易船均为互斥类型。
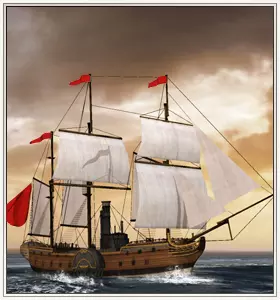
东印度商船 这是《帝国:全面战争》中典型的西方贸易船。它拥有3根桅杆、12门火炮以及一支规模小且武装薄弱的船员队伍,同时也是生产成本最低的贸易船。 船员:54人 火炮:12门 火力:26 射程:400 精度:40 装填技能:30 船体强度:19 速度:38 机动性:14 评级:中等 提示 东印度商船或许是游戏中最无用的战斗船只。它每侧仅配备6门火炮,且这些火炮在威力、精度和装填速度方面均无突出表现。船员全部由商船水手组成,这意味着船上没有配备火枪的海军陆战队来向敌方船员进行零星射击。虽然它的船体强度处于中等水平,但士气较低,若让其承受敌方主要火力,极易溃败。它们设有3根桅杆,因此在机动性上表现不错,能够灵活规避其他船只以躲避炮火。尽量不要让这类船只进入近战范围,因为其商船船员显然不适合与敌方海军陆战队作战,一旦意识到接舷战即将失利,他们往往会立刻溃败。
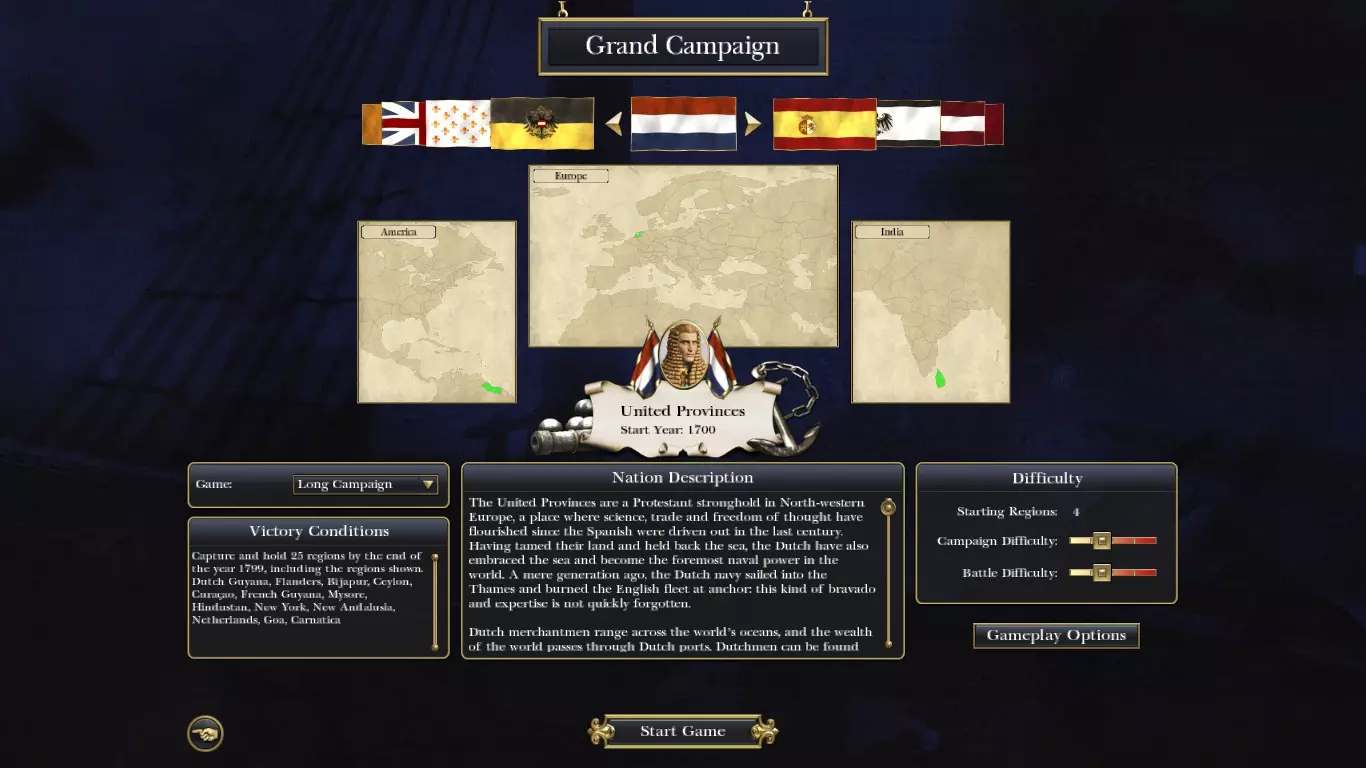
福禄特帆船 该舰船为荷兰联省共和国专属,兼具战斗与贸易功能。它航速较快,但机动性欠佳。在贸易船中,其船体强度最为出众。 船员:142人 火炮:42门 火力:58 射程:400 精度:40 装填技能:15 船体强度:445 航速:8 机动性:15 评级:中等 提示 尽管福禄特帆船主要作为商船使用,但它完全具备自卫能力。其拥有坚固的船体、中等规模的船员与火炮配置,在战斗中能够比大型敌舰更灵活地移动。若你选择荷兰派系,福禄特帆船通常可无需派遣正规战列舰保护贸易舰队,因为它们足以应对海盗,且通常也能抵御其他国家的攻击。

西班牙大帆船 西班牙大帆船是西班牙的贸易 vessel,是一种极其强大(且相当昂贵)的商船。其缺点是操控相当笨重,建造成本也很高。 船员 火炮 火力 射程 精准度 装填技能 船体强度 速度 操控性 176 58 370 400 40 40 4683 14 低 提示 西班牙大帆船是出色的贸易 vessel,出海时无需为它们担忧。它们非常强大,可用于猎杀敌方贸易 vessel,甚至能编入战斗舰队。其庞大的海军陆战队船员使其擅长近距离与敌舰交战,而大量强大的火炮则让它们成为完美的战舰。海盗们习惯于使用这类船只,并且能发挥出巨大作用。西班牙大帆船存在一个烦人的漏洞,即许多船员经常在战斗开始前死亡。据我观察,这是因为船只尺寸对于所载船员数量来说太小了:你经常可以看到甲板上的船员挤在船桥周围,互相卡住。这通常会导致10-20人被挤落水中(你可以在水里看到他们),并且战斗开始时往往有一些火炮无法使用。遗憾的是,目前没有解决此问题的办法。
Dhow The Dhow is the trade ship of the Eastern factions (such as the Maratha Confederacy and the Ottomans). It's comparable to the Galley, though a little smaller. These are very delicate, though they can cause some damage with their powerful guns. They're also incredibly cheap to produce and maintain. MenGunsFirepowerRangeAccuracyReload skillHull strengthSpeedManoeuvrability72204400403090416Average Tips These are the cheapest, but also most fragile trade ships. You can quickly and easily produce a trade fleet with these, but they constantly require protection. There is some use for them in combat, however: if you have a large number of them, you can sometimes cripple the enemy's hull before they come into combat range due to the power of the guns on the Dhow. You can also keep an enemy ship occupied by sending a single Dhow into range, then fire from relative safety using the rest of your Dhows. Shot types & when to use them There are 3 shot types: round, chain and grape shot. Round Shot Causes damage to the ship's hull and to its guns, and inadvertently kills the ship's crew as well. Round shot is best used against the sides of ships for eliminating their guns (reducing the risk their ships pose to your fleet), and for destroying the wooden hull so as to either close in for grapeshot blasts against the crew, or to simply sink the ship. A weakened hull will also affect the crew's morale, potentially forcing them to rout. In a prolonged battle, having a severely weakened hull will often cause the ship to begin sinking. Chain-shot Causes damage to the ship's sails and masts. Damaged sails reduce a ship's speed and its ability to manoeuvre, and significant damage leads to reduced morale, and can subsequently bring a ship almost to a complete standstill. Never use your chain shot unless the enemy sails are up, and even then, it's far more effective if you attack from the bow or stern (front/back) of their ships -- known as crossing the T for the shape it resembles. Usually one broadside against fully unfurled (which is to say, out and catching the wind) sails can bring down at least one mast, or cause considerable damage to slow them down at least. Interestingly, ship captains are often hyperactive during battle, and can sometimes be seen climbing the rigging to the top of a mast -- stray chain-shot will often kill them while they're up there, and bringing down the mast they're on will certainly kill them. Grapeshot This form of shot is used specifically to kill crew members aboard enemy ships, either to weaken their offensive power by killing gun crews and musket-armed marines, or to simply rout them due to fear caused by casualties. Grapeshot should never be used unless the enemy ship has taken enough damage to have an exposed hull (indicated by missing wooden planks on the hull). Use round shot to soften the hull before closing in with grapeshot, or the effects won't be noticeable. The one exception is when you're facing much lighter ships, such as Galleys and Brigs, whose crews are all exposed on the deck, rather than being below on the gun decks (protected by the hull). It's worth noting that unlike in real life, "crossing the T" with grapeshot is largely ineffective -- perhaps the Captain's glass windows are bullet proof... Maintaining morale & reducing your enemies' Much like in land battles, navies also have morale, which, when strained, can lead to a rout -- a disorderly retreat from the battle. A routing ship will simply flee, and will not return fire to pursuers. Ships rout independently of the rest of the navy (though a cluster of routing ships will cause mass-panic, and lead to a full-on retreat. A routing ship can still "rally", and rejoin the fight; a shattered ship will under no circumstances return to the battle, raising a white flag in surrender. Routing ships should be pursued until they're shattered, so as to ensure you maintain your prize and to reduce the chance of them returning to fight. Morale shocks Morale shocks are status effects which reduce the crew's morale. They are (incomplete -- will add more as i remember them): Being on-board a ship with severe damage to the sails Being on-board a ship with severe damage to the hull Being on board a ship that's on fire Being in a fleet whose admiral has fled the battle Being in a fleet whose admiral has been killed Being attacked in the stern (the rear of the ship) Having lost the majority of the ships guns (or not having enough crew to man the majority of the guns) Having lost the majority of the crew Being on a ship that's taking on water (caused by having severe enough hull damage to begin sinking -- the crew will eventually either rout or abandon the ship) Morale boosts Morale boosts are status effects which positively influence a crew's morale. They are (also incomplete): Being close to the flagship (the ship the admiral is aboard) Winning the current engagement (occurs during duels with other ships; doesn't last long) Seeing enemy ships routing Attempting a boarding action Battle strategies (To be completed...) Tips & tricks Dealing with fire Fire is massively imbalanced in E:TW, and is still pretty ridiculous in N:TW. When facing a potential fire, remember to: Listen for a ringing sound, and pay attention to your unit cards for a fire symbol. A burning ship will begin ringing its bell in alarm; this is your cue to take action Move the burning ship away from the rest of the fleet A burning ship has a high chance of exploding, which increases the longer the ship burns; an exploding ship has a high chance of spreading burning shrapnel to nearby ships. Tell the ship to hold fire (default: T) This frees the crew of the obligation to man the guns, allowing them to deal with the fire; however, i believe they will only tackle the fire once all guns are fully loaded.Remember that if all else fails, or if an oppurtunity presents itself, a fire-ship can be used offensively: charge the ship into your enemy, or better yet, attempt a boarding action -- when the ship explodes, it'll take your enemy down with it! Boarding actions An incredibly buggy feature, boarding actions have a huge chance of leading to crewicide, wherein your crew all attempt to "leap" onto the enemy ship, and subsequently break their legs in the process. Absolutely ♥♥♥♥♥♥♥ hilarious, but at the same time rage-inducing. Boarding actions also have the habbit of causing ships to defy the laws of physics, causing them to leap around, instantly perform 360/180 degree turns against oncoming winds, or end up smashing together with the targetted ship, and bringing all the sails on both ships down with it. Again, hilarious. Finally, even if your crew does somehow manage to get aboard, you're left with scripted battle sequences which play out so slowly and poorly that you'll often see 2-3 crew men "fighting" a cluster of 40 men, with the 40 men randomly collapsing dead in different spots of the ship. In short, do not use this button. Capturing ships Remember when i said not to use the Boarding button? That was a lie. The one use it has is for instantly causing a routing ship to surrender. If you can catch up to them (usually by crippling their sails), they can be grapneled via the Boarding button; however, no fight will actually occur. Instead, the ships will be brought against each other with the grapnels, but with surrender as soon as they're close enough for the crews to begin boarding one another. It's much faster than simply shooting at them until they surrender, and also reduces the damage to your prize. Dodging chain-shot Chain-shot causes incredible damage to your sails when they're unfurled (open); however, it's possible to reduce the damage by furling (lowering) your sails. This requires awareness, some knowledge of the AI, and a bit of luck. Generally, the AI will use chain-shot when it's crossing your T while you're at full-sail -- this is the time to either spam-click the "Lower Sails" button, or to simply hit the Drop Anchor (backspace) button. (hopefully more to be added, as soon as i can remember something decent...)