旅者之憩 Travellers Rest


《旅人小憩》更新内容 1. 霍莉的商店新增【糖】商品。 2. 孔雀的商店在每次补货时,都将固定出售【虾】。 3. 修复了选中快捷栏中的锄头时,地图上最后高亮的方格会被选中的bug。 4. 对游戏性能进行了多项优化。 5. 修复了新素材【贵族木材】【钴】【花岗岩】在背包中排序异常的bug。 6. 调整了【水槽】的互动距离,避免其干扰对附近门的互动。 7. 优化了矿场营地区域的碰撞判定。 8. 修复了在分屏合作模式下与鲍勃对话可能导致的软锁问题。 9. 修复了鲍勃每次对话都像初次见面一样进行自我介绍的bug。《旅行者的休憩》更新内容 1. 修复了教程过程中可能导致玩家被卡住的各种错误。 2. 修复了边缘部分可能无法加载到正确位置的bug。 3. 锻造灯柱现在可以旋转。

《旅人小憩》更新内容 1. 修复了奉献谜题中某些物品被错误判定为无效的问题。 2. 调整了水晶谜题的最小和最大步数,使其对应的成就可以正常获取。 3. 修复了清洁地毯的视觉bug,该bug导致清洁旋转桌子时地毯出现在桌子后方。 4. 酒馆员工现在会用正确数量的水杯填充墙式酒桶。 5. 解决了鸡和其他动物能够走到酒馆边界上方及外部的问题。 6. 修复了某些矿石脉无法开采的错误。 7. 移动箱子等特定物品时,外部制作台的工作区域现在能正确显示。 8. 改进了工具网格的视觉指示器。《旅者之憩》更新内容 1. 【衣柜】和【文物桌】现在仅可放置在室内。 2. 修复了城镇中的部分视觉错误。 3. 解决了特定条件下无法进入费罗商店的问题。


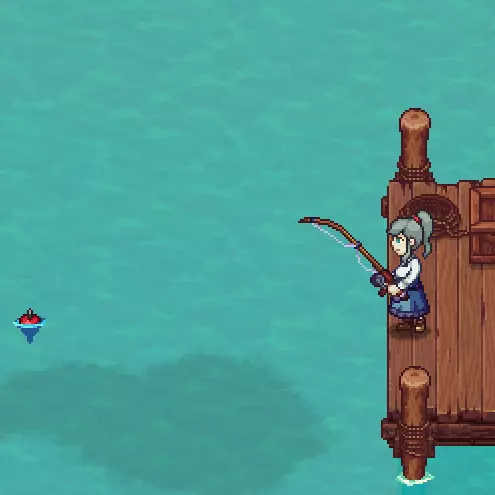

Basic beginner information and progression BiS Recipe Items Each dish that lets you choose a custom ingredient will always have a "Best In Slot" because it has more value, which slightly increase the price of what you're making. There is zero reason to cook anything without using BIS items. The one exception is customer orders which can want lower value items. Here is an example - you want to make Vegetable Broth. You can serve this as food, or use it as ingredient with other recipes. You might notice Pumpkin has most value, and 2 pumpkins is BIS. Therefore, unless fulfilling a customer order, ALWAYS make your Vegetable Broth with 2 pumpkins. Likewise, Watermelon is the BIS fruit for Fruit Juice, Jam, and Cocktails. Some rules to remember: 1. Hake, Pike, and Glit-Head Bream are the BIS fish most of the time. There are a few recipes where a different fish becomes the best. Meagres and Morays can be used to make Crab Pots as they are the most common fish to catch in my experience. Since there are BIS fish, this means the BIS bait are the ones those fish want. 2. Yellow-Foot seems to be the BIS Mushroom. 3. It's worth having Big Chests in your Kitchen for each "type" of thing. Because you will find some of the best recipes at each stage of the game do use some of the lower quality items in each category - green beans, turnips, garlics, sardines, etc. Find out which of these recipes you want to focus on and prepare your farm and fishing bait accordingly. You do want to maintain a wide variety of food and 8 drinks (4 kegs, 4 taps). Be aware that later game, different Alcohol and Food items will be required for some of the best recipes at that stage of the game. Remember to focus on a small amount of recipes at a time. First Year Your first year is rough because you have to go through the cycle of seasons to farm/fish the BIS and slowly get the money going. It's very slow in the beginning to build up money. Earlier in the game, buy things that increase comfort. Be mindful you get Diminishing Returns on the same item so every table doesn't need an oil lamp and incense burner and 2 coasters and candle holder. I like to set up each table with a Candle Holder in the middle, then on the middle row above and below it, one item of that type. Having more than 6 Tablecloths doesn't help. Some big ticket items that give +20 you can have a few more of because even with diminishing returns you still get an extra +3-8 out of "just one more". It's worth having ONE of each Light Source that provides comfort - other than the ones that provide comfort, it's only worth Candelabra, Shiny Candelabra, and Wall Torch for lighting. Later in the game, money just rains from the sky but levels stagnate as reputation is hard to get. I have 20 tables and 8 rooms at <3 level 200+. My tavern deco is 500+. I am level 30 and it's a real grind to gain a reputation/level. Individual Tables are required for rooms. Otherwise build Large Tables + Large Benches. Smaller tables than this give you less customers per space and more tables to clean. Helpful Routines Mon/Thur, check all the shops. Tue/Fri, forage. Weekends all shops are closed so use it to fish and make drastic changes to your farm/tavern. Wed, Fri, Sat remain. Fri/Sat are pretty worthless because all shops closed. Great days for fishing and foraging. Wednesday I usually just harvest crops and help wipe tables and serve food. It's worth a daily run to the beach to check if turkey or beach spawn spots and crabs are present, aromatic plants and herbs, also walk up one screen and see if the turkey is hanging out. Look at the recipes you have and determine which ones are the most expensive and easiest to make. As said above it's better to focus on a small number of drinks and food. I only focus on having 8 drinks. Likewise I only focus on 10 foods. I still make a lot of other foods. I basically want to keep about 20 foods in stock made of BIS ingredients at all times, and I don't make the same recipe with different ingredients. Staff/Employees Always hire staff. You need them ASAP. In the beginning, you are juggling cleaning with taps. Once you can hire staff, the game changes. Look for traits that make them clean tables/floor faster or cause customers to be less messy. At first it's easy for your staff to manage 4-6 tables. Once you upgrade to 10-20 tables, your staff will be overwhelmed and dirty tables everywhere. Once you expand toward this size, have 3 Enchanted Brooms with one in middle, one on left, one on right. You will Fire and Hire new staff frequently enough to not get attached to the ones you have. Before upgrading to new staff make sure you're able to afford it. Sometimes it's worth hanging on to a less good worker if the upgrade won't pay for itself. Don't worry about Customer Orders for the first year. If you really want to do that, then do NOT buy out cave recipes. Just pick like 1-2 from each category that have high value and between your recipes, don't overwhelm yourself on needing Milk, Herbs, Aromatic Plants, or Honey or the nuts or chocolate. Customer Orders want a random item with a random ingredient and usually don't give enough reputation to be worth doing. Once the first year is done, it's worth filling anything you can and placing the excesses into the menu at the bar. Your menu at the bar should have 8 or so recipes of focus and scraps of fulfilled orders. Renting Rooms Do NOT overfocus on rooms to rent. They take your housekeeper staff away from housekeeping the bar (where you make money). As you expand the tavern you will need the housekeeper wiping tables and sweeping and having 8 big rooms will result in dirty tables everywhere. I like to stop at 4 rooms, 2 large and 2 small. It's worth expanding their size to fit in more <3 giving furniture items such as Aquariums, Rugs, wall deco, etc. Wall Torch + a few well placed Candelabras are the ideal lighting, and a coral lamp. Animals ANIMALS can get stuck. At the beginning of each day, pet the cat, water its bowl if needed. Pet cat when its still or on bed, not when its walking. Then, go to barn and ring the bell, If your animals get stuck you can reset and lose nothing. On a non-weekend day, a trip to Buzz, use "Facilities" improvement - this usually forces the invisible/stuck animals to correct themselves. Sometimes a broom swat can work. Animals stuck outside can't usually be helped. Sometimes you can run to Buzz and do the thing above, and it will reset the inside of the barn and they will all appear inside. Best animals are 3 cows, 3 sheep. It's worth a few rounds of pigs because Pork makes Lard and Intestines are needed - but once you get a healthy stock you won't need no more for a while. Around the mid-game, you will never have enough milk, always buy out all the milk from the farm shop. Top Star animals don't produce extra milks, but they do give extra meat/products when butchered. So whack them 3 times with a broom. CAT: Pet it when it's still, not when it's walking. Keep its water full. Expand size of your room - you want cat Bed and Bowl to have a few free spaces on all sides.Put them toward middle of room not on a wall. Keep the tavern lit. PARROT: Feed it when it says something "good" that has Green Numbers with a + sign. You can feed it 2x a day and need to feed it 2x a day when you can. Sometimes it's just "bad bird" all day and takes a bit to get going. Once you've fed it a few crackers for a few days, it will progressively begin making more good comments and less bad ones (though the frequency of comments does not change). Its meter will go down as well, so you can't just forget about it. If you get the Cage, birds in the cage do not have their meter drain. Final Thoughts - Convert upstairs crafting room to rental room ASAP. - You can scroll past the wallpapers/floors to see more options. - Check out the discord for the game. - Check out the wiki for the game. - check out the mods on Nexus for the game. Thank you for checking out the guide. This guide will grow and expand over time as the game does.

《旅者之憩》更新内容 1. 改进了矿洞中的碰撞判定,减少了堵塞情况的发生。 2. 修复了已拥有但数量未达要求的配方材料显示不正确的bug。 3. 修复了矿洞中的视觉bug,该bug导致某个方块在黑洞内部显示泥土纹理。 4. 修复了植物基肉类未在菜肴工具提示中显示为食材的bug。 5. 修复了不应具有舒适度的物体却显示舒适度的bug。 6. 修复了本应无法进入多人游戏房间却能进入并导致软锁的bug。 7. 修复了与艾斯的对话可能随机出现的bug。 8. 修复了贵族图书馆中的视觉bug。 9. 修复了贵族衣柜无法让玩家更改风格的bug。《旅行者的休憩》修复公告 1. 修复了时钟显示为黑色的视觉错误。 2. 修复了矿脉已被开采完毕后仍显示采矿进度条的错误。 3. 修复了玩家昏厥后仍可使用传送按钮的错误,该错误会导致玩家返回之前的位置并引发场景加载问题。
《旅者之憩》修复公告 1. 修复了将谷仓放置在特定区域时,动物无法离开谷仓的bug。 2. 修复了从制作界面打开或直接使用快捷键打开制作燃料界面时,显示数值不一致的bug。 3. 修复了制作【贵族木桌】和【花岗岩块】时,加成效果无法正确应用的bug。 4. 修复了加载游戏时,橄榄树幼苗未正确标记其放置方格为已占用的bug。 5. 修复了选择鱼竿时,工具使用范围网格会显示的bug。 6. 修复了可能导致玩家无法与费罗互动的bug。 7. 修复了玩家在已有工具正在升级时,仍可请求工具升级的bug。《旅者之憩》更新内容 1. 修复了在分屏合作模式下,进行鲍勃的温泉事件时可能导致游戏软锁的漏洞。 2. 调整了【工艺品桌】的摆放位置。 3. 现在可以使用【水槽】来重新装满水桶。


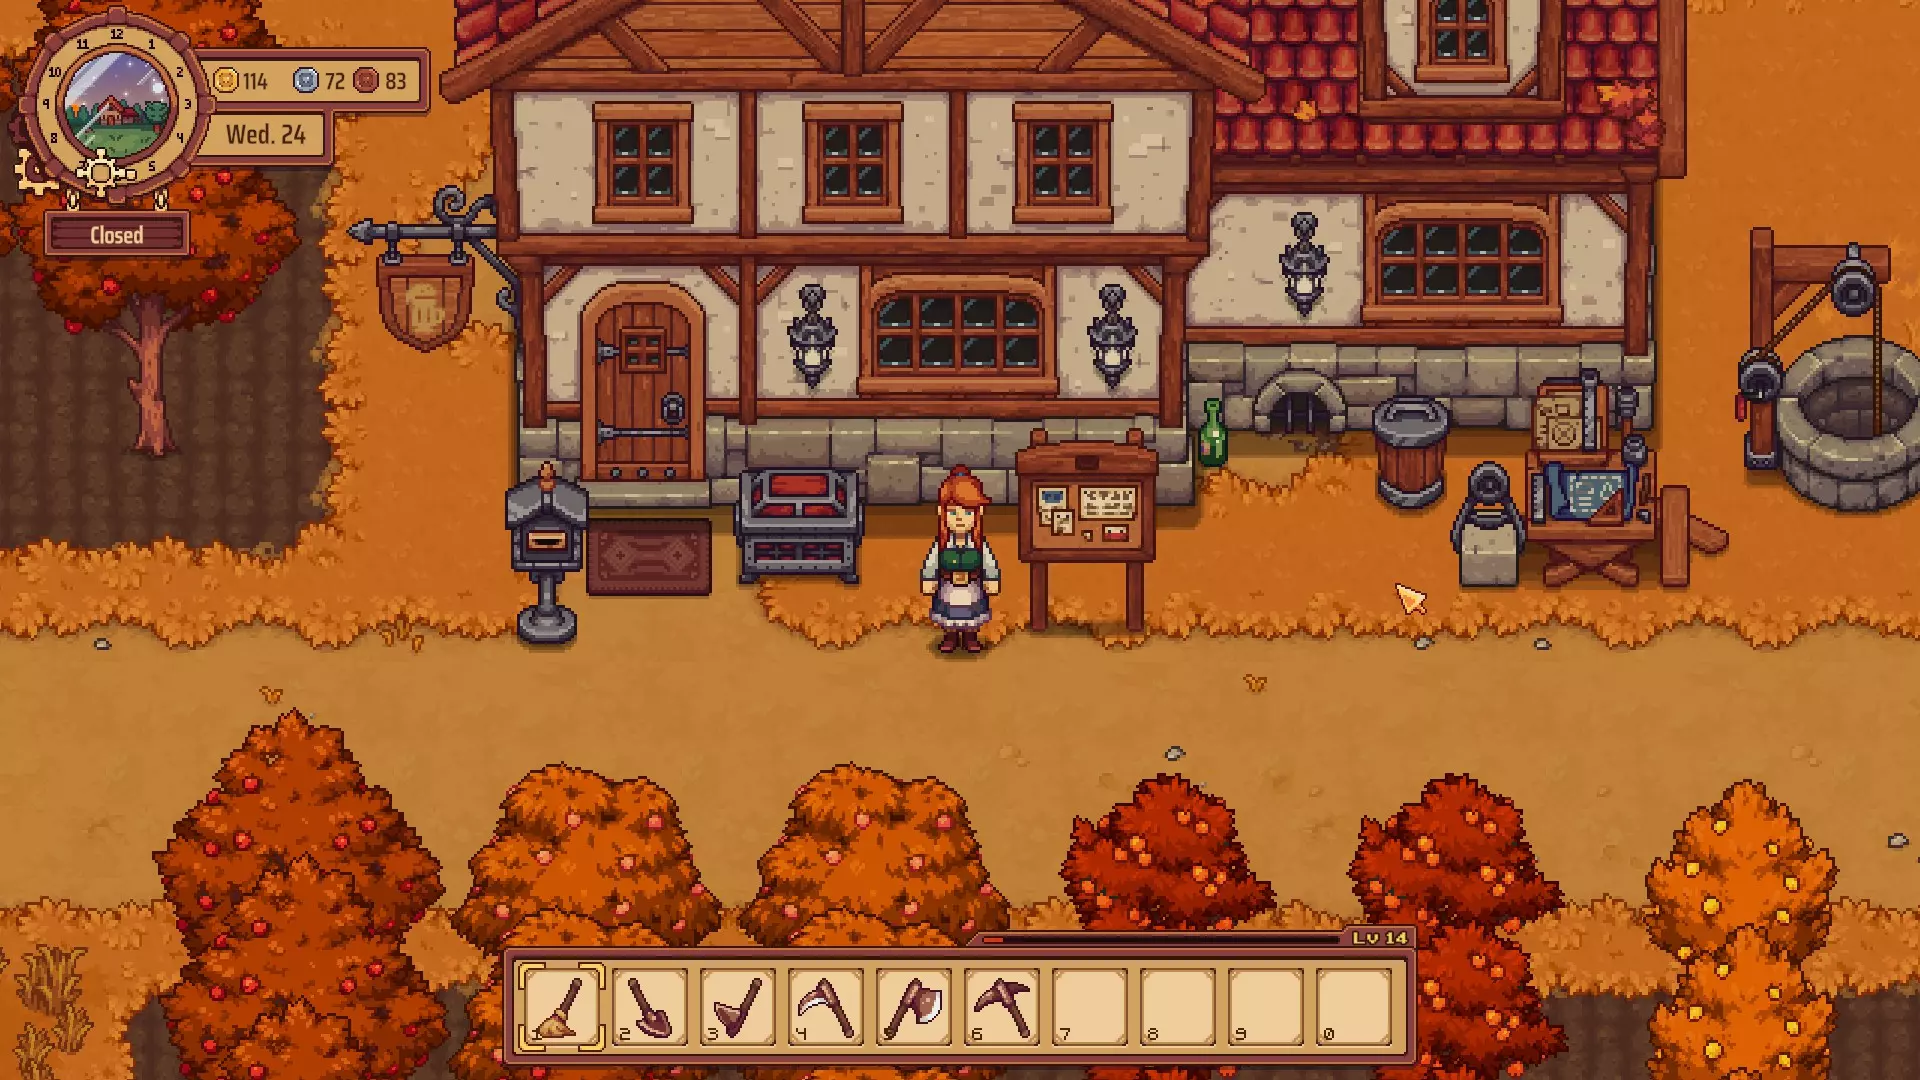
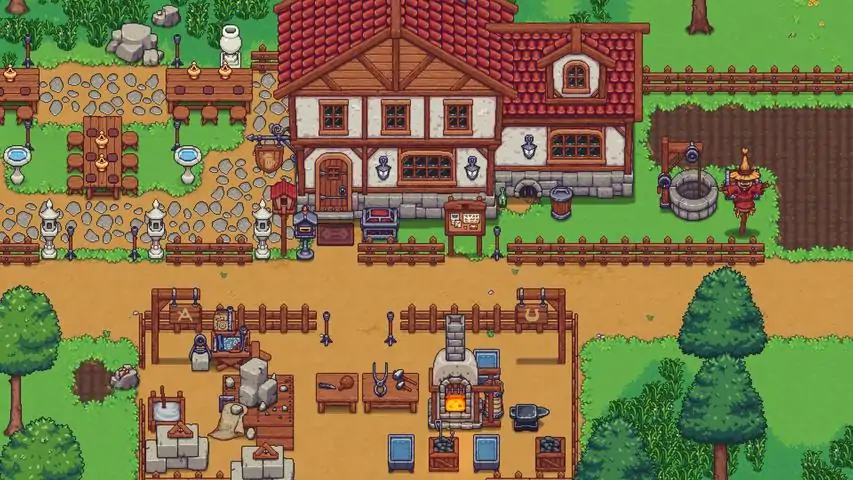
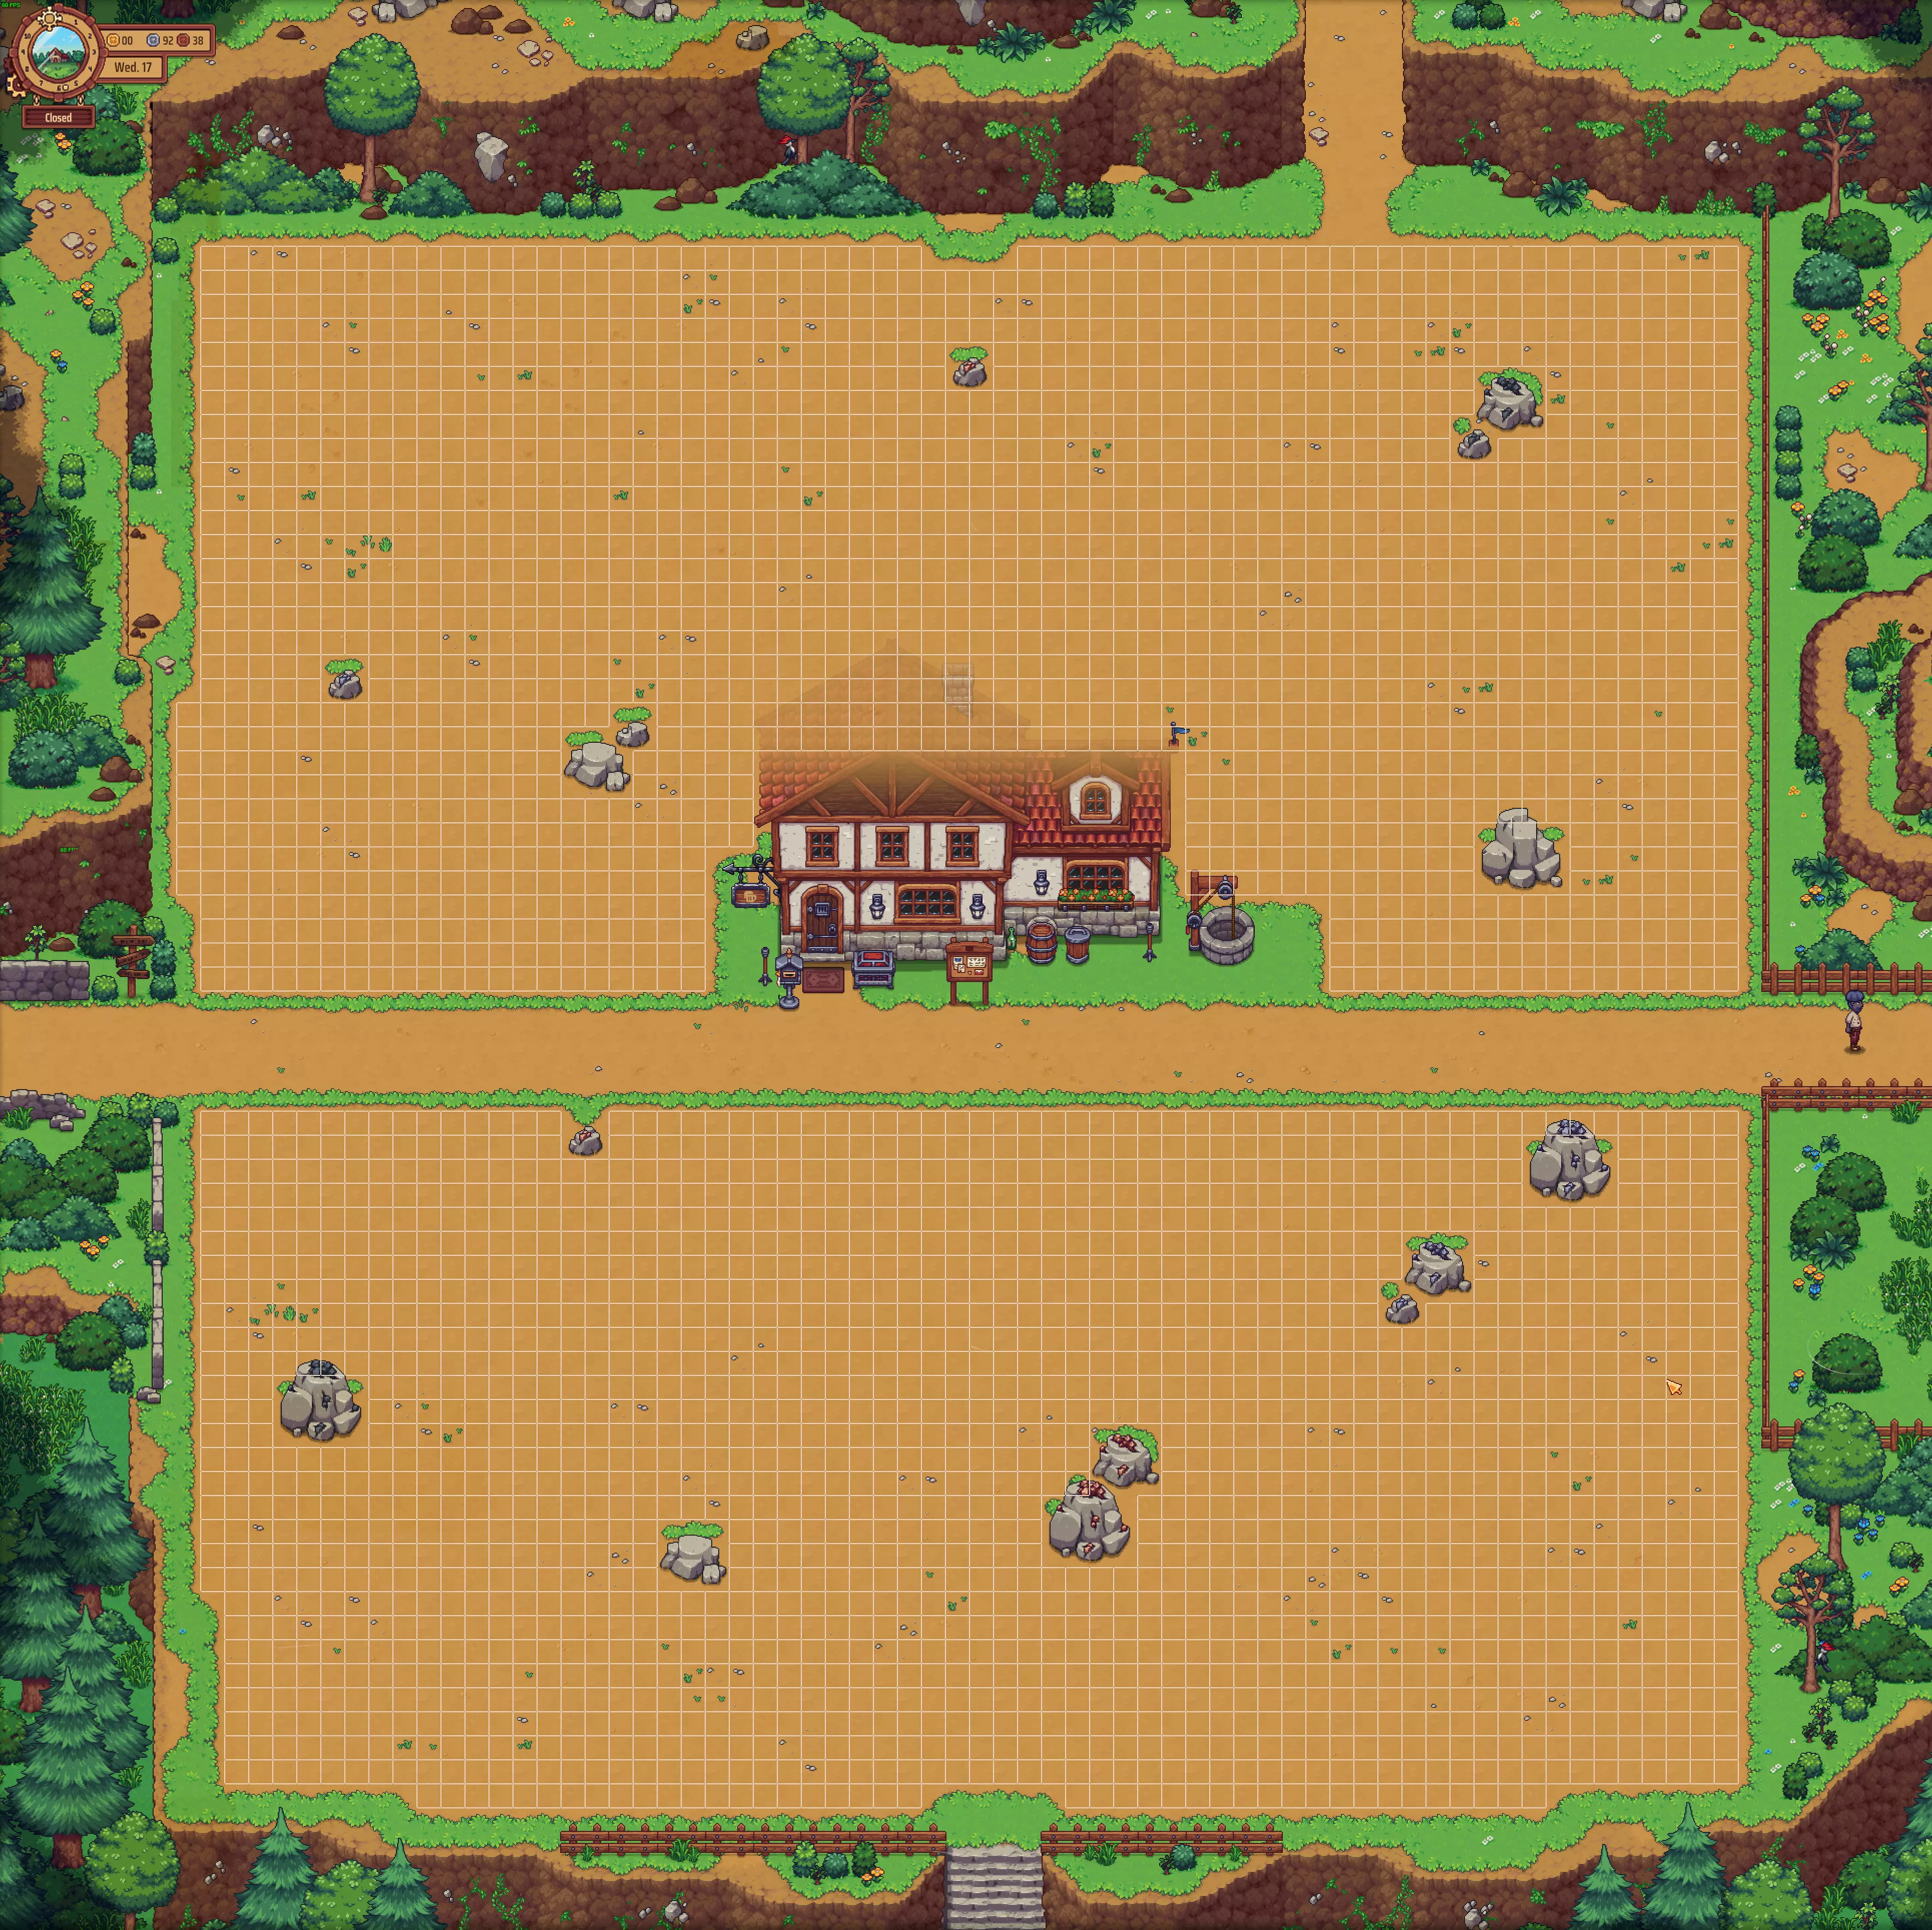
List of rewards at each reputation level. Also contains an assortment of miscellaneous knowledge Introduction This guide was written in April 2025, for build v0.7.0.15.1. The nearby city has been released, with all its vendors. Players are no longer able to purchase things via the postbox and must go into town or to the Harvest Hills farm in the south to purchase ingredients, seeds, crafters, and certain recipes. As of January 2026, build 0.7.4.8, everything is this guide is up to date. My steam name is Lancar. My reddit name is Couchsurfingdragon. This guide is dedicated to Fastidiousfrog on r/travellersrest. Reputation Unlocks These are recorded in a playthrough that skipped the tutorial. If playing through the tutorial, certain unlocks may require tutorial progression. Glossary: SP: Skill Points. These can be used to progress through the skill tree in the skills tab. RP: Recipe Fragments. These points can unlock recipes in a particular location. Occupancy: The number of guests your dining area can host, provided they have available seating. 01. SP+1, RP+10 02. SP+1, RP+10 03. SP+1, RP+10 04. Random order quests available at the notice board. SP+1, RP+10 05. SP+1, RP+10 06. Hireable staff available at the notice board, (not including housekeeper.) SP+1, RP+10 07. Construction mode unlocked (purchase a construction table from Woody. Upon building your first guest room, you will receive a reception desk for free); Housekeeper may now be hired. SP+1, RP+10. With construction unlocked, you can expand the tavern by 66 tiles. The first floor starts with 99 tiles, the cellar with 42 tiles, and the second floor with just 2 tiles. Most tiles can be removed from the first floor and cellar if needed. 08. SP+1, RP+10, Max Occupancy +1, Floor Tile +15, Dining Tile +5, Crafting Tile +5, Rooms +1 (2 guest rooms max) 09. Important customer event (very important guest unlocked). SP+1, RP+10, Floor Tile +15, Dining Tile +5, Crafting Tile +5, Rooms +1 (3 guest rooms max) 10. Cheese making. SP+1, RP+10, Maximum Occupancy +1, Floor Tile +15, Dining Tile +5, Crafting Tile +5 11. SP+1, RP+10, Floor Tile +15, Dining Tile +5, Crafting Tile +5, Rooms +1 (4 guest rooms max) 12. SP+1, RP+10, Maximum Occupancy +1, Floor Tile+15, Dining Tile+5, Crafting Tile +5 13. SP+1, RP+10, Floor Tile +15, Dining Tile +5, Crafting Tile +5, Rooms +1 (5 guest rooms max) 14. SP+1, RP+10, Maximum Occupancy +1, Floor Tile+15, Dining Tile +5, Crafting Tile+5 15. SP+1, RP+10, Floor Tile +15, Dining Tile +5, Crafting Tile +5, Rooms +1 (6 guest rooms max) 16. SP+1, RP+10, Maximum Occupancy +1, Floor Tile +15, Crafting Tile +5 17. SP+1, RP+10, Floor Tile +15, Dining Tile +5, Crafting Tile +5, Rooms +1 (7 guest rooms max) 18. SP+1, RP+10, Maximum Occupancy +1, Floor Tile +15, Dining Tile +4, Crafting Tile +4. Note the reduced increase of dining and crafting tiles. 19. SP+1, RP+10, Floor Tile +5, Dining tile +2, Crafting Tile +2, Rooms +1 (8 guest rooms max). Note the reduced gain of all tiles. 8 is also the maximum number of guest rooms. 20. SP+1, RP+10, Maximum Occupancy +1, Floor Tile +5, Dining Tile +2, Crafting Tile +2 21. SP+1, RP+10, Floor Tile +5, Dining Tile +2, Crafting Tile +2 22. SP+1, RP+10, Maximum Occupancy +1, Floor Tile +5, Dining Tile +2, Crafting Tile +2 23. SP+1, RP+10, Floor Tile +5, Dining Tile +2, Crafting Tile +2 24. SP+1, RP+10, Maximum Occupancy +1, Floor Tile +5, Dining Tile +2, Crafting Tile +2 25. SP+1, RP+15, Floor Tile +5, Dining Tile +2, Crafting Tile +2. Note the increase of Recipe Fragments. 26. SP+1, RP+15, Maximum Occupancy +1, Floor Tile +5, Dining Tile +2, Crafting Tile +2 27. SP+1, RP+15, Floor Tile +5, Dining Tile +2, Crafting Tile +2 28. SP+1, RP+15, Maximum Occupancy +1, Floor Tile +5, Dining Tile +2, Crafting Tile +2 29. SP+1, RP+15, Floor Tile +5, Dining Tile +2, Crafting Tile +2 30. SP+1, RP+15, Maximum Occupancy +1, Floor Tile +5, Dining Tile +2, Crafting Tile +2 31. SP+1, RP+15, Floor Tile +5, Dining Tile +2, Crafting Tile +2 32. SP+1, RP+15, Maximum Occupancy +1, Floor Tile +5, Dining Tile +1, Crafting Tile +2. Note the reduced increase of Dining Tiles. 33. SP+1, RP+15, Floor Tile +5, Dining Tile +1, Crafting Tile +2 34. SP+1, RP+15, Maximum Occupancy +1, Floor Tile +5, Dining Tile +1, Crafting Tile +2 35. SP+1, RP+15, Floor Tile +5, Dining Tile +1, Crafting Tile +2 36+ (needs more information) Level Unlocks by Vendor Vendors can be located in town. Agatha is in the northeast and sells decorations. Woody is in the southwest and sells recipes for wood and stonecrafting, as well as relevant crafters. Petra is in the southeast and sells recipes for blacksmithing and relevant crafters. Amos in the southwest and sells various tavern crafters and furniture pieces. Glossary: C: Comfort. Agatha04 Big Shelf, can be crafted 04 Clay Pot, c2 05 Bordered Rug, c3 05 Cuckoo Clock, c7, functional 05 Frayed Banner, c15 05 Grilled Window, c7, can be crafted 05 Indoor Bush, c4 05 Lion Banner, c15 05 Oil Lamp, c3, can be crafted 05 Rillia Standard, c6, smaller than other banners 05 Rose Banner, c15 05 Small Paned Window, c8 05 Triple X Bottle, c3, 2x1 05 Vertical Wood Framed Painting, c5 05 Wooden Fence Gate, functional 06 Indoor Plant, c10 06 Lantern, c0 (not a typo), placed on wall, provides light 07 Old Sword, c5 08 Coat Rack, c6, can be crafted 08 Cow Skull, c5 08 Shining Candelabra, c15, holds candles, can be crafted 08 Shining Candle Holder, c4, holds candles, can be crafted 08 Shining Wall Candle Holder, c6, holds candles, can be crafted 08 Tall Clay Jar, c2, 2x1 08 Wide Window, c10, can be crafted 09 Hanging Plant, c10 10 Big Wooden Framed Painting, c8 10 Blackboard, c7 10 Bookcase, c12, 2x1, tall 10 Children of the Sun Banner, c15 10 Decorative Shield, c7, can be crafted 10 Elegant Rug, c13 10 Fringed Rug, c6 10 Ornamental Axes, c8 10 Republic Banner, c15 10 Shiny Incense Burner, c8, can be crafted, no collision 10 Space Pirates Banner, c15 10 Striped Rug, c6 12 Decorative Sword, c10 12 Mosaic Window, c9 15 Big Wooden Window, c15 15 Elegant Wooden Framed Painting, c12 15 Geometric Rug, c10 15 Indoor Lily, c12 15 Lustrous Rug, c10 (less comfort than the elegant rug) 15 Moose Trophy, c7 15 Ornamental Armor, c20, can be crafted 15 Ornamental Axes and Shield, c10 15 Large Paned Window, c12 Amos05 Distillery, crafter 05 Enchanted Broom, functional 05 Preserves Table, crafter 05 Striped Table Runner, c3 07 Reception Desk (this is received for free after completing a quest) 10 Cheesery, crafter 10 Rhombus Pattern Tablecloth, c6 12 Cocktail Table, crafter 15 Cushioned Stool, can be crafted Woody05 Aging Barrel recipe. can be bought from Amos, any level 05 Aging Shelf recipe. can be bought from Amos, any level 05 Big Chest recipe. can be bought from Amos, any level 05 Big Shelf recipe. can be bought from Agatha at level 4 05 Bird House recipe 05 Large Bench recipe. can be bought from Amos, any level 05 Large Table recipe. can be bought from Amos, any level 05 Polished Stone Lantern recipe 05 Shining Wall Candle Holder recipe. can be bought from Agatha at level 8 05 Small Wooden Window recipe. 05 Wooden Fence recipe 07 Construction Table. use to expand your tavern 10 Wide Window recipe 10 Big Wooden Window recipe. can be bought from Agatha at level 15 10 Bird Fountain recipe 10 Rustic Stool recipe 15 Cushioned Stool recipe. can be bought from Amos at level 15 Petra05 Brazier recipe. can buy from Agatha, any level 05 Grille Window recipe. can buy from Agatha at level 5 05 Oil Lamp recipe, can buy from Agatha at level 5 05 Shining Candle Holder recipe, can buy from Agatha at level 8 05 Shining Wall Candle Holder recipe, can buy from Agatha at level 8 05 Small Bronze eye recipe, c10, no collision 08 Coat Rack recipe, can buy from Agatha at level 8 10 Barrel Support stand (5) recipe 10 Bronze eye recipe. c15, placed on wall 10 Decorative Sword recipe, can buy from Agatha at level 12 10 Reinforced Shield recipe 10 Shining Candelabra recipe, can buy from Agatha at level 8 10 Shiny Incense Burner recipe, can buy from Agatha at level 10 15 Ornamental Armor recipe, can buy from Agatha at level 15 Assorted Knowledge Gardening The watering can affects 3 squares in front of you: forward and to the diagonal left and right. You can plant your crops accordingly to make watering easier. I've found what works best is, if the number pad is a grid, 123 and 789. To reduce grown crops blocking your view, you can use 147 and 369. Crops only need to be watered every 3 days. Personal tip: Prior to irrigation, I water my crops every even day. Who wants to divide by 3? Decorations Wilson's tablecloths and coasters don't provide as much comfort as the options bought with coin. Wilson's music box can be interacted with for an animation and an appropriate tune. The cuckoo clock can be interacted with to set an alarm time. You can hear this alarm from wherever you are, regardless of distance from the tavern. Candles independent of candelabra and candle holders have different styles. A reception desk set in front of a wall looks different. Tavern Staff Hire a full staff as soon as possible to increase your flexibility. You can disable certain staff or staff responsibilities whenever you like. Or you can spend your entire day fishing. Check back when you can to refill the taps and food stocks. Personal tip: I recommend using low-leveled staffpersons to ensure your profit margins remain high. The Housekeeper 'accommodation' responsibility includes cleaning up in the morning after guests. Housekeeper maintenance refers to both helping with sweeping and replacing candles in candle holders and candelabras. Replacement candles automatically deduct money from your total. Room service refers to guests staying in rooms ordering food/drink from the bar. There is no mechanical penalty for ending a staff member's break early. You can select the skill level of each staff person's positive traits. Raising or lowering their trait levels affect their wages. Tavern Operation Coasters are functional. They reduce the speed a table gets dirty. Hearsay is that 6 cork coasters per large table is the maximum bonus. The red chest in front of the tavern is a 'lost and found' chest. Any items removed while you're building are either returned to your inventory or to this chest. The cylindrical bin in front of the tavern is a trash bin. Any items placed here will be removed at the end of the day. Unlike other games, items left on the ground persist, even through quitting the game and reloading a save. Starting at 19:00, guest satisfaction may lower if their area is not well lit/illuminated. At 20:00, their satisfaction will lower if the fireplace is unlit. You can close before 19:00 to avoid the hassle. (Brightness check is hearsay. Got that info from the wiki.) You can remove tiles from the basement to place them elsewhere in your tavern. The maximum size room a guest will request is 21. The first time I saw this in my current playthrough was at rep level 24. Order rewards are fixed. Using higher-cost ingredients or aging a product to a higher than base quality does not increase the reward. When a customer gets angry, have your mop equipped and swing it just as you ask them to calm down. If they calm down, nothing happens. If they get angrier, they get hit with the mop before they can walk away. Unlocked recipes can show up as orders. It's best to only unlock recipes you plan to keep on your menu.

《旅人小憩》更新内容 1. 拿起工匠设备时,其持有的燃料将被返还。 2. 修复了已放置物体对在线访客有时旋转角度不正确的bug。 3. 工艺品桌不再能放置在餐厅内,但可放置在其他任何地方。 4. 客房租赁界面的文字颜色已更改,以提高可读性。 5. 修复了毛绒玩具鼹鼠物品的碰撞错误。 6. 由于引火物的燃料值从1调整为2,易燃技能已更改为在此基础上额外增加1点燃料。该技能的描述已在英语和西班牙语中进行相应修改,其他语言版本待更新。 7. 当前矿层标签现已支持本地化显示。 8. 修复了右键点击无法以5个为一组向工匠设备添加燃料的bug。《旅者之憩》更新内容 1. 修复了在矿场中解决连接方块谜题后立即关闭谜题界面时,玩家无法拾取奖励的bug。 2. 修复了冬季酒馆屋顶的视觉bug。 3. 修复了部分装饰物品无法增加酒馆舒适度的bug。 4. 修复了采石场地图的各种视觉错误。 5. 修复了可能导致霍尔蒙德的【改进工具】选项不显示的bug。 6. 在教程期间,地窖中添加了可破坏物体。 7. 修复了教程期间烤箱的视觉错误。 8. 更新了翻译内容。