换一换
换一换 


Just a collection of strategies and things to keep in mind on different maps of Invasion campaign. Not all of them, since some maps are VERY straightforward. Plus a personal subjective view on units. All of this over a course of Legendary difficulty playthroughs - I never tried this game on easier difficulties, so most of this is probably not needed. View on units is rather spoiler free and may be useful outside the guide purpose, so if you stumbled on this guide randomly and want only that - just skip first 3 big parts, where I talk about missions themselves. Maps part 1 (till Clanmeet) First mapDon't bother with the regen altar to the left. It will slow you down, trying to get it and you can't afford slowing down on maps until clansmeet basically. I like sending falirson and one youngling to the right of the first village, to get to the third one and to kill wolves in the process, while other youngling and maidens go upper-left to the second village. Usually sets me up with 1 turn left after all the looting and you need all the money you can get. A Dark VisitorIf you help trolls they will remember it way later in the game and if you help humans there nothing of note to happen. A bloodoak in the upper left part of the map will give permanent brave if you behave bravely (choose first answer) - other choices will give you some buff for this map only which is useless since you'll probably have 2-3 turns of it left at that point, or will make you disordered for this map only which can just be rested out. Also always search the camp to get random loot - game tries to guilt you that you shall not loot, but there is no consequence. HomecomingSplit your army - send younglings and the birds to the woods to carefully pick them clean and your hero and maidens to the right to capture the village there. Be mindful that this village will take you some time which you can somewhat gain back if you capture speed altar in the middle of the map. If you are feeling brave then go and fight trolls, but on legendary with onle a few squads there it's rather risky. Better capture mana well and a cave beneath it and then go right from there to the shrine. Right down to the shrine there is a choice of going into mountain area or goind into the woods around it - the latter is better, since you can this way get to the ruins on the bottom right corner of the map a lot sooner. In the camp you will get brave wolf pack on your side - don't loose them, since they have innate +1 morale due to the buff and thus they can be a better melee than other wolf squads that you can get. After you are done with the village to the upper right go down with that squad. By that time you should already be around witches hut and the river crossing - don't activate witches hut yet, since that will spawn a lot of enemies. Instead go to the right and employ hammer and anvil tactic on the empire/barbarians army in the mountain area. After that you should have hopefully just enough time to deal with the trolls on the left. Of note there is a bloodoak there that gives unique fated buff. Give it to your younglings - you can make a "super" thane of them later so that -1 model debuff is meaningless, or you can make heavy axemen that can become immortal (100% physical and magical resist at the same time). A good thing for this map is Berzerker squad, since they are rather cheap to get, can charge into woods and rough terrain while Younglings cannot. Addition Use your bird! It needs to go to the left too and a bit down to where the troll hurler is standing. You can also fly above the bear in the center of the map to get it's attention too, but that's probably always gonna happen. Attack that troll with bird and then move slowly down, just out of reach of movement from troll. The trolls that saw the bird - will follow it. Guide these trolls to the lower left part of the map for now. Keep in mind that you better fly over all caves on the way there, since there are some troll pups that hide in them and they will not follow the bird until they are revealed. And whenever the coast is clear - scoop all the caves that are now unguarded. After you cleaned everything but the trolls - visit the witch. If your horde is near the bottom center of the map, then they will fight the enemy. Ailsa should get "Summon Ancestors" ASAP. Under AttackThis is a finicky mission with a lot of luck involved. I personally give the enemy upper manapool instantly and create a roadblock just north of my castle, where there is a chokepoint. Leave the central village visually undefended, hide some squads in the woods around it - enemy from the north will cramp themselves into the canyon trying to get to the village and thus you can easily hold them there, while dealing with other enemies. To the north of the northern village there are dragon bones that give you free dragonslayer perk. A good buff to have on any of your heroes but not on your ordinary units, since you can train them with this buff later. Also the enemy squad attacking there is very small - usually 3-4 squads, so you can ambush them from the woods and get some slingers in the tower there to pummel them. A good thing here is have an upgraded maidens to forify in the village. If you plan to go Iseal and burn it down - just raid villages on Clansmeet and on Under Attack! But only raid with Falirson (or mercs) if you don't want multiple squads to have kinslayer - first time you raid friendly village both Falirson and the raiding squad will get kinslayer. Into the TrollwoodsThis is quite difficult map on higher difficulties if you try and just go down from the start. What you should do is actually go to the left trying not to alarm the enemy - this way you will have much more favourable position and will not fight in water. The town on the leftmost part of the map is undefended so you better take it, hire some mercs and flank the enemy army on the right. This way it will go much smoother for you. Also on this map if you agree with Ailsa all the time it will give you mana that you can spend on ancestors and it will again help tremendously since they armor your frontline. Morale penalty is not that big of a deal here and it's only for this map anyways. After you got Tir sent her straight down - there's mana pool there with not that much of protection. Also summon ancestors with Ailsa and very carefully go to the bottom of the map around mana well and creep to the right - there's hidden ruin there that you will never get otherwise in time. There are also some ruins in the mountains to the north of the big open area - spirits can also cap them. A good thing here is berzerker squad again for the same reasoning as in Homecoming. Battle for HeartspireJust rush down from the start and send spirit to the left - there's mana pool there. Don't go that far with the spirit there, since there's a bear that will nom your spirit, take your lunch money and then cap your mana pool. There is almost no way to tame that bear if you are Hunter Falirson and didn't get fear mask from RNGsus, since you have only one source of roar and bear has 4 morale. If he had 3 you'd be set, but no. Also you can farm skeletons here until transmuter runs out of mana. It's a slow farm, but it's there. Surround him but leave a single tile free - he will summon there each turn if you can manage to kill skeletons in one turn. It's basically a level or two gain. Old roads or White hillsOld road offers you nothing of note while White hills give you an opportunity to tame some spiders and bears (if you play as Hunter) and have a set Extractor artifact (+1 mana per killed squad). Also White Hills have a bloodoak that gives innate frenzy - I usually give it to wolves, since frenzied spirit wolf is pretty good, but hurlers and heroes can do good with it as well. Also another plus for White hills is transmuter there - you can farm his summons just as in Battle for Heartspire if you want. ClansmeetSpawning Ailsa on the rightmost deployment zone can be beneficial. Summon wind elementals there en mass and send them up - there's mainly archers there and elementals close to each other mean huge missile resist, plus elemental aoe decimates archers quite good. Move a summon or a merc unit into the lake near the center of the map on Clansmeet. You will be presented with an option to sacrifice this squad to summon a free storm elemental for this map and he's quite helpful there. Maps part 2 (Clanmeet - Krell's Landing) After ClansmeetYou will be presented with a choice on what to do with thanes and afterwards with the buff you want to have till the end of Krell's Landing. For thanes you can get them in your army if Falirson has kinslayer (will give -1 morale to the whole army, till the end of Malric's Vale/The Gap map choice) and they give you +2 supplies to accomodate for themselves. Note that you can kick them and use that 2 supplies as you please - that will give you about 160 gold for firing each, depending on their level. Other choices give you 500 gold if ransom or 200 gold, 4 weapons and 2 armor if kill. About the buff - the best one in my opinion is gold, but armor pierce could be cool as well. https://steamcommunity.com/sharedfiles/filedetails/?id=2917620046 Edit: OK, I've changed my mind. The best one is armor pierce - it affects even magical attacks and that is very strong. Gold is good, but you will soon-ish find out that gold is plentiful. There is some condition on getting +1 permanent morale on every female unit you have on the next map choice. I encountered it on Malric's Vale, but I think that it should work on The Gap as well and The Gap doesn't give you anything like that. You need to have Ravencloak in your army and have at least 100 gold in the end of the map. It basically nullifies the morale penalty for Ailsa that she gets if you allow Ravencloak guy in. Honestly seems like The Gap and Old Road is objectively worse choice than the other. White hills with frenzy oak tree and extractor, and Malric's Vale with +1 morale to all female units and Malric's ring. The GapI hate this map. Honestly. It's just a check on if you have enough morale damage or trolls, otherwise you are in for a very long slog. If you have a spirit wolf with frenzy (I like to make one from the first wolfhound you get) - you can park it just a bit to the upper-left of the castle on the left side of The Wall. It will hold for quite a while there and make your life a bit easier, since reinforsements will be stuck on it. https://steamcommunity.com/sharedfiles/filedetails/?id=2966196744 For morale damage it's good to have bears (if you play hunter) - there's even a farmished owlbear just near the start that you can easily get if you got a bear in any previous map. Brother bear, Ulnar's roar, plus any extra bear and the owlbear is yours. Plus the Gloom spell on Ravencloak guy - an amazing spell honestly, -3 morale and 100% deaths in a 3 radius is amazing. Otherwise you kinda need tree growing spell from Tyr, since you NEED that anti-missile protection and charge breaking. This and air elemental from Ailsa just behind your frontline. Alternatively if you are lucky - the enemy will come out to get you, if you stand around 1 tile from The Wall, but it is inconsistent. I had more luck when I baited them with my javelin throwers 1-2 tiles from The Wall - for some reason enemy hurler decided to just get into melee range usually. Important notes: - There are harpies to the right of The Wall. You should send there an animal or a female unit, since there's also an altar with regen there that is rather useful. - Be sure to capture villages on the same turn as you find them. Otherwise the enemy will spawn 5-6 extra squads from them. - There are two camps with volunteers on the upper left and upper right corners of the map. They are hard to get to in time if you hope to raid every village here, but air elementals can manage, especially since their speed buff is free and can be cast on themselves. Malric's ValeA difficult map if you rush right down. There is a path through the mountains a bit to the right an north from your starting location and you can send part of your army through there. Though it's forests and rivers there with almost no open tiles, so send all-terrain units. There is also a lot of hidden units there in the forests (for instance spiders right near the exit, that will nom you) so trackers would do you good there. Don't send ancestors there to cap the shrine before you've found spiders - ancestors will get ambushed and killed quickly. Other than that you will really benefit from Tir having spawn forest skill and extra starting mana. Creep to around here and then move out. https://steamcommunity.com/sharedfiles/filedetails/?id=2919066985 While casting trees around where wind elemental's standing here: https://steamcommunity.com/sharedfiles/filedetails/?id=2919067118 This way most of your frontline will be safe-ish from archers, plus your wind elemental will give them extra 50% missile defence and forests will break most of the charges thrown at you. If you have Ravencloak then get him gloom spell. It lowers morale by 3 in a big radius, so with some attacks and roars from bears/Ulnar you can rout many enemies, freeing your frontline and minimising the damage. Extractor artifact from White hills will do you good here, as well as a unit that has shield, to tanks missile damage. VeilwoodThere's a free wolfmother and for the love of everything that is sacred - do not go into the witches huts on this map at all, since you'll get cursed to get +10% more dead instead of wounded forever. If you play with Hunter Falirson - things are a bit different. When you do find a girl - go visit the upper witches hut with some morale damaging units nearby. Say that you've found the girl, but don't let her go. The upper hut spawns a green ranged spider that has a hero perk (+50% invulnurability damage reduction) and deadly perk (+50% kill chance bonus). Pretty good to tame, since it is very versatile unit. This lower hut will spawn an owlbear with innate frenzy and strong perks and it is tameable, but the curse will not go away ever. A shame, really, since it's a real broken perk combo. There is also blood oak to the lower right on the map. You can give it blood and get an Ancestor's Guidance spell on this unit for a cost of -20% health and a buff of -20% chance to suffer kills: https://steamcommunity.com/sharedfiles/filedetails/?id=2918317443 Owin's fordIf you go Machnar and are very fast than on Owin's ford there are wolves on the left side of the map that have innate strong perk (+25% health and damage). They can make an amazing spirit wolf as you can guess and you can save them from stupid AI if you fly above them with any bird unit and lure them into a corner. There's also witches hut on the bottom right there that can give female unit free hex immunity perk - it can work on Ailsa, basically offsetting 3 "wrong" choices that she wouldn't like and got -1 morale for each. There is also some weird event with meeting a centaur on the mana pool also, but I don't think that it leads to anything even if you go Kanthas in this playthrough and meet centaurs. Machnar CastleI really do not remember anything important about Machnar castle though. Maybe there is something there, but it never was that important that I'd make a note of it being worth going there. Only thing I remember is that Machnar thane will be mad at you if you already have his armor on somebody and will call you a thief. This dialogue will not play if you don't have his armor. This and that you get a free axemen squad there. Eagles EyrieHonestly - do what you want, the map is easy. Just remember to not move castle guard mercs all that far and remember that cleanse works on charmed and on enemy units as well, so harpies shield can be cleansed perfectly fine. Krell's LandingAgain, pretty straightforward map. First test on if you have enough anti-air or not, since the enemy will use a lot of pegasi and Nightmares that are kinda difficult to deal with at this point. Be sure to use all-terrain units on the left side and those that break charges on the right. If you have hurlers - one on each side is pretty good. If you have magic archers - they will work better on the left side, since there are more undead there. Maps part 3 (Swamps and more) Into the Sunken LandsOn the first swamp map you can try and send some bird or fast moving mountaineer unit over the mountains on your left point of deployment. This way spiders will buy you some time while they will be fighting with the undead and transmuter there. You will benefit on going to spider area to cap shrine there and to send some fast-ish detachement to the bottom right side to capture similar shrine there. They will give you -15% kill chance both and this will alleviate deseases. Otherwise don't scout to agressively on this map - if you trigger the main event at the middle bottom part of the map then you can't cache in on the enemy innfighting and will make your life harder for no reason. GlowoodIn the southwest corner of the map there's a ruin with unique interactions. The 1st and the 3rd option will give you nothing, while the second one will increase the exploring units health by 55, which is not that important, but nice to have. The main plus of this map is a bossfight and tons of spiders - you can tame some if you are playing Hunter Falirson, since it's one of the last time you'll encounter them in any reasonable amount to do so, while the boss drops a real nice staff for your summoner. Staff gives any summon Strong perk and allows you to summon any animal - personally it's perfect for Ailsa, since elementals are the best summons ever and it buffs them. Shrouded Hills(Only if you play hunter Falirson) In the you can encounter two rabid dire bears and can tame them - they have innate frenzy and frenzy is always cool, plus they have 100 more HP than usual bears for some reason. One is located towards the middle north part of the map and you need to be fast-ish to get there, since it will die attacking lizards there if left unchecked. The other one is somewhere south-south-east from the middle of the map, in the woods. I don't think that it can die if you are not fast enough, or at least it can live for longer. As a warrior they are just inconvenient to fight and that's it, but with innate frenzy and some form of regen (from handola statue for instance) they should be nice to have in an army. Other than that there's not much to say. If you have anyone with magic damage, like spirit wolf - toss him into the shrine to the north-north-east of the middle of the map. This way enemy spirits that spawn from time to time will go and attack him and be deaded by him en mass, leaving your more squish troops free to deal with everything else. And if you didn't learn how to rotate wounded troops by that point - you'll have it rough, since you'll be fighting a lot of undead and they will always attack you, with no rest. Having stag units is surprisingly effective here, since they toss their magic javelins before enemy strikes them. And spirit wolves of course, since they still heal with each attack, even though there's technically no life to steal from undead. There and Back AgainThere is a dragon that you can get for free for this map if you give him Malric's ring or Malric's helmet. Otherwise it will cost you some resources. I've created a separate topic for all the choices and some strategy discussion there - https://steamcommunity.com/app/1025440/discussions/0/3765606580164473514/. On this map it's good to remember that Dolos' spell Shackles of Pain can be used offensively to kill enemy dragon quickly. As a thing of note - there are two islands in the bottom right corner of the map and only flying units can get there (well, if you don't use lizards that is and they are very suboptimal on this level of difficulty). Burial mound and ruins are there. And a sinlge island on the top left corner with the same rules of getting to. Burial mound and ruins as well. Dragon IslesDragon Isles is not that difficult of a map as There and Back. Keep in mind that you cannot get out from the bottom left island, so plan accordingly - use either ailsa there, that can summon elementals, use birds and maybe winged maidens can just jump away from there. Lvl 10 winged maidens are good on the right island as well, since they do exactly the amount of HP of the nasty fire breathing artillery piece Empire has there, plus (if you are Hunter Falirson and got one) huge spider with aura help from dogs can get to the wall on the central island on the first turn, so it makes it easier to get a hold there. Beware that there are dragon riders in the mainland here, so 2-3 archers there will definitely help. The left isle is kinda hard and has a lot of undead, so Ailsa would do great there, with wind elementals and chain lightning. Also you cannot escape from that island, while escaping from the right one (there's a small path to the north from it over the water) is slow and you will go through poison fog and some undead there. So plan accordingly. Also don't raid the last settlement before you explore the last area to the north on the biggest isle. Otherwise you will not kill the big bad guy - winning in this map tied to villages and not to him. A good thing here can be some lizard squads, since there is huge number of deepwater tiles. But lizards are very suboptimal on land and you will mostly fight on land in the following missions. Golden CoastYou can quickly rush to the upper right most tower and there you will have a nice event that will have these consequences: 1st - 2 mana potions 2nd - all undead units on this mission die (speeds the map up by a lot) 3rd - +20 mana for the mission 4th - nothing, can't repeat the event afterwards There are some events that spawn additional undead, so I think that if you choose 2nd option they will not spawn. If you choose 1st or 3rd they definitely will. There's also a manapool in the middle of the map. There you can get 4 squads of ancestors of you answer that you will break the enchantment. Mind that it costs 6 ordinary mana to do so. Otherwise you can just choose to destroy them and Ailsa will just delete them from this world instantly. PorikosFor the easiest time - don't bother splitting your army. You have enough riches at that point so picking everything fast is not important anymore and you have pretty generous turn limit on this map. If you choose the upper part you can get to supplies faster and if you choose the lower part you get to enemy -1 morale debuff for the map faster. Really important thing here is the camp in the upper left corner, since it gives you 2 supply. And another important thing is the tower just left to the central castle - you get the same choices as in the previous map and thus can kill all skeletons on the map instantly. You can usually just snach this tower really quick - if you attack something standing on it with an air unit you trigger the event there. The leftmost bottom tower offers your some choices - you either destroy the thing, get the thing or leave it. Taking it gives you some gold, destoying it gives the whole enemy army a debuff of -1 morale. There is a mana pool to the lower right with mana thing on top that after you destoy you are also presented with a choice of either desroying what was left, or leaving it be. If you destroy it you will get 2 liquid mana, if you leave it be nothing of particular happens. Hopefully I will add to this thread later just to remember about all this. Bay of KyriosBottom right corner has 4 centaur squads that can join you if you promise them land. Also the right part of the map has HUGE undead army, so you better have either armor piercing units or magical damage ones. Summons from wolfmother/summoning staff you got from swamps will do you good there to draw fire. Unit subjective usefulness tier-list TLDR Kinda work in progress. Male InfantryYounglings - 1/10. Upgrade to anything ASAP. Berzerkers - 5/10. Nice damage, has higland charge, high-ish morale, -30% to a chance of casualties. Suffers A LOT from counter charges and missile troops. Cleavers - 9/10. Amazing damage, magical even, frenzy, highland charge, high morale, -30% to a chance of casualties. Suffers A LOT from counter charges and missile troops, I tend not to use them at all, but objectively they are good. Werebears - 6/10. Good overall, but has basically no specialisation. Subjectively there is no point in using them anywhere instead of any other unit. Axemen - 4/10. Nice damage, missile defense, can disable "breaks charge" attribute from a unit (but not from terrain) for 1 turn. Heavy axemen - 10/10. Armour, nuff said. Durable to extreme against physical, can become immortal with right atrifacts and training. Low morale, vulnurable to charge. Thaine - 6/10. Good buffer for nearby units, can hold it's own in a fight, but not for long. 2 artifact slots are nice, but eh. Slingers - 2/10. Ranged, weak. Have point-blank, but it's also a weak version. Upgrade further. Wolf killers - 5/10. Actually decent damage point-blank, good on rough terrain. Armoured slingers - 7/10. Real decent damage, point-blank, survivability. Clumps of 3 will wreck faces. Thunderers - 8/10. 3 range, magical damage. Good, but firearchers are better. Trackers - 7/10. Decent if you can pull ambushes, nice to use in the middle of your infantry line, to make rotating safer if the line is too long to fill it completely. Work as scouting until you get air units and/or know the map. Female InfantryMaidens - 1/10. Upgrade to anything ASAP Spear maidens - 3/10. Better, but still upgrade ASAP. Shield maidens - 7/10. High morale, high-ish armour, immune to fear, -15% casualty chance, nice damage due to armour-pierce. Slow, but can march. Winged maidens - 10/10. Leap doesn't cost anything, gives charge attack, fortify after leap. High damage, high-ish morale. Not enough armour, need to use at least +1 artifact. Javelin throwers - 4/10. Decent scouts in groups of 2, decent in random places of frontline to bait enemies into it. Very low damage due to no AP. Iron javelins - 5/10. Tiny bit better, nice jump in damage due to 6 AP, but still not enough. Stag riders - 4/10. Cheap source of magical damage that quickly doesn't do anything. Stag lancers - 5/10. Cheap source of a bit more magical damage that quickly doesn't do anything. Wind riders - 7/10. Not a cheap source of nice amounts of magical damage that stays relevant. Stag chargers - 9/10. Lots of damage, versatile, tough. Heavily debuffed by forests/rivers if no boot artifact. Wolf mother - 6/10. Useful to have if you can spare mana for her summons and are willing to teach her. Otherwise eh, but has 2 artifact slots. EaglesGiant Eagles - 1/10. Upgrade to anything fast. As almost all eagles have an ability to create fog underneath, so has at least some utility before upgrading. Armoured Giant Eagles - 2/10. Tiny bit better, but still upgrade ASAP. Eagle Riders - 5/10. If only they had at least some AP... Since they cost 2 supply they are not worth it in my book. Monster Hunters - 8/10. Good utility due to net, can capture locations, 6AP, 5 speed, deal extra damage to animals and large units. A bit squish to physical, but utility is too nice not to have. Best scouts/ruin cappers. Spirit Eagles - 5/10. Actually useful protecting vulnurable units due to Life Bond skill. But squish. Firebird - 8/10. Free cleanse source, nuff said. Also decent damage and self heal every other turn, so low maintenance. Eagle Bombers - 3/10. Air artillery. If intercepted will stop on their tracks and die the next turn, since AI focuses them hard. Eagle Fire Bomber - 4/10. A bit better air artillery against multiple model units, a lot worse against low model units. Eagle Slinger Team - 1/10. No reason to use, you have better land alternatives. Can't even capture locations and cost 2 supply. Units (special notes and Shock Infantry) Special notes Winged Maidens. They have qualities of Shock unit (they can charge every 2 turns with a leap skill in a huge radius), they are somewhat physical resistant, they can break charges, have 10AP and they are fast (speed of 4). Another good thing here is that always fortify after leap, regardless if the killed an enemy or not - if they did they will take it's place and fortify there and if they didn't they will just fortify where they are standing. So most of the times they have 33% fortification resistance. Regarding armor just give them platemail artifact (with it they will have the same 3 speed as everybody else) and now they have almost the same armor value as armored trolls. Without anything buffing their physical resistance they are quite squish and archers just love killing them. The only serious catch here is that they cost 4 liquid mana to make and that's quite a lot, plus rng dependant on that armor artifact. All the alternatives for anything they can do are cheaper. Heavy Axemen with Fated buff They are the only unit in the game that can become immortal with 100% physical resist and 100% magical resist (if you give them dragonscale armor). Thus they can draw all the defence fire you want and plug every hole in your defence/offence lines. Plus the damage is still 150 for lvl 10 and that's not bad at all, while Harass enables charges and debuffs target's armor. Good all around unit. Giant Enemy Spiders (The Giant Enemy Spider remix starts playing) You can get these only if you play with Hunter Falirson by taming horse spiders and upgrading them to these ones. An amazing overall unit, that has 8 morale and 8 armor, is immune to phychology, can't be flanked, trapped or entangled, can entangle enemies from 3 tile range and has speed of 4. And that's before any training. Plus if you get a perk of beastmaster aura then around 3 tile range of Hunter Falirson they will get 20% more damage and 20% flat damage resistance. All this makes them VERY tanky and with damage of 20 with 5 attacks they can dish good damage as well. I can only wish they had fear aura or their entangling attack delt damage, but alas. Still a very good frontline unit, I'm very fond of them myself. Spirit wolf with frenzy Basically spirit wolves are pretty durable most of the times due to their 50% physical resist from being a spirit, but magical damage makes them suffer. With training though and some artifacts to enchance magical defence they can get to 45% magical defence and that's at least something. Also you can give them dragonscale armor and make them even more tanky in physical. The point here is frenzy. See, spirit wolves have life leech on their attacks, so the more damage they deal the more they heal and frenzy procs with even retaliatory damage. With some luck and planned movement from target to target they can get to 500 damage per attack and thus will heal 250 from it, completely healing them. Shock-infantry Don't get me wrong they are very good in terms of damage, VERY good at every stage of the game, since you can double tap (open up with harass unit and then charge with shock melee) and thus even charge breaking units will be chargeable. They also have a lot of health, which is a plus. The biggest and weakest thing about them is that your main line of upgrades (berzerk tree) has no armor, no missile protection, no armor pierce and no charge breaking. All this in mind they are glasscannons. Sure glass is study and sometimes they can survive a turn of attack, but even though they will need to retreat and rest. Thus your huge damage numbers will be able to contribute to the fight every 3rd turn and that's only if they can reach the already moved battleline from where they retreated. If the can't - it's every 4th turn. You can still use some strategy around using a lot of them and thus you will rarely need to retreat simply because of morale damage to the enemy (enemy morale gets damaged each time you inflict casualties, in a 3 tile radius from the unit you hit). It's a rather complex strategy to pull off though, since many tiles break charge and you will not have that many harasser melee to open the possibilities every time you need them. I must note that they are quite useful in the beginning of the game where they are basically your only units that can move faster in woods and rough terrain and that they never have casualties if they are not debuffed, but after Krell's Landing they loose some of this advantage, since you just train everybody to have All-Terrain. Werebears are decent but for some reason clunky. They have charge, they have armor of 6 and morale of 7, they have fear aura, their attacks even make it easier to kill an enemy since they inflict -2 armor and they recover health killing living units. They just don't attack all that good in ordinary situation and to get their true potential out of them you need to shove them deep into the enemy lines. 10% more damage and damage protection are amazing if you could get at least 3 units surrounding you. Problem here is if there are more than 3 melee units surrounding you - you are screwed, since there are a lot more than 3 NON-melee units also surrounding you. Plus their 6 armor and +60% ideal damage reduction (if they are completely surrounded) will net you 76% physical damage reduction or so. And that is way too low for surviving the next turn. Add a platemail, to get to 10 armor and you'll have 88% (while also being very slow with speed of 2). That seems more possible to survive but add some artirelly pieces pummeling you, some magic damage and yeah. They are just clunky to use. What about melee trolls? They too have shock qualities with their breakthrough ability. But they too suffer from not enough defence from missiles and they are very weak to magic damage (4 morale only). Still they have somewhat decent physical defence (6 and 10 for chargers and armored variants respectively) and you can always give them +20% magical defence from training, so they are not that bad. They are also your only source of siege damage (ignore fortification resistance) besides some air units. The not so great thing about trolls is that they cost 2 supply and you will always have more mileage from two units costing 1 supply than trolls. Plus they still have 30% chance of suffering casualties and thus halving their damage potential for the battle. Another Shock frontline unit is a bear. You can get them as Hunter Falirson very frequently. They have decent armor of 8 initially but they are lacking in morale terms and thus magic hurts them. Still they are a 1 unit model and thus they will not suffer "combat fatigue" where they deal less and less damage in response of being attacked. Yes they can't get the damage numbers that berzerkers can get and they will never attack with magic, but owlbears beak has 12AP and thus it always does it's damage and they are just being hurt way less. Units (Harassers, Charge Breaking Infantry, Cavalry) Harasser Thanes, trackers, axemen. Trackers are not that great for that role but they can harass, so there's that, I'll write about them later. Thanes are there to mainly spread some buffs. They have innate aura of +10% damage and +1 morale that will stack with a banner that gives the same buffs. By themselves they are not that great tanks, since only 4 armor. Yeah they count as heroes and have a shield so that's another 50% damage resist as a hero and 50% missile resist. The thing is that all these resists are not additive and their 28% physical resist (4 armor gives that) still dictates most of the damage they will suffer. Say there is 100 damage incoming and it's physical melee. The formula for what their resist in this situation will be something like 1-((1-28%)*(1-50%))=64% and so you will recieve 36 damage. Now heavy axemen have 11 armor and that's 77% physical resistance, so they will be better as physical fronline from the start. Thus thanes are not all that fit for the frontline, but can buff a lot your archers or artillery. One thing to note here is that though they are worse for the frontline they can be better than heavy axemen in one specific situation - when enemy transmuter casts transmute armor. Axemen. They are your dedicated fronline against physical damage centered enemy and they play this role nicely. Plus heavy version have march, allowing them to move faster at a cost of 1 morale per cast. They also have nice damage, roughly on par of half the damage of Berzerker line if they were not charging. The big problem with these guys is low morale - 5 morale for the frontline unit is very low and they will be decimated in the swamps. You can bump their magical defence with training (20% magical resist) and purple artifact of 25% magical immunity, but for an artifact they compete with one that stops charges. Yes, despite their armor they will still need a way to break charge or they will suffer a lot. Charge-Breaking-Infantry Maidens. They are decent. Winged maidens are real good and I've written at the start about them and the other unit of this line is Shield Maidens. They are truly frontline unit, even more so than heavy axemen - 7 armor (50% physical resistance), 11 morale (79% magic resistance), 50% missile resistance, aura of 2 armor to friendlies adjacent to them, charge breaking, pretty good 8AP. They are just really slow with their 2 starting speed. Even though they also have march skill as heavy axemen - they just really feel slow and you will start to feel that in the swamps first and in the empire vast maps second. They can be salvaged with some speed artifact, but honestly armor is a bit too low for comfort. You honestly want all your frontline have at the very least 57% physical resist. Maybe if you had more than one, but then again - they don't do that much damage themselves (15*5 base) and you are just prolonging the battle basically allowing the enemy to rotate and loosing time you could've used getting them ruins and raiding settlements. Skirmish infantry Javelin throwers, They are... there. They are fun on lower difficulties and do pretty well as scouts and flank units, but on Legendary you really need to at least use close to optimal unit configuration and they are really not optimal. They can't really attack ranged units since they will be decimated in return, they can't hold their own against most things with their 6 armor and 6 morale, they can't proc retreat in a lot of situations due to the same mechanics trackers can't. You can have fun with Iron Javelins though if you give them fated perk. They just never die, they rarely get hit, and are perfect for taking a hit or two instead of your frontline. But yeah, they are not that great. Skirmish Cavalry Stag riders, hit and run skirmish unit. They can be good at the very beginning, since you lack magical damage at that time, but then again - you can always summon something and get firearchers from the camps. They also have innate malus to their movement and damage in rough terrain that I've spoken about already. Malus will not go away with training - you can get rid of it only by using terrain specific artifacts, but that means they will not get their damage enchanced by some rings or bracelets. And honestly their damage is not that big and you will probably feel like they are not that snipe-artillery that you wanted them to be, but snipe-piston-toy. Everything important has a lot of morale and to deal with artillery/ground heroes you can use winged maidens leap and firearchers or lightning strikes from storm elementals anyways. I don't like them overall. Fire archers, Ailsa and her summons can cover all your needs for magic damage. Shock-cavalry Stag Chargers. They are real good. Most of the guides state that they are awful and they are indeed a bit worse in swamps (that are the most difficult part of the game) since the malus they have as cavalry is real bad (-25% damage in forest and water), but they attack with both magic and physical, have armor of 8 (57% physical resist) and morale of 7 (50% magic resist), they have a charge attack and they break charges by themselves. The movement malus is not that important since all-terrain training is helping with that and they become the same as any other unit. With some training and artifacts they may become nice frontline unit that will be faster than your other units in terms of denying enemy their retreat. Plus the fact that they are mounted means that they have innate +25% missile reduction and if you play Hunter - you can even add 20% to that with training. Keep in mind though that their charge damage is there only when thy are able to charge and you need to choose it everytime - by default right-click they will only throw their spears, even if charge is avaliable and would do more damage. And the amount of charge damage is about the same as your berzerkers do when they can't charge. Give them "can charge into any terrain boots" artifact and they will wreck things hard. So most of the time you will get a unit with 57% phys resist, 70% magic resist (hex training) and 45% missile resist (hunter Falirson training), with break charge, high speed and both charge and magical damage. What's not to love? Just give them some armour artifacts and you are set. Though their cost in resources is quite high, I'll give them that, but they don't cost any liquid mana. I'll get them over berzerkers (that are killed by everything but magic) all day every day - never liked glasscannons in games. Imperial lancers/knights. They are a really damaging block IF they can pull a charge. Comparing to Chargers they have a bit more defence (1 more armor and morale), a bit more damage and more health, but main difference is that instead of magic skirmish option they have only physical damage and a Breakthrough skill. Again Breakthrough is not as useful as you might think - we are speaking Legendary difficulty here and enemies will have much more charge breaking units than on other difficulties, (I remember in Into the Trollwoods they have more than 70% of their army as spear maidens, thus making my berzerkers completely useless for instance), plus a lot of terrain before Empire lands just breaks charge naturally. I'm not that big of a fan of them. For me the best use for your empire volunteers is to make them fire archers. Units (Scouts, Ranged, Air) Scouting Mainly scouting is done with units that have some sort of detection or opening a lot of map in a single turn. Thus for this category we have trackers (have a skill that can detect hidden units in their search radious) and stag riders (have a skill that disperses fog of war in 6 tile radious, but don't reveal hidden units) mainly due to the first part of the needed function. The bad part about using them is that they are very squishy and stag riders have an innate movement and damage penalty on rough terrain (for example on water, swamps, forests). Trackers are decent-ish, since they can go into mountains and that they have "retreat 2" so they can retreat in 66% chances. The only problem with retreat is that you need to have a speed value equal or higher than you attacker to even have a chance of it activating. And what do you usually get ambushed by? Correct, by something that will have more speed than you, like lizards, spiders or wolves. Sure, by some chance you may run away from same trackers in the woods or from bears, but that happens rather rarely - game has x-com-ish rng at times and retreat of 66% means you will be dead, basically. Enemies retreat chance of 33% works much more frequent than yours 66% even if statistically it's impossible. What about ground scout units contribution to fighting? That depends. Trackers have an amazing +200% ambush damage and they can hide on all terrain whatsoever, so before they die the same turn they ambushed somebody they will definitely do some damage. And they will die if they are noticed most of the times. One way to offset it is to use more trackers, since then it will be a constant ambush fest, right untill enemy fields air units that will just cruise above all your hidden units to uncover them. I swear enemy AI knows where your units are hiiden. Scouts that can open a lot of map in a single turn are partially stag riders (partially since they are so squishy that you really don't want to let them scout) all your air units and summons and, weirdly enough, spirit wolves since they can move over mountains and can cap shrines very good (shrines boost magic damage and more attack means more life leeched). Some air units like Monster Hunters can capture locations, so they make your need of ground scouts dissapear and if you don't like spirit wolves I advise you to get a couple of them. Ranged Slingers. The defining thing here is Point Plank that they have - extra damage to the enemy that's on the adjecent tile or flying above. If they can pull point blank Thunderers will outdamage even Fire archers here. Knowing this mechanic it's an easy two step job sometimes - move your slingers close enough, fire point blank, kill the enemy with melee and now you have melee protecting your slingers and slingers protecting your melee. Armored slingers can pull it more reliably and can protect from endless amounts of attacks per turn (a clump of 3 armored slingers is a very strong formation that deals tons of damage to anything), while thunderers provide you with magical damage and a range of 3. I prefer magical mostly, since it's easy to remember that all your melee is physical and all your ranged is magical. Imperial archers. Fire archers are your actual standart and what you should upgrade most if not all volunteers at least until you have 6 of them. Range of 3, tons of damage, not much else to say. Your usual candidate for magic damage increasing artifacts and blood oaks. Long-ranged Hurlers, your only artillery. Well, they are good at what they do, they will very rarely be attacked, so you are very free to ignore their resists and you don't have an alternative anyways. They are also very good at spreading the debuffs if you equip them with artifacts. Like harass artifact or curse/entangle ones - all can be applied from enourmous range and it makes them useful even if they can't utilize their main shtick of AoE attacking. Air If you want to go air then Firebirds are nice to have, due to their durability (full heal every 3 turns) and free cleanse skill, that can be important to counter petrify in the swamps, harpies shield or death mark from transmuters. You should probably have 1 of these. They cannot capture anything though, so for these purposes you better use someone like Monster Hunters - a really flexible air unit, that will cover your units from enemy air, entangle those who try to ran, cap some points of interest on the map if you deem it necessary, and they even have a charge attack for giggles. Other than that - Eagle Riders and Eagle Slinger Team you don't really need, since most of these roles function would be covered by your other ground troops. Eagle Fire Bomber is basically a troll hurler, but in the air. Not much more to say. Credits/Thanks Mindeveler found out that on Veilwood you can use Hex Immunity amulet to block the witches curse specifically for the unit that has it equipped. Amazing find! If you want to you can use a multiplication glitch with Hunter Falirson to multiply this amulet and put it on everyone, and then just tame the witch in animal form free of charge. Or if you don't want to use glitches you'll at least be able to shield the most important unit you have with that, but the wearer must never take it off till the rest of campaign for it to work. Haisen and Mindeveler found out that you can get a mass permanent +1 morale for your whole army in Iseal if you repeatedly refuse raiding settlements there. This is especially huge, since it's free +7 magical defence and swamp maps where it's the dominant type of damage going your way real soon after. 引用自 Haisen:I have just discovered that on the Iseal map, if you choose not to loot all settlements and instead occupies the castle directly, all troops except Tir and Ailsa receive a permanent +1 morale trait. I have not tested whether selecting the revenge option in the initial dialogue but ultimately refraining from looting all settlements would still produce the same result. 引用自 Mindeveler:- saying you will raid it but then backing out in the end - no +1 morale for everyone - repeatedly saying you won't raid it - +1 morale for everyone except for trolls (-1 for them), and it seem to be working if even if you actually raid it to your heart's content lol. End thoughts This is mostly to just not search each and every time for this info whenever I want to replay this game, but it can be of use for anyone playing it right now. Hopefully it will help somebody or just let them have more fun. Cheers!
关于单位的一些特定地图建议和想法(入侵/传奇难度)

2026-02-18 01:00:09
转载

导读
这是一篇针对某游戏传奇/入侵难度的地图攻略与单位评测帖,涵盖多阶段地图的玩法策略,如资源获取、路线规划、事件选择等,还对各类型单位的实用性、培养方向做了主观评级与细节分析,助力玩家优化阵容与战术。

评论
共0条评论

战争 矿工,意义不明的步兵代表
矿工属于那种典型的本身拉胯但还不至于拉垮到那么严重的单位,全靠低价格吊着,血量220达到了不会被小型远程攻击秒杀的阈值,可以扛住投石兵投矛弓箭手之类的远程攻击一…
2026-05-06 12:350赞 · 0评论
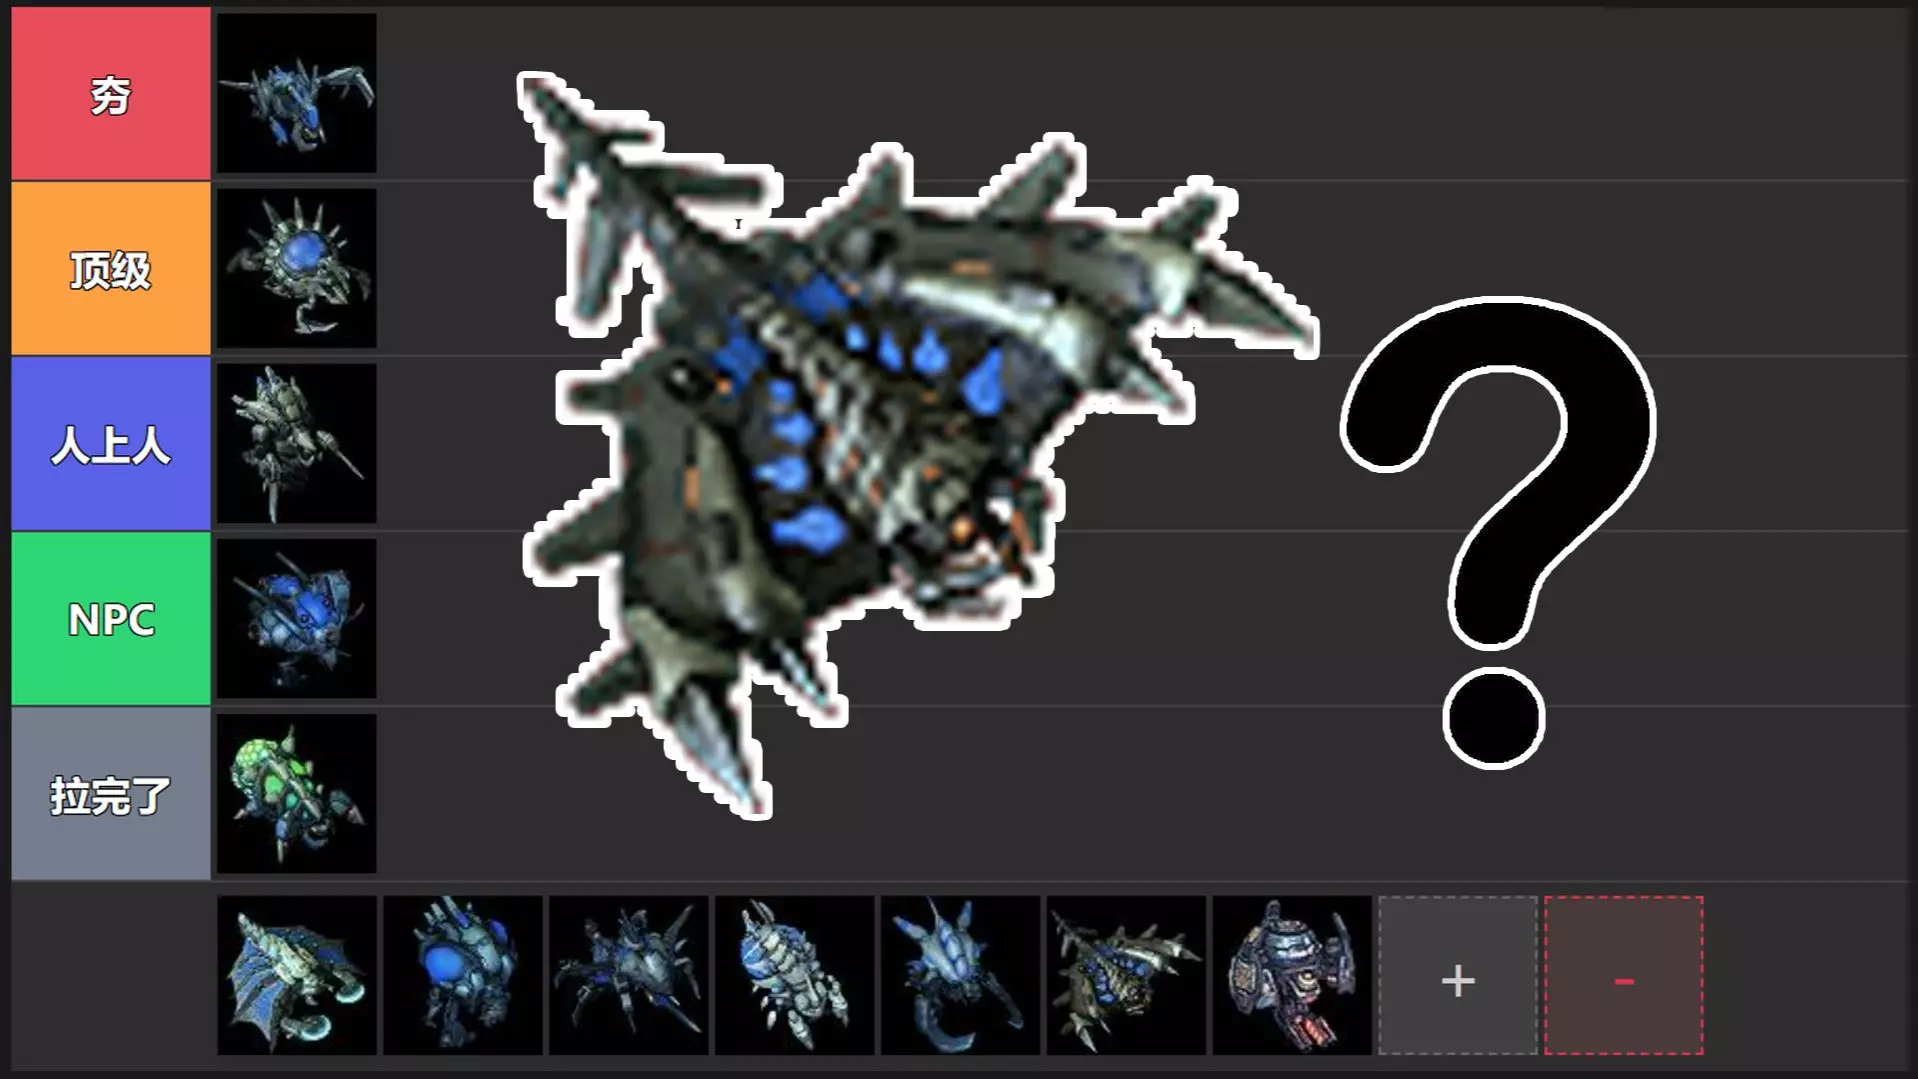
游戏 斯台特曼全单位从夯到拉(中肯版)
工具来自BV1ABH1z6E3t 个人感觉操作感染带来的收益不如同等操作下的地刺 当然选择独盖就不用纠结单位的梯度了
2026-05-13 04:110赞 · 0评论
基本原则(基础部分 2/3)
“基础”系列的第二篇指南,面向进阶新手至中级玩家,介绍战术与战略背后的基本概念。 前言与致谢 本系列指南的存在,是因为据我所知,自Don的文章之后,《轴心国与同…
2026-03-18 13:000赞 · 0评论

实验单位 它们真的是废物吗?
-
2026-01-29 15:380赞 · 0评论
《兽王争霸》S29W19传奇怎么过?猪蛙枭三族阵容配置推荐,1790+高分轻松拿
《兽王争霸》S29W19传奇难度攻略!本期使用猪、蛙、枭三族阵容,核心英雄配置为:7星猪50级,7星蛙50级,7星枭30级。这套3族1水系阵容轻松打出1790+…
2026-06-15 15:530赞 · 0评论

如何使用反坦克步枪击杀坦克:操作指南
如何使用反坦克步枪成功对抗坦克。 包含针对四号坦克、三号坦克、T-34以及T-70的战术技巧和所有已知弱点展示。 策略 策略: 你是一名猎人、狙击手和刺客,携带…
2026-04-02 22:000赞 · 0评论
常见问题与战术
一份基础游戏指南 提示与战术 游戏非常肝。你会花一半时间重玩之前的关卡,以获取额外金币来进一步升级你的单位和卡牌。特此提醒:游戏随机性很强。即使你的队伍已升至满…
2026-03-21 04:000赞 · 0评论
攻略 《帝国时代2决定版》刘备战役 传奇难度 攻略合集(全支线)
这里是帝国时代2 刘备战役的攻略合集 (新手也能过的攻略)
2025-09-17 19:190赞 · 0评论
《阴阳师》上古卷轴5 支线-神光水晶(下)-传奇难度【轮回整合】攻略解析
2026-06-12 08:380赞 · 0评论
通往维多利亚十字勋章之路!
大家好!这是一份全面的视频指南,包含一些战术、小队管理以及其他实用知识,能帮助你在不怎么花费成本的情况下,挺过从最基础到最困难的各种事件,直至获得维多利亚十字勋…
2026-03-19 07:000赞 · 0评论
暂无更多
最新更新
- 如何不浪费Steam点数 — 如何不浪费Steam点数 步骤1:不要给本指南奖励 就是不要给本指南奖励,我完全不配获得你辛苦赚来的点数。 谢谢
- 猛攻模式技巧与窍门 - 视频指南 — 以下是我为《猛攻》战役提供的一些技巧和窍门。我会谈到实用技能、防御火力、资源与占领的权衡,甚至分享一个补给技巧。 猛攻 技巧与窍门
- 关于单位的一些特定地图建议和想法(入侵/传奇难度) — Just a collection of strategies and things to keep in mind on different maps of …
- FG2其他派系单位指南 — 这是关于《FG2》中未包含在其他单位评测中的任何单位的单位指南。 蛮族派系指南在此。 帝国派系指南在此。 蜥蜴人派系指南在此。 如果发现任何错误,请在此主题下报…
- 图形设置 - 快速指南 — 一份无需过多牺牲画质即可提升《幻想将军2》帧率的简要指南。 无需过多考虑 以下是无需过多考虑即可降低以提升帧率的设置。
- FG2英雄单位评测 — 本指南介绍了《幻想将军2》中英雄单位的相关信息,包括他们的技能树以及在即将推出的训练场中可获得的晋升。由于部分内容仍处于测试版的开发阶段,我会在该补丁正式发布后…
- 图形选项基础指南 — 如果你想在《幻想将军2》中获得更高帧率,同时不过多牺牲画面质量,这里有一份快速指南。 无需动脑的设置 以下是一些无需动脑就能降低的设置,以获得更好的性能。
- 如何在《铁娘子》中使用存档读档大法 — 刷档或备份你的钢铁处女存档其实相当简单。 查找存档文件 在Windows系统中,《幻想将军2》的存档文件位于以下目录: <用户> 文档 我的游戏 幻想将军2 存…
- FG2英制单位指南 — FG2帝国派系单位指南文章 蛮族派系指南见此。 蜥蜴人派系指南见此。 其他小派系指南见此。 如发现任何错误,请在此主题下报告。 (最后更新于2021年2月26日…
- 入侵战役 - 无剧透指南(涵盖基础知识及最高难度通关方法) — In this guide I discuss which units to include into your army, how to build your…