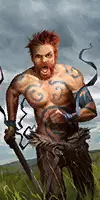
Fantasy General II


《幻想将军2》社区技巧与提示收集 简介 各位幻想将军们! 这是官方论坛社区努力的成果。目前仍在完善中,呈现方式将会改进! 战斗 【持盾单位】擅长承受弓箭手的防御火力,因为它们拥有50%的防御力。 【斧兵】的骚扰能力可以打破冲锋攻击的防御。因此,它们与具备冲锋能力的单位搭配效果很好! 【女巫单位】(由标枪散兵升级而来)初始拥有一项单位召唤能力,即召唤狼。但每次她魅惑一个单位时,她都会学会如何召唤该单位,这样你就能快速获得自己的吸血蝙蝠、熊、蜘蛛以及其他各种强大的怪物! 当近战单位击败另一个单位(且对方单位撤退时),它会移动到被击败单位的格子。这在你作为进攻方时可能会带来麻烦,但也能创造战略机会。如果你对此感到困扰,可以尝试用弓箭手、炮兵巨魔或散兵击杀敌方单位——这样你的单位就不会移动了。 你不必在移动时进行攻击。如果你需要多个单位来消灭单个敌人,可以将多个单位移动到防御单位的攻击范围内,这样所有攻击都会获得侧翼加成,从而减少你的伤亡。(感谢sandman25dcsss) 基本要点 没有法力值将无法使用魔法。在前7-8张地图中,法力来源十分稀缺,之后也只能获得少量恢复。因此,魔法使用者的第一个升级 perk 通常应选择增加6点法力值的那个。 从游戏开始的第一回合起,你就能查看完整的升级树。不过你会发现,高阶单位需要三种升级资源:护甲、液态法力(与地图中的法力不同)和武器。这些资源会随着游戏进程,通过任务奖励或地图地点的随机掉落获得。 开发者表示(经轻微编辑):“游戏前期的节奏故意设计得较慢,主要基于以下三个原因。”从剧情角度来说,高地地区金属资源匮乏,而当你入侵富饶的边境地区时,你会切实感受到那里拥有你所缺少的丰富资源。从玩法角度,这样设计能让你逐步了解不同单位,避免一次性面对过多单位而感到无所适从。从进度角度,你将从一支机动性强但防御较弱的部队起步,逐步发展为拥有更多坦克单位的强大力量。 被击败单位3格范围内的所有单位都能获得经验值。请据此部署你的单位。 觉得游戏太简单或太难?无需重新开始战役,你可以在关卡之间更改战役难度。进入选项菜单即可操作。

故障排除指南 本指南将帮助您解决最常见的问题。 1. 如何验证游戏文件是否已正确安装? - 验证游戏文件的完整性 2. 任何后台应用程序都可能对您的游戏或Steam本身产生负面影响。 - 可能干扰Steam的程序 - 干扰Steam的间谍软件、恶意软件、广告软件或病毒 3. 建议定期检查驱动程序更新。 - 更新驱动程序 4. 如果游戏卡住或地图无法加载完成,我们需要output_log.txt文件。 - 如果游戏崩溃,我们需要最新的崩溃报告文件夹。 - 请参考【问题报告/支持】讨论区,了解如何获取所需的信息和文件。


以下是我为《猛攻》战役提供的一些技巧和窍门。我会谈到实用技能、防御火力、资源与占领的权衡,甚至分享一个补给技巧。 猛攻 技巧与窍门
https://www.youtube.com/playlist?list=PLwba43MpMuUQwFYbZrq1BxiGRKA_rvfF-


刷档或备份你的钢铁处女存档其实相当简单。 查找存档文件 在Windows系统中,《幻想将军2》的存档文件位于以下目录: <用户> 文档 我的游戏 幻想将军2 存档 如果你有进行中的游戏,会看到按标题分组的存档文件集合。每个独立存档分为3到4个同名但扩展名不同的文件: *.fg2meta - 描述存档创建时间、启用的DLC、是否启用钢铁处女模式等数据。该文件为JSON格式,可直接阅读。 *.fg2restart - 仅在你处于战役地图中的特定关卡时存在。它保存了开始关卡前的*.fg2save文件副本。fg2save - 这是主要的存档文件。它仅部分内容可被人类读取。 *.jpg - 这是在加载游戏菜单中显示的缩略图。 在《Iron Maiden》中,存档会有自动生成的名称,但存档格式与其他情况相同。你通常可以通过修改日期来找到你想要备份/恢复的《Iron Maiden》存档。 备份与存档滥用 在《Iron Maiden》中进行存档滥用非常简单,只需备份你的存档文件,并在你想要重新加载时恢复它们。你甚至不需要退出游戏! 《Iron Maiden》会在你的回合开始时以及你退出游戏(返回主菜单或桌面)时自动保存游戏。在你回合中的行动之间不会进行保存。创建还原点只需将你想要备份的3或4个存档文件复制到另一个文件夹。 当你想重新加载存档时: 1. 退出到主菜单。 2. 将备份文件复制到存档文件夹,覆盖那里的文件。 3. 加载游戏。 返回战役地图 如果你深入地图后想要重新开始,但没有该场景开始时的存档备份,可以通过以下步骤轻松返回战役地图: 1. 退出到主菜单。 2. 【推荐】将存档文件备份到其他位置。 3. 删除【.fg2save】文件。 4. 将【.fg2restart】文件重命名为【.fg2save】扩展名。 5. 加载游戏。

这是一份《幻想将军2》的简明指南,将为你提供通关战役和普通战斗的实用技巧。无论是新手还是希望提升成绩的玩家都适用。 指南内容 《幻想将军2》是一款策略游戏,每一个决定都可能至关重要。要顺利通过关卡,需要记住几条简单但至关重要的规则。 侦查是胜利的基础 信息就是力量。探索地图,研究敌人位置,寻找替代路线。侦查可以让你避开陷阱并提前规划行动。 不要害怕撤退 不要让部队白白送死。每个部队的损失(除“步兵”和召唤单位外)都会导致士气和资源的损失。最好让部队撤退治疗,而不是永久失去他们。 魔法值与技能 留意魔法值——它是有限的,且没有来源的话很难恢复。合理运用技能:不要随意浪费,要留到关键时刻使用。 战略位置 塔楼、定居点、地图上的关键地点能提供重要优势——控制、资源、防御。如果有机会,就占领它们,这对战斗有帮助。 探索地图 一定要查看废墟、营地和其他可疑地点。在那里可以找到 artifacts、黄金、资源,甚至盟友。魔法与士气 魔法对士气低落的部队造成的伤害更大。保持军队的战斗意志——胜利、英雄和技能将有助于维持士气。 军队平衡 不要单一化——仅由弓箭手或仅由重步兵组成的军队是低效的。每种兵种都有其作用。多样性是灵活性和力量的保证。 结语 以上就是简短的建议列表。希望这些能帮助您更好地熟悉游戏。祝您在战场上取得胜利,指挥官!
本指南将帮助你解决最常见的问题。 故障排除 如何验证游戏文件是否正确安装? 验证游戏文件完整性 电脑上运行的应用程序可能会对Steam游戏或Steam客户端的性能产生负面影响。 可能干扰Steam的程序 间谍软件、恶意软件、广告软件或病毒对Steam的干扰 建议定期检查驱动程序更新。 更新驱动程序 如果游戏卡住或地图无法加载完成,我们需要output_log.txt文件。 如果游戏崩溃,我们需要最新的崩溃报告文件夹。 请查看【问题反馈/支持】讨论区,了解如何获取所需的信息和文件。
这是一份《幻想将军2》的简明指南,能为你提供通关战役和单人战斗的实用建议。无论你是新手,还是想提升游戏成绩的玩家,都能从中获益。祝你阅读愉快! 指南内容 《幻想将军2》战役实用建议 《幻想将军2》是一款策略游戏,每一个决定都可能关乎成败。要想成功通关地图,记住几条简单但至关重要的规则非常重要。 侦查是胜利的基础 信息就是力量。探索地图,研究敌人,寻找备选路线。侦查能让你提前规划行动,避开陷阱。 不要战斗到最后一刻 不要毫无必要地牺牲部队。每个阵亡的单位(尤其是非召唤单位)都意味着实力和资源的损失。最好将士兵撤到后方治疗,而不是彻底失去他们。 魔法值与技能 留意魔法值水平——它是有限的,且恢复困难。明智地使用技能:不要在无关紧要的时刻浪费,要为关键战斗积攒。 战略位置 地图上的塔楼、定居点和其他重要地点能提供优势——控制领土、黄金、增强防御。尽可能夺取它们,这会让战斗变得更轻松。探索 务必仔细搜查废墟、营地及其他可疑地点。在这些地方可以找到 artifacts(神器)、黄金、资源,甚至盟友。 魔法与士气 魔法对士气低落的士兵影响极大。密切关注军队的精神状态——如果士气下降,部队就会变得脆弱。通过胜利、英雄和技能来维持部队的战斗意志。 军队平衡 不要让军队只由弓箭手或仅由重步兵组成。每种兵种都很重要。缺乏多样性会造成弱点——容易受到骑兵、魔法或攻城武器的攻击。 总结 以上就是这份简短的建议列表。希望这些建议能帮助你更好地熟悉游戏。祝各位指挥官在战场上好运!

Just a collection of strategies and things to keep in mind on different maps of Invasion campaign. Not all of them, since some maps are VERY straightforward. Plus a personal subjective view on units. All of this over a course of Legendary difficulty playthroughs - I never tried this game on easier difficulties, so most of this is probably not needed. View on units is rather spoiler free and may be useful outside the guide purpose, so if you stumbled on this guide randomly and want only that - just skip first 3 big parts, where I talk about missions themselves. Maps part 1 (till Clanmeet) First mapDon't bother with the regen altar to the left. It will slow you down, trying to get it and you can't afford slowing down on maps until clansmeet basically. I like sending falirson and one youngling to the right of the first village, to get to the third one and to kill wolves in the process, while other youngling and maidens go upper-left to the second village. Usually sets me up with 1 turn left after all the looting and you need all the money you can get. A Dark VisitorIf you help trolls they will remember it way later in the game and if you help humans there nothing of note to happen. A bloodoak in the upper left part of the map will give permanent brave if you behave bravely (choose first answer) - other choices will give you some buff for this map only which is useless since you'll probably have 2-3 turns of it left at that point, or will make you disordered for this map only which can just be rested out. Also always search the camp to get random loot - game tries to guilt you that you shall not loot, but there is no consequence. HomecomingSplit your army - send younglings and the birds to the woods to carefully pick them clean and your hero and maidens to the right to capture the village there. Be mindful that this village will take you some time which you can somewhat gain back if you capture speed altar in the middle of the map. If you are feeling brave then go and fight trolls, but on legendary with onle a few squads there it's rather risky. Better capture mana well and a cave beneath it and then go right from there to the shrine. Right down to the shrine there is a choice of going into mountain area or goind into the woods around it - the latter is better, since you can this way get to the ruins on the bottom right corner of the map a lot sooner. In the camp you will get brave wolf pack on your side - don't loose them, since they have innate +1 morale due to the buff and thus they can be a better melee than other wolf squads that you can get. After you are done with the village to the upper right go down with that squad. By that time you should already be around witches hut and the river crossing - don't activate witches hut yet, since that will spawn a lot of enemies. Instead go to the right and employ hammer and anvil tactic on the empire/barbarians army in the mountain area. After that you should have hopefully just enough time to deal with the trolls on the left. Of note there is a bloodoak there that gives unique fated buff. Give it to your younglings - you can make a "super" thane of them later so that -1 model debuff is meaningless, or you can make heavy axemen that can become immortal (100% physical and magical resist at the same time). A good thing for this map is Berzerker squad, since they are rather cheap to get, can charge into woods and rough terrain while Younglings cannot. Addition Use your bird! It needs to go to the left too and a bit down to where the troll hurler is standing. You can also fly above the bear in the center of the map to get it's attention too, but that's probably always gonna happen. Attack that troll with bird and then move slowly down, just out of reach of movement from troll. The trolls that saw the bird - will follow it. Guide these trolls to the lower left part of the map for now. Keep in mind that you better fly over all caves on the way there, since there are some troll pups that hide in them and they will not follow the bird until they are revealed. And whenever the coast is clear - scoop all the caves that are now unguarded. After you cleaned everything but the trolls - visit the witch. If your horde is near the bottom center of the map, then they will fight the enemy. Ailsa should get "Summon Ancestors" ASAP. Under AttackThis is a finicky mission with a lot of luck involved. I personally give the enemy upper manapool instantly and create a roadblock just north of my castle, where there is a chokepoint. Leave the central village visually undefended, hide some squads in the woods around it - enemy from the north will cramp themselves into the canyon trying to get to the village and thus you can easily hold them there, while dealing with other enemies. To the north of the northern village there are dragon bones that give you free dragonslayer perk. A good buff to have on any of your heroes but not on your ordinary units, since you can train them with this buff later. Also the enemy squad attacking there is very small - usually 3-4 squads, so you can ambush them from the woods and get some slingers in the tower there to pummel them. A good thing here is have an upgraded maidens to forify in the village. If you plan to go Iseal and burn it down - just raid villages on Clansmeet and on Under Attack! But only raid with Falirson (or mercs) if you don't want multiple squads to have kinslayer - first time you raid friendly village both Falirson and the raiding squad will get kinslayer. Into the TrollwoodsThis is quite difficult map on higher difficulties if you try and just go down from the start. What you should do is actually go to the left trying not to alarm the enemy - this way you will have much more favourable position and will not fight in water. The town on the leftmost part of the map is undefended so you better take it, hire some mercs and flank the enemy army on the right. This way it will go much smoother for you. Also on this map if you agree with Ailsa all the time it will give you mana that you can spend on ancestors and it will again help tremendously since they armor your frontline. Morale penalty is not that big of a deal here and it's only for this map anyways. After you got Tir sent her straight down - there's mana pool there with not that much of protection. Also summon ancestors with Ailsa and very carefully go to the bottom of the map around mana well and creep to the right - there's hidden ruin there that you will never get otherwise in time. There are also some ruins in the mountains to the north of the big open area - spirits can also cap them. A good thing here is berzerker squad again for the same reasoning as in Homecoming. Battle for HeartspireJust rush down from the start and send spirit to the left - there's mana pool there. Don't go that far with the spirit there, since there's a bear that will nom your spirit, take your lunch money and then cap your mana pool. There is almost no way to tame that bear if you are Hunter Falirson and didn't get fear mask from RNGsus, since you have only one source of roar and bear has 4 morale. If he had 3 you'd be set, but no. Also you can farm skeletons here until transmuter runs out of mana. It's a slow farm, but it's there. Surround him but leave a single tile free - he will summon there each turn if you can manage to kill skeletons in one turn. It's basically a level or two gain. Old roads or White hillsOld road offers you nothing of note while White hills give you an opportunity to tame some spiders and bears (if you play as Hunter) and have a set Extractor artifact (+1 mana per killed squad). Also White Hills have a bloodoak that gives innate frenzy - I usually give it to wolves, since frenzied spirit wolf is pretty good, but hurlers and heroes can do good with it as well. Also another plus for White hills is transmuter there - you can farm his summons just as in Battle for Heartspire if you want. ClansmeetSpawning Ailsa on the rightmost deployment zone can be beneficial. Summon wind elementals there en mass and send them up - there's mainly archers there and elementals close to each other mean huge missile resist, plus elemental aoe decimates archers quite good. Move a summon or a merc unit into the lake near the center of the map on Clansmeet. You will be presented with an option to sacrifice this squad to summon a free storm elemental for this map and he's quite helpful there. Maps part 2 (Clanmeet - Krell's Landing) After ClansmeetYou will be presented with a choice on what to do with thanes and afterwards with the buff you want to have till the end of Krell's Landing. For thanes you can get them in your army if Falirson has kinslayer (will give -1 morale to the whole army, till the end of Malric's Vale/The Gap map choice) and they give you +2 supplies to accomodate for themselves. Note that you can kick them and use that 2 supplies as you please - that will give you about 160 gold for firing each, depending on their level. Other choices give you 500 gold if ransom or 200 gold, 4 weapons and 2 armor if kill. About the buff - the best one in my opinion is gold, but armor pierce could be cool as well. https://steamcommunity.com/sharedfiles/filedetails/?id=2917620046 Edit: OK, I've changed my mind. The best one is armor pierce - it affects even magical attacks and that is very strong. Gold is good, but you will soon-ish find out that gold is plentiful. There is some condition on getting +1 permanent morale on every female unit you have on the next map choice. I encountered it on Malric's Vale, but I think that it should work on The Gap as well and The Gap doesn't give you anything like that. You need to have Ravencloak in your army and have at least 100 gold in the end of the map. It basically nullifies the morale penalty for Ailsa that she gets if you allow Ravencloak guy in. Honestly seems like The Gap and Old Road is objectively worse choice than the other. White hills with frenzy oak tree and extractor, and Malric's Vale with +1 morale to all female units and Malric's ring. The GapI hate this map. Honestly. It's just a check on if you have enough morale damage or trolls, otherwise you are in for a very long slog. If you have a spirit wolf with frenzy (I like to make one from the first wolfhound you get) - you can park it just a bit to the upper-left of the castle on the left side of The Wall. It will hold for quite a while there and make your life a bit easier, since reinforsements will be stuck on it. https://steamcommunity.com/sharedfiles/filedetails/?id=2966196744 For morale damage it's good to have bears (if you play hunter) - there's even a farmished owlbear just near the start that you can easily get if you got a bear in any previous map. Brother bear, Ulnar's roar, plus any extra bear and the owlbear is yours. Plus the Gloom spell on Ravencloak guy - an amazing spell honestly, -3 morale and 100% deaths in a 3 radius is amazing. Otherwise you kinda need tree growing spell from Tyr, since you NEED that anti-missile protection and charge breaking. This and air elemental from Ailsa just behind your frontline. Alternatively if you are lucky - the enemy will come out to get you, if you stand around 1 tile from The Wall, but it is inconsistent. I had more luck when I baited them with my javelin throwers 1-2 tiles from The Wall - for some reason enemy hurler decided to just get into melee range usually. Important notes: - There are harpies to the right of The Wall. You should send there an animal or a female unit, since there's also an altar with regen there that is rather useful. - Be sure to capture villages on the same turn as you find them. Otherwise the enemy will spawn 5-6 extra squads from them. - There are two camps with volunteers on the upper left and upper right corners of the map. They are hard to get to in time if you hope to raid every village here, but air elementals can manage, especially since their speed buff is free and can be cast on themselves. Malric's ValeA difficult map if you rush right down. There is a path through the mountains a bit to the right an north from your starting location and you can send part of your army through there. Though it's forests and rivers there with almost no open tiles, so send all-terrain units. There is also a lot of hidden units there in the forests (for instance spiders right near the exit, that will nom you) so trackers would do you good there. Don't send ancestors there to cap the shrine before you've found spiders - ancestors will get ambushed and killed quickly. Other than that you will really benefit from Tir having spawn forest skill and extra starting mana. Creep to around here and then move out. https://steamcommunity.com/sharedfiles/filedetails/?id=2919066985 While casting trees around where wind elemental's standing here: https://steamcommunity.com/sharedfiles/filedetails/?id=2919067118 This way most of your frontline will be safe-ish from archers, plus your wind elemental will give them extra 50% missile defence and forests will break most of the charges thrown at you. If you have Ravencloak then get him gloom spell. It lowers morale by 3 in a big radius, so with some attacks and roars from bears/Ulnar you can rout many enemies, freeing your frontline and minimising the damage. Extractor artifact from White hills will do you good here, as well as a unit that has shield, to tanks missile damage. VeilwoodThere's a free wolfmother and for the love of everything that is sacred - do not go into the witches huts on this map at all, since you'll get cursed to get +10% more dead instead of wounded forever. If you play with Hunter Falirson - things are a bit different. When you do find a girl - go visit the upper witches hut with some morale damaging units nearby. Say that you've found the girl, but don't let her go. The upper hut spawns a green ranged spider that has a hero perk (+50% invulnurability damage reduction) and deadly perk (+50% kill chance bonus). Pretty good to tame, since it is very versatile unit. This lower hut will spawn an owlbear with innate frenzy and strong perks and it is tameable, but the curse will not go away ever. A shame, really, since it's a real broken perk combo. There is also blood oak to the lower right on the map. You can give it blood and get an Ancestor's Guidance spell on this unit for a cost of -20% health and a buff of -20% chance to suffer kills: https://steamcommunity.com/sharedfiles/filedetails/?id=2918317443 Owin's fordIf you go Machnar and are very fast than on Owin's ford there are wolves on the left side of the map that have innate strong perk (+25% health and damage). They can make an amazing spirit wolf as you can guess and you can save them from stupid AI if you fly above them with any bird unit and lure them into a corner. There's also witches hut on the bottom right there that can give female unit free hex immunity perk - it can work on Ailsa, basically offsetting 3 "wrong" choices that she wouldn't like and got -1 morale for each. There is also some weird event with meeting a centaur on the mana pool also, but I don't think that it leads to anything even if you go Kanthas in this playthrough and meet centaurs. Machnar CastleI really do not remember anything important about Machnar castle though. Maybe there is something there, but it never was that important that I'd make a note of it being worth going there. Only thing I remember is that Machnar thane will be mad at you if you already have his armor on somebody and will call you a thief. This dialogue will not play if you don't have his armor. This and that you get a free axemen squad there. Eagles EyrieHonestly - do what you want, the map is easy. Just remember to not move castle guard mercs all that far and remember that cleanse works on charmed and on enemy units as well, so harpies shield can be cleansed perfectly fine. Krell's LandingAgain, pretty straightforward map. First test on if you have enough anti-air or not, since the enemy will use a lot of pegasi and Nightmares that are kinda difficult to deal with at this point. Be sure to use all-terrain units on the left side and those that break charges on the right. If you have hurlers - one on each side is pretty good. If you have magic archers - they will work better on the left side, since there are more undead there. Maps part 3 (Swamps and more) Into the Sunken LandsOn the first swamp map you can try and send some bird or fast moving mountaineer unit over the mountains on your left point of deployment. This way spiders will buy you some time while they will be fighting with the undead and transmuter there. You will benefit on going to spider area to cap shrine there and to send some fast-ish detachement to the bottom right side to capture similar shrine there. They will give you -15% kill chance both and this will alleviate deseases. Otherwise don't scout to agressively on this map - if you trigger the main event at the middle bottom part of the map then you can't cache in on the enemy innfighting and will make your life harder for no reason. GlowoodIn the southwest corner of the map there's a ruin with unique interactions. The 1st and the 3rd option will give you nothing, while the second one will increase the exploring units health by 55, which is not that important, but nice to have. The main plus of this map is a bossfight and tons of spiders - you can tame some if you are playing Hunter Falirson, since it's one of the last time you'll encounter them in any reasonable amount to do so, while the boss drops a real nice staff for your summoner. Staff gives any summon Strong perk and allows you to summon any animal - personally it's perfect for Ailsa, since elementals are the best summons ever and it buffs them. Shrouded Hills(Only if you play hunter Falirson) In the you can encounter two rabid dire bears and can tame them - they have innate frenzy and frenzy is always cool, plus they have 100 more HP than usual bears for some reason. One is located towards the middle north part of the map and you need to be fast-ish to get there, since it will die attacking lizards there if left unchecked. The other one is somewhere south-south-east from the middle of the map, in the woods. I don't think that it can die if you are not fast enough, or at least it can live for longer. As a warrior they are just inconvenient to fight and that's it, but with innate frenzy and some form of regen (from handola statue for instance) they should be nice to have in an army. Other than that there's not much to say. If you have anyone with magic damage, like spirit wolf - toss him into the shrine to the north-north-east of the middle of the map. This way enemy spirits that spawn from time to time will go and attack him and be deaded by him en mass, leaving your more squish troops free to deal with everything else. And if you didn't learn how to rotate wounded troops by that point - you'll have it rough, since you'll be fighting a lot of undead and they will always attack you, with no rest. Having stag units is surprisingly effective here, since they toss their magic javelins before enemy strikes them. And spirit wolves of course, since they still heal with each attack, even though there's technically no life to steal from undead. There and Back AgainThere is a dragon that you can get for free for this map if you give him Malric's ring or Malric's helmet. Otherwise it will cost you some resources. I've created a separate topic for all the choices and some strategy discussion there - https://steamcommunity.com/app/1025440/discussions/0/3765606580164473514/. On this map it's good to remember that Dolos' spell Shackles of Pain can be used offensively to kill enemy dragon quickly. As a thing of note - there are two islands in the bottom right corner of the map and only flying units can get there (well, if you don't use lizards that is and they are very suboptimal on this level of difficulty). Burial mound and ruins are there. And a sinlge island on the top left corner with the same rules of getting to. Burial mound and ruins as well. Dragon IslesDragon Isles is not that difficult of a map as There and Back. Keep in mind that you cannot get out from the bottom left island, so plan accordingly - use either ailsa there, that can summon elementals, use birds and maybe winged maidens can just jump away from there. Lvl 10 winged maidens are good on the right island as well, since they do exactly the amount of HP of the nasty fire breathing artillery piece Empire has there, plus (if you are Hunter Falirson and got one) huge spider with aura help from dogs can get to the wall on the central island on the first turn, so it makes it easier to get a hold there. Beware that there are dragon riders in the mainland here, so 2-3 archers there will definitely help. The left isle is kinda hard and has a lot of undead, so Ailsa would do great there, with wind elementals and chain lightning. Also you cannot escape from that island, while escaping from the right one (there's a small path to the north from it over the water) is slow and you will go through poison fog and some undead there. So plan accordingly. Also don't raid the last settlement before you explore the last area to the north on the biggest isle. Otherwise you will not kill the big bad guy - winning in this map tied to villages and not to him. A good thing here can be some lizard squads, since there is huge number of deepwater tiles. But lizards are very suboptimal on land and you will mostly fight on land in the following missions. Golden CoastYou can quickly rush to the upper right most tower and there you will have a nice event that will have these consequences: 1st - 2 mana potions 2nd - all undead units on this mission die (speeds the map up by a lot) 3rd - +20 mana for the mission 4th - nothing, can't repeat the event afterwards There are some events that spawn additional undead, so I think that if you choose 2nd option they will not spawn. If you choose 1st or 3rd they definitely will. There's also a manapool in the middle of the map. There you can get 4 squads of ancestors of you answer that you will break the enchantment. Mind that it costs 6 ordinary mana to do so. Otherwise you can just choose to destroy them and Ailsa will just delete them from this world instantly. PorikosFor the easiest time - don't bother splitting your army. You have enough riches at that point so picking everything fast is not important anymore and you have pretty generous turn limit on this map. If you choose the upper part you can get to supplies faster and if you choose the lower part you get to enemy -1 morale debuff for the map faster. Really important thing here is the camp in the upper left corner, since it gives you 2 supply. And another important thing is the tower just left to the central castle - you get the same choices as in the previous map and thus can kill all skeletons on the map instantly. You can usually just snach this tower really quick - if you attack something standing on it with an air unit you trigger the event there. The leftmost bottom tower offers your some choices - you either destroy the thing, get the thing or leave it. Taking it gives you some gold, destoying it gives the whole enemy army a debuff of -1 morale. There is a mana pool to the lower right with mana thing on top that after you destoy you are also presented with a choice of either desroying what was left, or leaving it be. If you destroy it you will get 2 liquid mana, if you leave it be nothing of particular happens. Hopefully I will add to this thread later just to remember about all this. Bay of KyriosBottom right corner has 4 centaur squads that can join you if you promise them land. Also the right part of the map has HUGE undead army, so you better have either armor piercing units or magical damage ones. Summons from wolfmother/summoning staff you got from swamps will do you good there to draw fire. Unit subjective usefulness tier-list TLDR Kinda work in progress. Male InfantryYounglings - 1/10. Upgrade to anything ASAP. Berzerkers - 5/10. Nice damage, has higland charge, high-ish morale, -30% to a chance of casualties. Suffers A LOT from counter charges and missile troops. Cleavers - 9/10. Amazing damage, magical even, frenzy, highland charge, high morale, -30% to a chance of casualties. Suffers A LOT from counter charges and missile troops, I tend not to use them at all, but objectively they are good. Werebears - 6/10. Good overall, but has basically no specialisation. Subjectively there is no point in using them anywhere instead of any other unit. Axemen - 4/10. Nice damage, missile defense, can disable "breaks charge" attribute from a unit (but not from terrain) for 1 turn. Heavy axemen - 10/10. Armour, nuff said. Durable to extreme against physical, can become immortal with right atrifacts and training. Low morale, vulnurable to charge. Thaine - 6/10. Good buffer for nearby units, can hold it's own in a fight, but not for long. 2 artifact slots are nice, but eh. Slingers - 2/10. Ranged, weak. Have point-blank, but it's also a weak version. Upgrade further. Wolf killers - 5/10. Actually decent damage point-blank, good on rough terrain. Armoured slingers - 7/10. Real decent damage, point-blank, survivability. Clumps of 3 will wreck faces. Thunderers - 8/10. 3 range, magical damage. Good, but firearchers are better. Trackers - 7/10. Decent if you can pull ambushes, nice to use in the middle of your infantry line, to make rotating safer if the line is too long to fill it completely. Work as scouting until you get air units and/or know the map. Female InfantryMaidens - 1/10. Upgrade to anything ASAP Spear maidens - 3/10. Better, but still upgrade ASAP. Shield maidens - 7/10. High morale, high-ish armour, immune to fear, -15% casualty chance, nice damage due to armour-pierce. Slow, but can march. Winged maidens - 10/10. Leap doesn't cost anything, gives charge attack, fortify after leap. High damage, high-ish morale. Not enough armour, need to use at least +1 artifact. Javelin throwers - 4/10. Decent scouts in groups of 2, decent in random places of frontline to bait enemies into it. Very low damage due to no AP. Iron javelins - 5/10. Tiny bit better, nice jump in damage due to 6 AP, but still not enough. Stag riders - 4/10. Cheap source of magical damage that quickly doesn't do anything. Stag lancers - 5/10. Cheap source of a bit more magical damage that quickly doesn't do anything. Wind riders - 7/10. Not a cheap source of nice amounts of magical damage that stays relevant. Stag chargers - 9/10. Lots of damage, versatile, tough. Heavily debuffed by forests/rivers if no boot artifact. Wolf mother - 6/10. Useful to have if you can spare mana for her summons and are willing to teach her. Otherwise eh, but has 2 artifact slots. EaglesGiant Eagles - 1/10. Upgrade to anything fast. As almost all eagles have an ability to create fog underneath, so has at least some utility before upgrading. Armoured Giant Eagles - 2/10. Tiny bit better, but still upgrade ASAP. Eagle Riders - 5/10. If only they had at least some AP... Since they cost 2 supply they are not worth it in my book. Monster Hunters - 8/10. Good utility due to net, can capture locations, 6AP, 5 speed, deal extra damage to animals and large units. A bit squish to physical, but utility is too nice not to have. Best scouts/ruin cappers. Spirit Eagles - 5/10. Actually useful protecting vulnurable units due to Life Bond skill. But squish. Firebird - 8/10. Free cleanse source, nuff said. Also decent damage and self heal every other turn, so low maintenance. Eagle Bombers - 3/10. Air artillery. If intercepted will stop on their tracks and die the next turn, since AI focuses them hard. Eagle Fire Bomber - 4/10. A bit better air artillery against multiple model units, a lot worse against low model units. Eagle Slinger Team - 1/10. No reason to use, you have better land alternatives. Can't even capture locations and cost 2 supply. Units (special notes and Shock Infantry) Special notes Winged Maidens. They have qualities of Shock unit (they can charge every 2 turns with a leap skill in a huge radius), they are somewhat physical resistant, they can break charges, have 10AP and they are fast (speed of 4). Another good thing here is that always fortify after leap, regardless if the killed an enemy or not - if they did they will take it's place and fortify there and if they didn't they will just fortify where they are standing. So most of the times they have 33% fortification resistance. Regarding armor just give them platemail artifact (with it they will have the same 3 speed as everybody else) and now they have almost the same armor value as armored trolls. Without anything buffing their physical resistance they are quite squish and archers just love killing them. The only serious catch here is that they cost 4 liquid mana to make and that's quite a lot, plus rng dependant on that armor artifact. All the alternatives for anything they can do are cheaper. Heavy Axemen with Fated buff They are the only unit in the game that can become immortal with 100% physical resist and 100% magical resist (if you give them dragonscale armor). Thus they can draw all the defence fire you want and plug every hole in your defence/offence lines. Plus the damage is still 150 for lvl 10 and that's not bad at all, while Harass enables charges and debuffs target's armor. Good all around unit. Giant Enemy Spiders (The Giant Enemy Spider remix starts playing) You can get these only if you play with Hunter Falirson by taming horse spiders and upgrading them to these ones. An amazing overall unit, that has 8 morale and 8 armor, is immune to phychology, can't be flanked, trapped or entangled, can entangle enemies from 3 tile range and has speed of 4. And that's before any training. Plus if you get a perk of beastmaster aura then around 3 tile range of Hunter Falirson they will get 20% more damage and 20% flat damage resistance. All this makes them VERY tanky and with damage of 20 with 5 attacks they can dish good damage as well. I can only wish they had fear aura or their entangling attack delt damage, but alas. Still a very good frontline unit, I'm very fond of them myself. Spirit wolf with frenzy Basically spirit wolves are pretty durable most of the times due to their 50% physical resist from being a spirit, but magical damage makes them suffer. With training though and some artifacts to enchance magical defence they can get to 45% magical defence and that's at least something. Also you can give them dragonscale armor and make them even more tanky in physical. The point here is frenzy. See, spirit wolves have life leech on their attacks, so the more damage they deal the more they heal and frenzy procs with even retaliatory damage. With some luck and planned movement from target to target they can get to 500 damage per attack and thus will heal 250 from it, completely healing them. Shock-infantry Don't get me wrong they are very good in terms of damage, VERY good at every stage of the game, since you can double tap (open up with harass unit and then charge with shock melee) and thus even charge breaking units will be chargeable. They also have a lot of health, which is a plus. The biggest and weakest thing about them is that your main line of upgrades (berzerk tree) has no armor, no missile protection, no armor pierce and no charge breaking. All this in mind they are glasscannons. Sure glass is study and sometimes they can survive a turn of attack, but even though they will need to retreat and rest. Thus your huge damage numbers will be able to contribute to the fight every 3rd turn and that's only if they can reach the already moved battleline from where they retreated. If the can't - it's every 4th turn. You can still use some strategy around using a lot of them and thus you will rarely need to retreat simply because of morale damage to the enemy (enemy morale gets damaged each time you inflict casualties, in a 3 tile radius from the unit you hit). It's a rather complex strategy to pull off though, since many tiles break charge and you will not have that many harasser melee to open the possibilities every time you need them. I must note that they are quite useful in the beginning of the game where they are basically your only units that can move faster in woods and rough terrain and that they never have casualties if they are not debuffed, but after Krell's Landing they loose some of this advantage, since you just train everybody to have All-Terrain. Werebears are decent but for some reason clunky. They have charge, they have armor of 6 and morale of 7, they have fear aura, their attacks even make it easier to kill an enemy since they inflict -2 armor and they recover health killing living units. They just don't attack all that good in ordinary situation and to get their true potential out of them you need to shove them deep into the enemy lines. 10% more damage and damage protection are amazing if you could get at least 3 units surrounding you. Problem here is if there are more than 3 melee units surrounding you - you are screwed, since there are a lot more than 3 NON-melee units also surrounding you. Plus their 6 armor and +60% ideal damage reduction (if they are completely surrounded) will net you 76% physical damage reduction or so. And that is way too low for surviving the next turn. Add a platemail, to get to 10 armor and you'll have 88% (while also being very slow with speed of 2). That seems more possible to survive but add some artirelly pieces pummeling you, some magic damage and yeah. They are just clunky to use. What about melee trolls? They too have shock qualities with their breakthrough ability. But they too suffer from not enough defence from missiles and they are very weak to magic damage (4 morale only). Still they have somewhat decent physical defence (6 and 10 for chargers and armored variants respectively) and you can always give them +20% magical defence from training, so they are not that bad. They are also your only source of siege damage (ignore fortification resistance) besides some air units. The not so great thing about trolls is that they cost 2 supply and you will always have more mileage from two units costing 1 supply than trolls. Plus they still have 30% chance of suffering casualties and thus halving their damage potential for the battle. Another Shock frontline unit is a bear. You can get them as Hunter Falirson very frequently. They have decent armor of 8 initially but they are lacking in morale terms and thus magic hurts them. Still they are a 1 unit model and thus they will not suffer "combat fatigue" where they deal less and less damage in response of being attacked. Yes they can't get the damage numbers that berzerkers can get and they will never attack with magic, but owlbears beak has 12AP and thus it always does it's damage and they are just being hurt way less. Units (Harassers, Charge Breaking Infantry, Cavalry) Harasser Thanes, trackers, axemen. Trackers are not that great for that role but they can harass, so there's that, I'll write about them later. Thanes are there to mainly spread some buffs. They have innate aura of +10% damage and +1 morale that will stack with a banner that gives the same buffs. By themselves they are not that great tanks, since only 4 armor. Yeah they count as heroes and have a shield so that's another 50% damage resist as a hero and 50% missile resist. The thing is that all these resists are not additive and their 28% physical resist (4 armor gives that) still dictates most of the damage they will suffer. Say there is 100 damage incoming and it's physical melee. The formula for what their resist in this situation will be something like 1-((1-28%)*(1-50%))=64% and so you will recieve 36 damage. Now heavy axemen have 11 armor and that's 77% physical resistance, so they will be better as physical fronline from the start. Thus thanes are not all that fit for the frontline, but can buff a lot your archers or artillery. One thing to note here is that though they are worse for the frontline they can be better than heavy axemen in one specific situation - when enemy transmuter casts transmute armor. Axemen. They are your dedicated fronline against physical damage centered enemy and they play this role nicely. Plus heavy version have march, allowing them to move faster at a cost of 1 morale per cast. They also have nice damage, roughly on par of half the damage of Berzerker line if they were not charging. The big problem with these guys is low morale - 5 morale for the frontline unit is very low and they will be decimated in the swamps. You can bump their magical defence with training (20% magical resist) and purple artifact of 25% magical immunity, but for an artifact they compete with one that stops charges. Yes, despite their armor they will still need a way to break charge or they will suffer a lot. Charge-Breaking-Infantry Maidens. They are decent. Winged maidens are real good and I've written at the start about them and the other unit of this line is Shield Maidens. They are truly frontline unit, even more so than heavy axemen - 7 armor (50% physical resistance), 11 morale (79% magic resistance), 50% missile resistance, aura of 2 armor to friendlies adjacent to them, charge breaking, pretty good 8AP. They are just really slow with their 2 starting speed. Even though they also have march skill as heavy axemen - they just really feel slow and you will start to feel that in the swamps first and in the empire vast maps second. They can be salvaged with some speed artifact, but honestly armor is a bit too low for comfort. You honestly want all your frontline have at the very least 57% physical resist. Maybe if you had more than one, but then again - they don't do that much damage themselves (15*5 base) and you are just prolonging the battle basically allowing the enemy to rotate and loosing time you could've used getting them ruins and raiding settlements. Skirmish infantry Javelin throwers, They are... there. They are fun on lower difficulties and do pretty well as scouts and flank units, but on Legendary you really need to at least use close to optimal unit configuration and they are really not optimal. They can't really attack ranged units since they will be decimated in return, they can't hold their own against most things with their 6 armor and 6 morale, they can't proc retreat in a lot of situations due to the same mechanics trackers can't. You can have fun with Iron Javelins though if you give them fated perk. They just never die, they rarely get hit, and are perfect for taking a hit or two instead of your frontline. But yeah, they are not that great. Skirmish Cavalry Stag riders, hit and run skirmish unit. They can be good at the very beginning, since you lack magical damage at that time, but then again - you can always summon something and get firearchers from the camps. They also have innate malus to their movement and damage in rough terrain that I've spoken about already. Malus will not go away with training - you can get rid of it only by using terrain specific artifacts, but that means they will not get their damage enchanced by some rings or bracelets. And honestly their damage is not that big and you will probably feel like they are not that snipe-artillery that you wanted them to be, but snipe-piston-toy. Everything important has a lot of morale and to deal with artillery/ground heroes you can use winged maidens leap and firearchers or lightning strikes from storm elementals anyways. I don't like them overall. Fire archers, Ailsa and her summons can cover all your needs for magic damage. Shock-cavalry Stag Chargers. They are real good. Most of the guides state that they are awful and they are indeed a bit worse in swamps (that are the most difficult part of the game) since the malus they have as cavalry is real bad (-25% damage in forest and water), but they attack with both magic and physical, have armor of 8 (57% physical resist) and morale of 7 (50% magic resist), they have a charge attack and they break charges by themselves. The movement malus is not that important since all-terrain training is helping with that and they become the same as any other unit. With some training and artifacts they may become nice frontline unit that will be faster than your other units in terms of denying enemy their retreat. Plus the fact that they are mounted means that they have innate +25% missile reduction and if you play Hunter - you can even add 20% to that with training. Keep in mind though that their charge damage is there only when thy are able to charge and you need to choose it everytime - by default right-click they will only throw their spears, even if charge is avaliable and would do more damage. And the amount of charge damage is about the same as your berzerkers do when they can't charge. Give them "can charge into any terrain boots" artifact and they will wreck things hard. So most of the time you will get a unit with 57% phys resist, 70% magic resist (hex training) and 45% missile resist (hunter Falirson training), with break charge, high speed and both charge and magical damage. What's not to love? Just give them some armour artifacts and you are set. Though their cost in resources is quite high, I'll give them that, but they don't cost any liquid mana. I'll get them over berzerkers (that are killed by everything but magic) all day every day - never liked glasscannons in games. Imperial lancers/knights. They are a really damaging block IF they can pull a charge. Comparing to Chargers they have a bit more defence (1 more armor and morale), a bit more damage and more health, but main difference is that instead of magic skirmish option they have only physical damage and a Breakthrough skill. Again Breakthrough is not as useful as you might think - we are speaking Legendary difficulty here and enemies will have much more charge breaking units than on other difficulties, (I remember in Into the Trollwoods they have more than 70% of their army as spear maidens, thus making my berzerkers completely useless for instance), plus a lot of terrain before Empire lands just breaks charge naturally. I'm not that big of a fan of them. For me the best use for your empire volunteers is to make them fire archers. Units (Scouts, Ranged, Air) Scouting Mainly scouting is done with units that have some sort of detection or opening a lot of map in a single turn. Thus for this category we have trackers (have a skill that can detect hidden units in their search radious) and stag riders (have a skill that disperses fog of war in 6 tile radious, but don't reveal hidden units) mainly due to the first part of the needed function. The bad part about using them is that they are very squishy and stag riders have an innate movement and damage penalty on rough terrain (for example on water, swamps, forests). Trackers are decent-ish, since they can go into mountains and that they have "retreat 2" so they can retreat in 66% chances. The only problem with retreat is that you need to have a speed value equal or higher than you attacker to even have a chance of it activating. And what do you usually get ambushed by? Correct, by something that will have more speed than you, like lizards, spiders or wolves. Sure, by some chance you may run away from same trackers in the woods or from bears, but that happens rather rarely - game has x-com-ish rng at times and retreat of 66% means you will be dead, basically. Enemies retreat chance of 33% works much more frequent than yours 66% even if statistically it's impossible. What about ground scout units contribution to fighting? That depends. Trackers have an amazing +200% ambush damage and they can hide on all terrain whatsoever, so before they die the same turn they ambushed somebody they will definitely do some damage. And they will die if they are noticed most of the times. One way to offset it is to use more trackers, since then it will be a constant ambush fest, right untill enemy fields air units that will just cruise above all your hidden units to uncover them. I swear enemy AI knows where your units are hiiden. Scouts that can open a lot of map in a single turn are partially stag riders (partially since they are so squishy that you really don't want to let them scout) all your air units and summons and, weirdly enough, spirit wolves since they can move over mountains and can cap shrines very good (shrines boost magic damage and more attack means more life leeched). Some air units like Monster Hunters can capture locations, so they make your need of ground scouts dissapear and if you don't like spirit wolves I advise you to get a couple of them. Ranged Slingers. The defining thing here is Point Plank that they have - extra damage to the enemy that's on the adjecent tile or flying above. If they can pull point blank Thunderers will outdamage even Fire archers here. Knowing this mechanic it's an easy two step job sometimes - move your slingers close enough, fire point blank, kill the enemy with melee and now you have melee protecting your slingers and slingers protecting your melee. Armored slingers can pull it more reliably and can protect from endless amounts of attacks per turn (a clump of 3 armored slingers is a very strong formation that deals tons of damage to anything), while thunderers provide you with magical damage and a range of 3. I prefer magical mostly, since it's easy to remember that all your melee is physical and all your ranged is magical. Imperial archers. Fire archers are your actual standart and what you should upgrade most if not all volunteers at least until you have 6 of them. Range of 3, tons of damage, not much else to say. Your usual candidate for magic damage increasing artifacts and blood oaks. Long-ranged Hurlers, your only artillery. Well, they are good at what they do, they will very rarely be attacked, so you are very free to ignore their resists and you don't have an alternative anyways. They are also very good at spreading the debuffs if you equip them with artifacts. Like harass artifact or curse/entangle ones - all can be applied from enourmous range and it makes them useful even if they can't utilize their main shtick of AoE attacking. Air If you want to go air then Firebirds are nice to have, due to their durability (full heal every 3 turns) and free cleanse skill, that can be important to counter petrify in the swamps, harpies shield or death mark from transmuters. You should probably have 1 of these. They cannot capture anything though, so for these purposes you better use someone like Monster Hunters - a really flexible air unit, that will cover your units from enemy air, entangle those who try to ran, cap some points of interest on the map if you deem it necessary, and they even have a charge attack for giggles. Other than that - Eagle Riders and Eagle Slinger Team you don't really need, since most of these roles function would be covered by your other ground troops. Eagle Fire Bomber is basically a troll hurler, but in the air. Not much more to say. Credits/Thanks Mindeveler found out that on Veilwood you can use Hex Immunity amulet to block the witches curse specifically for the unit that has it equipped. Amazing find! If you want to you can use a multiplication glitch with Hunter Falirson to multiply this amulet and put it on everyone, and then just tame the witch in animal form free of charge. Or if you don't want to use glitches you'll at least be able to shield the most important unit you have with that, but the wearer must never take it off till the rest of campaign for it to work. Haisen and Mindeveler found out that you can get a mass permanent +1 morale for your whole army in Iseal if you repeatedly refuse raiding settlements there. This is especially huge, since it's free +7 magical defence and swamp maps where it's the dominant type of damage going your way real soon after. 引用自 Haisen:I have just discovered that on the Iseal map, if you choose not to loot all settlements and instead occupies the castle directly, all troops except Tir and Ailsa receive a permanent +1 morale trait. I have not tested whether selecting the revenge option in the initial dialogue but ultimately refraining from looting all settlements would still produce the same result. 引用自 Mindeveler:- saying you will raid it but then backing out in the end - no +1 morale for everyone - repeatedly saying you won't raid it - +1 morale for everyone except for trolls (-1 for them), and it seem to be working if even if you actually raid it to your heart's content lol. End thoughts This is mostly to just not search each and every time for this info whenever I want to replay this game, but it can be of use for anyone playing it right now. Hopefully it will help somebody or just let them have more fun. Cheers!


In this guide I discuss which units to include into your army, how to build your heroes and how to approach the campaign. Introduction This guide assumes that you are new to the game and that you want to tackle the Invasion campaign on the highest difficulty - Legend - but is meant to be useful for all newbies so I go into a bit more detail than is absolutely necessary. The guide explains the main game mechanics, focuses on how (and why) to build up your army & your heroes and gives some advice on the levels with difficulty spikes. Spoilers are avoided as much as possible. There are no story related spoilers. Info on which units you can add to your army is kept vague or dropped completely where possible. There are no spoilers on the type of enemies you encounter except for 1.5 specific units that you need to be aware of before you start your campaign. I decided to refrain from posting screenshots altogether to avoid spoilers. I tried to be spoiler-free in my section about the hardest missions as well but you want to skip those if you want to go in blind. By adhering to the army composition discussed here you will finish maps in the second half of the game (the last third at the latest) in approximately 15 out of your 40-odd turns (on Legend difficulty). The last two maps took me 15 and 9 turns respectively (conquering all loot locations and killing all enemy units) without going for speed and on my first try. You will probably do even better than that. Obviously, you will not be taking any significant damage - that would slow you down and would be in poor style. This guide turned out quite a bit longer than planned (it is a complex game after all) but the TL;DR gives you all you need to know to get started and most sections can be skipped or read on their own. Army composition - TL;DR Our strategy is to kill everything in one turn and route what cannot be killed. The turn after the slaughter we move on towards our objectives and kill stragglers while our wolves get the army back together. We need to be able to insta-kill groups of about 3 units in early game, battlegroups of about 6-9 units in mid game and armies of 12-20 units in late game. All of which is doable (most of the time). Before we discuss how the game works and which units to choose: here is the summary / TL;DR on what to do. If you are playing on a more lenient difficulty this is all you need. VolunteersYou ALWAYS want to leave 1 supply unused and search camps to grab imperial volunteers to get Fire Archers. You cannot have enough Fire Archers (well, 8 of them would be a good goal). If you are maxing out your supply you transition from Slingers to more Fire Archers. Read: sell a Slinger. Army compositionIn early game you want to grab: 1 Berserker. (You can postpone the upgrade to Cleavers.) 3 Slingers. (You can skip the upgrade to Wolf Hunters and hopefully the one to Thunderers as well) 2-3 Stag Lancers. (For magic damage and range.) 1 Wolf Mother. (Using your first liquid mana.) 0+ Imperial Volunteers. (As many as possible; to be upgraded to Longbowmen asap.) 0+ Spear Maidens. (You start with a named unit of maidens. If you want to retain 0 cavalry after mid game but want to keep the named unit for lore reasons you want to upgrade her to a Spear Maiden. Do so before "Thieves in the night". Afterwards she is wasted supply until you can spare enough liquid mana to push her to Winged Maiden.) In mid game you want to add/upgrade: 2-3 Troll Hurlers. (You do not need the final upgrade for quite a while; you will get an additional one for free.) 1+ Troll Chargers. (The final upgrade is comparably cheap but you don't need it yet) 1-2 Hunting Packs. (One is a guaranteed drop a second one is really useful) 1+ Winged Maidens (very expensive at this stage of the game). 3+ Fire Archers. (If you manage to get more than 3 Longbowmen you can skip upgrading some of your Slingers and save a lot of resources) 3 Thunderers. (Yes, the liquid mana is somewhat wasted if you sell them but you want 6+ anti-air units when you start the swamps; upgrade them in-mission against swamp dragons as needed). 1 Phoenix. (support for outrider detachments and main battle tank) 1+ Monster Hunter. (Anti-air for your main battle line, don't send it out to capture, use 1-supply units like Cleavers or Maidens and a Phoenix) Ditch your Cavalry when you reach the swamps. (Maybe keep one as a scout, in particular if the 0-supply recon loot drop did not happen yet) In late game you want those numbers to go up to: 3-4 Siege Trolls in total 2-3 Monster Hunters in total 3-5 Armoured Trolls in total (EDIT: Winged Maidens are now viable too and can substitute 2 melee trolls) ALL the Fire ArchersThis should leave you with some wiggle room to emphasize the units you feel comfortable with - in particular in late game. Further TL;DR readingTo get a somewhat different perspective on army composition in a TL;DR style you can visit some tips on units by VladK02. They make some good points and have a (somewhat) different approach than the one this guide is based on so their valuation differs a bit as well. Imho my approach makes your army stronger and is less reliant on item drops (trading it for Fire Archer drops, which can be forced without cheating by killing off unwanted drops) but VladK02's army certainly is very strong and good enough to beat FG2 on Legend without major problems outside of the worst parts of the swamp. ReasoningIf you want to play on legend you probably know what you are doing and you will want to adapt the army list to your taste. The following sections should give you enough info to do so without being frustrated about wasted resources later on. Game mechanics Before we discuss unit types we neet to make sure that we are on the same page concerning game mechanics. Open hexes are a precious resourceFree and accessible hexes in range of an enemy unit (preferable several of them) are opportunities to attack from. They can be considered a resource and I will call them open hexes. Quite often the number of open hexes is very limited because at least initially your units are either slow or very slow. The average movement range of 3 hexes is low already but if there are forests, rivers or swamps (there always are) this can go down to 1 for many units. So, it is hard to get into (melee) range of an enemy (or just to go anywhere really). This severely limits the number of open hexes and it can be compounded by additional hindrances like mountains or ambusher. Open melee hexes without river/swamp debuffs are particularly precious because the AI uses acceptable positioning and makes you cross rivers/swamps. Sometimes open melee hexes without debuffs do not exist at all. Once you switch from fighting battlegroups to fighting armies at the end of mid game there will be so many units around that the number of open hexes is even more of a bottleneck to overcome if you want to actuate your full damage potential. Positioning - a cautionary tale on melee unitsMoving a unit and having it attack an enemy are two separate actions and should be treated as such. If you move up all units before the killing starts, you can: optimize XP distribution. move in all buffs and debuffs (banners, horns, ...). get a better visual idea on how to allocate your attacks and what sequence to use them in (the effect of your buffs will have is very hard to calculate precisely without trying).Nothing stops you from moving a ranged unit into an open melee hex and to attack from there. This is a design mistake imho. The enemy should be able to retaliate if you stand next to them while you attack anything (unless your unit is a skirmisher). That is not the case though so there is no downside to using ranged units in melee hexes other than them being blocked for melee units. There are several upsides to filling the melee line with ranged units: you can kill or soften up enemies further back. you can kill stuff on the frontline and create a new and open melee hex.The last point is more important than it seems. It increases the number of high-quality open hexes. That means, you do not want to move in your melee units until the last moment which makes them even weaker than they already are by being reliant on open melee hexes. So why bring melee units at all you ask? Well, glad you asked! You should not. Melee units are a liability. I will go into detail on the exceptions in the sections about them. Morale and magic damageIn FG2 most units have a morale score that determines how easy it is to route them. A consequence/mechanic that is not immediately intuitive is that in FG2 a unit's resistance against magical damage is not fix because it takes a hit whenever a units morale is lowered. This means that by killing off individual units you weaken the rest of the army. If you combine this with mass-cursing it allows you to hit extremely hard with all units dealing magic damage (and one-shotting almost anything with Fire Archers). The main source of morale damage on a unit is witnessing an attack dealing massive damage vs. an ally. Which is exactly what this army does. The secondary sources of morale damage are artefacts and spells. You should incorporate these whenever possible. Sometimes it is worth it to summon a bear purely to let it roar. Damage allocationWith this army (or any army really) you are trying to make sure that any enemy unit you encounter dies after two attacks from your troops. This is not possible immediately, of course, but you get there fast and should be able to reliably do so in (early) mid game. In late game you should be able to kill key enemy units (heroes in particular) in two attacks, lowering the morale of the army enough to start one-shotting weaker units, which allows you to kill stronger units in one attack and to rout all survivors left standing after you run out of attacks. The main exception to this target sequence is the transmuter. When you encounter him you will probably be too weak to kill him effectively. This is true for quite a while actually. So you want to focus on slightly less high profile targets first to break his morale before taking him out. His death is still the single highest priority because of his Transmute Life spell that kills damaged stacks off. To be able to 2-shot consistently you need to be able to allocate attacks to units that are susceptible to them (the game shows you the relevant parameters in the top left corner before your attack, which is quite handy) and/or to create such weaknesses. Your main debuffs are cursing and morale bombing. Your secondary options are harassing and transmuting armor. The first one is quite useful if done alongside a curse (or on units that cannot be cursed) and the second one is only needed/sensible in late game against the absolute hardest of tanky threats. All of this means that open hexes are not created equal and that you need to be able choose which unit to put into which hex. This re-emphasizes the need to maximize your mobility once more. OverwatchUnits carrying the keyword/trait "defensive fire" will preemptively attack/retaliate if an adjacent unit is attacked. I will call that overwatch (innovative I know). Overwatch is surprisingly powerful and surprisingly useless. The downsides are: You cannot position your Fire Archers and Slingers in such a way that they cover your front lines effectively. Your priority is to go in and do damage - you do not want to compromise that Slingers do very low damage if they are not adjacent to the enemy The AI is clever enough to draw overwatch with shielded unit and tanksWhile overwatch is reasonably useful in (very) early game, it shines once you have enough Fire Archers (you never have enough Fire Archers) or just lots of magic Missile units in general. Enemy units that can handle magic damage are much less ubiquitous than shielded ones and after you went in and decimated the enemy battlegroup/army ("nonaginate" would be more appropriate...) its morale will have taken a massive hit, strengthening your overwatch significantly. In addition: while you cannot route certain unit types, those are mostly the same ones that are susceptible to magic damage from the get go and will go down to overwatch anyway. Resources and upgrading unitsThe TL;DR gives you the army list and differentiates between the stages of the campaign. The sequence in which to upgrade or recruit your units depends on your item drops, which volunteers you can find and on the challenges the story and campaign throw your way. So, I will not go into details in this guide other than giving you a few pointers. Concerning resources: Gold is balanced perfectly to keep you progressing nicely. Weapons will be your bottleneck in early game and mid game. They become ubiquitous in late game. Armor is ubiquitous almost the whole time (because most units that need it are sub-par). Liquid mana will be extremely rare in early game (you can cheat and try to get a random drop from one burial site per map), common in mid game & ubiquitous in late game. Supply is what defines the strength of your army. The maximum you can have is 53. If you can choose between missions you should look for those that increase your supply. You can upgrade your units within mission and you should do so. You should hold back on spending resources until you are able to train your units - and remember that new heroes bring new - and expensive - training options. Looting and cheating A game mechanic that deserves its own section is "Loot". Loot locationsLoot drops seem to be predetermined in form of a chain, which means you get the same loot if you check one or several locations in one turn then reload and try the same again. Certain actions reset the loot chain though which allows you to manipulate the content of loot locations. To call them "chains" is not really accurate but quite intuitive for those of us without a background in math. (What I call loot chains are ordered graphs with edge choices that depend on the kind of loot locations you visit and where certain loot locations are clustered into equivalence classes). So here is what you want to know about loot locations: Loot locations with the same name are not differentiated in the loot chain (= they form an equivalence class). There are story related loot locations that are not marked as such. These do not change when you reset the loot chain. Camps are not treated equally. Some camps are volunteer-camps, some offer resources (weapon, armor and gold). You can only get one unit of volunteers per map - unless you lose a unit (I think) [Edit: as of 2021 this is not or no longer true in the Empire campaign so it might be wrong in this campaign as well]. The lost unit needs to be an actual unit that spawns mana and I did not check whether mercenaries count. Damaging an enemy unit resets the loot chain (a new graph is generated). Ending your turn resets the loot chain. Entering location type A changes the loot for all location types but does not reset the loot chain (=you are still on the some ordered graph, just one node deeper. I am not positive whether the branches are interconnected but think they are not). Raiding results are part of the loot chain. All raiding locations are treated the same by the loot chain (= they form an equivalence class). There is something weird going on with the raiding location when resetting the loot chain. I assume that the reset function has a bug and it somehow references the last graph that was built. This seems to be an issue relevant only for raiding, the other resets seem to be actual resets.In other words: you can attack an enemy and try to loot a/several locations and get different stuff than you did before. Save scummingObviously, I did save-scam quite a bit in the beginning because random loot frustrates me in a game but I stopped and would advise against starting to do so in the first place. It is not necessary (unless you don't find any Water Boots - you really need those in the swamp or you will be frustrated, EDIT: the movement in the swamps seems to be patched. I will not test that though, those missions are not really one of the games highlights - hopefully they are less painful now). Most artifacts are useful and the developers patched in some stuff that allows you to get rid of unwanted artefacts and that makes gold very useful later on. That being said, if you do want to cheat I would advise setting up several loot locations to be raided in succession and then writing down the loot chains for different numbers of attack. Attack 0 enemies and check all locations, attack 1 enemy and check all locations.... This gives you a number of loot chains to choose from and if you are digging for a certain artefact it drastically increases the number of tries you have (depending on the number of locations you raid, of course). Purple artifacts don't seem to be part of the regular drop tables (the story will tell you when they are) This changed for the Empire campaign so maybe it was changed retroactively for the Barbarian campaign as well. Keep in mind that ending your turn also resets everything. If you don't find any loot chain you like, you can try again next turn. ArtefactsIf you do want to save scum, here is my take on what to prioritize (non-purple only, all the purple stuff is excellent). God-Tier Magic Ring War Banner Water Boots Horse Token / Striding BootsExcellent Cursed Amulet (less useful in late game) Death Mask Weighted Spears (can be useless in late game)Good Horn of Courage Slash of Blackness Spirit Mask Helmet of Health Plague Doctor Mask Mana ElixirOk Spiked Bracers Chain of Armor Restoration Potion Belt of Bear's Strength DiaryDo take this list with a grain of salt though - artefacts depend on your army composition. Magic Rings and War Banners being the only exception. Two Magic Rings on a Fire Archer are spectacular and War Banners stack for each character that carries one - bringing your whole army to 100% magic resistance. You won't get attacked anyway but it is cool nevertheless (the increase in attack damage is not that relevant. It can be an advantage if it allows one your units to one-shot an enemy. Otherwise is it negligible because almost every enemy unit is dead after two hits anyway). Unit types The game helps you by organizing its units into "types" (or classes or...). The way the game differentiates between different unit types is quite opaque though - not just if you are new to the game. So first let us clear up what the game is trying to tell us. Take "Light Shock Infantry" (the basic male unit) and "Light Spear Infantry (the basic female unit). The important parts are "Shock" and "Spear". That is what I will call the type of unit we are talking about. Almost all prefixes like "Light", "Heavy", "Magic" and so forth only differentiate between different variants of a certain unit type like "Shock". The suffixes used by the game mostly describe the movement type of a unit, think "Infantry" or "Cavalry". For now, we ignore all of prefixes and suffixes and look most important bit: the unit types available. Using the games logic, the types of units you can field are: Shock Axe Spear Missile Recon Scout Skirmish Artillery Support Leaders Beasts AnimalsA somewhat long list but be can clean it up quite a bit. Recon and Scout are the same type so we will ignore "Scout" (it being the Imperial "Recon"). "Beast" and "Animal" are a mis-named unit types (the mistake was introduced mostly with the Onslaught DLC). Wolves (Animals) should be called Support and the flyers should instead be called by their actual type and be given "monstrous" as a suffix (and "animal" needs to be a suffix to signal that they can be charmed). "Aerial" should be used as the unit type for flyers, not as a prefix (and I will just use "Flyers"). Skirmish cavalry works completely different from any other unit in the game so it is its own type. Leaders should be called support. So the new list of unit types is: Shock Spear Axe Skirmish Skirmish Cavalry Recon Missile Artillery Flyers SupportFor the discussion of which units to pick and when to transition into another army composition we need to create some clusters. Those are: melee (Shock, Spear, Axe, Skirmish, Recon), medium range (Missile, Support), long range (Artillery, Skirmish Cavalry) and Flyers. The reason we choose these clusters is pretty self-evident: in a perfect world hexes closest to the enemy should be filled with melee units then ranged units then artillery while flyers can be positioned anywhere. So units within one cluster compete for spots in your army (and flyers compete with almost everything else at once - even with their own unit type). For detailed statistics on all barbarian units you can take a look at the overview FG2 Barbarian Units Review by Virgil-SKY. Melee units (shock, spear, axe, skirmish, recon) ShockShock units get a second attack when they are on the offensive. Their attack is called a charge to differentiate them from a regular melee attack. Shock units have the highest damage output of any unit in the game - twice that of most other melee units. They have very good mobility in forests and several very useful offensive and defensive traits. All that makes them the best and only choice when recruiting melee units. SpearThere is nothing special about the attack of Spear units. Their strength is that they break charges when being attacked. They are meant to counter Shock units but their own damage output is laughably low in comparison and the Shock unit can just attack someone else. Their damage output is lower than what a Shock unit can do without its second attack and they do not deal magic or siege damage. Their mobility is horrible compared to Shock units. They are completely useless. There is one exception: one spear unit (the Winged Maiden) is an undercover Shock unit. AxeThere is nothing special about the attack of Axe units. They are given shields that make them resistant to missile attacks. They are meant to counter Missile units but their own damage output is laughably low in comparison and the Missile unit can just attack someone else. Their damage output is about the same compared to what a Shock unit can do without its second attack and they do not deal magic or siege damage. Their mobility is horrible compared to Shock units. They are completely useless. SkirmishSkirmish units can attack in melee without triggering a counterattack. This can be useful but it does not increase their damage potential which is - you guessed it - comparable to that of Spear and Axe units which puts it at half of what a Shock unit can do. They get shields and their mobility is as good as that of a Shock unit so they are only a bad unit choice and not a terrible one. There is no reason to ever get a skirmisher. ReconRecon units do triple damage when they attack from hiding. The problem is that they start out at half the damage potential of everyone else. This means that even if you can activate their gimmick they fall short off the damage of a Shock unit. They are supposed to be scouts and get better vision range & a skill that allows them to spot other Recon units in hiding (used instead of attacking). They do indeed have good mobility and they are the only ground unit that can climb mountains. Unfortunately for them the Witch-Hero carries a cheap spell with long range that can scout just as well while being able to summon scouts as well as combat units with better stats respectively that can cross mountains as well. You should not recruit any Recon unit but they are a fun addition to your army that gives you more options when planning capturing routes. You might get one for free from a loot drop that you will want to keep because it does not cost supply. (Support)There is a melee support unit - the Thane. It is a trap though, a wolf mother is the much better choice for all intents and purposes. If you really want to get Thanes you should wait until you can train your units before upgrading them to become a Thane. Thanes count as heroes and cannot be trained. By the time you can train your units the Thane is even more useless though than earlier in your campaign. ConclusionThere is only one choice when it comes to melee units: Shock units massively outperform the competition. The good news is that almost all Shock units are viable. Specific unitsBerserkers and Cleavers They do very good damage and their traits give them decent survivability. They can easily be brought to 100% magic resistance. They are good at: leading outrider detachments going for loot in early game and early mid game (until you can afford Winged Maidens). triggering ambushes in swamps - which is a much bigger problem than you probably anticipate. holding shrines in the swamps. A good unit that is outperformed by the Winged Maiden in utility & by both the Maidens & the Troll in combat. Berserkers are very good in the early game because they do not cost liquid mana and are already offering many of the strengths of Cleavers. Winged Maidens They have good resistances and excellent movement range. The reason that they can be considered undercover Shock units is that they can jump-attack which counts as a charge attack (=double damage). Considering our goal to kill everything immediately this makes them a de facto ranged Shock unit. Their strengths are: Their jump attack has a very high range which opens up new hexes. Their mobility and durability make them the best choice to hold shrines Their mobility makes them the only unit able to make good use of plate mail (apart from a frenzied Falirson) Their weaknesses are: Their jump is blocked by air units which is a pain because up to 25% of the enemy battlegroups and armies consist of flyers and your own flyers take their place when they kill them - blocking your maidens again. You cannot easily boost their damage output via artefacts because their jump attack does not formally count as a charge attack and because they do not do magic damage.Toss-ups: They are too squishy to jump into the middle of the enemy army but they don't need to because they stay put after jumping if they don't kill their target. (EDIT: jump now fortifies) They deal normal damage while offering the best armor penetration in the game. Magic damage is still more desirable in most cases but your Missile Units, your Supports and most Heroes all deal magic damage so it offers your more flexibility if you do not bring too many Maidens. The next patch is... EDIT: Fortify is now actually useful. You no longer have to stand still to toggle it. In addition it activates after winged leap. This helps the Winged Maidens massively in engagements and in the rare situation that you are falling back with your army. All that being said: the buffs to fortify & jump made Winged Maidens the best 1-supply melee unit by an ever bigger margin. You want at least 1 that you send out to capture shrines that are hard to reach otherwise. Armoured Trolls are a lot more robust & do splash and siege damage - but 2 Winged Maidens attack twice. Armoured Trolls These get better the longer the game goes on. They start out very strong because of their regeneration ability and their very good resistances and health. On higher unit levels & later on in the campaign the regeneration becomes irrelevant but by then they have become the best unit in the game: They do siege damage which means that they are the only unit that can kill the strongest enemy ground units reliably. They do splash damage every few turns (2x their normal damage on the 3rd hex, while attacking two more enemies). The only other option for splash damage are the Air Elemental & Chain Lightning (both spells on the Witch hero) which both cost mana (the elemental, not its attack). With pockets, their damage can be increased while bringing them up to 80% physical and magical resistance. High health is amplified when leveling up.This means they are an essential part of any late game army where their main downside - being 2 supply - is not as relevant. When open hexes are exceedingly rare, only Trolls and Maidens can get their melee damage in. Werebears While they are not nearly as bad as the non-Shock competition, they are a not a strong choice. They cost one supply compared to the 2-supply Armoured Trolls and have excellent survivability in drawn out engagements for their cost (Trolls still dominate, of course). Their downfall is the scarcity of open melee hexes, the lack of drawn out engagements and the high quality of the other choices among the Shock units. Medium range units (missile, support) First off: keep in mind that every ranged unit is automatically a skirmisher at the time this guide was created. In fact, they are skirmishers+ because they do not trigger overwatch. Both of that might (and should) get patched in the future. Missile units Slingers, Wolf Killers & Thunderers Their damage is bad but their mobility is good and they have overwatch. Their point-blank damage makes them viable in early game but is irrelevant later on (and there might be a bug, where point blank does not trigger against Skirmishers). Wolf Killers are quite expensive and stay at range two so you should only upgrade your Slingers in an emergency. The biggest strength of Slingers is that they have no competition. They are the only Missile Unit available and you desperately need ranged units. If you can get Imperial volunteers early on you can skip Slingers altogether. Longbowmen & Fire Archers Any group of Imperial Volunteers can be turned into Bowmen so it does not matter which one spawns. (I got quite a few Peltasts, one group of Hunters and no Spearmen so the chances might not be evenly distributed.) You can skip Bowmen and go straight for Longbowmen once you have enough weapons (I would get Stag Lancers first). Decent damage, range three, good mobility and Ambush make them a very strong choice. Fire Archers are the best 1-supply unit in the game (for the Invasion campaign!). If you give them Magic Rings, they get up to 272 damage late game (with offensive traits from training on top of it). Thunderers need a buff. I would try 200% point-blank damage or (better) morale damage. Centaur Archers The damage of Centaur Archers is pitiful so you cannot use them instead of Fire Archers. In combat they are worse than upgraded Slingers. Which means that they should not be considered Missile units but instead as Support units supplying a pathfinder aura. That means they compete with Hunting Packs for slots in your army. Their advantage over wolves is that they have a ranged attack with range 3. Centaurs are available in late mid game which means that the wolves' better mobility can be overcome via training and the wolves' strength against animals is no longer relevant. All in all, Centaurs are the superior choice for a Support unit that delivers a Pathfinder aura, an aura that is extremely useful (and cannot be recreated with an artifact afaik). There is one problem though. You get the option to get Centaurs quite late in your campaign and if you get the option to hire them, you decided against acquiring 5 supply. FIVE SUPPLY. That translates into all kinds of massive disadvantages just so your wolves can have a ranged attack they will hardly ever use. One example would be two additional Winged Maidens, an additional Armoured Troll and an additional Fire Archer that are not currently pummeling the enemy. Those alone can take on a small battlegroup. You can safely discard anyone's opinion who advocates for Centaurs (unless you activate "scaling" which would, of course, defeat the whole purpose of acquiring supply and building up your army and has no place in a grand strategy game based on that premise exactly). Support unitsHunting Packs The packs' pathfinder auras are essential to keep your army moving at top speed. The upgrade to Hunting Pack does not cost weapons and Packs have decent damage (excellent damage against animals) which makes them viable in combat. In early game (when you are not strong enough yet to just plow through the map) on maps where you don't need to send an outrider detachment into some forest you can park your guaranteed drop of Wolves next to your Skirmish Cavalry. You want a second group of wolves soonish. So, while you are digging for Imperial volunteers you don't need to kill off wolves if you happen to find them. Thanes Thanes are not ranged you say? Exactly. They should be (or better still they should get a third artefact slot). You do not want or need them in a melee hex so you don't want or need them at all. You want Wolf Mothers instead - even in open melee hexes. Thanes can carry an additional artifact and they can debuff enemies. Their poor damage output more than neutralizes the debuff though (which is gone after one turn anyway). They do not have magic damage or armor penetration. They are expensive. Their resistances are not that good for a tank and their mobility is horrible. Another nail in an already tightly sealed coffin is that they cannot be trained - which is a design decision so bad that it is a bug imho. Wolf Mothers They can carry an additional artefact. Charm works on Pegasi and the AI does not de-prioritize charmed units. Bears can debuff morale for a huge group of enemies. They have a ranged attack and their range can be extended if you find the right artefact. They are one of the best tanks in early and mid game - in particular once you can equip them with a Plague Doctors Mask (health artifact). They can be trained (as opposed to the Thane).Their attack is not particularly strong but it offers magic damage when that damage type is still rare. The attack being ranged it can easily deliver debuffs (if you have the right artefact) in particular if you put the Wolf Mother on a melee hex - which you want to do anyway because she is a decent tank. You can attack without entering rivers/swamp (as opposed to the Thane again). They are cheap, mobile and their utility is excellent. You want to get one with your first liquid mana and you want another one to cover the rest of the map. You can get the second one for free during your campaign so I would advise not to recruit a second one. Long range units (skirmish cavalry, artillery) Skirmish CavalryStag Riders & Stag Lancers Stag Riders are very cheap which means they offer the earliest/easiest source of magic damage. In addition, they have excellent mobility in open fields and can operate in most environments if you find the right items. They can attack air units and while they ignore zones of control, they do trigger ambushes. Their retreat mechanic is a matter of opinion. I dislike it because you lose a turn (or two) and the random nature of the direction they flee in can easily get the unit killed. The attack mechanic of Skirmish Cavalry is quite counterintuitive. They ignore zones of control, are skirmishers and they move back for free after they attack. So, to have the right mental model you should consider them artillery pieces with solid shot (Troll Hurlers being the artillery pieces using grapeshot). One synergy that is not immediately obvious is that your wolves give your Skirmish Cavalry (your solid shot artillery) 2 hexes of additional range - which it can use to cross a river or forest or... One additional strength of the attack mechanic is that you can (and will) use it to scout enemy positions. The major weaknesses of the attack mechanic are that you Cavalry can be "caught" by ambushers and that it triggers overwatch from units you have not been aware of before the attack. Secondary weaknesses are that the hex you are attacking from formally is not the one you are standing/starting on. Early on this is a disadvantage because your army is not yet overwhelming and consistently pushing so your buffs are not close enough to the enemy lines. All in all you absolutely want to bring a couple of Stag Lancers until you hit the swamps. Then you want to ditch them all or keep one as a scout that has obscene movement range and can finish off stronger enemies. That one can be upgraded to a Wind Rider (the upgrade does not help them at scouting). ArtilleryTroll Hurler & Siege Trolls Hurlers demolish enemy units consisting of large numbers of low health troops and they attack at range 4 - at a time when most if not all of your ranged units attack at range 2. This gives you the typical strengths of artillery in games against AI. You can soften up enemy positions, you can attack accross mountains and rivers. You pretty much always find an open hex for a unit with range 4 which keeps them relevant all game (even if they have to move to attack). In addition, they have several strengths that you would not expect from an "artillery" unit: They have very high mobility. During early game and early mid-game your Hurlers rival your best tanks - the equally 2-supply-costing Troll Chargers - in tankiness. Until after the swamps you might not field more than 1 Troll Charger while you might field up to 4 Hurlers (including the one you get for free) - making them your primary (off-)tank. They can deliver debuffs. The last point does not seem surprising at first but the high range and the option to equip an artifact effectively turn Hurlers into spellcaster. In fact, the best way to think about them is as spellcasters that need to channel before they can dish out their full damage. (I suspect that the unit was indeed a spellcaster in an earlier build and the wording was changed from "channeling" to "heavy weapon" to make it easier to understand/use). The goal of our army is to kill every enemy unit in 2 hits and some in 1 hit. The Hurler delivers on both fronts. It can take out quite a few enemy units in one hit (again: at a time when no other unit in your army can do so) and if it is equipped with a cursed amulet it can soften up most enemy unit far enough for them to be killed with the next attack. This also means that the main weakness of your Hurlers (the need to stand still to deal full damage) is a lot less relevant than it seems. You do not need the upgrade to Siege Troll for quite a while. In fact - you do not need to do so at all until liquid mana becomes ubiquitous - instead you can give them an additional artefact slot if you find good items to buff/debuff with. Imperial Artillery There is a random drop that gives you access to one piece of Imperial artillery. It is not worth it to spawn it unless your army is at max supply and you can go over that. But even then - your supply will go up further and you will want to discard the unit again. Flying units The number of flyers you field is a a personal choice. Everything between 2 to 7 of seems reasonable and them being 2 supply each means that a huge part of your army is purely a personal choice. As it should be for a strategy game. Most flyers cost too much supply for what they can do. The only flyers that are not out-competed by another unit (or several) are the Monster Hunter and the Phoenix. Those two share a few similarities so we can discuss their usage in one go: They are both melee and super-melee. They attack adjacent Flyers (which can retaliate) but can only attack ground units on the same hex (dive attack). Which makes them horrible against ambushers. They both move into the hex of an enemy Flyer that they have defeated. That can be a problem because it blocks Winged Maidens and some other attacks/spells you will want to use. They cannot ambush. They do not get buffed by a pathfinder aura. They can stop enemy air units from killing off weakened units in your army. They cannot move over an enemy unit and attack later (at least I did not find out how - CTRL does not work). This seems to be a bug/oversight and it means that you have a hard time positioning them optimally before the slaughter starts. This reduces the number of open hexes massively if you want to split up movement and attacks - which is acceptable if you use them mainly as anti-air. [Edit: Ha! Someone in the forum wrote that you can use "move" - normally bound to "m" to move without attacking automatically. It sure took me a while to learn that...].Both viable flyers focus on anti-air (the Phoenix less so than the Monster Hunter) which means that there is such a thing as fielding "too many" flyers. Both Monster Hunters and Phoenixes are essential to shield your army against enemy flyers and both excel as anti-air on the offensive as well. Once there is no more enemy "air" to fight they get harder to use effectively (considering their 2-supply cost). Monster Hunters Monster Hunters are the best anti-air units in the game and enemy air units are a massive mid and late game threat (the only actual threat in the whole game are certain mid game flyers). The damage ouput of Monster Hunters is not quite high enough for a 2-supply unit but their mobility, their ability to intercept enemy flyers and their ability to take out the most dangerous threats make them worth it. Notable points: Their net sounds useful but you will only use it in one or two swamp missions if at all. There is a summon for entangling units (which you don't need as well) and to use the turn of a 2-supply unit to disable one enemy is a waste in late game. It only slows you down. One major strength of theirs is that they do NOT deal magical damage. Almost every thing else does, so you want flexibility. Winged Maidens deal physical damage as well but they cannot attack air units and are a lot less durable. They can carry 2-3 artefacts and can be positioned in the middle of your army (while still being able to attack an enemy flyer) which makes them a very useful in late game if they carry buffs.The swamps are the only missions that are actually dangerous and they can be a lot easier if you bring Monster Hunters (Phoenixes are useful as well) So if at all possible you want 2 or even 3 Monster Hunters to fight in the swamps. In hindsight I should have ditched 2 of my Skirmish Cavalry immediately to get my first Monster Hunter and maybe ditch a Hurler as well (I got the free one when I was at 3 already) to get second Monster Hunter. Hurlers are quite useful all game long but the Monster Hunters take the edge of the hardest parts of the game. Firebird Phoenixes (I will not call them "Firebirds") are the best main battle tank in late game (because the AI has poor target priority). You want 1 Phoenix asap to be able to use Cleanse (a cheap long range spell that removes all buffs and debuffs - you need it mainly against harpies and against petrify and blessings from certain enemy units) and to use it as your main battle tank within you outrider detachment(s) that go capturing or for secondary objectives. A weakness that is not immediately obvious is that a Phoenix is immune to psychological effects. So it cannot be buffed by war banners - which is irrelevant in an outrider detachment but a massive drawback when it is with your main army. This gives you an additional reason to overextend with your Phoenixes (one or two artifacts to buff their resistances and it/they should survive one turn in the middle of an enemy battlegroup or a smaller army). If a Phoenix' level is high enough to allow it to survive without artifacts you give it a mask to reduce damage and morale - the last one being massively useful in late game I would recommend a Phoenix as your first flyer and 2 or 3 Monster Hunters afterwards. Summoned units and mercenaries SummonsThe most important summons are: Ancestors. They are reasonably cheap, can cross mountains and buff each other which makes them the best choice early on when mana is very limited and your army has not yet grown (and you might not have access to Air Elementals yet). Air Elementals. They have a magic-based area-of-effect spell/attack that the enemy cannot retaliate against, a haste spell, great mobility and good health. Both of those spells are free. The Air Elemental is ridiculously overpowered and needs to be changed. (the developers should limit it to 2-at-a-time or add a 1 mana cost to their spells or make them one-off or...). Bears. They can lower morale and hold a position for quite a while. Eagle Bears hit hard in addition. The morale debuff is their raison d'être though. Spitting spiders. In some fights against swamp dragons you might want to disable a threat that you cannot kill fast enough. I would (and did) get an Air Elemental instead but that is probably the wrong call. Bats. In theory you need some flying 1-mana summons to scout with but I just used the spell from the Witch Hero, checked and reloaded. If you don't want to do that (it is cheating after all) you want a couple of those from your Wolf Mothers. EDIT: Something I missed is that bats are very useful as tanks. They go down relatively fast but that makes them BETTER at tanking (given their low cost). The reason is - again - that the AI chooses its targets very poorly. The AI will try so hard to kill bats (hurt ones in particular) that they will put some of their strongest units (flyers in particular) in harms way AND waste their attack instead of finishing off a more important unit of yours. A bat can often tank three (or even more) attacks before going down (it can be buffed by horns) which makes it massively overpowered for one mana. Scouting and attacking archers who have spent their defensive fire are both nice-to-have in comparison - and those alone almost make up for a cost of one mana. That's what you get for cheating.... you miss one of the best defences against flyers.The other summons are not worth it. Most are appropriately priced for what they do but Bears, Air Elementals, Bats and Cheating cover all bases. At some point you will get an artifact that gives the trait "strong" to all units summoned by the caster carrying the artefact. Once you have it, you will be pumping Air Elementals each turn with the Witch hero. MercenariesUsing mercenaries brings dishonor on you and your cow. You are spending gold that you could be using to upgrade your troops. Mercenaries are unnecessary and buying them weakens your army. That being said: they are not all that expensive and you get 3 mana once they die. Get them, if you enjoy fielding them - in particular for the three harder mission (I am not sure whether you can buy them in the swamps...). Builds for your Heroes Max level is 10 so you have 10 skill points to spend. Each hero gives you different options to train your troops. Apart from the two mandatory heroes the hero that buffs gives you the most import training options by far. Wanderlust and Magic Armor are essential. You can find the detailed stats in FG2 Hero Units Review by Virgil-SKY. This is about builds instead and the names are de-spoilered. FalirsonMandatory skills (6 skill points) Quartermaster und Master Provisioner are the second-best skills in the game after Transmute Life. Bigger Pockets and Even Bigger Pockets are needed to up his resistances and/or to carry buffs.Recommended (4 skill points) Drill II gives units you hire on the campaign map (=your flyers) an XP boost. Strong but not all that powerful because "Volunteers" (spawned by Camps, some can be upgraded to Fire Archers) do scale with the average level of your units (my last 4 volunteers were all level 10 immediately) and once you are level 10 (to take full advantage of "half the level") your army is pretty big already - apart from archers, flyers and maybe a couple more trolls (that you can and will get from camps as well while fishing for Fire Archers if you leave two supply unused). Call Champion does not cost mana and it allows you to overextend on purpose. If the bait does not get killed it can retaliate with heavy damage. The auras needed to get to Call Champion are decent but only really useful in early game. You will not take damage later on anyway.You absolutely can take the hammer upgrades instead. They keep Falirson useful in late game so they are probably the better option tbh. Call Champion is just a bit more interesting... Famous and More Health are a joke in comparison. Falirson is by far the best candidate to put frenzy on (there is an option in a mission). He also needs his mount. So, you should free it or help him (loot location in "Thieves in the night"). A witchUnfortunately, VladK02 found a build that is clearly the best choice. I dislike it because I really wanted the XP-aura and the mana boost trait. In reality this hero needs to do two things though: spam strong Air Elementals und Chain Lightning II. So instead of taking that sweet early game boost and/or helping your whole army level quicker you need to take: Chain Lightning II. Raging Storm. Bigger Pockets and Even Bigger Pockets.You use the pockets to amp magic damage and give her a mana extractor. I would take Summon Mist on my way to Chain Lightning II but only because you do not get access to it any other way. You will be summoning and blitzing when you have mana. A transmuterMandatory skills Transmute Life. Bigger Pockets and Even Bigger Pockets increase their range and/or allow them to carry buffs. Shackles of Pain. You can cast this on enemy units. I was not aware of this until I read it somewhere. So not only does this make a unit invulnerable for three turns, it lets you utilize overwatch. Cleanse. Very useful - details in the section about the Phoenix.If you want to cheat you can do so by taking Mirror Image while carrying mana potions (I assume this will be patched when the Empire campaign gets released). If you don't want to cheat I would advise against Mirror Image. Random positions are not acceptable, every hex counts. Resurrect is nonsense because the unit loses XP. This hero is an essential support for your army, being your mana generator. Do NOT let them leave. You need 2 liquid mana the first time their presence is in jeopardy and 800 gold (or 6 liquid mana if you are crazy) the second time. After that it is handy to have another 2 liquid mana in reserve for an optional bonus. So always keep two liquid mana around or look up when exactly you will need it. If you can't pay them, force them to stay. The resulting debuffs are almost irrelevant (for min-maxing purposes you can straight up safe the 800 gold and take the debuffs, but hey! They need that gold for their yacht! Maybe they leave you later if you do, but I don't think so. A hero that buffsMandatory skills Bigger Pockets and Even Bigger Pockets increase their tankiness and allows them to get close and doom an army. Attuned II. Heroes Song. Doom.They are a very straight forward hero carrying every relevant support spell there is. Transmute Armor is the only one I did not see an artifact for but that does not matter because you would put it on this hero anyway to go in a debuff/buff. Their ability to curse in retaliation is quite strong early on. Once mana no longer is an issue (=the transmuter arrives) you will be mass-cursing all armies and most battlegroups anyway. A hero that joins late gameMandatory skills (6 skill points) Quartermaster und Master Provisioner are the second-best skills in the game after Transmute Life. Bigger Pockets and Even Bigger Pockets are needed for them to carry buffs. Army Stance March.Army Stance March changes the dynamic of the game completely and lets your already highly mobile army travel maps without a single turn interrupting the slaughter. The debuffs are irrelevant because you annihilate the enemy in one turn and retreating actually gets good late game because your wolves push stragglers anyway and you cover so much ground that your retreating units will almost never go somewhere nasty. It does not matter what you take for the rest of their skill points. Their damage is almost irrelevant so even though you don't need them I would recommend the other two stances. If you have an emergency or made a planning mistake those stances can save you. Don't cast them when March is fresh though! It would be a shame to waste 50 gold for finishing the level a bit earlier. The restThe other heroes will probably leave you in mid-game but they are as straight forward to build as the hero that buffs. Some can stay if you make corresponding decisions but that is spoiler territory. Advice on specific missions Strategies for the hardest missions Some words on the three missions that are not quite trivial, even if you bring a strong army and know what you are doing. That-god-awful-swamp-mission (pretty sure it is called "Shrouded Coast" but it might be "Glowood") You know, the one with 12 to 15 (if you are unlucky and the patrol gets activated alongside the battlegroup) unpleasant swamp dragons attacking a third of your army all at once. This can be a brick wall and could force you to reduce the difficulty (no shame in that!). The army composition we are going for in this guide with its focus on ranged units brings the best anti-air you can possibly have at this point but still: this one is HARD. The strategy for the map depends heavily on where the AI spawns its massive group of dragons and on their initial movement. It consistently spawned them in the middle for me (I tried more than once...) but I would not rely on it. You want to join your western battlegroup and the one in the middle ASAP. You need to keep to the edge of the map or you aggro the dragons. The battlegroup in the east can try to fight for a bit but I did move most of it west as well immediately (I left the stronger melee and a very small anti-air detachment to fight the non-dragon lizard army over there. Then you hold against the huge group of swamp dragons but baiting them to attack melee units you can pull back or summons. Things I did not do that might help: You just might be able to aggro only a part of the dragons (if they fly off into a "good" direction on their first turn). It gets quite a bit easier if you already have Monster Hunters. You can think about summoning spiders instead of air elementals to web dragons (they are not "large") and to tank. Thieves at night Imho this is the second hardest mission in the game. Focusing an mobility allows you to beat it without mercenaries though (those are uncouth - they cost gold! Boo!). You want to pull everything back into the middle while grabbing loot, to hold out there (loosing temps is fine) and break towards the north east, circling the mountains to avoid the battlegroup to the south/south east. It is imperative to kill as many groups of enemies as possible before they merge in the middle. The north east needs to be taken out if you want to break into that direction. (You can choose another direction but the forest and mountain ridge in the north east give you an advantage). Here is a discussion about the mission, containing lots of exaggerations and lots of insults over those exaggerations. They still make some good points about the mission. There and back again Probably objectively the hardest mission in the game and at first sight not a good fit for this army (it being about being on the offence). If you know the map though this army composition is still by far the best option and will carve through the Imperials ridiculously fast. You want to drink 2 to 4 mana potions (pumping strong air elementals and normal bears), grab the shrines and the dragon, hold the riverbank (to break charges and to debuff the enemy standing in the water) with summoned bears and annihilate most of the lizards first with almost everything you have. The riverbank is not the best place to fight the Imperials - there is a mountain ridge right beside the dragons lair which is perfect. That is not an option unfortunately because you lose control over the battlefield if you engage there. You cannot hold the two shrines and the lizards can consolidate their armies. So about those stone skin shrines and the speed shrine (one stoneskin shrine was a regeneration shrine in the past or is one on other difficulty levels) as well as the dragon's lair: You do not necessarily need the shrines yourself but you don't want the enemy to grab them (the speed shrine in particular). The speed shrine (just east of your keep but across the river on an "island") can be held by an isolated Falirson equipped with enough purples. The southern shrine (almost at the edge of the map; south of the speed shrine) can be capped and held by a winged maiden supported by an eagle (preferably a phoenix) and the dragon. You need to run through spider-territory without getting webbed, so maybe bring another unit to bait the webs. The shrine in the north east (north east and comparably close to your keep) will be held by you anyway - this is broadly where you fight the lizard armies. The dragon lair can be found at the river bed to the south of the speed shrine. There are lots of discussion about this mission in the forums but those are mostly weird. Probably not really on legend difficulty. The mission is not really hard, you just need to know the map in advance or you will suffer heavy losses. Mission choices This discussion is really helpful to choose between missions: The Mission Choice Spoiler Thread by Mhorhe. Not all choices and results are in there but it seems mostly correct and is low on spoilers.

本指南旨在帮助解决常见问题。 故障排除 如何确保游戏文件已正确安装? 验证游戏文件的完整性 始终存在这样的可能性:您电脑上运行的应用程序可能会对游戏或Steam客户端的性能产生负面影响。 可能导致Steam出现问题的程序 会影响Steam的间谍软件、恶意软件、广告软件或病毒 我们建议定期检查驱动程序更新。 更新驱动程序 如果游戏卡住或任务无法结束,我们需要output_log.txt文件。 如果游戏崩溃,我们需要最新的崩溃报告文件夹。关于我们需要哪些信息以及如何获取所需文件,你可以在“报告问题/支持讨论”中查看。