换一换
换一换 


A quick and dirty guide to the Pirates of the Sword Coast Premium Module. Before you get started. A few things to note before you begin your pirate adventure: The module scales with your character level, so don't worry too much about importing higher level characters. Be sure to speak with Poly often. He'll have some interesting things to say about your situation, and can sing a song for you for some temporary buffs. Also, he loves to count things. (There is a section at the end of this guide listing the things Poly can count.) Not long after you begin your adventure, you will lose everything your character has on them. "Some things float and some things sink. All the good stuff's in the drink." You'll have an opportunity to get most of it back. If you're something of a hoarder with an imported character, just think of it as a chance to do some housecleaning. Chapter 1: The Adventure Begins. Start by talking to Captain Allendry of the Midnight Rose, where you'll find that you've agreed to work as a temporary crewman in exchange for passage. He'll ask you to go collect another passenger who has yet to show up. You'll find Rahman Madani, the passenger in question, in the Silver Sales Trading Company. When you ask what the holdup is, you'll find out that another crewman is neglecting his duties and refused to load a statue belonging to Rahman onto the ship. So your next step is to find the missing crewman, Martins, and get him back to work. At this point, you may want to stop by Rusty Al's Tattoo and Pawn Shop for a little memento of your visit to Neverwinter. For just 100 gold, he will offer to give you one of four different tattoos, each of which gives a permanent buff. A rope and anchor, which gives you +2 to will saves. A heart and arrow, which gives +2 to fortitude saves. The eye and tears, which gives +1 deflection AC bonus. Or a gnaked gnome for +2 to reflex saves. Head north to the Seedy Tavern. As you approach, you'll be accosted by two shady characters, Honeypea and Bradley, who give you the typical demand for either your money or your life. You'll have several options to deal with them but it really boils down to two outcomes. Fight them or don't. However, you're going to be dragged into a fight either way. Your choice here simply determines which gang you'll be fighting from now on as long as you're still in Neverwinter. As soon as the choice is made some Bloodsailors will show up and pick a fight, which several Blackriver Bandits will join. If you avoided a fight with Honeypea and Bradley, the Bloodsailors will decide you've allied with the Blackriver Bandits and attack you and the Blackriver Bandits will be friendly. Otherwise, the Bloodsailors will join with you and help you fight the Blackriver Bandits, whom will be hostile to you. The whole docks district will erupt into skirmishes between the two gangs at this point, and you'll probably wind up getting caught up in some of them as you wander around. You can put an end to it by visiting each of the gang hideouts located around the edges of the district and killing the gang boss located within each. In any case, enter the Seedy Tavern to speak with Martins. Unfortunately, it seems he still refuses to go back to work. You can get the whole story out of him with a few drinks. Apparently, as soon as he touched the statue, he had an apocalyptic vision involving the sea rising up and destroying the world. Consequently, there's no way he's going to be willing to sail again any time soon. With Martins now officially AWOL, return to the Silver Sails Trading Company and try to convince the dockworkers there to move the statue anyway. You've got several options to do this, including intimidation, curses and bribery. If for some reason you still can't convince them, you can go get Rahman his spellbook from the Midnight Rose and he'll move the statue himself. Once the statue situation is taken care of, return to Captain Allendry, who will inform you of a last minute addition to the passenger list. Head on up to the Golden Apple Inn and let Gilda know you've come to escort the new passenger, Tasina, to the Midnight Rose. Of course, it won't be that easy. Turns out another group has already arrived ahead of you to "escort" Tasina. Head upstairs and take them out, then talk to Tasina. When you're done, make your way back to the Midnight Rose and let Captain Allendry know you're ready to set sail. Enjoy the cutscene. Chapter 2: Marooned! You find yourself on a seemingly deserted island with nothing but the thirst for vengeance to keep you alive and a ruined sailor uniform to protect your dignity. At least Poly is with you so you won't get lonely. At this point you can ask him to sing you a song for a temporary buff, which will probably come in handy as you explore the island so keep it in mind. You can also ask Poly to count things for you, and if you collect everything in a category you'll get a reward, so keep that in mind as well. You cannot rest on the island like you can everywhere else. Instead you must find a place to make a fire and use that to rest. Southern Beach Start by collecting things you'll need to survive. Sticks can be collected from driftwood, tinder from palm trees, rocks from, well, rocks. There are animals to contend with as well. Gray Ooze will drop ichor, jaguars drop catgut, seagulls drop feathers, and boars drop leather. These items can be used to make various crude weapons. There's a cave nearby where you started that has a fire pit you can use to build a fire and rest as well as craft some items. You'll need the tinder to start it, and also some way to make fire. If you're a spell caster and have a fire spell available, you can use that in the dialogue to do it. If not, no worries. There's some flint in some rubble on the hill above the cave. Once the fire is lit, you can extend it's lifespan by feeding it some sticks and also use the fire to cook meat and make torches and spears. Everything you need to survive respawns quickly, so don't worry about running out of sticks or something. In fact you could stand next to a piece of driftwood, for example, and just collect sticks every fifteen seconds or so. If you have a torch in hand, the local wildlife will be affected with fear when you get close. Oozes will simply disappear as well. You can't loot them when this happens, but if you already have a torch then you don't really need ichor anymore so it doesn't matter. When you're ready to proceed, find the cave on the north edge of the map and go through. It's filled with jellies and oozes, but if you have a torch out this won't be an issue. Northern Beach Once through the cave, you'll be on the north side of the island where you'll find some troglodytes discussing a map in the sand. You can use a lore check to reveal the area on your map if you want. Near the troglodyte map is a cave you can use to make another fire and rest. To the west and around the corner is a cave where the troglodyte village is located. Go ahead and enter, where you'll be overwhelmed by the stench and pass out. When you awake, you'll be in a prison cell and you'll be forced to fight a troglodyte named Garm in the arena. Chances are you're going to lose, but that's okay. Once you're down, you'll be presented with several options to turn the tide. Pick whatever you like. You should be able to succeed even if you lack the particular skill selected. With that done, Garm will inform you that you are now Eater-of-Garm, since you are supposed to eat him after defeating him in battle. He will now join you as a companion so he's always readily available whenever you start getting hungry. You are now free to explore the troglodyte village, which is friendly to you for the time being. There's a vendor named Drak in the southern area if you're interested. You can also find the "sacred wood" in the southwest room, but if you take it the troglodytes will turn hostile, so hold off on that for the moment. More importantly you'll want to speak with King Utnal in the northwest. He'll give you the key to the chest behind him, which contains the stuff that you lost when you went for a long swim in the ocean. You should be able to get most of it back, if not everything. King Utnal will also ask you to eliminate whatever creature is inhabiting the sacred cave to the east. Head back outside and go to the sacred cave on the eastern side of the map. As you approach, you'll be greeted with a grand firework display. Go inside and freeze. This area is loaded with traps. You'll have to either disable them somehow or carefully navigate your way to the room at the back of the cave where you'll find the genius shipbuilder Edgrimm. This not at all insane dwarf has been spending his time on the island inventing several new ship designs that will revolutionize the industry, but the one you're interested in is S.H.I.P. 2.0, also known as the R.A.F.T. Ask him to build it for you and he'll agree, but he needs the sacred wood in the troglodyte village to do so. So now you have two choices. Help the troglodytes by killing Edgrimm and taking his plans for the R.A.F.T., which you can use with the troglodytes' help to build one. Or you can kill the troglodytes, steal their sacred wood and get Edgrimm to build one for you. If you choose the later, you can make that fight easier by using a bucket of water to douse their sacred fire. This will weaken all the troglodytes and make them slow, except for your companion Garm who sees the whole situation as all the other troglodytes getting what they deserved for abandoning their cannibal god in favor of accepting handouts from the warmbloods' sea goddess. You could also slaughter both the troglodytes and Edgrimm, but then you have to build the R.A.F.T. yourself. In any event, you will finally be able to escape the warm beaches and beautiful scenery of a tropical island and instead enjoy floating around the ocean on bits of broken wooden planks questionably strung together with makeshift cords. Chapter 3: A Town Full of Booty. You journey aboard the R.A.F.T. will meet it's end on a sandy spit next to a lighthouse. The lighthouse gnome will greet you and inform you that you have indeed reached civilization. A few things to note before we dig into what you need to do here. Scattered around the island are some I.O.U.s, which are usually found in already looted chests. When you find one, simply take it to the person who's name is written on it and they'll give you an item or service in exchange. There are also several treasure maps to be found or purchased. When you use one of these in the appropriate area, it will tell you where a certain landmark is relative to your current position. When you find it, it will point you to another one. After four or five or so, you'll dig up some buried treasure. For example, "30 paces East to the statue." "17 paces North to the pine tree." "21 paces West to the wagon." "24 paces Southeast where a pillar marks the spot." There is another tattoo shop in this town where you can get another permanent buff, though you'll have to bail the owner out of prison first. The available options are Skull and Crossbones for 12 spell resistance, Flaming Skull for +2 Dex, Umberlee's Waves for +2 Wis, or Copper Dragon for +2 Str. Every proper pirate loves booty, so now that you've found a town full of people, you should ask everyone you meet if you can buy some booty from them. Everyone. The priestesses in the temple, the large man in the street, the sahuagin in the blacksmish shop, ask every person you run into to sell you some booty. Poly will keep track of how much booty you've purchased and give you a reward once you've purchased booty from everyone willing to sell it to you. Back to business. You'll soon discover that the Midnight Rose is docked here, which means you have an opportunity to steal it back. But to do that you'll need a crew. You'll also need to do something about the weather somehow so that your ship doesn't get torn to pieces as soon as it leaves port. Before you do anything else though, you should probably head down to the docks where you'll find your old pal Nisar who will join you as an additional companion. Chapter 3a: Gathering a Crew. So lets start getting a crew together. You'll need to recruit at least five sailors, but if you recruit all eight possibilities available to you, Poly will give you a present. Sailor Number 1. There are two possibilities here depending on if you helped the Bloodsailors or Blackriver Bandits back in Neverwinter. If you helped the Bloodsailors, Vengaul Bloodsail will be waiting for you on the Sandy Spit somewhere between the lighthouse and Spindrift Town. If you helped the Blackriver Bandits, Honeypea Blackriver will be waiting there instead. In either case, if you want to recruit them then you need to help them retrieve the Scepter of Storms, which is as simple as following the treasure map they'll give you for the Temple of Umberlee. Sailor Number 2. Longneck Langer. He's a fine sailor, but also a wretched pirate. And that's why he's in prison. He's just no good at being a pirate, which is a crime in this town. Not enough "Arrs" and "Yarrs" and "Shiver me timbers". To recruit him, you'll have to get him out of prison. You have three options for this. First, pay his 10,000 gold bail. Second, you can use persuade skill on the governor to let him go. Or third, you can use the services of the local tattoo artist to make him more piratey by giving him the "Jolly Roger Special". For the third option, you'll first have to pay Flastaff the tattoo artist's bail. He will give you an I.O.U. for doing so that you can use to pay for Longneck's pirate makeover. Sailor Number 3. Redtip. You'll find this big guy in the smuggler's warehouse. To recruit him, you just have to beat him in a fight. Sailor Number 4. Sir Francis of the Dragon. Also located in the smuggler's warehouse. In order to recruit him, you need to find the ring he lost that he had promised Rascally Pete he would safeguard. You'll find the ring down in the sewers in the same location as Rascally Pete. The exact same location, actually. As in, in his pocket. You'll have to get the ring from him somehow and give it to Sir Francis, though Sir Francis will prefer it if you went with a non-violent approach to the problem. Sailor Number 5. Whipped Willigan. Same old story. The Swashbuckler Willigan meets a girl. Swashbuckler Willigan marries girl. Girl turns out to be a shrew. Swashbuckler Willigan gets transformed into Whipped Willigan. In order to recruit this poor, unfortunate soul, you're going to have to rescue him from his prison of marital bliss. Speak with Grogbeard at the Monkey's Cutlass and he will set up a ladder for you to get into Willigan's manor. From there, you'll have to retrieve Willigan's pirate gear from three different chests on the first floor while avoiding the wife and sister's in law. Invisibility spells and potions will help a great deal with this. Once that's done, Willigan can make a break for it and attain freedom once again. Sailor Number 6. Shakey McGwire. Located in the Temple of Umberlee. Suffers from aquaphobia, the fear of water. You'll have to either coerce or persuade him to join. Sailor Number 7. Either Pegleg Paulson in the Monkey's Cutlass or Sweetie Marie in the Temple of Umberlee. If you are female, you can convince Pegleg Paulson to join by flirting with him. You may have to buy him some drinks and get him good and drunk first. If you are male, speak with Pegleg Paulson to get the Wildflowers treasure map. Complete that and give the wildflower to Sweetie Marie to get her to join your crew. Sailor Number 8. Vantabular Garsp. Also known as the lighthouse gnome. To recruit him, you need to solve the lighthouse puzzle to open a portal to some hidden caverns and retrieve the ancient astrolabe from within. The puzzle can be reset from the console behind Vantabular, but it changes on each attempt so there is no simple solution I can just give you here. You'll have to figure it out yourself. As for the rules of the puzzle, the goal is to turn all of the pillars of light white. Click a tile and you'll have the option of laying down a colored arrow. As long as an arrow is pointed at a light pillar, it will work anywhere on the board. If you see a purple pillar, that means it needs a green arrow pointed at it. If the light is yellow, it needs a red arrow pointing at it. Good luck. Chapter 3b: Ending the Storm and Leaving Port. Now that you have a crew, you still need to put a stop to the storm. As it turns out, it's being caused by the priestesses of Umberlee, so you're going to need to find a way into the temple and politely ask them to stop so you can take your ship back. There are a couple ways to do this. The first way is to sneak in through the sewers. It's pretty obvious you're not supposed to be there if this is your chosen route though. The second way is to pretend to be a priestess yourself. One of your potential crewmates, Pegleg Paulson, has just the thing to help you in this endeavor. A slightly used set of Umberlant Robes. If you chose the later, just wear the robes and speak with the sahuagin guard in the entryway of the temple to gain access. If you're female, he'll just let you right on in. If you're male, however, then you'll have to us a little persuasion. Either way, make your way all the way to the back and around the corner to the right. Make your way to the southeastern area of the map and you should find a hallway that leads to the entrance to the Sea Caves. Inside the caves you'll discover that the priestesses have just completed their stormcalling ritual just before you arrived, so you really didn't need to go through all that trouble. Unfortunately you also discover that they plan to use the Midnight Rose to transport the statue that started this mess to Fiddler's Green. This can go one of two ways, but whether you choose the violent or non-violent route, Tasina will leave with the Midnight Rose and you'll have to find another ship to go after her. Lucky for you, there's one available down at the docks called the Skull and Bones commanded by a totally trustworthy and not at all shady captain by the name of Kolmarr the Grim. By shear coincidence, Kolmarr just so happens to be in need of a crew himself, having lost his previous crew to and unfortunate encounter with a storm. A crew you just so happen to have available. So just let him know which five crew members you want to take with you and tell him you're ready to set sail. The Isle of the Dead Before you continue your pursuit of Tasina and the Midnight Rose, Kolmarr wishes to make a pit stop on this cozy little island to retrieve a certain artifact that will help you enter the Fiddler's Green. You should definitely help this good upstanding citizen with this simple task. But first make sure to speak with Old Tom to get some supplies, as the place has a little bit of an undead infestation. All you need to do is make a loop around the island and interact with five sigils to assign a crewmember to stand on each one. Once all five are activated, go to the center of the island and good Kolmarr will open a gate for you so you can go in and retrieve the artifact. Chapter 4: Now You're Dead. Alright, so it turns out Kolmarr is not as trustworthy or upstanding as you were lead to believe and now you are living impaired. Luckily you're not under his control like he wanted. Too bad the same can't be said of your five crew members. You're going to have to fight your way out of this. Your crew will be fighting on Kolmarr's side against you and your companions. Worse, you've developed a crippling allergy to healing potions, so you'd better avoid those. Once Kolmarr is dead, your crew will be free from his control and you'll be sent back outside. Head back down to the Skull and Bones where it seems Old Tom has lost some weight since last you spoke. On the bright side, they say only the dead can find their way to Fiddler's Green, so maybe this situation has worked out in your favor. Take some time to sort out your potion situation if you need to and when you're ready to continue, tell Old Tom to set sail for Fiddler's Green. After a short cutscene, your ship will come under attack by sahuagin. While your crew is busy battling them on the deck, you'll be bellow trying to keep the ship from sinking from all the holes being put in it. The sahuagin will keep spawning, so it's largely a waste to try and fight them. Let your companions keep them busy. Your task will be collecting wood from the pile on the north side of the room and using that to plug the holes. You'll also need to run to the back of the ship (west) and use the bilge pump to keep the water from getting too high. The battle ends after you plug the last hole. With the battle over, go up the ladder where you'll find you've finally recovered the Midnight Rose. That's the good news. The bad news is that it's nothing but calm seas with no wind all around, which means neither ship is going anywhere any time soon. Board the Midnight Rose and go bellow deck. In the captain's quarters you'll find none other than the ghost of Captain Allendry, who is now doomed to haunt the ship until his murder is avenged. Swear to him (or pretend to) that you'll take vengeance against Tasina for his death and he will teach you a poem that you need to recite to get to Fiddler's Green. Go back upstairs and interact with the nearby gangplank. Recite the poem and go for that long walk into the deep. Chapter 5: The Fiddler's Green. Under the sea! Under the sea! Darling it's better down where it's wetter.... Well, maybe not. There's not much here besides groups of sharks that will try to eat you. You'll probably notice some footprints in the sand. Follow them to a stone bridge leading to an ominous looking building in the center of the map. Even if for some strange reason you can't see footprints, there's really only one way you can go right now, so you can't miss it. A cutscene will play where a creature called The Dweller will destroy the bridge, blocking you from entering. Doesn't matter if you go left or right from here, just make your way to the north end of the map where you'll find a sunken ship. As you approach, a dragon named Yxondralu will appear and tell you her story. She also happens to know another way into the temple and will bring you there if you swear that you will spare the priestesses. This vow 100% contradicts the vow you made to Captain Allendry, and you can't proceed without agreeing to this promise, so you're going to end up breaking your word to one of these two. Once you've made your promise not to harm the priestesses, fingers crossed or not, the dragon will take you to the hidden entrance to the temple. Inside you'll find a gave filled with colored gates and pillars. It looks complicated, but it's really not. When you approach a colored pillar, you'll be bathed in light the same color as the pillar. You can only pass through gates of the same color as that light. If you approach a gate of a different color, you'll be transported back to the last pillar you visited. The ultimate goal is to enter the white gate in the center of the map. There's really no puzzle to be solved here because if you walk in a big counterclockwise circle around the map you'll easily encounter the pillar you need to pass through the next gate. The white pillar is at the center of the south end of the map, and once you're covered in white light you can pass through any gate you want. After "solving" the puzzle, enter the portal in the center where you'll be taken to the final battle. As soon as you arrive, you'll enter a conversation with Tasina where you'll need to decide how this goes. If you convince Tasina that she's making a huge mistake and spare her, the priestesses will leave and you'll have to battle the Aspect of Umberlee. The Dweller will also periodically make an appearance in the pools located in the four corners of the map. You can grab some aromatic oils from the fountains located around those pools and use them like firebombs on the dweller, but it just makes him disappear for a short while. I don't think you can actually kill him, and even if you can it's not really worth the effort. Sahuagin will also spawn during the fight, but they'll just keep respawning so not much point in focusing on them either. Instead, focus on bringing down the Aspect. When you kill the Aspect of Umberlee, you'll be brought back to your ship where you'll also find you're no longer living impaired, having been cured by a grateful Tasina and her priestess sisters. The crew will ask where to go next, now that you're an admiral with two pirate ships under your command, and Captain Allendry will be doomed to haunt the Midnight Rose for all eternity given that you broke your promise and betrayed his trust. If, on the other hand, you decide to avenge the good captain and attack Tasina, she will wind up transformed into a sea hag and you'll have to battle her and her fellow priestesses instead of the Aspect. Focus on the sea hag until she's dead. After the battle, you'll be brought back to your ship where you'll find that you still lack a heartbeat and your crew is just as dead as they were before. The Captain is happy to have been avenged and you are now an admiral with two pirate ghost ships under your command. But you also now have a pissed off dragon after you because you broke your promise not to kill the priestesses. Oh well, can't please everybody I guess. Either way that is the end of this pirate adventure. Things Poly Can Count. During your travels, Poly will keep track of how many items in various categories you have collected. Once you collected every item in a category, Poly will reward you for it in a manner befitting a parrot. Things he can count for you are: Tropical Island Usable Items Tinder Stone Flint Sturdy Stick Long Stick Raw Meat Seagull Feather Leather Hide Ichor CatgutReward: Poly's Precious Droppings. Allows you to cast Acid Splash unlimited times a day, as well as Burning Hands, Contagion, and Infestation of Maggots once per day each. Created Items Crude Arrow Crude Sling Crude Bow Crushed Stone Bullet Fire-Hardened Spear Makeshift Torch Maul Cooked MeatReward: Poly's Mangy Feathers. Allows you to cast Cat's Grace once per day and Charm Person or Animal unlimited times per day. Spindrift Island Buried Treasure Sandy Spit Scepter of Storms Spindrift Town 1 Spindrift Town 2 Lighthouse Caverns Caves of Umberlee Blackeye's Silver Willigan Manor Sewers *Wildflowers (Only available if your character is male.)*You only need 9 out of 10 to get the reward for this category. Reward: Poly's Crystal Egg. Allows you to cast Aura of Glory once per day and Scintillating Sphere twice per day. Sailors Recruited Longneck Langer Redtip Shakey McGwire Vantabular Garsp Whipped Willigan Sir Francis Pegleg Paulson / Sweetie Marie Vengaul Bloodsail / Honeypea BlackriverReward: Poly's Parrot Tongue. Allows you to cast Ironguts unlimited times a day, Sound Burst twice per day, and Wounding Whispers once per day. Booty Purchased Vantabular Garsp Vengaul Bloodsail / Honeypea Blackriver Jack Ketch Governor Blackeye Prison Guard Prugdush Grogbeard McPherson Kolmarr the Grim Longneck Langer Redtip Sir Francis Whipped Willigan Rascally Pete Shakey McGwire Pegleg PaulsonReward: Poly's Golded Egg. Allows you to cast Confusion once per day.
剑湾海盗指南

2026-02-18 22:00:35

导读
这是《剑湾海盗》模组的入门指南,涵盖冒险全流程:从与午夜玫瑰号船长开启任务、流落荒岛求生,到招募船员、解决风暴,最终抵达 fiddler's green 完成结局抉择。还提及角色物品丢失与找回、Poly的计数奖励等关键提示,助力玩家顺利推进剑湾海盗冒险。

评论
共0条评论

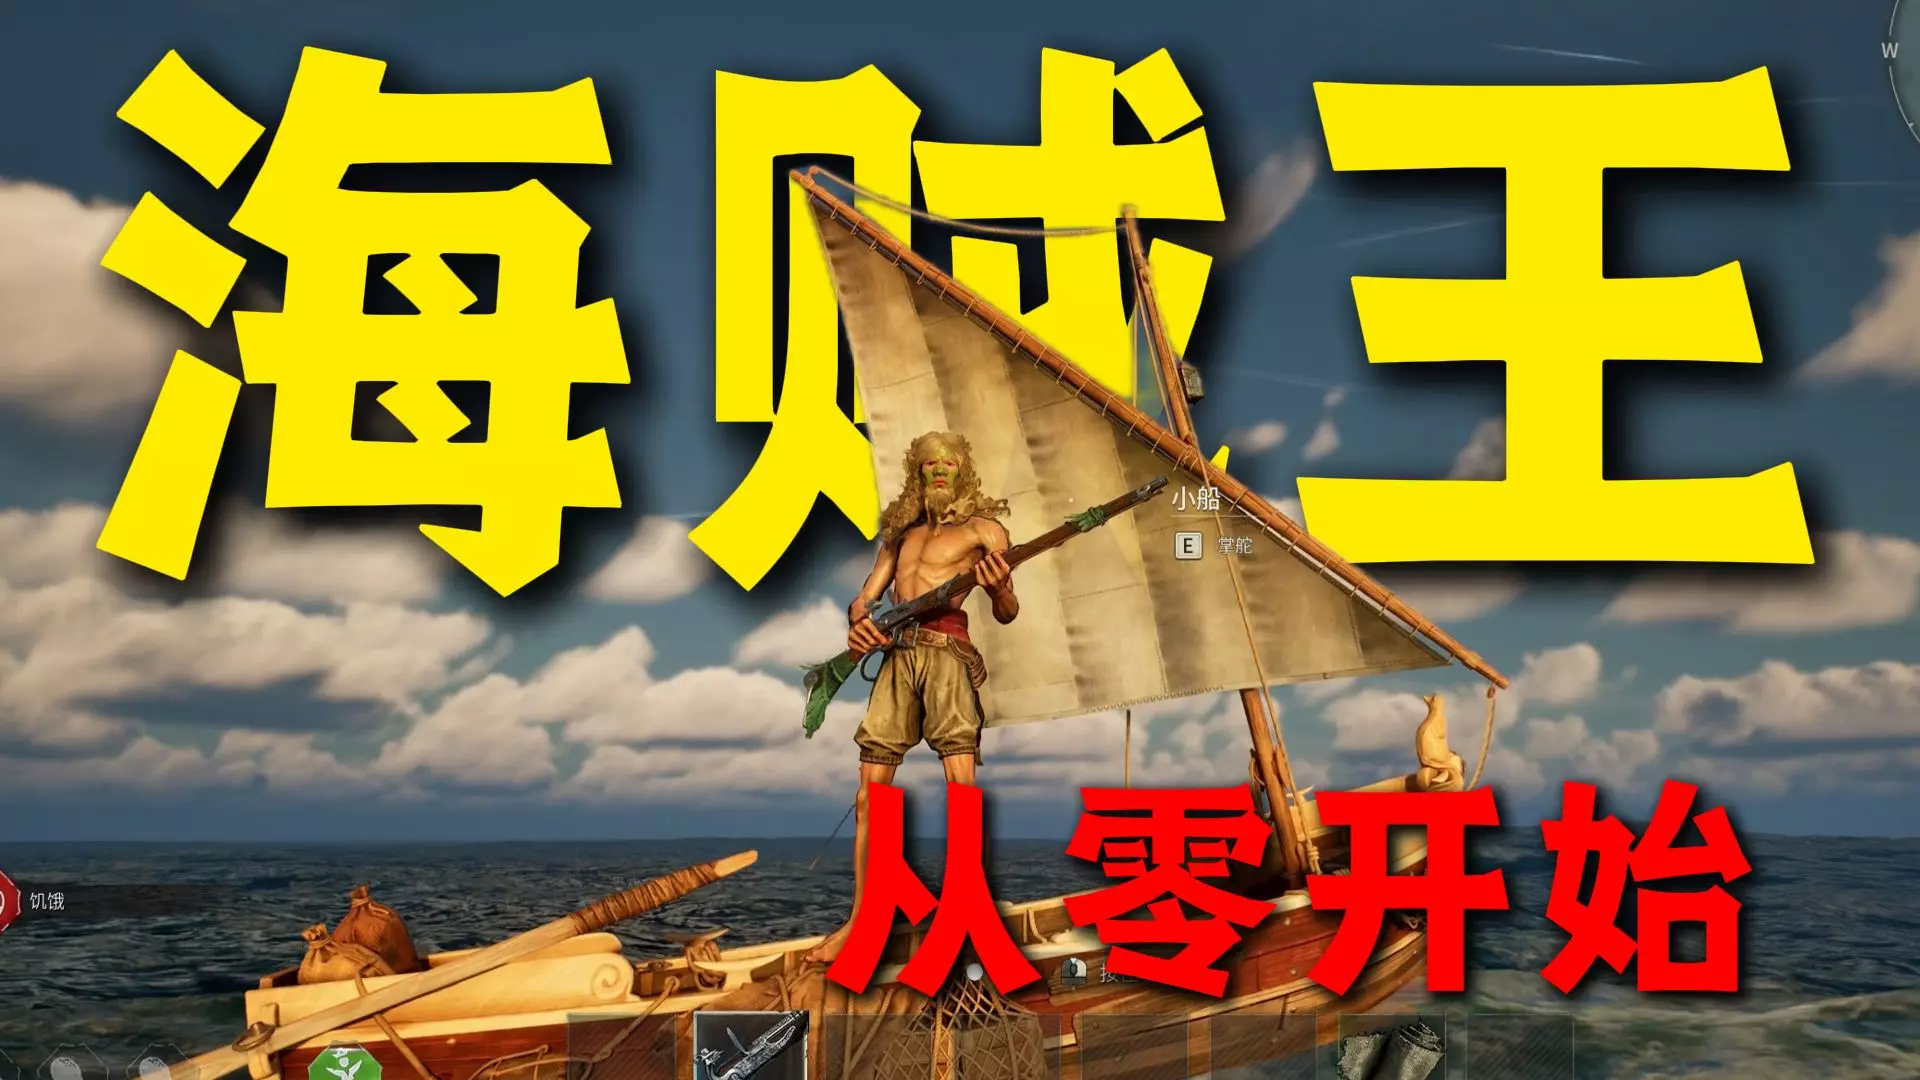
荒岛求生 从荒岛求生到征服海洋,海盗的日子能这么爽?【风启之旅】
游戏:风启之旅
2026-01-03 20:040赞 · 0评论
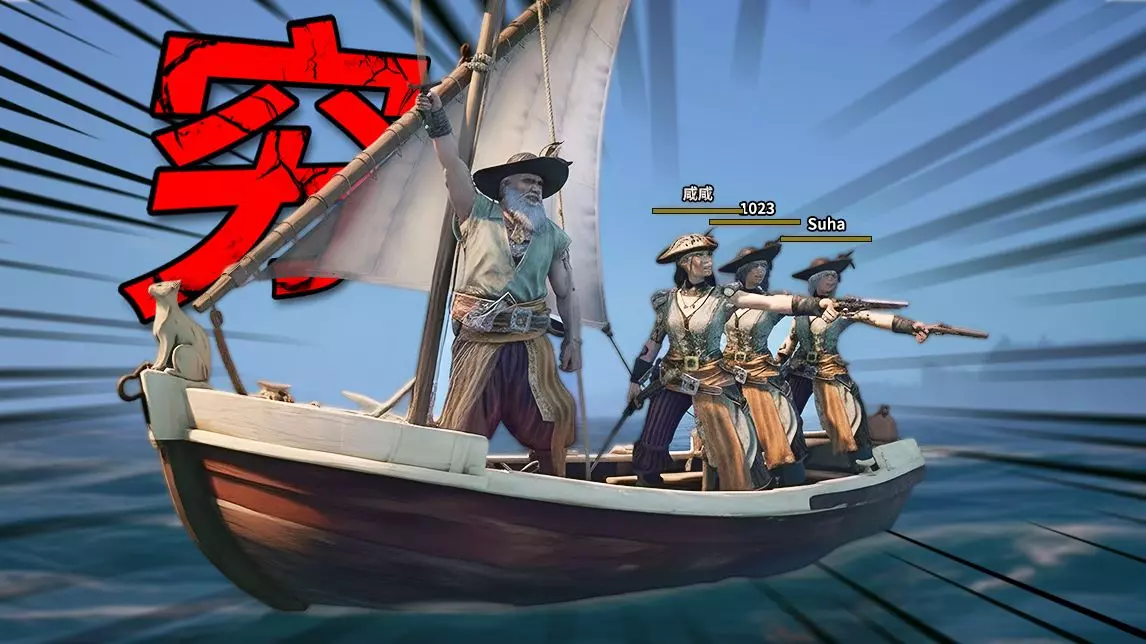
单机游戏 就TM没见过这么穷的海盗!
游戏名:风启之旅 感谢各位的支持,凯蜂会继续努力!
2026-02-11 21:540赞 · 0评论
游戏实况 海盗就要干海盗船
游戏名:风启之旅
2025-11-18 13:080赞 · 0评论
炮击海盗 海盗、鲸鱼和冒险,《踏鱼行歌》5月11日上架
第一眼看到《Run-A-Whale》的概念时,我脑海就自动为它匹配了一个中文名《踏鱼行歌》。
2026-05-15 04:300赞 · 0评论
Sails-视频介绍
2026-04-21 09:300赞 · 0评论
模组通用指南
Информация и рекомендации для заинтересованных в модификации игры не мододелов. …
2026-02-17 16:000赞 · 0评论
模组列表
本指南旨在帮助玩家了解该游戏的模组。 ~前言~ 指南的头像取自Tumor。 大家好! 本指南仅用于让玩家对模组有一个大致的了解。 我计划根据玩家对本指南的反馈来…
2026-02-14 13:001赞 · 0评论

R.E.P.O 模组列表
通过这份全面的模组指南,释放你的R.E.P.O.游戏玩法全部潜力。
2026-02-11 12:000赞 · 0评论

《星球大战:旧共和国遗产》模组指南
新游戏设置: 若游玩拥有1300颗恒星的大型星球大战星系,请将宜居星球数量设为0.5倍,以减少后期游戏卡顿。 该模组无需任何DLC即可运行。 经济: 人力:用于…
2026-04-02 22:030赞 · 0评论
原版派系扩展 - 远古 - 俄语指南
本指南是对Vanilla Factions Expanded模组作者在其创意工坊页面上留下信息的翻译。本指南旨在向那些不懂英语或懒得翻译的玩家解释该模组的所有细…
2026-03-05 05:360赞 · 0评论

暂无更多
最新更新
- 新手友好:角色创建入门指南 — 作为《无冬之夜:增强版》的新玩家,在角色创建界面做出的决定至关重要,这可能会让你感到有些压力。我见过的许多指南都假设玩家已经熟悉龙与地下城3版规则。本指南旨在帮…
- 如何在无冬之夜模组库中查找并游玩模组 — There are thousands of fan-made adventures on Neverwinter Vault. Here's how to c…
- BioWare经典史诗角色build — Some of the builds posted by bioware long ago Undead Lord: Wizard 6/Fighter 4/Pa…
- 艾瑞莉斯角色build指南 — 我整理的一些适用于艾瑞斯里思多人服务器的Build。部分Build使用了仅艾瑞斯里思服务器可用的特性,可能在其他服务器或游戏中无效。关于艾瑞斯里思Build的相…
- Steam创意工坊中的俄语模块 — 我在创意工坊中添加的俄语或已翻译模块列表。 协调者及翻译作者 所有本指南中提及的翻译,均得益于Lord Draconis创建的翻译项目。1. Azalander…
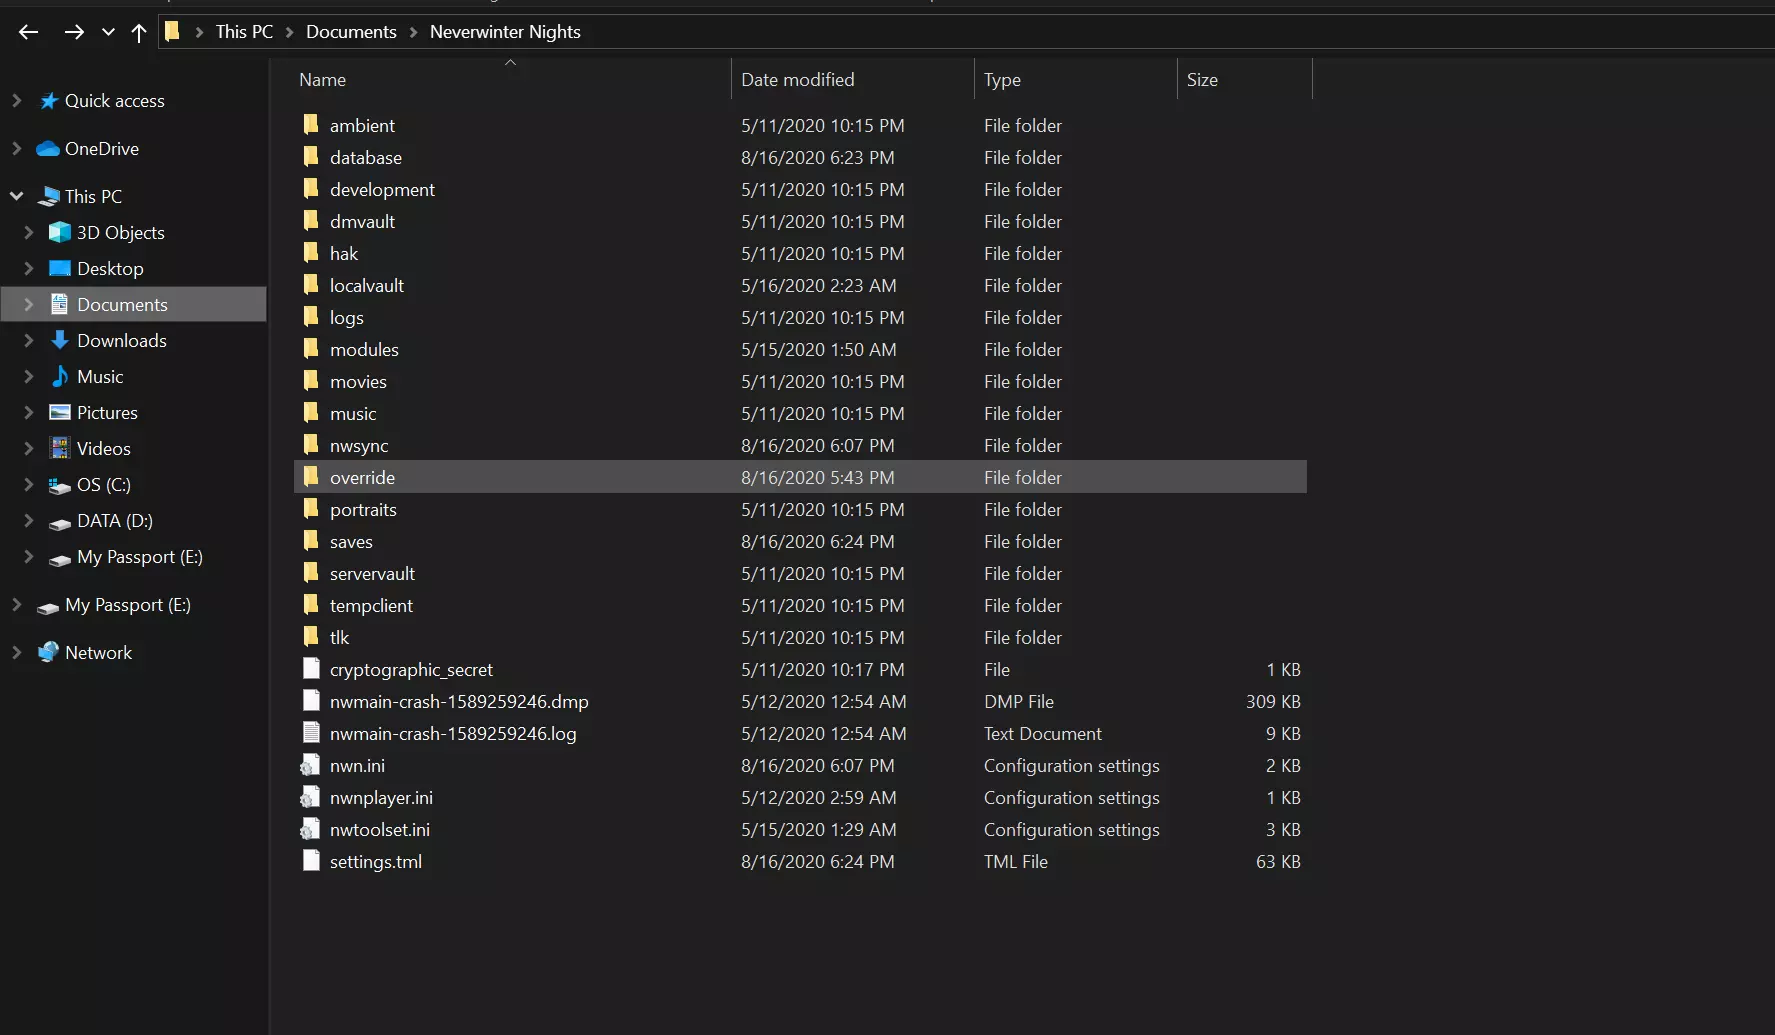
- 别名设置失败修复 — 你是否曾遇到过尝试启动游戏时弹出“Failed to set up alias: HD0”这个烦人的提示,却不知道该如何解决?在本指南中,我将向你展示如何修复此…
- 《无冬之夜:增强版》文本与语音汉化补丁 — 提供增强版以及经典版的完整本地化补丁,包含游戏本体及两个DLC的本地化内容。该本地化补丁基于1.70社区俄语版文本制作,并参考了1С 1.66版本进行编辑。多项…
- 角色创建工具 — 本指南是为新手以及那些根本不知道这些程序存在的人编写的。
- 《冬日永夜》成就指南 — 《无冬之夜:增强版》全成就获取指南 简介 你究竟是陷入了怎样的困境,才会来向我求助。©欢迎你,冒险者!这份指南是我为那些和我一样的“受难者”所写——2021年,…
- 先知传奇。《无冬之夜》最佳剧情模组 — 你好,旅行者!本指南旨在帮助你了解精彩的“先知”系列模组。我会简要介绍模组的概念、可能存在的漏洞、解决方法以及其他有趣的细节。 哪里下载以及舒适游戏还需要什么此…