换一换
换一换 


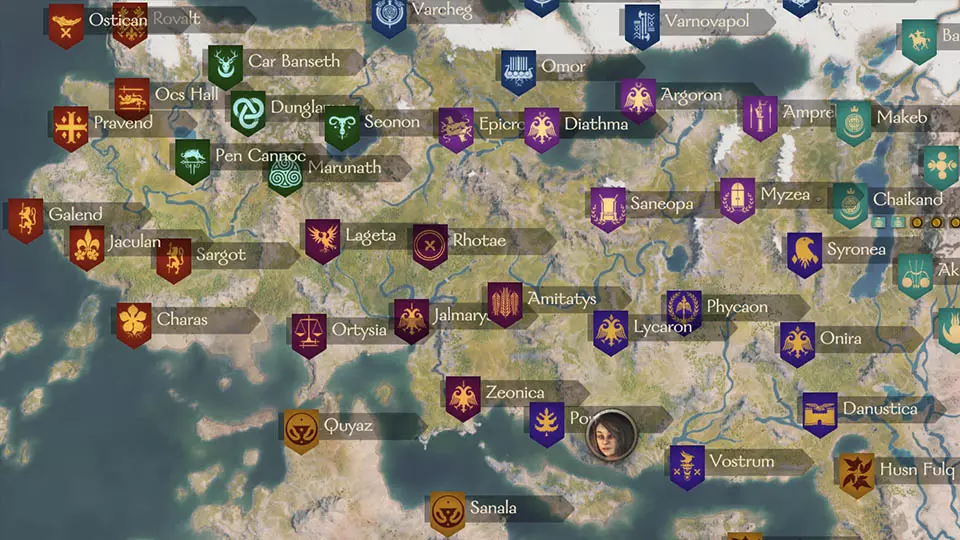
《骑马与砍杀2:霸主》新手入门指南:十大技巧 角色创建 选择角色文化:这听起来可能很明显,但你应该根据自己的实际使用需求来选择初始阵营和角色属性,而不是仅仅因为喜欢某个选项的背景故事就做出选择。这是什么意思呢?开始新战役时,你可以选择6种角色文化之一,分别是瓦兰迪亚人、斯特吉亚人、帝国人、阿塞莱人、库赛特人和巴坦尼亚人。 阅读斯特吉亚文化描述时,其中提到他们“在整个帝国拥有现成的毛皮市场”,他们“成为了王子”,并且“为了贸易和掠夺而远走他乡”。这段描述让他们听起来像是富裕的维京商人,既会劫掠又精明,几乎像威尼斯商人一样。 这听起来确实很酷,但实际情况如何呢?如果你选择斯特吉亚文化,能获得什么文化加成? 【20%的雪地速度惩罚减免】。 再加上截至4月30日,无论如何你总是会在位于帝国腹地的中心城市莱卡隆之外的某个训练场开始游戏。你将不属于任何势力,初始只有基础武器和一些食物。以下是所有势力的加成,之后我会说明我认为哪些最好。 势力加成: 维兰迪亚:部队从战斗中获得的升级经验增加20%。 斯特吉亚:在雪地中的速度惩罚减少20%。 帝国:城镇项目、城墙修复和攻城器械的建造速度提升20%。 阿塞莱:商队建造费用降低30%,贸易惩罚减少10%。 库赛特:骑兵在大地图上的移动速度提升10%。 巴旦尼亚:部队在森林中的速度惩罚减少10%。 显然,其中一些加成比其他的更好。在我看来,我们真正需要认真考虑的只有维兰迪亚、阿塞莱和帝国的文化加成。按实用性排序(个人观点)如下:
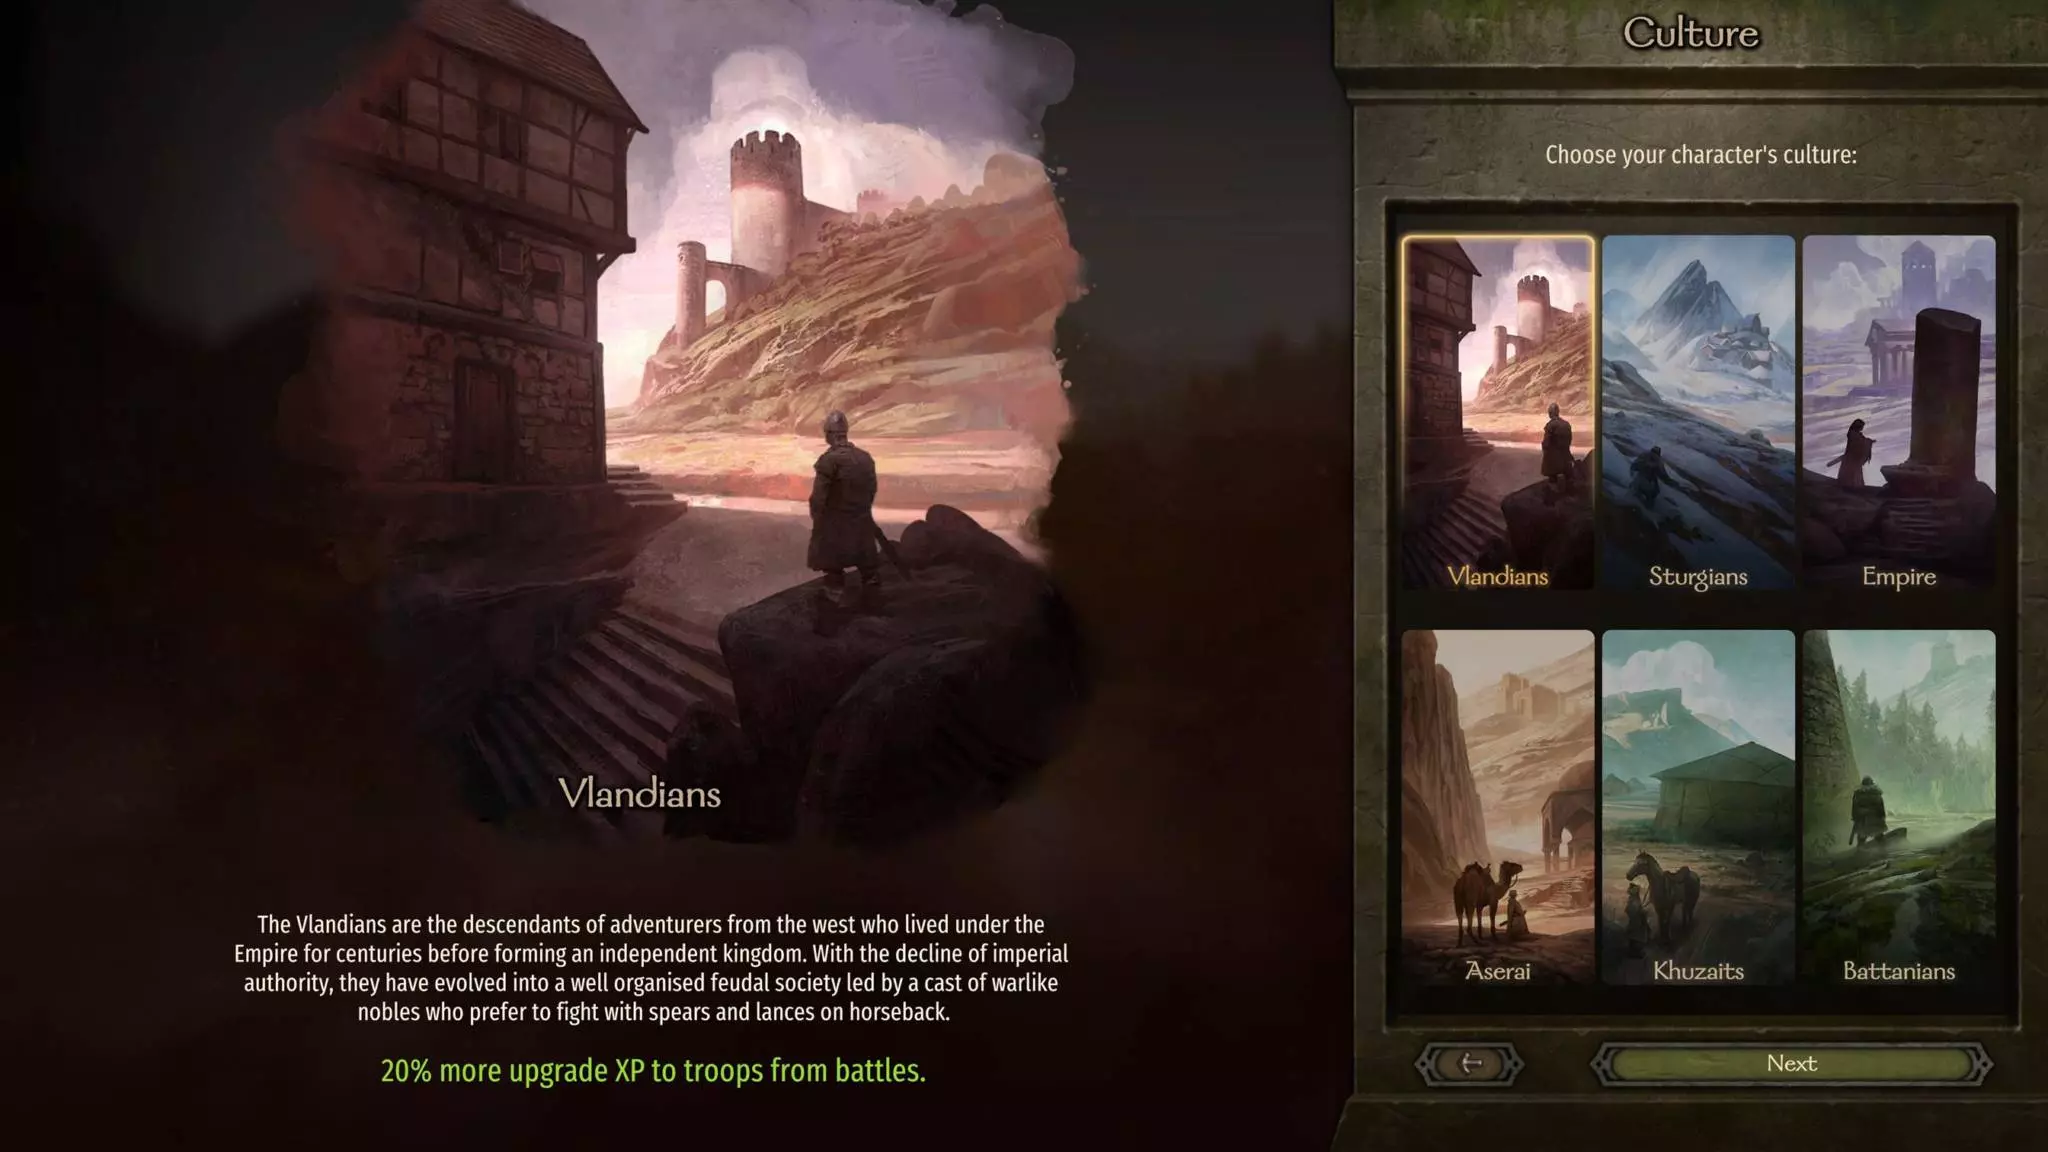
瓦兰迪亚:训练部队不仅在游戏初期只能招募农民作为士兵时很重要,在整个游戏过程中也同样关键,因为你会出现伤亡,需要招募农民来补充队伍。训练速度越快越好。与《骑马与砍杀:战团》不同,在《骑马与砍杀2:霸主》中升级部队成本很低,在《骑马与砍杀:战团》中如果不够注意就可能破产。这个 perk 绝对值得投入,因为你在整个战役中都会用到它。 阿塞莱:阿塞莱的加成非常有用,在游戏初期或如果你喜欢使用贸易商队时尤其如此,不过即使在整个游戏过程中,10%的贸易惩罚减免也依然有效。这意味着你与游戏中的 NPC 交易物品时能获得 10%的更好价格。随着时间的推移,这会是一笔相当可观的资金——比购买第三个商队节省的15,000金币更为重要。为什么呢? 至少就目前而言,贸易商队在后期并不划算。无论在哪里,每个商队都需要投入15,000金币。城镇繁荣度和商品获取与此无关,游戏也没有将风险因素考虑在内。由于最近的补丁使得商队在两种文化处于战争状态时成为【攻击目标】,因此现在投资商队比在远离两种文化边境地带的城市开设工坊风险更高。 此外,你的同伴需要被占用,在地图上四处奔波进行买卖交易来为你赚钱。他们更适合在战场上与你并肩作战、治理你的定居点、率领自己的军队,甚至完成你偶尔遇到的支线任务。这些都比让他们在城市间辗转,并冒着被敌方领主俘虏的风险要好得多。他们最终会逃脱,但之后你还得去他们逃脱时距离最近的城市“接他们”。这不值得!不如买个工坊! 帝国:帝国的速度加成确实很吸引人。这在游戏中期会变得更加重要,并且这种重要性会持续下去。然而,城镇的建设速度很快就会达到上限,以我的经验,将整个城镇或城堡的所有设施都升到3级只需要很少的时间。我认为建造攻城器械会非常有用,但如果你招募到一名攻城技能较高的同伴,只要该技能超过60,你就可以放心地将自己角色的重心放在管理或魅力等其他技能上,而不必专注于工程学。 家族、童年、故事背景 同样,阅读这些背景设定和故事内容确实很有趣。Taleworlds在塑造卡拉迪亚世界的文化以及让我们沉浸其中方面做得非常出色。不过,对于你的角色而言,这些都无关紧要。你只需选择能为你提供所需加成的背景,以便扬名立万并征服这片大陆。从童年到青春期、青年、成年以及故事背景阶段,请确保选择你将在整个游戏中使用的武器和技能。我会选择一种主要近战风格、一种远程风格,其余则根据游戏风格来选。 应避免的属性是侦察、战术和领导力。 请务必避免侦察。你可以按N键查找游戏中任何你想要的NPC,屏幕右上角甚至会显示他们最后被发现的城镇、城堡或村庄以及时间。你不需要追踪足迹,这毫无用处。 避免战术,因为除非你有很好的胜算,至少在游戏初期,否则不要自动解决战斗。我发现一旦我拥有一支精良的T2-T3部队,即便在数量上处于劣势,也能轻松击败规模更大的敌军,而且我从未使用过战术加成。实际上,在一些自动战斗模拟中,结果甚至比我亲自指挥战斗时预想的还要好。 领导力。这一点有些违反直觉,我也曾困惑过一段时间,直到我意识到魅力属性以及家族规模更为重要。家族规模的更高等级只需通过在游戏中获取声望即可解锁。领导力的提升说明是“保持队伍高昂士气,组建并领导军队”,但即便没有高领导力,你也能维持高昂的士气。你只需要提供种类丰富的食物,赢得战斗,不临阵脱逃,仅此而已。氏族规模越大,你能在战斗中带领的部队就越多。领导力,据我所知,对部队数量的加成很小甚至没有。无论如何,部队质量比数量更重要! 尽早加入一个势力 为什么不四处游荡,袭击掠夺者,抢他们的白色棉质上衣呢?那将是我对抗整个世界!作为一个自由人!我来告诉你为什么:
Joining a faction early on will help you gain valuable experience fighting alongside allies. Even if your personal army is smaller, the army you roll with will give you and your troops much needed experience, and loot (which includes weapons, horses, armor, food, prisoners, and trade goods). *Those trade goods will go a long way toward fueling your treasury which we'll go over in a later section of the guide! Whether you support a faction, or you decide to become King of all Calradia and create your own faction, befriending lords will allow you to recruit them as generals working for you on your quest to conquer the continent! There are two ways to join a faction: Mercenary: Becoming a mercenary is good at the very beginning if you need gold because you're basically just a sword for hire, and that means you're only paid gold based on how well you fare against an enemy faction. It can be as low as 10 gold per day, and go as high as 500 gold per day (I've seen) depending on how good you're doing against factions you're at war with! Vassal: The rewards are much better. The Influence you gain allows you to partake in the voting for who gets a Town or Castle after a battle. Accrue enough Influence, you can sway the vote and get the King of that faction to gift you Towns you want. When you have a Town, you are now in charge of a potentially huge source of income in the game. Upgrade the amenities, keep the roads safe of bandits, and prevent enemy lords from raiding your villages and you will become a very rich dude! You can leave a faction at any time by hitting the K for Kingdom menu, and hitting Leave at the top right. You'll take a relation penalty for leaving but it's not catastrophic. If that lord gave you control of towns or castles and you refuse to give them up, they will declare war on you immediately. This is usually only useful when you have decided to start your own kingdom and want to strike out on your own! Otherwise, I would advise giving them back and earning new fiefs to manage under your new faction leader. Getting Supplies & Troops When Part of Another Army When you've joined a faction and either see a notification of a friendly lord building an army, or you see one roaming around, you can go to it, join it, and become part of that coalescing force and take part in huge battles, sieges, or even earn yourself your own fief! The AI takes control, and the controlling lord usually stops at Towns and villages for recruits and supplies. This is where my tips come in: As the lord's army is approaching a Village or Town, make sure you press 2 to set the Speed to normal, and then hit 1 or Space bar as soon as you get to the Settlement. This will allow you to buy much-needed supplies, recruits, or even start quests. Once you're finished you can return to the army without issue. This is really useful so that enemy armies can't pick you off as a straggler, and so you can gather much-needed supplies while on campaign with your battle bros! Bonus Tip 1:If your friendly army is starving (you can see on the bottom right), you can opt to buy a little extra food so that it's donated to the friendly army. This will grant you a small Influence bonus as well! :) Bonus Tip 2:It's also a good idea to buy locally-produced goods in bulk, since they're usually cheap and can be sold at a recently-captured town, or any town you visit for the matter -- at a profit! Archers & Throwers Set to "Hold Fire" If you've ever attacked a bandit hideout and charged archers headlong into sword fights they were never going to win, have you ever wondered why they never fired their arrows? That's because by default, they're set to "Hold Fire." Make sure as soon as you spawn at a bandit hideout, you hit F4. A little message in the bottom left will notify you that your archers and throwers have been set to "Fire at Will." How many Fian Champions have I saved you from getting needlessly slaughtered? Countless! You can thank me by hitting the Thumps Up button at the top of this guide! :) Now your ranged units actually stand a chance! Shift Click and Trade All Shift Click These are two very quick, but very time-saving and useful tips. Have you been slaughtering Looters, and want to offload hundreds of items of clothing that are probably covered in sweat, blood and bandit tears? Hold Shift while clicking on an item's arrow, and you will move them in stacks of 5 into the trade menu. If there's less than 5, like say 2 or 3, it will move that whole stack. How to Trade All Except for Your Prized Possessions! You can trade all without losing precious items, like horses (which we'll get to in a minute). Next to your items in the trade screen is a little empty circle on the far right column with the header, "Locked." If you click that, it will fill in yellow. Once you lock everything you don't want to trade, such as blacksmithing resources, horses, food, or anything else, you can now click the two big grey arrows at the top of your inventory to trade everything that IS unlocked. This makes selling off HUGE quantities of blood soaked shoes and other bandit trash that much easier! Keep All Horses Horses, as well as camels and mules, ALL have inventory space! Now, if you're going for a *faster* army composition that can go across the campaign map quicker, and perhaps outrun enemy armies -- not only will you want to get rid of all of your prisoners, but you'll also want to get rid of all of your camels, mules, and Sumpter Horses as well. Keep in mind while on the battle field: You can double tap W and double tap S to accelerate faster and slow down to a halt. Once you try it, you will never ride your horse into battle without it! However, *if you want to carry as much as possible*, I recommend you keep all of these pack-loving animals so that they can carry all of your loot across Calradia. You'll see your max inventory capacity go up any time you acquire new horses, camels or mules. This is very good for when you want to purchase stacks of hundreds of items at a time. Even Grain can be sold at a profit if a Town is starving! Do the math: Even if you only profit 10 gold per trade good, if you sell 500 items at 10 gold each, that's a profit of 5,000 gold. Keep that in mind when there are donkeys as loot! They're much more profitable than you might think! Trade Goods At first glance, something like Olives, Tools, or Flax Bundles, might seem useless -- but some cities either have no access to these things whatsoever, or the tides of war have ravaged the countryside -- making for dangerous trade routes and shortages. What did we all learn in Economics? Supply and Demand. While that is true in real life, it's also true in Bannerlord. You can get a rough idea of what a good might sell for in nearby cities just by hovering over it and looking at the Trade Rumors. These are by no means complete, and might not always hold true if a trade caravan gets to a town and offloads that resource before you do. This satisfies the local supply, reduces demand, and thus the price you'll get for the item. Use SHIFT to Move Stacks of 5 Per ItemIf you press SHIFT while clicking the grey arrow next to an item, you will move stacks of 5 of that item! If the stack has less than 5, it will move the whole stack. How to Sell Everything Except What You Want to Keep!Do you have endless amounts of useless loot that you just want to sell off? There's an empty circle next to every item in your inventory. If you click that circle, it will fill in gold, which locks it to your inventory. Go from top to bottom throughout your inventory, and lock everything you want to keep. When you click on the big double grey arrows at the top of your inventory, it will move EVERYTHING over to the trader that isn't locked! This will make selling copious amounts of blood-soaked bandit trash that much easier. You can always hold onto your goods as you travel, and explore the various cities in the game. Again, if you have all of those horses and camels, it'll be worth it even if you're riding a little bit slower. Trade goods won't slow you down like Prisoners will! Press 'N.' 'N' for Encyclopedia
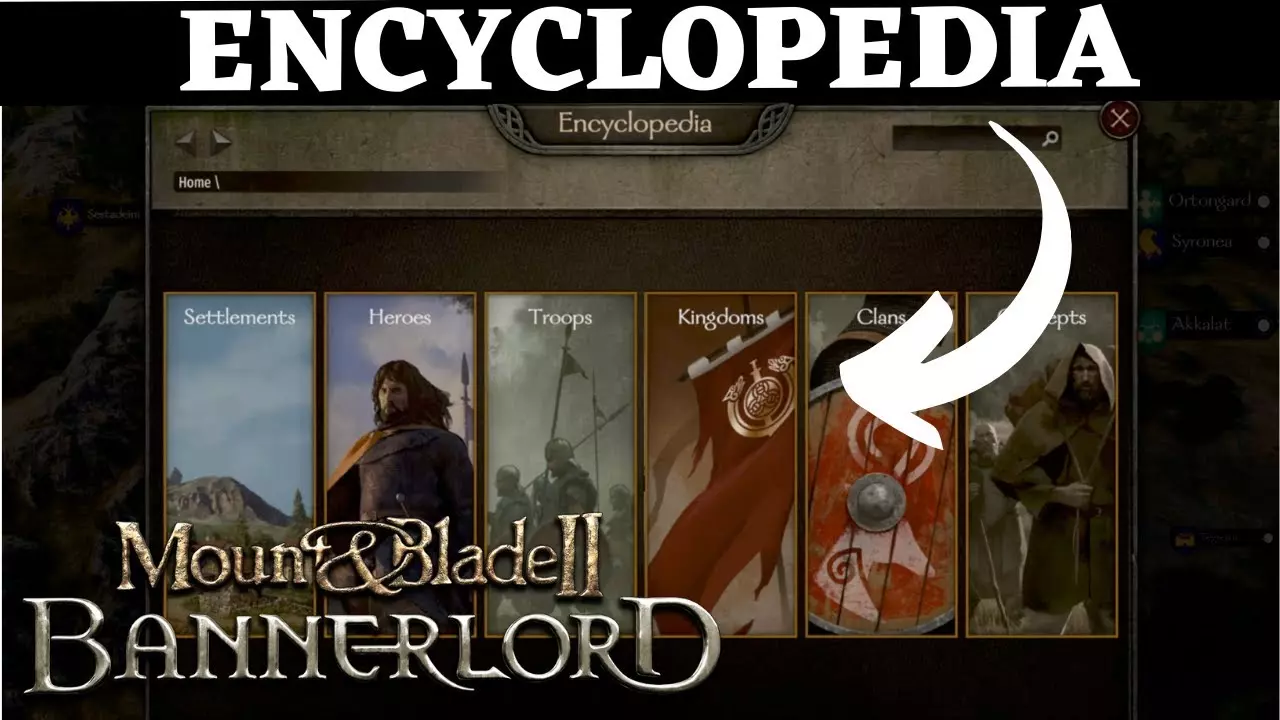
By pressing [b']N'[/b], a whole slew of categories open up with all of the game's info. One of the first you should check out is Heroes. Then scroll down and filter by Wanderer. This will allow you to see all of the Companions in your world! Including their stats! Not sure if you want to fork over 2,000 gold dubloons for this guy with the last name, "the Wronged" or "Willowbark" or "Ironeye"? Look at their stats to see if they're worth the loot you're about to drop to recruit them! You can also use 'N' to search for the best marriage partners in the game by filtering by Gender, Noble, and verifying they're unmarried. Check their stats to make sure they're up to your standards ;) Press 'B.' 'B' is for Banner By pressing 'B' you can retroactively edit your banner! Whether with the base banner editor that comes with the game or by using any mods that add to this functionality, you can edit the colors, tabard -- anything you want -- just like you're creating your character all over again! The 3 Types of Settlements and What They Are Used For There are 3 types of Settlements in Bannerlord: Villages, Castles, and Towns. Each have their own uses, quests, economic and military value. It's very important that you know all of these, if you wish to have a successful campaign within the world of Mount & Blade 2: Bannerlord! VillagesBest for early-game quests, building reputation with Notables in town by completing those quests successfully, improving your Renown, buying higher quality troops once your reputation with Notables goes up enough, and finally buying cheap trade goods produced locally within the village. *You can often sell those trade goods at a nearby town for a very handsome profit!* CastlesThe main value in castles is in defense. These settlements are usually situated on cliff sides, checkpoints, and overlooking mountain passes and valleys. Castles act as an anchor and projection of strength for the lord or faction. These bulwarks of force act as a bank for troops to garrison, and as a kind of shield or deterrent for the general area. If you have 400 troops in the castle garrison, the enemy AI will think twice about raiding the local area or even laying siege to the castle itself. When you get to the late-early to early-middle part of the game, when you're attacking enemy settlements -- it doesn't make much strategic sense to skip over a heavily garrisoned enemy castle to get to a Town further into the interior of a faction's territory, even if it's less defended, and I'll explain why: The city itself may be a softer target and easier to take in the short run, but once it's captured, your armies will most likely be drained of strength, and will need some time to heal and recruit new troops. The nearby castle that your enemy still controls, again acting as an anchor for the local countryside will be used to rally troops against you, and will cut your new city off from the rest of your empire. There's a chance that enemy lords are holed up in the castle you passed over. This means they can leave and conduct raids on their own, or even hit you in your backside while you're vulnerable, trying to build siege equipment. This puts your new prize of a city, fought over long and hard by your witless peasants and allies, at huge risk to being easily recaptured by the enemy faction. If the enemy faction does lay siege and they do recapture it, it will be a very quick affair, and they will now be able to use the opportunity to blitzkrieg through your territory and capture cities and castles of their own! This is why in my opinion, in the long-run, capturing castles along the way is vitally important. Shore them up with defenders and prisoners (to recruit from later on), and use that castle as a springboard for your eventual assault (and hopefully successful siege) of the nearby enemy city! Towns AKA Cities Last but certainly not least are the money-makers: Towns AKA Cities. Towns, or cities, in my opinion, are the most valuable of the 3 settlement types in Bannerlord. The villages bound to the city in the surrounding area are what provide a major amount of the city's prosperity and growth over time. Cities can have very profitable tax incomes, even if they're only moderate prosperous economically. You can look at a city's Prosperity number by clicking on the city and looking at the top left of your screen. You can also find the city's most stable -- if not most lucrative workshops, but finding out what villages are bound to it by hovering over the city and looking at the tooltip, then seeing what those bound villages produce. You can also look at far-away city's bound villages, by again clicking 'N', and searching for the city from there. This will allow you to plan ahead and open workshops far away from the front lines of war! If a city has 3 villages bound to it, say, one producing Grain and the other 2 producing Grapes. It's probably a good idea to buy a workshop in town, and choose Wine Press. This will press the Grapes into Wine, which will then be sold as a finished good in the local city to which the villages are bound to. Since Wine is valuable everywhere, caravans -- even caravans from enemy factions -- will buy the surplus bottles of Wine in the Town's trade menu, and sell it elsewhere for a profit, making you money for very little work or risk! In my humble opinion, cities/towns are the most valuable fiefs, then castles, then villages. While castles don't produce a lot of tax income, but they are extremely valuable militarily, and this is a game where you fight non-stop battles -- I would say they're second in importance. Even if villages are raided, they do repair relatively fast, even on Realistic Settings which I play on. ------------------------------------------------------------------------------------------------------------------------------------