狂野飙车:竞速传奇


Game Play Basics Nitro- There are 4 types of Nitro in this game, it is to be noted that all types of nitro give the same top speed boost, and also that different cars will give different acceleration of nitro or, different nitro pulses. For example the henessy venom F5 has a strong nitro Pulse, meanwhile the vencer sarthe does not. Yellow Nitro It is used on the straight sections of a track because it doesn't give a useful acceleration boost, also if you want to turn your car with this nitro you will lose speed. (Tap Nitro Button once to activate it, press brake button to stop the Nitro) It is very efficient to maintain a top speed for a long time. Blue nitro or Perfect Nitro is used to take corners which don't make your car turn much or drift, Perfect Nitro has a mediocre acceleration, but more than Yellow Nitro. Also NEVER use this nitro in the air as it gives a TERRIBLE speed boost. (Tap nitro button once but tap again only when the nitro reaches the blue section or simply just tap again after 1 second) This Nitro also has a Nice duration. Orange Nitro is used to accelerate Strongly. It doesn't last for very long, but that i guess that is the price to be paid for a better acceleration. You can use it to take corners, but prefer Blue nitro as this Nitro Empties fast and the turning radius of the car is more than Perfect Nitro (Bad). You should definitely use this Nitro in the air, when Shockwave is not an option. Shockwave Nitro is used to accelerate Very fastly, either after drifting to take a corner. Also, make sure to tap the brake button again after drifting if you want to use nitro because if nitro is used while drifting, the car will skid a lot and will lose speed and not gain speed for some time (approx. 1 second). Also, Bad handling cars benefit from Shockwave Nitro over Patchy areas with terrain because even Blue nitro and red nitro doesn't save you from speed loss. Cars with above average handling can go over patchy areas without losing speed with Shockwave, Orange or Blue Nitro. Tips For Currency Never waste Tokens, Tokens can be acquired from seasonal and daily events as well as Daily Tasks. Credits can be obtained through a Daily Credits Heist. Blueprints for cars and keys for cars are also obtainable from seasonal and sometimes daily events. Don't worry about trade coins, the cars or import parts available for purchase using Trade coins are not good anyways, but to verify check videos on the specific car on YouTube. Types of Cars Make sure to use cars with decent top speed, nitro and accel, and handling. Don't worry much about Top Speed, But make sure to worry about Accel, nitro and handling. Never accept cars below 50 handling, make sure nitro is at least 40, but High class S cars can be taken advantage of even if they have bad nitro, learn to use bad nitro cars. As for Accel, it only matters if the car has a nonexistent nitro, but don't worry much about it becuase all cars have above 70 Accel when maxed. Some Bad Handling cars like the Ferrari F12tdf and Ford GT have Bad Handling but all other stats are godly, like top speed and nitro, those cars are not necessarily bad, just avoid drifting with them and exist corners with ShockWave after Steering (NOT DRIFTING). Extra Tips to Increase your Lap times Drifting There are 2 techniques which are really beneficial to drift fast, The 360 Floaty and Nitro Punch. 360 Floaty To perform a 360 Floaty, Do a 360 in the opposite direction of the turn and then drift in the direction of the turn. Use this trick only with floaty cars or speedy cars. This trick works by lifting up your front wheels and allowing you to drift at Insanely high speeds (450+ Km/h). Please note that use this only with tracks that have alot of headroom to drift like shanghai, as this trick makes the car, when drifting, go wide. Nitro Punch or NS Drift You can use this when a 360 Floaty is not possible. First drift in the direction of the turn, and press nitro and immediately after that press drift. You can repeat this several times. It works by lifting the front wheels only when nitro is applied. The force of the Nitro Lifts the wheels up and allows the car to be floaty, although not as much as a 360 Floaty. You can use this on tracks like Cairo (Roundabout). Nitro Punch and 360 Floaty Hybrid Yes, you can combine both. The first type is just applying nitro in between the 360 (Opposite Direction of the turn, ShockWave or Orange), and then drifting in the direction of the turn. If you notice smoke in the front wheels visible to you, it means that the car has lost floatiness, to combat this you can use Nitro Punch after the Nitro 360 Floaty. The Second Type is Perfect Nitro Hybrid, first you have to do 360 in the opposite direction of the turn, just in the beginning of the 360 shoot yellow nitro and when the 360 is about to end and you are about to do a drift, do a perfect nitro and then drift in the direction of the turn (brake + brake + single nitro button tap + Single nitro button tap + brake). Once the car loses floatiness, you can continue by using Nitro punches. Nitro We know that the game slows us down to our ground top speed after we jump and attain max speed, so to delay the process and retain our airspeed, we can use a trick called nitro braking. it is done by repeating the brake and nitro button (brake + nitro, does this as fast as you can but not so fast that you end up doing a 360). It can also be used to make yellow nitro last longer, if you want to maintain top speed. Misc Tips If a turn is too wide and you fear that you might lose a lot of speed, you can simply just wall ride against the wall and recharge your nitro. When you land after doing a 360, you can tap the brake button to avoid overspin which makes the vehicle lose speed. Make sure that on flat and big ramps, you delay your 360, but on short length and tall ramps, you do a 360 early or fast 360 (shanghai). On the jumps like himalayas, force a barrel role by sticking to the side of the ramp, you can also do this with any ramp that is short and tall. Another Bonus tip is that you can position your car over the rail and glide like a champ while gaining airspeed. Never take Barrel ramps which rotate your car very slowly (like the carribean ones on the beach). If you find yourself doing a barrel role Somehow because after a micro jump you drifted and then took the ramp, you can turn off your nitro to avoid barrel rolling or crashing on the ground with your car upside down. And Finally and lastly, take barrel ramps which should be taken on the middle. Never take those too High or too low. Thank you for your Patience and Reading This Guide! Guide


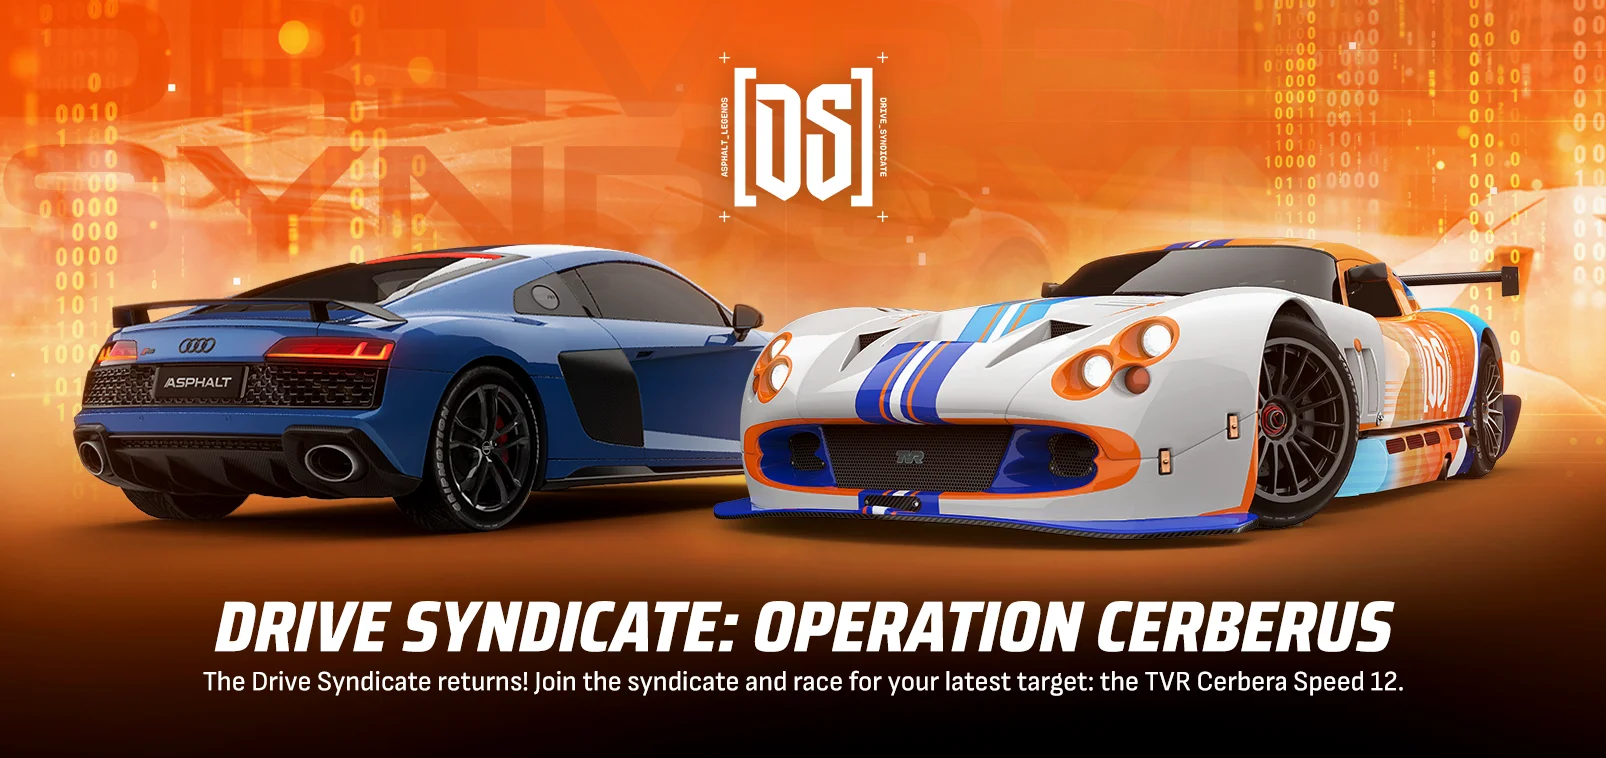
周三快乐! 今天是本周的中间,同时我们也刚过了当前荣耀之路赛季的中期。 别担心!本赛季我们仍有很多精彩内容,你还有时间在我们的限时活动中获取几辆新车。 当前限时活动 【hololive最终安可特别活动】(4月28日 - 5月27日)最后机会获取你最爱的表情和贴纸!驾驶本田思域Type-R、万达电动Dendrobium、Glickenhaus 003S、保时捷911 GT3 RS、Noble M600 Speedster、日产GT-R50 Italdesign以及Aspark Owl收集所有音符并领取奖励! 【混乱赛事Ares Panther】(5月5日 - 5月28日)是时候来点混乱了!获取全新的【阿瑞斯 Panther】、【迈凯伦 600LT Spider】、【帕加尼 Zonda Cinque】、【阿斯顿·马丁 DBS GT Zagato】、【迈凯伦 650s GT3】、【福特 GT MK IV】以及【梅赛德斯-奔驰 Mercedes-AMG ONE】。 兰博基尼 Invencible 寻星活动:(5月8日 - 5月19日)本次寻星活动的主角是另一款兰博基尼,你可以在活动中收集该车的蓝图。 兰博基尼 Sterrato 大奖赛:(5月11日 - 5月28日)你认为自己有足够实力吗?在赛道上证明自己,就有机会获得全新兰博基尼的钥匙! 国际家庭日:(5月12日 - 5月19日)乘坐【保时捷 718 Cayman GT4 Clubsport】、【保时捷 911 GT1 Evolution】和【保时捷 Taycan Turbo S】,一同庆祝多米最喜欢的节日。《狂野飙车:竞速传奇》活动预告 星途之路:文瑟萨尔特 (4月28日 - 5月27日)本赛季星途之路活动中,你将驾驶道奇蝰蛇ACR、法拉利Monza SP1、兰博基尼Huracán Super Trofeo EVO以及兰博基尼Countach 25周年纪念版,争夺文瑟萨尔特跑车。 本周即将开启的活动 帕加尼Imola释放赛 (5月18日 - 6月2日)全新的释放赛即将到来,参与车辆包括帕加尼Imola、阿斯顿·马丁Valhalla概念车、法拉利F8 Tributo、阿波罗EVO以及兰博基尼第六元素。《狂野飙车:竞速传奇》更新内容 1. 阿格拉亚特别活动:(5月19日 - 6月3日)一场云集众多强力车型的特别活动,由RAESR Aglaia领衔,还有道奇Charger SRT Hellcat Redeye Widebody、阿斯顿·马丁Valour、Puritalia Berlinetta、兰博基尼Essenza SCV12、FV Frangivento Sorpasso GT3以及科尼赛克Jesko。 2. 乐高机械组阿斯顿·马丁Valkyrie巡回赛:(5月14日 - 5月28日)这是你收集缺失零件以完成套装的又一次机会,本次活动为巡回赛形式! 3. 兰博基尼Invencible史诗狩猎:(5月19日 - 5月30日)狩猎活动继续,本次目标是进口零件!世界蜜蜂日:(5月19日 - 5月26日)暂时抛开所有烦恼,驾驶ARASH AF8 Falcon Edition、迈凯伦Solus GT以及梅赛德斯-奔驰AMG GT S驰骋吧


A myriad of small details the game makes no effort to communicate or are not very obvious from a newbie's standpoint. Things I usually learned the hard way. Nitro The tutorial completely mislabels and gives outright misinformation about how nitro works. Here's how Nitro actually works. Universal DetailsNitro influences your car in four ways. Acceleration rate, the top speed of your car, its toughness and its "grip factor". Not its handling. That's a different thing. Top speed with Nitro on is identical for all types. Nitro types only influence your acceleration rate and your grip factor. Your priority should be to boost as much and as long as possible except in certain situations we'll explain below. Standard / Yellow Use this whenever you're not cornering. A car with a good nitro stat should be able to basically boost in Yellow at all times as long as you're drifting in every corner you can drift, near-miss every traffic car, and take every jump close to optimally. Do not use it right out of corners until you have finished angling yourself properly, you'll lose a bunch of nitro for no real effect. You can only boost immediately out of a corner if you have very high (80+) Handling, and even then you need to be careful about it. In short, Yellow has • Drain rate 1 • Accel + • Grip - "Perfect" / Blue Perfect Nitro's use is mostly to exit or navigate difficult corners and cross slowdown terrain. If you're not doing either, you don't need to be hitting Perfects. The keyword for Perfects is anticipation. By default you will waste 3-5% of your bar at minimum just to turn it on, so be well aware of what is coming up so you trigger it on time. Perfect Nitro offers no other speed benefits outside of preventing slowdowns that would impact other nitro types, and for cheaper than Shockwave does. Perfect is for preserving speed, not gaining it, unless you're exiting a corner. In short, Blue has • Drain rate 2 • Accel + • Grip + Afterburner / Red The tutorial says nothing about this one which is kind of ridiculous when it's probably one of the most important types. Afterburner is all about accelerations, so use it in straightaways and jumps. Using it to recover from a corner as you're still angling will not only lead to you wasting a bunch of Nitro, it will also make you corner worse and lose speed on top of that. If you're hitting any air for more than a split second, you need to be hitting Afterburner the moment your wheels take off. As your air time is limited, getting the most accel so you can approach your airborne max speed is paramount. In short, Red has • Drain rate 3 • Accel ++ • Grip -- Shockwave / Purple Shockwave is depicted as being the "fastest"... Which is not only completely incorrect, it's also misleading. Shockwave has a very specific effect, outside of being a combination of Red and Blue, that makes it useful: It's the only type that increases your car's toughness, allowing it to survive collisions with other vehicles and objects from the side more reliably. Be mindful that angle is incredibly important. If your front bumper touches a wall during shockwave you're probably more likely to wreck than you are using yellow. Shockwave should be used strategically in full-contact races so that you can survive someone attempting to crash you off the track. Otherwise you're wasting nitro outside of using a more appropriate type. The notable exception is exiting very nasty corners, such as very tight hairpins with lots of rough terrain. However, if you need shockwave for that, you're compensating for handling that's too low for this track. In short, Purple has • Drain rate 4 • Accel ++ • Grip + • Toughness + Air Getting airtime and using it efficiently is one of the main ways of getting a ton of speed and catching up/staying ahead. However, poorly approached air is also the best way to completely eat crap and ruin your entire run. WhyYour airborne top speed is significantly higher than your grounded top speed. You want to spend as much time as possible going fast. So you want to get airtime that is both long AND has a good trajectory that doesn't send you on a ridiculous parabola that wastes your time. Types of ramp and what to do with them Ramps have more or less 4 types of elevation: • Bump (short hops, like in Singapore) • Low (about the height of your car) • Steep (more than the height of your car) • Supersteep (about twice or more the height of your car) Generally, the height of a ramp correlates with the airtime you'll get out of it. Bump ramps are generally obligatory to cross anyway. Ramps can be flat or slanted, in which case they are barrel roll ramps. You take flat ramps by spinning on them. You take barrel roll ramps by driving into them. From the side that is the lowest first, of course. Otherwise it's a wall. Approaching a rampThere is one ideal way of approaching a ramp: Head on and slightly offset to the side of the road that has the most space, especially if it's a flat ramp. This is especially true if the ramp has obstacles directly against it, as trying to spin on it might just cause you more trouble than it's worth. This is also especially true if you're hitting a supersteep barrel roll ramp, as those can send you further up that they do forwards, and that's a huge time loss. Sticking your landing Pay attention to where you're going as to not land, even partially, on an obstacle such as a fence, that either instantly explodes you or bounces you off at a weird angle that'll either kill or stall you. When you take a barrel roll ramp, the number of rolls you'll get if taken properly is based on how far and high you're expected to go, assuming your angle does not change midflight. This means that if you turn during a barrel roll jump, you may land on an elevation that is too high for your roll to complete. In VERY specific cases, you can 360 before landing to slightly angle yourself better, but this is hugely unreliable. Gaining Nitro from air Airtime gives a trivial amount of nitro, with only 80+ Nitro stat letting you keep up with Yellow as you jump. Try your best to take all jumps while spinning or barrel-rolling. You must initiate the spin before you hit the ramp because you can't drift in midair. Usually. Sometimes you can, it's weird. The only exceptions are if • Short flat ramp OR (all below at once) • You are about to take a flat ramp at full speed • Have high nitro • Are in a competitive position against someone nearby. A 360 has a small speed loss, and if you have nitro to spare, taking it straight on is a speed advantage. What Nitro for a ramp When hitting a ramp, use your afterburner/red. You want as much acceleration as possible so you can reach that airborne top speed, or at least get close to it. Try to have a bit of nitro to initiate a ramp, otherwise your nitro will stall for a moment and you're losing potential speed. If your nitro stat is low, first of all, don't drive a car that has a low Nitro stat, second, wait for whichever Nitro gain type you're going for (roll or spin) to give you one tick of nitro gain, THEN use your afterburner. Treacherous Ramps Some ramps are absolute bastards and consistently lead you into some weird nonsense that makes you crash if you don't know exactly what you're doing. Notorious examples are: • Almost any bump/low barrel roll ramp, especially those on Singapore and Vienna, which will lead to a half-roll unless taken PERFECTLY, leading to a crash. • The ramps leading to the suspension bridge on Midwest, which has a massive, invisible deathplane above the suspension cables. • Some supersteep ramps on Himalayas that are so steep that they make you lose lots of speed from the parabola's trajectory (this is why you take them offset) • The ramp from the dam in Arizona that leads to the hairpin corner with the semi truck on the inside. If you 360 too late, you WILL hit the wall at a bad angle and stall. • Generally flat ramps that lead straight into harsh corners, where it's likely that your spin will end against a wall and make you stall. • Absolutely everything in Greenland that has a stage hazard (volcano, airplane) nearby. What if you're about to mess up a barrel roll ramp SPIN. You can't barrel roll and spin, if you 360 before you take the bad ramp, you may get a weird angle, but you'll land on your wheels at the very least. Don't 360 if you feel your spin will land you at a bad angle. This is what I call a stall and it's worse than most crashes. Know your ramps. Pay very close attention to which ones are hard and think of how you can approach them best. Cars Most cars in this game are awful. Almost every car in the game starts awful. There are very few exceptions. Most cars won't be competitive at all if they're not fully upgraded (not necessarily maxed out, but that helps a lot). The early game will teach you that muscle sucks and electric is god. This is also wrong. There are godawful cars for both types. In the end this is what you REALLY need to pay attention to: NOT the performance rating It means nothing. It's a meme. Ignore it. Top Speed Remember that your max speed is going to be around 3% less than your Nitro top speed, and significantly less than your airborne. Top speed is absolutely important, but it's useless to "be able" to go fast if you can't, well. Go and stay fast. Top speed should be a baseline - everything else matters more since it's what actually lets you access and use that top speed. Acceleration You need some level of accel to not drive a barge. Luckily most cars don't suck at accel, and good Nitro makes up for it. Upgrade it decently but max it out last. Handling Handling is a vital stat and you'll soon learn to hate any car that is under 65 handling. Ideally you'd like to have 70+. You cannot go wrong with more Handling. Very high Handling is stupendously useful. The higher your handling is, the wider your three angles: • The angle in which you can still accelerate at all. • The angle in which you can stall your speed. • The angle at which you're not considered to be "braking". There are handling thresholds of sorts that will let you take certain corners cleanly without having to drift. At high handling you'll just avoid losing so much speed, it's as if you got a massive accel upgrade. You should get your handling as high as possible, and low-handling cars are absolutely not appropriate for very technical tracks such as New Zealand, Arizona, Carribean, etc. You'll notice that most superfast cars tend to have an awful handling stat, and you'll barely ever touch or keep your max speed as a result. This is why cars like the Lotus Elise are really good, because you'll be at your top speed 95% of the time, and sometimes that 292 KPH constantly is better than a car that can sometimes hit 360. Nitro If it's sub 70 it's bad. Doesn't mean the car is unusable, just that your Nitro will be very limited in utility. Anyway, under 70 you'll have to do something called "being strategic about your nitro use", whereas over 75 you can just basically blast yellow at all times when you're not cornering on most tracks. Not only that, but higher Nitro stat means slightly better acceleration (never speed) from your Nitro, so you can accept having slightly worse accel if your Nitro stat is huge. Most superfast S tier cars also have ridiculously bad Nitro. If you ever drove a Bugatti Bolide for the Clash, for instance, you'll realize that the car is entirely driving-skill-based, nitro is barely even a thing at all for these cars. All in All You'll notice that cars regularly considered to be Really Good have some utterly deranged stat spreads for everything but often mid to ok top speed. Once you've driven a maxed out DS E-Tense you'll quickly understand that a car that is almost constantly at top nitro speed at all times is significantly better than a car that can go 40 KPH faster... Under ideal conditions. Some cars look like they have stupid low power ratings, like the 370Z Nismo that caps under 1600, but it has 80+ on every non-speed stat, so it's actually really nice to drive! Look for cars like that. The Lotus Elise, the Viper ACR and Corvette Grand Sport are all excellent contenders for their class and you'll be able to get them semi reliably under Garage Level 15. Unspecified Mechanics There are some things the game doesn't communicate to you at all. You just kind of have to figure it out via trial and observation. "Rough Terrain" Sometimes you'll just lose a bunch of speed. This is because tracks have areas I'll call "rough terrain", which reduce your max speed considerably. Some make perfect sense (like the snow-covered trackside in Himalayas, or the sidewalks in Paris.) Some don't and are absolutely imbecilic: • The dusty patches in the roads close to the tunnels in Rome. • That single patch of red asphalt in the hangar in San Francisco • The slanted roads below the minecart tracks in Midwest, but NOT the halfpipe corner in Auckland There are probably others. You'll notice it pretty quickly. You can ignore most of the speed loss areas by increasing your grip, which is what the "handling" of Perfect and Shockwave Nitro really is. Cop Nitro Hold down the button. If you just tap you'll get the shortest duration. You accumulate boost duration by doing stunts and collecting bottles while NOT boosting, but it's not displayed at all, and the cap is very minimal. Your boost is extended if you are far away from other Syndicate players. Cop Nitro is substantially stronger on the accel but also very short, though you can have it last a truly obscene amount of time if you can manage your speed and not overuse it. Race Types When you play multi, make sure you check the ruleset. Some races are fullcontact and allow you to smash people. Some have full contact but ultra-high durability cars. Some races have slipstream at all times. Some only when someone uses nitro. None of this is displayed on the pre-race camera panning (only the slipstream logo is), but it is written in the season description. Don't 360 other players in Multi Most will tell you that's a jerk move. Even if it wasn't, it's almost always a time loss unless it's perfectly executed (and anyone can smash into you as you finish it and obliterate you, which they will, you bastard).
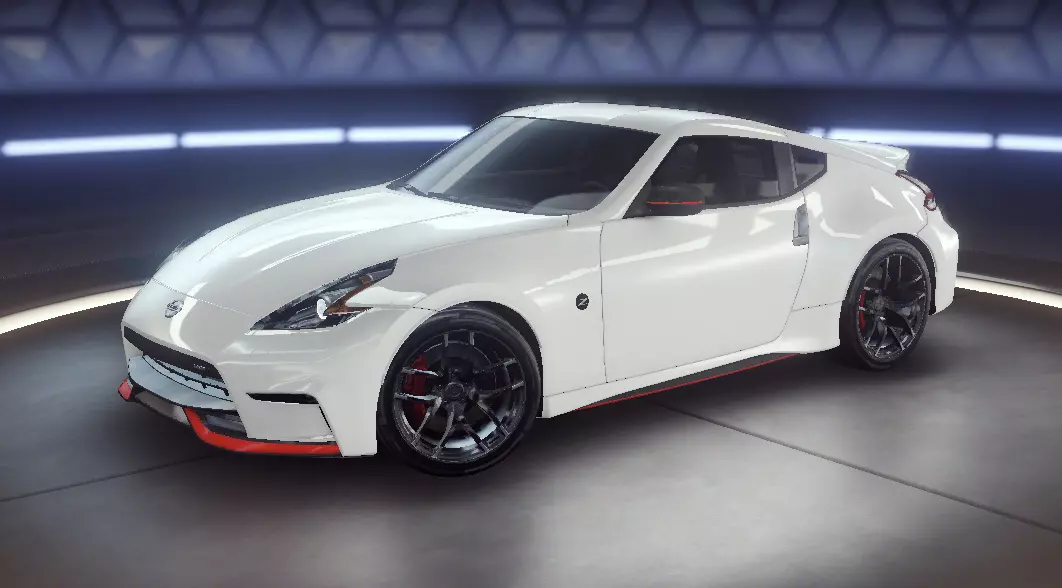
Really quick and dirty explanation of how to go FAST. No secrets, no mention of which car is best. Just generally GO FASTER. So you wanna go fast? Nitro BasicsThat yellow bar is your NITRO GAS fill level. As you use nitro, it goes down. As you drift or do tricks, it refills. The yellow bar has THREE sections when you activate nitro, each corresponds to a different nitro effect if you double-tap the nitro button on it: 1. Pink Bar (if you have FULL nitro gas): double tap nitro in the pink section to do "shockwave." 2. Blue Bar: double tap nitro in the blue section to do "perfect nitro." 3. Yellow Bar: double tap in the yellow section to do "afterburner." 4. Single Tap Nitro: only burns regular nitro if you single tap the nitro button instead of double tap. How to use each nitro: Single tap yellow nitro is good for a medium speed boost, burns the nitro SLOWEST of all the nitro types, but it makes it a little bit harder to steer. Great for straight sections of track. Pro tip: quickly alternate between boost and brake repeatedly to cheese the game into making you go fast and your nitro bar lasts longer than it should. The blue Perfect Nitro gives a SMALL speed boost, burns faster than yellow, but gives you FANTASTIC handling - good for going faster around turns without relying on drift. Orange Afterburner gives a HUGE speed boost, burns nitro FASTER than all the other types, and makes it difficult to turn. It's SUPER EFFECTIVE in the air. Best way to use it is to do a trick (barrel roll or 360) off of a ramp and immediately double tap orange nitro. You fly super fast and each trick refills a big chunk of your nitro bar. The pink shockwave gives a BIG speed boost (bit less than orange afterburner) and FANTASTIC handling (better than blue), but it burns the nitro bar really quickly. Great to use this after drifting, as you're coming out of a turn, since it gives you GREAT acceleration for a second or so, then hit brake and switch to a different type of nitro that doesn't burn your nitro bar so quickly. How to RECHARGE your nitro bar: Slipstream - ride in the blue path behind another car. Preferably while burning a nitro so you catch up to them. 360 - double tap the brake. Barrel roll - go up and fly off of a twisted ramp. Drift - hold the brake button down. This slows you down, but it's a good way to get better steering around turns. Nitro bottles - pick up the yellow or blue nitro bottles that are scattered around the track. Wrecking ball - destroy an opponent's car. Nitro into it, 360 into it, etc. But people will complain and think that you use dirty tricks to win if you start wrecking all your rivals like this. How to run a race well 1. At the start, hold the gas and just drive for THREE SECONDS. 2. Double-tap the brake to do a quick 360, to build your nitro and possibly wreck any nearby opponents. 3. Use YELLOW nitro for straight sections of road. QUICKLY alternate pressing nitro and gas back and forth for best results. 4. Drift into turns. If you are in danger of hitting a wall, or if your speed gets too low, pop a BLUE nitro to help you out of the turn. But for best results, keep drifting until nitro bar is full and then pop a PINK nitro to come out of the turn. 5. As soon as the turn is done, hit the brake and then pop a YELLOW nitro again. 6. When you get close to a FLAT ramp, double tap the brake to do a 360 up the ramp. You should keep doing spins in midair, these will refill your nitro meter. So pop an ORANGE nitro to fly faster!! 7. As soon as you land off a ramp, hit the brake and then pop a YELLOW nitro again. 8. When you get close to a TWISTED ramp, pop an ORANGE nitro. The ramp will make you do barrel rolls, which refill your nitro meter while you're in the air. ZOOOM like Superman! 9. Again, tap the brake and then pop a YELLOW nitro when you hit the ground again. 10. Sometimes you can bounce off of certain surfaces, or grind them like a skateboarding rail, to extend the trick and fly even farther. Feel free to experiment... but if you hit a surface at a bad angle you will explode. 11. If you are running a race that allows you to do so, slide in behind another car that has the glowing blue trail behind it and STAY CLOSE. This will continuously refill your nitro. So you can basically ride in 2nd or 3rd place, refill your nitro bar for free - WHILE NITRO DRIVING - and when the time is right and your nitro bar is full, make your move into 1st place! Just bear in mind then the drivers behind you can do the same thing to you. 12. Keep following those tips (2-11) until the race is almost over. When you are within sight of the finish line, pop an ORANGE nitro since it is the fastest one, for a last-minute super speed boost. REMEMBER - if your steering and braking skills are not very good... you can enable "touch drive" for a simpler experience. But it takes away the ability to steer directly, it's like autopilot for your car. You will be in charge ONLY of the nitros and brakes. And occasionally you choose which fork to take when the path splits. I highly recommend playing with touch drive turned OFF. Best upgrades for SPEED Your car has FOUR parameters you can upgrade. TOP SPEED: you want this BIG so you go fast even without nitro. If this is below 270, your car sucks. ACCELERATION: this is less important than top speed, but lets you recover faster from hitting a wall or slowing down for a turn. If this is under 60, you're going to rely on nitro after every little crash and every turn. HANDLING: also less important than top speed. Makes your steering smoother, easier to point your car where you want it to go. If this is below 60, you need a lot of skill to drive properly. NITRO: determines how slowly your nitro bar depletes when you use your nitro. If this is below 60, your car sucks. You can also collect "import parts" that can be added to your cars. These are essentially upgrades beyond the car's natural abilities. You will have to pay some extra coins to apply them, but they can give you a SLIGHT edge if every other car in the race is as good or better than you, or if you are struggling to finish a race below a certain time. These come in the random car packs, or as rewards for certain event races, or you can buy them from the shop. You can also SELL them if you think you have too many, for the red TRADE coins. Typically speaking, higher grade cars are better. D is garbage level, C is mediocre, B is middling. A and above are VERY FAST. That said, a fully upgraded 3-star C car might be better than some 1-star low-level B cars, etc. You get more star levels by collecting more cards for that car. Star levels allow you to boost the car's four upgrade stats to even higher levels, so you can steer better and go faster. If you have a car at max star level, any more cards you find for that car will be converted into the red TRADE coins. Don't pay too much attention to the overall "power rating" of each car. It's an estimate based on the upgrade level of your car. The only thing it's really good for is estimating whether or not your car has enough high stats to complete the current race (in career mode). But even then it's just a "quick glance" estimate - not a definite indicator. I've beaten races with cars that were quite "underpowered" according to this number. Instead of using that power rating, look at the TOP SPEED and NITRO numbers first. If those are good, you can probably beat the race even if the ACCELERATION and HANDLING are still a bit low. You might not be able to win in first place with low A and H stats, but you probably won't be last place either. The "best" cars in each class... depends which ones you have cards for, and which ones you paid to upgrade the most. You want a car with HIGH top speed, HIGH nitro, and pretty good handling, and then as long as your acceleration doesn't SUCK you should do fine in practically any car. Here is a table of "good stats" at each car rank. Table of "good" stats for each car rank Rank Speed Acceleration Handling Nitro D 270 67 67 67 C 310 67 67 67 B 340 70 70 70

我觉得有必要写一篇关于如何正确驾驶并对其他玩家保持礼貌的指南,因为我发现这个社区明显缺乏这种意识。 步骤1 - 你为何参赛 第一步是最困难的部分,指南的其余部分从这里开始会变得简单。 第一步是审视自己、你的游戏风格以及启动多人比赛时的最终目标。 可能的原因有很多,例如: - 为了完成每日任务而进行多人比赛 - 为了获取多人通行证奖励而刷比赛 - 想要与其他玩家竞速 当然,原因可以是任何合理的理由!但归根结底,你不是去那里破坏别人的游戏体验的。你是为了自己而参与其中。一旦你明确了自己玩游戏的原因,就可以开始分析自己当前的比赛方式了——你们大多数人可能甚至不需要继续阅读本指南,因为你们的比赛方式已经很不错了! 不过,我发现有些玩家无论是有意还是无意,在与其他玩家比赛时,都把他们当成了电脑角色。 步骤2——如何礼貌地比赛。 “礼貌——在对他人的态度和行为上表现出礼貌” 礼貌比赛其实很简单,就像这个想法:“我希望这种事发生在自己身上吗?” 如果答案是否定的,那么通常明智的做法就是不要去做。例如: - 在直道上猛撞其他车辆的侧面,只为扰乱对方的行驶路线 - 故意撞向其他玩家,不仅破坏目标玩家的比赛,也毁掉自己的比赛 - 逼迫其他车手撞上他们原本可以避开的赛道障碍物或墙壁 在大多数情况下,即使你完全不关心游戏,遇到上述情况也会让所有相关人员的游戏乐趣大打折扣。最好的情况是,你把这当作一场被毁掉的比赛而耸耸肩继续玩下去;最坏的情况是,这会毁掉某人下班后试图放松的心情。 留意自己对他人的行为不仅能改善周围玩家的态度,还能提升你自己的策略——更了解他人意味着你能更好地预测并智取对手。结语 以上就是我想阐述的核心内容,最后就长话短说了。感谢阅读,祝各位比赛顺利! 总结:不要用自己都不喜欢的方式去玩游戏。


在《狂野飙车:传奇集结》的多人游戏中,赢得比赛的最快方式是完全无视竞速,专注于成为移动障碍物。 第一个弯道时,直接撞向最近的车辆。如果有人跑出了干净的赛车线,就通过猛撞他们的后四分之一面板来纠正这个“错误”。获胜是可选的,但撞击是必须的。 氮气应该留到两种情况使用:一是把自己撞向车流,二是错过近道时顺便带上另外三名玩家。表情动作是必不可少的,尤其是当你最后一名冲线时。 如果你不这样玩,别担心——多人游戏机制会确保其他人会这么做。

最近,游戏《狂野飙车:传奇》新增了所谓的倍率机制。它们实际上是你的比赛奖励倍率,能让你获得额外的 credits。本指南将为你提供如何通过这些倍率获取尽可能多 credits 的建议。 当然,这里有一些特定规则…… 倍率基本规则 1. 不要将你的账号与移动账号绑定,因为移动版有广告,这会导致倍率无法激活。 2. 每天只有20个倍率可用。 3. 倍率包括以下几种:3倍、4倍、6倍、8倍、12倍、20倍。 4. 只能组合生涯、每日任务和季节性任务……多人游戏的计算方式不同。 5. 倍率的运作方式是一种模板,即它们总是按相同顺序出现且从不改变 通用规则 所有倍率在你启动游戏时都会重置。现在你需要弄清楚模板中你能获得哪些倍率。操作如下: 1. 进入生涯模式,1个章节即可,至少进行30场比赛。每场比赛后都要记录下获得的倍率。务必准确、诚实地记录,因为在重置/关闭游戏后,你在其他比赛(除多人模式外,不得与其他活动混用)中获得的倍率顺序将完全相同。 2. 要获得最高 credits,你必须始终在比赛中获得第一名。 3. 一个非常重要的项目是名次奖励。名次越高,你通过倍率获得的奖励就越高。 4.如果你想获得更高的倍数,就拒绝你不想要的那个……甚至连续拒绝好几次。 为了让你理解整体运作方式(因为它看起来可能很复杂),我会用一个例子来展示它是如何工作的。 我的倍数是……4倍、8倍、8倍、12倍、4倍、12倍、4倍、6倍、8倍、4倍、8倍、8倍、12倍、3倍、12倍、4倍、8倍、20倍、12倍、12倍、6倍、3倍、20倍、20倍、20倍、8倍、12倍、20倍。 我尝试过其他的,但那些结果已经不尽如人意。 我打开游戏。 我参加任意生涯中的第一场比赛……我得到了4倍的倍数……我拒绝了它。 第二场比赛我去寻找车辆。目前有3876的位置奖励。我赢得了比赛,因此获得了最高名次奖励3876,而我的序列中第二个是8倍乘数,所以3876乘以8,我得到了31008 credits。 当然,我也可以拒绝这个,但你要记住,每日任务和赛季任务的尝试次数是有限的,也就是所谓的A credits,每10分钟增加1个。 ********************************************* 大致就是这样了。 还有个小提示:在生涯模式中,名次奖励非常少,所以你不会在那里赚到什么钱。不过第6章有一些不错的奖励……我还没有全部测试过,但我最多拿到过3162,虽然不算多,但还是比每日任务中的少。

想知道资深玩家的经验,现在开始玩是否值得,还是纯粹浪费时间。 花费时间 首先你要明白,这是一款极其肝的游戏。你每天至少需要投入1小时才能获得不错的进展。投入的时间越多,进展就越快。所以要记住这一点!如果你做不到,可能就该考虑完全不玩这款游戏。 活动 其次,尽管这款游戏已经推出5年多,你也错过了很多活动,但还是有办法获得过去活动中的车辆。获取那些真正好的车辆通常需要相当长的时间,但用1-2年时间打造一个不错的车库是有可能的(取决于你投入的时间和金钱)。新手入门建议: 首先,专注于容易获取的车辆。大多数车辆获取难度较高,且通常每年仅有一次获取机会。除非有合适的机会,否则不要考虑获取这些车辆。最好专注于当前可获取的车辆,即使你觉得它们很一般,甚至性能数据确实很差(例如,挑战者SRT8和Z4在游戏中驾驶体验不佳,但目前你需要它们)。 其次,生涯模式:尽可能推进。你会遇到多次卡关,但在此模式取得进展很重要,因为这对你在游戏其他方面的发展有帮助。 最后,每日活动:确保完成所有日常任务,这是游戏进度提升的必要环节。一开始你会得到一些性能一般的车辆,但初期你确实需要它们。 车辆搜寻是获取车辆和刷资源的理想方式。尽管我已经将大部分通过搜寻获得的车辆升到满级,但我仍在继续刷 credits、import parts 和 trade coins。 特别活动(季节性):作为新手,你可能很难在这些活动中获得太多有价值的东西,但还是要尽量获取你能得到的(少数)物品。每一点收获都有帮助。而且,资深玩家如果不花费真实货币,通常也无法完成活动的一半以上内容。 还要注意有一个关于 488 GTB 的新手活动,一定要参加,因为它对新手真的非常有用! 多人游戏:你需要几辆性能不错的车才能有所进展。最开始最重要的车是 DS E-Tense。它可能看起来不怎么样,但它是新手最容易获得的 D 级车,而且即使是资深玩家也一直在使用它。请尽快将其升到满级。在C级中,蝰蛇ACR或宾尼法利纳H2是最容易获取的MP车辆,而在B级中,克尔维特Grand Sport(简称GS)是必备车辆。 这些车辆之所以表现出色,是因为它们拥有良好的操控性和氮气性能,这使得它们非常容易驾驶。这比高极速重要得多。此外,排名的影响也不大。 有一些新功能可以帮助你: 【自动领取】:当车库等级达到12级时,你可以自动领取一些每日活动奖励(每日车辆战利品、杯赛和 credits 劫案)。因此,升到GL12对于更轻松地刷取资源来说是必须的! 【星路】:有4个周期性的星路活动,每3个月一次。对于新手来说,目前这还不是一个选择,但之后你会从中获得一些好车。 展厅:本次更新新增了展厅功能,提供了几辆不错的车。获取过程需要大量刷取,但可能是值得的。对你来说,莲花Elise活动是必做的,因为它甚至比满级的DS E-Tense还要好。 花费方面: - 金币:只按需要升级车辆。在生涯模式中,你通常不需要满级车辆。只需升级到推荐等级即可。只有像DS这样的车才值得满级。 - 代币:目前最好先攒着。当你至少有10-20k代币时,再考虑花费。如果你觉得需要花费,可以在这里咨询建议。 - 赛季代币:这是一个新功能,目前我认为最好攒到最多66/33k(使用LP),然后兑换成2k。如果你认为需要付费,可以在此咨询建议。 关于真实货币:游戏支持免费游玩,但进度显然会较慢。大多数付费项目定价过高,你可能花费100欧元却连一辆车都得不到。相对而言,【传奇通行证(LP)】和【每日赛事通行证】是比较划算的选择(仅在有优质车辆收集活动时推荐!如有疑问,可再次在此咨询建议!) 务必查看本社区的维基页面,其中包含许多有用信息。Sreglov与版主erik_g在Reddit上共同撰写了指南和常见问题解答,此外还有一些优质指南。我只是在Steam上重新发布并编辑了这些内容。