换一换
换一换 


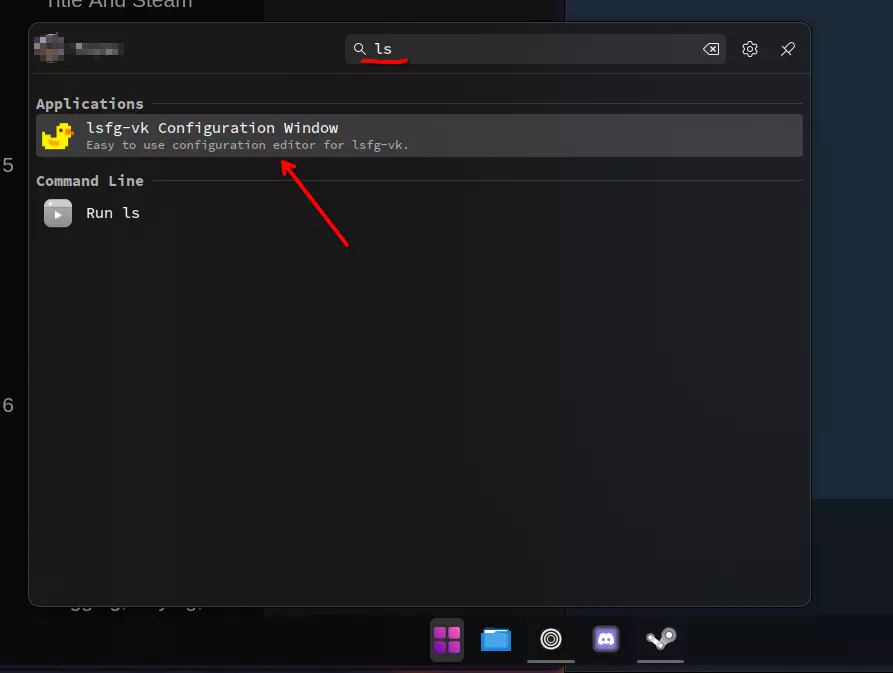
LSFG-VK 安装与使用指南:桌面模式用户分步教程 分步指南 步骤1: 在Steam购买《Lossless Scaling》并下载。 步骤2: 前往PancakeTAS的LSFG-VK项目。 步骤3: 下载最新版本(.tar.zst文件)并将其放入下载文件夹。 步骤4: 打开Konsole,使用命令禁用SteamOS只读模式:sudo steamos-readonly disable 步骤5: 关闭Konsole。 打开下载文件夹,右键点击文件夹空白处,选择【在此处打开终端】 步骤6: 运行以下命令: sudo pacman-key --init sudo pacman-key --populate holo sudo pacman -Syy 然后使用以下命令安装软件包: sudo pacman -U ./lsfg-vk-x.y.z-x86_64.⚠️ 重要提示:将文件名替换为你下载的确切文件名。 撰写本文时,文件名为:lsfg-vk-1.0.0.x86_64.tar.zst 因此撰写本文时,命令如下:sudo pacman -U ./lsfg-vk-1.0.0.x86_64.tar.zst 步骤7:使用以下命令重新启用只读模式:sudo steamos-readonly enable (可选)步骤8:要确认SteamOS已恢复为只读模式,请使用以下命令:sudo steamos-readonly status 如果输出显示“enabled”,则根文件系统处于只读模式(默认)。如果显示“disabled”,则根文件系统处于可写模式(读写模式) 完成 打开开始菜单,输入lsfg,你应该会看到Lossless Scaling图标。你可以将其固定到收藏夹。
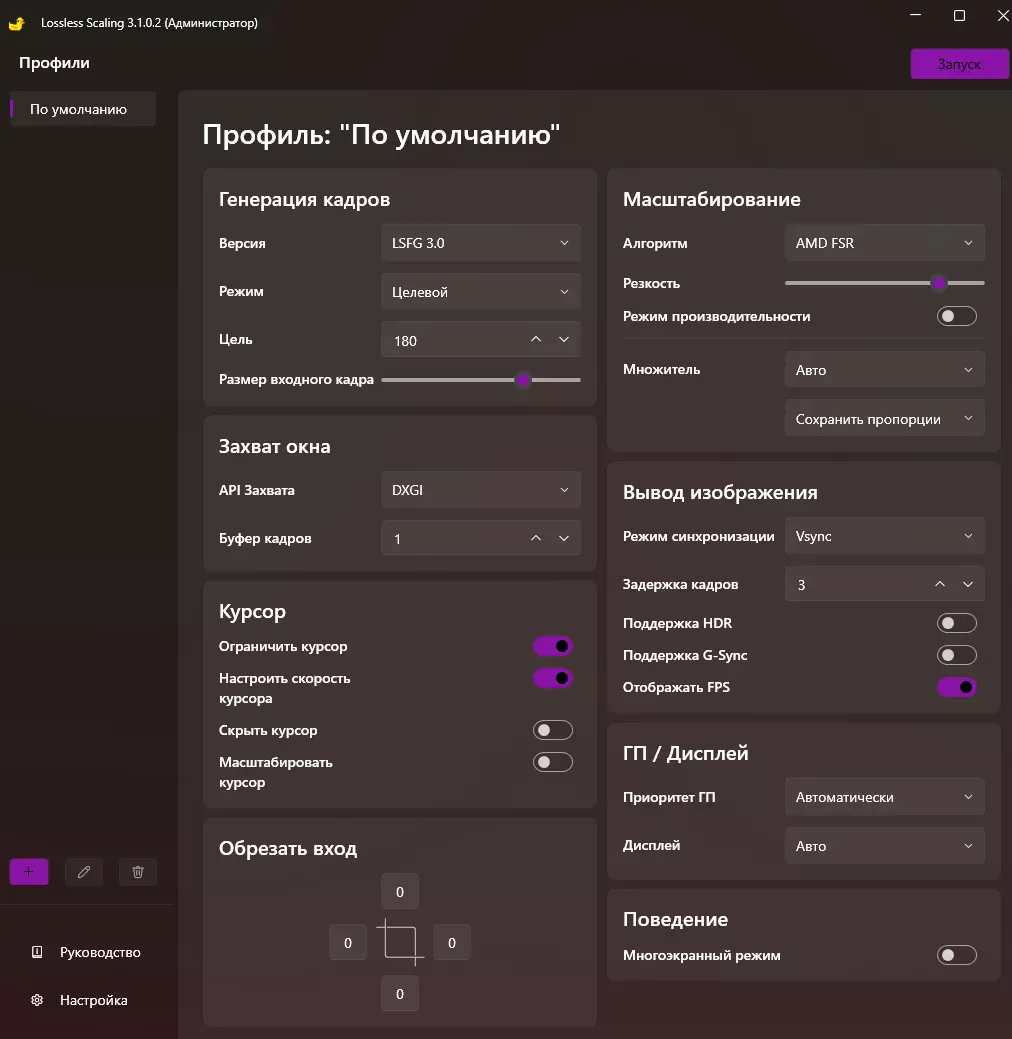
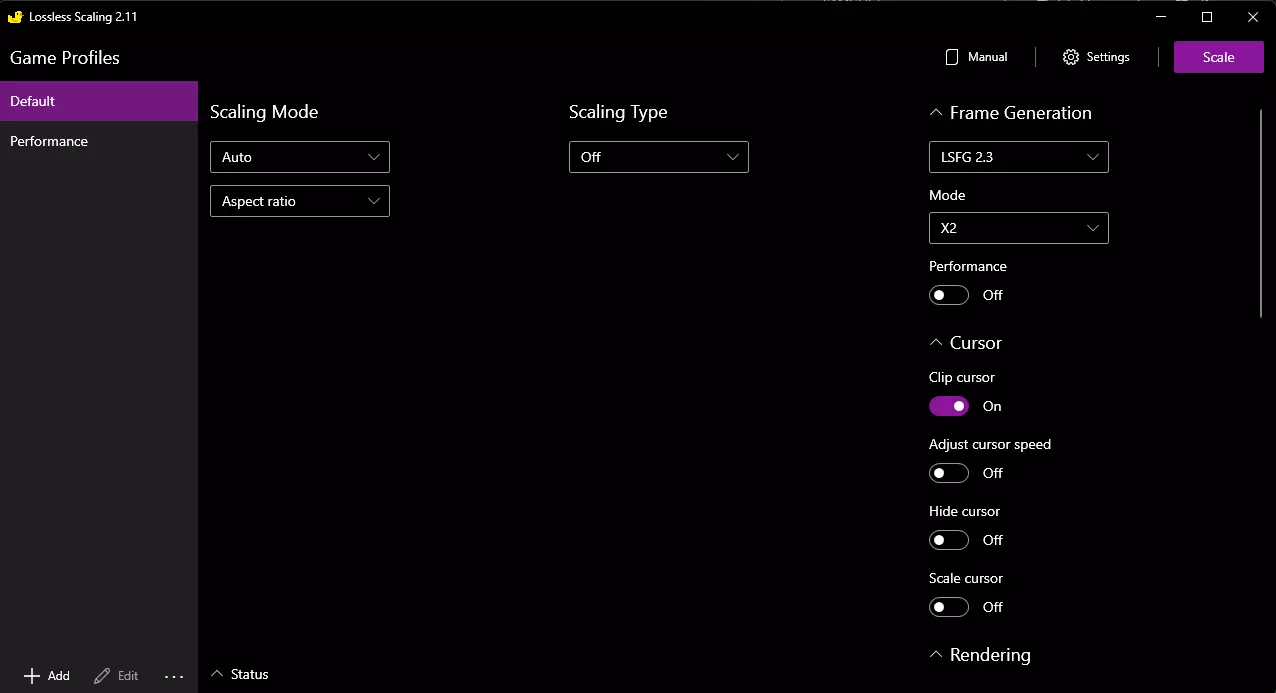
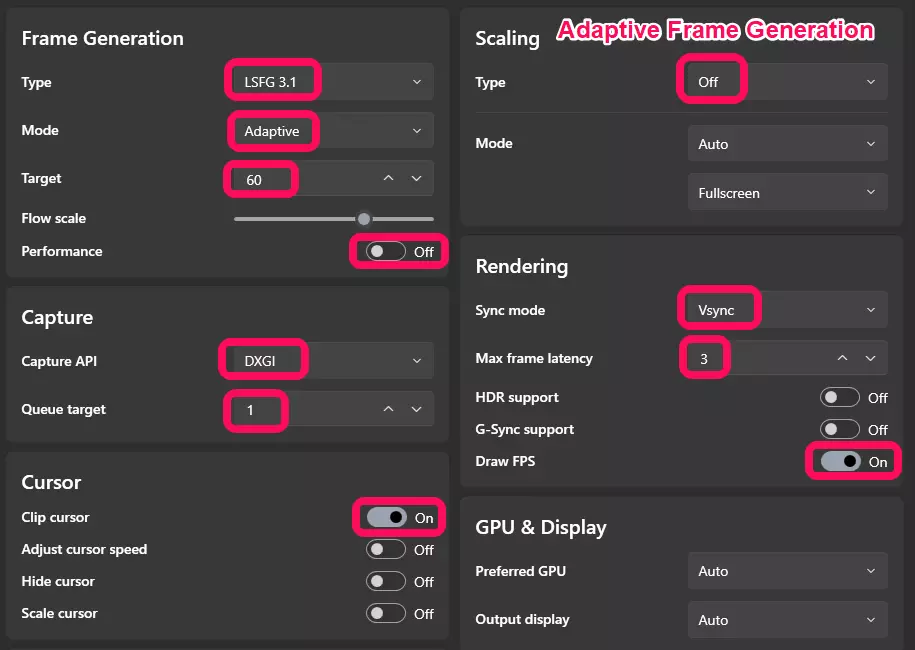
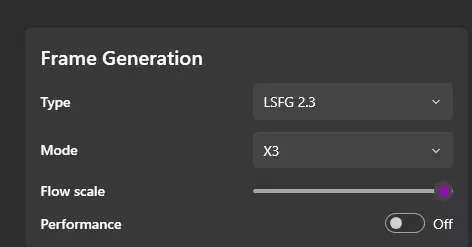
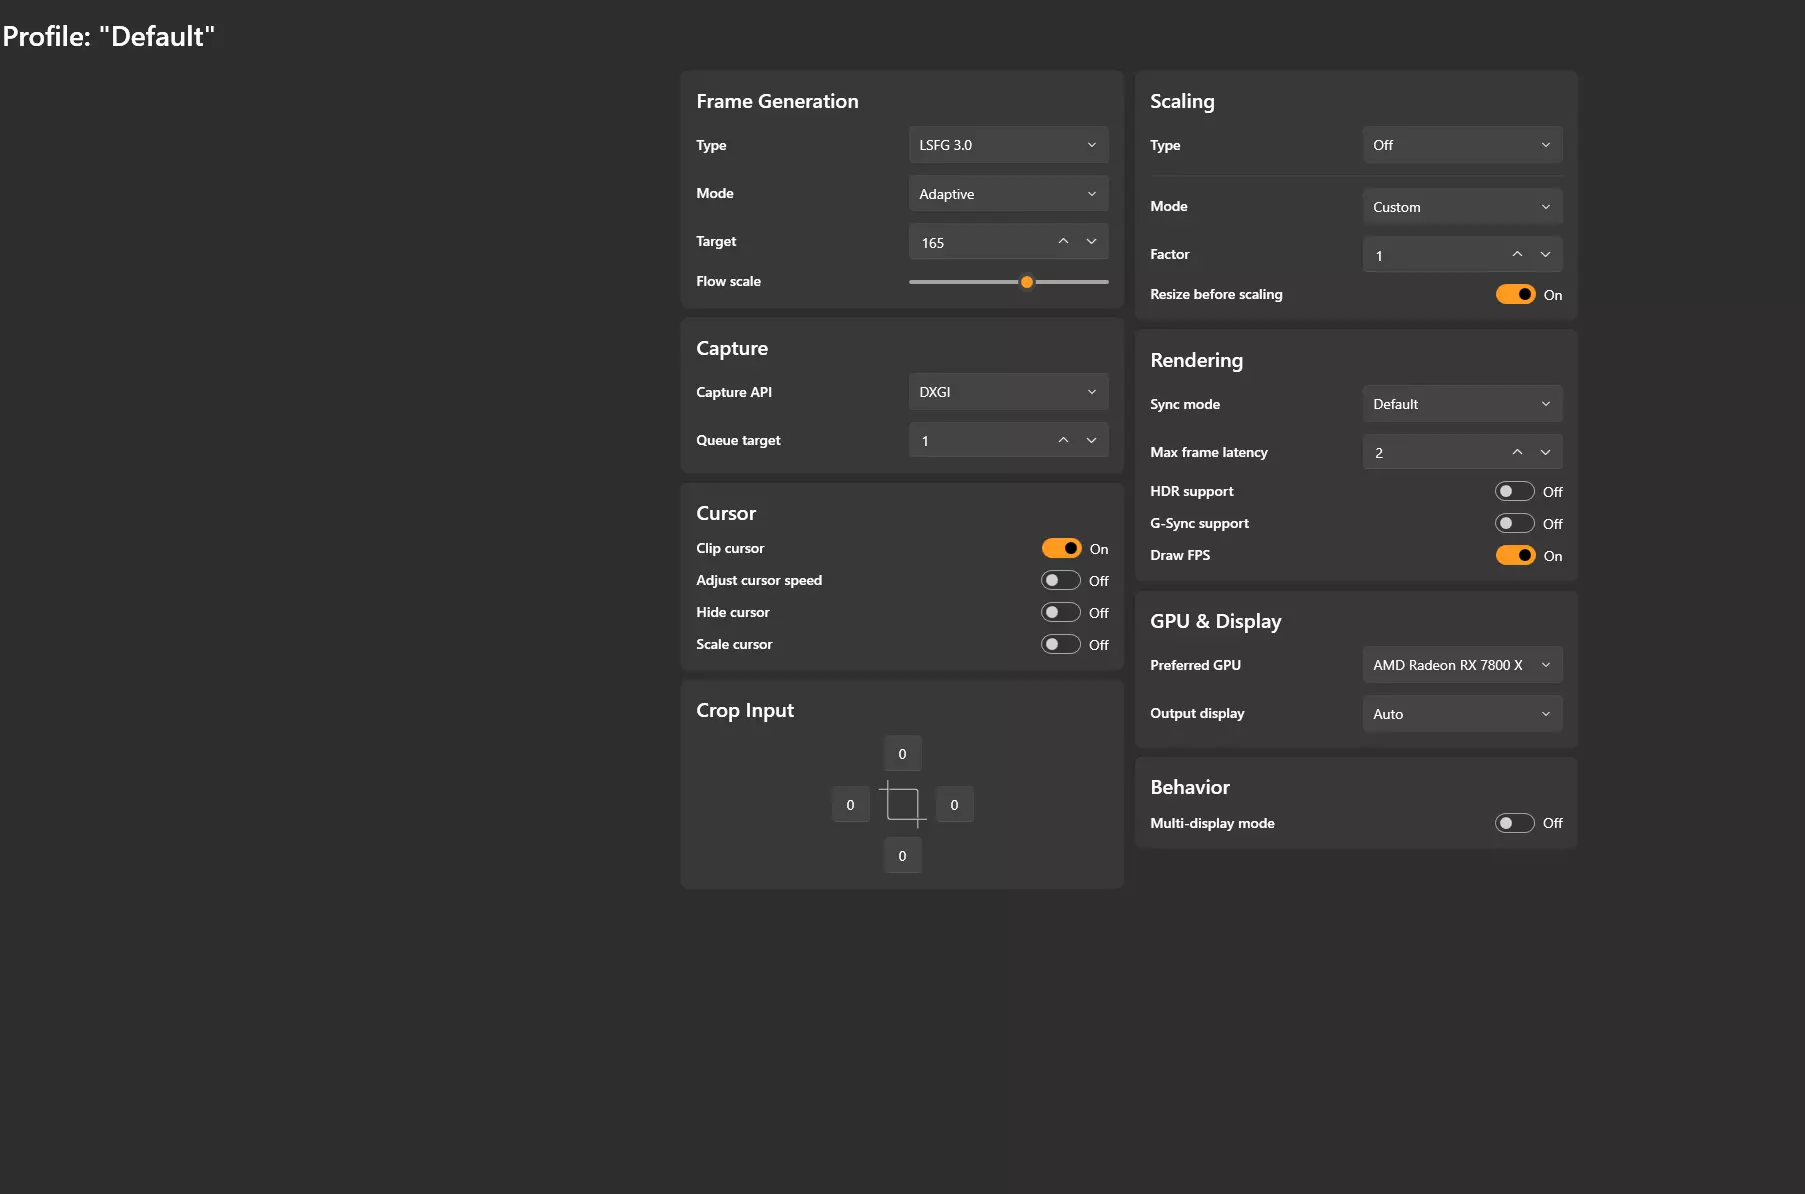
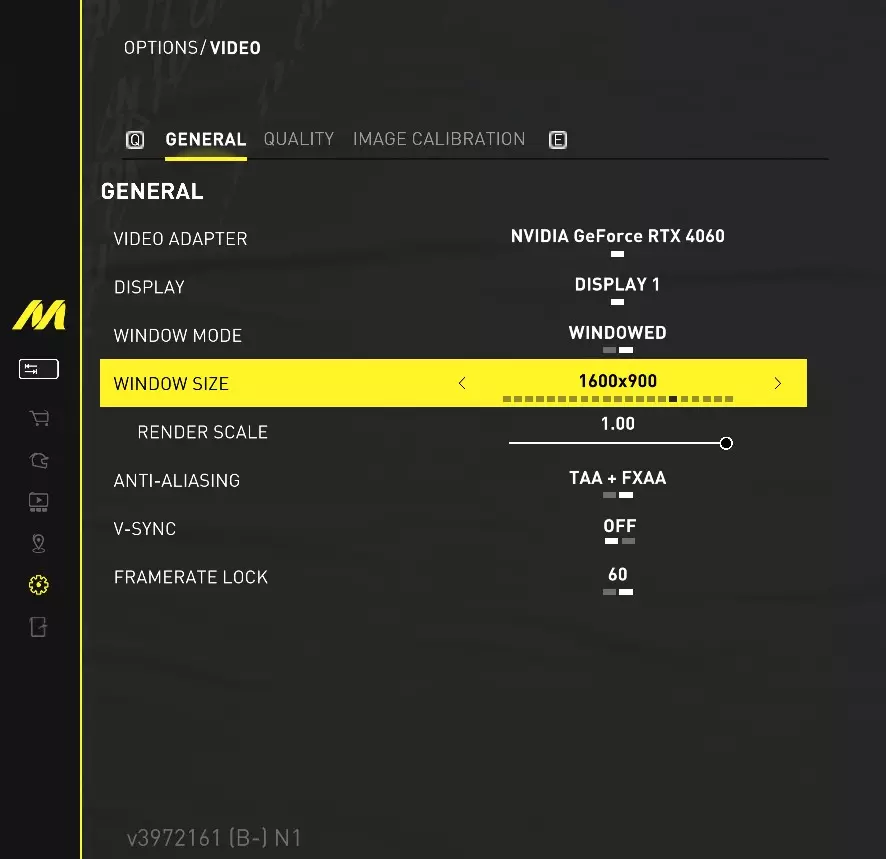
Important Notice: Major SteamOS updates may remove this package; you can re-install using the same steps. How to Use LSFG‑VK 1. Open LSFG‑VK click Create New Profile. Frame Generation Settings Multiplier: 2 (note: 1 = off) Flow Scale: 80 Performance Mode: ON Misc Settings Present Mode: VSync/FIFO (Default) 2. Start your game Limit the game’s FPS to match its 1% lows for the best stability. Adjust graphics settings so that your 1% lows are at least half your monitor’s refresh rate. Example: On a 60 Hz display, aim for a stable 30 FPS minimum. Once tuned, lock the in‑game FPS to that target (e.g. 30 via the in‑game limiter or use Goverlay if the game does not have an in-game FPS Limiter). 3. Alt+Tab back to the LSFG‑VK Configuration Menu Under General Properties: Find Profile Name. Click the magnifying glass icon 🔍. Select the name of your game (sometimes listed as “Game Thread”). Then switch back to the game, LSFG‑VK should now be active! ✅ Note: If it appears as though lossless scaling frame generation is not functioning. Try going into the steam settings for the game and enabling "Force the use of a specific Steam Play compatibility tool" then relaunch the game. Installing Goverlay on SteamOS for FPS Limiting in Desktop Mode Step 1: Install Gear Lever Open Discover, the built-in SteamOS app store. Search for Gear Lever. Click Install. Tip: Gear Lever allows you to manage AppImages (like Goverlay) easily. Step 2: Download Goverlay Go to the official Goverlay GitHub page: https://github.com/benjamimgois/goverlay/releases/tag/1.7.3 Download the .AppImage file to your Downloads folder for easy access. Step 3: Add Goverlay to Gear Lever Open Gear Lever. Click the + Open button in the top-left corner. A file browser (called Dolphin) will appear. Navigate to your Downloads folder and select the Goverlay AppImage. Click Add Application. Tip: Once added, you can search for Goverlay in the start menu and pin it to your favorites for easy access. Step 4: Configure Goverlay Open Goverlay. On the Presets tab, select the button labelled "Basic". (This sets up a simple overlay similar to RTSS on Windows.) Go to the Visual tab to adjust how the overlay looks. Set a keybind to toggle on & off the overlay (Head-Up Display). Step 5: Set Performance Options Go to the Performance tab. Under the Information section: Check FPS Average & Set the box below to 1% Low. Under the Limiters section: Check the boxes for 60, 45, 40, & 30 FPS. Set your limit toggle key (this is the key combination to switch between FPS limits). Click the green Save button in the bottom-right corner. Step 6: Configure Steam Launch Options Open Steam and go to the Settings for the game you want to use Lossless Scaling with. In Launch Options, type: mangohud %command% Important: Do not use the Goverlay provided option (MANGOHUD=1 %command%) Lossless Scaling Frame Generation will not work if you do. You’re done! You can now toggle both FPS limiter & statistics overlay in-game using the keybindings you set. ⚠️ Note / Bug Warning: If you turn off and then turn on Lossless Scaling Frame Generation, the FPS limiter from Goverlay will reset. You will need to re-toggle the limiter using the keybind you set. Info about the commands 🛈︎ Steam OS read only? What the command is steamos-readonly is a SteamOS utility that switches the root filesystem between read‑only (protected) and read‑write (modifiable) modes. sudo steamos-readonly disable runs that utility with admin rights and disables the read‑only mode, meaning / can now be modified. Why it is used in this context Pacman keyring setup and system‑level package installs (like pacman-key --init, -- populate holo, and pacman -U ...) write into system directories under /usr, /etc, etc., which are blocked while SteamOS is read‑only. Running sudo steamos-readonly disable is therefore a prerequisite so those commands can actually modify the system (initialize keys, update databases, install the lsfg-vk package) instead of failing with “read‑only filesystem” errors. For safety, the usual pattern is: disable read‑only, make the necessary changes, then run sudo steamos-readonly enable to lock the system back down. Keyring command sudo pacman-key --init Initializes Pacman’s GPG keyring so it can use trusted keys to verify package signatures; this is needed if the keyring is missing, new, or broken. sudo pacman-key --populate holo Adds the SteamOS/“holo” key set to the keyring, which lets Pacman trust and verify packages signed with SteamOS-specific keys (fixes “unknown trust” errors with Deck/SteamOS repos). Database refresh sudo pacman -Syy Forces a complete resync of all enabled Pacman package databases, even if they appear up to date, which is often done after fixing key issues so repo metadata and signatures are in sync. Local package install sudo pacman -U ./lsfg-vk-x.y.z-x86_64.tar.zst Tells Pacman to install a package directly from the given file in the current directory (here, a lsfg-vk archive) instead of from a repo, resolving dependencies from configured repos as needed TL;DRfix/setup trust (keyring), refresh the repos, then install that specific local lsfg-vk package file via Pacman. FAQ What is sudo? sudo means “superuser do” and lets a regular user run a command with administrator (root) privileges temporarily. You use it for system-level actions like installing software, changing system files, or managing users, which normal accounts are not allowed to do. What is pacman? pacman is the package manager used by Arch Linux and Arch-based systems (including SteamOS 3.x under the hood). It installs, removes, and updates software packages. Commands like pacman -S (install), pacman -R (remove), and pacman -Syu (update system) work with repositories and local package files to manage your software. What is a keyring? In this context, a keyring is a database of cryptographic keys (usually GPG keys) that the package manager uses to verify that packages really come from trusted sources. When pacman downloads a package, it checks the package’s signature against keys in the keyring to ensure it has not been tampered with and is signed by a trusted maintainer. What are keys (GPG/PGP keys) in this context? A key is a cryptographic identifier used to sign and verify data; maintainers sign packages with their private keys, and your system uses the corresponding public keys to verify them. Pacman’s keyring stores these public keys; if a needed key is missing or untrusted, you see “unknown trust” or “invalid signature” errors until the correct key is added and marked trusted. Why do commands like pacman-key --init and --populate matter? pacman-key --init creates or resets the keyring so that it can hold trusted keys for verifying packages. pacman-key --populate <something> (like holo or archlinux) fills that keyring with a known set of trusted keys for those repositories, which fixes many signature/trust errors before installing packages. Why not just use the Decky lsfg-vk plugin? The issue (and the reason I made this guide) is that the Decky plugin only works when the game is launched from Gaming Mode. If you're using the Steam Deck docked at a desk in Desktop Mode, or launching non-Steam apps directly in Desktop Mode, the Decky plugin won’t activate.