换一换
换一换 


This battle-guide provides UGCW player-generals with an overview of various structural “basics” for each battle in UGCW’s CSA/Confed campaign. (See the USA/Union guide for introductory notes on those details.) As is also the case with the USA guide, please note the following about this CSA guide: (1) It has been built out of analysis of version “1.09 rev. 21114”, although most of its content has now been confirmed for the 1.10 & 1.11 updates. (2) It is not yet comprehensive for all battle-relevant details and may in fact contain mistakes or inaccuracies. (It does not, e.g., distinguish between difficulty-levels, although this factor may not be relevant.) Some explicit notes are found below on these counts. Please contribute corrections and amendments and additions and whatever edits may seem (or be) necessary, etc. May this information help you to achieve victory more enjoyably and effectively on UGCW’s battlefields. (Note that this guide has been built out of analysis of version “1.09 rev. 21114”, although most of its content has now been confirmed for the 1.10 & 1.11 updates. No updates are currently planned in order to conform to changes caused by the various mods now available.) (1) The Potomac Fort - 22 & 29 MAY 1861 PRE-BATTLE NOTES: * This is an OFFENSIVE-then-DEFENSIVE minor battle * Note the importance of conserving your force-strength: units from Day 1 will appear in same condition on Day 2 * After this battle, you will receive, as permanent part of your developing army, several of the units deployed here, so you may wish to conserve them: INF bdes of Sigfried and Kemper + ART bde of Cabell. [Thx to CivWar64 for this info.] DEPLOYMENT: * N/A (units are assigned to player) DAY 1 (May 22nd) - PHASE 1: “[Intercept Enemy Reinforcements]” TIME: 1015 TIMER: None [:30 implicitly] MAP: Potomac Fort area (on banks of Potomac River somewhere in Virginia) DEPLOY-FORCE: 2 INF + 1 SKM + 1 CAV + General POSITIONING: Pre-positioned at south-edge of map OBJECTIVES: Destroy Battery A / Destroy Battery B / Capture Coastal Fort NOTES: * Situation-Overview begins phase, emphasizing enemy reinforcements moving from southwest to fort * The actual imperative of this phase seems to be getting into position to intercept the USA reinforcements before they reach the fort -- and beginning to attack them 1.2: “[Take the Fort]” TIME: 10:45 TIMER: 3:30 MAP: Same DEPLOY-FORCE: As at end of Phase 1 + reinfs: 3 INF +1 SW POSITIONING: As at end of Phase 1 + reinfs: south-edge of map OBJECTIVES: Same NOTES: * Brief Situation-Overview announces this new phase * Once the 3 objectives are achieved & with run-down of CONTESTED timer (11 mins.) on holding the fort, there is an immediate finish to the phase [not clear if CONTESTED timer continues past overall-timer] DAY 2 (May 29th) - PHASE 1: “[Defend the Fort]” TIME: 1100 TIMER: 3:00 MAP: Same, restricted (does not extend as far south now) DEPLOY-FORCE: 2 ART + 3 INF [Kemper, Siegfried, Birney] + General POSITIONING: Pre-positioned inside the fort OBJECTIVES: Hold Coastal Fort NOTES: * Brief Situation-Overview announces this new day/phase, with emphasis on holding the fort against attacks from southwest until reinforcements can arrive * Destroying the enemy ironclads may be tied to overall victory-conditions (this is not confirmed) * 1117~: Reinforcements (1 CAV) from south-edge of map [unless it was destroyed on Day 1] * 1137~: More reinforcements (2 INF + 1 SW) from south-edge of map * If USA captures fort, run-down of CONTESTED Timer will IMMEDIATELY end battle * Immediate FINISH at end of time? Rovernavigator reports that, with fort held, extra time is available until 1615 ***CAMP now available*** (2) Newport News - 15 JUN 1861 PRE-BATTLE NOTES: * This is a DEFENSIVE minor battle * There is a “sticky spot” on the river north of the town: enemy units (perhaps our own) will, when shot while routing across the river, get stuck mid-river and thus become easy prey, etc. It is unclear whether they can/will still fire. [Thanks to Sheldon Cooper for this tip.] * Immediate FINISH at end of time (perhaps adjusted by CONTESTED time-overlap?) DEPLOYMENT: * Delay: 3 bdes - 1 deploy-box PHASE 1 TIME: 1800 TIMER: 1:00 MAP: Newport News (Virginia) area DEPLOY-FORCE: 3 INF + General + 1 Loan-Aux CAV (JEB Stuart) POSITIONING: Per deployment-box north of town (CAV appears from northwest soon after start) OBJECTIVES: Hold Town NOTES: * Phase begins with Situation-Overview * 1832~: USA forces (reinforcing the northern force already present) arrive from west PHASE 2 TIME: 1900 TIMER: 1:30 MAP: Same, expanded especially southwards DEPLOY-FORCE: As at end of Phase 1 + reinfs: 4 INF + 2 ART + General POSITIONING: As at end of Phase 1 + reinfs: arriving from southwest as phase begins OBJECTIVES: Hold Town NOTES: * Phase begins with brief Situation-Overview * USA forces soon begin attacking from east (in addition to already existing attackers) * 1932: More reinforcements (CAV & SW) arrive from south-edge of map (Alert: Escort SW to town) ***CAMP now available*** (3) 1ST BULL RUN - 21 JUL 1861 PRE-BATTLE NOTES: * This is a DEFENSIVE-then-optional-OFFENSIVE grand battle * This battle takes place in northeast Virginia near Manassas Depot, southwest of Washington D.C. * Most of the troops involved in this battle are Loan-Aux troops that arrive as reinforcements * EXTRA time available after FINISH pops up: see Phase 3 DEPLOYMENT: * Defend Bridge: 4 bdes - 1 deploy-box PHASE 1: “[Defend, Scout, Delay!]” TIME: 0730 TIMER: 3:00 MAP: Bull Run River area (from Henry Hill at south to far north beyond Matthews Hill) DEPLOY-FORCE: 4 bdes + General + SW POSITIONING: Per deployment-box near Stone Bridge OBJECTIVES: Hold Stone Bridge / Hold Matthews Hill NOTES: * Extended Situation-Overview begins this phase, emphasizing “defend, scout, and delay” tasks * Holding Matthews Hill is NOT required (but ownership of it seems to affect Timer; thus, once USA takes it and the CONTESTED timer runs out, this phase ends even if overall Timer has not -- possibly?) * 0740~: USA forces approach Stone Bridge from east * 0822~: Reinforcements (Bee) arrive from southwest to cover the left flank * 0824~: USA CAV tries to force ford north of Stone Bridge * 0843~: Reinforcements (Hampton/Beauregard) arrive from Henry Hill area * 0848-1000~: Various alerts about and approaches of more USA forces PHASE 2: “Withdraw to Henry Hill” TIME: 1030 TIMER: 2:00 MAP: 1st Bull Run area, expanded south of Henry Hill and to west DEPLOY-FORCE: As at end of Phase 1 + reinforcements: 5 INF + 1 ART + General Jackson + SW POSITIONING: As at end of Phase 1 + reinfs from south-edge of map OBJECTIVES: Hold Henry Hill NOTES: * Situation-Overview begins this phase, emphasizing Jackson is on his way to help * 1045~: Stuart’s CAV (1 bde) arrives to help from southwest * This phase does not always seem to end exactly at 12:30: other factors may lead to early cut-off PHASE 3: “Counter-Attack!” TIME: 1230 [or earlier depending on end of Phase 1.2] TIMER: 2:30 MAP: Same as in 1.2 DEPLOY-FORCE: As at end of Phase 2 + reinforcements: 5 INF + General Johnston (+ SW?) POSITIONING: As at end of Phase 2 + reinfs from south-edge of map OBJECTIVES: Hold Henry Hill NOTES: * Situation-Overview begins this phase, emphasizing our counter-attack against USA right flank * EXTRA time is available after FINISH pops up -- until 1745 ***CAMP now available*** (4) Ambush Convoy - 29 SEP 1861 PRE-BATTLE NOTES: * This is an OFFENSIVE minor battle * With all 3 SWs captured, there is immediate FINISH at end of timer; with none or some captured, there is EXTRA time -- until 0915 DEPLOYMENT: * Ambush: 10 bdes - 1 deploy-box TIME: 0545 TIMER: 2:00 MAP: Somewhere near Richmond (Virginia) DEPLOY-FORCE: All bdes + General + SW + 2 Loan-Aux CAV POSITIONING: Per deployment-box / Loan-Aux CAV: pre-positioned to north & south of deployment-box OBJECTIVES: Capture Supplies x3 (there are 3 SWs in the enemy convoy) NOTES: * Situation-Overview emphasizes the convoy’s intended meet-up with 7k troops under McDowell to east * Soon after sighting/attacking convoy, there is alert about enemy reinfs to the north (they soon appear) * 0610~: McDowell’s Union force arrives from east ***CAMP now available*** (5) Stay Alert - 25 FEB 1862 PRE-BATTLE NOTES: * This is a DEFENSIVE minor battle * 11, not 10, bdes can actually be deployed for this battle * EXTRA time available after FINISH (with VP in hand, anyway) -- until 1230 DEPLOYMENT: * Defend Supply Depot: [11] bdes - 1 deploy-box TIME: 0600 TIMER: 3:30 MAP: Supply depot area (near Corinth, Mississippi) DEPLOY-FORCE: 6 bdes + General + SW POSITIONING: Per deployment-box around the supply depot OBJECTIVES: Hold Supply Depot NOTES: * Brief Situation-Overview begins the battle * 0755~: reinforcements (up to 5, not 4, more bdes) arrive from southeast [Note that the arrival-time of these reinforcements is now much later, it seems, with the new 1.10/11 patches] ***CAMP now available*** (6) SHILOH - 06-07 APR 1862 PRE-BATTLE NOTES: * This is an OFFENSIVE grand battle * This battle takes place in southwest Tennessee, in/around Pittsburg Landing on the Tennessee River * Much of the overall force used in this battle is Loan-Aux (and appears in Day 1 - Phase 2) * General Grant may make an appearance during this battle (see Day 1 - Phase 3) * Phase-changes may play out differently, depending on VP-statuses and perhaps other triggers * There is no Day 2 for the CSA in this battle if the Pittsburg Landing VP is taken and held for the whole CONTESTED time before the overall TIMER runs out * BrigGen Nathan Bedford Forrest and his bde of CAV (melee: 300 men) are awarded to player after this (victorious-only!) battle. Visible in CAMP after battle concludes, this free bde may generate a free bde-slot in the 1st Corps: it is automatically slotted into the FIRST AVAILABLE slot in the 1st Corps; if all bde-slots are already occupied per the player’s current AO level, a new slot is created. E.g., a 6th slot will be created if the 1st Corps already has all of its divisions filled with 5 bdes apiece. This appears to be true for any AO level. (Note: removing this bde at any time also removes the extra-slot; yet, swapping it out directly with another bde will preserve the extra slot.) DEPLOYMENT: * Attack at Dawn: 20 bdes - 1 deploy-box DAY 1 (April 6th) - PHASE 1: “[Attack Union Right Flank]” TIME: 0630 TIMER: 2:30 [or less, if CONTESTED timer runs out] MAP: Shiloh Church area (west part of battlefield) DEPLOY-FORCE: 10 bdes + General + SW POSITIONING: Per deployment-box at southwest OBJECTIVES: Capture Shiloh Church NOTES: * Extended Situation-Overview begins this battle/phase * 0700~: “2nd attack wave” arrives from south (remainder of deploy-corps: up to 10 bdes more) * This phase ends if/when the CONTESTED timer runs out (after VP is taken) 1.2: “[Attack Union Left Flank]” TIME: 0730 [or earlier, per Phase 1] TIMER: 3:00 [or less, depending on CONTESTED timer for at least 1 held VP] MAP: Spain & Larkin Bell fields area (east part of battlefield) DEPLOY-FORCE: Loan-Aux troops of the “II Corps”: 6 INF + 2 ART + 1 CAV + General Bragg + SW POSITIONING: Arriving gradually at start of phase from southwest corner of map OBJECTIVES: Capture Spain Field / Capture Larkin Bell Field NOTES: * Brief Situation-Overview begins this phase * 0815~: More Loan-Aux reinfs arrive (2 waves about 10 mins apart) from south-center: 3 INF / 3 ART + General Breckinridge [no SW] 1.3: “Defend Shiloh Church” TIME: 1200 TIMER: 1:06~ MAP: Shiloh Church area (west part of battlefield) DEPLOY-FORCE: As at end of Phase 1 POSITIONING: As at end of Phase 1 OBJECTIVES: Hold Shiloh Church NOTES: * Brief Situation-Overview begins this phase * General Grant, “checking on the attack”, may make an appearance here for the USA * This phase occurs even if Shiloh Church is taken in Phase 1. If Church was not taken, then it still begins as CONTESTED in this phase -- with timer of 00:25 1.4: “Attack Hornet’s Nest” TIME: 1307 [or otherwise, per end of Phase 1.3] TIMER: 3:30 [but may be less depending on unidentified triggers] MAP: As in 1.2, but extended north (to include the new VP) and east DEPLOY-FORCE: As at end of 1.2 POSITIONING: As at end of 1.2 OBJECTIVES: Capture Hornet’s Nest * It is NOT necessary to capture this VP for battle to continue NOTES: * Brief Situation-Overview begins this phase * The TIMER may cut off early here, depending on unidentified triggers, even if the VP is not taken(!) 1.5: “Advance to Pittsburg Landing!” TIME: 1637 [or as at end of Phase 1.4] TIMER: 3:00 MAP: Combination of earlier maps & expanded northward to include Pittsburg Landing DEPLOY-FORCE: As at end of 1.3 & 1.4 POSITIONING: As at end of 1.3 & 1.4 OBJECTIVES: Capture Pittsburg Landing NOTES: * Brief Situation-Overview begins this phase, emphasizing the Union ironclads that will support Union’s left flank and the imminent arrival of Union reinforcements from north * Union reinforcements eventually arrive from northeast of map; then, from center/northwest area. [Per CivWar64: northeast USA reinfs arrive at 1:19, or 16:51 on the TIMER; northwest/center reinfs arrive 10 minutes later. Per D-Dub’s latest: northeast USA reinfs arrive at 1:18, then northwest/center reinfs arrive 26 minutes later. (The AI is not completely predictable here, indeed.)] * With VP (Pittsburg Landing) in hand, there is immediate FINISH once the CONTESTED timer runs down. Without VP in hand (or, perhaps, if CONTESTED timer has not run out?), TIMER runs to 1945 and then DAY 2 sequence begins Proceeding to next day: CAMP available DAY 2 (April 7th) - PHASE 1: “[Pittsburg Landing, Again!]” *** RE-SET PHASE! *** TIME: 0600 TIMER: 4:00 MAP: Shiloh battlefield (including all 4 VPs and surrounding areas) DEPLOY-FORCE: As at end of Day 1 + CAV bde (Nathan Bedford Forrest commanding) POSITIONING: Pre-positioned (RE-SET) in 2 lines south of Pittsburg Landing OBJECTIVES: Hold or Capture… Pittsburg Landing / Shiloh Church / Spain Field / Larkin Bell Field * Victory is achieved through holding Pittsburg Landing & losing less than 75% of your army NOTES: * Situation-Overview begins this phase, emphasizing the Union ironclads supporting Union’s left flank * CAV bde appears at start under command of N.B. Forrest -- to south of Larkin Bell Field * The objectives may begin as CONTESTED or not depending on status at end of Day 1 * 0637~: Buell’s corps arrives from north (western) to reinforce the USA * With VPs in hand or not, there is an immediate FINISH once TIMER runs out (even if CONTESTED time remains for Pittsburg Landing) ***CAMP now available*** (7) 1st Winchester - 25 MAY 1862 PRE-BATTLE NOTES: * This is an OFFENSIVE minor battle * EXTRA time available after FINISH pops up -- until at least 1225 DEPLOYMENT: * Secure Town: 8 bdes - 1 deploy-box TIME: 0500 TIMER: 2:30 MAP: Winchester and parts north & west (Shenandoah Valley - Virginia) DEPLOY-FORCE: All bdes + General + SW POSITIONING: Per deployment-box at northwest OBJECTIVES: Capture Winchester NOTES: * Situation-Overview begins this battle ***CAMP now available*** (8) Cross Keys - 08 JUN 1862 PRE-BATTLE NOTES: * This is a DEFENSIVE minor battle * Immediate FINISH when TIMER runs out DEPLOYMENT: * Defend: 10 bdes - 1 deploy-box TIME: 0500 TIMER: 3:30 MAP: Cross Keys area (Shenandoah Valley - Virginia) DEPLOY-FORCE: All bdes + General + SW POSITIONING: Per deployment-box at west OBJECTIVES: Hold Mill Creek 1 / Hold Mill Creek 2 NOTES: * Brief Situation-Overview begins this battle ***CAMP now available*** (9) Port Republic - 09 JUN 1862 PRE-BATTLE NOTES: * This is an OFFENSIVE minor battle * 11, not 9, bdes can actually be deployed for this battle * EXTRA time available after FINISH pops up -- until 1230 DEPLOYMENT: * Assault: [11] bdes - 1 deploy-box TIME: 0500 TIMER: 3:00 MAP: Port Republic area (Shenandoah Valley - Virginia) DEPLOY-FORCE: 2 bdes + General + SW POSITIONING: Per deployment-box in northwest OBJECTIVES: Capture Hill NOTES: * Brief Situation-Overview begins this battle: it is a follow-up to the Cross Keys battle * 0530~: reinforcements arrive from northwest: remainder of deploy-corps (up to 9 additional brigades, rather than the 7 indicated in the DEPLOYMENT stage pre-battle: these will arrive by division per their order in each) * 0615~: Union reinforcements arrive & attack from northeast ***CAMP now available*** (10) GAINES’ MILL - 27 JUN 1862 PRE-BATTLE NOTES: * This is an OFFENSIVE grand battle * This battle takes place in eastern Virginia as part of the Seven Days Battle * Not all bdes from each deployed corps will actually deploy: see Phase notes below (and these notes do not cover deployment, etc., of more than the 2 basic corps required for the battle) * NO extra time after timer runs down in final phase * Upon (victorious?) completion of this battle, BrigGen A.P. Hill is added to the BARRACKS roster DEPLOYMENT: * Frontal Attack: 30 bdes - 2 deploy-boxes (only 1 corps required) * Flank Right: 25 bdes - 2 deploy-boxes (only 1 corps required) PHASE 1: “[Advance with Caution]” TIME: 1300 TIMER: 2:00 MAP: Gaines Mill area, centered on Boatswain Creek & Woods (Virginia) DEPLOY-FORCE: 10 bdes + General + SW (from 1st Frontal Attack corps) POSITIONING: Per deployment-box in northwest OBJECTIVES: Capture Boatswain Hill / Capture Boatswain Woods NOTES: * Situation-Overview begins the battle, emphasizing reinforcements to arrive from northeast for flanking attack so “wait till they arrive before attacking?” * lipa5021 reports that Phase 2 begins 25 minutes after any capturing of Boatswain Woods PHASE 2: “Keep Attacking!” TIME: 1500 TIMER: 2:30 MAP: Same, expanded east & south to include new VP DEPLOY-FORCE: As at end of Phase 1 + reinfs (if available) from Frontal Attack corps (3 bdes + General) POSITIONING: As at end of Phase 1 + reinfs: from northwest OBJECTIVES: Capture Boatswain Hill / Capture Boatswain Woods / Capture McGhee Hill NOTES: * This phase begins with brief Situation-Overview * Union reinforcements appear (& rather sneakily) around McGhee Hill area * 1610~: Elements of Flank Right corps (8 bdes + General) appear from northeast * lipa5021 reports that Phase 2 begins 25 minutes after any capturing of Boatswain Woods, along with variations on reinforcement arrival-times and numbers PHASE 3: “Break Their Defenses Before Nightfall” TIME: 1730 TIMER: 2:00 MAP: Same DEPLOY-FORCE: As at end of Phase 2 POSITIONING: As at end of Phase 2 OBJECTIVES: Hold (or, Capture) all three same objectives NOTES: * Brief Situation-Overview begins this phase * [At start or soon after???]: if available, more Flank Right reinfs (5+ bdes) arrive from northeast * 1747~: reinfs from Frontal Attack corps (3+ bdes) arrive from northwest * Battle ends when all objectives are held through the CONTESTED timers, even if there is time remaining on the overall timer * There is NO extra time in this phase ***CAMP now available*** (11) MALVERN HILL - 01 JUL 1862 PRE-BATTLE NOTES: * This is an OFFENSIVE grand battle * This battle takes place in eastern Virginia (north of Harrison’s Landing) as part of the Seven Days Battle * Check Victory Conditions in upper right for precise understanding of victory-triggers * EXTRA time available in Phase 3 after FINISH pops up -- until 2030 * MajGen James Longstreet becomes available after this (victorious?) battle DEPLOYMENT: * 1st Attack Wave: 20 bdes - 1 deploy-box * 2nd Attack Wave: 20 bdes - 1 deploy-box * Reserves: 20 bdes - 2 deploy-boxes (not required) PHASE 1: “[Attack or Wait?]” TIME: 1300 TIMER: 2:00 [early cut-off is triggered by as-yet unidentified factors] MAP: Malvern Hill area DEPLOY-FORCE: 1st Attack Wave + General + SW POSITIONING: Per deployment-box in north-center area of map OBJECTIVES: Capture North Malvern Hill NOTES: * Situation-Overview begins the battle, emphasizing difficulty of attacking either flank and possibility of waiting until reinforcements arrive to begin any attack * The timer is not strict: the next phase seems to be triggered by, e.g., any substantial engagement with the Union line around the VP PHASE 2: “Attack Their Center!” TIME: 1500 [but this is adjusted per the actual end-time of previous phase] TIMER: 2:30 [early cut-off is triggered by as-yet unidentified factors] MAP: Same, expanded north & south DEPLOY-FORCE: As at end of Phase 1 + reinfs: 2nd Attack Wave + General + SW POSITIONING: As at end of Phase 1 + reinfs: north-edge (eastern) of map OBJECTIVES: Capture North Malvern Hill NOTES: * New Situation-Overview announces arrival of 2nd Attack Wave & emphasizes center-attack * The timer is not strict: the next phase begins before the full 2:30 passes (due possibly to securing VP) PHASE 3: “[Take the Entire Position]” TIME: 1730 [but this is adjusted per the actual end-time of previous phase] TIMER: 2:30 MAP: Same, expanded still further north & (even more) south DEPLOY-FORCE: As at end of Phase 2 + Reserves corps (if available) POSITIONING: As at end of Phase 2 + Reserves corps: north-edge of map OBJECTIVES: Capture West Malvern Hill / Capture East Malvern Hill / Hold (Capture?) North Malvern Hill NOTES: * Brief Situation-Overview begins the phase, emphasizing aim of success before nightfall * [At start of phase?]: Reserves corps shows up as reinforcements from north-edge of map * To achieve victory, it is possible to hold only West or East Malvern Hill, depending on casualty-ratio * EXTRA time available after FINISH pops up -- until 2030 ***CAMP now available*** (12) Cedar Mountain - 09 AUG 1862 PRE-BATTLE NOTES: * This is an OFFENSIVE minor battle * EXTRA time available when TIMER runs out -- until 1930 DEPLOYMENT: * Attack: 14 bdes - 1 deploy-box TIME: 1300 TIMER: 3:00 MAP: Cedar Mountain (Virginia) area DEPLOY-FORCE: All bdes + General + SW POSITIONING: Per deployment-box in south-center of map OBJECTIVES: Capture Ridge NOTES: * Situation-Overview begins the battle ***CAMP now available*** (13) Manassas Depot - 27 AUG 1862 PRE-BATTLE NOTES: * This is an OFFENSIVE minor battle * EXTRA time is available after FINISH pops up -- until last Union unit is destroyed [timer seems to be endless] DEPLOYMENT: * N/A (player uses Loan-Aux troops entirely) TIME: 0430 TIMER: 3:00 MAP: Manassas Depot area (Virginia) DEPLOY-FORCE: Loan-Aux force: 4 INF + 1 SKM + 2 SKM-CAV + General Trimble + SW POSITIONING: Pre-positioned at northwest of map OBJECTIVES: Capture Supply Depot 1 / Capture Supply Depot 2 NOTES: * Situation-Overview begins the battle * 0500~: Union reinfs arrive from north/east * 0520~: Our reinfs (Loan-Aux) arrive from west: 5 INF + 2 ART + General Early ***CAMP now available*** (14) 2ND BULL RUN - 28-30 AUG 1862 PRE-BATTLE NOTES: * This is a DEFENSIVE/OFFENSIVE grand battle * This battle takes place near Bull Run River (Manassas, Virginia) to southwest of Washington, D.C. * There is a “sticky spot” on the river-crossing at the far north of the CSA line: enemy units (perhaps our own) will, when shot while routing across the river, get stuck mid-river and thus become easy prey, etc. It is unclear whether they can/will still fire. [Thanks to Sheldon Cooper.] * EXTRA time available after FINISH pops up in Phases 1.1 & 3.2 DEPLOYMENT: * Diversion: 25 bdes - 1 deploy-box * Reinforcements: 60 bdes - 3 deploy-boxes DAY 1 (Aug 28th) - PHASE 1: “[Entice the Yankees]” TIME: 1830 TIMER: 1:23 MAP: Brawner’s Farm area (southwestern portion of overall battle-map) DEPLOY-FORCE: 5 bdes + General + SW (from Diversion corps) POSITIONING: Per deployment-box around Brawner’s Farm OBJECTIVES: Hold Brawner’s Farm * This is NOT a required VP (hold it or lose it, the rest of the battle proceeds) NOTES: * Situation-Overview begins the phase, emphasizing need to entice enemy to attack & conserve losses * EXTRA time is available after FINISH pops up -- until 2030 Proceeding to next day: CAMP available * Deployed corps are now re-named as “Hold” (previously, “Diversion”) and “Approaching” (previously, “Reinforcements”) -- but no shifting-around possible at this point DAY 2 (Aug 29th) - PHASE 1: “[Defend the Ridge]” TIME: 0800 TIMER: 2:30 MAP: North & west portion of overall battle-map (focused on Stony Ridge) DEPLOY-FORCE: Pre-selected elements of Diversion Corps: 16 bdes + General + SW POSITIONING: Pre-deployed along Stony Ridge OBJECTIVES: Hold Stony Ridge NOTES: * Situation-Overview begins the phase * 0830-0900~: Three alerts about USA forces approaching left flank (and they soon arrive) * 1025~: Alert about USA forces approaching right flank * The full time may not play out due to unidentified triggers 2.2: “Porter Assaults!” TIME: 1500 TIMER: 4:00 MAP: Same, expanded (esp south) DEPLOY-FORCE: As at end of Phase 1.1 POSITIONING: As at end of Phase 1.1 OBJECTIVES: Hold Stony Ridge NOTES: * Situation-Overview begins the phase, emphasizing coming attacks on our right flank and advising holding out with defense (our reinforcements will be arriving soon from the west) * 1630~: Porter’s units threaten our right flank * 1740~: Elements of Reinforcements corps arrive at west-edge of map (we are advised to keep them in reserve until the next day) * The full time may not play out due to unidentified triggers Proceeding to next day: CAMP available * Deployed corps are now re-named as “Counter-Attack” (previously, “Diversion” & “Hold”), with 1 deploy-box allowing 30 bdes, and “Flank” (previously, “Reinforcements” & “Approaching”), with 3 deploy-boxes allowing 60 bdes [It appears that any open deploy-boxes may be filled here -- if one has corps available] DAY 3 (Aug 30th) - PHASE 1: “[Defend!/Attack?]” *** RE-SET PHASE! *** TIME: 1500 TIMER: 2:30 MAP: Same, expanded slightly DEPLOY-FORCE: All available units per initial DEPLOYMENT screen POSITIONING: Pre-deployed: Diversion corps along Stony Ridge + Reinforcements at west of map OBJECTIVES: Capture Dogan Ridge / Capture Chin Ridge / Hold Stony Ridge NOTES: * Situation-Overview emphasizes need to continue to hold Stony Ridge and possibility of beginning a counter-attack (but wait until “Porter assaults”?) * The full time may not play out due to unidentified triggers 3.2: “Ready to Counter-Attack!” TIME: 1730 TIMER: 2:30 MAP: Same, expanded (much) eastwards DEPLOY-FORCE: As at end of 3.1 POSITIONING: As at end of 3.1 OBJECTIVES: Hold Stony Ridge / Capture Henry Hill * It is not necessary to hold both VPs for Victory, if casualty-ratio meets victory-conditions NOTES: * Situation-Overview begins the phase * EXTRA time (until 2040) available after FINISH pops up -- with or without VPs controlled ***CAMP now available*** (15) Chantilly - 01 SEP 1862 PRE-BATTLE NOTES: * This is a DEFENSIVE minor battle * 14, not 13, bdes can be deployed for this battle * EXTRA time available after FINISH pops up -- until 1930 DEPLOYMENT: * Repel Attackers: [14] bdes - 1 deploy-box TIME: 1500 TIMER: 3:00 MAP: Chantilly (Virginia) area DEPLOY-FORCE: 8 bdes + General + SW POSITIONING: Per deployment-box central/north OBJECTIVES: Hold Right Flank / Hold Left Flank NOTES: * Brief Situation-Overview begins the battle, noting approach of several Union divisions * 1503~: reinforcements (up to 6, not 5, bdes) arrive from west-edge (northern) of map ***CAMP now available*** (16) Weapons Factory - 12 SEP 1862 PRE-BATTLE NOTES: * This is an OFFENSIVE minor battle * Immediate FINISH when TIMER runs out (unless CONTESTED timer is running: extension to 0835) DEPLOYMENT: * Assault: 12 bdes - 1 deploy-box [ComputerCrasherDad, using V1.7 mod, reports that 11, not 12, bdes may actually deploy here] TIME: 0600 TIMER: 2:30 MAP: Heights above Weapons Factory (Harpers Ferry, Virginia) DEPLOY-FORCE: All bdes + General + SW POSITIONING: Per deployment-box at south OBJECTIVES: Capture Harpers Ferry Heights NOTES: * Brief Situation-Overview begins the battle ***CAMP now available*** (17) ANTIETAM - 17 SEP 1862 PRE-BATTLE NOTES: * This is a DEFENSIVE grand battle * This battle takes place in/around Sharpsburg, Maryland * After this battle (with victory?), LtGen Robert E. Lee is added to the officer pool * EXTRA time available in Phase 3 if Stone Bridge is not held: until 1930 (there may be other extra-time scenarios possible here related to other VPs) DEPLOYMENT: * Left Flank: 20 bdes - 1 deploy-box [Thanks to ComputerCrasherDad: 21 bdes will deploy if Army Org level allows for 6 bdes per division] * Center: 20 bdes - 1 deploy-box * Right Flank: 20 bdes - 1 deploy-box * Reinforcements: 20 bdes - 2 deploy-boxes [not required] PHASE 1: “[Hold!]” TIME: 0530 TIMER: 2:00 MAP: Northern Antietam map (centered on Dunker Church) DEPLOY-FORCE: Elements of Left Flank corps: 11 bdes + General + SW POSITIONING: Per deployment-boxes around Dunker Church: 3 bdes / 5 bdes + Gen + SW / 3 bdes OBJECTIVES: Hold Dunker Church / Hold Nicodemus Hill NOTES: * Extended Situation-Overview begins the battle/phase * 0630~: Reinforcements (more units from Left Flank corps) arrive from southwest * If Nicodemus Hill is lost and the CONTESTED timer runs out, there is immediate phase-change to Phase 2 -- and, if before 0630, the 0630-reinfs from Left Flank corps will NOT enter here or in next Phase[!] PHASE 2: “Sunken Road!” TIME: 0730 TIMER: 3:30 MAP: Same, expanded south & east DEPLOY-FORCE: As at end of Phase 1 + Center corps POSITIONING: As at end of Phase 1 + reinfs: around the Sunken Road OBJECTIVES: Hold Sunken Road / Hold Dunker Church NOTES: * Situation-Overview begins the phase, emphasizing that we are outnumbered by USA’s 2nd wave * Per CivWar64's latest (Thanks, CW!): 1) Union reinfs enter from northeast at start of this phase 2) 8:38 (2:21 on timer): Porter (Union) bdes cross bridge in the southeast 3) 8:43: Frankin (Union) bdes enter from northeast & 1 Union CAV bde spawns just north of the Porter bridge 4) 8:48: Slocum (Union) bdes enter from northeast 5) 8:55: Smith (Union) bdes enter from northeast 6) 8:58: 2nd Union CAV bde spawns at the little section of river further north of the Porter bridge PHASE 3: “[Burnside’s Bridge!]” TIME: 1100 TIMER: 5:00 MAP: Same, expanded still more to south and east DEPLOY-FORCE: As at end of Phase 2 + Right Flank corps & Reinforcements corps POSITIONING: As at end of Phase 2 + reinforcing corps: in Sharpsburg and points south OBJECTIVES: Hold Sharpsburg / Hold Dunker Church / Hold Sunken Road / Hold Stone Bridge [It is NOT necessary to hold Stone Bridge for victory] NOTES: * Situation-Overview begins the phase * This phase may end early depending on unidentified triggers ***CAMP now available*** (18) Corinth - 03 OCT 1862 PRE-BATTLE NOTES: * This is an OFFENSIVE minor battle * EXTRA time available after FINISH pops up if VP is not held -- until 1330 (CONTESTED timer does not add extra time) DEPLOYMENT: * Assault: 15 bdes - 1 deploy-box TIME: 1000 TIMER: 3:00 MAP: Corinth (Mississippi) area DEPLOY-FORCE: All bdes + General + SW POSITIONING: Per deployment-box at north/central OBJECTIVES: Capture Farm NOTES: * Situation-Overview begins the battle * 1055~: Union reinforcements arrive from east-edge (north) of map ***CAMP now available*** (19) Prairie Grove - 07 DEC 1862 PRE-BATTLE NOTES: * This is an OFFENSIVE-DEFENSIVE minor battle * This is a DEFENSIVE minor battle * Immediate FINISH once TIMER runs out -- with VP held and CONTESTED timer completed (If VP is not held…?) DEPLOYMENT: * Defend: 12 bdes - 1 deploy-box TIME: 0700 TIMER: 2:30 MAP: Prairie Grove (Arkansas) area DEPLOY-FORCE: All bdes + General + SW POSITIONING: Per deployment-box at south/central OBJECTIVES: Capture (then Hold) Bordern Fields NOTES: * Brief Situation-Overview begins the battle ***CAMP now available*** (20) FREDERICKSBURG - 11 & 13 DEC 1862 PRE-BATTLE NOTES: * This is a DEFENSIVE grand battle * This battle takes place in and around Fredericksburg, (northeastern) Virginia * Maps allow for “spill-over” effect (e.g., Left troops appear in southern maps) in Phases 2.3-4 * Some EXTRA battle-time is available here: see Phase 1.1 DEPLOYMENT: Left: 25 bdes - 1 deploy-box Center: 25 bdes - 1 deploy-box Right: 25 bdes - 1 deploy-box Reserves: 50 bdes - 2 deploy-boxes (not required) [Per ComputerCrasherDad, each reserves corps here is limited to 10 bdes each, not 25] DAY 1 (Dec 11th) - PHASE 1: “[Delay the Union Advance!]” TIME: 0400 TIMER: 2:00 MAP: Fredericksburg east, including bridges DEPLOY-FORCE: 1 bde (from Left corps) + General + SW + Loan-Aux: 3 SKM POSITIONING: Per deployment-box around Fredericksburg VP + Loan-Aux: pre-positioned OBJECTIVES: Hold Fredericksburg * This VP is NOT decisive: hold or lose it, the next phase commences NOTES: * Extended Situation-Overview begins the battle/phase * Extra time is available after FINISH pops up -- until 0730 (if VP is held) Proceeding to next day: CAMP available * [Dec 12th passes without incident, it seems] DAY 2 (Dec 13th) - PHASE 1: “[Right Flank is Attacked!]” TIME: 1300 TIMER: 3:30 MAP: South (Prospect Hill area) DEPLOY-FORCE: Right corps + General + SW POSITIONING: Pre-positioned in the woods to north of VP OBJECTIVES: Hold Prospect Hill NOTES: * Situation-Overview begins the phase * Per CivWar64 on Reinforcements corps (in the left-most deploy-box on the DEPLOYMENT-screen), if available: all bdes [+General but not SW] are already present and positioned at start of this phase, along with Right corps * Note “spill-over” effect: units at north-edge here show up at south-edge of map in Phase 2.3 2.2: “Assault at Marye’s Heights” TIME: 1300 TIMER: 3:30 MAP: North map (Marye’s Heights area) DEPLOY-FORCE: Left corps + General + SW POSITIONING: Pre-positioned around the Marye’s Heights area OBJECTIVES: Hold Marye’s Heights NOTES: * Situation-Overview begins the phase * Per CivWar64 on arrival of Reinforcements corps (in the right-most deploy-box on DEPLOYMENT-screen), if available: At start of this phase, up to 10 bdes [+General but not SW] of the reinforcing corps will roll in steadily from the southwest map-corner, e.g., the first 6 bdes of Division 1 & the first 4 bdes of Division 2 2.3: “Enemy Continues the Attack” TIME: 1630 TIMER: 3:00 MAP: North map (Marye’s Heights area), expanded to include Center map (Telegraph Road area) DEPLOY-FORCE: Left corps + Center corps + Spill-over units from Phase 2.1 POSITIONING: Left as at end of Phase 2.2 + Center: pre-positioned + Right (spill-over units): as at end of Phase 2.1 OBJECTIVES: Hold Marye’s Heights / Hold Telegraph Road NOTES: * Situation-Overview begins the phase * Per CivWar64 on arrival of Reinforcements corps (in the right-most deploy-box on DEPLOYMENT-screen): At start of this phase, any remaining bdes of the reinforcing corps will roll in steadily from the EXTREME southwest map-corner of this expanded map, e.g., the next 2 bdes of Division 2 & any bdes from Divisions 3 & 4 [ComputerCrasherDad notes that only 10 bdes of the Reserves Corps will appear] * Per CivWar64: at 2:30 on the timer, USA reinfs (4 CAV + General Pleasanton) appear north/east of Fredericksburg * Note “spill-over” effect: there may be units present here at south-edge of map (from Phase 2.1) * Note that units in the bottom/southern portion of this phase’s map (the entire “Center” area, in fact) will show up in next phase 2.4: “Right Flank Attack Continues!” TIME: 1930 TIMER: 3:30 MAP: Center + Right Maps (Telegraph Road and Prospect Hill areas) DEPLOY-FORCE: Right Flank corps + Center Corps POSITIONING: Right Flank corps as at end of Phase 1 / Center corps is pre-positioned OBJECTIVES: Hold Prospect Hill / Hold Telegraph Road NOTES: * Situation-Overview begins the phase * Given new combination of maps (Center and South), units from “Center” area in Phase 2.3 appear here * 2030~: More Union reinfs appear from north-edge of map [this seems dependent on Phases 2.2 & 2.3] ***CAMP now available*** * Now available via reputation-points: MajGens William Hardee & Leonidas Polk (21) Everettsville - 20 DEC 1862 PRE-BATTLE NOTES: * This is an OFFENSIVE minor battle * EXTRA time available for this battle after FINISH pops up -- until at least 1330 * Per CivWar64: If we hold the VP but the CONTESTED timer is still running, we can FINISH and still get the Victory * Per godspeedthunder: Battle “ends in a draw at 14:00” DEPLOYMENT: * Attack: 15 bdes - 1 deploy-box TIME: 0500 TIMER: 3:00 MAP: Everettsville area (near Goldsboro, North Carolina) DEPLOY-FORCE: All bdes + General + SW POSITIONING: Per deployment-box at east of map OBJECTIVES: Capture Junction NOTES: * Brief Situation-Overview begins the battle ***CAMP now available*** (22) STONES RIVER - 31 DEC / 02 JAN 1862 PRE-BATTLE NOTES: * This is an OFFENSIVE grand battle * This battle takes place in the area of Murfreesboro, south and east of Nashville, Tennessee * EXTRA time is available for some phases of this battle: see Phases 1.3 & 2.1 * CONTESTED Timers must run down to zero in 1.3 or else Day 2 will be triggered: see Phase 1.3 notes DEPLOYMENT: * Right: 20 bdes - 1 deploy-box * Reserves: 20 bdes - 1 deploy-box * Left: 20 bdes - 1 deploy-box DAY 1 (Dec 31st) - PHASE 1: “[Flank ‘em!]” TIME: 0600 TIMER: 2:00 [timer may cut out early per unidentified triggers] MAP: Southern portion of battlefield (CSA Left Flank) DEPLOY-FORCE: Southern: 12 bdes + General + SW / Northern: 8 bdes } Left corps units POSITIONING: Per two deployment-boxes (southern & northern) at east of map OBJECTIVES: Capture Franklin Road Woods / Capture Center NOTES: * Extended Situation-Overview begins the battle/phase * TIMER may cut off early due to unidentified triggers 1.2: “Enemy Falls Back” TIME: 0800 [or as at end of Phase 1] TIMER: 3:00 MAP: Same, expanded mainly north to include new VP DEPLOY-FORCE: As at end of Phase 1 + reinfs: 11 bdes + General + General [I.e., General + 5 bdes from Reserves corps & General + 6 bdes from Right corps -- bdes appear per division-order] POSITIONING: As at end of Phase 1 + reinfs: pre-positioned at north of map (to east of new VP) OBJECTIVES: Capture Wilkinson Turnpike Hill NOTES: * Brief Situation-Overview begins the phase * TIMER may cut off early due to unidentified triggers -- seemingly locational, with northwest corner as trigger-area (i.e., move any [or x?] number of units into that area and phase will end) 1.3: “Attack Nashville Pike!” TIME: 1100 [or as at end of Phase 2] TIMER: 3:00 MAP: Same, expanded mainly north and west DEPLOY-FORCE: As at end of Phase 2 + reinfs: more units from Reserves (14-15 bdes + SW) & Right corps (5-6 or more bdes + SW) [Per CivWar64: Right corps’ 4th Division will NOT appear here; however, it will appear on Day 2. Per ComputerCrasherDad: Right corps’ 3rd Division also will NOT deploy here -- and only 11 bdes total from Right corps deployed for him on this Day 1.] POSITIONING: As at end of Phase 2 + reinfs: pre-deployed at northeast of new map OBJECTIVES: Capture Nashville Pike East / Capture Nashville Pike West NOTES: * Brief Situation-Overview begins the phase * With VPs taken & held, FINISH pops up once the TIMER runs down and then there is very brief EXTRA time (1-2 minutes?) * With VPs not taken & held, EXTRA time is available -- until 1945 * At end of EXTRA time, with VPs still not taken & held, Day 2 commences * Per battle-experience of floatingrate (and confirmed by others): CONTESTED timers must run down completely to zero or else Day 2 will be triggered * Per ComputerCrasherDad: Battle ends here on Day 1 if FINISH button appears and NOT all USA units are eliminated. If ALL USA units are eliminated, Day 2 WILL be triggered no matter what… Proceeding to next day: CAMP available * Jan 1st is a rest-day -- “New Year Celebrated…” -- then conflict resumes on the 2nd DAY 2 (Jan 2nd) - PHASE 1: “[TAKE THE PIKE!]” *** RE-SET PHASE! *** TIME: 1600 TIMER: 3:00 MAP: Northern portion of battlefield, focusing on the two VPs DEPLOY-FORCE: All 3 deployment-corps [Per CivWar64: previously undeployed Division 4 from Right corps will appear here] POSITIONING: Pre-positioned in two different groups: one central (aligned west-east) & one northeastern OBJECTIVES: Capture Nashville Pike East / Capture Nashville Pike West NOTES: * Extended Situation-Overview begins the phase, noting extension of USA entrenchments to north (and also that Jan 1st was a rest-day for both armies) * If VPs are not captured & held, EXTRA time is available after FINISH pops up -- until 1945 ***CAMP now available*** (23) Blackwater Heights - 15 MAR 1863 PRE-BATTLE NOTES: * This is an OFFENSIVE minor battle * This map is identical to the Alexander’s Bridge portion of the Chickamauga battle-map * With VP held, EXTRA time available after FINISH pops up -- until at least 1645 (and Rovernavigator reports extension until 2100) DEPLOYMENT: * Advance: 20 bdes - 1 deploy-box TIME: 1030 TIMER: 3:00 MAP: Blackwater Heights area (vicinity of Chancellorsville, Virginia) DEPLOY-FORCE: All bdes + General + SW POSITIONING: Per deployment-box at bottom of map OBJECTIVES: Capture Blackwater Heights NOTES: * Brief Situation-Overview begins the battle ***CAMP now available*** (24) 1st Franklin - 10 APR 1863 PRE-BATTLE NOTES: * This is an OFFENSIVE minor battle * EXTRA time available after FINISH pops up -- until 2100 [Many thanks, Schonhult. for time-limit clarity] DEPLOYMENT: * Attack: 12 bdes - 1 deploy-box TIME: 0530 TIMER: 3:00 MAP: Franklin (Tennessee) area DEPLOY-FORCE: All bdes + General + SW POSITIONING: Per deployment-box at bottom of map OBJECTIVES: Capture Union Camp NOTES: * Brief Situation-Overview begins the battle, noting imminent return of USA CAV * At some point, USA CAV (4-5 bdes) arrive from north-edge (central/west) of map: this may be triggered by taking the VP or, if VP is still not taken, it happens at 0743~ ***CAMP now available*** (25) Rio Hill - 25 APR 1863 PRE-BATTLE NOTES: * This is a DEFENSIVE minor battle * EXTRA time available after FINISH pops up -- until at least 1104 DEPLOYMENT: * Advance: 10 bdes - 1 deploy-box TIME: 0530 TIMER: 3:00 MAP: Rio Hill area (vicinity of Charlottesville, Virginia) DEPLOY-FORCE: 4 bdes + General + SW POSITIONING: Per deployment-box around the VP OBJECTIVES: Hold Supplies NOTES: * Brief Situation-Overview begins the battle, noting eventual arrival of reinforcements * 0610~: reinfs arrive from west-edge (south) of map: 6 more bdes of deployed corps ***CAMP now available*** (26) CHANCELLORSVILLE - 01-03 MAY 1863 PRE-BATTLE NOTES: * This is an OFFENSIVE grand battle * In-game date of April 30th is adjusted here to May 1-3 (but see Notes for Phase 1.1) * EXTRA time available after FINISH pops up: see Phases 2.1 & 3.1 below * A Day 3 COUNTER-ATTACK must be countered if Chancellor Farm is still untaken after Day 2 DEPLOYMENT: * Center: 25 bdes - 1 deploy-box * Flanking Force: 25 bdes - 1 deploy-box DAY 1 (May 1st) - PHASE 1: “[Positioning?]” TIME: 1100 TIMER: 2:00 MAP: Central/Southern area around Chancellor Farm DEPLOY-FORCE: Center corps: 4 bdes + General + SW (southeast) / 5 bdes (east-central) } pre-selected POSITIONING: Pre-positioned: arrive on-field from southeast & east-central OBJECTIVES: Hold Orange Turnpike / Hold Orange Plank Road / Capture Chancellor Farm NOTES: * Extended Situation-Overview begins the battle/phase, including general overview, with brief glimpse of April 30th and 1600 start-time, then more particular overview of this May 1st battle * 1150~: Reinforcements arrive from southeast corner (10 more bdes of Center corps) * 1215~: Remaining reinforcements from Center corps arrive -- from central-east deployment area * 1230~: Elements of Flanking Force corps arrives as reinforcements with General & SW -- from southeast * 1250~: Remainder (perhaps less a few bdes?) of Flanking Force arrives -- from central-east area 1.2: “[Forward?]” TIME: 1300 TIMER: 1:30 MAP: Same DEPLOY-FORCE: As at end of Phase 1 + Remainder of Flanking Force (if any not yet deployed?) POSITIONING: As at end of Phase 1 + Remainder of Flanking Force (a few bdes at southeast?) OBJECTIVES: Capture Chancellor Farm / Hold Orange Turnpike / Hold Orange Plank Road [If all VPs are held and no CONTESTED time remains, battle ends in victory here with run-down of overall TIMER] NOTES: * Brief Situation-Overview begins the phase * 1410~: Alert about USA reinforcements and recommendation to fall back * Battle ends here if all VPs are held through CONTESTED times by end of phase Proceeding to next day: CAMP available DAY 2 (May 2nd) - PHASE 1: “Flank Attack” *** RE-SET PHASE! *** TIME: 1730 TIMER: 3:00 MAP: Same, expanded to west & south & north DEPLOY-FORCE: Center corps and Flanking Force corps (entire) POSITIONING: RE-SET per pre-positioning: Center corps central/south + Flanking Force at northwest-edge OBJECTIVES: Hold Orange Turnpike / Hold Orange Plank Road / Capture Chancellor Farm NOTES: * Extended Situation-Overview begins the phase, emphasizing taking a gamble by dividing forces or not (Note that the pre-positioning is based on decision to divide one’s forces!) * VPs taken/held (with CONTESTED timer at ZERO): Immediate cut-off soon after the FINISH pops up * VPs not taken/held: EXTRA time available (until at least 2230) after FINISH pops up * If VPs are not taken/held (or with CONTESTED timer not yet at ZERO) after EXTRA time, DAY 3 begins Proceeding to next day: CAMP available DAY 3 (May 3rd) - PHASE 1: “Flank Attack [Again!]” *** RE-SET PHASE! *** TIME: 0530 TIMER: 3:00 MAP: Restricted, centered on Chancellor Farm DEPLOY-FORCE: Center corps and Flanking Force corps (entire) POSITIONING: RE-SET per 4 deployment-boxes: At west-edge: 8 bdes (northern) / 17 bdes + General + SW (central) / 10 bdes + General + SW (southern) / In southeast: 15 bdes OBJECTIVES: Capture Chancellor Farm NOTES: * Brief Situation-Overview begins the phase * 0740~: USA reinforcements arrive from north-central portion of map * If VP not taken/held (or even if so?), EXTRA time available after FINISH pops up -- until 1130 * If VP not taken/held at end, Day 3 is triggered *** CAMP available *** 3.2: “Hooker Counter-Attacks!” *** RE-SET PHASE! *** TIME: 1230 TIMER: 4:00 MAP: Restricted, centered around the VPs DEPLOY-FORCE: Center corps and Flanking Force corps (entire) POSITIONING: RE-SET per pre-positioning: Both corps positioned in front of the VPs OBJECTIVES: Hold Orange Plank Road / Hold Orange Turnpike NOTES: * Situation-Overview begins the phase * USA will commence to attack soon after phase begins * There may be early cut-off of TIMER due to unidentified triggers ***NEXT BATTLE BEGINS IMMEDIATELY: NO CAMP AVAILABLE*** (27) Salem Church - 03 MAY 1863 PRE-BATTLE NOTES: * This is a DEFENSIVE minor battle that begins immediately after previous battle * EXTRA time available for this battle after FINISH -- until 2200~ DEPLOYMENT: * Intercept: 10 bdes - 1 deploy-box [any corps can be chosen by player for deployment] TIME: 1800 TIMER: 3:00 MAP: Salem Church area (vicinity of Fredericksburg & Chancellorsville, Virginia) DEPLOY-FORCE: All bdes + General + SW POSITIONING: Per deployment-box at west of map OBJECTIVES: Hold Salem Church NOTES: * Brief Situation-Overview begins the battle ***CAMP now available*** (28) Brandy Station - 09 JUN 1863 PRE-BATTLE NOTES: * This is a DEFENSIVE minor battle * EXTRA time available for this battle after FINISH -- until 1330 DEPLOYMENT: * N/A (Loan-Aux troops are assigned to player) TIME: 0430 TIMER: 3:00 MAP: Brandy Station (Virginia) area DEPLOY-FORCE: Loan-Aux troops (2 INF + 7 SKM-CAV + 5 ART + General Stuart) POSITIONING: Pre-positioned around the VP OBJECTIVES: Hold Brandy Station NOTES: * Brief Situation-Overview begins the battle ***CAMP now available*** (29) GETTYSBURG - 01-04 JUL 1863 PRE-BATTLE NOTES: * This is an OFFENSIVE grand battle * Before Phase 3.2, two more corps (Reserves) may be deployed via 2 new deploy-boxes * EXTRA time is available in various phases, if VPs are not taken: see Phases 2.3, 3.1, 3.2 * Capturing (and holding-thru-CONTESTED-timer) VPs in Phases 1.5 thru 3.1 will end this battle entirely in a Victory: Cemetery Hill is the key VP for Phase 1.5. (Phase 3.2 seems to be different, with battle continuing to Day 4 even if VPs are taken and held.) So, it’s a bit of a mess: --Day 1: Center and left corps should contain 24 units. This allows the center corps to deploy a total of 16 units instead of 14 with an extra unit arriving in 1.3 and 1.4. The left corps will be able to deploy 17 instead of 15 with the 2 extra units arriving with the second set of reinforcements. --2.3: If 24 units are in the Left corps, then 22 will deploy. In Phase 3.1, this doesn’t work: only 14 will deploy. --3.2: Reserve corps only deploy 14 units each. The Left corps must have at least 12 units to deploy 5, while the Right must have 24 to deploy 11. --Day 4: Center corps deploys 23, Left deploys 5 (must have at least 12!), Right deploys 17 (must have 24!), Reserves deploy 19 each (no need to overcap). DEPLOYMENT: * 1st Attack Wave: 20 bdes - 1 deploy-box * 2nd Attack Wave: 15 bdes - 1 deploy-box * Tomorrow Reinforcements: 25 bdes - 1 deploy-box * [Appearing before Phase 3.2: RESERVES: 50 bdes - 2 deploy-boxes] DAY 1 (July 1st) - PHASE 1: “[Forward!]” TIME: 0900 TIMER: 00:30 MAP: Northwestern Gettysburg (Pennsylvania) area DEPLOY-FORCE: Elements (3 bdes) of 1st Attack Wave + General + SW POSITIONING: Per deployment-box at western (central) edge of map OBJECTIVES: Capture McPherson’s Ridge / Capture Oak Ridge / Capture Seminary Ridge NOTES: * Extended Situation-Overview begins the battle/phase 1.2: “Reynolds’ 1st Corps Spotted!” TIME: 0930 TIMER: 1:00 MAP: Same DEPLOY-FORCE: As at end of Phase 1 POSITIONING: As at end of Phase 1 OBJECTIVES: Capture McPherson’s Ridge / Capture Oak Ridge / Capture Seminary Ridge NOTES: * Brief Situation-Overview notes arrival of USA reinfs from southeast * 0938~: Our reinforcements (5 bdes more of 1st Attack Wave) arrive from west-edge (central) of map 1.3: “More Yankees Reinforce!” TIME: 1030 TIMER: 1:30 MAP: Same, expanded slightly to east DEPLOY-FORCE: As at end of Phase 2 POSITIONING: As at end of Phase 2 OBJECTIVES: Capture McPherson’s Ridge / Capture Oak Ridge / Capture Seminary Ridge NOTES: * Brief Situation-Overview notes arrival of more USA reinfs from southeast * 1045~: 4 bdes more of 1st Attack Wave arrive from west (northern) 1.4: “Howard’s XI Corps Arrives” TIME: 1200 TIMER: 1:30 MAP: Same, expanded further to east and south to include new VP DEPLOY-FORCE: As at end of Phase 3 POSITIONING: As at end of Phase 3 OBJECTIVES: Capture McPherson’s Ridge / Capture Oak Ridge / Capture Seminary Ridge / Capture Cemetery Hill NOTES: * Brief Situation-Overview notes still more USA reinfs arriving from southeast * 1242~: Remaining bdes from 1st Attack Wave arrive from west (central) * 1300~: Elements of 2nd Attack Wave (9 bdes + General + SW) arrives from northwest * 1315~: Remainder of 2nd Attack Wave arrives from northeast 1.5: “[Take the Hill!]” TIME: 1330 TIMER: 2:00 MAP: Same DEPLOY-FORCE: As at end of Phase 4 POSITIONING: As at end of Phase 4 OBJECTIVES: Capture McPherson’s Ridge / Capture Oak Ridge / Capture Seminary Ridge / Capture Cemetery Hill NOTES: * Situation-Overview begins the phase * 1350~: USA reinfs arrive from southeast Proceeding to next day: CAMP available * Note that, on Deployment-Screen, available deploy-boxes are now labeled “Right”, “Center”, and “Left” DAY 2 (July 2nd) - PHASE 1: “Little Round Top” TIME: 1500 TIMER: 2:00 MAP: Southern area of battlefield: Little Round Top DEPLOY-FORCE: 7 bdes of Right corps + General + SW POSITIONING: Pre-positioned at west-edge (south) of map OBJECTIVES: Capture Little Round Top NOTES: * Situation-Overview begins the phase * 1510~: Reinfs (8 bdes) arrive from north/west part of map 2.2: “[More LRT!]” TIME: 1700 TIMER: 4:30 MAP: Southern area of battlefield: Little Round Top, expanded north & south (including new VP) DEPLOY-FORCE: As at end of Phase 2.1 POSITIONING: As at end of Phase 2.1 OBJECTIVES: Capture Little Round Top / Capture South Cemetery Ridge NOTES: * Situation-Overview begins the phase CAMP now available 2.3: “Culp’s Hill” TIME: 2030 TIMER: 2:30 MAP: North-Central part of battlefield, including Culps Hill and Cemetery Ridge areas (and Gettysburg) DEPLOY-FORCE: Center Corps: ___??? bdes + General + SW / Left Corps: ___??? bdes + General + SW [See again PRE-BATTLE NOTES for pandakraut’s details on deployment here] POSITIONING: Pre-positioned to west, north, and east of VPs OBJECTIVES: Capture Culp’s Hill / Capture Cemetery Hill NOTES: * Situation-Overview begins the phase * 2045~: USA reinfs move towards Culp’s Hill * EXTRA time available after FINISH pops up, if VPs are not taken -- until 2310~ Proceeding to next day: CAMP available DAY 3 (July 3rd) - PHASE 1: “[Culp’s Hill Again!]” TIME: 0800 TIMER: 1:00 MAP: Culp’s Hill area, restricted (small map centered on Culp’s Hill VP) DEPLOY-FORCE: Elements of Left corps: 14 bdes + General + SW POSITIONING: Pre-positioned around Culp’s Hill OBJECTIVES: Capture Culp’s Hill NOTES: * Situation-Overview begins the phase * EXTRA TIME is available after the FINISH pops up, if VPs are not taken -- until 1100 CAMP now available * Note that two new deployment-boxes are available, 50 bdes total - RESERVES 3.2: “One More Chance at Cemetery Ridge -- Pickett’s Charge!” *** RE-SET PHASE! *** TIME: 1400 TIMER: 3:30 MAP: Cemetery Ridge area (large map but not including Culp’s Hill or Little Round Top) DEPLOY-FORCE: Left corps: 1 Division + General + SW / Center corps: 4 Divisions + General + SW / Right corps: 2 Divisions + General (and SW?) / Reserves corps (if any) [See again PRE-BATTLE NOTES for pandakraut’s details on deployment here] POSITIONING: Pre-positioned to west & north OBJECTIVES: Hold South Seminary Ridge / Capture Cemetery Hill / Capture Cemetery Ridge / Capture South Seminary Ridge NOTES: * Extended Situation-Overview begins the phase * 1520~: USA reinforcements arrive from east-edge (and south-central) of map * CONTESTED TIMERS seem to be very strict here: they may need to run down before overall TIMER ends * If VPs are not taken, EXTRA time available after FINISH pops up -- until ??? Proceeding to next day: CAMP available * Those two new deployment-boxes are still available, 50 bdes total - RESERVES DAY 4 (July 4th) - PHASE 1: “[Union Counter-Attack?!]” *** RE-SET PHASE! *** TIME: 0525 TIMER: 3:30 MAP: Same as 3.2 but narrowed slightly (from west and east) DEPLOY-FORCE: Various bdes from the three deploy-corps + Reserves corps (if any) [See again PRE-BATTLE NOTES for pandakraut’s details on deployment here] POSITIONING: Pre-positioned to west & north OBJECTIVES: Hold South Seminary Ridge / Capture Cemetery Hill / Capture Cemetery Ridge / Capture South Cemetery Ridge NOTES: * Situation-Overview begins the phase * Objectives begin as CONTESTED (except for South Seminary Ridge) * There may be early cut-off of this phase, if USA forces in previous phase are completely destroyed or due to other (unidentified) triggers ***CAMP now available*** * Now available via reputation-points: MajGen Patrick Cleburne (30) Siege of Jackson - 11 JUL 1863 PRE-BATTLE NOTES: * This is a DEFENSIVE minor battle * EXTRA time available for this battle after FINISH -- until 1330 DEPLOYMENT: * Defend: 20 bdes - 1 deploy-box TIME: 0530 TIMER: 4:00 MAP: Jackson (Mississippi) area DEPLOY-FORCE: 15 bdes + General + SW POSITIONING: Per deployment-boxes north (5 bdes), central (7 bdes +General + SW), south (3 bdes) OBJECTIVES: Hold Jackson’s defenses NOTES: * Extended Situation-Overview begins the battle * 0630~: Reinforcements (remaining bdes of deployed corps, if any) arrive from northeast corner ***CAMP now available*** (31) CHICKAMAUGA - 18-20 SEP 1863 PRE-BATTLE NOTES: * This is an OFFENSIVE grand battle * This battle takes place in northwest Georgia & south-central Tennessee, south of Chattanooga, TN * Day 3 may be triggered: see notes for Phase 2.4 * There may be EXTRA time in Phase 1.2 & Phase 2.4 & Phase 3.2: see notes * For most of the phases, TIMERs may cut out early: see notes * See Notes for Phases 1.1 & 1.2: only 22 of 24 (25) deployable bdes will actually deploy on Day 1 also, any ARTY bdes -- all of which seem to appear twice during this overall battle. At end of battle, cross-check the Units tab on the post-battle screen: instead of two Hegs, two Posts, etc., only the Day 3 units KDR will be recorded, which erases any benefits (e.g., weapons recovered) from shattering the same units on Days 1 or 2. Further confirmations? Or not? DEPLOYMENT: * Vanguard: 25 bdes - 1 deploy-box * Tomorrow Reinforcements: 25 bdes - 1 deploy-box DAY 1 (Sep 18th) - PHASE 1: “[Take the Bridges!]” TIME: 1630 TIMER: 2:00 MAP: Areas around Alexander’s Bridge and Reed’s Bridge DEPLOY-FORCE: 6 bdes of Vanguard + General + SW POSITIONING: Per deployment-box at southern portion of map OBJECTIVES: Capture Alexander’s Bridge / Capture Reed’s Bridge NOTES: * Extended Situation-Overview begins the battle/phase * 1730~: Reinfs (4 bdes) appear near Reed’s Bridge (northeast VP) in position to assault * 1747~: Via secret ford, more reinforcements from Vanguard (4 bdes) arrive at east-edge (central) of map * 1747~: Minty’s USA troops appear centrally to harass & attack, etc. * Per CivWar64, based on Divisions of 6 bdes each: Initial deployment is all 6 bdes of 1st Division. Reed’s Bridge reinfs are 2nd thru 5th bdes of 2nd Division. Next batch of reinfs (via secret ford in central area) is 1st & 6th bdes of 2nd Division plus 2nd & 3rd bdes of 3rd Division. 1.2: “[Take the Fords!]” TIME: 1830 TIMER: 2:30 MAP: Same, expanded south and west to include the fords DEPLOY-FORCE: as at end of Phase 1 POSITIONING: as at end of Phase 1 OBJECTIVES: Capture Alexander’s Bridge / Capture Reed’s Bridge / Capture Dalton’s Ford / Capture Thedford’s Ford NOTES: * Brief Situation-Overview begins the phase * 1833~: Reinforcements (3 bdes) arrive from south-edge (central) of map * 1926~: “Last reinforcements” of the day (up to 5 more bdes) arrive from southeast corner * There may be an early cut-off of overall TIMER. Per pandakraut: If all 4 VPs are captured and no longer contested, then the phase ends immediately. Also, per Rovernavigator: “If you wait with capturing the last VP until just before the timer ends, contested timer of around 13 minutes counts as extra time. However, you will need to capture the VP before the timer runs out to avoid defeat.” * Per CivWar64, based on Divisions of 6 bdes each: Initial reinfs are from 3rd Division - 1st, 4th, 5th bdes (for 3 bdes total). Last reinfs consist of: 6th bde of 3rd Division plus the first 4 bdes of 4th Division (for 5 bdes total). [So, 5th & 6th bdes of 4th Div do NOT deploy on Day 1.] Proceeding to next day: CAMP available DAY 2 (Sep 19th) - PHASE 1: “[Right-Flank Advance!]” *** RE-SET PHASE! *** TIME: 0900 TIMER: 2:00 MAP: Centered on the VPs DEPLOY-FORCE: 8 bdes of Vanguard + General + SW [in groups of 2, 3, 3 bdes -- with General & SW in the Jay’s Mill group] POSITIONING: Per 3 deployment-boxes around VPs OBJECTIVES: Hold Jay’s Mill / Hold Brotherton Road [these are not nec’y for battle to continue] NOTES: * Extended Situation-Overview begins the phase * 0903~: Reinforcements (6 bdes) arrive from southeast part of map 2.2: “Our Right Flank Must Be Secured” TIME: 1100 TIMER: 1:00 MAP: Same, expanded to include new VPs DEPLOY-FORCE: As at end of Phase 2.1 POSITIONING: As at end of Phase 2.1 OBJECTIVES: Capture Kelly’s Field / Capture Brotherton Cabin / Hold Jay’s Mill / Hold Brotherton Road [these are not nec’y for battle to continue] NOTES: * Brief Situation-Overview begins the phase * 1103~: Reinforcements arrive from south-edge (eastern) of map 2.3: “Break Their Defenses!” TIME: 1200 TIMER: 2:30 MAP: Same, expanded even further to include new VPs DEPLOY-FORCE: As at end of Phase 2.2 + reinfs: elements of 2nd corps POSITIONING: As at end of Phase 2.2 + reinfs: pre-positioned south/central in 3 groups OBJECTIVES: Capture Kelly’s Field / Capture Brotherton Cabin / Hold Jay’s Mill / Hold Brotherton Road / Capture Viniard Field / Capture Lee-Gordon’s Mill [these are not nec’y for battle to continue] NOTES: * Extended Situation-Overview begins the phase, emphasizing decision to protect right flank or to attack the LaFayette Road positions of the USA * Remaining elements of 2nd corps soon arrive at south-edge of map -- but only up to 2-3 divisions! (If you have a 4th division in the deploying corps, it does not arrive.) 2.4: “Attack or Wait?” TIME: 1430 TIMER: 4:00 MAP: Same DEPLOY-FORCE: As at end of Phase 2.3 POSITIONING: As at end of Phase 2.3 OBJECTIVES: Same [but see NOTES below] NOTES: * Brief Situation-Overview begins the phase, emphasizing imminent arrival of Longstreet’s corps (which does not arrive!), so keep attacking or keep waiting or not, General? * To trigger Day 3 (per pandakraut et al.): Hold ONLY Jay’s Mill and Brotherton Road. Other reports indicate that, even with all VPs in hand, Day 3 may be triggered; e.g., when USA’s entire force is destroyed before the end of regular time. It is also seems that not holding any VPs at all may trigger Day 3.(!) * EXTRA time may be available here -- until 2000 -- when NO VPs are taken and the USA still has forces on the field * Likewise, for Victory at end of Day 2, there are some reports that stated conditions (per the upper-right Victory-conditions menu) are not accurate; thus, a Defeat or Draw can result surprisingly. TechnoSarge reports, however, that holding all of the on-map VPs results in Victory. Proceeding to next day: CAMP available DAY 3 (Sep 20th) - PHASE 1: “[Complete the Victory]” *** RE-SET PHASE! *** TIME: 0930 TIMER: 10:30 [yes, this is correct] MAP: Same DEPLOY-FORCE: All available units from the 2 deploy-corps (including 4th division of the Reinforcements Corps -- but only 5 bdes max) POSITIONING: RE-SET: Pre-positioned centrally and in north-to-south groups OBJECTIVES: Capture Kelly’s Field / Capture Lee-Gordon’s Mill / Capture Viniard Field / Capture Brotherton Cabin NOTES: * Extended Situation-Overview begins the phase, emphasizing arrival of USA reinforcements (Rosecrans’ Reserves) from north/northwest: these actually arrive 2-3 hours after start of phase (but confirmation here is needed) * Per ComputerCrasherDad: Only 5 of 6 bdes from the 4th Division of the Reinforcements Corps deploy * TIMER may cut off early. Per pandakraut: Capturing Kelly’s Field, Viniard Field, and Brotherton Cabin triggers start of next phase. Per CivWar64: status of Kelly’s Field is not a trigger; it seems that Brotherton Cabin status is the key. [Any other input to clarify would be appreciated...] 3.2: “Yankees Withdrawing: Advance?!” TIME: 1930 [may differ depending on 3.1] TIMER: 2:00 MAP: Same DEPLOY-FORCE: As at end of 3.1 POSITIONING: As at end of 3.1 OBJECTIVES: Capture Kelly’s Field / Capture Lee-Gordon’s Mill / Capture Viniard Field / Capture Brotherton Cabin / Capture Horseshoe Ridge NOTES: * Brief Situation-Overview begins the phase * TIMER may cut off early, based on unidentified triggers. Per pandakraut: EXTRA time is available after FINISH pops up, at least when Phase 3.1 ends early. Yet, capturing all VPs immediately ends the battle. ***CAMP now available*** (32) Mansfield - 08(+) APR 1864 PRE-BATTLE NOTES: * This is an OFFENSIVE minor battle * With VP held, EXTRA time is available after the FINISH pops up -- until 2200 * With VP not held (and never having been), even MORE EXTRA time is available after FINISH pops up -- until at least April 11th at 10am (but this is only when we ran out of patience and just ended, concluding that this battle WILL NOT END until the VP is taken and/or all USA forces are eliminated) DEPLOYMENT: * Assault: 25 bdes - 1 deploy-box TIME: 1600 TIMER: 3:30 MAP: Mansfield area (Louisiana, south of Shreveport & north of Alexandria) DEPLOY-FORCE: 16 bdes + General + SW POSITIONING: Per deployment-box at west of map OBJECTIVES: Capture Chapman’s Woods NOTES: * Brief Situation-Overview begins the battle * 1701~: Reinforcements (remainder of deployed corps) arrive from west-edge (central) of map * 1745~: USA reinforcements arrive from east-edge (central) of map (they may arrive much later depending on status of VP and positioning of units) ***CAMP now available*** (33) Saunders Farm - 05 MAY 1864 PRE-BATTLE NOTES: * This is an OFFENSIVE minor battle * If VPs are held at end of time, NO extra time available * If VPs are NOT held at end of time, EXTRA time available -- until 2130 * With VPs held but CONTESTED-timer still running, after the overall time has run out, we can press FINISH and still achieve Victory [per CivWar64] DEPLOYMENT: * Assault: 25 bdes - 1 deploy-box * Reinforcements: 10 bdes - 1 deploy-box [Per ComputerCrasherDad, only 9 bdes actually deploy] PHASE 1 TIME: 1300 TIMER: 2:00 MAP: Saunders Farm area (part of the “Wilderness” series of battles - Virginia) DEPLOY-FORCE: Assault corps: 10 bdes + General + SW POSITIONING: Per deployment-box at south of map OBJECTIVES: Capture Saunders Farm NOTES: * Brief Situation-Overview begins the battle/phase * 1330~: Reinforcements arrive from south: 8 bdes of Assault corps * 1335~: Alert about watching the Left Flank due to USA forces (CAV) approaching PHASE 2 TIME: 1500 TIMER: 3:00 MAP: Same DEPLOY-FORCE: As at end of Phase 1 POSITIONING: As at end of Phase 1 OBJECTIVES: Hold Saunders Farm / Capture Saunders Fields * If held at start of this phase, Saunders Farm has CONTESTED timer of :30 running at start NOTES [With thanks to CivWar64 for most of this info]: * Brief Situation-Overview begins phase, emphasizing imminent arrival of USA reinfs from north * 1501~: Remainder of Assault corps arrives from south-edge (central) of map * 1501~ (about same time as arrival of the above reinfs): 3-4 USA CAV bdes advance from north * 1530~: Reinforcements corps (entire) arrives from central south-edge of map [Per ComputerCrasherDad, only 9 bdes, not 10, actually deploy] * 1540~: USA reinfs arrive from north-central portion of map: VI Corps -- 5 INF bdes + 1 ART bde * When the FINISH button pops up, with VPs in hand but CONTESTED-timer still running, we can press FINISH and still achieve Victory ***CAMP now available*** (34) Laurel Hill - 10 MAY 1864 PRE-BATTLE NOTES: * This is a DEFENSIVE then optional-OFFENSIVE minor battle * The Alsop’s Field VP is not required for victory * If the Alsop’s Field VP is not captured, EXTRA time available at end of Phase 2 -- until 2100 [Thanks to pandakraut & CivWar64 for clarifications on time here] DEPLOYMENT: * Defend: 25 bdes - 1 deploy-box PHASE 1: “Defend!” TIME: 0600 TIMER: 2:30 MAP: Laurel Hill area (part of the Spotsylvania Courthouse battles - Virginia) DEPLOY-FORCE: Loan-Aux troops: 4 INF + 3 ART + General Anderson + SW (north) and 2 INF (south) / Defend units: 6 bdes + General + SW POSITIONING: Loan-Aux troops: pre-positioned / Defend units: per deployment-box at west OBJECTIVES: Hold Laurel Hill / Hold Harrisson’s Woods NOTES: * Situation-Overview begins the battle/phase * 0700~: Reinforcements arrive at west-edge of map: 6 bdes * 0800~: Reinforcements arrive from southwest corner of map: 6 bdes PHASE 2: “Attack If It Is Practical!” TIME: 0830 TIMER: 3:30 MAP: Same DEPLOY-FORCE: As at end of Phase 1 + Remaining elements of Defend corps POSITIONING: As at end of Phase 1 + Defend corps units: at southwest of map OBJECTIVES: Hold Laurel Hill / Hold Harrisson’s Woods / Capture Alsop’s Fields * To achieve victory, Alsop’s Fields does not need to be captured NOTES: * Brief Situation-Overview begins phase ***CAMP now available*** (35) COLD HARBOR - 01-03 JUN 1864 PRE-BATTLE NOTES: * This is a DEFENSIVE grand battle (but see Phases 1.1 & 1.2 for offensive objectives) * This battle takes place around Old & New Cold Harbor, Virginia (northeast of Richmond) * Check Victory Conditions in upper-right of battle-map to be sure about victory-triggers for each phase * With FPS-lag in mind (this battle causes some systems to lag), consider using the “Direct3d 9” option when starting the game before this battle * “Spill-over” alert: see NOTES for Phases 3.1, 3.2, 3.3, and 3.4 on apparent spill-over (of troops) effect between the maps involved in those phases [Thanks to Capt Rovernavigator & pandakraut] * EXTRA time available for this battle at end of PHASE 3.3 (but only if contested timers are still running?) * Note that Phase 3.4 is a “last-chance” phase that triggers when we have failed to meet the casualty-rate Victory-condition -- less than 40% casualties [per CivWar64] DEPLOYMENT: * Left Flank: 25 bdes - 1 deploy-box * Tomorrow Reinforcements: 15 bdes - 1 deploy-box [Per ComputerCrasherDad: 14, not 15, bdes] * Right Flank: 25 bdes - 1 deploy-box DAY 1 (Jun 1st) - PHASE 1: “[Old Cold Harbor]” TIME: 0800 TIMER: 2:00 MAP: Right flank area [actually mostly center, but focused on Old and New Cold Harbor] DEPLOY-FORCE: 8 bdes + General + SW (of Right Flank corps) POSITIONING: Per deployment-box at west of map OBJECTIVES: Capture Old Cold Harbor / Hold Central Breastworks * The capture-VP is NOT required NOTES: * Extended Situation-Overview begins the battle/phase * 0849~: USA reinforcements arrive from northeast * 0913~: More USA reinforcements arrive from eastish & we are alerted to fall back CAMP now available 1.2: “We Must Secure Our Left Flank” TIME: 1830 TIMER: 1:30 MAP: Left flank area (limited) DEPLOY-FORCE: From Left Flank corps: 5 bdes (to north) & (to south) 6 bdes + General + SW POSITIONING: Per 2 deployment-boxes, northerly & southerly, at west of map OBJECTIVES: Capture Magnolia Woods / Capture Shady Grove Road / Hold Old Church Road * One capture-VP MUST be taken for overall battle to continue * If all objectives are achieved, this battle ends in final Victory [needs confirmation] * Per Live Free or Die: I achieved all objectives for this phase. Both contested timers for the capture objectives ran down before the phase timer ended the battle. It did not deliver a final Victory. The prompt for phase 1.3 popped up instead. https://steamcommunity.com/sharedfiles/filedetails/?id=3126386861 NOTES: * Situation-Overview begins the phase * 1932~: USA reinforcements arrive from northeast corner of map * 1932+: Two more batches of USA reinforcements arrive & we are alerted to fall back CAMP now available 1.3: “Our Right Flank is Under Attack!” TIME: 1830 TIMER: 3:45 MAP: Right flank area [actually mostly center, extending north from Central Breastworks to the Walnut Grove Road at north-edge of map] DEPLOY-FORCE: 21 bdes + General + SW (of Right Flank corps) POSITIONING: Pre-positioned to west around the VPs and fortifications OBJECTIVES: Hold Central Breastworks / Hold Walnut Grove Road / Hold Walnut Grove Woods / Capture Beulah Church / Capture Old Cold Harbor NOTES: * Situation-Overview begins the phase * Careful: Taking one of the “Capture” VPs results in final VICTORY Proceeding to next day: CAMP available * “Tomorrow Reinforcements” corps now named “Reinforce Right” DAY 2 (Jun 2nd) - PHASE 1: “[Defend Right Flank Expanded]” *** RE-SET Phase! *** TIME: 1630 TIMER: 3:30 MAP: Right flank area - expanded (mainly south to include Turkey Hill) DEPLOY-FORCE: 1st (1st div), 2nd (1st, 2nd, 3rd divs), 3rd Corps (1st, 2nd, 3rd, 4th divs) POSITIONING: Pre-positioned OBJECTIVES: Hold Central Breastworks / Hold New Cold Harbor / Hold Turkey Hill / Hold Walnut Grove Road / Hold Walnut Grove Woods / Capture Old Cold Harbor / Capture Beulah Church * The capture-VPs are NOT required to continue into the next phases NOTES: * Situation-Overview begins the phase * 1906~: Hancock’s corps is sighted (and appears in central part of map): “It’s risky to attack!” 2.2: “Observing the Left Flank” *** RE-SET Phase! *** TIME: 2000 TIMER: 2:00 MAP: Left flank area - expanded (mainly north and east) DEPLOY-FORCE: Elements of Left Flank corps (2nd, 3rd, 4th divs -- no General or SW!) POSITIONING: Pre-positioned OBJECTIVES: Hold Old Church Road / Hold CSA Left Flank (begins contested) / Capture Bethesda Church * We do NOT need to capture Bethesda Church for battle to continue NOTES: * Situation-Overview begins the phase Proceeding to next day: CAMP available DAY 3 (Jun 3rd) - PHASE 1: “[Back to Right Flank]” *** RE-SET Phase! *** TIME: 0430 TIMER: 2:30 MAP: Same as in 2.1 DEPLOY-FORCE: Same as in 2.1 POSITIONING: Pre-positioned OBJECTIVES: Same as in 2.1 * The capture-VPs are NOT required to continue into the next phases NOTES: * Situation-Overview begins the phase * “Spill-over” alert: per Capt Rovernavigator (per pandakraut), units positioned in the creek north of the Walnut Grove Rd VP, in the far northwestern edge of the right-flank map, will appear in the map for the next phase… 3.2: “Left Flank in Danger” *** RE-SET Phase! *** TIME: 0430 TIMER: 2:30 MAP: Left flank area - expanded (mainly north and east) DEPLOY-FORCE: Elements of Left Flank corps (2nd, 3rd, 4th divs -- no General or SW!) POSITIONING: Pre-positioned OBJECTIVES: Hold Old Church Road / Hold CSA Left Flank / Capture Bethesda Church * We do NOT need to capture Bethesda Church for battle to continue NOTES: * Brief Situation-Overview begins the phase * “Spill-over” alert: units from previous phase may spill-over into this map -- see 3.1 NOTES. They may also be positioned (in the same area in which they appeared?) for re-spill-over effect into next phase… 3.3: “The Battle Continues -- Right Flank” TIME: 0700 TIMER: 3:30 MAP: Same as in 3.1 DEPLOY-FORCE: As at end of 3.1 POSITIONING: As at end of 3.1 OBJECTIVES: Same as in 2.1 and 3.1 * The capture-VPs are NOT required for victory NOTES: * Brief Situation-Overview begins the phase * “Spill-over” alert: units from previous phase may spill-over into this map -- see 3.1 & 3.2 NOTES. Not confirmed: they may also be positioned (in the same area in which they appeared?) for re-spill-over effect into next phase… * EXTRA time is available after timer runs out if there are CONTESTED timers still running [Rovernavigator reports that a distinct phase may open up here between 3.3 & 3.4: “They Continue the Attack on Our Left!” A continuation of 3.2, it triggers with (i) VPs Old Cold Harbor & Beulah Church NOT captured and (ii) some Union troops still on the battlefield. It starts at 0700 with timer of 2:30. Again: no need to capture Bethesda Church here for the battle to continue. Also, there is another spill-over effect: troops may spill-over north (Left Flank) & south (Right Flank) via the center of the northern edge of the southern battle-map, specifically in the area of the hill-top by the white fence.] 3.4: “[Last Chance to Salvage a Draw!]” TIME: 1900 TIMER: 2:30 MAP: Same as in 3.2 DEPLOY-FORCE: As at end of 3.2 POSITIONING: As at end of 3.2 OBJECTIVES: Hold Old Church Road / Hold CSA Left Flank / Capture Bethesda Church NOTES: * This phase will activate when our total casualty-rate exceeds the 40%-maximum losses required for Victory. Apparently, we are given this “last chance” to snatch a draw out of the jaws of defeat! [Many thanks to CivWar64 for discovering this previously “hidden” phase] * “Spill-over” alert (but not confirmed): units from previous phase may spill-over into this map -- see 3.1 & 3.2 & 3.3 NOTES ***CAMP now available*** (36) Hall's Ferry Road - 14 SEP 1864 PRE-BATTLE NOTES: * This is an OFFENSIVE minor battle * With FPS-lag in mind (this battle causes some systems to lag), consider using the “Direct3d 9” option when starting the game before this battle * This is a what-if battle, supposing that the CSA found a way to attempt a re-take of Vicksburg, MS * This is often described as very difficult battle for the CSA, requiring attacks on interlocking trenches with deep-wooded cover often available to the USA defenders * If no VPs are held when TIMER runs out, EXTRA time available after FINISH -- until 1800 * Per CivWar64: When VPs are held through CONTESTED timers, battle ends immediately DEPLOYMENT: * Assault: 25 bdes - 1 deploy-box * Reinforcements: 25 bdes - 1 deploy-box TIME: 0600 TIMER: 6:00 MAP: Hall’s Ferry Road area (near Vicksburg, Mississippi) DEPLOY-FORCE: Entire Assault corps + General + SW POSITIONING: Pre-positioned, arriving from south & southeast as battle begins OBJECTIVES: Capture West Redoubt / Capture Salient Work / Capture Hall’s Ferry Road NOTES: * Extended Situation-Overview begins the battle * 0730~: Elements of Reinforcements corps (9 bdes + General + SW) arrive from south * 0800~: Remaining elements of Reinforcements (up to 16 bdes) arrive from south ***CAMP now available*** (37) Hardin Pike - 15 DEC 1864 PRE-BATTLE NOTES: * This is an OFFENSIVE minor battle * With FPS-lag in mind (this battle causes some systems to lag), consider using the “Direct3d 9” option when starting the game before this battle * This (offensive) battle is often described as very difficult, requiring attacks on interlocking trenches with deep-wooded cover available to the USA defenders, multiple well-protected ARTY batteries, and a rather aggressively counter-attacking AI. * EXTRA time available after FINISH pops up, if VPs are not yet taken -- until 1530 (If VPs are taken and held? Not tested.) DEPLOYMENT: * Assault: 25 bdes - 1 deploy-box * Reinforcements: 25 bdes - 1 deploy-box TIME: 0702 TIMER: 5:00 MAP: Hardin Pike Road (near Nashville, Tennessee) DEPLOY-FORCE: Entire Assault corps + General + SW POSITIONING: Pre-positioned along west side of map OBJECTIVES: Capture North Fort / Capture South Fort NOTES: * Extended Situation-Overview begins the battle * 0803~: Arrival of entire Reinforcements corps along west-side of map ***CAMP now available*** (38a) WASHINGTON - 10-11 APR 1865 - DAY 1 PRE-BATTLE NOTES: * This is an OFFENSIVE grand battle * This is a what-if battle, supposing a CSA “end-game” attack on Washington, D.C. * SPILL-OVER effect is possible here, where units positioned at bottom edge of TOP map will appear on BOTTOM map (or vice-versa) in a successive phase; e.g., see Phases 1.4, 1.5, 2.1, 2.2, 2.3 DEPLOYMENT: * Main Attack: 50 bdes - 2 deploy-boxes [northeast force - 1 corps required] * Secondary Attack: 25 bdes - 1 deploy-box [northwest force] * Flank Left: 25 bdes - 1 deploy-box [west/southwest force] * Flank Right: 25 bdes - 1 deploy-box [southeast force] DAY 1 (Apr 10th) - PHASE 1: “Fort DeRussy” TIME: 0600 TIMER: 2:00 MAP: Northwest (Fort DeRussy area) DEPLOY-FORCE: Elements of Secondary Attack corps: 15 bdes + General + SW POSITIONING: Per deployment-box in northwest corner of map OBJECTIVE: Capture Fort DeRussy (not required for battle to continue) NOTES: * Extended Situation-Overview (covering entire map & battle-to-come) begins battle/phase * 0625~: Reinforcements: remainder of same corps arrives from northwest * CAUTION: Taking Fort DeRussy -- and having CONTESTED time run down -- will lead to early cut-off of TIMER and start of Phase 2. 1.2: “Fort Stevens” TIME: 0800 [or earlier, if there was early cut-off of Phase 1] TIMER: 3:00 MAP: Northwest expanded (mainly east & south) to include Fort Stevens area DEPLOY-FORCE: As at end of Phase 1 + elements of the 1st Main Attack corps [13~ bdes + Gen + SW] POSITIONING: As at end of Phase 1 + pre-positioned & arriving from north/northeast OBJECTIVE: Capture Fort Stevens (not required for battle to continue) NOTES: * Situation-Overview begins the phase, noting that Prez Lincoln is observing the battle from Fort Stevens * Fort DeRussy begins as contested (even if captured in Phase 1) * 0935~: Reinfs arrive from northeast: remainder of 1st Main Attack corps [Thanks to CivWar64] * Capturing Fort Stevens & holding it through CONTESTED time does NOT lead to early cut-off of phase (but some other triggers may lead to early entry into Phase 3) 1.3: “Fort Slocum” TIME: 1100 [or earlier, if there was early cut-off previously] TIMER: 3:00 MAP: Same as 1.2 but expanded (mainly east) to include Fort Slocum area DEPLOY-FORCE: As at end of Phase 2 + elements of the 2nd Main Attack corps [Composition TBD] POSITIONING: As at end of Phase 2 + arriving from north/northeast OBJECTIVE: Capture/Hold… Fort DeRussy / Fort Stevens / Capture Fort Slocum (not required for battle to continue) NOTES: * Situation-Overview begins the phase * Fort DeRussy & Fort Stevens begin as contested (even if captured earlier) * USA CAV may appear here from east-central area, i.e., behind the lines, to cause trouble * ______~: Arrival of the remainder of 2nd Main Attack Corps from northeast * CivWar64 reports (per Legendary campaigning) of early cut-off, with 1:00 remaining, and start of next phase even though he did not hold Fort Slocum. Possibly, the force/unit-ratio was a factor here, as he had a 2:1 superiority. The AI may use such ratios as a trigger in order to get to next phase (and its reinfs). Further, the status of other VPs, such as 1.1’s Fort DeRussy VP, may be relevant. The number of corps used in the attack here could be yet another factor. 1.4: “Union Counter-Attack!” TIME: 1400 [or earlier, if there was early cut-off previously] TIMER: 3:00 MAP: Same (i.e., entire TOP/north area), expanded to south DEPLOY-FORCE: As at end of Phase 3 POSITIONING: As at end of Phase 3 OBJECTIVE: Capture/Hold… Fort DeRussy / Fort Stevens / Fort Slocum (not required for battle to continue) NOTES: * Situation-Overview begins the phase * All forts begin as contested (even if captured earlier); i.e., the contested-timers are re-set * USA counter-attack emerges from South and Southwest, aiming at Fort Stevens * This phase may cut-off early, depending on TBD factors * Spill-over effect: Positioning troops at the far-south/bottom edge of this TOP map will lead to their appearing during the next phase -- at the top of the map 1.5: “Our Flank Attacks Begin” TIME: 1400 TIMER: 3:00 MAP: Bottom (south) area -- only upper part (i.e., not yet including Washington) DEPLOY-FORCE: Elements of Flank Left corps (? bdes + General + SW) & Flank Right corps (7 bdes + General + SW) POSITIONING: Pre-positioned at west (central) and northeast parts of map -- arriving as phase begins OBJECTIVE: Capture Fort Washington / Capture Fort Thomas / Capture Washington (not required for battle to continue) NOTES: * Situation-Overview begins the phase * Spill-over effect: Units at the far-south (bottom) edge of Phase 1.4’s map will appear at the top of this phase’s map (this includes USA units!) * 1445~: Reinfs arrive (more elements of the flanking corps) on either side of the map 1.6: “The Forts Must Fall!” TIME: 1700 TIMER: 3:00 MAP: Same as in 1.4 DEPLOY-FORCE: As at end of 1.4 (except for units sent south via “spill-over effect”) POSITIONING: As at end of 1.4 (except for units sent south via “spill-over effect”) OBJECTIVE: Capture/Hold… Fort DeRussy / Fort Stevens / Fort Slocum (not required for battle to continue) NOTES: * Situation-Overview begins the phase 1.7: “Finish Them Off!” TIME: 1700 [or as at end of 1.6] TIMER: 5:00 MAP: FULL (both top & bottom maps, combined) DEPLOY-FORCE: As at end of 1.5 & 1.6 POSITIONING: As at end of 1.5 & 1.6 OBJECTIVE: Capture/Hold… Fort DeRussy / Fort Stevens / Fort Slocum / Fort Washington / Fort Thomas / Washington NOTES: * Situation-Overview begins the phase * Date-of-battle (above time, not TIMER) may show as April 15th here(!) * The phase will end early if all VPs are taken and CONTESTED timers run down Proceeding to next day: CAMP available NOTE: There is a re-deployment here; so, before the next day, all corps need to be re-assigned for the upcoming phases as follows: * Fort Stevens: 25 bdes - 1 deploy-box * Flanks: 75 bdes - 3 deploy-boxes * Washington: 25 bdes - 1 deploy-box (38b) WASHINGTON - 10-11 APR 1865 - DAY 2 DAY 2 (Apr 11th) - PHASE 1: “[Hold in the North]” *** RE-SET PHASE! *** TIME: 1300 TIMER: 4:00 MAP: TOP DEPLOY-FORCE: Up to 65 bdes total from up to 4 different deployed corps + Generals & SWs POSITIONING: Per 8 deployment-boxes across the map to the bottom OBJECTIVE: Hold Fort DeRussy / Hold Fort Stevens / Hold Fort Slocum NOTES: * Extended Situation-Overview begins the day/phase * All forts and supply-centers begin as contested or USA-held, though no USA units occupy them * USA attacks will come from west, north, and northeast (Fort Slocum seems unimportant to them, but this may not hold for every campaign or may depend on CSA’s garrisoning of it, etc.) * Spill-over effect is possible here: units on the southern/bottom edge of this TOP map will appear in the next phase (at the top edge of the BOTTOM map) 2.2: “[Hold in the South!]” *** RE-SET PHASE! *** TIME: 1300 TIMER: 4:00 MAP: Bottom DEPLOY-FORCE: Up to 38 bdes total from up to 4 different deployed corps + General (1) + SW (1) POSITIONING: Pre-positioned in multiple groups, roughly central and eastern Washington OBJECTIVES: Hold Fort Washington / Hold Fort Thomas / Hold Washington NOTES: * Situation-Overview begins the phase, emphasizing coming attacks from the west, northeast, and southeast (the last does not seem to take place until Phase 2.4) * All forts and supply-centers begin as USA-held, though no USA troops occupy them * Spill-over effect: Units (CSA or USA) located at the very bottom of the TOP map may appear here, in this phase, at the very top of the map 2.3: “Don’t Lose the Northern Forts!” TIME: 1700 TIMER: 4:00 MAP: Top DEPLOY-FORCE: As at end of 2.1 POSITIONING: As at end of 2.1 OBJECTIVE: Hold Fort DeRussy / Hold Fort Stevens / Hold Fort Slocum NOTES: * Brief Situation-Overview begins the phase * Shortly after start (2-6 mins): USA begins to receive reinfs via “Howard’s IV Corps” arriving from southwest, initially 3 INF bdes + 2 ARTY. Over next 30 mins or so, more troops arrive for total of 8 INF bdes + 4 ARTY bdes [Thanks to CivWar64 for this] * Spill-over effect is possible here: units on the bottom edge of this TOP map will appear in the next phase (at the top edge of the BOTTOM map) 2.4: “Hold for a Few More Hours!” TIME: 1700 TIMER: 4:00 MAP: Bottom DEPLOY-FORCE: As at end of 2.2 POSITIONING: As at end of 2.2 OBJECTIVES: Hold Fort Washington / Hold Fort Thomas / Hold Washington NOTES: * Brief Situation-Overview begins the phase * Spill-over effect: Units (CSA or USA) located at the very bottom of the TOP map may appear here, in this phase, at the very top of the map * 1711~: More USA troops appear from southwest * 1715~: More USA troops appear from southeast (and focus on the Washington VP) * If VPs not held at end of time, immediate FINISH (and DEFEAT)
南部邦联战斗指南

2026-03-19 22:01:05

导读
这是一份《终极将军:内战》(UGCW)中南部邦联(CSA)的战斗指南,涵盖了从1861年到1865年的38场大小战役,包括葛底斯堡、奇卡莫加等知名战役,详细说明了每场战役的部署、阶段目标、增援情况、额外时间规则等内容,帮助玩家指挥南部邦联军队作战。

评论
共0条评论

38场战役中登场的历史将领及其指挥权 - 联邦军
本指南包含以下内容:(1)战役中所有登场的历史联邦将军列表,包括他们的属性、登场时间及获取方式;(2)38场战役中这些将军在军团、师、旅级别的指挥详情概述。联邦…
2026-03-20 01:000赞 · 0评论

南部邦联战斗指南
This battle-guide provides UGCW player-generals with an overview of various stru…
2026-03-19 22:010赞 · 0评论
高效将军(开发中)
本指南汇集了我在战役中使用的各种技巧和战术。即便你只是为了娱乐而玩这款游戏,记住其中一些技巧也能帮助你击败北方联邦军/南方邦联军! 致读者与进度说明: 本指南尚…
2026-03-19 22:000赞 · 0评论
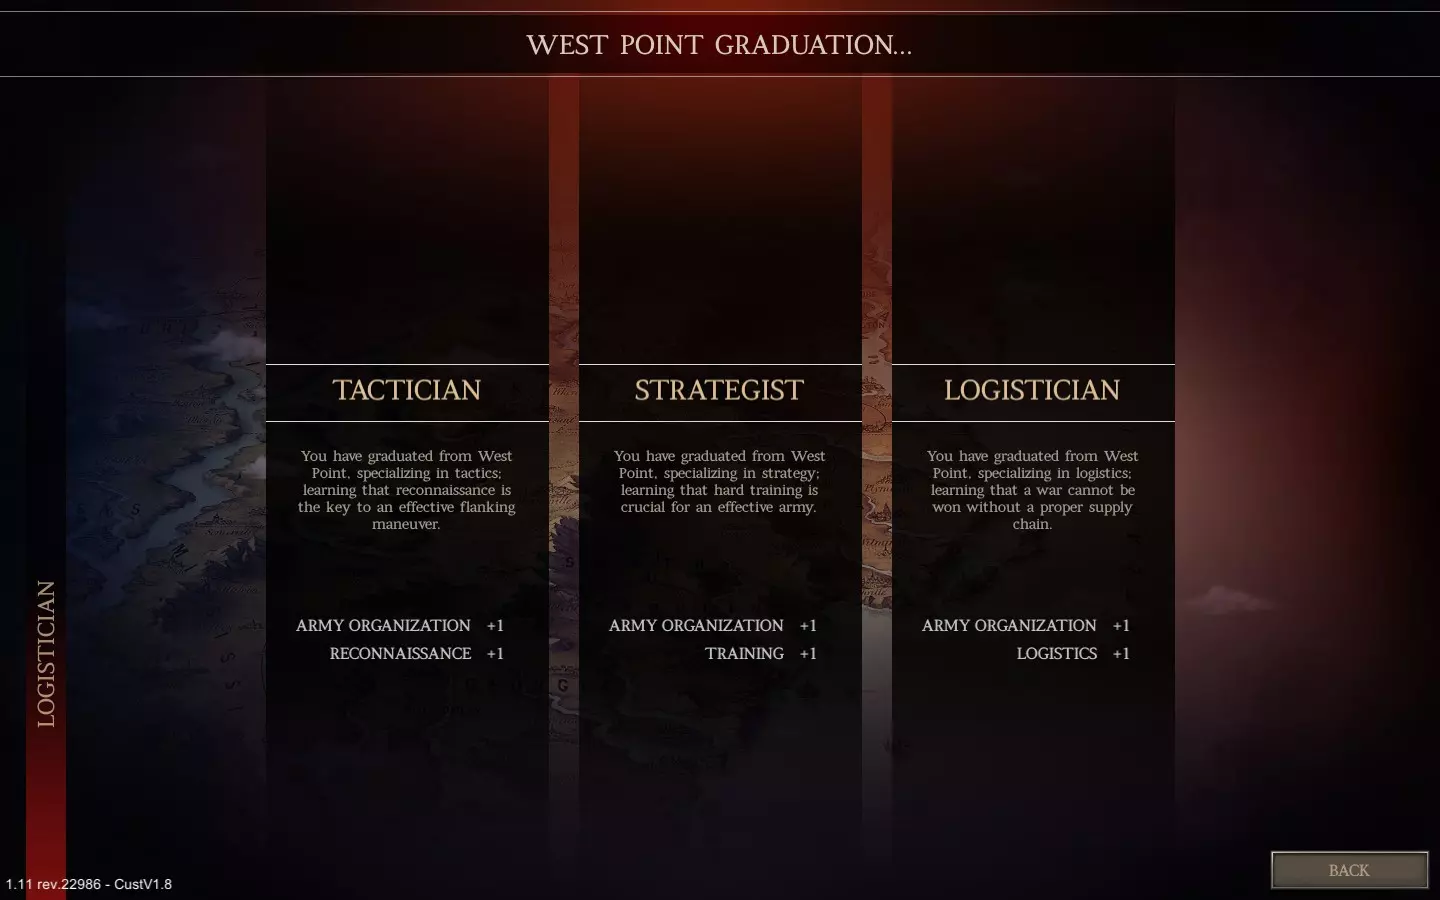
公式手册日文翻译
这是游戏附带的官方手册的日语翻译版本。 目前尚未完成,会随时更新。 由于内容量庞大,暂时中断... 战斗基础 ■ 地图控制 地图移动:按住右键拖动鼠标即可移动。…
2026-03-19 22:000赞 · 0评论

【过时】南部联盟战役指南
避免寡不敌众并赢得南部联盟战役的指南 简介
2026-03-19 22:000赞 · 0评论
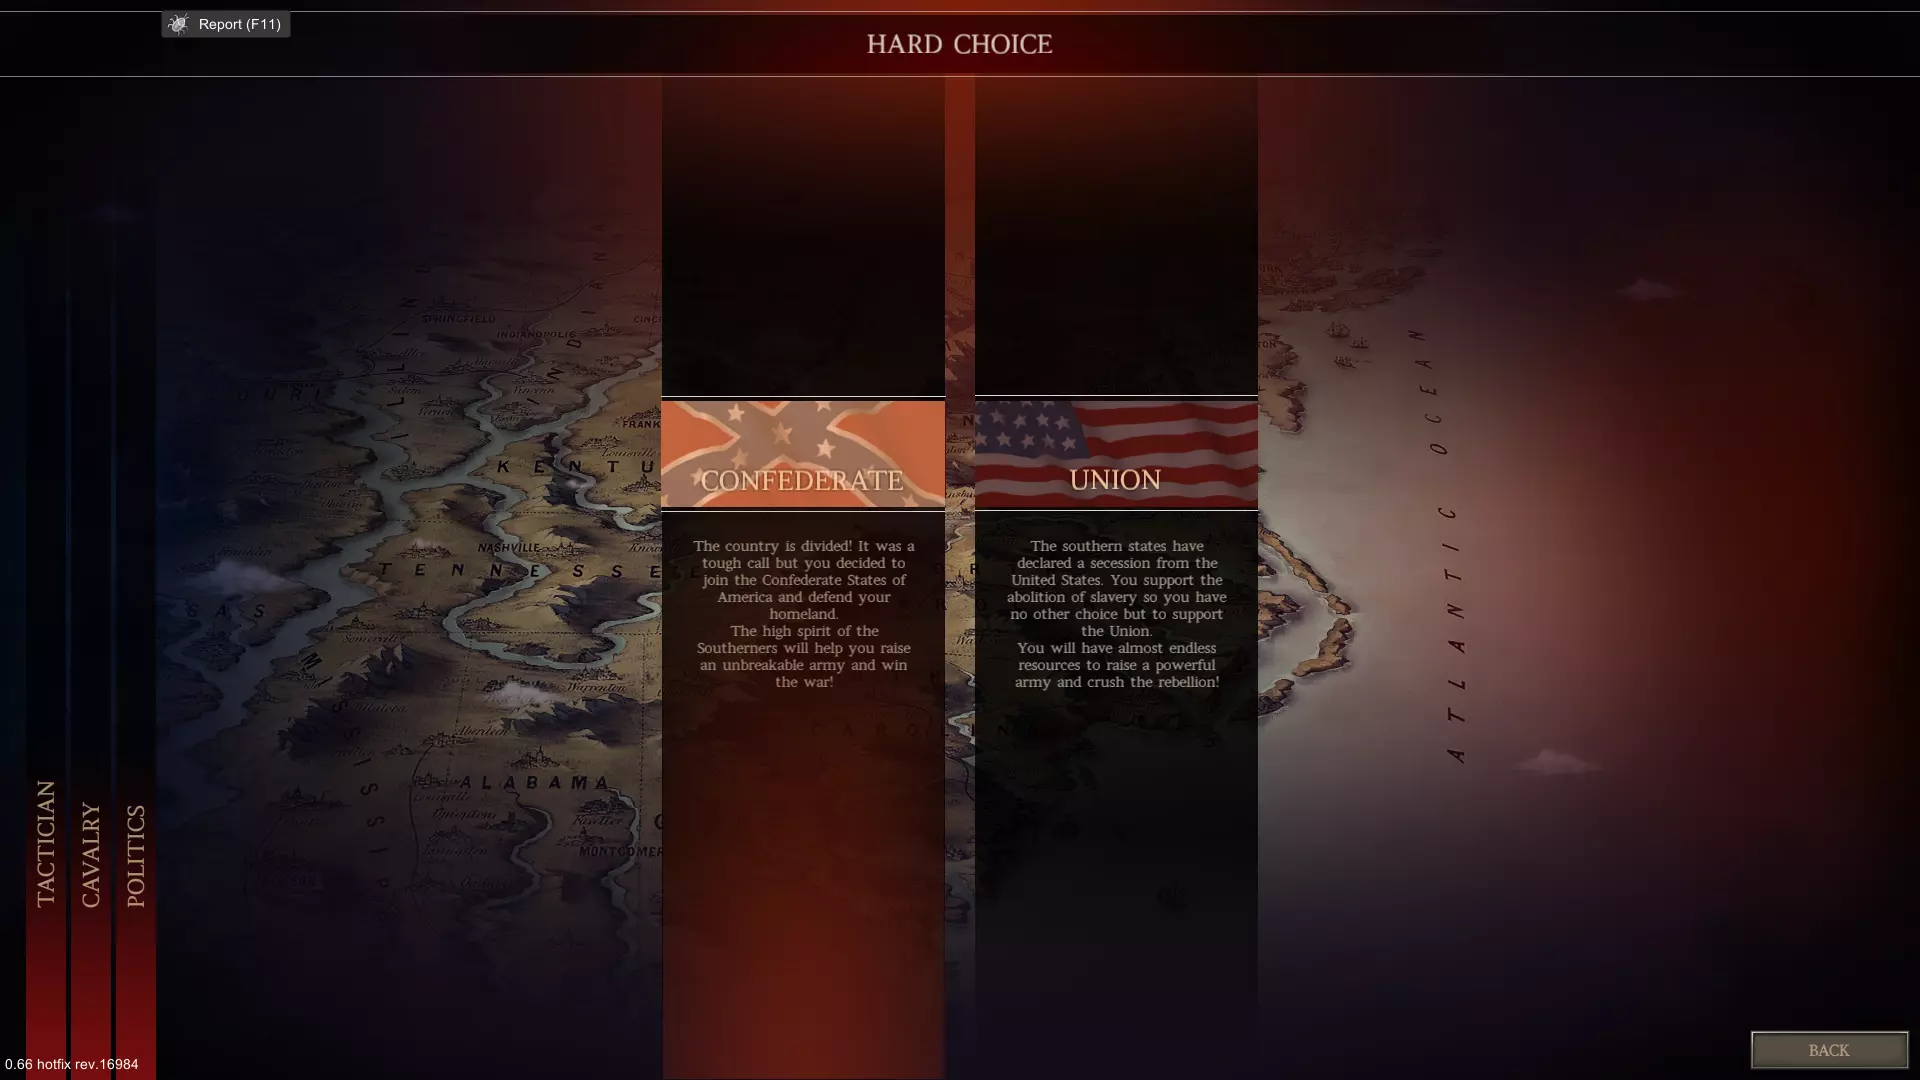
《终极将军:内战》炮兵指南
随着1.04版本更新,火炮的平衡性发生了显著变化。是时候来看看《终极将军:内战》中那些不太受重视的火炮,它们的口碑是否有所提升了。 基本信息 本指南将介绍《终极…
2026-03-19 19:000赞 · 0评论
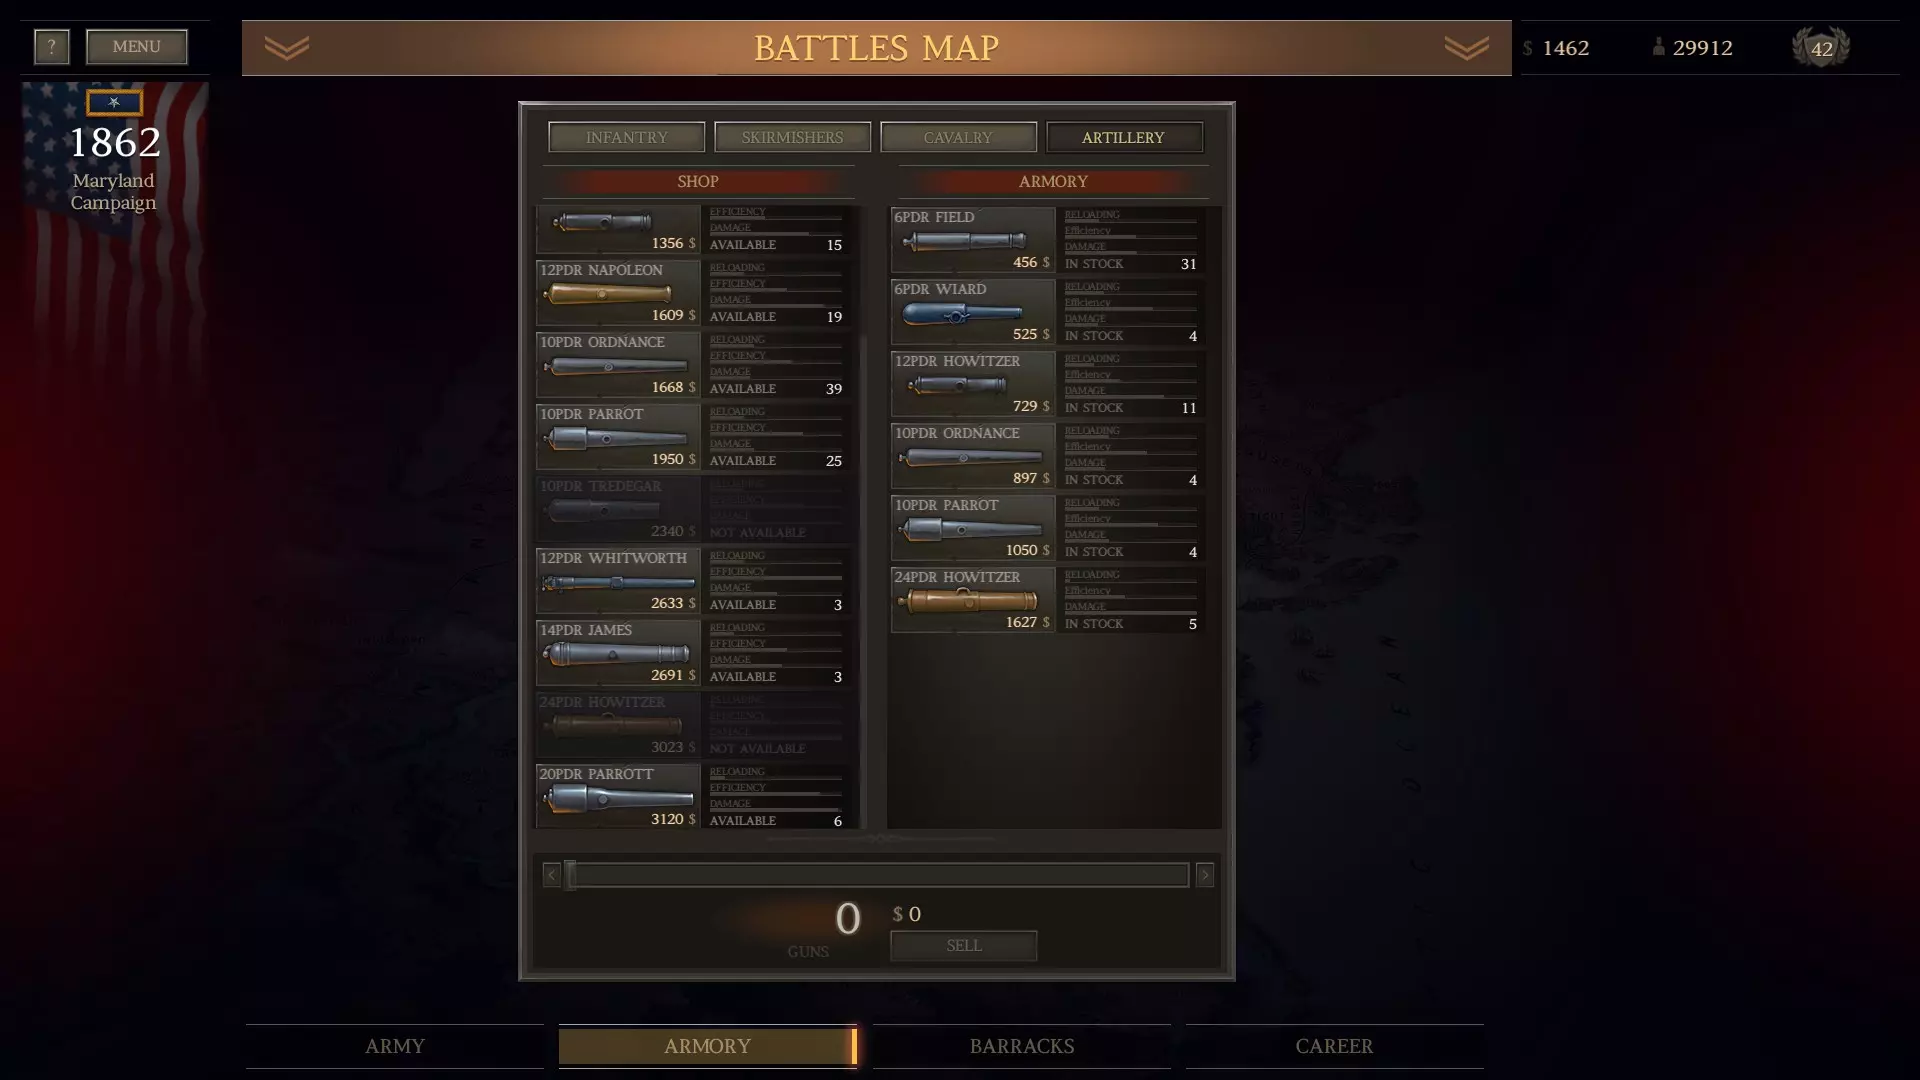
突击纵队指南:大规模步兵军团——正确游玩本游戏的方法
《终极将军:内战》战役模式最强陆军类型指南——能为你带来最佳游戏体验,并为后续每场战役提供最多资源的部队,即大规模步兵军团。 如何使用大规模步兵军团并运用突击纵…
2026-03-19 19:000赞 · 0评论
赢得战斗!!!1!
别整那些定义、列表和空话!赢下战斗! 制胜要点 厌倦了那些枯燥的索引和术语表吗?我以为这是《终极将军:内战》的指南页面!我已经赢了3场南部联盟战役,有些简单的技…
2026-03-19 16:000赞 · 0评论
美国联邦军战斗指南
This battle-guide provides UGCW player-generals with an overview of various stru…
2026-03-19 13:000赞 · 0评论
散兵战术
使用散兵在战斗中斩获数千击杀的技巧 欢迎 应大家要求,我特意撰写了这份关于《终极将军:内战》中散兵使用的指南。本指南可作为我骑兵指南的补充,两者都将帮助读者了解…
2026-03-19 13:000赞 · 0评论
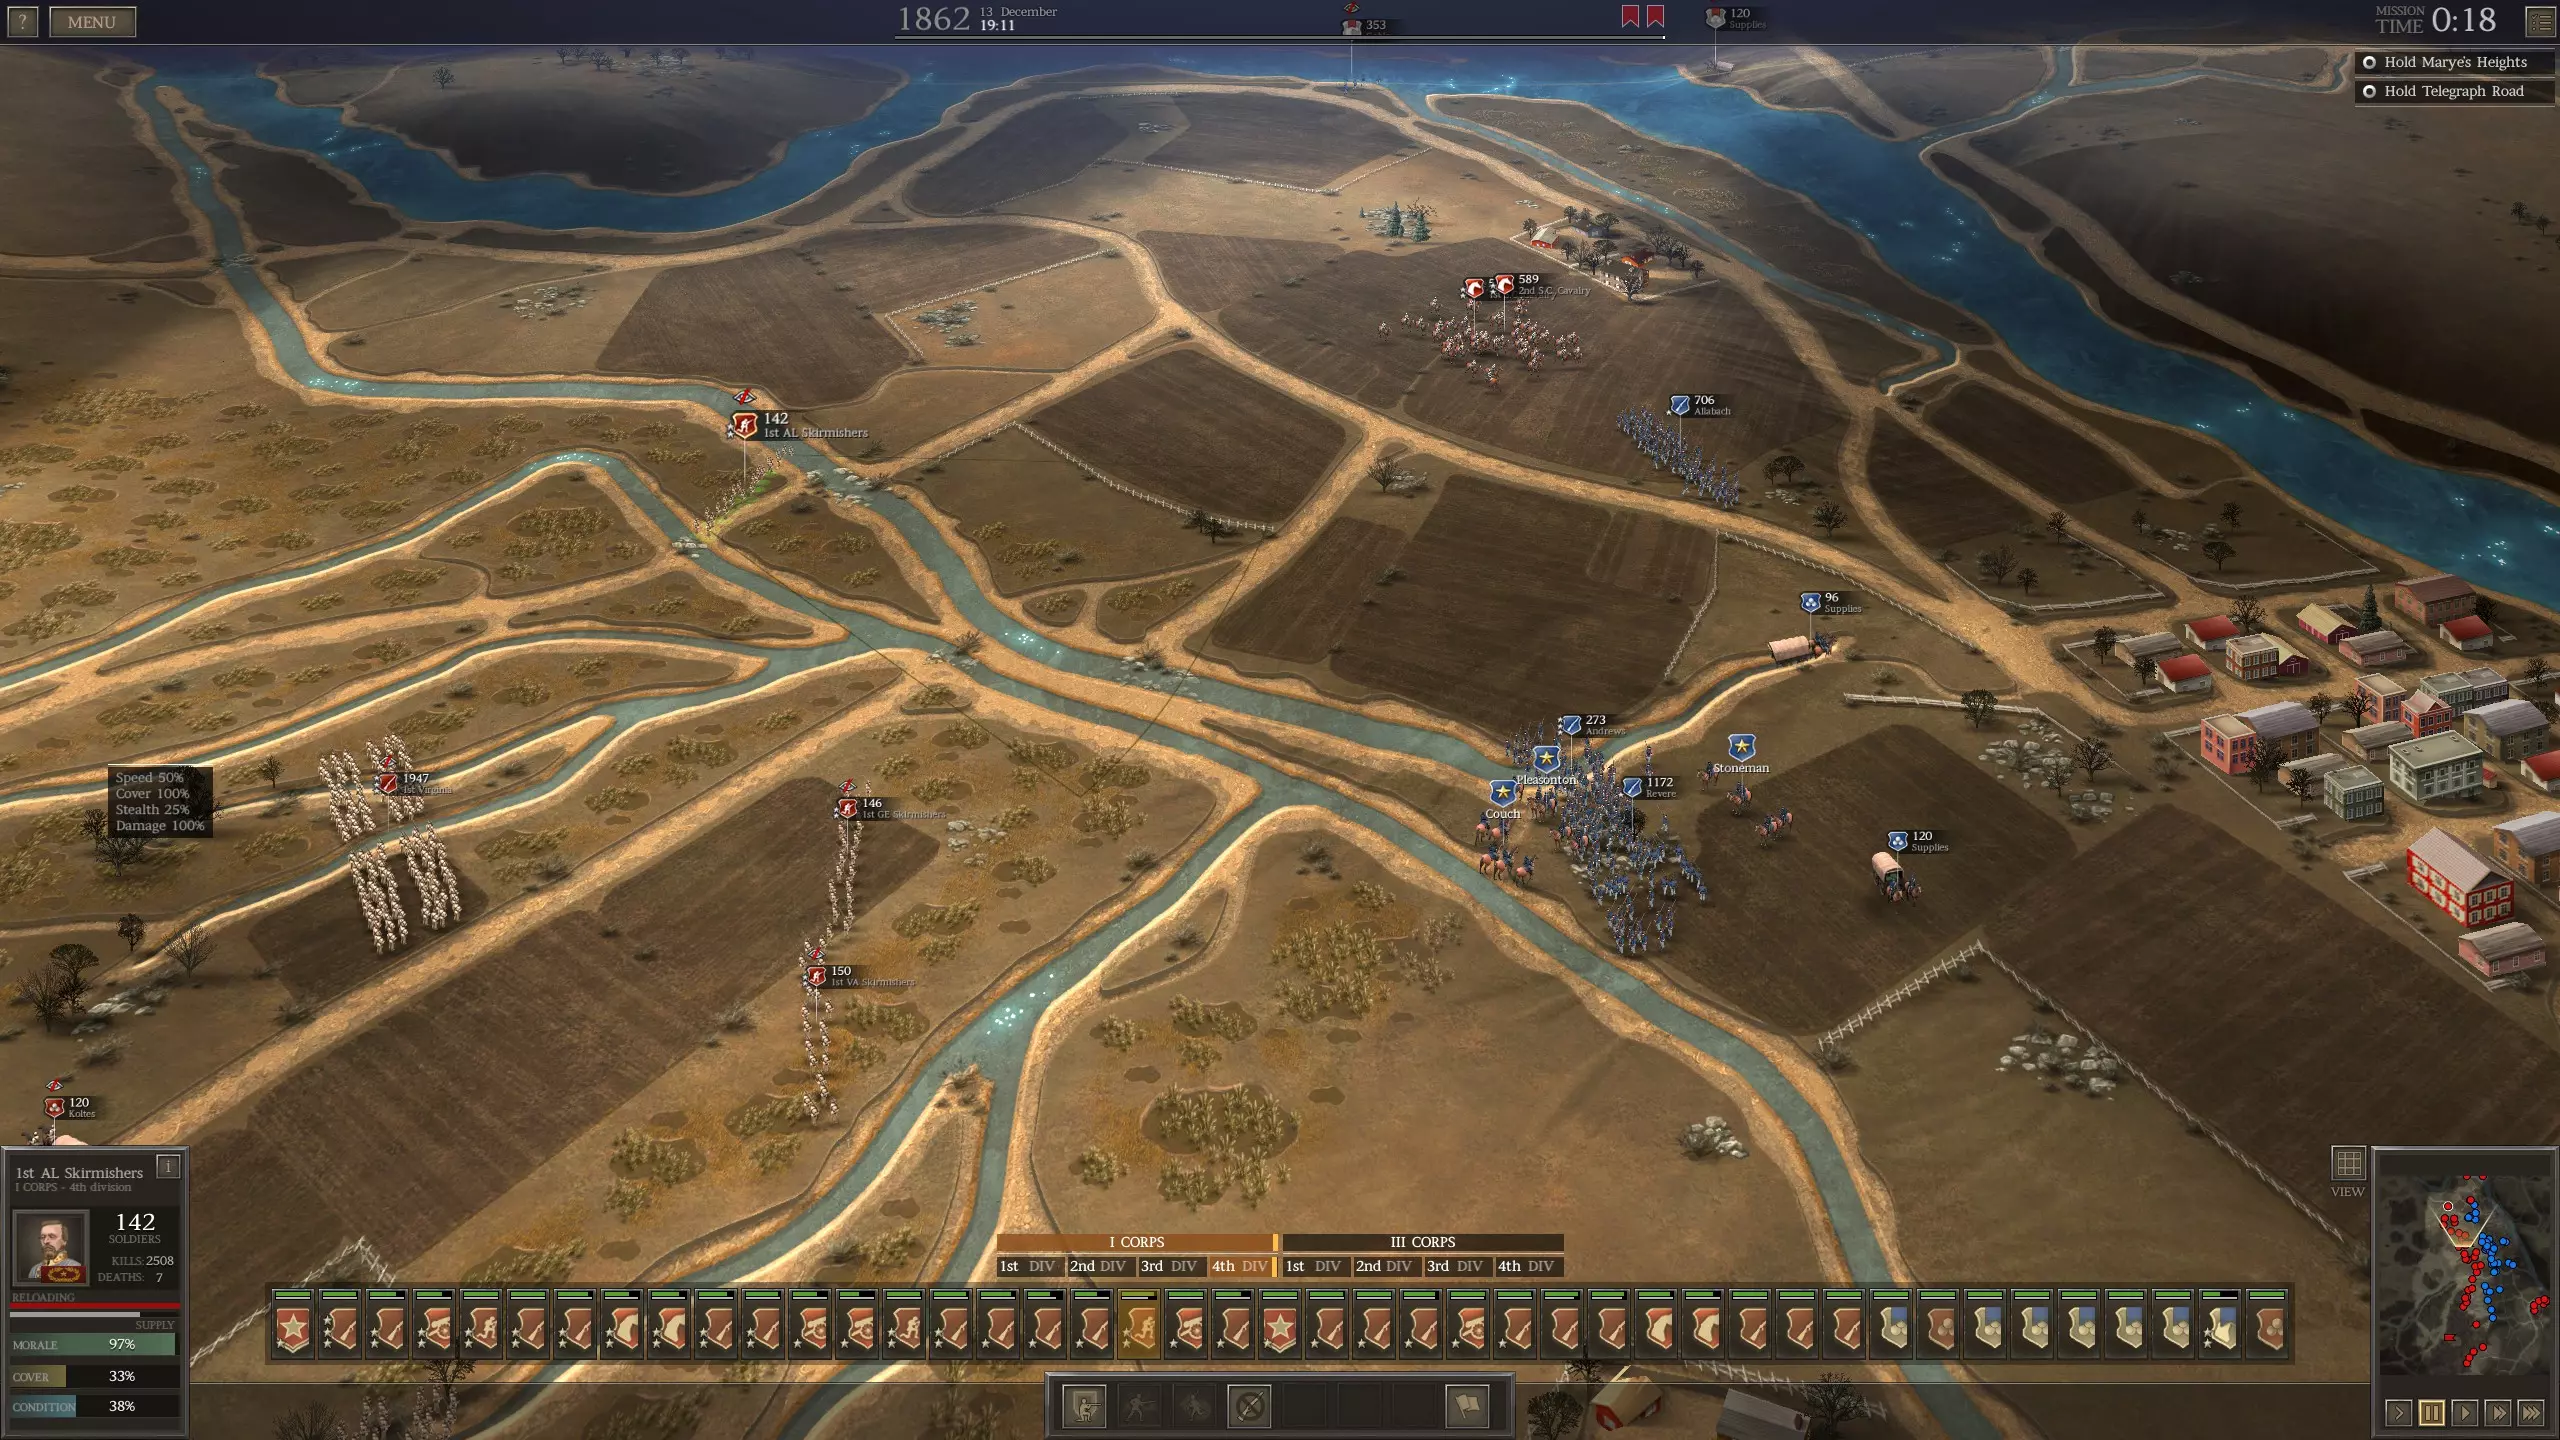
暂无更多