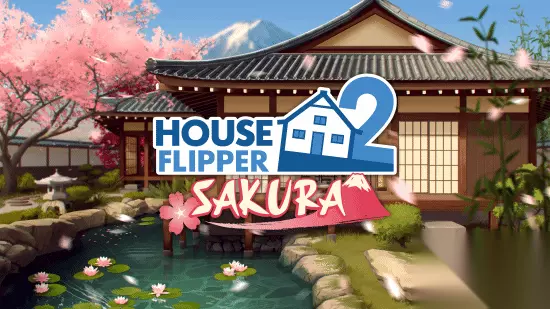
房产达人 2

房产达人 2

房产达人 2

欢迎来到房产达人 2社区! 
关注
48帖子·--新帖
游戏详情
全部
官方资讯
攻略创作
组队交友
问题反馈

以下是一些能让故事模式体验更轻松的指令,不会影响成就或其他内容。 按F11打开控制台菜单。 时间相关 speed-double - 使玩家速度翻倍。 speed-half - 使玩家速度减半。 垃圾与污垢 clear-trashes - 清除所有垃圾。 destroy-all-dirts - 清除所有污垢。 庭院 set-foliage-wild - 使草变长。 set-foliage-tidy - 使草被剪短。 set-foliage-cut - 清除地面上的所有草。 技能与工具 learn-all-perks - 解锁所有技能。 enable-all-tools - 解锁游戏中所有工具。 组装 complete-all-assemblies - 完成所有组装任务。 预算 add-to-current-budget (1000) - 此指令可向当前预算添加1000金币,1000可替换为任意数字。

--
--
3
--
--
--

This guide is for those who would like to edit Story Mode houses in Sandbox Mode. Introduction This guide is for those who would like to edit Story Mode houses in Sandbox Mode. Though the steps here are laid out in a simplistic manner, please be careful when performing these actions. Be certain you understand what you are supposed to do before doing it. - CyberDiva Launching File Explorer in Windows If your game is launched, shut it down. Being in-game when you are copying files over could potentially cause issues with your game that you do not want. Be safe! Shut it down! Open your File Explorer on your computer. * If you have the yellow folder icon on the bottom bar of your screen (the one with the Windows logo on it), you can single left click that to open what you need. * Otherwise, press the Windows key and type File. The first result should be File Explorer. Open it. Finding the Story Mode Houses Folder If your game is launched, shut it down. Being in-game when you are copying files over could potentially cause issues with your game that you do not want. Be safe! Shut it down! If you have purchased the house in the game first: Go to C: Users <username> AppData LocalLow Frozen District House Flipper 2 Profiles <number> Houses If you have not purchased the house in the game first: Go to C: Users <username> AppData LocalLow Frozen District House Flipper 2 Profiles <number> Jobs * If you transfer the house from the Jobs folder instead of the Houses folder, you will have to remove all quests for the job, etc. in addition to your other edits. Additionally, the house will not necessarily be the same house that is offered for sale. I recommended that you use the Houses folder. If you need to, change the "C" to the appropriate drive letter. Replace the <username> with the username assigned to your profile on your computer. Oftentimes it is a shortened version of that computer username. If you see them, you will never use the Default or Public folder here. For example, I might have three folders when I open the Users file on my system: Default, Public, and Workpc. Workpc would be my computer profile. In the House Flipper 2 files, your profiles are numbered in these files. You will need to replace the <number> with the appropriate number. "0" is usually the first profile you created on the game. "1" would be the second profile you created, "2" the third profile, and so forth. Unpurchased houses will not show in the file. Once inside the Houses folder, you will see the files for the Story Mode houses. Important: If the file does not show up in your Houses folder, you need to enter Story Mode, enter the house, do one thing, and SAVE. At that point, a file will be generated in the Houses folder for you. Likewise, if inside the Jobs folder, you will see the files for the Jobs. Select the file of the house that you wish to place into Sandbox Mode. You will notice that each filename has an @ symbol followed by a set of numbers. If you only have one copy of the file you want in this folder, you can ignore the numbers in the filename, as they are irrelevant to you. You may have more than one file of the same house. This is not uncommon. If you need to decipher which one you want, you can check the numbers following the @ symbol on the filename. The first set of numbers before the underscore ( _ ) symbol is actually a date. The first four numbers are the year, followed by the month and then the day of the month. So, the file called WOSP@20241112_210752.house would be the Great Charity Mansion from the date of November 12, 2024. When you have the correct file, copy the file you want with either (a simple Ctrl + C after single left clicking on it) or (right-click the file and click Copy). List of Game File Names - "Houses" Folder The current filenames for each house as of this writing are: FILENAME ACTUAL HOUSE NAME LOCATION D1-0 Starter house Peaceys' Family Home Pinnacove Suburbs HJ1-1 House under renovation Lavender House Pinnacove Suburbs HJ1-2 Small blue house Blue Bungalow Pinnacove Suburbs HJ1-3 Old house with basement More Than a Trailer Pinnacove Suburbs HJ1-4 Narrow one-story house Over the Garage Pinnacove Suburbs HJ1-5 Hoarders aftermath Compact House Pinnacove Suburbs HJ1-6 Mother-son conflict Verdant Nook Pinnacove Suburbs HJ1-7 House with workshop Timber House Pinnacove Suburbs HJ1-8 Children's mess Sunny Bungalow Pinnacove Suburbs HJ1-9 New Year resolutions House Left Behind Pinnacove Suburbs HJ1-11 The old market Old Marketplace Pinnacove Suburbs HJ1-12 Christmas disaster Very Merry House Pinnacove Suburbs HJ1-14 Dirty laundry A Dirty Laundromat Pinnacove Suburbs HJ1-15 Christmas Comedy House From a Movie Pinnacove Suburbs HJ2-1 Old beach restaurant Closed Restaurant Crayfish Coast HJ2-2 Floating house Former Houseboat Crayfish Coast HJ2-3 House on the Beach Crayfish Coast HJ2-4 When the kids moved out Waterfront House Crayfish Coast HJ2-5 House on Stilts Crayfish Coast HJ2-6 Destructive wave Flooded Summer House Crayfish Coast HJ2-7 Old costal gem Coastal Residence Crayfish Coast HJ2-8 Faded with age Seaside Cottage Crayfish Coast HJ2-9 Broker's fall Modern Beach House Crayfish Coast HJ2-10 Forgotten hostel Seaside Resort Crayfish Coast HJ2-11 Redbeards hideout A Sinking Business Crayfish Coast HJ2-12 Haunted amusement park A Closed Amusement Park Crayfish Coast HJ3-1 Taken over by nature In Harmony with Nature Coralroot Forest HJ3-2 Forest hotel Woodland Hostel Coralroot Forest HJ3-3 Abandoned barn Old Barn Coralroot Forest HJ3-4 Cabin in the woods Forest Cabin Coralroot Forest HJ3-5 After winter heating Cobblestone House Coralroot Forest HJ3-6 Overgrown construction Desolate Villa Coralroot Forest HJ3-7 The forgotten one Charming Hideaway Coralroot Forest HJ3-8 House with hidden secrets Modern Bungalow Coralroot Forest HJ3-9 Red riding hood A Fairytale House Coralroot Forest HJ3-10 Student pool party Summer House with a Pool Coralroot Forest HJ3-12 Mad scientists lab A Victorian Mansion Coralroot Forest HJ3-13 Badly prepared House with a Bunker Coralroot Forest HJ4-1 Bohema apartment Bohemian Apartment Old Pinnacove HJ4-2 Small cinema Small Theater Old Pinnacove HJ4-3 School full of magic Vacant Private School Old Pinnacove HJ4-4 Manor renovation The Alligator Bar Old Pinnacove HJ4-6 Auction House A Auctioned Auction House Old Pinnacove HJ4-7 Hostile neighbours A Double Trouble Old Pinnacove TrevorHouse Trevor's Mansion Pinnacove Suburbs WOSP Great Charity Mansion Pinnacove Suburbs Finding the Sandbox Mode Houses Folder With your desired house file already copied, go to C: Users <username> AppData LocalLow Frozen District House Flipper 2 Profiles <number> Sandbox Houses Paste the file into the new folder with either (a simple Ctrl + P) or (right-click inside the folder and click Paste). Once the file is in the Sandbox Mode folder, start your game and go into Sandbox Mode. Under the My Projects category (seen at the top of your screen), you will find the filename of the file you just placed into your Sandbox mode waiting for you to open it.

--
--
2
--
--
--
--
--
13
--
--
--

如果你想查看其他人的房屋,但点击模组标签时显示为空,本指南将引导你完成设置,以便访问这些房屋。 注册Mod.io账号 首次点击游戏内的Mod.io标签时,会提示你使用智能手机或电脑登录。 智能手机用户可扫描二维码,通过默认移动浏览器访问Mod.io网站,但仍需按照以下步骤操作。 电脑用户可通过所选浏览器(如Firefox、Opera GX等)访问Mod.io网站。 无论哪种方式,若未将账号正确关联至Mod.io,都无法直接通过游戏登录Mod.io。 如果你使用广告拦截器,需要允许mod.io。为确保网站正常运行,网站本身需要相关权限。 1. 进入网站后,点击浏览游戏。在进入该页面之前,你不会看到登录选项。 2. 点击登录按钮,使用你《房产达人2》游戏所在平台(Steam、Xbox Live、PlayStation等)的账户登录。如果你是该网站的新用户,请先注册账户(并验证你的电子邮箱地址)。 3. 登录后,将浏览器中的网址更改为【mod.io/connect】。 4. 此时会提示你输入一个代码来连接账户。输入游戏中显示的代码。 5. 如果连接成功,你将看到“连接成功”的提示信息。 帮助!我已注册但模组未显示! 注意:一旦你注册了Mod.io账户……请确保完全关闭《房产达人2》游戏,然后重新启动。 如果这样做,下次在《房产达人2》的沙盒模式中点击Mod.io按钮时,游戏会自动为你启动Mod.io网站,并且你已自动登录该网站。很简单!(如果未自动登录,请参见步骤1)。 如果不这样做,你需要使用浏览器访问Mod.io网站,直到重启《房产达人2》游戏。 在《房产达人2》中获取房屋模组 让我们开始获取第一个模组吧! 1. 要么点击模组类别下的Mod.io按钮(如果你已重启游戏),要么通过互联网浏览器访问该网站(如果你尚未重启)。如果这是你首次在《房产达人2》中访问该功能,你可能需要点击左下角的人物图标【我的账户】并登录。 警告:点击Mod.io按钮会通过你的平台覆盖层功能(如Steam覆盖层)启动网站。如果你的平台覆盖层功能已关闭,你需要重新启用它或通过互联网浏览器访问该网站。 2. 如果你已超过查看成人内容的法定年龄(请注意:是成人,不是青少年,更不是儿童),请确保点击你的个人资料图片(如果你使用的是网站的电脑版,该图片位于窗口左下角;你会发现网站已从你的平台导入了你的个人资料图片)。在常规设置中,你可以选择查看成人级内容的选项。系统会要求你输入出生日期。完成设置后务必点击保存按钮。你也可以在此页面注销账户。 仅适用于网页浏览器/移动设备用户: 2 A. 如果你未进入个人资料窗口,则可以跳过此步骤,因为你已处于浏览游戏页面。如果你进入了个人资料,请点击控制器图标以浏览游戏。移动设备用户……直接进入浏览游戏页面即可。或者使用台式电脑,很简单! 2 B. 快速搜索【房产达人2】并点击出现的游戏图标。遗憾的是,你无法将【房产达人2】或Mod.io上的任何其他游戏添加为收藏——仅能收藏特定模组。所有用户恢复常规设置: 3. 你现在看到的是《房产达人2》的模组页面,左侧有一些筛选器,还有许多玩家自制的房屋模组可供获取。 4. 当你找到想要了解更多信息的模组时,只需点击该模组显示的图片,即可查看其描述和其他信息。 5. 如果你想获取该模组,点击【订阅】按钮即可下载房屋。 6. 使用Mod.io的游戏内用户会立即在游戏内的模组分类中看到该模组;如果没有显示,请查看本部分顶部的通知。浏览器或移动浏览器用户需要完全关闭《房产达人2》并重新启动,才能在游戏内的模组部分看到模组。如果关闭并重启《房产达人2》后,你的游戏仍未显示模组,你可以手动下载文件。 手动下载文件的方法: 若需要手动下载文件,你需要确保将它们放入正确的文件夹才能访问。 手动下载的模组需放入以下文件夹: C: Users <用户名> AppData LocalLow Frozen District House Flipper 2 Profiles <档案名称> Sandbox Houses * 如果你使用的驱动器盘符不是C盘,请将C替换为该盘符。 * 根据我和其他人的电脑显示,档案名称位置通常是数字0。

--
--
--
--
2
--
--
--
--
--
14
--
--
--

A quick text-guide to assist in unlocking all achievements, with tips on some of the harder ones. Introduction Hello! If you're like me, you'd find yourself looking for an achievement guide for a few more of the more obscure ones. Having just completed all the achievements myself, hopefully I can provide that guide to others! There are no pictures, as of yet. I really don't feel they're necessary, even the collectables are incredibly easy to find with a brief blurb of text. Still, if the guide draws interest, I may pretty it up a bit. Without further delay, onto the guide! Progression Achievements The following will be unlocked simply by playing through the game. Hello? - Unlocked in the introduction, upon answering your first phone call. First Steps -Complete your first job. Fully Prepared -Progress through jobs until you unlock all tools. You Did It! -Complete the story and see the credits. Pinnacove Suburbs, Crayfist Coast, Coralroot Forest -Complete all jobs in each of the three areas of the map. Charming Talker -Talk to clients on the phone. Simply don't ignore/hang up on clients when you call you on jobs. One-Off Achievements The achievements in this section are completed by doing something in particular, and involve little to no grinding. They're not missable, and are generally fairly easy to complete. I'm an Architect -Create a house in the sandbox mode with four walls, a ceiling, a floor, and a door. Then save it. The Tables Have Turned -In sandbox mode, create trash and place dirt on a wall in a complete 'house', as in the last achievement. It may require testplaying and cleaning the mess. Full Control -Wire 20 objects to a single switch. Can easily be done by buying 20 cheap wall lamps, wiring them to an existing switch with the wiring tool, and then switch it on. Don't Try This at Home -Buy an electrical outlet, then spray it with the spray bottle of the cleaning tool! Requires the spray bottle being unlocked through perk points. Custom PC Cooling -Put a laptop in a fridge. Easy enough! Change of Mind -Use the style-change function of the Flipper Tool to change the style of an existing piece of furniture. Requires a few perk points spend in the Flipping Tool. Everything Matches -Use the style-copy function of the Flipper Tool five times, to copy a furniture's style to another. Requires a few perk points spent in the Flipping Tool. Work Smart, Not Hard -Bring an outdoor trash bin indoors, and use it to dispose of a garbage bag. It Ain't That Easy -Attempt to sell a bag of trash. Trick Shot -Throw three trash bags into a bin without missing. This can be done at point-blank range, and will likely occur naturally. Bullseye -Throw a bag of trash into a bin from ten meters away. You'll need height to make such a long throw, so do this on any job or house with an accessible roof or balcony. Simply bring a few bags to a high point, and adjust your trajectory between throws until you nail it. The first and arguably best place to get this is the job 'Tiny house to flip'. Deja Vu -Redo any job. Should happen naturally when you try and get the next achievement. The Fast and the Cleanest -Complete in a job in under five minutes. You can get 1 completion star and immediately end it, and it will count. Perfection is not important. This is doable in the first job relatively easily - just pick up all the trash, sell the sellables in the living room, and scrub down the raccoon tracks until you get your first star. As Instructed -Complete any 'Assembly' mission. These unlock on the main tablet menu fairly early in the game. Tinkerer -Complete all 12 'Assembly' missions. Getting three stars is not necessary. They unlock through game progression/completing earlier assembly missions. Business is Booming -Sell a house for the first time. Change of Environment -Buy a house, and move in! On the house screen for an owned property, simply select 'Move Office Here.' House Hoarder -Own three houses. Lengthy Achievements The following require some degree of grinding or lengthier gameplay to accomplish. Mount Everest in particular is a massive chore. They Come and Go -Sell five houses. Should happen naturally, but if not, you should have money leftover by endgame to buy and sell a few with minimal effort, if you're not interested in doing any actual work on them. Millionaire -Earn a million dollars. You do not need to have a million in your account at one point, simply earn it cumulatively. This should happen through the course of the game, plus flipping a few houses. Money Sink -Spend a million dollars. Should happen naturally through the course of flipping houses. A million goes fairly quickly after buying a few houses. With Great Power... -Unlock all perks. The only one unlikely to happen naturally through the course of completing jobs is Flipper Sense. You can increase this purely by mashing the activate button over and over again with a cleaning tool selected, regardless of whether or not anything is being detected. Alternatively, just press the Flipper Sense button a few times whenever you're scrubbing a stain - it'll add up! Other tools are self explanatory, and can be grinded if necessary by using the relevant tools. Marathon Runner -Move 42km ingame. Distance covered while jumping may not count, so bear that in mind if you like to spring about. That being said, you should be nearly finished with this by the end of the jobs and a few houses. If it's not completed by the time you're done everything else, simply run laps around a large property. That Was a Lot -Clean 3000 stains. It'll happen naturally around the time you finish all jobs, if you're going for three stars. Mount Everest -Move the paint roller 8.848km. Allegedly this achievement now counts space painted and not just distance painted, so try it with the telescopic paint roller on a large wall, and it should be a tad less tedious. Original text kept below, in case it's still relevant. Also does not work in Sandbox, so make sure to do it in the main game! (This one is awful. Through testing, I've confirmed that it's indeed distance travelled and not squares painted, so painting with the non-extended roller will help it occur naturally, if you're so inclined. In all likelihood, you'll be a mere 20% of the way through by the end of the game, as I was. There is a trick to completing this, however! Build a long wall, the length of your property. Click one end of it with paint on your roller, hold, and use WASD to move the roller to the far end. Repeat, repeat, repeat. Thankfully, by repainting the wall with the same color, you never actually use paint, and it does count. It still took me about an hour to do, after completing everything else.) Collectible Achievements I'm Grateful -Find the gratitude journal in the job 'More light, please'. It's located in the upstairs bedroom, by the bed. Press E/A on it to 'collect' it. Full House -Find the 9 Bessie figurines hidden throughout nine different jobs, and press E/A to 'collect' them. Note, you do not have to complete the jobs for the figures to count, despite the Steam achievement progress not updating immediately. The jobs and their locations are as follows: So You Wanna Be a House Flipper? In the bedroom in the rear left of the building, on a shelf in the back between a fern and a candle. I Have a New Quest For You In the garage, sitting on the shelves in the back, slightly high and in the center. Easy to spot. Out With the Old Immediately upon entering the house, it's sitting on a stack of boxes, obscured by the rubber duck. Tiny House to Flip In the living room, near the bathroom door in the rear-right, on the cubic shelf near the ceiling. My Crew is Moving Here In the small laundry room by the stairs, sitting in a crate in the back right of the room. My House Doesn't Feel Like Home Go upstairs, stand by the piano, and face the cube-shelves beside you. It's in the upper left shelf. Making Room For Our New Baby In a yellow box in the living room, sitting next to the grey sofa. Exterior Renovation Upstairs in the kid's bedroom with the starry wallpaper. On the dresser between other stuffed animals. Adding Music Studio In an open cabinet above the coffee maker in the kitchenette, at the rear left of the main room. Conclusion Hopefully this guide helped you out some! If you have any details I'm missing (notably the section on unknown achievements) or feel like I need to be less vague in places, do let me know. I intend to update this as the game progresses, if DLC or updates bring about new achievements. For now, I'm simply missing a few details to consider the guide complete.

--
--

正如标题所说,这是一个会让日本人产生“为什么要这样?”的设计。 屋顶坡度 在国际上,很少用角度来表示屋顶的坡度。 因为如果用普通角度的话,垂直方向使用的屋顶材料尺寸大多会变成无理数,非常麻烦。 所以,会使用“水平距离x对应垂直高度y”的比例形式。 在这款游戏中,“屋顶坡度”旁边滑块的数值就是y。 在日本,通常表示屋顶坡度时,会写成“四寸坡度”“五寸坡度”等。 这表示的是水平距离10寸(1尺)对应的垂直高度。 (“四寸坡度”就是水平10寸对应垂直4寸的高度,有时也写作4/10。)不过,在这款游戏中,坡度的“行”(run)的基数不是10,而是西式的12。游戏本身采用的是国际单位制,但遗憾的是,这里保留了英制单位的痕迹,指的是“每1英尺(12英寸)上升多少英寸”。实例

将坡度(rise)设置为“6”时,对应日本的“五寸坡度”。将坡度(rise)设置为“12”时,对应“十寸坡度”,也就是角度为45度的屋顶。由于10和12的最大公约数是2,因此除此之外,日本的坡度与游戏中的坡度无法严格对应。

--
--

A full tutorial, from start to finish, on how to surface in Sandbox Mode. This includes tiles, paint, wallpaper, and even making rusty railings. This guide ONLY assumes you know how to enter your house in Sandbox Mode. Where is the Tiling Tool in Sandbox Mode? In Sandbox Mode, there is no tiling tool. Instead, you must use the Surface Finishes tool, which is the icon that looks like a paintbrush. In fact, the Surface Finishes tool is used to place the following surfaces: Paint Stone Wood Wallpaper Metal Worn Surfaces (aka Grimy) Other Surfaces (such as moss, drywall, wooden shingles, and particle board) Textiles (such as carpet and other fabrics) Because of this, you do not need to purchase any of the surfaces you normally would in Story Mode. Selecting the Appropriate Tool for the Job To place tile, wallpaper, paint, etc. we need to use the Surface Finishes Tool. 1. Enter Sandbox Mode and go into the property that you wish to edit your surfaces within. 2. Right-click on your screen to bring up the Tools menu box. It is a large box with many options. 3. On the second row, select the image that looks like a paintbrush. This is your Surface Finishes tool, and it will tell you as much when you hover over it with your mouse. Locating General Surface Types You are now in the Surface Finishes tool. 1. Press Q to open a Customize box and to select the type of surface you want (stone, wood, etc.). 2. A Customize box appears with two options: Material and Rotation. The default Material is red brick, as indicated by the image of red bricks at the top right). The default Rotation is 0, as indicated by a slider. If you have more than these two options it is because you have previously selected a surface. If this is the case and you require further instruction, please ignore any additional options at this time. 3. Left-click the square box with the red brick image, or whatever it is you have showing in the Material section on the Customize page. 4. A new Customize box appears. At the top of the new Customize box you have seven tab options in the following order, from left to right: Paint (Blue paint dripping down tab) Stone (Gray brick tab) Wood (Diagonal brown wooden slats tab) Wallpaper (Green rainbows on yellow background with upper left corner turned down tab) Metal (Gray rectangle with a diagonal light sheen going from left to right) Other (Three circles in a triangular pattern tab) Grimy (Tab with a tiny bit of red brick on the left, and the majority is a black, gray, and white mess) Textiles (Scrunched up green material) This is where you select whether you want paint, tile, wood, wallpaper... All of it. Selecting a Material Type Before you select colors or anything else, Material should be the first thing you select on your Customize page. This will determine whether or not you have a color option (or two of them) as well as any other available options to manipulate the material with. I Want Paint 1. Select the Paint tab at the top of the Customize box, which looks like a tab with blue paint dripping down it In this tab, you will see all of the available paint styles that paint can create: Stucco, Old Plaster, and Venetian Plaster. 2. Choose your paint style from this tab by left-clicking on the box of paint style that you want. Example: Bill would like to apply a nice Venetian Plaster to his walls. He clicks the Paint tab at the top of the Customize box to receive his options. Already knowing what he wants, he left-clicks on the Venetian Plaster box on the page to make is selection. 3. Once your paint style is selected, it returns you to the first Customize page you saw, with some additional options. I Want Stone 1. Select the Stone tab at the top of the Customize box, which looks like a tab of gray brick. In this tab, you will see all of the available basic stone types. For example: Gray Granite, Stone Blocks, Subway Tiles, etc. 2. Choose your base stone type from this Stone tab by left-clicking on the box of stone type that you want. Example: Jane would like to apply a nice granite to her floors. She clicks the Stone tab at the top of the Customize box to receive her options. After a moment, she decides on the Gray Granite and left-clicks that box on the page. Her basic stone type selection is now made. 3. Once your base stone type is selected, it returns you to the first Customize page you saw, with some additional options, including color and patterns. I Want Wood 1. Select the Wood tab at the top of the Customize box, which looks like a tab of diagonal brown wooden slats. In this tab, you will see various types of wood for you to choose from. For example: Dark Wenge, American Cherry, and European Walnut. 2. Choose your type of wood from this Wood tab by left-clicking on the box of wood that you want. Example: Chris would like to apply a really nice wood to his front porch. He clicks the Wood tab at the top of the Customize box to receive his options. After a bit of consideration, he chooses to go with European Walnut, as dark woods tend to be more elegant in his mind. He left-clicks that box on the page and his selection is now made. 3. Once your base stone type is selected, it returns you to the first Customize page you saw, with some additional options, including type of wood, color, and patterns. I Want Wallpaper 1. Select the Wallpaper tab at the top of the Customize box, which looks like a tab of green rainbows on a yellow background with the upper left corner turned down. In this tab, you will see all of the available wallpapers to you. 2. Choose your wallpaper from this Wallpaper tab by left-clicking on the box of of wallpaper that you want. Example: Beth is absolutely obsessed with cows. It is possibly an unhealthy obsession, but she is obsessed nonetheless. She wants her entire guest bedroom to look like a cow paddy, complete with cow wallpaper, with the hopes of raising a baby calf in there. Despite the likely need for some serious help in the psychosis department, she proceeds with her plans in sandbox mode. For now. She clicks the Wallpaper tab at the top of the Customize box to receive her options. Being obsessed with cows, she absolutely wants the cow print wallpaper and left-clicks that box on the page. Her wallpaper selection is now made. 3. Once your wallpaper is selected, it returns you to the first Customize page you saw, with some additional options. That is where you will select the coloring on your wallpaper. I Want Metal 1. Select the Metal tab at the top of the Customize box, which looks like a gray rectangle with a diagonal light sheen going from left to right. In this tab, you will see different types of metal surfaces that you can choose from. 2. Choose your metal from this Metal tab by left-clicking on the box of metal that you want. Example: Sven is in a heavy metal band and wants to deck out his barn in a really cool industrial theme, complete with metal beams across the ceiling. He clicks the Metal tab at the top of the Customize box to receive his options. With a unique style of industrial in mind, he selects the Black Iron option as his metal. Happy with his choice, his selection is made when he left-clicks the box. 3. Once your metal is selected, it returns you to the first Customize page you saw, with an additional option for a Cut Pattern. I Want a Different Material (Other) 1. Select the Other tab at the top of the Customize box, which looks like three gray spheres set into a triangular pattern. In this tab, you will see material surfaces that do not fit into the other types of surfaces, such as drywall, wooden shingles, and cork. 2. Choose your material type from this Other tab by left-clicking on the box of material that you want. Example: Gloria is creating a house where others can perform tasks. One of these tasks happens to be painting some walls. Rather than keep the look of the basic red bricks, however, she wants the house to look like it already has drywall up on those bricks and is ready for painting. She clicks the Other tab at the top of the Customize box to receive her options. Seeing precisely what she wants, she selects the Drywall box. 3. Once your material is selected, you are returned to the Customize page you first saw. I Want to Create Old Material (Grimy) 1. Select the Grimy tab at the top of the Customize box. It has a tiny bit of red brick on the left, and the majority is a black, gray, and white mess. In this tab, you will see material that is old, mossy, damaged, rusty, etc. This is the tab to use if you want something to look run-down. 2. Choose your material type from this Grimy tab by left-clicking on the box of material that you want. Example: Miguel wants his house visitors to feel the need to repair the outer walls of his house. Instead of leaving the red building bricks exposed, he chooses to go for an old and worn-down look on the house. He clicks the Grimy tab at the top of the Customize box to receive his options. After some consideration, he chooses the Damaged Wood option. 3. Once your material is selected, you are returned to the Customize page you first saw. I Want Textiles 1. Select the Textiles tab at the top of the Customize box. It has a tab with some scrunched up green material in it. This is the tab you want for applying carpet, suede, burlap, knitted fabric, etc. All of the cloth materials are found in this tab. 2. Choose your material type from this Textiles tab by left-clicking on the box of material that you want. Example: Lori wants carpet! Carpet everywhere! In the kitchen (No, please!), in the bathrooms (Please do not do this!), on the ceilings (Why, Lori, why?), on the walls, in the attic, and even on her front porch outside (No! Just...no!). Although Lori was really starting to scare us with her carpet obsession, thankfully she does not want carpet in her yard. Yet. She chooses the Textiles tab and selects the Carpet option. After a bit of unhealthy drooling and panting, she finally returns to a partially sane state and finishes her selection process. 3. Once your material is selected, you are returned to the Customize page you first saw. Customizing Your Selection Once you have your Material selected, it is time to Customize! After making your material selection, you are automatically brought back to the Customize page. Previewing Your Choices You may notice a large box at the bottom left corner of your screen. At its bottom there is an image of a paint roller. This is your Preview Selection Box. It allows you to see what you have chosen thus far and how it may look on a smaller scale. Lets Talk Options! The additional options that you are given depend upon your specific Material selection. Sometimes, such as when you select a certain type of stone, you may receive only two additional options, whereas selecting a different stone type offers you six options. If you receive no options at all, such as with particle board, it is because there are no options available for this material type with your current selections. Unless you select a Pattern option for your material, you may not receive additional options such as Rotation or Cut Pattern Size. Just like when you left-clicked the Materials box to choose your type of Material, most of the options you gain work in the same manner. Click the box on the right side of the screen next to the name of the option you want and make your selection. Some options have sliders instead of boxes to click. One example of a slider is Rotation. Unlike with the other options, you are not transported to another page to change the slider. For slider options, simply move the slider with your mouse to change your option. As with selecting a color or other option, each time you change the slider you can preview your chosen Rotation in the Preview Selection Box. Option: Color This is the color of your selected Material. In some cases, you may receive multiple color options, such as with Wallpaper. When you left-click the Color option you will receive a single page with all of your color choices on it. This is unlike in Story Mode, where you have different tabs of colors to choose from. Though some of these colors may appear to be identical, each one is different, even if that variation is only slight. Option: Cut Pattern This is where you can shape your material into patterns. Here you can find patterns such as herringbone, house siding cuts, bathroom octagons, chevron, decking board pattern, and parquet. The default pattern is set to a solid square, meaning that there is no pattern selected for your material. Once you have completed all of your selections, right-clicking on your screen will save your choices and exit the Customize page. Option: Cut Pattern Size This option shows up if you have selected a Pattern. Just as with the Size option, this is a slider that changes the size of each element of the pattern each time you change the slider. As the number on the slider grows higher, the pattern becomes larger. With the Cut Pattern Size option, it may be a little difficult for you to determine by the preview window if you like the size you selected. When using this with wood, for example, you may want to experiment with the sizes by going ahead and placing a surface down in your house to see what size you like best. Option: Cut Pattern Rotation This option shows up if you have selected a Pattern. Just as with the regular Rotation option, changing this slider will rotate your Pattern each time you change the number on the slider. Available settings for Rotation are Horizontal (left to right) Vertical (up and down), and two Diagonal settings (upper left corner to bottom right corner; or upper right corner to bottom left corner). With some patterns, you may not see a rotation despite receiving this option, as the pieces are identical (such as with octagons or squares). Option: Rotation The Rotation option is a slider that rotates the chosen material each time you change the number on the slider. Available settings for Rotation are Horizontal (left to right) Vertical (up and down), and two Diagonal settings (upper left corner to bottom right corner; or upper right corner to bottom left corner). Option: Size Size is a slider option that makes each component on the selected Material larger. The higher the number on the slider, the larger the material appears. With the Size option, it may be a little difficult for you to determine by the preview window if you like the size you selected. When using this with wood, for example, you may want to experiment with the sizes by going ahead and placing a surface down in your house to see what size you like best. Since we selected Gray Granite, we now also have an option in this window for Cut Pattern and Color. The Rotation option was removed because it is now located elsewhere. Worry not, you can still select a rotation in just a moment. Example I want to make a log cabin in the Sandbox, so I build all of my walls for the cabin, and now I am ready to surface them. I do not want to use paint on my log cabin, as I would like it to appear authentic. I right-click on my screen and left-click on the Surface Finishes selection (paintbrush icon). With this tool now selected, I press Q to open its Customize page and to make my selections. The first thing that I do is to select my basic material type -- wood. For this project, I select Yellowwood, which is a neutral wood. Since I chose a wood, I will not have a color option. The color of wood I chose is going to be my color. With my material now selected, and by default the color selected also, if I do not set a pattern to it, my cabin is going to look like one large sheet of wood. That is not what I want, and so I left-click the Pattern box. Since this is a log cabin, my best option here is to choose something that would look like wooden logs. I left-click on the image that looks like white diagonal strips going from the top left to the bottom right, with no other lines to break up the strips into sections. Now I need to look at my rotation. Remember, this determines the direction in which your pattern goes. For this particular pattern, the choice I want to make is to go left to right. I check the Preview Image Box to see how the rotation changes as I move the slider and set it so that the wood is going from left to right. My final option for this wood is a Cut Pattern Size. Since this will determine how large or how small my "logs" are, I want to set this as high as I can, so that I have nice big logs. After all, it is not practical for someone to build a log cabin out of tiny trees. All of my options have now been selected. I right-click on my screen and the Customize box goes away....setting the last choices I made. It is time to Build! Applying Your Selection You have made your selection of surfacing material, but there are a couple of minor things that you need to be made aware of first. The Clean Stains ToggleOn the left side of your screen, above your tile preview image, you will have the words "Clean Stains" in a white box. On the right side of that box is a toggle followed by the letter V. This is important to pay attention to if you are building a house and have already placed stains prior to changing that surface. Having the Clean option on will remove those placed stains. Having it off will keep those stains in place. If you have not placed stains, do not worry about this option. By default, it should be set to On. You can use your mouse button or a keyboard button to change this to off. The keybinding to turn it on or off is actually the same keybinding for "Change Item Orientation" in your settings. By default this is a "V", but if you have changed it, you may need to go to Settings &gt; Keybindings &gt; Change Item Orientation to check the assigned letter. Laying Your Surface 1. Place the white dot that is your mouse pointer in this game over the ugly brick or other surface that you want to cover. Just like in Story Mode, you cannot place surfacing on grass and furniture. You need to lay brick first. 2. Your white dot mouse pointer will turn into a white square on your screen when you are hovering over a place where you can change the surface. 3. At the bottom center of your screen you have three blue bubbles: Copy Surface Finish: This is good for when you lay down new bricks or an item that can be tiled and need it to match another surface you have already placed elsewhere. Just place the square box on the surface you wish to copy and press the R key (or whichever key you have assigned to it) "Hold &lt;left mouse button image&gt; Find surface finish in store": Use this to find a pattern you have already laid down. If you are placing wood on a platform, for example, and need the same wood but for it to face another direction, this is a good option to use. Just place your white square over the surface and hold down the left mouse button. "&lt;left mouse button image&gt; Select first point": This is what you are going to use to tile the surface you are trying to change. We want to use the third option listed above, "&lt;left mouse button image&gt; Select first point", to turn those ugly red bricks into something beautiful. 4. Place the white dot that is your mouse on the corner of the surface you want to alter and single-left click. So, if you are surfacing a wall, place it in the corner where the wall meets either the floor or the ceiling. You have now set your first point. 5. The options on the bottom of your screen now change because you have "selected the first point". You should now have a light blue square on the surface where you left clicked. You now have a prompt to select your last point on your screen instead of one telling you to select your first point. You will notice that, as you move your mouse around, that square becomes larger, changing its shape to further cover the surface and ending wherever your mouse pointer rests. 6. If you mess up and select the wrong starting point, that is alright! Just right-click and that light blue square highlight goes away. You can then choose a new starting point and left-click once more to start your selection. A message on the bottom of your screen will remind you that you can right-click to cancel your last point (read: selection). 6. Since you have already selected your first point at the corner of the surface, drag your mouse across the entire surface that you want to alter with your current material choice and left-click on the very last square you want covered. If you are doing a wall, for example, you will want to drag the mouse so that the entire wall is highlighted in that light blue square. I can now see the entire area that is going to be altered. 7. Once you click that final time, the entire surface that you highlighted will change, applying the material you selected. Example of Surfacing From Start to Finish I want to make a log cabin in the Sandbox, so I build all of my walls for the cabin, and now I am ready to surface them. I do not want to use paint on my log cabin, as I would like it to appear authentic. I right-click on my screen and left-click on the Surface Finishes selection (paintbrush icon). With this tool now selected, I press Q to open its Customize page and to make my selections. The first thing that I do is to select my basic material type -- wood. For this project, I select Yellowwood, which is a neutral wood. Since I chose a wood, I will not have a color option. The color of wood I chose is going to be my color. With my material now selected, and by default the color selected also, if I do not set a pattern to it, my cabin is going to look like one large sheet of wood. That is not what I want, and so I left-click the Pattern box. Since this is a log cabin, my best option here is to choose something that would look like wooden logs. I left-click on the image that looks like white diagonal strips going from the top left to the bottom right, with no other lines to break up the strips into sections. Now I need to look at my rotation. Remember, this determines the direction in which your pattern goes. For this particular pattern, the choice I want to make is to go left to right. I check the Preview Image Box to see how the rotation changes as I move the slider and set it so that the wood is going from left to right. My final option for this wood is a Cut Pattern Size. Since this will determine how large or how small my "logs" are, I want to set this as high as I can, so that I have nice big logs. After all, it is not practical for someone to build a log cabin out of tiny trees. All of my options have now been selected. I right-click on my screen and the Customize box goes away....setting the last choices I made. Now I apply my surface. I place my mouse pointer at the top left corner of the wall that I want to change and left click one time. Seeing the light blue square appear, I drag my pointer to the bottom right corner of the wall I am changing and left-click again, highlighting the entirety of what I want to change. Immediately, my wall changes to the pattern I selected. Advanced Options Changing the surface of one side of a wall is good for when a wall has multiple surfaces. Sometimes, though, the wall needs to be the exact same on all sides. Instead of building your surfaces and then using the Surfacing tool to change them, consider instead the following option: When you build with the Build Walls tool, You Can Change Its Surface Before You Start Building. After selecting the Build Walls tool, press the key assigned to your Tool Settings (Default: Q), which should be displayed under the image in the bottom left corner of your screen. Pressing that key will bring up a box showing your current material setting and its options. Just like with with Surfacing tool, you can change these options for your current session.

--
--
--
--