换一换
换一换 


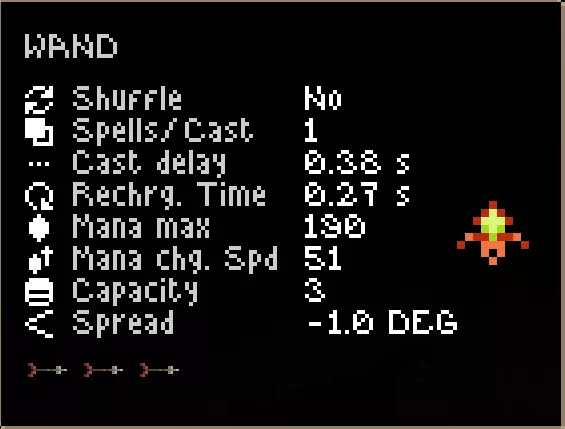
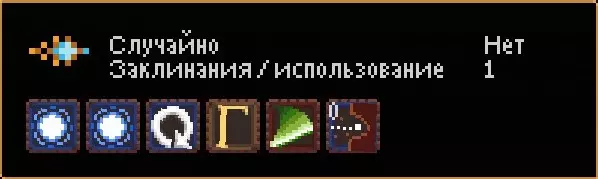
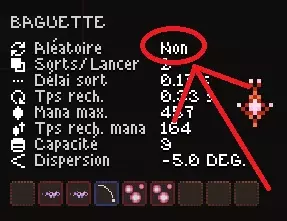
What they don't tell you about Noita's ingame mechanics. Combat & Spells You can Block melee-type attacks by using Kick right before the attack connects. Melee-type attacks include the Hurrta (glowing-eyed dogs) leaps, frog tongues, tentacles, et cetera. A successful block prevents all damage the melee attack would've done to you, and deals that much damage back to the attacker.Kicking a humanoid enemy holding a wand will Disarm them, causing them to drop that wand. Getting close enough for this is dangerous without invisibility, shielding or other protections, though. It's useful for getting charmed Hiisi Healers to drop wands they might've grabbed without having to kill them.Loading any Multicast-type spell after a Trigger/Timer etc. spell will multicast as many spells as it can when triggered. Projectile modifiers placed after the trigger but before this multicast will apply to spells fired from that trigger.Projectile Modifiers put in a castblock before Multicasts will apply to ALL spells in that Multicast.Wands that cast multiple spells per use are assumed to always have a Multicast in its castblock up to the specified number, but any Projectile Modifiers put in the castblock are still applied first. This means if you load Damage Plus at the beginning of a wand that casts 2 Spark Bolts, for instance, the modifier would apply to both bolts."Wrapping" occurs when a given cast of the wand cannot find enough spells in the rest of the castblock, i.e. when Double Spell only has 1 spell to its right, or a Trigger has nothing. For instance, Spark Bolt w/ Trigger > Double Spell > Bubble Spark x2 > Spark Bolt w/ Trigger will make a 'block' out of the multicast & sparks that fires with the 1st spark bolt, but the 2nd has nothing to cast so it reads from the beginning of the entire block, finds the 1st, fires it, then triggers the wand recharge.Spells with certain modifiers, such as Spark Bolt's +5% crit chance, are not part of the spell themselves—they modify the individual castblock they are part of. If you load Double Spell > Bouncing Burst > Spark Bolt, just having spark will add +5% crit chance to both it AND the Bouncing Burst!Multicasts can stack! If you load two Double Spell mods side-by-side, with three Spark Bolts after, then a single cast of the wand reads the Double Spell to the right of the first, and fires two bolts, but this counts as only one draw, and so that cast also fires the third bolt, effectively acting as a Triple Spell mod.If your spell's critical hit % chance goes over 100%, the excess is converted into extra critical damage multiplier on top of the normal 5x damage critical hits inflict.When casting certain "throwable" spells (TNT, Bomb, etc.), how far away your cursor is from your character determines the force it's thrown with. Keeping your cursor close results in a shorter 'throw' than if the cursor is halfway across the screen.Increasing a spell's damage with modifiers generally also increases its recoil, i.e. how far back it pushes you when cast."Homing" modifiers typically apply acceleration to the projectile(s) they modify, allowing even normally static ones (such as Barrier particles) to shoot towards enemies. However, "Rotate towards Foes" only applies homing ability at the projectile's normal speed and applies no acceleration, which will not enable static projectiles to home in.The damage type listed on a spell matters. Enemies composed of fire, such as the Stendari (fire spirits) in the Mines, are harmed by water and take extra damage from ice attacks. Ice-based enemies are more vulnerable to fire. Robotic enemies take only half damage from projectiles, and almost nothing from Slice, but a LOT of extra damage from explosives and electricity."Mist"-type spells such as Toxic Mist will stop certain spells/attacks from passing through, most notably Concentrated Light & Flamethrower, and the delayed laser beam of the Tesla Turret. This is because mist-affected areas count as being in liquid, and the abovementioned attacks cannot pass through liquids."Weakening Curse" modifiers apply an additive 25% modifier to damage received from the respective type. This means they can even make enemies vulnerable to damage who otherwise have a 0.00x modifier, as the curse sets it to 0.25x instead. This does NOT work if the enemy has full, perk-based Immunity to that damage type—it only affects their natural modifier(s).Fireball and certain other spells can burn away gases in their path, making them able to clear out dangerous materials like Freezing Vapor in a hurry. Environment & Materials Small fires and spots of Freezing Liquid that permanently release freezing vapor can generally be neutralized by shooting the pixels they occupy, even with weak spells like Spark Bolt.Kicked or thrown objects tend to sink into certain powdery materials like Coal. Be mindful of explosives that may be hiding deep in piles of snow!Bomb, Thunder Charge and similar powerful explosions can "powderize" solid materials above the explosion, causing them to fall as a powdered form of that material with the same Hardness. This means you could dig upwards through any material, but that material could then fall and block off passages.Ice will crack and break in a semi-predictable manner when shot, shearing off large pieces. No matter their size, you can still Kick these pieces around."Freeze Charge" and related ice-based effects will freeze toxic sludge and acid in place, which still deal damage when touched by creatures. The only clue (aside from mousing over the material) are small particles released from the surface of the ice. Be aware!Due to Concentrated Mana's ability to eat through metal on contact, it massively damages robots and other metal-based opponents as if it were acid.Electricity arcs through any liquids/metals in proximity. Damage is determined by how many electrified pixels an entity is in contact with—full immersion in shocked water is practically instant death. Arcing can also ignite flammable materials touching liquids/metals. You can use this property to burn things on the other side of a steel wall, for instance.If there is no space for a created/emitted material to enter the world, it tends to clip through the terrain directly above it and emerge into the first open space available. You can use this with a Water Potion by levitating to the bottom of a surface with Toxic Sludge on the other side, pointing up, then spraying water. The water will emerge on the other side and detoxify the sludge. This can be helpful when using acid, too, since acid can only eat straight down through materials, but it's also quite dangerous. Experiment!Shooting into mixed liquids can 'stir' them up and help them mix faster. This is especially useful for helping water to quickly detoxify toxic sludge, for instance.Berserkium causes certain spells to behave differently. For instance, Unstable Crystal starts its countdown to detonation immediately after being cast.Certain enemies and volatile objects leak liquid or gaseous material when shot; the slimeball-spewing fliers in the Mines leak toxic sludge, and fuel barrels can leak oil, for instance.Many liquids, including magical ones, that contact lava or fire can turn into gaseous variants, i.e. Toxic Gas or Chaotic Polymorphine Gas.Weird Fungus (the pink stuff) allows solids/entities to pass through, but not liquids. This can make for effective "potion baths" or airlocked corridors where nothing can pass through without touching the Polymorphine inside, for instance.If a Wand is submerged in Pheromone, one of two things will happen—a wand with spells becomes a flying, charmed creature that fights for you; or an empty wand turns into 200 x Wand tier worth of gold nuggets.You can safely collect dangerous materials such as acid, lava or polymorphine in a bottle by Levitating yourself to the bottom of a thin solid layer separating you from that material.Being in contact with fire will rapidly evaporate certain stains from you, including Slime.Materials that can mix will do so if they're both inside a bottle/pouch. For instance, even a tiny quantity of Water in a bottle of Toxic Sludge will quickly turn all the Toxic Sludge into more Water.Steam will slowly recondense back into Water, and fall like rain.Steel terrain & objects will slowly rust over time, especially when in contact with Water. Rusted steel is weaker, and can be removed by common digging spells. If you have no other options, covering Steel with Water and waiting a while is a viable way to get through it.When Polymorphed into another creature, you or another entity are treated as a creature belonging to the same 'group' as that creature. For instance, Unstable Polymorphine, because it always turns you into a Hiisi-type creature, will make all other Hiisi neutral to you and not shoot at you. Berserkium removes group target filters and causes creatures to shoot everything on sight—including your own charmed creatures!Materials such as Poison can react with air, such as Poison turning to Poison Gas, or Freezing Liquid turning to Freezing Vapor. But if such materials are not in contact with air, this doesn't happen. Thus, if another material lays on top of it and prevents contact with air, that material is preserved rather than dissipating. You can take advantage of this for alchemical purposes in case you don't have a container handy to store it. Just be careful that you're not using something that reacts with whatever you're trying to preserve! Perks Collecting multiple perks in a given 'set' of like perks, such as all the rat-based perks, can grant your character unique bonuses and cosmetic attachments for that run.Certain perks give stacks of a hidden "Halo" value, depending on whether they are more "divine"- or "evil"-aligned. Obtaining 3 stacks of a given Halo gives you a visual effect. Every stack increases your resistance to Fire and Holy damage by 10%."Peace With Gods" prevents any future revenge guardians from appearing in the Holy Mountain, but all currently existing ones will also become Charmed and fight on your side instead!"Projectile Repulsion Field/Sector" doesn't just push incoming projectiles away—it also pushes those you yourself cast away from you at higher speed. Even normally static projectiles such as Barriers or Mists are pushed as well."Projectile Slower" has some anti-synergy effects vs. homing attacks, as it can slow them down enough that shots which you might otherwise dodge and let hit a wall could instead curve back around and hit you. However, it synergizes well with Projectile Repulsion Field, as both effects drain momentum from incoming projectiles."Gas Fire" will effectively erase all dangerous gases, including Freezing Vapor and Polymorphine Cloud. It is one of the only sure ways to protect yourself from Freezing Vapor."Homing Shots" will apply homing not just to every projectile you cast, but the sub-projectiles those might create, even if they're from modifiers such as Downwards Bolt Bundle."Melee Immunity" applies to any melee-type attack, not just an enemy touching or striking you in proximity. Tentacles, tongues and other physical strikes are completely nullified. By contrast, "Contact Damage" only prevents any damage from entities practically touching you, not tentacles, etc."Telekinetic Kick" can be used to grab the flying healer/repair drones, because these enemies also count as physics objects. Try grabbing, holding, then positioning it so it tries to heal an enemy but its healing bolts heal you instead!"Iron Stomach" may seem like a gimmick at first, but it has some very interesting synergies and effects. First, it lets you eat literally anything, even lava, without taking damage. Second, you can increase Satiation without dying. You can thus drink effectively infinite Concentrated Mana to extend the mana regen buff until it's practically endless. It makes the Vampirism perk more convenient, as you don't need to worry about harmful substances like oil mixing with blood and damaging you. It also synergizes with Eat your Vegetables, letting you consume Slime and Slimy Meat as food sources."Freeze Field" does not say so, but it confers true immunity to fire damage, even vs. direct fire attacks, whilst the Fire Immunity perk simply stops you from catching fire. It is also the closest you'll get to Poison immunity, as it can neutralize poison (the liquid) before it ever touches you. It also instantly extinguishes fires in close proximity.
ćşĺś

导读
这是一篇《Noita》的游戏机制隐藏技巧攻略,涵盖战斗与法术、环境与材料、天赋三大核心内容,分享了格挡近战反击、缴械敌人、法术组合机制、环境材料互动、天赋特殊效果等实用玩法,帮助玩家掌握游戏进阶技巧。

评论
共0条评论

环境互动
《陷阵之志》游戏中罕见/意外环境互动及模糊机制参考列表 简介 欢迎指出任何遗漏内容。以下大部分内容均经过测试。 感谢评论区玩家的帮助:dn、Osaka Sewe…
2026-04-01 07:000赞 · 0评论

《王者荣耀世界》怎么玩?娱乐解说P18实机演示,练成再战玩法攻略
《王者荣耀世界》娱乐解说P18:练成再战!最新实机演示与玩法解析,带你深入了解游戏机制与战斗技巧。
2026-06-15 23:110赞 · 0评论

洛克人Zero 攻击判定优先级/连击系统
本指南将解释《洛克人 Zero1-4》的攻击判定优先级系统 简介 《洛克人 Zero》系列以其在《洛克人》系列中顶尖的战斗系统而闻名,速通玩家们展示了利用该系统…
2026-03-27 01:000赞 · 0评论
《小镇惊魂2》深度数据与机制指南(含其他实用内容)
包含《小镇惊魂2》(Obscure 2/The Aftermath)中你需要了解的所有数据统计和数值,以及游戏机制的详细解析。 简介 这是我的《小镇惊魂》深度数…
2026-03-20 22:001赞 · 0评论

游戏机制
我的笔记:哪些可以做,哪些不可以做 序章 基于个人观察所得,主要是给自己做的记录。其中肯定会有不准确的地方,毕竟游戏节奏极快,而训练模式又非常简单。我会从整体到…
2026-02-19 04:000赞 · 0评论
新手教程 【天国拯救2】新手保姆级指南 亨利必看的百科全书 路线规划 重要道具 装备 机制 构筑 让亨利们少吃苦少受累!
新手保姆级指南 亨利必看的百科全书 路线规划 重要道具 装备 机制 构筑 让亨利们少吃苦少受累,从人厌狗嫌的乞丐变成受人景仰的贵族老爷,早日完成任务回家享福。 …
2025-11-29 01:380赞 · 0评论

《师父》- 从学徒到大师
一份面向新手的入门指南,涵盖游戏基础玩法、核心系统、机制、攻击特性等内容。 本指南不包含敌人/ Boss 及其攻击方式的信息。若后续我有意愿,可能会补充相关内容…
2026-03-27 04:000赞 · 0评论
《陷阵之志》进阶攻略
深度剖析游戏机制,让敌人生成与行动不再玄学,让路线选择与资源管理有章可循。内容涵盖策略技巧的介绍、机甲装备的解析,甚至是辅助技术的应用,旨在成为最完善的【陷阵之…
2026-03-25 19:000赞 · 0评论

《Revulsion》基础须知;常见问题解答;你应该了解的内容
《Revulsion》那些重要却没告诉你的事,或者你看到了却没留意的内容。 绝对要点: 1. 你需要满血才能通过第一道门。找到小型医疗包,使用它,然后踩下按钮。…
2026-03-21 16:000赞 · 0评论
技巧 从12条机制来看《博德之门3》自由度有多高
2025-10-31 07:220赞 · 0评论
暂无更多
最新更新
- 新手指南 — Эпиграф: «Жизнь – это очередь за смертью, но мы лезем без очереди!» Вступление П…
- 新手视频指南 — 我尝试在20分钟内整合尽可能多的知识,以帮助新手应对艰难的初次尝试。祝游戏顺利!
- 心与宝箱位置指南[含图片与视频] — 心形道具与宝藏位置 一份助你更轻松找到心形道具的指南!对新手玩家特别有用。 额外最大生命值是一种拾取物,能使你的最大生命值增加25点,但不会恢复生命值。它的外观…
- 鱼竿制作指南 — ### 魔杖与法杖的优质配置详细指南 希望本指南不仅能帮助你通关游戏,还能让你享受游戏乐趣。 基础要点: 1. 每根魔杖都会依次发射其插槽中的所有法术弹,发射间…
- 最全面详细的《女巫》指南——秘密、特性、彩蛋 — Первое и самое важное – это гайд не для зеленых новичков, делающих первые шаги в…
- 进阶派系指南 — 我尝试解释、复述或翻译过的文章: 施法 法杖更新 分裂 为了直观了解法杖的工作原理,建议安装Wand dbg模组。 (俄语内容) “免责声明” 我已尝试用最易懂…
- 100%成就达成 — 本指南将介绍成就支柱以及如何解锁全部成就。 支柱是一种成就,通过完成各种行为来获取:从击杀 Boss 到献祭药水等。 你可以在知识树中找到它们,知识树位于出生点…
- 《女巫》法术编程指南 — 在这篇指南里,你将学会如何搭配《女巫》中的法术组合。 《女巫》法术编程指南
- 《到处摆弄魔杖》的替代游戏 — 在大多数游戏流程中,你无法在早期获得【Tinker with Wands Everywhere】 perk。以下是一些替代工具和策略。 简介 有帮助吗?
- 《女巫》职业级 Boss 攻略 — 显然会有剧透。我不会提供关于科尔米希尔梅的攻略,因为他其实相当简单,而且为每个可获得的宝珠等级提供攻略也太耗时了。科尔米希尔梅的核心/金字塔 Boss