换一换
换一换 


这是一份《求生之路:纳粹僵尸部队》的完整指南。其中包含游戏机制、战术、技巧等深度信息,涵盖从基础到高级移动/战斗技巧,以及高效的合作策略,助你通关所有地图。 本指南展示了最有效的生存方法,以及其他可供选择的方式,让你在练习和提升过程中形成自己的游戏风格。无论是刚入门的新玩家,还是希望提升技能的老手,都能从中受益。 ### 简介与免责声明 ◈ 免责声明:本指南仍在制作中,部分章节尚未完成。如果看到章节标题旁有️图标,说明该章节正在撰写中。如果你看到此图标或此图标,分别表示图片和视频缺失。
欢迎阅读《地狱已满》完全指南。如果你是偶然发现本指南的新玩家,那么欢迎来到这款游戏!在这里,你将找到大量关于游戏基础玩法、战斗机制、合作策略等内容的信息。如果你是老玩家或资深玩家,肯定已经了解基础内容,但你或许能从中发现许多之前可能不知道的进阶信息,从而提升自己的游戏水平。 需要声明的是:玩这款游戏并没有绝对正确的方式,享受游戏的乐趣才是关键。这款游戏既可以休闲游玩,也能硬核挑战,具体取决于你作为玩家个人以及你认为什么是乐趣。我在这里将展示的是你需要掌握的基础和进阶知识,以便能稳定完成游戏中所有地图——包括官方地图和社区自制地图,无论是合作模式还是单人模式,经典难度还是噩梦难度。 基于玩家合作的方法:
本指南的重点是教你我认为能持续赢得《求生之路:纳粹僵尸部队》比赛的最有效方法。在我看来,什么是“胜利”?基本上就是在每张地图结束时,尽可能让最多的玩家成功撤离。这是我在本指南中解释每个主题时都会遵循的原则。你对成功的定义可能与我不同,所以你需要自己决定是选择合作还是自私。 无论如何,你在本指南中看到的内容都基于这样一个理念:玩家既要关心队友的生存,也不会忽视自己的生存。另一方面,如果为了让尽可能多的玩家成功逃脱,有时采取自私的行为是明确的获胜途径,那么玩家就应该表现得自私一些。如果你是单人游玩,会有更多自由去做自己想做的事,但当你身处8人团队中时,负面的团队互动会阻碍进程,甚至可能毁掉整局比赛。 完成地图有许多不同的策略,但通常只有少数几种策略是真正最有效且稳定的,无论它们在你个人看来可能有多枯燥。无论是躲避一大群僵尸,在狭窄走廊里慢慢消灭蹒跚者,还是在队友大杀四方时袖手旁观,只要能推动地图进程并助力团队获胜,这些做法都是可行的。 话虽如此,我会在合适的时机提及一些替代策略。因为将这些策略与主流玩法相结合,经过足够的练习和投入后,你就能形成自己的独特玩法风格。这还能提升你的适应能力,让你在计划被打乱时更有胜算。 你的适应能力至关重要。
《求生之路:纳粹僵尸部队》鼓励玩家适应环境并具备多面性。如果你局限于单一玩法、不运用所有可用技巧、不知道如何应对猪队友或捣乱玩家、无法判断何时该合作(以及与谁合作)或何时该自私地只顾自己生存,那么你会不断死亡。若想存活,你必须适应游戏和随机玩家带来的各种情况。了解、练习并应用所有这些技巧和策略,将为你提供生存的手段。 你需要学会自给自足,但这并不意味着你应该对试图帮助你的其他玩家置之不理。如果其他玩家是优秀的队友并能为整体地图进度做出贡献,你也应该帮助那些有需要的人。保持独立固然很好,但积极参与合作行为会为你和团队带来益处。如果你也想帮助那些恶意破坏者或不合作的玩家,你可以这么做,但在大多数情况下,这要么效率低下,要么毫无用处。只有当你试图实现个人目标时,这样做才有意义。 本指南面向哪些玩家?

本指南汇总了所有基础与进阶机制,旨在满足两类玩家的需求:一是希望轻松游玩简单地图的休闲玩家,二是可能最终想在最高难度下进行单人或合作游玩高难度自定义地图的硬核玩家。即便是想要进一步提升技能的老手,也可能从中获得一些帮助。 掌握本指南所提供的知识,能让你更快提升水平,避免不良习惯,并专注于练习有效的策略和技巧,从而获得显著优势。这将帮助你和其他玩家在最高难度下完成游戏中最具挑战性的地图。
作为本指南的作者,我会尽量保持客观。但很明显,我也是普通人,因此个人的偏见和观点可能会影响指南的某些部分。我会尽最大努力减少这种影响,并会在某些内容更多是个人观点而非事实时加以说明。 欢迎任何有建设性且有礼貌的批评和反馈。如果你认为我遗漏了某个重要机制,或者对某种武器/策略/技巧的效果有不同看法,又或者觉得你有比我所描述的更好的方法,请在下方留言。我很乐意与你礼貌地讨论,并可能会据此对指南内容进行补充或修正。我的目标是帮助其他玩家,尽可能收集关于游戏的有用信息,而不是吹嘘自己懂多少。“这肯定会无聊透顶吧?”这是一份冗长、全面且详细的指南,但它并非是那种随意堆砌令人困惑的数字、武器数据和技术术语的“书呆子盛宴”。不过,当需要用这些信息来解释某个观点或认为其具有一定相关性时,还是会提及数据和数字。好在你不需要接触太多这类内容,游戏的大部分方面都可以通过更直观的方式来学习。与《收获日2》或《杀戮空间2》等包含职业、技能、武器专长、技能树等RPG元素的游戏相比,本作的基础玩法机制在数值方面并不复杂。但要学习和掌握这些机制需要很长时间,所以你要做好一开始就死亡数十次并遭遇惨败的准备。我们都经历过这个阶段。 好了,话不多说,让我们开始这段旅程。准备好迎接末日吧……
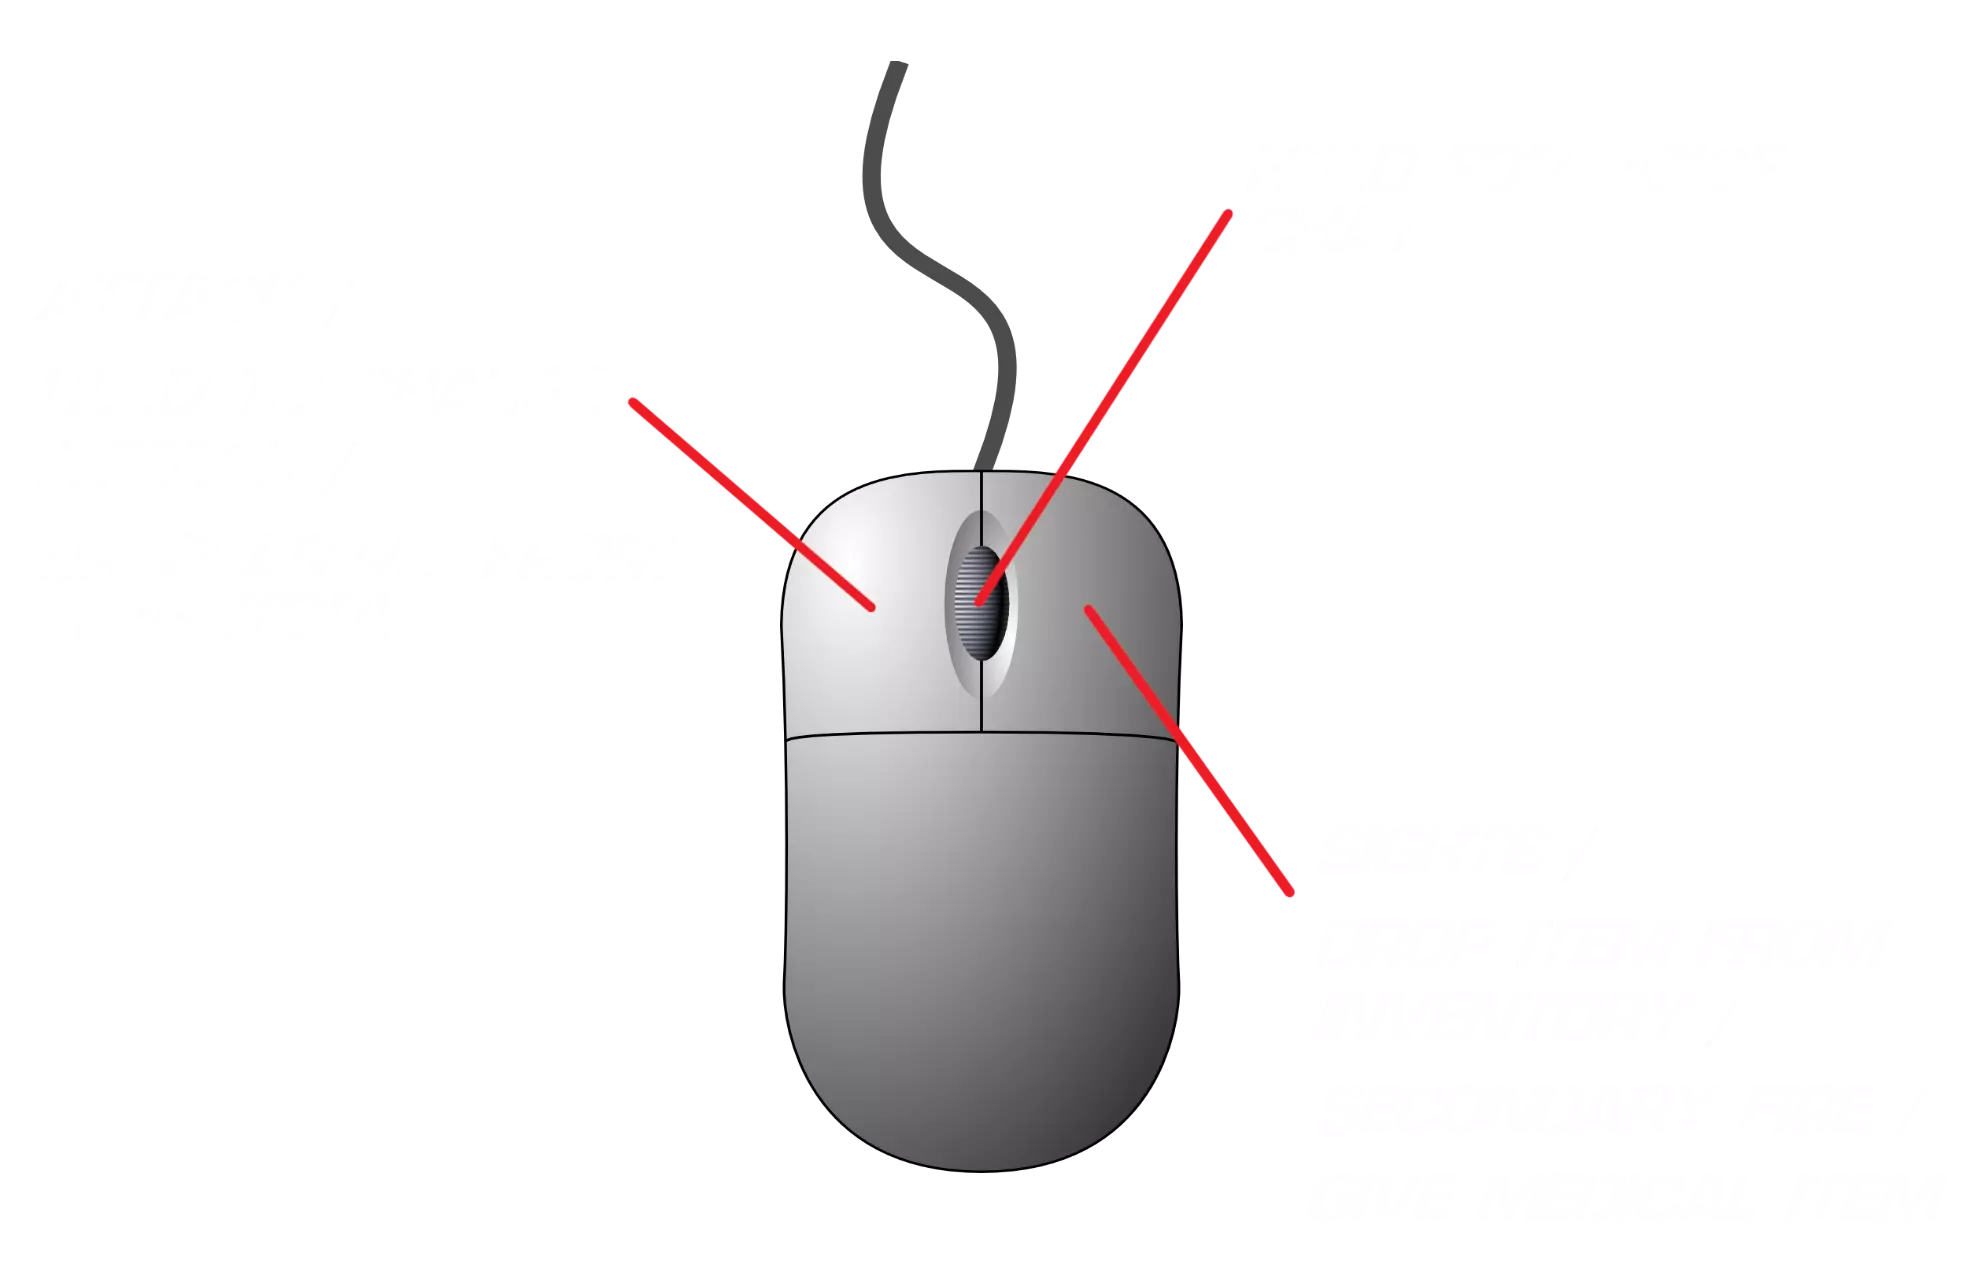
默认控制方案 以下是控制方式的简要说明:
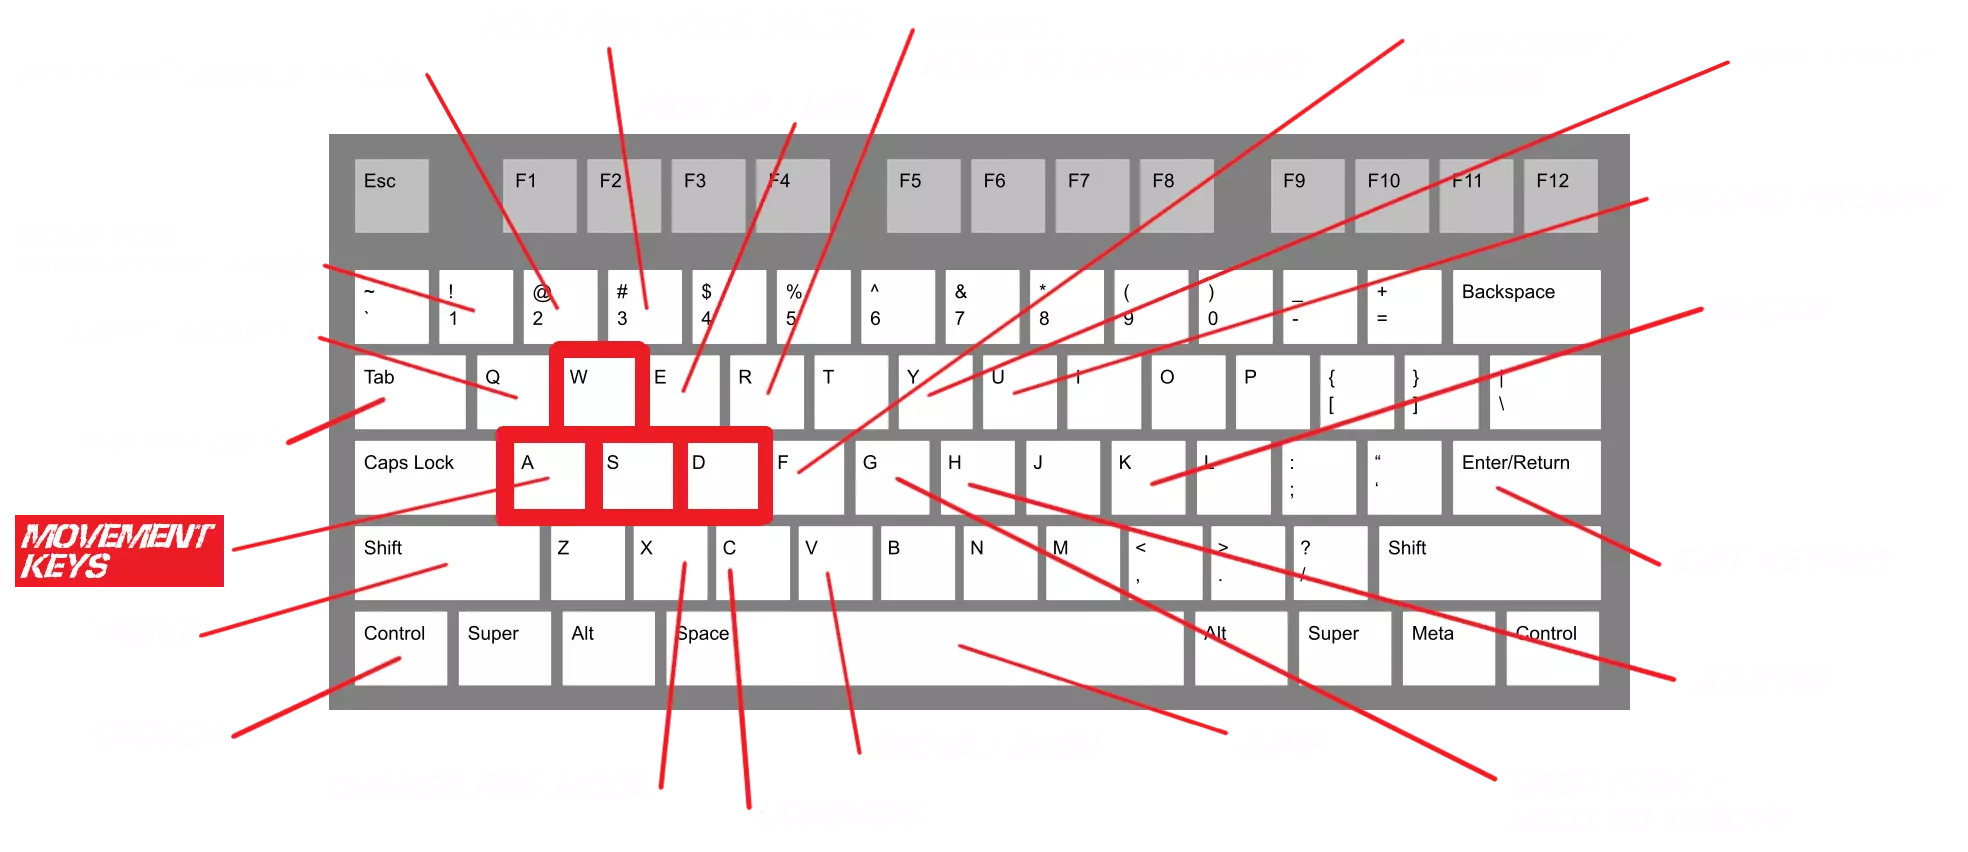
【注意事项】:如果你的物品栏中有Maglite(手电筒),可以在装备单手武器后按下F键,将其与单手武器同时装备。 如果物品栏中有Maglite,按住F键可以切换为Zippo打火机(不过在有Maglite的情况下真的不建议使用打火机,因为它在各方面都 inferior)。 有时你需要按住E键来完成依赖进度条的目标,例如转动曲柄。 我不会教你如何创建自定义绑定,如脚本或宏来加快输入速度或简化操作。我的目标是展示如何在不借助宏等人工辅助的情况下完成所有操作技巧。你可以随意尝试并创建自己的方案,但我不会在这方面提供帮助。 在本指南中,我将假设你使用默认控制设置,因此请根据你自己的个人控制方案进行必要的调整。 如果你的键盘上有数字小键盘,可以使用它更快地在按键面板上输入代码。 【平视显示器】(HUD)
《求生之路:纳粹僵尸部队》拥有简约但非常直观舒适的HUD界面。它包括: 1. 三个不同的径向菜单,可通过按住1、2、3键访问 2. 指南针,用于地图导航和追踪任务目标 3. 屏幕右下角的弹药计数器 4. 可拾取物品或需要携带的任务物品会有发光/轮廓效果 5. 生存模式下的额外HUD信息,如安全区生命值、僵尸数量等 6. 物品轮盘
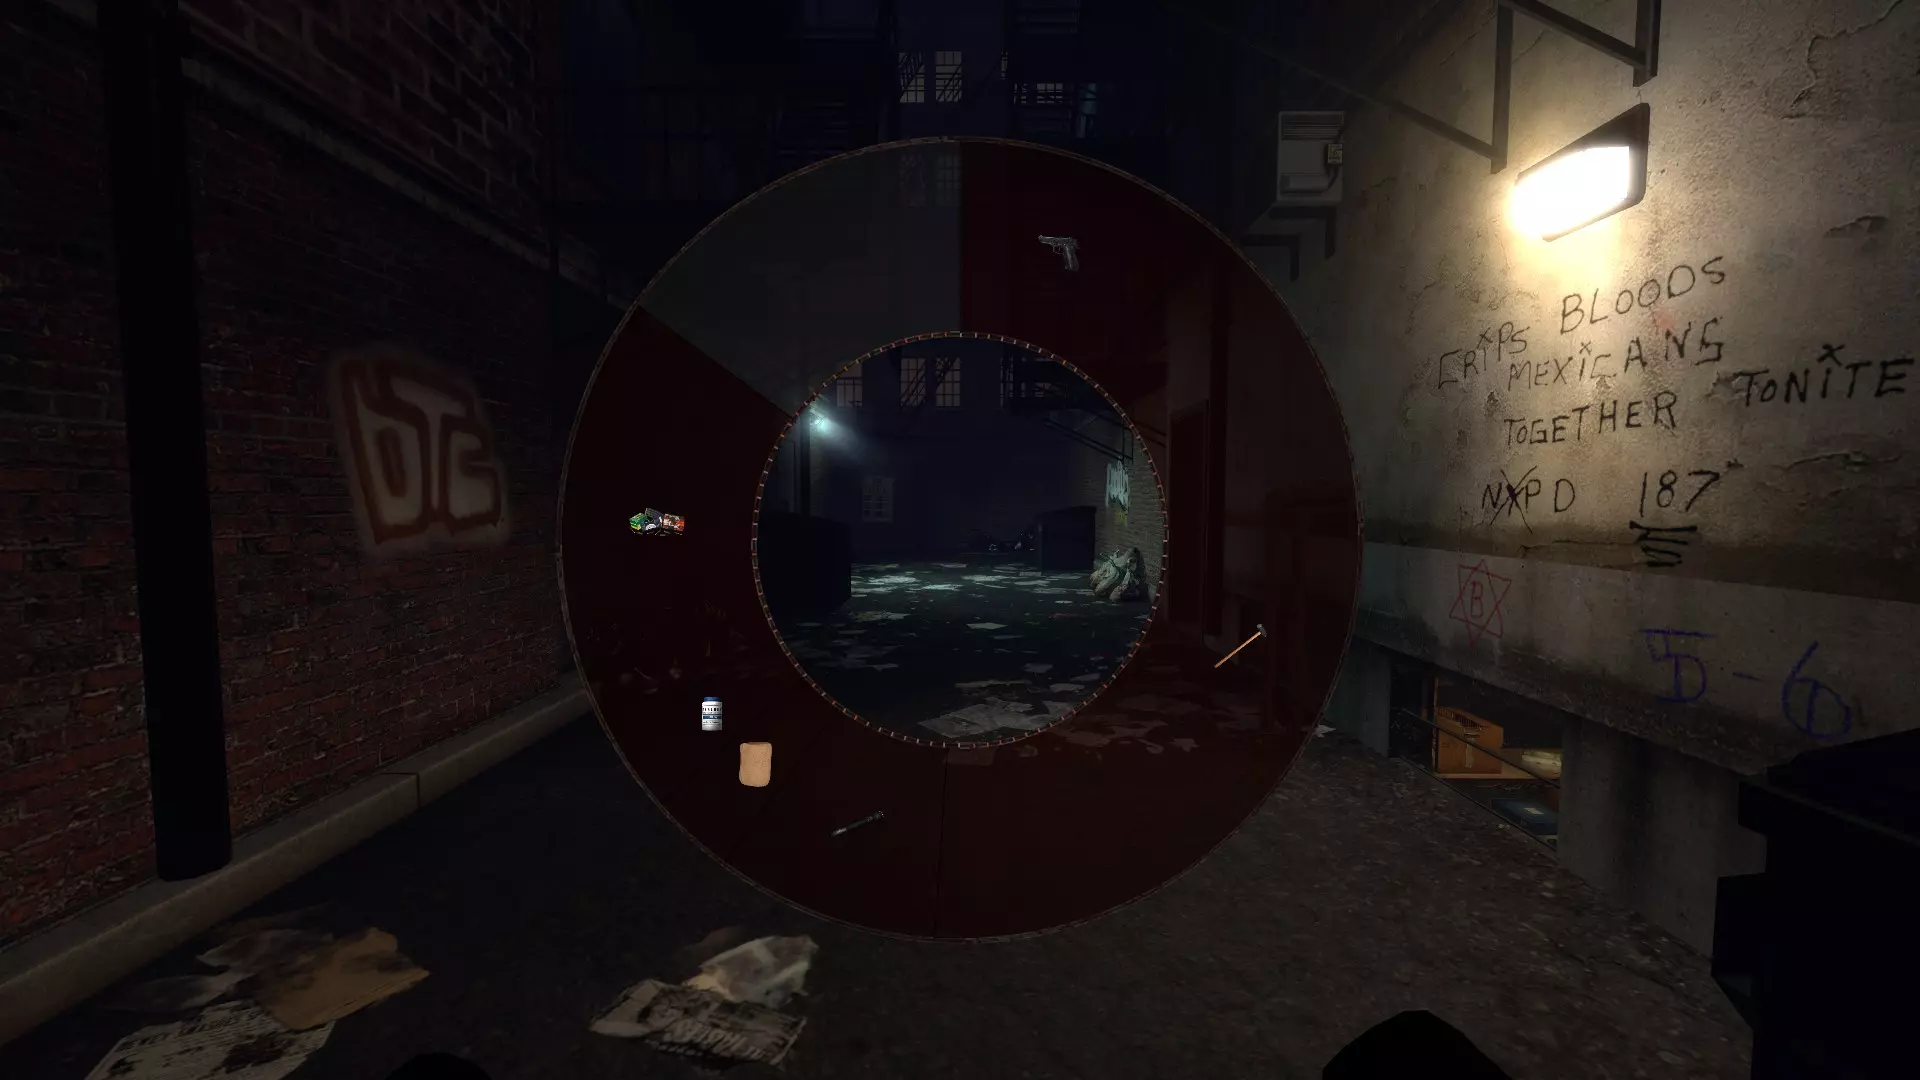
这是你的主物品栏,按住1键即可打开。轮盘上的灰色区域表示空闲空间,深红色区域则代表已被物品占用的空间。每个物品都有独特的图标,拾取时会根据其重量占据总物品栏的特定百分比(更多信息请查看【物品栏:移动速度/优先级】部分)。 左键点击物品可装备该物品,你也可以将鼠标悬停在物品上并松开1键,这样既能装备物品又能同时关闭物品栏。右键点击物品会直接丢弃它,这比先装备再按G键丢弃更快。只有当你已经手持该物品,或者想按住G键将其扔给可能需要的队友时,才需要使用后一种方法。注意:如果你捡起一把已装填的枪械,它会以常见的暗红色显示在你的物品栏中。如果它显示为灰色背景,则表示该枪械未装填弹药。 弹药轮:
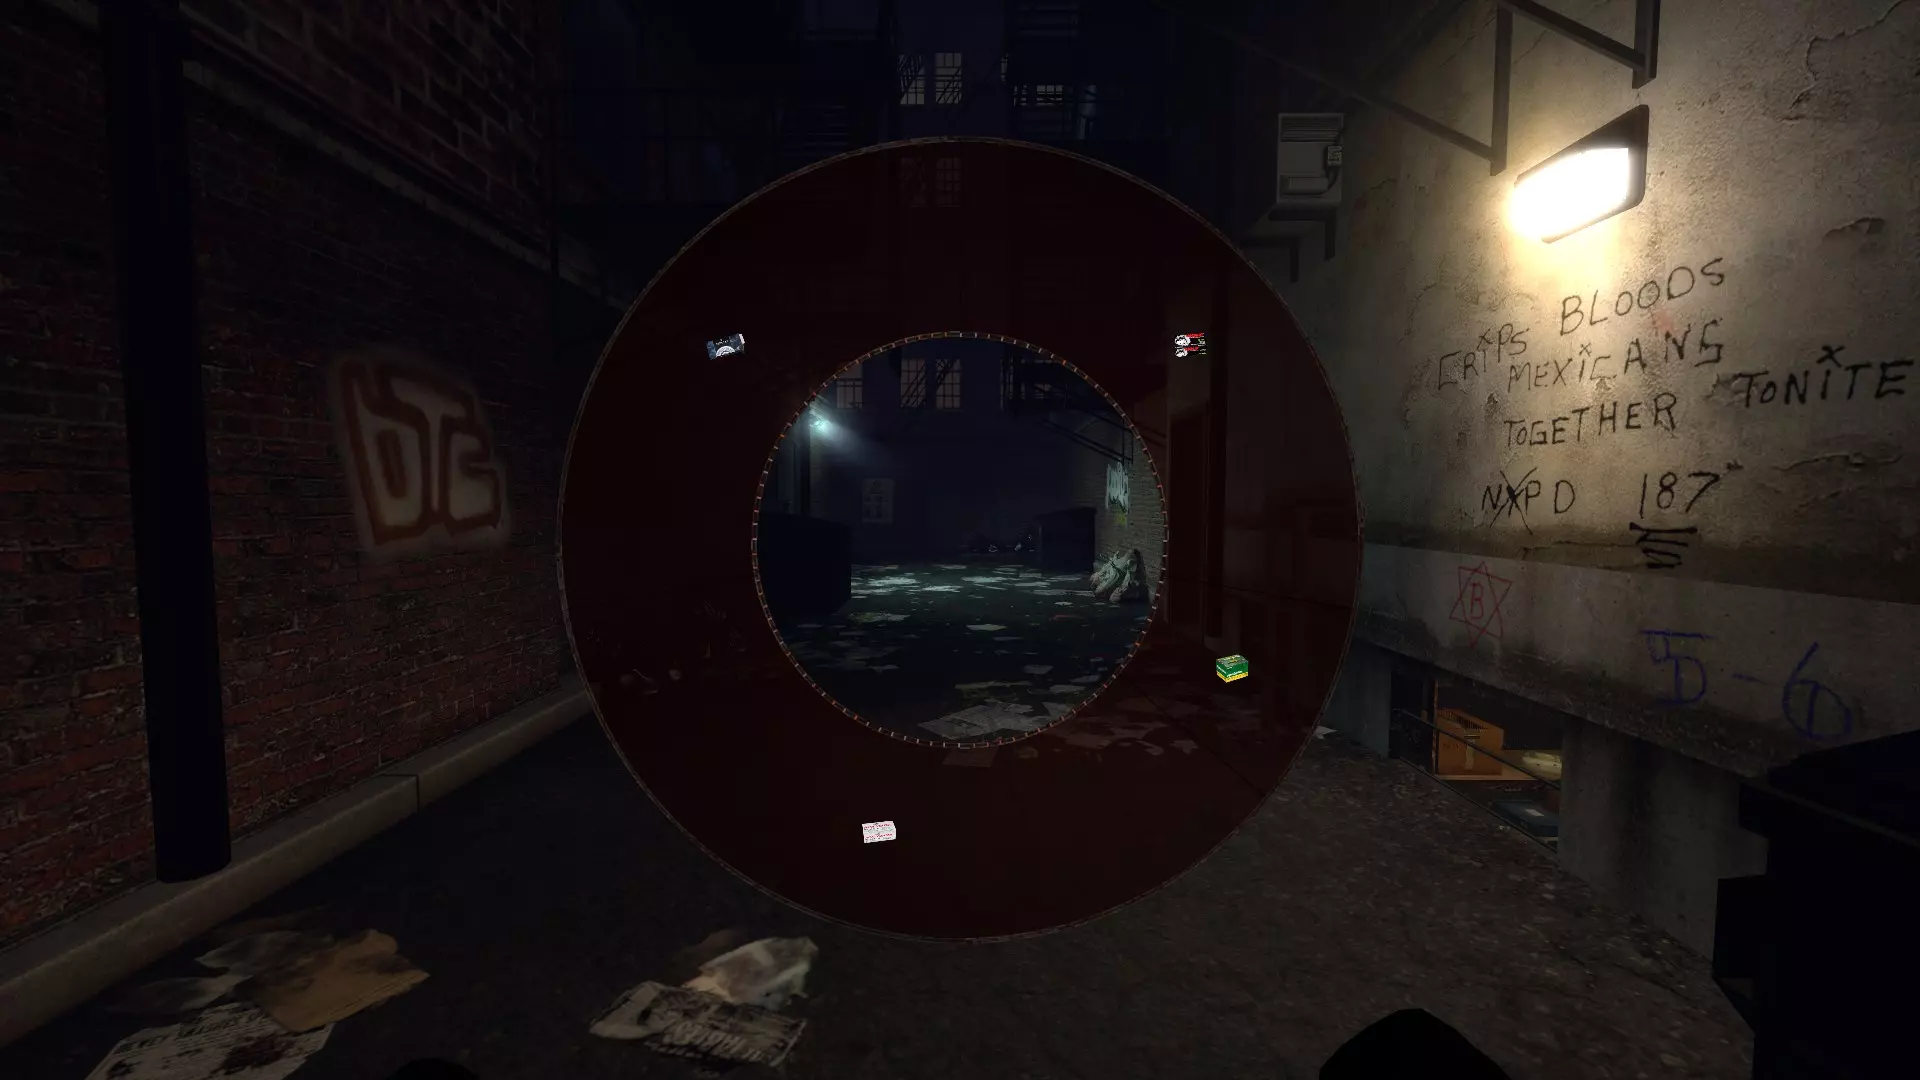
这是你的专用弹药管理次级背包。你可以按住2键打开它。由于《求生之路:纳粹僵尸部队》采用了写实的枪械设定,游戏中有多种口径的弹药,每种口径对应特定的武器。因此,次级背包是必要的,它能让你同时携带多种不同类型的弹药。 将鼠标悬停在每种弹药类型上,你可以查看确切的剩余弹数。左键点击任意弹药类型,会根据弹药种类丢弃固定数量的子弹。你也可以将鼠标悬停在弹药上,然后松开2键,快速丢弃一个弹药盒。此外,右键点击弹药类型可以一次性丢弃所有该类型弹药。如果你有两把弹药充足的枪械,并且想与队友分享其中一把,这会很有用。 • 语音轮盘
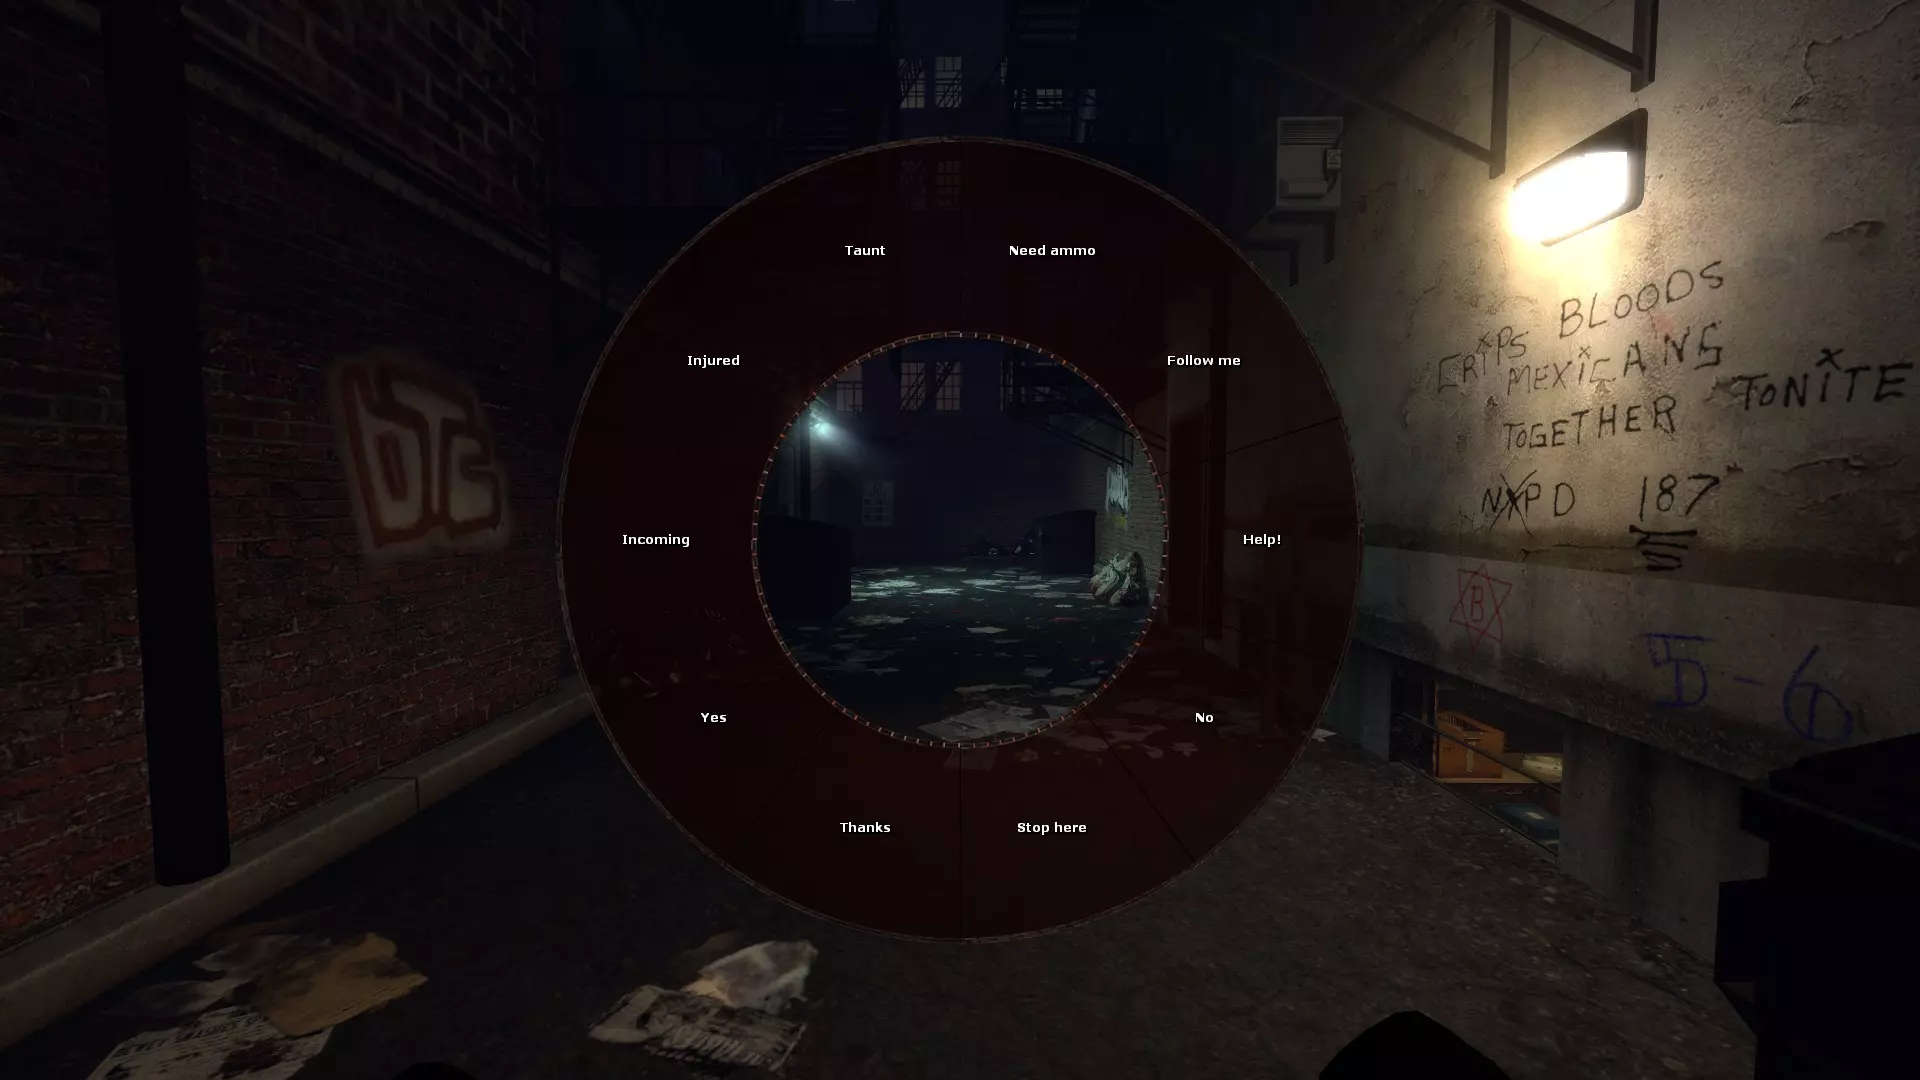
此轮盘包含用于与其他玩家交流的游戏内语音指令。打开方法为按住3键,将鼠标悬停在某个语音指令上,松开3键即可使用所选指令。或者,你也可以左键点击指令。这些指令在大多数情况下很少有用,但对于与不说你语言的玩家交流时很方便。 ◈ 注意:如果在行走时打开任何HUD轮盘,你可以在移动中管理物品栏,但在关闭轮盘前无法移动相机。这将启用一些实用技巧,这些技巧将在【物品栏:技巧与窍门】部分中解释。 • 指南针:
指南针是《求生之路:纳粹僵尸部队》的基础工具之一。你可以按C键调出指南针。 在目标模式下,指南针会显示你当前的任务,并显示多个箭头指向必要任务物品的位置和/或任务目标本身。 在生存模式下,指南针会显示你必须防御的每个安全区的位置。箭头位于屏幕底部、指南针顶部。 使用指南针时,你需要注意以下几个关键要点: 它仅提供水平方向指引:这意味着它会告诉你当前目标的方向,但不会告诉你是否需要从当前高度上升或下降才能到达目标。换句话说,大多数时候,目标点不会有直达路径,你必须上下梯子,或者寻找诸如通风管道之类的迂回路线和隐蔽入口。例如,在nmo_lakeside地图中,有许多门和交汇的路径,但通常每个目标点只会有一条可用路径,因此你需要进行探索。 不同地图中箭头的颜色可能不一致:关于如何以直观且一致的方式使用指南针标记颜色,从未有过统一标准。官方地图和自定义地图都存在这个问题,不过自定义地图的问题要严重得多。就官方地图而言,通常遵循固定规则:白色箭头指向主要目标(如门、收音机、发电机等)。而次要红色箭头则指向你需要获取以继续游戏的目标物品(如电池、丙烷罐、钥匙等)。紫色也常被用来标记目标物品,例如在nmo_fema地图中的凝固汽油弹罐。 对于自定义地图,颜色使用则各不相同,你可能会看到绿色、橙色、青色等多种颜色。不过,大多数设计良好的地图会尽量遵循官方地图的设定规则(白色箭头表示主要目标位置,红色箭头表示目标物品位置)。 • 物品发光/轮廓/覆盖层:
所有可放入背包的物品,其模型上都会有发光效果。当发光效果为绿色时,表示你可以拾取该物品;当发光效果为红色时,则表示因背包空间不足而无法拾取。 任务物品同样有发光轮廓,其颜色与指南针上的箭头颜色相对应,以帮助你识别它们。
注意:如果因为其他物品被高亮而无法拾取某个物品,或者物品卡在场景几何体中,你可以直接站在物品正上方并向下瞄准,然后按E键尝试拾取。 弹药计数器:
每次重新装填武器或按住R键检查弹匣弹药时,屏幕右下角会暂时显示弹药计数器。这是快速查看总弹药数量的方式,但可以通过主菜单的角色选择界面将其禁用。我个人会禁用它,因为我更喜欢简洁的HUD。你仍然可以通过按住R键并聆听角色的语音台词,以及分别打开弹药轮来检查 inventory 或弹匣中的弹药。 • 生存HUD:
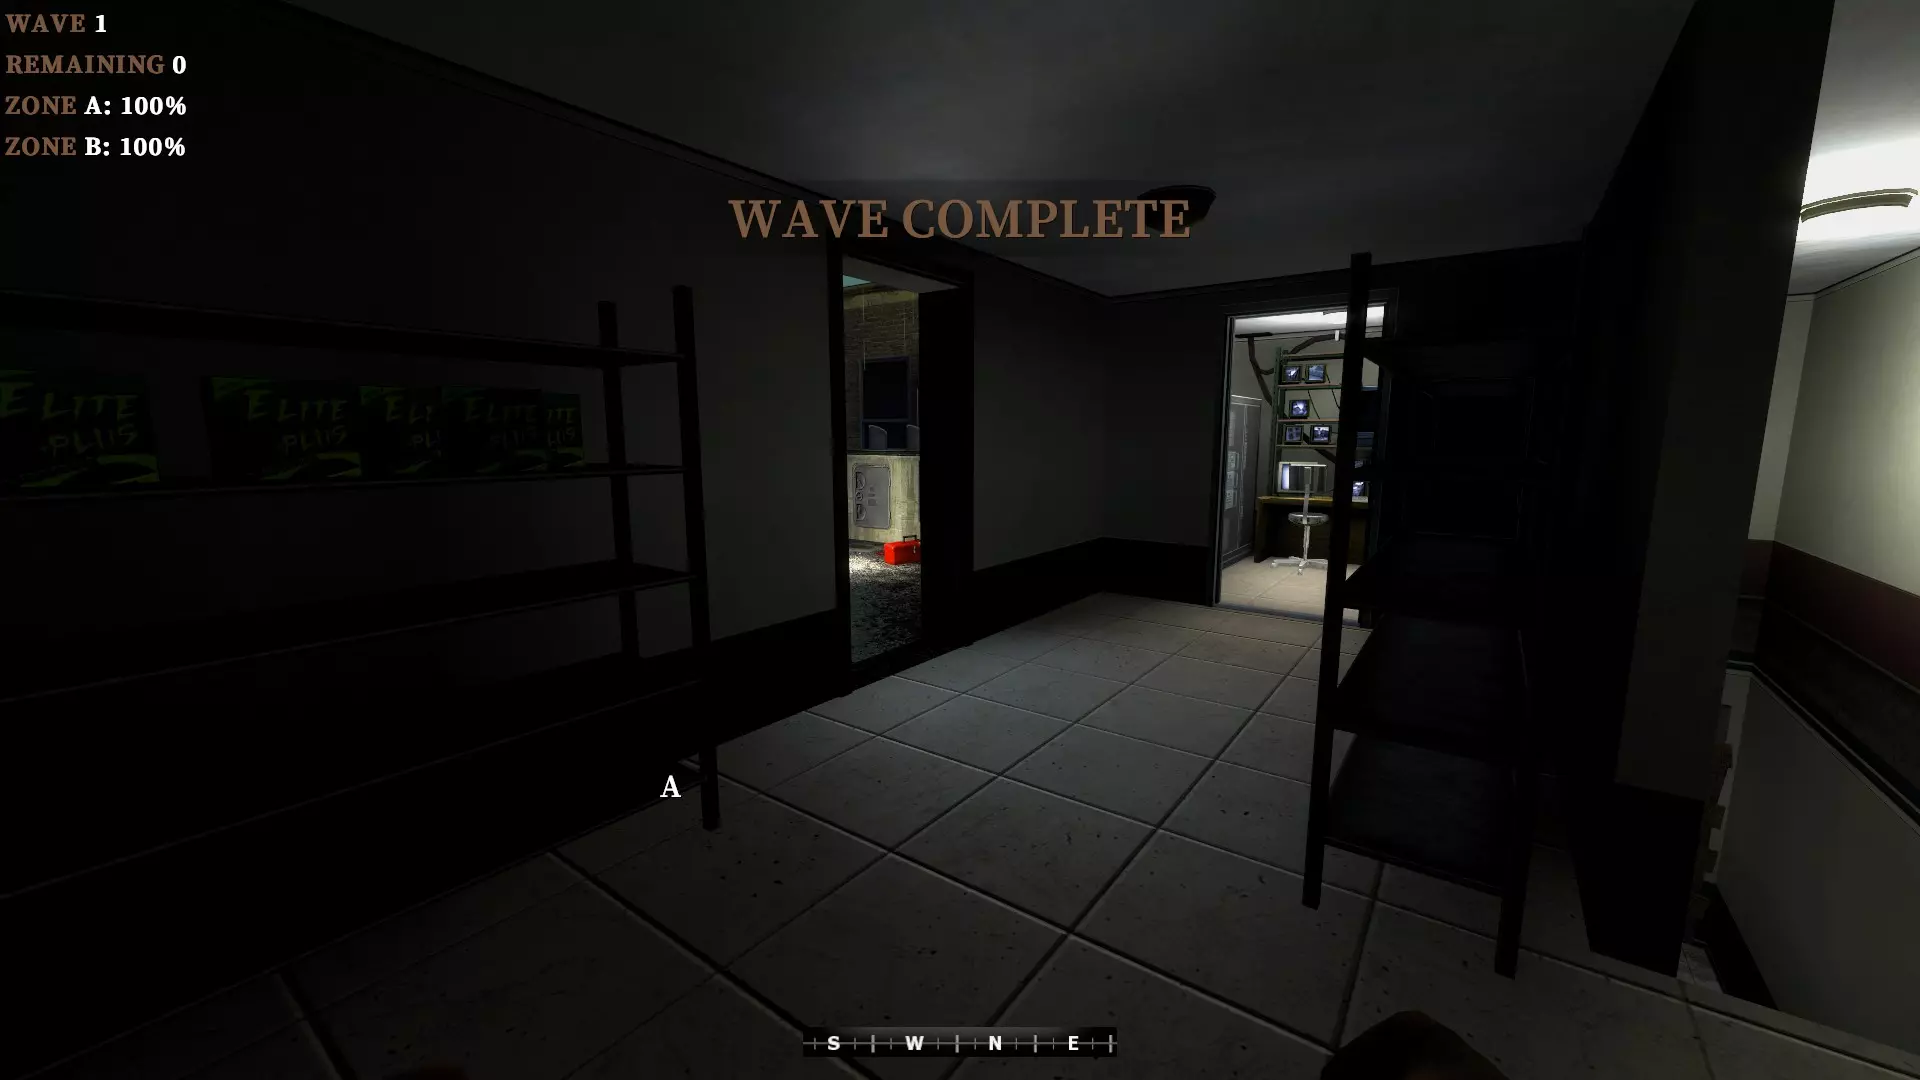
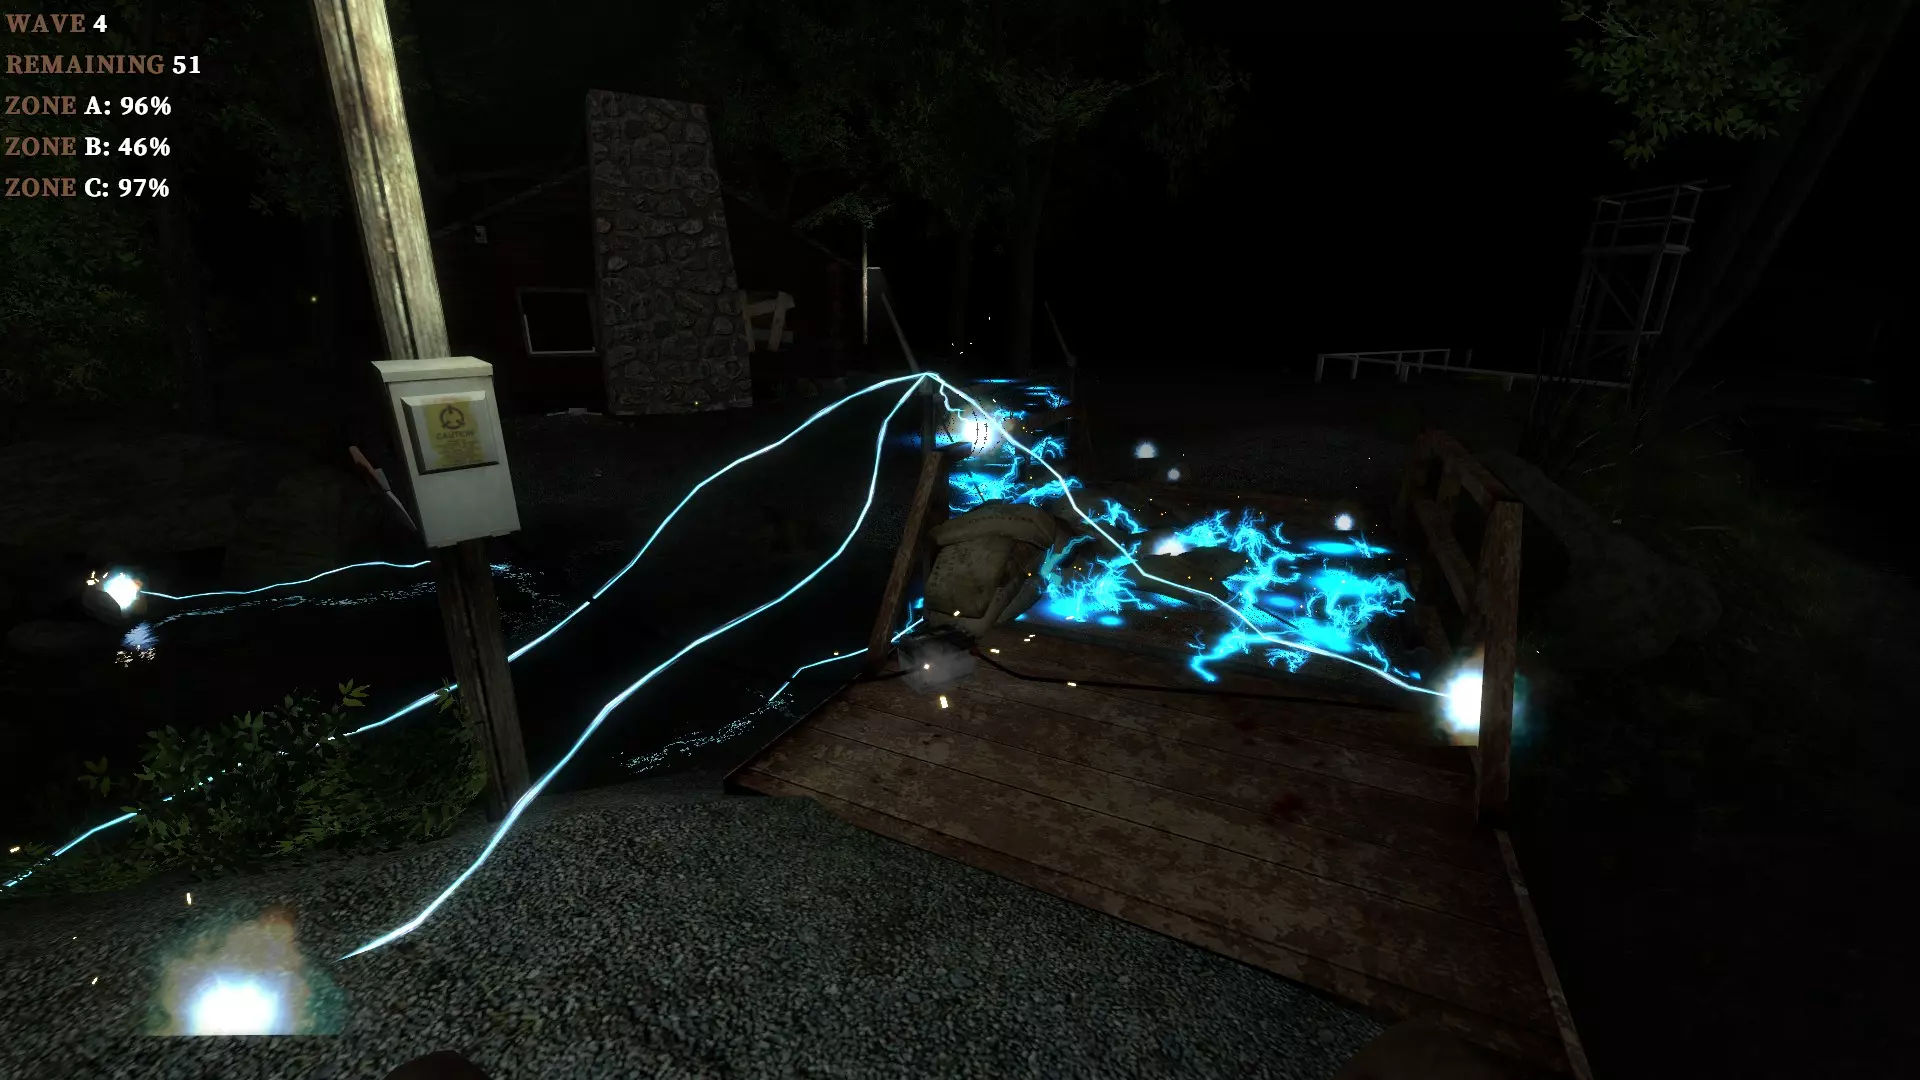
在游玩生存地图时,已提及的界面元素会新增额外的HUD信息。屏幕左上角会显示多个计数器,详细列出当前波次、每波僵尸总数、安全区生命值等信息。此外,还会广播地图事件消息,例如波次开始或结束。更多信息请查看【生存模式:基本信息】部分。快速提示(精简版)
For those of you who prefer reading some tips and learning the game by yourselves rather than reading a huge guide, I've compiled a few basic principles that you should learn if you want to play better during your first hours. Note that these are only basic tips to give you a better chance of surviving, there's nothing related to proper cooperation, interactions with other players or advanced mechanics. You'll miss a lot of important information this way, but I guess I don't need to tell you that already. ◈ RECOMMENDATION:I would still suggest you use the search function (Ctrl + F). Look for key words related to the topic you are interested in. Please note that learning things like the melee combat system still takes a long time and a lot of practice, so you'll only avoid some heavy reading, not the actual effort it takes to master the game. Here's the list of important tips for rookies: Learn to use most melee weapons. Start with the easier ones like the Sledgehammer / Pickaxe and work your way down. Learn their ranges, their damage breakpoints and animations. Try to kill Shamblers (slow zombies) with a single hit by charging your weapon, but don't overcharge since it will drain your stamina. Learn how long it takes to charge and kill them with each melee weapon without losing more stamina than necessary. Always try to shove zombies back with the V key automatically after each attack you perform. This will protect you in case the attack doesn't connect or the hit detection fails and you are within the zombie's attack range. Learn every ammunition type available and which firearms use each of them. Don't hoard ammo that you are not actively planning to use. Save your ammo for Runners and for Shamblers that are blocking the entrances to key areas. In general, try to use melee all the time, save the ammo for emergencies or for when speed is of the essence. Play online on Classic difficulty. Stay away from infinite ammo servers and Casual difficulty. Only try Nightmare difficulty once you have a firm grasp of the base mechanics. Runners and Zombie Children cannot attack you if you are walking forwards or sideways, as long as you don't use the S key to move backwards. Abuse this to avoid getting hit, rushing through chokepoints or to simply kill them when you have several of them chasing you at the same time. Don't be afraid of Runners, they are very exploitable and die easily if you have firearms or a Machete / Pickaxe / Sledgehammer / Fire Axe. Do respect them though, they can kill you in 3 attacks at full HP if you are unlucky enough. Play Survival maps on Classic difficulty to practice the basics of combat, then quickly move on to Objective maps. Start with basic ones like nmo_toxteth, nmo_lakeside, nmo_broadway, nmo_chinatown and slowly work your way up to the hardest official maps. After that, if you're still hungry for a challenge, move on to hard custom maps. Past that it's safe to say that you can then try these hard custom maps on Nightmare difficulty. Objective maps have random objective variations. Try to memorize them as you go when playing each map so you can complete them more efficiently. Jumping while passing through a bunch of zombies forces them to attack you with hand attacks, preventing you from getting grabbed. Pills only stop the infection symptoms temporarily. Once you take them, the 2 minute death countdown is reset and delayed for 200 seconds. Use the Pills when your screen is too dark to see, you're buying more time this way. However, if you are in a dangerous situation like being chased by Runners and you run the risk of getting stuck in the level geometry because you can't see, take them as soon as you need to, even if it's not the most efficient time to use them. Gene Therapy syringes make you permanently immune to the infection, regardless of whether you were infected or not at the time. The only side effect is a 10% chance of contracting temporary partial blindness that lasts 60 seconds. Medkits heal 30 HP and they stop your bleeding. You can use them at any time as long as you have less than 100 HP. Bandages heal 15 HP when used and they stop your bleeding. However, you can only use them when you are bleeding. Standing completely still (no shoves, attacks or any movement) increases your stamina regeneration drastically. Crouching does the same thing to a smaller degree but it only makes a difference if you are moving or performing actions, since the standing still state overrides the crouching state. Melee hit detection works sort of like it does in Chivalry: Medieval Warfare or Pirates, Vikings and Knights II. Your swings draw a hit detection arc that grants headshots when it collides with the zombie's head hitbox. The arc follows the attack animation of your current weapon. Do not crouch to kill Zombie Children. The easy and consistent way is to shove them before they attack, immediately walk forward while they are stumbling and finish them off before they recover. Don't rush your attack, wait until you are close. This is consistent but very slow, the fastest way is to learn your melee weapon's range and the correct timing to instantly kill the kid as soon as it reaches you, before they attack. To kill Zombie Children faster, compensate your aim to try to align the kid's head with the point on which the melee hit detection ark starts being drawn. For example, the machete attacks from RIGHT to LEFT, meaning that the ark starts being drawn at the center of the screen on the right. Therefore, if you aim to the LEFT of the kid's head, it will be closer to the earliest point in which the ark is drawn. This means that your attack will register faster and it will allow you to kill kids instantly as soon as they reach your attack range, and they won't hit you. This aim compensation works on all enemies, not just Zombie Children. Technical Jargon Glossary
由于游戏中包含大量不同的机制、技巧、策略和漏洞利用,使用技术术语在所难免。以下是本指南中可能频繁使用的缩写、词汇和表达列表: 仇恨值 = 敌人锁定玩家的行为 范围伤害(AOE)= 区域效果,指影响整个区域的伤害来源,例如火焰或爆炸 助推=使用物品或僵尸跳过障碍物或到达高处 瓶颈=狭窄空间或拥挤的关卡地形,僵尸可能会挡住你的路 碰撞体积=根据类型阻挡玩家、僵尸或物品的隐形墙 DOT=持续伤害,可能适用于火焰、受感染的水或燃烧瓶 安全点=地图上僵尸无法到达或攻击你的特定位置 重击=蓄力攻击=蓄力近战挥击,按住左键开始蓄力 即时命中=类似激光的攻击,与具有模拟物理效果的投射物相反 HP=生命值,指任何可以被杀死或摧毁的东西(玩家、门、僵尸) 击退=近战武器使敌人踉跄的几率轻击=快速攻击=无需蓄力的简单近战挥击(不按住左键) 视线=视线范围,指僵尸能否直接看到你 导航跳跃=一种地图实体,允许僵尸攀爬物体,无论高度如何 国民警卫队=国民警卫队,一种不常见的僵尸变体 目标模式=可指目标模式或目标地图 生存模式=可指生存模式或生存地图 寻路=僵尸如何从A点移动到B点的方式 耐力恢复=再生,指你恢复耐力的速度 随机数生成器=随机数生成器,指程序设定的随机性,例如被感染 奔跑者长队=大量奔跑者主动追逐你,形成类似长队的状态 踉跄=僵尸的动作因近战击退、爆炸或推搡而踉跄后退 触发器=强制事件发生的隐形地图实体,例如任务进度推进 ZC=僵尸小孩,一种不常见的僵尸类型,移动和攻击速度很快 Zeds/Zeekes/僵尸=泛指任何类型的僵尸 僵尸刷怪区=生成和重新生成僵尸的隐形地图实体 感染者:蹒跚者
你会遇到的最常见敌人类型是蹒跚者。它们是典型的慢速移动僵尸,灵感来源于乔治·罗梅罗的经典电影以及其他“活死人”类作品。 它们通常会大量生成,只有成群结队时才构成威胁,因为单个蹒跚者很容易被利用。它们会形成庞大的尸潮,如果关卡地形足够狭窄,这些尸潮可能会变成移动的路障,让你寸步难行。它们会缓慢但持续地追击,直到把你逼入绝境。 蹒跚者有三种攻击方式: 单手攻击:造成15点伤害 双手攻击:造成15点伤害 撕咬:造成15点伤害并可能感染玩家
根据敌人随机使用的攻击动画以及你实际受到的攻击,它们会造成不同的伤害量。例如,双手攻击后总会接另一次双手攻击,所以如果你被两次攻击都命中,会损失30点生命值。另一种可能是仅单次单手攻击,造成15点伤害。对于奔跑者来说,这种情况更加多样化,因为它们两种不同的攻击会造成不同的伤害值。我们将在下一节讨论这个问题。 生成机制: 在生存模式中,所有僵尸都在地图边界外以受控方式生成,具体由每波僵尸的程序设定决定(更多信息见“生存:基本信息”部分)。而在目标模式中,僵尸则通过生成刷动态生成。当玩家与这些实体相距足够远且未面向它们时,它们会生成成群的蹒跚者,以保持地图周围稳定的僵尸密度。这些生成的强度由每个生成刷的独立程序设定决定。 不过在某些情况下,奔跑者并非通过刷生成,而是由地图创作者单独生成,以维持一致的难度,因为奔跑者的生成由生成刷内部的概率值决定。这意味着有时你可能会遇到大量奔跑者与蹒跚者一同生成,但当你重玩该区域时,生成数量可能会少很多。一般来说,这些手动生成的僵尸在被杀死后不会重生,除非有其他专门设计用于此目的的实体。 注:所有.gif文件由Infinite提供 感染者:奔跑者
第二种最常见的感染类型是奔跑者。它们是行动迅猛的僵尸,由于极高的伤害输出而非常危险。 奔跑者的灵感来源于《僵尸世界大战》或《惊变28天》中的狂奔丧尸。 它们的行为与蹒跚者完全相同,但移动速度极快,这使得玩家可以利用其特定行为更有效地将其消灭。 奔跑者同样拥有3种攻击方式,但造成的伤害更高: 单手攻击:造成20点伤害 双手攻击:造成40点伤害 撕咬:造成15点伤害,并有几率感染玩家
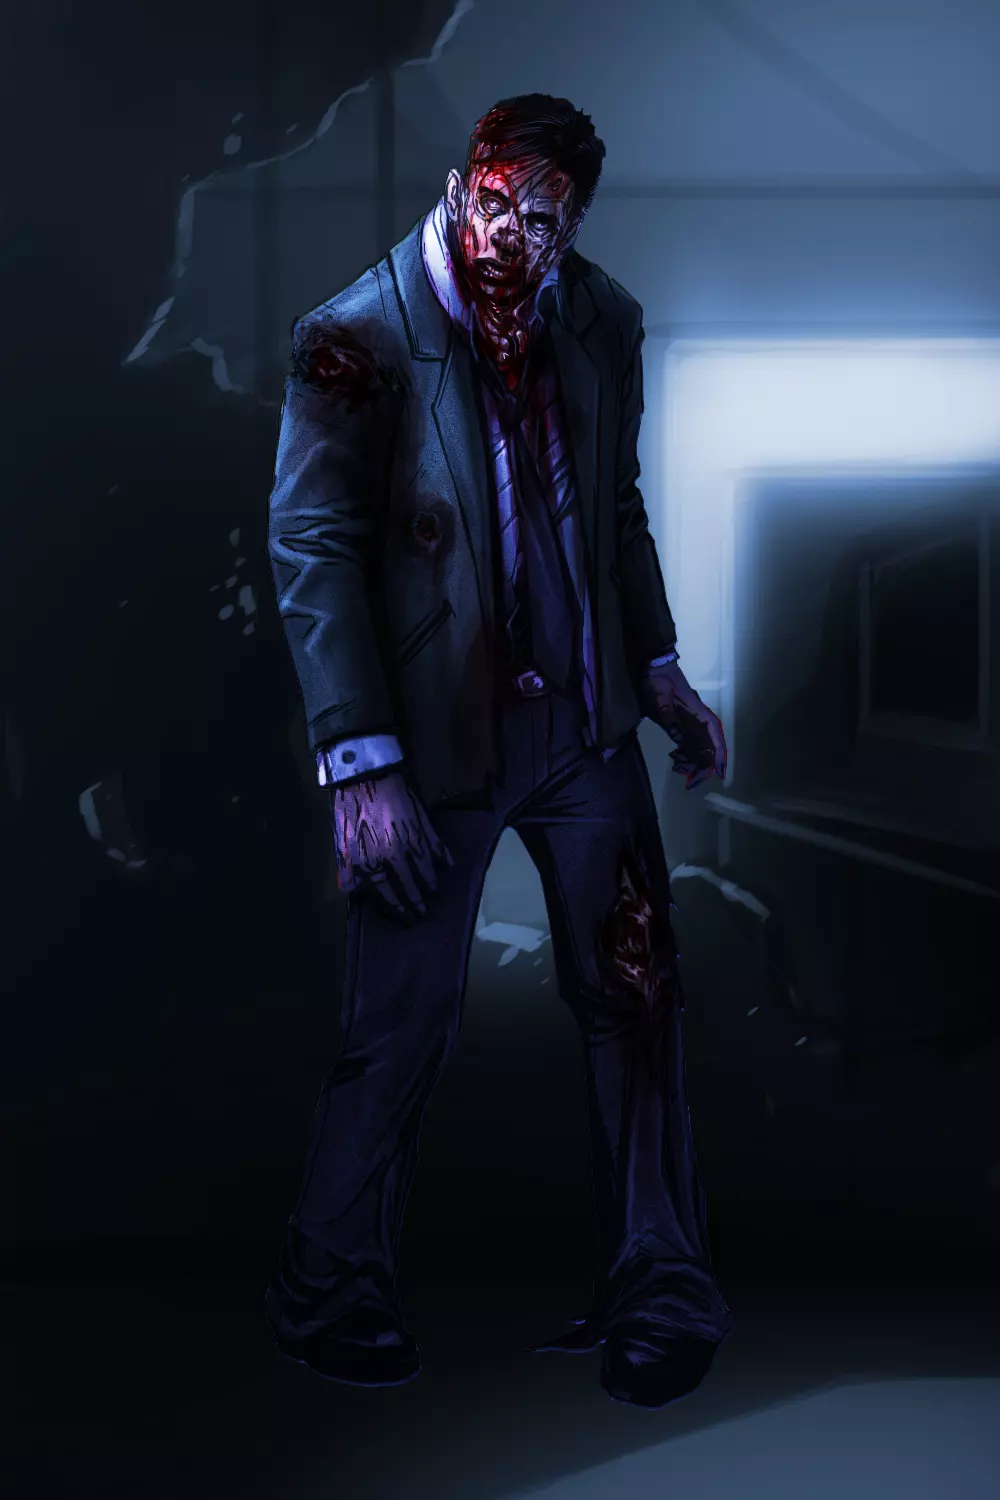
这表明,如果你运气不佳,且特定攻击动画组合在一起,一旦全部命中,你可能会几乎瞬间被击杀。例如,双手攻击会造成40点伤害,之后必定会接另一次双手攻击,再造成40点伤害。然后,它们可以快速连续发动两次单手攻击,每次造成20点伤害。这种连招足以在约3秒内击杀100生命值的你。 • 复活者(僵尸幸存者):我们稍后会在“玩家状态异常:感染/流血”部分详细讨论感染机制,但基本上,当幸存者被病毒感染后,若因任何方式死亡(除爆头或爆炸外),其尸体会复活为奔跑者。这些复活者的功能与普通奔跑者完全相同,只是它们的皮肤和模型与感染状态下死亡的幸存者一致。它们拥有相同的生命值、伤害和行为模式,没有更高感染几率等任何特殊属性。 • 僵尸AI:这些AI行为为所有敌人类型所共有,但在此处解释是因为奔跑者更能体现这些行为。僵尸的目标选择基于视线(LOS)和距离,这意味着它们要开始锁定你,必须先直接看到你,然后你必须是离它们最近的目标。如果另一名玩家比你离它们更近,它们会全部跟随那名玩家。 在限制方面,僵尸无法在你向前行走时攻击你,因为它们缺乏移动中攻击的动画。不过,如果你正在后退,它们就能够追上你并发起攻击。此外,它们无法流畅地进行急转弯或曲线移动,必须先停止移动,调整自身位置,然后才能再次开始移动。换句话说,它们的行动模式是:移动→停止→转向面对你→移动→重复。 最后,僵尸之间会发生碰撞,这会导致它们导航失败,进而尝试朝不同方向移动以避开障碍物。但在3次导航尝试失败后,它们会暂时忽略与其他僵尸的碰撞,以避免陷入卡住的状态。 所有这些行为都可以在很大程度上被利用,结合合适的武器和地形,你可以施展多种战斗技巧来高效击杀任何敌人。例如,如果你要对付被蹒跚者尸群困住的奔跑者,可以围绕尸群转圈,迫使奔跑者改变方向并与其他多只僵尸相撞。这会加速其三次导航尝试的失败,使其失去碰撞体积。此时,它会快速向你冲刺,你便可安全击杀。 如果需要应对大量尸群,你也可以利用它们有限的追逐能力,将其引到身后或绕圈风筝,从而相对安全地将其击杀(详见【战斗:僵尸操控】部分)。 另一个细节是,游戏中的僵尸可以打开大多数普通门,因此它们会跟随你进入建筑物等地方。你必须时刻注意这一点,因为被困在狭窄的室内是非常危险的,你无法躲避尸潮。如果你没有像样的武器杀出一条血路,这可能就是死刑判决。不过有些门只能由玩家使用,这对于避免被逼入绝境很有用(查看【地图学习:记忆】部分)。 感染者:僵尸儿童
僵尸儿童是一种不太常见的感染者类型。它们的移动速度和奔跑者一样快,通常会和奔跑者一起生成,形成极其危险的尸潮。其设计灵感主要来源于《行尸走肉》电视剧第一季中的僵尸女孩,也可能参考了《活死人之夜》中的卡伦·库珀这一角色。 它们的行为与奔跑者类似,但有一些区别。最重要的一点是,它们所有的攻击动画都非常快,几乎能瞬间对玩家造成伤害,这会导致玩家的镜头比面对其他僵尸时更频繁地剧烈晃动,除非玩家远离并停止受到伤害,否则将无法击中它们。因此,不知道如何迅速杀死它们会让你损失比想象中更多的生命值。它们只有一种攻击方式,即造成8点伤害的单手攻击。不存在造成双倍伤害的双手攻击变体。此外,它们无法抓取并撕咬你,因此也无法对你造成感染。
它们本身威胁不大,除非它们在危险区域困住你(它们会在你躲避蹒跚尸潮时进行身体阻挡),或者数量众多,比如在nmo_broadway2地图的篮球场(由于它们的攻击速度,靠近其中一个就很困难,因为另一个会迅速偷偷靠近并攻击你,每次攻击都会缓慢消耗你的生命值)。 要了解如何应对它们,请查看【战斗:应对僵尸儿童】部分。 感染者:爬行者
爬行者是一种不常见的感染者类型,你可能会在任何地图中偶尔遇到它们,因为它们有2%的概率替代蹒跚者生成。 它们本身相当无害,因为它们是所有僵尸中生命值最低的,并且只能咬你,因此它们的伤害上限为15点生命值。只有当你被其他僵尸分散注意力并被包围时,它们才会变得危险,因为它们会悄悄靠近并抓住你。 你可以用任何东西杀死它们,甚至用拳头一击即可,这是推荐的做法。原因在于拳头的攻击范围很长,并且不像其他近战武器那样基于轨迹弧线来判定命中(可查看【战斗:基础近战机制】了解更多相关内容)。拳头本质上属于瞬击武器,因此攻击会精确命中你瞄准的位置。所以,拳头攻击的命中判定始终稳定一致,并且其消耗的耐力远低于大多数近战武器的快速攻击。
它们的啃咬速度远高于其他僵尸,因此在这种情况下仍能造成相当大的伤害,因为你可能需要几秒钟才能反应过来自己是被它们抓住了,而不是普通的蹒跚者(它们也有机会感染你,因为它们唯一的攻击方式就是啃咬)。它们在有浅水区的地图中也很危险,因为此时它们几乎难以被发现。 爬行者在大多数对局中影响不大,但有一种名为【爬行者跳板】的有趣技巧例外,你可以跳到它们身上,将其用作平台来登上其他僵尸,从而躲避整群僵尸。你可以在“移动:高级技巧”部分找到更多相关信息。注意事项:当爬行者试图抓住你时,会播放一个动画,它们在抓取前会稍微后退。如果你恰好在此时推搡它们,推搡可能无法稳定生效,导致被咬伤并可能感染。建议仅使用当前装备的武器击杀爬行者(显然是在你即将被抓住的情况下,如果不是,就像我之前提到的那样用拳头)。 感染者:国民警卫队
重要说明:在当前补丁中,国民警卫队僵尸的抗性【不生效】。它们的行为与普通僵尸类型完全一致,即奔跑者、蹒跚者或爬行者。如果此问题得到修复或更改,我将更新此部分并进行相应修正。 游戏中除僵尸儿童外的每种僵尸类型,都有国民警卫队(NG)变体。 它们本质上与原始类型相同,但有一些额外特征:

首先,当它们被击杀后,会掉落身上携带的几种物品之一: 贝雷塔M9空枪 一盒9毫米弹药 一个5.56毫米弹匣 绷带 手榴弹 其次,它们的 kevlar 背心和头盔拥有随机的伤害抗性。 由于你的所有攻击都应瞄准僵尸的头部,因此 kevlar 背心的抗性无关紧要。但头盔的抗性会显著提升它们的生存能力。有时你用砍刀轻砍2下就能杀死它们,有时却需要6到7下。枪械攻击也是如此,所以务必时刻留意,因为如果不小心,它们的抗性很容易将你逼入绝境。 被感染者:燃烧僵尸
所有僵尸类型都能被多种来源点燃,例如环境火焰、爆炸桶、汽油罐或燃烧瓶投掷物。处于燃烧状态时,它们的生命值会立即降至原始值的约10%,因此通常会在10秒内(默认燃烧持续时间)死亡。 例如,一只刚生成的蹒跚者拥有500点生命值,一旦被点燃,生命值会降至50-60点,这使其会自行烧死,或者你可以用任何近战武器轻松将其击杀。 奔跑者、僵尸小孩和爬行者会保留它们通常的行为,但蹒跚者在被点燃后有几率开始冲刺。它们实际上不会变成奔跑者,而是保留所有自身属性,只是切换为与奔跑者相同的移动动画。
与普遍看法以及《求生之路:纳粹僵尸部队》官方指南所述内容相反,燃烧状态的僵尸无论其类型如何,都不会造成双倍伤害。它们在进入燃烧状态前造成的伤害会保持不变。因此,如果蹒跚者(Shambler)着火,即使它们开始像奔跑者(Runner)一样移动,其造成的伤害仍会根据攻击动作组合分别为15点和30点,而非20点和40点,或者30点和60点。 此外,由于燃烧的僵尸很容易被击杀,所以在游戏中它们通常不会构成太大威胁。不过,如果有燃烧的僵尸在你身后突然冲刺并对你发动突袭,或者你在狭窄区域引燃了大量僵尸,它们可能会将你逼入绝境并将你击杀。但这些都属于极端情况,并不常见。注意你使用燃烧瓶或汽油罐的方式,提前告知队友你即将点火,这样大家就不会有事。 武器:近战
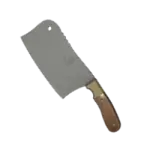
在《求生之路:纳粹僵尸部队》中,近战武器是玩家最重要的工具。虽然我之后会详细说明,但基本上,只要你不被击中导致生命值减少,近战武器就能让你持续击杀僵尸,除了时间外不会消耗任何资源。 这对两种游戏模式都极为有用,因为在目标模式中僵尸会不断重生,而在生存模式中,你的任务是消灭海量的僵尸。 了解在不同场景下哪些武器更有用,对于在一些最难的地图中生存至关重要。同时,知道哪些近战武器性能较差,以便尽快更换它们,从而提高生存几率,这一点也很重要。 人们通常会对哪些近战武器最好或最差提出许多不同的观点。就我所见,其中大部分都并非基于能真正量化其实际实用性的真实数据。 以我个人而言,我会尽量做到简单、简洁且客观。我会将所有近战武器按实用性分为三个类别:【较差】、【普通】和【高 tier】。这一分类将基于特定的武器属性,这些属性使其在《求生之路:纳粹僵尸部队》的游戏玩法中更具实用性。以下是我用于对武器进行优先级排序的各项数据(从高到低): 1. 击杀奔跑者所需的快速攻击次数(越少越好) 2. 一击击杀蹒跚者所需的蓄力时间(越少越好) 3. 推击和攻击动画的速度(越快越好) 4. 有效射程长度(越长越好) 5. 快速攻击和蓄力攻击消耗的耐力值(越少越好) 6. 在玩家背包中占据的空间(越少越好) 7. 是否具备可攻击多个僵尸的横向攻击动画 8. 是否能与手电筒配合使用 9. 每次攻击的击退几率(越高越好) 【重要提示】:此分类不适用于噩梦难度,因为该难度下僵尸的生命值会翻倍。战斗机制发生了显著变化。更多信息请查看【噩梦:策略差异】部分。 • 次等近战武器:在此类别中,我会将所有我认为在绝大多数情况下都过于弱小、无法作为可靠武器的近战武器归为此类。其中有些可能比其他的稍好,但总体而言,除非实在别无选择,否则在整个对局中都不值得保留这些武器。一旦你看到任何不属于此类别的其他近战武器,就应该立即丢弃当前的次等武器。这必须是下意识的行为,甚至无需权衡利弊。 不被视为次等武器的最低伤害要求是:能够在2次快速攻击或1次蓄力攻击(约3秒蓄力)内击杀蹒跚者和奔跑者。你会发现FUBAR和铲子都超过了这个要求,但由于其他几个因素,它们仍然被认为是次等的。 - 厨房 knife
整体伤害极低,达到关键的蹒跚者(Shambler)阈值所需的充能时间极长,有效射程极小且耐力消耗极高。 - 活动扳手:
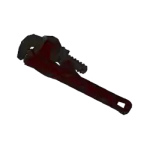
总体伤害极低,达到关键的蹒跚者(Shambler)伤害阈值所需的充能时间极长,有效射程极小,且快速攻击动画存在延迟。 - 棒球棍:
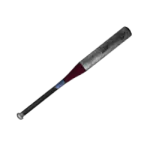
总体伤害较低,达到关键的蹒跚者伤害阈值需要较长的充能时间,推搡和攻击动画延迟严重,如此低的伤害却消耗极高的耐力,且无法装备手电筒。 - 砍刀:
整体伤害较低,达到关键的蹒跚者(Shambler)阈值需要较长的充能时间,推击动画存在延迟,有效射程较短。 - FUBAR
游戏中最高的近战伤害,但代价是快速攻击和蓄力攻击都极度消耗耐力,且推击、快速攻击和蓄力攻击的动画延迟严重。 - 铲子:
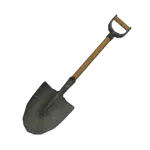
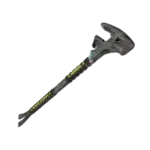
在伤害阈值方面,它与下一类武器(普通级)相同,但遗憾的是其他属性差距太大。其快速攻击动画有明显延迟,且与下一类近战武器相比过重。此外,无法装备手电筒。不过它是该类别中最好的武器,因此建议优先选择它而非之前的武器。 【重要说明】:我排除了部分物品(路障锤、手电筒、焊机和灭火器),因为它们已在“物品:工具”部分详细说明。尽管这些都属于次级近战武器,但你应将它们的使用限制为仅作为完成任务的工具(如焊机)、辅助战斗/移动(手电筒)或生存防御(路障锤)。如何在找到更好的近战武器前更好地使用性能较差的近战武器:除非面对僵尸小孩或爬行者,否则务必避免快速攻击。这是因为它们极差的攻击动画延迟加上整体较低的伤害,会大幅增加你受到攻击的几率。 每次挥击后务必推击,以最大程度降低被击中的几率(更多信息见【战斗:基础近战技巧】部分)。 尽量对蹒跚者和奔跑者使用消耗最少耐力的单次蓄力攻击来实现一击必杀(查看【战斗:基础近战技巧】中的【不间断击杀蹒跚者】要点)。 武器:近战(续)• 普通近战武器:这些武器强度和稳定性足以长时间使用,且不会显著降低你的生存几率。它们都能通过2次快速攻击和1次蓄力攻击(3秒蓄力)击杀蹒跚者,与奔跑者相同,但蓄力时间略短。 使用它们可以勉强应对所有类型的感染者,但遗憾的是,与游戏中最稳定的近战武器相比仍有差距。这可能是因为它们在一个或多个对安全进行近战至关重要的关键方面存在不足。因此,如果你找到下一类(高 tier)中4种最强大的近战武器中的任何一种,一定要放弃这些武器,转而使用它们。 - 工兵铲(镐头形态)

铲子形态的伤害较低,因此可以通过右键切换为镐子形态。攻击动画很快,但有效攻击范围较短,这使得在僵尸发动攻击前挥舞武器变得极其困难。此外,所有挥击动作都是垂直的,除非僵尸彼此卡在一起,否则一次无法击中多个僵尸。无法同时装备手电筒。 - 撬棍:
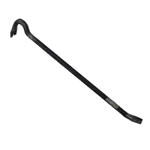
仅比工兵铲稍好一些。有效射程长得多,提升了安全性和稳定性,但推击和快速攻击的动画延迟严重,降低了武器的响应速度和整体效能。快速攻击为横向,可根据需要击中多个目标,且可搭配手电筒使用。 - 铅管:

这是第一款真正像样的近战武器。没有延迟动画,有效攻击范围长,横向快速攻击可击中多个目标。不过,它每次攻击消耗的耐力比平均水平多,容错率更低。其特点是每次攻击都有较高的击退几率,如果你没能一击杀死僵尸,这能起到安全保障作用。它还可以与Maglite(强光手电)一同装备。 - 短柄斧:
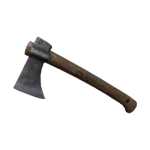
无延迟动画,横向快速攻击可应对多个目标,快速攻击和蓄力攻击的耐力消耗都极低。缺点是:有效攻击范围非常小且没有击退效果,因此需要大量练习才能掌握。如果能熟练使用,你可以运用一种与砍刀通用的实用战斗技巧【轻攻击连击】(详情可查看“战斗:进阶近战技巧”部分)。总之,短柄斧在实用性上优于铅管,但由于攻击范围非常有限,使用难度要大得多。此外,它还可以搭配强光手电使用。 • 高阶近战武器:这一类别包含游戏中仅有的4种能通过1次快速攻击击杀奔跑者的武器。因此,一击击杀蹒跚者所需的充能时间要么非常短,要么武器只需一次快速攻击就能将其击杀。FUBAR也符合这些要求,但其所有其他缺陷仍使其表现欠佳。 所有武器都有特定的用途,其效果会根据你所处的情况和正在游玩的地图而有所不同。尽管有一把武器(砍刀)在其他武器中占据优势地位,但所有武器都很出色。因此,决定从一种武器切换到另一种武器将取决于你的游玩风格偏好、你正在游玩的地图以及你队友的类型。此外,这4种是在噩梦难度下唯一真正可行的近战武器,你将在本指南末尾的【噩梦:策略差异】部分看到这一点,它们的 effectiveness ranking也会发生巨大变化。 - 消防斧:
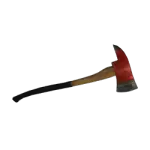
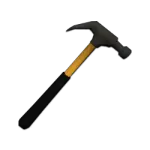
它可以通过1次快速攻击击杀奔跑者,通过约1.7秒的长蓄力攻击击杀蹒跚者。遗憾的是,该武器在此排名最低,因为其快速攻击动画存在一定延迟,导致难以熟练使用。此外,其所有其他属性,如重量和耐力消耗,均被砍刀全面超越。 - 大锤:
它可以通过一次快速攻击杀死奔跑者和蹒跚者。也可以通过一次无需蓄力时间且不会造成净耐力损失的充能攻击杀死它们(查看“战斗:基础近战技巧”部分中的【大锤/镐充能攻击滥用】要点)。 更高的伤害使其突破了消防斧无法达到的一个非常重要的阈值,但攻击动画的延迟略高,并且如果使用除无蓄力时间的充能攻击之外的任何攻击方式,耐力消耗会显著增加。 这种对蹒跚者的一击快速击杀阈值,让你可以立即穿过被1到3个蹒跚者阻挡的狭窄通道(查看“战斗:基础近战技巧”部分中的【重型近战蹒跚者快速击杀】要点)。作为额外优势,它和所有钝器一样拥有较高的击退几率,为你提供额外的安全保障。 - 镐子:

本质上与大锤相同,但有效射程略短,击退几率也较低。不过,由于其蓄力攻击动画快得多,因此可以使用一种名为【镐子攻击冷却取消】的技巧,显著提高击杀蹒跚者群的速度(详见“战斗:高级近战技巧”部分)。这在噩梦难度或蹒跚者密集的地图中非常有用。 - 砍刀:
在经典难度下,砍刀是游戏中综合性能最佳的近战武器,就是这么简单。它极其轻便,这意味着你可以携带所有医疗物品、一把轻型或重型枪械以及大量弹药。它的伤害基本与消防斧相同(仅在对付蹒跚者时,蓄力攻击的击杀速度略慢),但快速攻击动画的响应速度要快得多,因此用它对付奔跑者非常轻松。 此外,它的耐力消耗也低得多,能让你在相当长的时间内不间断地击杀奔跑者。和短柄斧一样,你可以使用轻攻击连击技巧来快速应对小规模的蹒跚者群。虽然它在击杀大量蹒跚者时可能比镐子或大锤慢一些,但大多数情况下,这种差异并不足以决定比赛的胜负(不过在噩梦难度的某些地图中,它确实更具优势)。 另一方面,无需排成一列就能应对大量奔跑者群的能力通常更为实用,尤其是在地形狭窄的地图中。此外,作为额外优势,你还可以为它配备手电筒。 【重要提示】必须明确的是,这些分类仅考虑能带来实际游戏优势的因素。显然,你仍然可以自由使用任何喜欢的武器,但区分客观优势和主观喜好至关重要。我会以自己为例说明。我喜欢使用短柄斧,因为用它快速消灭大量蹒跚者尸群既有趣又富有挑战性。而且,由于我对短柄斧很熟练,除了在尸潮中奔跑者特别多的场景外,在大多数情况下使用它都没有问题。不过,我不会自欺欺人地认为短柄斧比砍刀更好,因为事实并非如此,就是这样。 武器:枪械
正如我之前所提到的,《求生之路:纳粹僵尸部队》尝试以写实的手法描绘一场僵尸启示录,因此你会发现种类繁多的 firearms( firearms )以及与之对应的多种不同口径弹药。将它们视为稀缺且消耗性的资源是个不错的常规做法,因为与其他大多数游戏相比,弹药在这里非常匮乏。 与近战武器不同,firearms( firearms )之间的效能差异并不那么显著,这主要是因为它们是极其强大的工具,只要你有足够的弹药来应对,就能让你在游戏中最致命的遭遇战(在困难地图中很常见)中存活下来。不过,有些武器的效果明显优于其他武器,这取决于一些对于新玩家来说可能不太直观的因素。我会在这里详细列出所有这些因素,以便你理解它们为何会被归为特定类别。 再次提醒,这是一次客观分析,旨在说明为何某些武器表现更出色,因此像武器手感、音效或外观这类主观因素不在讨论范围内。不过,如果你个人确实会考虑这些因素,也不必觉得不妥,因为它们确实能让武器使用起来更有趣、更吸引人。但本列表仅从纯粹的有效性角度展示哪些武器更优秀。
我将把所有枪械按实用性分为三类:较差、普通和高 tier。这将基于特定的武器属性,这些属性使它们在《求生之路:纳粹僵尸部队》的游戏玩法中更有用。武器将按 effectiveness 从低到高排序,从最差的开始。以下是我用于对枪械进行优先级排序的标准(从高到低): 1. 对奔跑者的秒杀或两枪击杀能力(秒杀更佳) 2. 射速(越快越好,但在没有半自动模式的情况下,射速过快反而不佳) 3. 弹匣容量(越大越好,减少背包占用,更适合连续射击) 4. 重量(越轻越好,背包灵活性更高,可携带总弹药量更多) 5. 手电筒装配功能(仅使用重型近战武器时可启用手电筒) 6. 换弹速度(越快越好,降低被突袭的风险) 【重要说明】:此分类不适用于噩梦难度,因为该难度下僵尸生命值翻倍,且游戏会启用脑干 hitbox,因此战斗机制会发生显著变化。查看【噩梦:策略差异】部分以获取更多信息。 武器效能判定不考虑精准度,因为所有枪械都采用相同的随机散布模式(霰弹枪除外,其散布范围更广)。精准度本身与游戏战斗无关,因为绝大多数僵尸遭遇战都发生在近距离,当99%的僵尸都近在咫尺时,更高的精准度并无优势。 为何射速如此重要?原因很简单:腰射任何枪械时,基础精准度都不算理想,这意味着子弹通常会偏离屏幕中心。这是不可避免的,因为尽管使用瞄准镜能显著提高精准度,但会让你容易受到奔跑者/小孩的攻击(这会让你视野变窄且移动非常缓慢),所以腰射通常是更优选择。为了弥补腰射精准度的不足并有效对抗奔跑者,武器必须有足够高的射速,以便在之前的射击未命中或命中判定出现问题时能够快速连续射击。 【极其重要的免责声明】必须明白,“最佳武器”是指你能在一局比赛中长时间使用的武器。这取决于你正在游玩的地图以及弹药生成的随机因素。如果你的背包里放着最有效的武器之一,却找不到任何弹药,那它就毫无用处。有时候,“最佳武器”可能是霰弹枪(效果最差的武器类别)、鲁格Mark III(相对较弱的手枪)或柯尔特1911(游戏中最出色的武器之一)。因此,即使你只能找到一把性能欠佳的枪械,只要能找到大量弹药,就应该使用它。这条规则适用于所有武器,但少数极其糟糕、在对抗奔跑者时使用甚至会带来危险的武器除外(PSE弓、Perennia SV10和温彻斯特1892)。 武器:性能欠佳的枪械 ◈ 性能欠佳的枪械:
在这一类别中,我会列出根据上述数据表现欠佳的枪械。这里的“表现欠佳”是指该枪械在对付奔跑者时稳定性不足。任何武器都能轻松击杀蹒跚者,因此真正的考验在于游戏中最危险的敌人——奔跑者。 大多数这类武器存在泵动式/栓动式/杠杆式的动作动画问题。这些动画会显著降低射速,从而造成阻碍。此外,它们还会引入0.5秒的延迟,导致射击后无法立即推搡,这在极端情况下可能致命,例如奔跑者密集出现的场景。对于部分此类武器,你可以通过使用“栓动/杠杆/泵动动作动画取消”技巧来跳过这一延迟(详情可查看“战斗:高级枪械机制”部分)。此外,它们的弹匣容量通常较小,这在面对奔跑者尸潮时是个明显的阻碍,因为你无法长时间连续射击,容错率极低,必须精准消灭那些即将对你造成致命威胁的敌人。它们的换弹速度也非常慢,进一步降低了持续射击能力。 更重要的是,霰弹枪的伤害不稳定,因此有时无法做到对所有敌人一击爆头 kill。我不确定具体原因,可能是子弹散布导致部分弹丸未命中头部,使得伤害刚好低于击杀阈值。就像所有性能欠佳的近战武器一样,一旦你找到一把质量更高的枪械,并且有足够的弹药使其在你正在玩的地图中值得使用,就立即丢弃它们。 ⊛ PSE Deerhunter Bow:弹药类型➔箭矢(1爆头击杀)
不可否认,它是游戏中最糟糕的远程武器(显然它不是火器,但由于它使用弹药,我将其归为此类)。 它是唯一具有弹道机制而非即时命中的远程武器,这意味着你必须提前瞄准才能准确击中目标,这在远距离下基本不可能做到,从而将你限制在中近距离。它的射速极慢,蓄力攻击时你无法推搡或 sprint,容易受到奔跑者/小孩的攻击。用它对付他们基本上是自杀行为。 由于所有这些因素,它只能有效地用于对付蹒跚者,这使得它在绝大多数情况下基本无用。从技术上讲,它拥有无限弹药,因为你可以捡起用过的箭矢,但一部分箭矢会永久性丢失,因为它们有几率射穿僵尸而不是掉落在你脚边。这会导致箭矢掉落在离你很远的地方,除非你故意将僵尸引到附近的墙边击杀。除非你别无选择,必须快速消灭僵尸(比如任何像样的近战武器都没有),否则无论如何都要避免使用它。 ⊛ 伯莱塔SV10 Perennia:弹药类型➔12号霰弹(一击爆头 kill)

它不仅是游戏中最烂的霰弹枪,也是继PSE弓之后第二烂的远程武器。它的射速不错,但糟糕的换弹速度和可怜的弹匣容量(只有2发)让它变得毫无用处。 此外,作为霰弹枪,它还受到所有同类武器共有的几个重要限制:伤害不稳定(正如之前所解释的,有时霰弹枪无法通过1发爆头秒杀奔跑者或蹒跚者)以及射程有限(霰弹枪在非近距离外造成的伤害非常低)。 佩伦尼亚霰弹枪具有穿透力,可以实现 collateral kills,但这只有在对付成群的蹒跚者时才真正有效,因为你必须使用其机械瞄准具来减小散布。此外,穿透力仅对僵尸生效,这意味着你无法通过穿墙或穿门射击木板来解锁秘密储藏点或跳过地图区域。务必避免使用此武器。 ⊛ 温彻斯特1892:弹药类型➔.357马格南(一击爆头 kill)
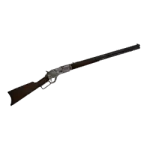
它仅比Perennia SV10略好一些。如果考虑到Perennia SV10那慢得令人痛苦的换弹速度和糟糕的弹容量,这款武器的射速要快得多,它拥有不错的弹容量(15+1),并且具备穿透力。 这意味着你可以对蹒跚者造成穿透击杀,还能射穿墙壁破坏木板等可破坏物,从而跳过地图部分区域或打开隐藏的物品储藏点。然而,由于杠杆式操作的动画,与更高等级的大多数其他武器相比,它的总体射速仍然很慢,这使得即便它的口径拥有一击爆头的伤害,在对付奔跑者时表现也非常不稳定。此外,它是管式供弹,意味着你需要像霰弹枪一样一次装填一发子弹,这导致从空膛到装满的换弹时间慢得离谱。无论如何都要避免使用它,就像PSE弓和Perennia SV10一样。 从现在开始,我认为以下所有武器至少在你没有其他更高质量选择的情况下,对付奔跑者时是可以忍受的。 PSE弓、Perennia SV10和温彻斯特1892是仅有的3种我建议忽略的武器,即使这会让你的 inventory 中没有任何火器,因为使用它们比只依靠一把像样的近战武器会让你面临更高的死亡风险。【莫斯伯格500A】:弹药类型➔12号霰弹(一击爆头 kill)
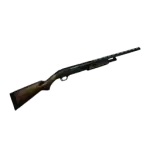
本排名中的第一款可用霰弹枪。所有霰弹枪都被归为次等武器,原因有以下几点:射速极慢、弹容量低、重量大导致背包灵活性下降、换弹速度慢,并且射击后会有推击延迟,若不注意可能会让你丧命。 在我看来,莫斯伯格霰弹枪比温彻斯特更有效一些,尽管它的弹容量小得多(5+1发 vs 15+1发)。原因在于,作为霰弹枪,当你的射击因部分弹丸随机未命中目标而未能击杀僵尸时,它有更高的几率将僵尸击退。这能让你有第二次机会妥善解决敌人,而要是用温彻斯特步枪打偏了(这很常见,因为大多数枪械腰射时精度都很差),面对奔跑者时你就会陷入被动。 ⊛ 雷明顿870:弹药类型➔12号霰弹(一击爆头 kill)
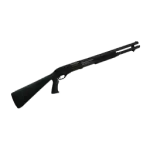
本质上与莫斯伯格500A相同,但它更出色,因为其弹容量为8+1,而非5+1,这让你在不得不重新装弹前有更大的容错空间来击杀奔跑者,由于这两款武器均为管状供弹,所以装弹都需要很长时间。 武器:次等枪械(续) ⊛ JAE-700:弹药类型➔.308(一击爆头 kill)
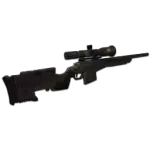
本指南中出现的第一款狙击枪。它在榜单上排名不高,因为在《求生之路:纳粹僵尸部队》中,绝大多数僵尸遭遇战都发生在近距离,所以瞄准镜带来的超远射程毫无意义。 此外,对付僵尸的最佳方式是腰射,以避免因视野狭隘而遭到奔跑者的突然袭击。因此,这款狙击枪的优势毫无用处,反而存在诸多缺点:射速慢、射击后推击有延迟、 reload 速度慢,而且重量很大。不过,它的弹匣容量还算不错(10+1发),并且采用弹匣供弹,由于 reload 速度快得多,所以比温彻斯特步枪要好一些。如果你偏爱霰弹枪,可能会认为它不如莫斯伯格和雷明顿霰弹枪,这是可以理解的,但这两类武器其实都效果甚微。Sako 85(两种瞄准镜型号):弹药类型➔.308(一击爆头 kill)
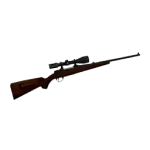
萨科85的性能略优于JAE-700,尽管其弹匣容量几乎只有后者的一半。原因在于,你可以通过收起武器后快速拔出(双击Q键)来取消枪栓动作动画,这能让你以明显更快的速度射击。 这个技巧对JAE-700无效,因为它的拔枪动画较慢。此外,这两款武器的实际效果相当,因为瞄准镜并无太大作用,大多数僵尸遭遇战都发生在近距离。 史密斯威森M686:弹药类型➔.357马格南(一击爆头 kill)

它是温彻斯特1892的改进版,因为它拥有相当快的换弹速度和可接受的射速——这得益于取消了杠杆动作动画,尽管其弹匣容量不到前者的一半(它可以一次性装填全部6发子弹)。 它使用相同的弹药,因此保留了造成 collateral( collateral 指穿透伤害或同时击中多个目标)和破坏可破坏物的能力,而且它相对较轻,这让你能携带更多总弹药并拥有更大的 inventory( inventory 指物品栏)灵活性。另一个值得一提的优势是,你可以为它配备Maglite(Maglite 指战术手电),这在一些光线有限的地图中非常有用。不过,这仍然是一把 subpar( subpar 指性能欠佳的)武器,所以请尽快用更好的武器替换它。 ⊛ 温彻斯特 Super X3:弹药类型 ➔ 12号霰弹(一击必杀)
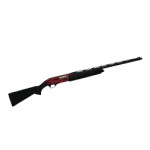
Super X3 在列表中的表现远优于所有狙击步枪和其他霰弹枪,主要原因是它拥有无限射速,能让你对奔跑者进行更有效的火力压制。它仍然保留了其武器类别固有的所有缺点(换弹缓慢、弹匣容量小、精度差、伤害不稳定),但射速在一定程度上弥补了这些不足,使其处于可接受的水平。不过,它确实是游戏中精度最低的武器,这导致其伤害输出更加不稳定,但射速在一定程度上还是弥补了这一点。⊛ Ruger 1022:弹药类型➔.22 LR(两发爆头击杀)
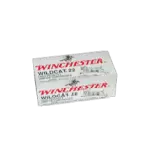
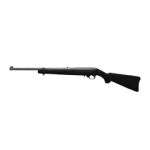
我发现很难将鲁格1022归到这一类别中,因为你完全可以说史密斯威森左轮更好,理由是它伤害更高、有 collateral(范围伤害)且重量更轻;或者说超级X3更好,因为它的口径能实现一击爆头 kill。但我确定的是,这把武器绝对是次一档的。 由于伤害较低,鲁格1022的弹匣(10+1发)只能击杀5个蹒跚者/奔跑者,而且考虑到它的性能,它还很重,限制了你的 inventory(物品栏)灵活性。不过,我确实认为它比史密斯威森左轮略好一些,因为它拥有无限射速,必要时可以连射,这能显著提高你对抗奔跑者时的生存几率(尽管这种连射根本无法持续太久)。我也认为它比超级X3更好,因为它是弹匣供弹,因此换弹速度明显更快,减少了被奔跑者抓住空枪的几率。 武器:普通枪械 ◈ 普通枪械:
在这一类别中,我会列出那些相比次等类别能为玩家提供更显著优势的枪械。不过,它们仍存在一些缺点,降低了对奔跑者的 effectiveness,因此比游戏中最顶级的枪械低一个层级。 这一类别会包含几款手枪,因为它们重量轻,具有库存灵活性,并且能够装备Maglite手电筒,但这些手枪使用的口径需要对奔跑者和蹒跚者进行两次爆头才能击杀,与上一层级的枪械相比,其 effectiveness 大幅降低。 ⊛ 鲁格Mk III:弹药类型 ➔ .22 LR(两次爆头击杀)
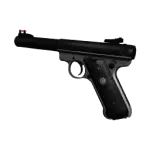
鲁格可以被视为一把性能欠佳的武器,因为它是两发爆头才能击杀敌人,一个弹匣(10+1发子弹)最多只能击杀5个蹒跚者/奔跑者。 不过,它能处于这个等级是因为其重量较轻,这让你在物品栏方面有很大的灵活性,可以轻松使用重型近战武器(消防斧、鹤嘴锄或大锤)。它还拥有无限射速。 但要注意的是,由于伤害低且弹匣容量非常小,它的连续击杀能力非常有限。它比鲁格1022更好,因为两者本质上是同一种武器,但前者更轻,并且可以配备手电筒,这在光照有限的地图区域非常有用。 ⊛ 带扩容弹匣的鲁格1022:弹药类型➔.22 LR(两发爆头击杀)
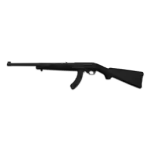
这把武器和鲁格Mk III一样好用,但各有优缺点。两者拥有相同的伤害和无限射速,但这把武器的弹匣容量是前者的两倍,使其每个弹匣的最大击杀数提升至13个蹒跚者/奔跑者(25+1发子弹)。 因此,就纯粹的有效性而言,这把武器更胜一筹,但由于它更重,鲁格Mk III仍能提供更好的 inventory 灵活性,使其作为重型近战副武器有其特定用途。你选择的近战武器将决定你优先使用哪一把,但如果你更喜欢砍刀而非重型近战武器,那么一定要选择这把1022变体,而不是鲁格Mk III。 ⊛ 黑克勒&科赫 MP5A3:弹药类型 ➔ 9毫米(两发爆头击杀)

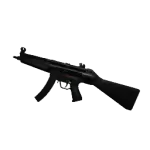
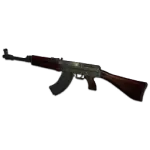
本质上与配备扩容弹匣的鲁格1022相同。它的弹匣容量更高,为30+1发,这使得它的最大击杀数略高,为15人,但它也更重,因此你能携带的总弹药量基本相同。 ⊛ 西蒙诺夫SKS(无刺刀):弹药类型➔7.62x39毫米(头部一击必杀)
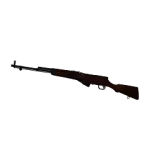
SKS之所以排名高于MP5A3,主要是因为其伤害更高,能够实现一击爆头击杀。尽管它更重(此时你应该搭配砍刀而非重型近战武器),并且弹匣容量较小,为10发,而MP5A3则是30+1发。 尽管SKS每个弹匣能击杀的蹒跚者/奔跑者最大数量低于MP5A3(10个对15个),但凭借一击爆头的伤害,它的表现更为稳定。不过,由于与顶级武器相比弹匣容量相对较小,且 reload 动画相当缓慢,所以它未能在榜单上获得更高的排名。 ⊛ 西蒙诺夫SKS(带刺刀):弹药类型➔7.62x39毫米(一击爆头击杀)

很明显这是同一种武器,只是增加了某种集成的近战武器。刺刀本有潜力变得极为有用,但遗憾的是,其命中判定并不稳定,导致常常无法成功推击,或是无法像2015年它刚出现时那样实现一击必杀。 不过,在某些情况下它能救你一命,例如当你弹药耗尽,又被蹒跚者包围,且手边没有合适的近战武器时。要注意的是,由于刺刀被算作推击,它会消耗同等的耐力,这比例如砍刀的快速攻击消耗要高,而且它还有明显更长的延迟(可以通过推击冷却取消漏洞来跳过)。所以,由你决定是喜欢这个版本还是没有刺刀的版本,因为这会显著影响使用时的推搡机制。 ⊛ 伯莱塔M92FS:弹药类型➔9毫米(两发爆头击杀)
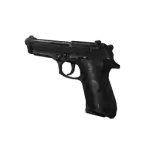
本质上,它和鲁格Mk III相同,具有相同的伤害和重量(极佳的背包灵活性,可携带重型近战武器)、无限射速,但它更出色,因为每个弹匣最多可击杀8个蹒跚者/奔跑者(15+1发子弹)。 尽管它是两发爆头击杀的口径,但由于重量轻,它的排名仍在两把SKS之上,这为你提供了极佳的背包灵活性,使其成为重型近战武器的理想副武器。此外,可装备手电筒也是一个加分项。 抛开纯粹的有效性不谈,9毫米弹药也更常见,因为被击杀的国民警卫队僵尸会随机掉落,这在你陷入困境时有时能意外地救你一命。 ⊛ 格洛克17:弹药类型➔9毫米(两发爆头击杀)
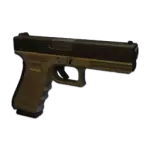
本质上与伯莱塔M92FS相同,但由于弹匣容量更大而略有改进,每个弹匣最多可击杀9个蹒跚者/奔跑者(17+1发子弹)。格洛克17和伯莱塔都比MP5A3更有效,因为它们重量更轻(搭配重型近战武器时库存灵活性更高,并且可以携带更多总弹药), reload速度更快,还能装备手电筒。MP5A3更大的弹匣容量无法弥补所有这些因素。【MAC-10:弹药类型➔.45 ACP(头部一击必杀)】
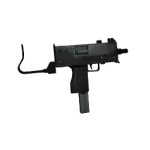
MAC-10是普通等级中最出色的武器,它几乎具备了一切优势:30发弹匣搭配一击爆头的口径(每个弹匣最多可击杀30个蹒跚者/奔跑者,这一数量明显高于之前的武器),并且拥有无限射速(非常适合连射)。 明显的问题在于它仅支持全自动射击,没有半自动切换功能。因此,很难进行可控的点射,容易浪费弹药。你必须轻轻触碰M1键才能每次发射1到2发子弹,至少就我的偏好而言,这最终会让人感到厌烦。所以,受此影响,实际最大击杀数会低于30,但如果你能掌握点射技巧,就能非常接近这个数字。 武器:高级枪械 ◈ 高级枪械:
此类武器拥有最佳属性,是对付奔跑者最有效的武器。它们均使用一击爆头的口径,并具备其他非常实用的属性,例如无限射速、高弹匣容量或轻量化设计以增加背包灵活性。 这些武器比前面列出的任何枪械都能显著提高你的生存几率。显然,如果你的近战武器选择和弹药供应情况使其在当前情境下适用,那么你完全应该优先选择它们,而非其他替代品。 ⊛ 柯尔特1911:弹药类型➔.45 ACP(一击爆头)
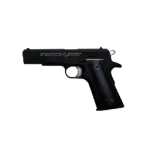
柯尔特1911本身就是一款出色的武器。它作为手枪拥有高额伤害(可一击爆头 kill),射速相对较快(并非无限快,但依然迅速),换弹速度尚可,而且非常轻便。这意味着你可以像其他手枪一样携带大量弹药(对于能一击爆头 kill 的武器来说这尤其出色),或者搭配重型近战武器(消防斧、镐头或大锤)使用。 此外,你还可以为其配备手电筒,以便在适合使用的地图中发挥作用。唯一的缺点是它的弹匣容量较小,为7+1发,这意味着每个弹匣总共可以击杀8个蹒跚者/奔跑者。它没有排在更后面的位置,是因为尽管你可以灵活地将它与重型近战武器搭配使用,但在经典难度下,【砍刀】仍然是游戏中最好的近战武器,因此接下来的三种枪械由于整体属性更优,与它搭配效果更好。如果你的游戏风格更偏爱重型近战武器而非砍刀,那么【柯尔特1911】无疑是游戏中最好的枪械。 ⊛ FN-FAL:弹药类型➔.308(一击爆头 kill)

FN-FAL是下一个选择,因为它在最重要的方面拥有更出色的属性:一个弹匣(20+1发)最多可击杀21个蹒跚者/奔跑者,并且拥有无限射速(整体连射能力更好)。唯一的主要缺点是它重得多,这限制了你的 inventory 灵活性并减少了你的最大总弹药量。但如前所述,这不是大问题,因为有砍刀存在。 此外,由于它使用具有穿透力的.308弹药,你可以获得 collateral kills 并破坏可破坏物以打开秘密藏匿处或捷径。顺便提一下,.308弹药在大多数地图中往往相对稀有。这不会影响武器的实际效能,但有一点需要注意:如果你找不到足够的弹药,这把武器就会变得毫无用处,正如我在【武器:枪械】部分开头所解释的那样。 ⊛ CZ 858:弹药类型 ➔ 7.62x39毫米(一击必杀)
CZ本质上与FN-FAL是同一种武器,但重量略轻(意味着总弹药量更多),换弹速度更快,弹匣容量明显更大(30+1发),这也使得总弹药量更多,整体连射性能更优。 此外,7.62x39毫米弹药的刷新频率比.308弹药稍高。它几乎是游戏中最好的武器,仅次于M16A4,两者性能差距极小。它虽然失去了FN-FAL使用.308弹药所具备的穿透力,但与其他提升的属性相比,这只是一个小劣势。 ⊛ M16A4(两种瞄准镜版本):弹药类型➔5.56x45毫米北约弹(头部一击必杀)
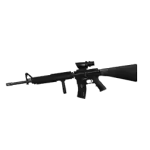
M16A4是游戏中最好的枪械,但仅比CZ稍好一些,它们极为相似。两者唯一的区别在于M16A4的换弹速度更快,而且击杀国民警卫队僵尸时偶尔会掉落5.56x45毫米弹药,这使得它比前两种口径的弹药更为常见。 这与我之前解释的纯粹武器性能无关,但实际上,这让M16A4在整体上更具实用性。不过它们几乎是一样的,所以没必要特别偏爱其中一款,地图的随机数生成将决定在这一轮中哪款是更好的选择。 武器:链锯

武器:投掷物
投掷物是一种小巧实用的战斗工具,偶尔能救你一命。除了极少数情况外,它们的使用并非绝对必要,但确实经常能派上用场。 在特定情况下,当大量僵尸聚集在一起时,投掷物就能发挥作用。如果用近战武器对付这些大群僵尸,会耗费很长时间;如果使用 firearms,又会消耗大量弹药。而且,如果其中有很多奔跑者,情况可能会变得致命。 如果玩家知道何时、如何使用投掷物,以及如何协作以避免潜在死亡,那么一个投掷物就能以低得多的风险解决所有这些问题。 共有3种类型的投掷物: 手榴弹 TNT 燃烧瓶 ◈ 手榴弹:
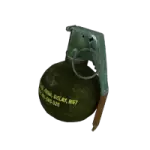
三种投掷物中最弱的一种。它的爆炸范围非常小,整体伤害也很低,因此其唯一的合理用途是清理聚集在一起的小型尸潮。它们唯一的优势是数量更多,因为击杀国民警卫队僵尸时会随机掉落。 所有类型的僵尸如果距离爆炸中心足够近,都会被爆炸杀死。如果距离爆炸中心稍远,它们会受到伤害但不会死亡(会被击退)。然而作为玩家,即使生命值为100,只要站在爆炸范围内,几乎都会死亡。只有站在爆炸范围的最边缘才能存活,但在常规游戏中除非运气好,否则这种情况不会自然发生。由于手榴弹伤害低、范围小,加上角色投掷力度极大,可能导致手榴弹不可预测地弹开,因此发挥其最大效果的最佳方法是:靠近你想要消灭的尸潮,让它们更加密集 ➜ 站定并向脚下投掷手榴弹 ➜ 按住W+Shift直线 sprint 逃离爆炸范围。 这样做,你可以精确控制手榴弹的落点,使其不会弹开,同时还能将尽可能多的僵尸聚集在杀伤范围内。不用担心,只要你有足够的耐力,总能有足够的时间逃离爆炸范围。由于NG难度的丧尸经常掉落手榴弹,因此可以将其视为免费快速击杀蹒跚者的手段。如果对自己或队友没有危险,请持续使用(记住,被感染的玩家始终容易受到友军火力伤害;此外,站着不动聚集丧尸会让你在面对奔跑者时变得脆弱,所以首先要确保该区域没有奔跑者)。手榴弹可以通过清理狭窄通道等麻烦地点的小型蹒跚者群,帮你节省一些时间或弹药。 ◈ TNT:
它在机制上与手榴弹相同,但效果却强得多,因为它拥有超大的爆炸半径和超高的伤害。基本上,爆炸半径内的任何僵尸都会被杀死,只有最边缘的除外。对于玩家来说,任何站在爆炸半径内的人都会死亡,因为即使在边缘,伤害也足以杀死100生命值的你。 与手榴弹相比,TNT的半径要大得多,因此你绝对不要在脚下投掷它,因为你无法足够快地逃离爆炸范围。从远处向你想要消灭的尸潮投掷它。这样可以让你安全地处于爆炸范围之外,而且与手榴弹相比,TNT本身的碰撞特性使其不会发生太多弹跳或滑离目标的情况。 ◈ 燃烧瓶:
燃烧瓶也是一种非常有效的投掷武器。它不会产生高伤害爆炸,而是能点燃僵尸并在其范围内造成【持续伤害】(DOT)。在平地上引爆会留下一个燃烧的火坑,对僵尸和友军都造成显著伤害,并且在引爆后很长一段时间内持续点燃僵尸。 如果将其扔到墙壁或类似表面上,则不会形成火坑,只有初始引爆范围内的僵尸会被点燃,因此应尽可能将其扔向地面。 持续伤害本身并不太重要,因为任何燃烧的僵尸最终都会死亡,但它确实有助于更快地杀死被困在火范围内的僵尸,从而减少僵尸突然向你冲刺的可能性。• 其他信息: - 按住左键可以无限延迟投掷实弹爆炸物。即使有引信,它们也不会在你手中爆炸。 - 你可以通过切换物品来取消投掷,例如按H键收枪或按Q键切换到上一个物品。你可以取消“点燃引信”动画和手持实弹爆炸物的状态。 - 点燃任何投掷物的引信会使你处于易受攻击状态,因为此时你无法 sprint(冲刺)或 shove(推搡)。一旦你手持实弹爆炸物,就可以自由 sprint(冲刺)。不过,你仍然无法 shove(推搡),但如前所述,你可以通过按H键或Q键取消此状态。 - 当友军伤害关闭时,投掷物会穿过玩家。这种机制可以避免意外死亡和恶意行为,比如其他玩家可能会导致你手里的燃烧瓶在面前爆炸,或者迫使TNT掉落在你脚边,让你没有足够时间逃离爆炸范围。 关于如何使用投掷物的几个实用例子:在nmo_cleopas地图中,幸存者需要穿过一条小巷才能到达尽头的购物中心。问题是小巷里挤满了蹒跚者和奔跑者,必须消灭它们才能继续前进。使用近战武器需要很长时间,使用 firearms则需要大量弹药。而使用一个投掷物就能显著减少僵尸的总数。 你可以先打开金属门,然后迅速关上,这样所有僵尸都能看到你并锁定你。这会迫使它们在大门旁聚集,如果你等几秒钟让它们移动,就能更有效地击杀。然后你可以在大门旁边扔燃烧瓶,无需打开大门,它会燃烧并杀死范围内的所有僵尸。保持大门关闭可以确保你不会被开始冲刺的蹒跚者随机追逐。如果你有TNT,应该先打开大门,因为大门可能会阻挡爆炸。作为一条基本经验法则,当你准备使用燃烧瓶时,应始终牢记:尽量在僵尸可能被困住的区域,或者在某些僵尸开始冲刺时它们无法跟随你的地方使用,以防止可能的死亡(nmo_cleopas中的小巷栅栏门就是一个完美例子,燃烧瓶可以透过它造成伤害,但僵尸无法打开它)。如果情况并非如此但你仍需要使用燃烧瓶,与队友协调让他们正确站位以避免被燃烧的冲刺僵尸攻击是非常重要的。另一个例子是nmo_broadway2中篮球场旁边的超市。侧门处挤满了奔跑者和僵尸小孩,因此在这种情况下,有效使用燃烧瓶或TNT几乎是生存并继续推进地图的必要手段。等待汽油罐炸开侧门,点燃投掷物的引信,冲刺到靠近门口的位置,将其尽可能扔向僵尸群。注意,燃烧瓶是该地图中唯一100%会刷新的投掷物,在几个固定位置有刷新点,比如电影院入口右侧的长凳旁边。 物品:工具
工具是《求生之路:纳粹僵尸部队》中具有特定游戏机制和用途的可选物品。部分工具可用于完成任务目标和解锁隐藏资源。 它们可以当作武器使用,但在这方面表现都欠佳(更多信息请查看“武器:近战”部分)。通常情况下,这些工具都不值得保存在背包中,除非你有多余的空间,或者当前游玩的地图在整体上非常需要它们,例如存在大量黑暗区域。 【重要提示】所有工具都可通过右键点击激活其特殊使用模式。例外情况如下:芝宝打火机只会播放无意义的动画,信号枪仅能激活机械瞄具,对讲机则会被动激活全服语音。 • 美光手电筒:
游戏中最实用的工具,它能为你和队友照亮黑暗区域。其射程较远,让你能从远处发现威胁,尤其是在黑暗狭窄的走廊里的奔跑者。这能防止遭遇突袭,让你在这些区域舒适地进行近战。你可以单独装备它,右键开启;也可以按下F键将其与大多数单手武器搭配使用。 需要注意的是,使用诸如推击冷却取消(详见【移动:高级技巧】部分)等动画取消技巧时,由于手电筒在收起时会关闭,你需要频繁重新开启它。你可以将它当作武器使用,但效果欠佳(整体伤害极低,达到关键的蹒跚者伤害阈值所需的充能时间极长,且有效射程很短)。查看【武器:近战】部分,了解我如何根据特定因素对近战武器进行评级。 隐藏机制:装备手电筒会改变部分单手近战武器(铅管、撬棍和斧头)的第一人称攻击和推击动画。充能攻击动画从垂直挥砍变为水平挥砍,使你能够击中多个目标(铅管和撬棍能借此获益)。此外,它还会将撬棍的推击动画改为无延迟版本,实质上增强了其 effectiveness。 打火机:
它在各方面本质上都是Maglite的劣质版本。它无法与武器同时使用,奔跑时会熄灭,点亮效果不稳定,且仅能持续60秒。尽管玩家默认拥有它且不占用背包空间,但并不值得使用。只有在急需照明却没有Maglite时才应使用,这种情况可能出现在部分Maglite刷新有限的地图,或灯光突然熄灭的场景(如nmo_khafre)。 • 信号枪:
它最突出的用途是在生存地图中呼叫额外的补给空投(更多信息见“生存模式:基本信息”部分)。不过,它也有一些特殊用途,例如点燃一群僵尸,以及对付一些自定义地图中作为最终Boss的高生命值自定义僵尸(如nmo_khafre、nmo_ravenholm、nmo_miner_detour等地图)。 由于弹药生成通常非常有限,你应该将它视为一种远程但效果较差的燃烧瓶,而非火器。因此,使用时需格外小心,因为在某些情况下可能会导致自己和队友死亡。若你确实需要在战斗中使用信号枪(这种情况其实并不常见),请查看“武器:投掷物”部分,了解使用燃烧瓶的最佳方法并将其应用于信号枪。通常情况下,尽量点燃被困在墙或门后的僵尸,这样即使有些僵尸开始冲刺,它们也无法够到你(例如在nmo_cleopas地图的拥挤小巷中)。除非绝对必要,否则不要向队友周围射击,因为有些队友可能已被感染,这可能会导致他们死亡。此外,如果你在离僵尸太近的地方射击,自身受到的伤害会非常高,如果你的生命值没有处于较高水平,这很可能会杀死你(至少现在信号弹会穿过未被感染的玩家)。 • 焊接工:
它最常见的用途是完成NMO地图中的任务目标,例如焊接锁具、路障,修理设备,生火等。右键点击即可开始焊接,同时需要对准可交互物体。 通常情况下,你不应该在背包里一直携带焊枪。只有当地图大量需要使用焊枪时才携带,比如在nmo_broadway2地图中,有多个任务目标需要焊接入口才能继续前进。如果地图中有多个隐藏储藏点只能通过焊接才能进入,比如nmo_suzhou或nmo_anxiety_classic,携带焊枪也很有用。否则,一旦你用完它,就立即丢弃,因为它会占用你的背包空间,而且是一把性能较差的武器(伤害低,需要较长的充能时间才能达到一击杀死蹒跚者的临界点,有效射程短)。查看【武器:近战】部分,了解我如何根据特定因素对近战武器进行评分。 焊接枪还有一个实用的技巧:焊接时你非常脆弱,因为你无法移动或攻击。不过,你仍然可以推搡,因此如果有僵尸靠近,你可以调整视角对准它,同时不要转动太多导致焊接中断,然后持续推搡以将僵尸挡在远处,直到焊接完成。◈ 注意:焊接器无法自然与大多数物体互动,只有在特定触发条件下才能以脚本化方式使用,例如挂锁、上闩的大门、可点燃的物体(如汽油罐)。有关秘密藏匿处等更多信息,请查看【地图学习:记忆】。 • 灭火器:
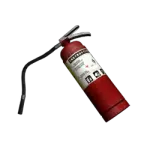
它与焊枪的用途相同,例如完成任务目标(但它是灭火)和解锁秘密储藏点(如在nmo_suzhou或nmo_vertigo中),不过它占用的背包空间更多。右键点击会拿出水管,按住左键开始喷水。和焊枪一样,它也是一把不太好用的武器,所以除非确实需要解锁某个武器储藏点,否则请尽快丢弃。 • barricade hammer:
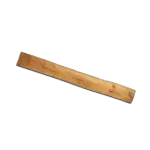
它主要用于NMS地图中,用来封锁通往安全区的入口(更多信息请参见“生存模式:基本信息”部分)。部分NMO地图会将 barricade系统用于防御目的,例如nmo_shelter的最终关,或是用于获取藏匿物品,比如nmo_suzhou中隐藏的电锯。它以木板作为【弹药】,右键可激活封锁模式。此外,它作为武器的性能较差,因此请避免将其当作武器使用。 • 对讲机:
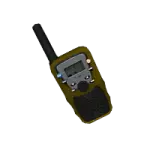
此物品仅能为背包中拥有该物品的玩家开启全服语音模式,仅此而已。你可以在下一节中找到更多相关信息。 游戏模式/难度/修饰符
Here's a list of all the gamemodes and modifiers present in NMRiH. Note that I won't be including any info about custom difficulty modifications, modded gameplay or similar. Also, the unofficial PvP mode won't be covered in this guide. ◈ Gamemodes: • Objective: You and the other survivors must escape your current hideout and progress through a multitude of zombie-infested environments in hopes of getting extracted out of the hellhole you are in. In order to do this, you must complete a series of objectives to eventually call for a rescue. The meat and potatoes of NMRiH, by far the most complex and demanding gamemode. I will explain in further detail in the following sections. • Survival: You and the other survivors are tasked with defending a zombie-infested area to help the National Guard in minimizing infection spread. As a reward, the military offers you a safe extraction to infection-free zones. A somewhat repetitive and basic gamemode in my opinion. It lacks complexity and diversity, but useful for learning and practicing your melee combat skills. I will explain in further detail in the following sections. ◈ Difficulties: • Casual: This difficulty completely lacks any form challenge. The reason for this is simple: infinite respawning, basically having no penalty for dying or doing stupid things. Here are the individual stats: - Infinite respawning: Players can respawn infinitely during the course of a match - Proximity-based Spawning: Every time you die, you respawn near your teammates - Joining players can spawn regardless of map progress - Players spawn with a random melee weapon - Respawn tokens available in Objective mode: these are like "extra lives" (more info later) - Afflictions like bleeding or infection are removed after a wave finishes in Survival mode ◈ Conclusion:This mode makes NMRiH utterly trivial to the point where it completely stops being a survival horror game. Due to this and the fact that extensive knowledge of the game mechanics is not needed, Casual difficulty will be completely ignored from this point forward.If this is your cup of tea that's fine, you won't need any more info from this guide other than the basics. In my opinion, the best casual experience is mainly playing easy official maps on Classic difficulty. I recommend that you try that first and avoid Casual difficulty altogether if you feel like you can get the hang of it. • Classic: The default game difficulty. This mode will be the main focus of this guide, and it will be the base on which you will learn the game mechanics before moving on to Nightmare. Here are the changes compared to Casual: - No Proximity Based Spawning - No infinite respawns - No starting melee weapon - No respawning near your teammates, only in scripted respawn points in specific locations - No respawn tokens in Objective mode, only available in Survival mode - No affliction removal after a wave is finished in Survival mode - Players earn a respawn token after 40 consecutive zed kills without dying in Survival mode - Players only respawn if certain objectives are completed, which activate scripted respawns - Late joiners cannot spawn until live players reach a scripted respawn point • Nightmare: The toughest challenge available in the game. To consistently survive on this difficulty, you need to master most of the techniques in the game, as well as being versatile enough to vary your playstyle and strategies in a moment's notice. It's a constant balance of slowly killing zombies, rushing through hordes suicidal-style, melee combat and proper firearm use. Combat mechanics change noticeably and mistakes are not tolerated. The changes compared to Classic are as follows: - Overall zombie count increased by 50% in Objective mode - Base zombie health increased from 500 HP to 1000 HP - Bite infection chance increased to roughly 75% at full health - Disabled token respawning in Survival mode - Disabled player names - Friendly fire increased by 50% - Brain Stem functionality enabled ◈ Brain Stem Functionality:Players can kill Shamblers and Runners with a single gunshot from any weapon if they score a headshot on the Brain Stem hitbox. This includes the National Guard zombie variants. I will discuss effective strategies and gameplay changes on this difficulty in the "Nightmare: Differences in Strategy" section near the end of the guide. ◈ Modifiers: • Realism: This modifier makes several changes regardless of what difficulty is chosen. It can potentially make the gameplay harder or easier, depending on individual player skill, amount of players, map being played, gamemode and difficulty: - Objective mode respawns disabled completely - Survival wave start respawns disabled (scripted respawns on supply drops are unaffected) - Any firearm will kill all zombie types with one headshot, regardless of what caliber it uses - Bodyshots have no effect on zed HP, only headshots (Crawlers aren't affected by this) - The brain stem hitbox on Nightmare is overriden, any shot to the head will kill instantly • Hardcore Survival: This modifier only affects Survival mode. It removes all visual info and HUD elements typical of Survival maps: zone health, wave number, zombie counter, respawn token logos when obtained, wave start and wave end messages. Players are forced to interpret sound queues to know what is going on during the course of the match, like safe zones reaching 0% integrity, waves starting and ending, etc. More info on this shortly. • Alltalk:
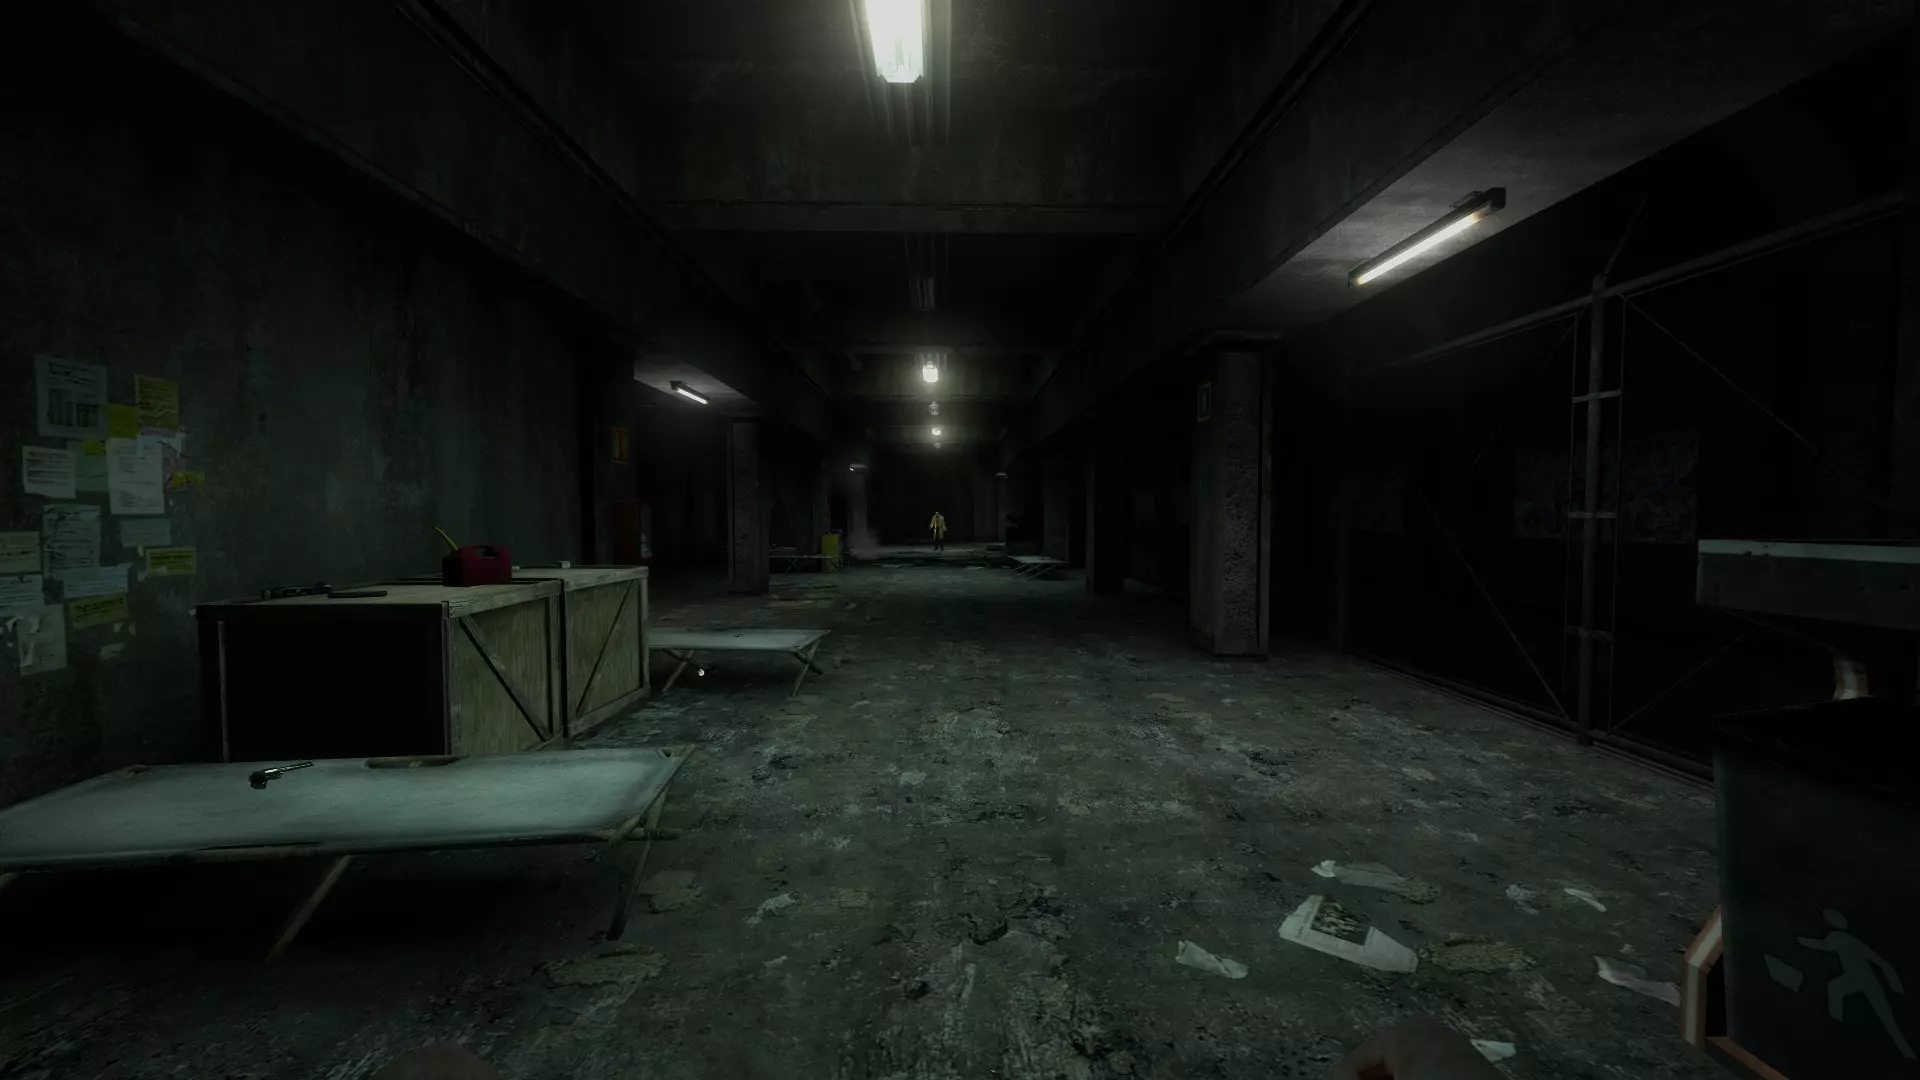
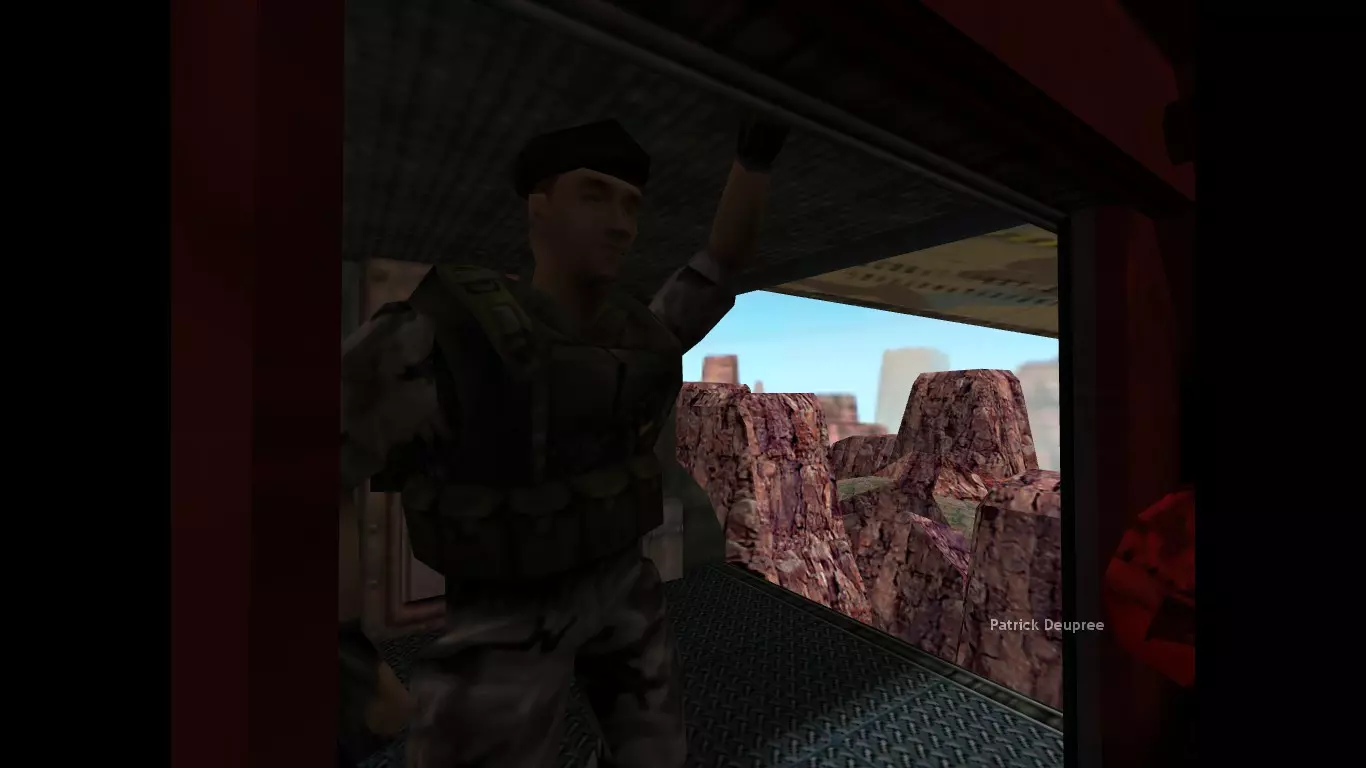
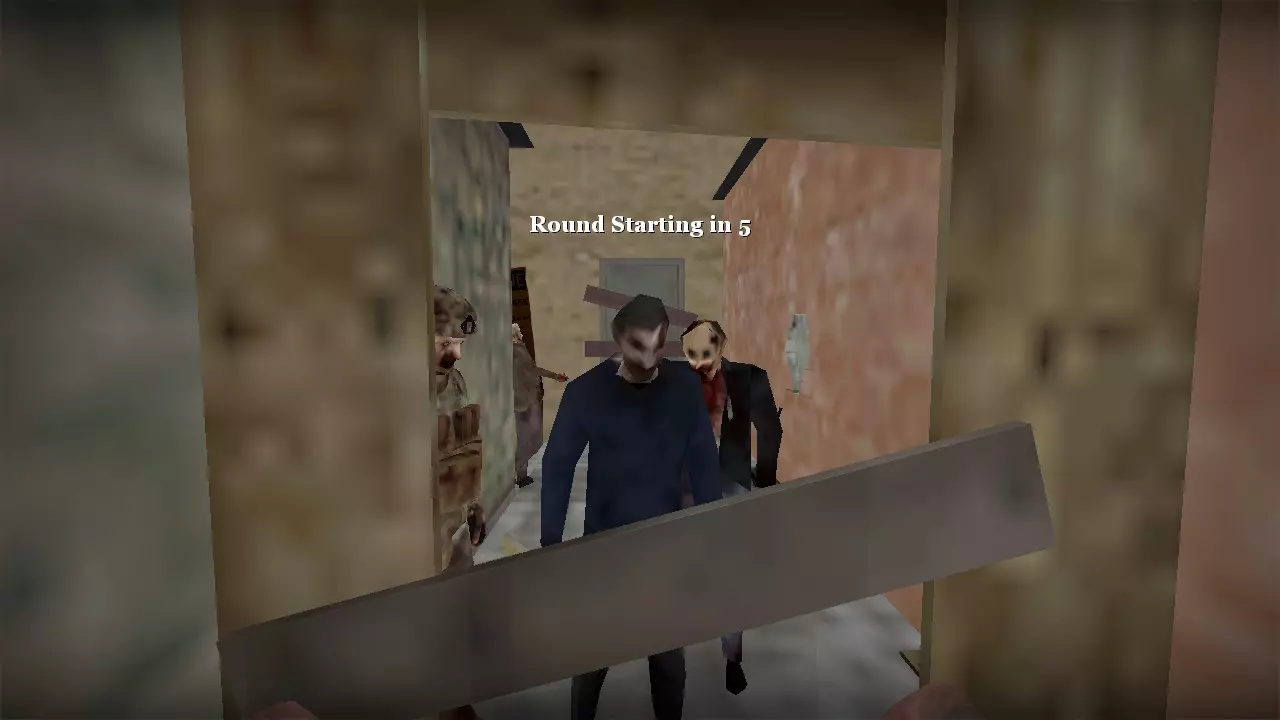
在默认服务器设置下,玩家可以通过麦克风或聊天进行交流,但这种交流仅在彼此处于一定半径范围内时有效。你离队友越近,他们的声音听起来就越大,类似于《DayZ》等其他热门游戏。 另一方面,当你与队友距离足够远时,聊天内容会变得不可见。 你可以将这张截图作为最大距离的参考(放大后查看效果更佳)。这是nmo_chinatown的出生点。此外,死亡玩家完全无法与仍存活的其他玩家交流,既不能聊天,也不能使用麦克风。他们只能与其他死亡玩家交谈。 如同其他Source引擎游戏一样,全通模式(Alltalk mode)会移除所有这些限制。玩家将能够随时通过任何方式相互交流。这使得游戏体验更加轻松,例如,观战者可以告诉你剩余多少生命值、指示你前进的方向,或者提醒你有【奔跑者】正在追赶你。
当你存活且全服语音关闭时,与远处队友交流的唯一方式是使用对讲机,这是一种在大多数地图中随处可见的工具。当你们两人都持有对讲机时,你们之间将启用全服语音。任何其他找到对讲机的玩家都能以完全相同的方式与你交流。 重要注意事项:《求生之路:纳粹僵尸部队》的难度很大程度上取决于你正在游玩的地图。难度和修饰符可能会让游戏变得更难或更简单,但如果所玩的关卡缺乏挑战性,那么游戏仍然会很轻松。例如,即使在噩梦难度下,游玩nmo_toxteth地图也可能很轻松,而在经典难度下游玩nmo_broadway2地图则往往会很艰难。 目标模式:基本信息
Objective maps place the survivors in urban, industrial or rural environments where they must complete certain scripted tasks in order to be rescued. These tasks vary between maps, but they are generally actions like finding a key to unlock a door, destroying a padlock to open a fence gate, welding structures to create passages, finding fuel for electricity generators, using explosives to blow up doors, etc. These all lead up to a final objective that unlocks the escape route and are generally accompanied by an in-game cinematic. The survivors will escape in vehicles like helicopters, boats, vans, trucks, trains, subways, and more. These are available for a brief period of time, so you have to be quick but also careful and help others escape as well. Being reckless during finales can get you and other players killed if you only care for your own survival. • Objective Types: - Timed Objectives:Some objectives are basically an in-game timer that forces you to wait while it's counting down. Examples of this are "Survive for 2 minutes." objective on nmo_broadway2 or the final evac center holdout on nmo_suzhou. They are usually found at the end of most maps as a way to hold out a certain area before evac arrives. - Prop Interaction Objectives:These are very simple. Simply walk up to the item and press the E key once. They are generally radios that are used to ask for evac, as well as buttons that activate doors or other mechanisms. - Progress Bar Objectives:This kind of objectives revolves around a single player standing still and performing an action like activating a panel by holding the E key, welding a door or lock, extinguishing a fire. When you start one of these objectives, you'll see a red bar that shows the progress. While you are in this state you are very vulnerable due to the fact that you can't move, can't look very far away from the item you are interacting with and you can't attack. However, there's a small exploit that you can use to give you some form of defense against zombies while you are welding something. It will be discussed in the "Items: Tools" section. Some objective progress bars reset after you stop your interaction, while others keep it intact, letting you resume from where you left off. Generally, putting out fires and normal use key interactions reset, while welder objectives tend to save your progress. This depends completely on the map you are playing, for example, nmo_fema has both a use key interaction that resets when you let go and another one that saves your progress. - Keypad Objectives:Pretty straightforward: find a code somewhere in the level and enter it on the designated keypad. Code selection is generally determined by map randomness, you must either memorize all variations, or know where to find the random code. Sometimes, there are very few codes, so you can memorize them (nmo_broadway) or even a single code, while other times there's a huge list (nmo_fema), so it's way faster to just look for the code as intended. While you are interacting with the keypad, you are completely vulnerable, you cannot perform any actions at all. If you feel threatened, press the ENTER key to cancel the keypad interaction. You can also input codes faster if you have a numpad on your keyboard. - Item-based Objectives:These are probably the most common type of objectives, they generally revolve around scavenging several props at the same time and taking them to the main objective trigger. Examples of this are: finding a fuel can for a generator (nmo_chinatown), finding 3 fuse boxes to repair an electric panel (nmo_subside) or scavenging the components of an improvised radio for you to call for a rescue (nmo_cleopas). These are the objectives that reward player cooperation the most. The reason for this is that usually more than one item is required to complete a section, meaning that several players can carry them all at the same time while others cover them with firearms, killing zombies that block the path to the main objective. This category of objectives gives way to several advanced techniques that allow you to seamlessly move through zombie hordes while carrying items. These will be explained later on the "Movement: Carrying Objective Items" section. - Miscelaneous Objectives:These are objectives that don't fall into any of the previous categories and are generally present in custom maps, where community mappers wanted to experiment with unconventional ways to make objectives. For example, in nmo_genex, one objective consists of killing a Runner that's carrying an access keycard needed to progress. ◈ NOTE:Some objectives have to be completed by performing several of these actions, like the welder section in nmo_subside (weld cabinets, carry the crank to the elevator and hold the E key to interact). • Objective Randomness or Variation (Anti-objectives):Most official maps have objective variations, a.k.a. "anti-objectives". When a map starts, the game decides at random which objective chain will be played if there are at least two options available. Note that in every objective that's chosen by the game there can still be randomness involved, like the location of an objective item that you have to retrieve. Depending on the map's programming, you can get things like nmo_suzhou with several different branching paths leading to a huge amount of possible outcomes, or like nmo_in_the_dark where you can get two alternative branching paths at the beginning (going through the streets or traversing through the underground tunnels). Some maps lack this randomness almost entirely, like nmo_chinatown or nmo_junction. You can't force or manipulate RNG in this case. The map decides what you're going to get, therefore, you need to adapt and act accordingly. As a general rule, custom maps tend to have less RNG in them, since creating these variations takes a lot of effort and time. This is not always the case though, nmo_ravenholm for example, has a surprising amount of randomness built in. Additionally, most custom maps are difficult to complete, compensating that lack of variation. A huge part of learning to play this game, is memorizing map layouts, tricks, strategies and objective randomness, because a huge chunk of the challenge are the levels themselves instead of the zombies. The focus of this section though is just the general principles of Objective mode, you'll have to memorize all the maps by playing them repeatedly, learning from your mistakes and trying different strategies on how to complete them consistently. I will detail many things that generally you should learn and memorize about any map you play, so that you increase your chances of survival. You can find this info in the "Learning the Maps: Memorization" section. • Player Respawns:In Objective mode, players can only respawn in fixed locations specific to each map. Those spawns are scripted to happen once the survivors complete a specific objective or physically reach a certain location. The amount of respawn points is variable, it depends entirely on the map being played. In general though, they range from 1 to 3, while some exceptions may have more than 3 or even no respawns at all. If Realism mode is enabled, then all scripted respawns will be disabled completely. Survival mode differs slightly from this, which I will explain shortly. Objective Mode: General Strategy
In NMRiH, maps are usually drastically different from each other. They do not necessarily share the same mechanics, the same zombie spawn systems, the same objective types, etc. However, these are important strategies that you should always have in mind when playing Objective mode, because most maps worth playing are built with the same principles in mind: • Do not kill zombies without a reason to do so: On the vast majority of objective maps, shamblers will respawn infinitely. They spawn from invisible "brushes" placed around the level. When players eliminate enough of them and walk far enough away (plus avoid looking in that direction), the brush will re-spawn more zombies to keep the density up. Generally, less zombies re-appear after the initial spawn is dealt with, but most hard custom maps are designed to keep a high density of Shamblers regardless of what people do. What does this mean for the player? Simple: avoid killing zombies that you don't need to kill. No matter how hard you try, zombies will keep respawning, it's unavoidable. It's useless to stand around fragging, you waste ammo and you can potentially get infected or killed by simply engaging with a lot of zombies via melee. You need to focus on completing the objectives, there is no point to NMO matches other than escaping. The best you can do, aside from actually progressing, is delay the spawns by standing on top of a spawner or brush and keeping an eye on the ones nearby, effectively blocking them. This is a useful technique on some maps like nmo_underground. • Use the compass constantly:It will help you understand what you have to do to progress, as well as help you find your bearings and provide situational awareness, like the general direction you should move towards, which areas don't contain objective items so they can be avoided and what type of objective you're dealing with. For example, if you know that you have to weld something, you should preemptively look for a Welder before you reach the objective. Keep in mind the info explained in the "Heads Up Display (HUD)" section. • Be constantly on the lookout for Runners and Zombie Children:When going into a new area, always be on the lookout for Runners and Kids. While dealing with the zombies close to you, always keep your peripheral view centered on chokepoints and obstacles. Hidden Runners may come out and attack you while you are distracted, so you have to be able to multitask: learn the melee combat mechanics well enough so that you can automatically kill zombies while your attention is centered on spotting Runners and Kids at a distance, plus keeping an eye on chokepoints to determine when's the right time to run through them. However, don't go rushing through chokepoints as fast as possible unless there's a clear window of opportunity or if you are confident enough that Runners won't block you and murder you. You also need to consider that if you want to rush through, there must be enough space to dodge Runners and kill them safely once you run past the chokepoint itself. If there's not enough room, you can get overwhelmed by groups of Runners and you'll die in seconds. Examples of this are the apartments and tunnels in nmo_in_the_dark or the warehouse area where you find a Welder in nmo_junction. • Pay attention to specific zombie noises in the environment:Apart from being able to spot them at a distance, you can also determine if if there are Runners or Zombie Children near you by listening to their sounds. You can hear distinctive growls and noises that are unique to each of them. Kids obviously have their unique voices, and in the case of Runners, you can determine their presence if you hear a loud growl. This means that the Runner has spotted you and has started chasing you. Additionally, Runners sometimes stand around idling and you can't distinguish them from Shamblers visually, but if you listen carefully, you will be able to tell them apart by their idle sounds. Runners emit more aggressive noises and growls, while Shamblers usually sound like they're in a slumber. • Kill all Runners / Kids if you spend a long time in an area:After locating all Runners / Zombie Children like it was explained previously, you should try to force them to follow you. Zombies will target players by line of sight and proximity, which you can abuse to get them to move away from bigger hordes and attack them individually, avoiding massive Runner conga lines. Alternatively, if the place from which you enter the new section is not secure enough to be drawing Runners into (like Shamblers re-spawning behind you in the narrow subway hallways of nmo_anxiety_classic or the tunnels in nmo_underground or even the tight alleyway in nmo_urbanhazard) you can rush through if you know the map layout. You can then gather most Runners in a conga line behind your back and kill them if you know how and have the necessary equipment, a.k.a. a firearm or a good enough melee weapon. However, doing this on Nightmare difficulty is much more risky, try to avoid it if you can. Check the "Nightmare: Differences in Strategy" section for more info. Also, if you're NOT going to stay for long in a particular section, it's sometimes better to only kill the Runners that are directly chasing you, and then move on to the next section, even if you didn't kill all of them. This is valid only if you don't have to backtrack to that same section later. • Complete objectives as fast and as efficiently as possible:The longer you take to complete objectives, the more zombies you'll have to kill or dodge, you'll have a higher chance to get cornered and you'll waste an excessive amount of ammunition, decreasing your chances of survival. Divide tasks within your team, look for multiple objective items at once in different groups, protect people carrying them, coordinate to kill the necessary zombies to move through a chokepoint, etc. Don't go overboard though, rushing maniacally without a plan or knowledge of what lies ahead just to speedrun the map will get you killed. • Keep close to your teammates:Unless you know the map very well and you are experienced enough, it's advisable to stick with your team at all times. This means not getting distracted while scavenging for weapons / ammo, which is probably the most common reason why players get lost. However, if you do need to scavenge for supplies, then pay attention to what direction the team is moving towards so you can catch up to them after looting. • Practice and learn each map you want to play:Like it was mentioned earlier, the factor that affects NMRiH's difficulty the most, is the map you are playing in. As a general rule, official vanilla maps (the ones released before 2018) are trivial to complete once you've mastered the basics, while most custom maps are very difficult and demand a lot of skill, knowledge and practice from the player. Therefore, memorizing map layouts, objectives, items spawns, zombie spawns and more is fundamental if you want to survive consistently. You'll find more info on how to better learn any map in the game in the "Learning the Maps: Memorization" section. Survival Mode: General Info
生存模式将玩家置于大型非线性环境中,他们必须协助国民警卫队减少指定为【安全区】区域内的感染者数量,并保护这些区域,以便其他幸存者重新集结并等待未来的撤离。作为奖励,玩家将被转移到无感染区域。然而,这些【安全区】实际上被用作诱饵,以减少城市地区的僵尸数量。这是为了给国民警卫队争取时间,安全撤离城市中剩余的幸存者。 在游戏玩法方面,这意味着:在每一波攻击中消灭大部分僵尸,并保卫标记区域或地带不被攻陷,直到救援抵达。该模式引入了多种独特的游戏机制。它们中有些被用作抵御尸潮的防御手段,另一些则成为幸存者重新补给的工具: - 僵尸浪潮:这是脚本事件,会导致僵尸生成并向所有安全区移动。浪潮初期强度较低,僵尸数量在20到50只之间,随后数量逐渐增加,有时会达到约200只,同时还会加入奔跑者和僵尸小孩的生成。 当一波浪潮中生成的僵尸数量减少到5只或以下时,会有10秒的计时器提示下一波开始。之后,大约30秒后会开始生成更多僵尸。所有官方地图总共有9到10波僵尸浪潮(nms_drugstore地图除外,它有7波),而自定义地图可以有更多波数。屏幕左上角的HUD元素会显示已完成的波数和剩余僵尸数量。安全区的完整度也会以同样方式显示。 • 安全区:这些是需要抵御僵尸的区域。每个安全区都有一个完整度计量条显示在屏幕左上角(如果启用了硬核生存模式,这些计量条会隐藏)。官方生存地图总共有1到3个区域,而自定义地图可以有更多区域。
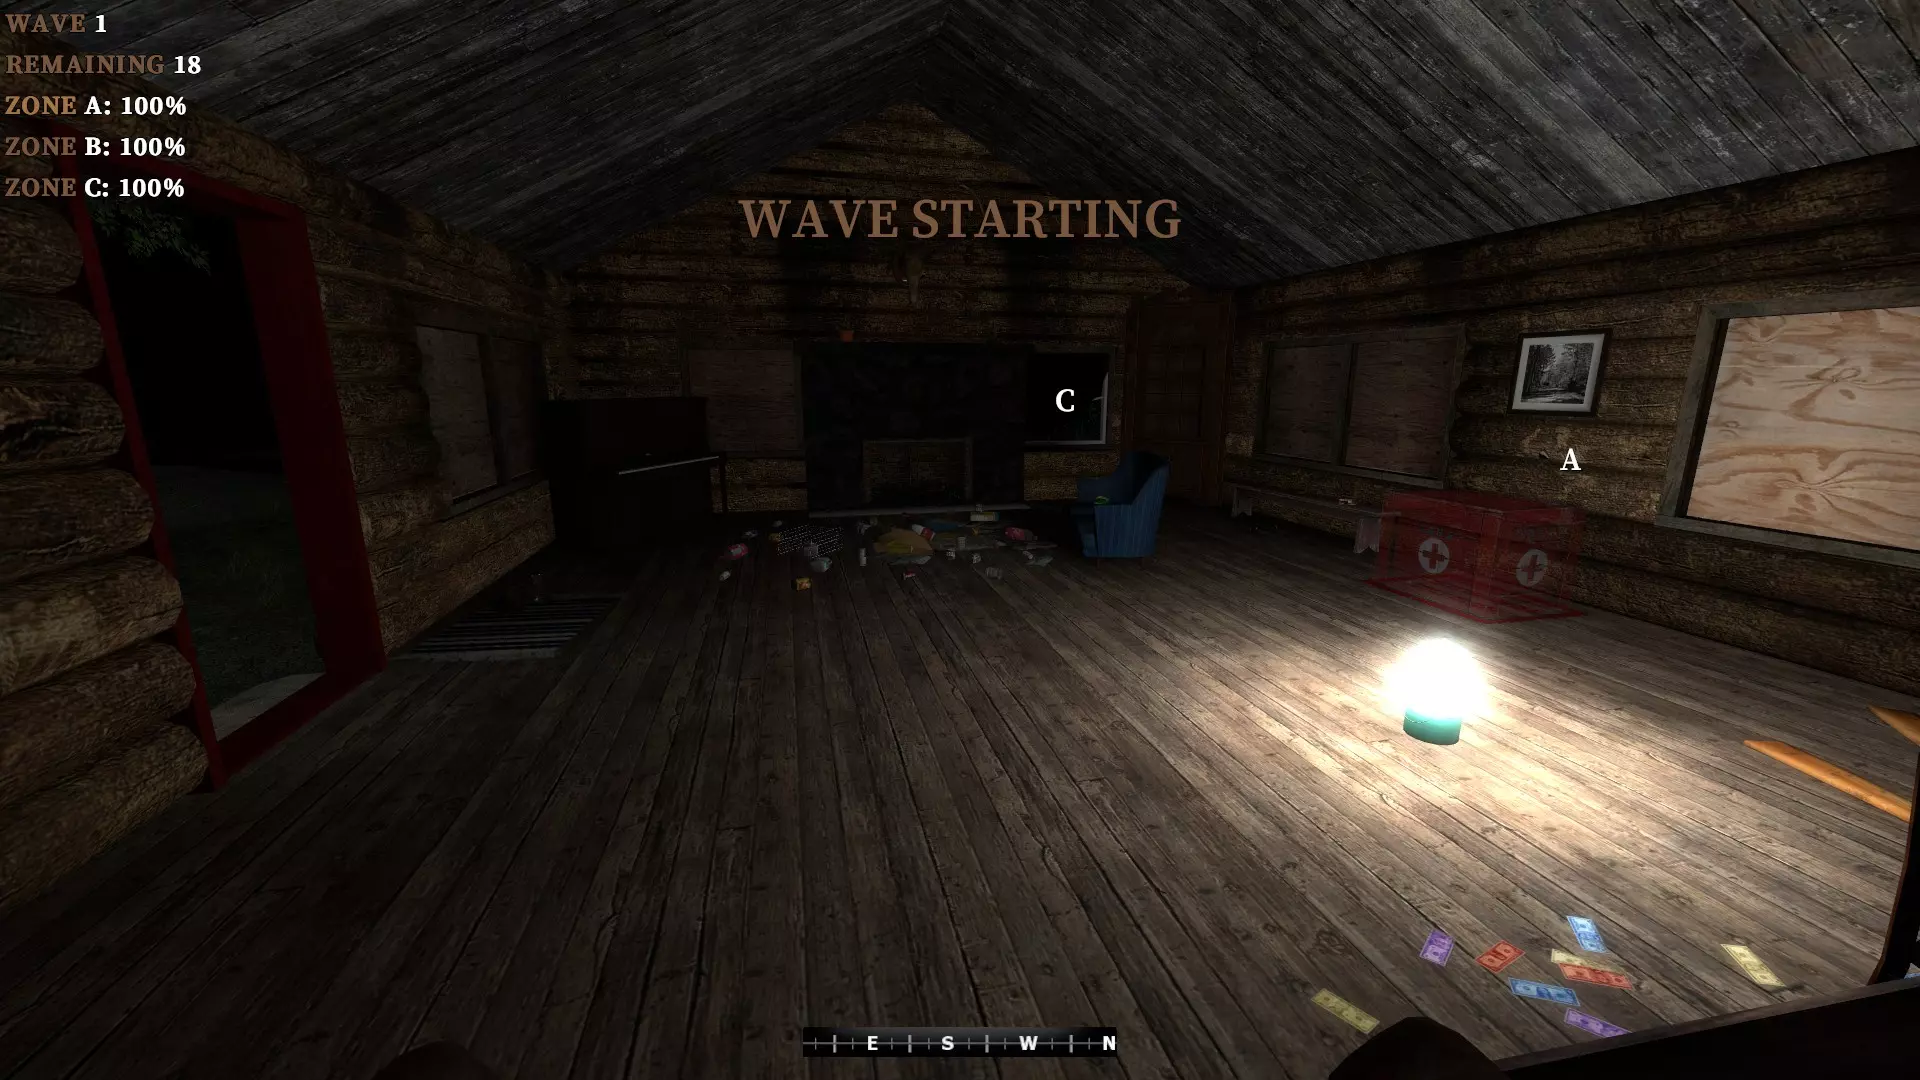
当僵尸进入某个区域且该区域内没有玩家时,该区域的完整度将从100%开始下降。进入区域的僵尸越多,完整度下降速度越快。初始下降速率为每个僵尸每秒降低0.15%完整度,最高每秒降低1%(超过7个僵尸不会进一步加快完整度下降速度)。 要防御一个区域,玩家需要站在该区域的边界内(例如,站在某栋建筑内)。如果区域内僵尸数量少于12个,只需1名玩家即可阻止完整度下降。如果僵尸数量更多,则至少需要2名玩家。不过,大多数情况下2名玩家已足够。如果安全区的完整性降至0%,僵尸将不再以其为目标,而是直接前往其余的活跃区域。在此情况下,修复该区域的唯一方法是等待补给空投,补给空投会将其完整性提升至50%,之后你就可以使用FEMA包再次对其进行修复。 • FEMA包:
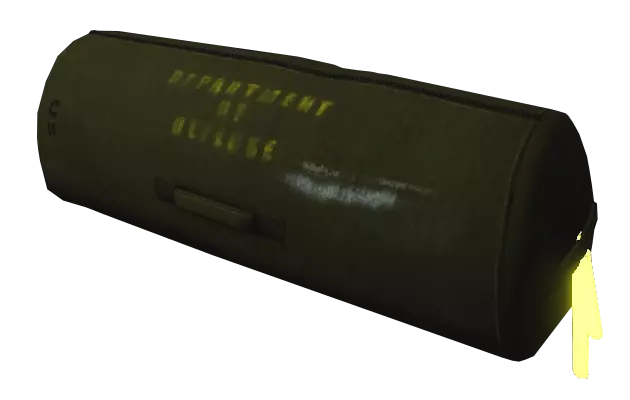
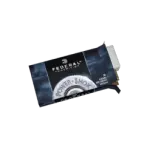
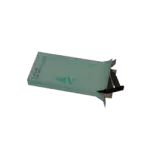
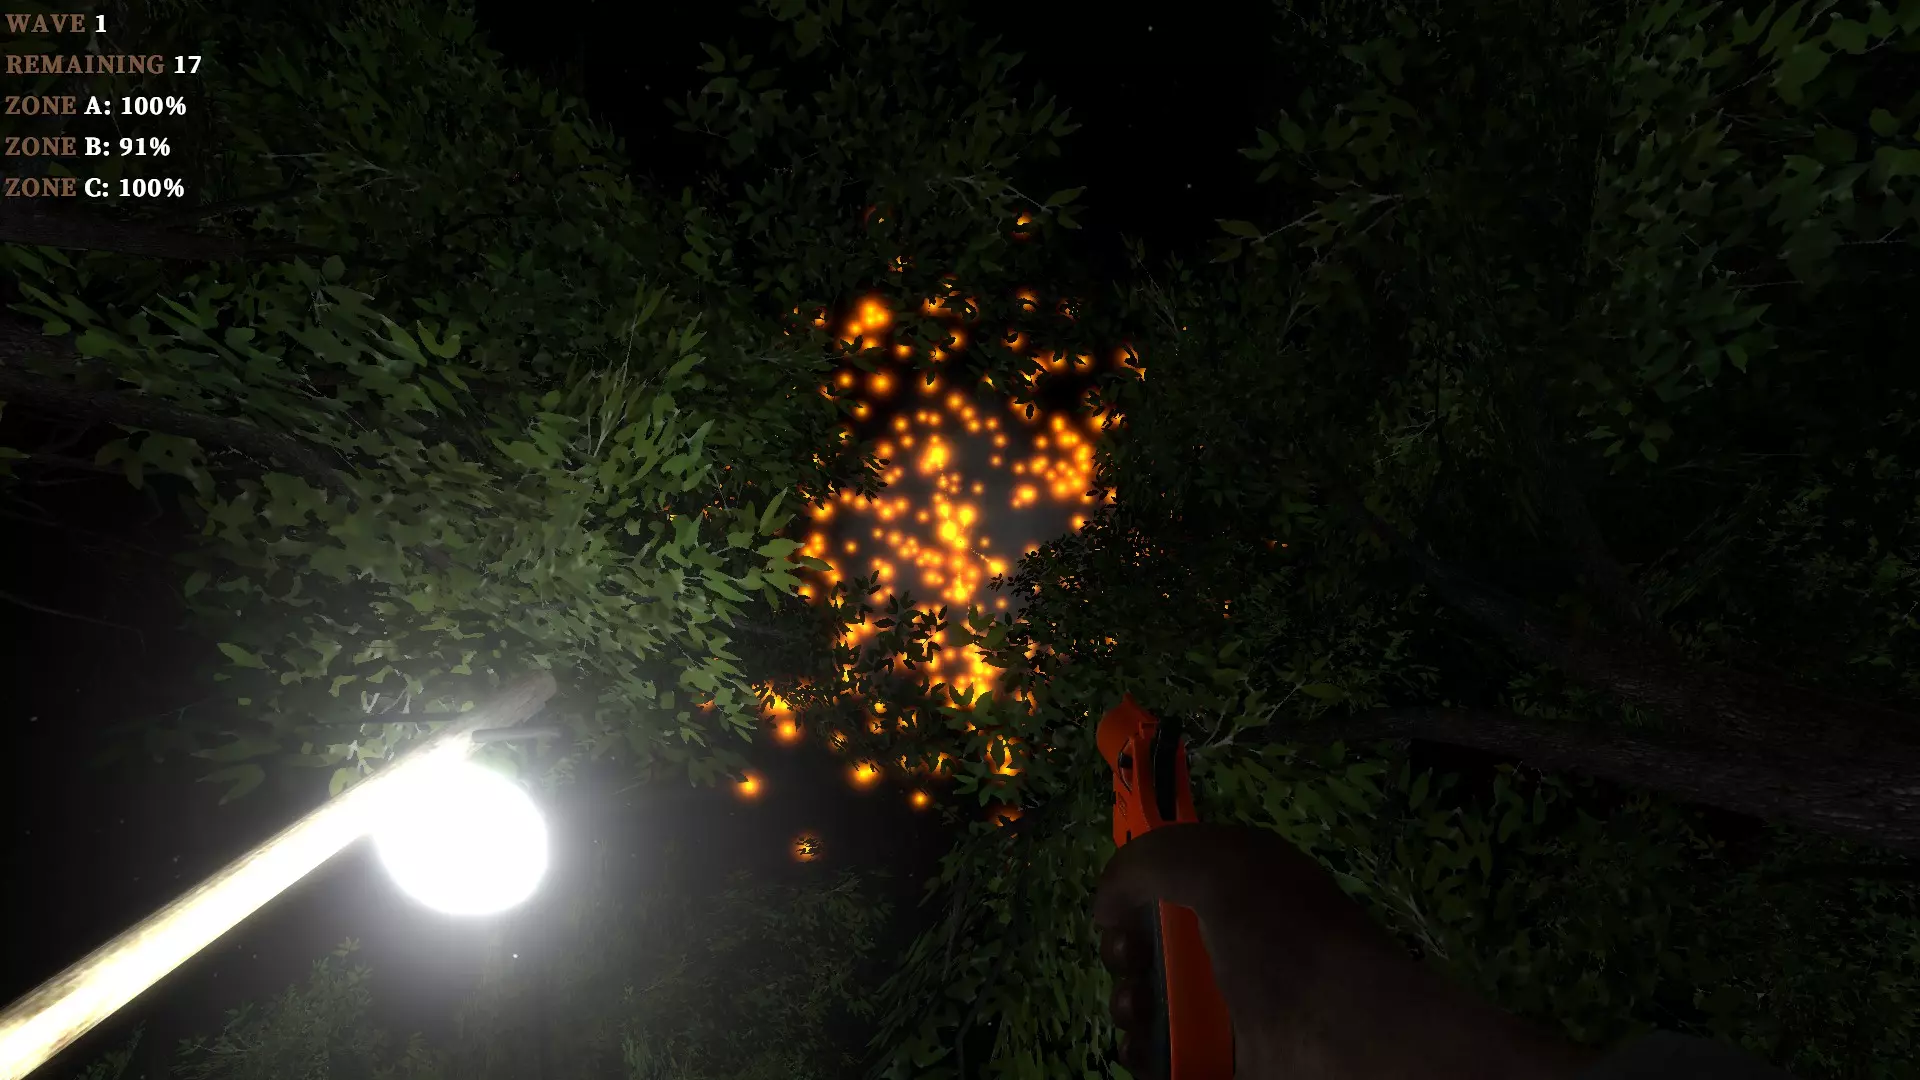
这些是绿色行李袋,可在标有荧光棒的木箱中找到。取出时,只需按住E键直至进度条充满。 这些袋子可以恢复地图上任意安全区25%的完整性。使用方法很简单,拿起袋子并走进你想要修复的区域。袋子会消失,你会看到安全区完整性上升,同时出现绿色数字以确认增加。

请注意,一旦某个区域的完整性降至0%,在一波攻击后出现脚本化补给空投前,你将无法通过FEMA包提升其完整性。补给空投会使该区域恢复50%的完整性,之后你就可以用FEMA包将其修复至100%。尽量不要浪费FEMA包,等待特定区域的完整性至少降至75%以下再使用。 • 路障:
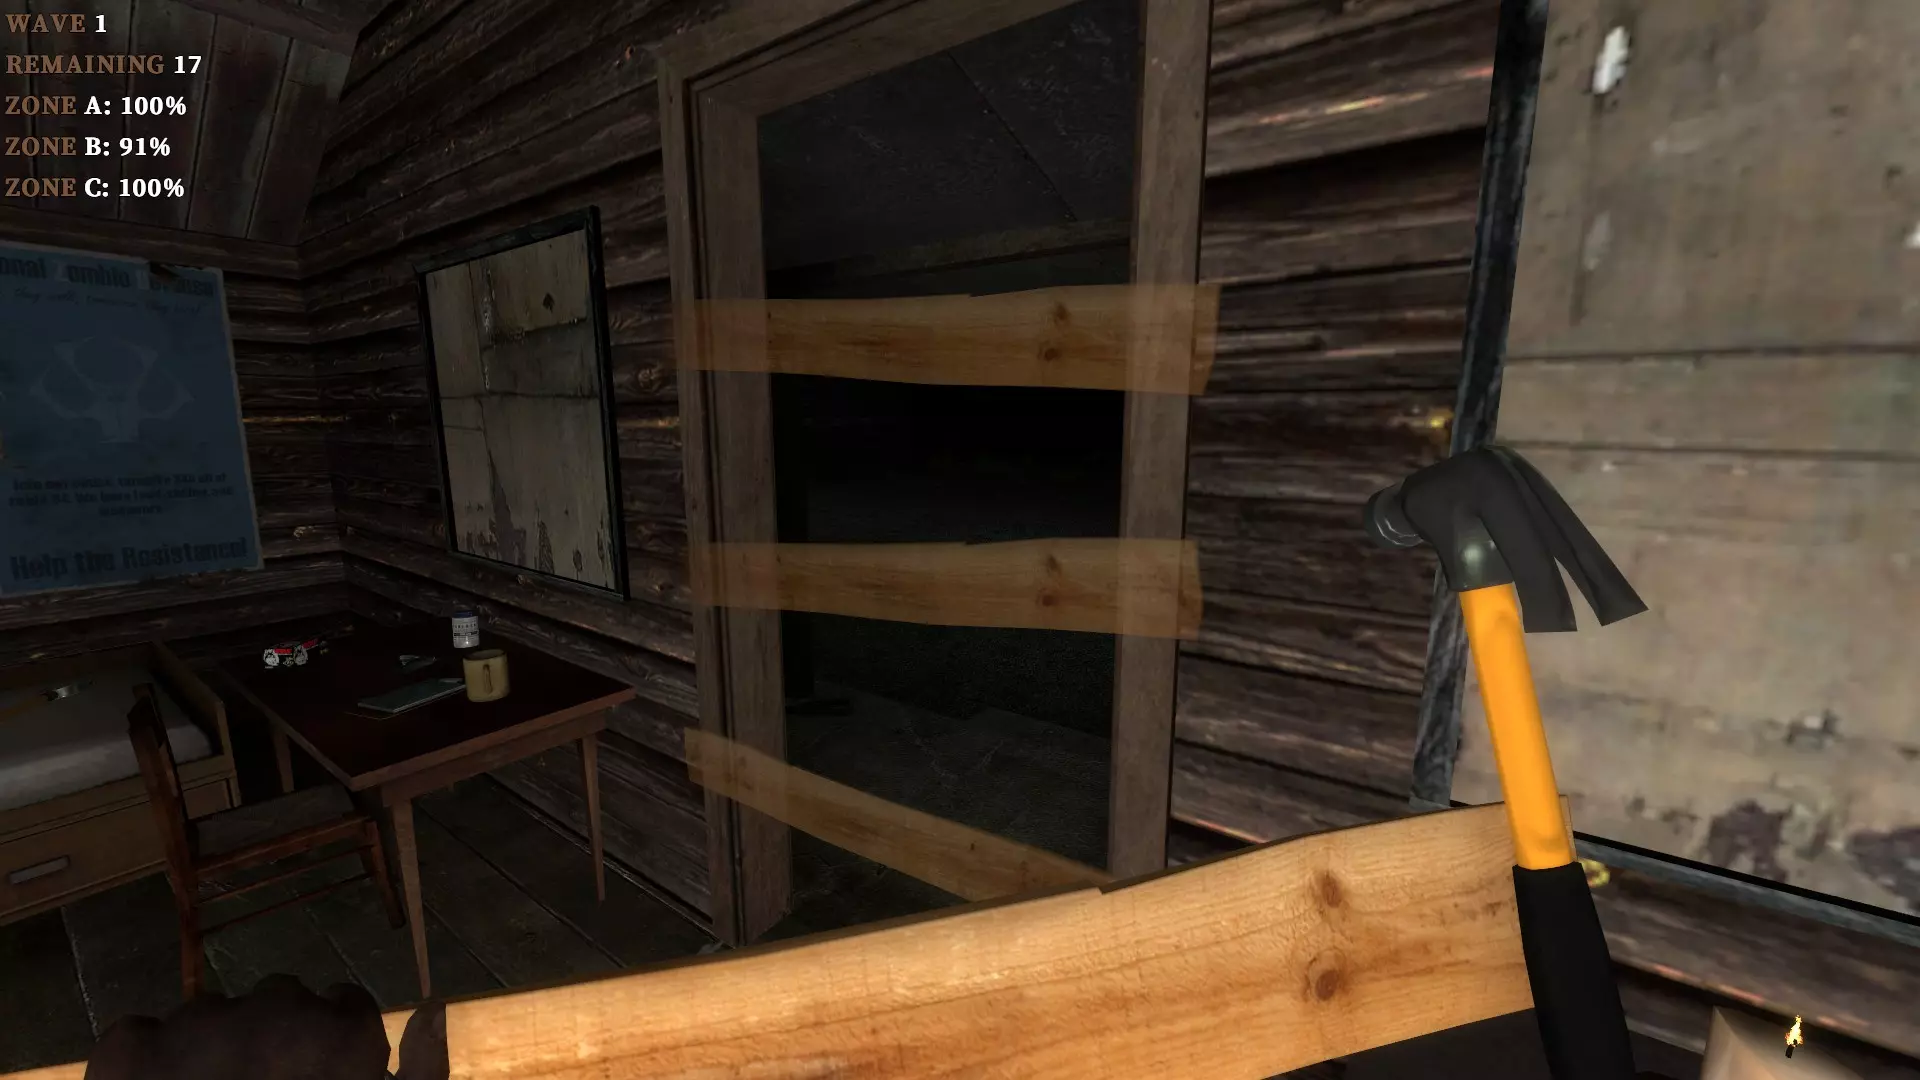
你可以使用关卡中找到的木板来封锁门口和通道。放置木板需要使用 barricade hammer 工具。首先装备该工具(你需要木板,木板相当于锤子的弹药),按右键进入 barricade 模式,然后在透明木板覆盖层附近按左键放置 barricade。 这些 barricade 可以阻止僵尸进入区域,直到它们被摧毁。站在 barricade 附近的僵尸可以开始用拳头捶打木板的动画,也可以使用攻击玩家的相同攻击动画来对木板造成伤害。请注意,前者不会对木板造成任何伤害。 • 医疗站:
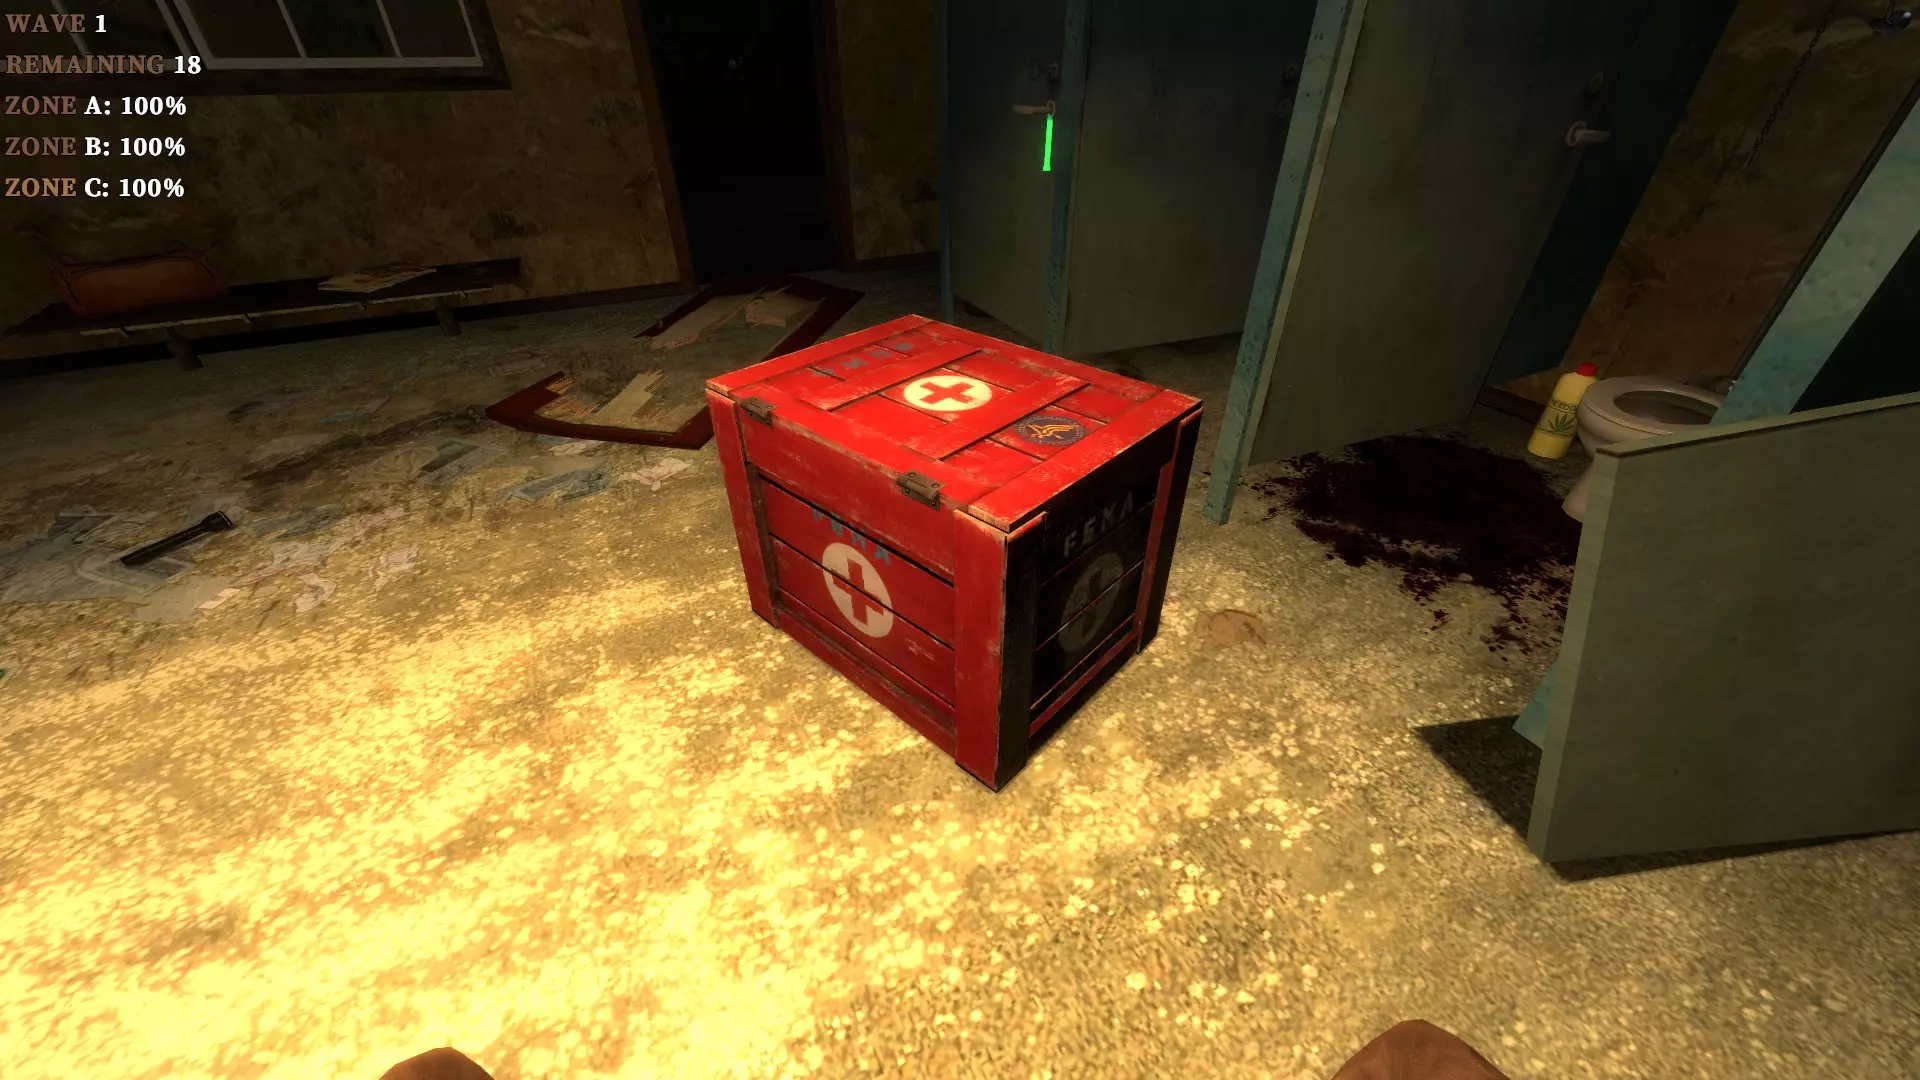
这些是红色木箱,会在每张地图的固定位置生成。按住E键使用它们直至耗尽,可恢复生命值。需要将它们带到被称为【医疗站位置】的特定地点,这些地点外观与医疗站完全相同,只是呈透明状态。它们通常在每个区域内都能找到,且只能使用一次。
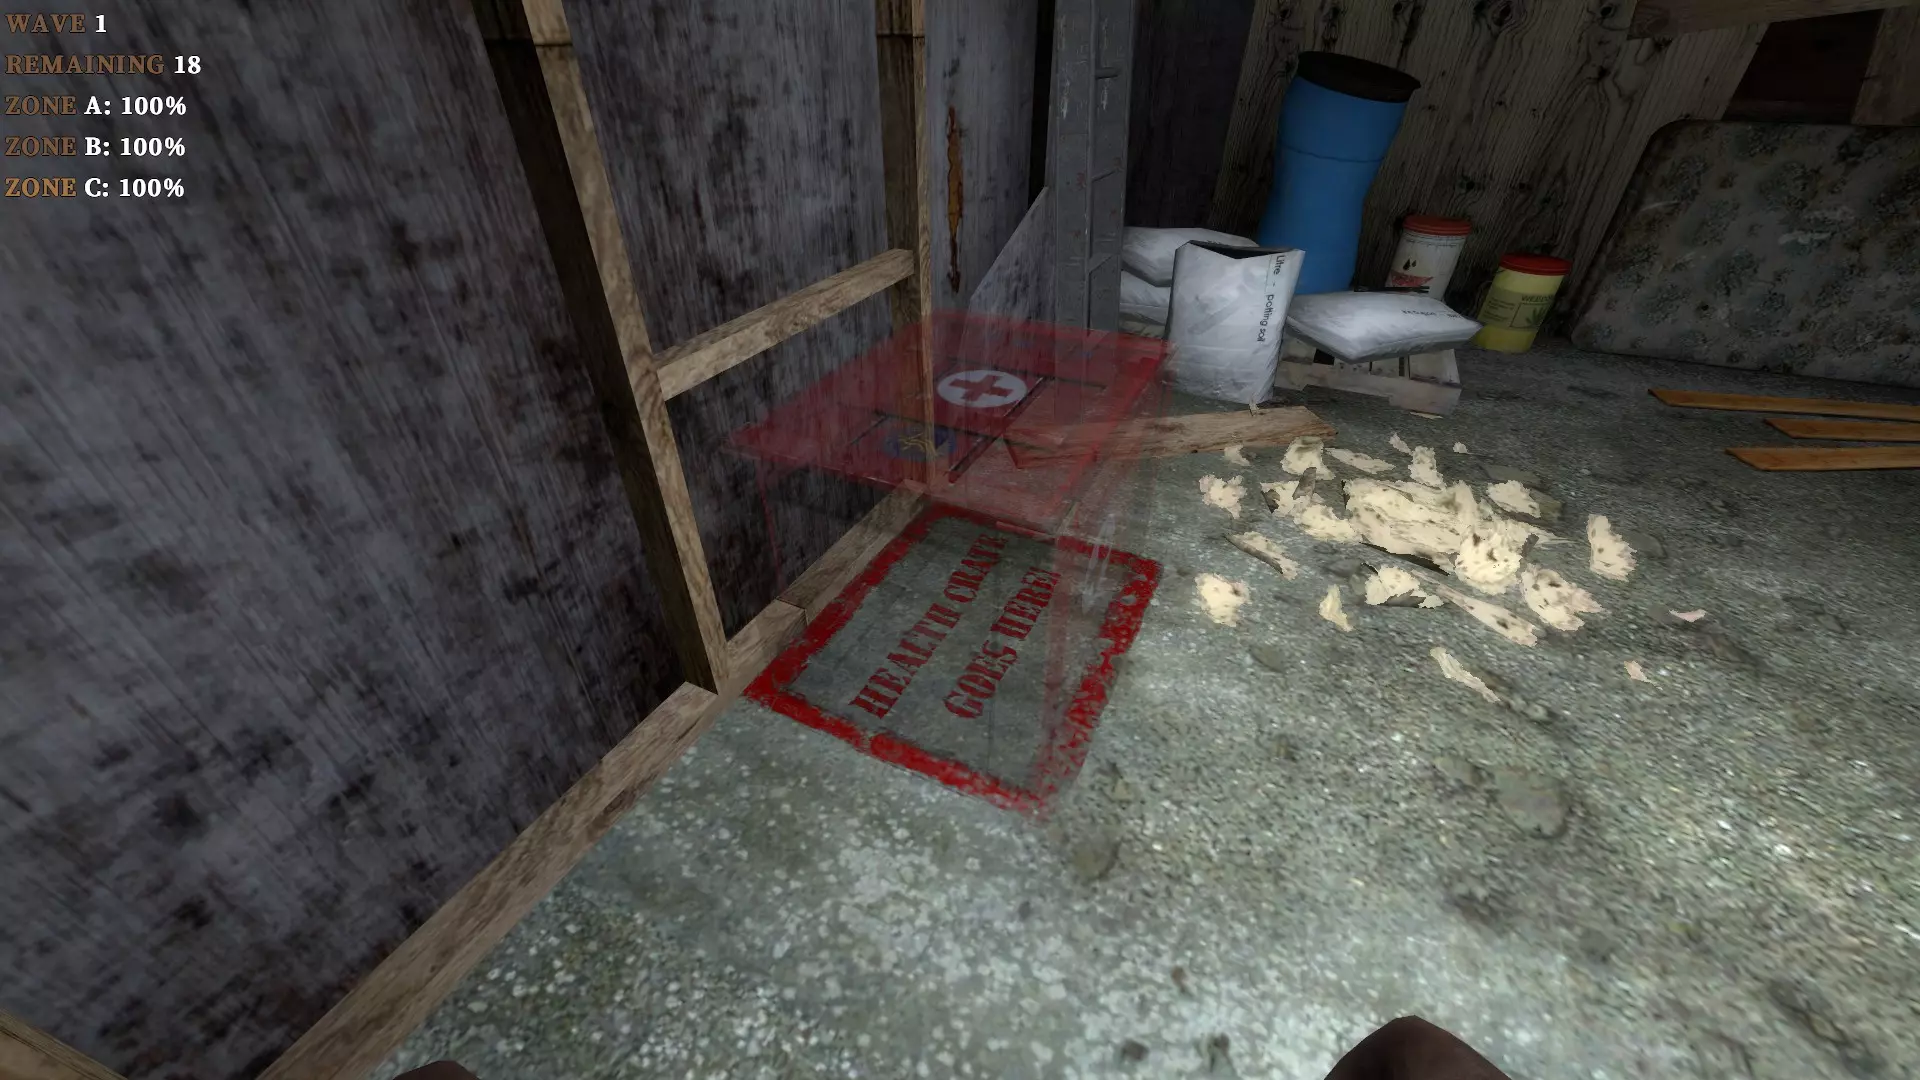
当医疗站的容量完全耗尽后,它会消失且无法被替换,你需要在其他区域使用另一个槽位。 “医疗物品:高效使用”部分有更多信息。 生存模式:通用信息(续) • 补给空投:
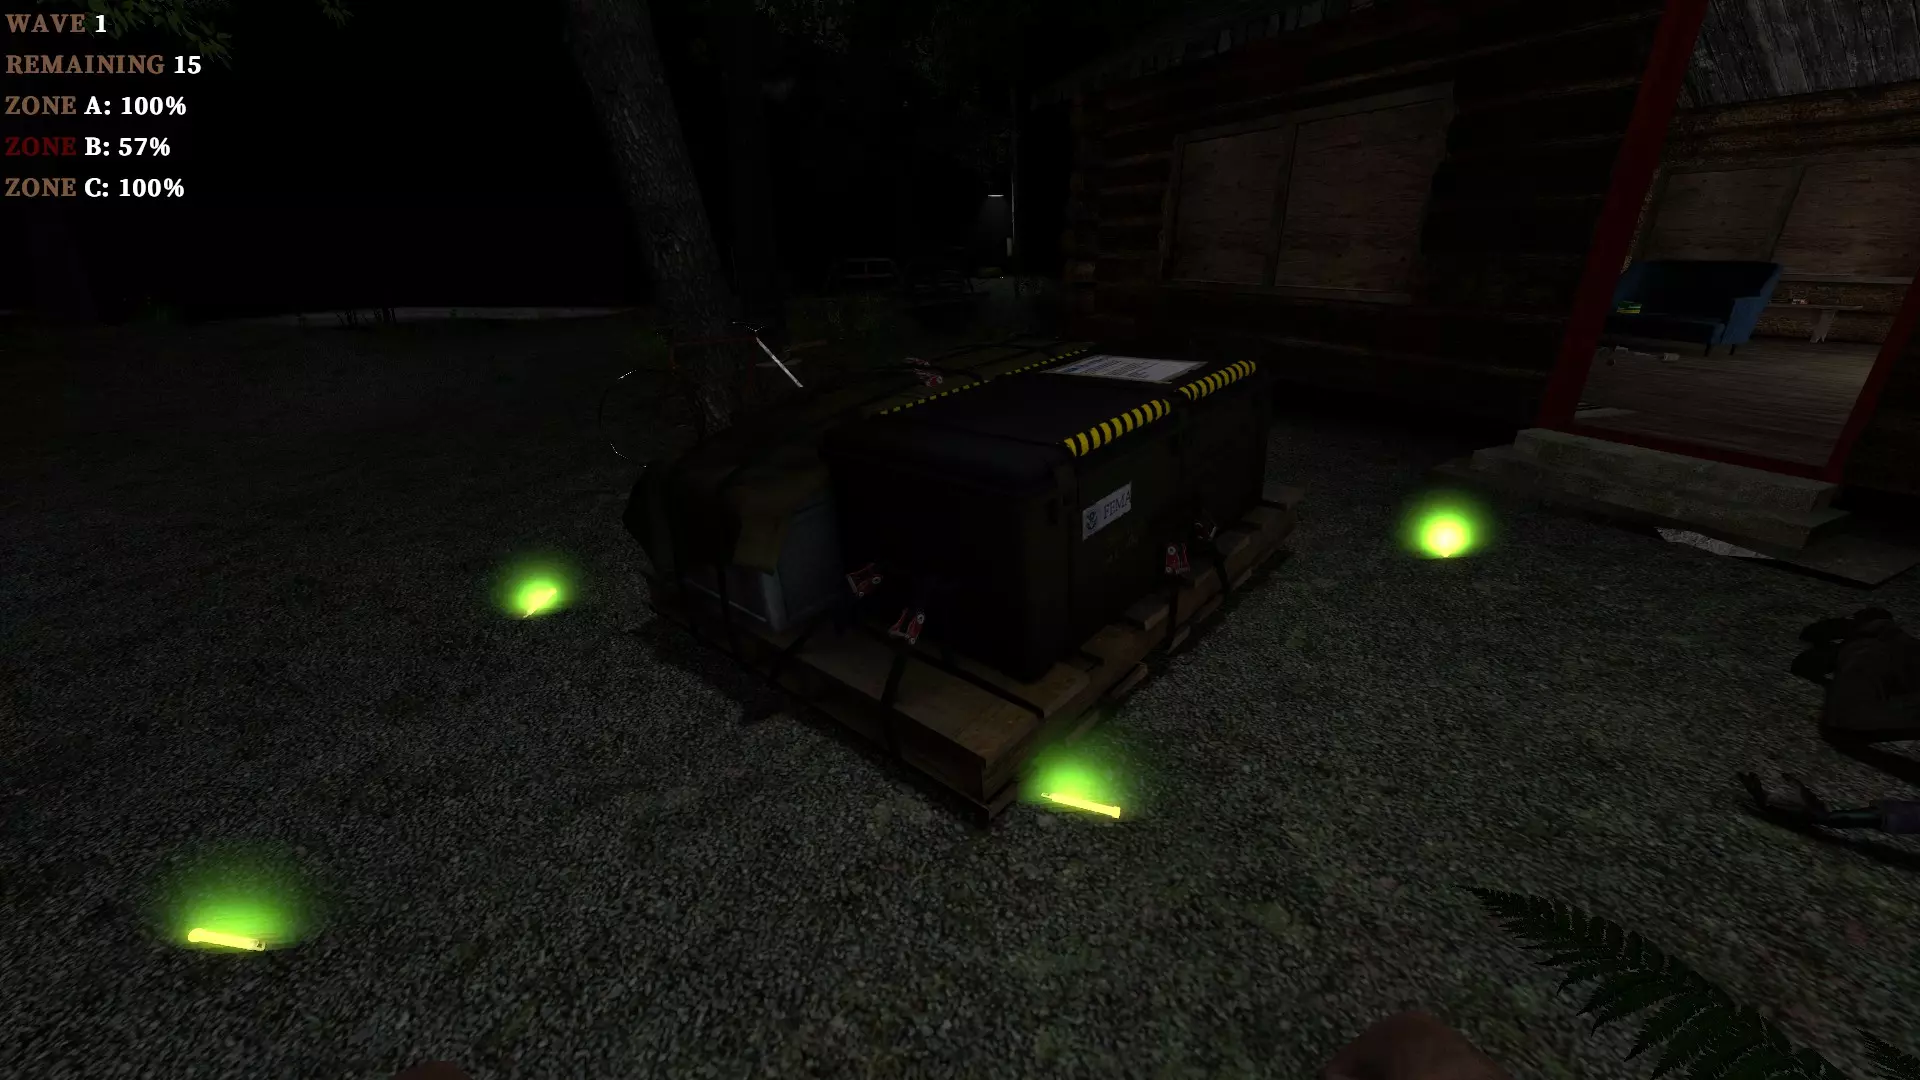
这些物品看起来像是用绳索捆在一起的弹药包和武器箱。在生存模式中,国民警卫队每隔几波会投放一次,里面装有资源。 它们几乎可以包含游戏中的所有物品,但不包括焊接器、信号枪和灭火器。 补给投放的数量完全取决于所玩的地图。当投放一个补给时,会开始60秒的倒计时,这会延迟下一波的正式开始,以便玩家有时间搜刮其中的物品。一旦新的补给投放,若玩家尚未清空之前的补给,之前的补给就会消失。 信号枪直升机信号:
如果你向天空发射信号弹,会有一架直升机抵达并投放补给箱,这与某些波次结束后按脚本投放的补给箱无关。每回合通过这种方式只能呼叫一次补给箱,并且在发射信号弹前,你需要清空地图上仍存在的任何旧补给箱。只要关卡中还存在补给箱,信号弹就无法生效。 • 陷阱:
大多数生存地图的不同位置都设置了陷阱。这些陷阱包括带电水坑、爆炸桶、用作火焰喷射器的煤气泄漏等。它们通常只能使用一次,这意味着你必须谨慎管理。有些陷阱是可重复使用的,例如nms_notld地图上的电击陷阱,通过给发电机重新加油即可再次使用。 • 玩家重生:与目标模式类似,存在特定事件触发后的脚本化玩家重生。在生存模式中,每波结束并开始下一波后,死亡的玩家将在地图周围的多个位置重生。如果启用真实模式,所有这些脚本化重生都将被禁用。不过,每次空投物资送达时也会触发固定的复活机制,这意味着即使开启了写实模式,玩家在每次空投物资送达后仍然可以复活。 • 复活代币:
这些本质上是玩家的“额外生命”。每连续击杀40只僵尸(意味着在获得40次击杀前不能死亡),你将获得一个复活令牌。如果你持有复活令牌时死亡,将在5秒后自动在随机出生点复活。你可以在计分板(按住TAB键)中查看拥有的令牌数量。当你获得令牌时,会播放提示音,屏幕右上角会短暂显示计数器。 • 声音提示:生存地图中的几乎每个事件发生时都有特定的音效。例如:一波僵尸开始或结束、到达一波的终点(进度条中仅剩5只僵尸)、放置医疗站、获得复活令牌、安全区完整性降至0%等。声音提示在游玩硬核生存模式时非常有用,该模式会完全禁用所有通常显示的HUD信息(如区域完整度0%、僵尸数量、波次计数等)。熟悉每种声音提示能让你准确了解当前状况并快速做出正确决策。 • 双倍感染几率:在生存模式中,感染几率是目标模式的两倍(基础几率分别为5.87%和2.93%)。这就是为什么妥善管理医疗物品以避免全队耗尽至关重要。其目的是让所有人都能存活。关于感染几率的更多信息,请参见【玩家状态异常:感染/出血】部分。 生存模式:通用策略
Survivial mode in itself is very straightforward, there's not too much complexity or depth involved when playing. Playing on Classic difficulty with a team is trivial, assuming the other players aren't completely useless. Playing them solo however, is much more difficult. Some maps are challenging, like nms_camilla or nms_house_of_forester for example. These require proper coordination, but no new concepts need to be explained. If you are playing solo, then you do need to learn the map from top to bottom to know the location of all supplies, but that's pretty much it. When playing on Nightmare, it's basically the same strategy, but you have to be overly conservative and careful with your resources and actions. You should check the section "Nightmare: Differences in Strategy" and that should be enough for most intent and purposes. Here are a few general useful strategies to keep in mind when playing Survival: • Use scripted respawns to your advantage:After each wave is done, the game activates a player respawn. This means that you have around 8 or 9 respawns, allowing you to commit suicide if you are infected or at low HP, saving resources. Do keep in mind though that players won't respawn in this situation if Realism is ON. Also, some maps, like nms_campblood, won't respawn players when the last wave starts. • Use FEMA bags efficiently:Since they each replenish 25% integrity, you should only use them when a zone is under 75%. If you don't, the bag will be used up and you lose the max amount of replenishable points. You can take all of them out of their respective boxes and place them near a zone for easy and quick access when you are in a pinch. • Use traps efficiently:Traps are generally one-time-use resources, so you should definitely save them in case of an emergency (several players are killed mid-wave and you need to clutch) or to secure your escape if Runners start to spawn in heavy numbers after the last wave is complete, like nms_isolated. It can also be used to speed up the zombie-killing process in extreme cases where several players are infected and there's no more scripted respawns, tokens, Pills or Gene Therapy syringes. • Use medical items efficiently:This basically means that you should minimize the use medical items as long as there are scripted respawns remaining. If you can trust your teammates not to steal your items and leave you defenseless, you can use either your Respawn Tokens or scripted respawns to instantly go back up to full health and eliminate afflictions (infection and bleeding). If you can't, then start with Health Stations, save up your Medkits for later and try not to get killed. You should use medical items freely if you need to kill large groups of zombies when your teammates fail to help you defend properly or if the entire team is getting overwhelmed. Start with Health Stations like I mentioned previously, since they're fixed in place. Use Medkits later because they can be carried in your inventory, making them more versatile. Same goes for Pills and Gene Therapy syringes, use them only in emergencies or during the last wave in case there's no more scripted respawns. • Use barricades efficiently:Barricades should be placed in crucial spots where zombies absolutely shouldn't get in. An example of this is the living room window in nms_isolated. If zombies get in through there, they can back survivors into a corner and cut off access to both zone B or C depending on where they are standing. If you are planning on using them on every possible entrance, then you should place only a couple of boards on the bottom to allow survivors to go in and out by jumping over them. Barricades in general are not that useful if you know how to kill zombies efficiently, they become more of a safety net the majority of the time. Position yourself and your team in all critical entrances to the zones, use good melee weapons / firearms when necessary and that's it. • Kill zombies behind barricades with caution:If you want to kill zombies behind a barricade, it's important to keep your distance because they can damage players through the boards. Therefore, you either have to use a firearm or you have to go to the other side of the barricade and kill them with a melee weapon. If you attack them directly through the boards via melee, there's a very high probability that you'll get severely wounded or killed. • Use melee weapons constantly:Since your only goal is to kill zombies, of which there are many, using melee weapons is crucial to conserve ammo. Use what you saved up for Runners and Zombie Children, as well as for tricky escapes like in nms_silence, where you have Shamblers and Runners spawning very close to a tight chokepoint leading to the rescue truck. Check the Uninterrupted Shambler Killing technique in the "Combat: Basic Melee Mechanics" section. It can help you tremendously in Survival mode. • Decide which zones to defend and which to abandon:The amount of intact zones doesn't affect anything other than zombies moving directly to the remaining zones, resulting in a more aggressive siege. For this reason, you should decide which zones are strategically easier to defend. The ones that are inconvenient to defend should be left alone. All maps are different, so the strategy can vary. On some maps however, there are scripted events that start once you lose a specific safe zone. For example, in the map nms_drugstore, there's an event that triggers if you lose zone C. The entire area will explode, catch fire and then collapse, closing off a very useful shortcut that connects 2 sections of the map. This will force the players to take a long detour to reach the same destination. • Practice and learn each map you want to play:Like it was mentioned earlier, the factor that affects NMRiH's difficulty the most, is the map you are playing in. As a general rule, official vanilla maps (the ones released before 2018) are trivial to complete once you've mastered the basics, while most custom maps are very difficult and demand a lot of skill, knowledge and practice from the player. Therefore, memorizing map layouts, objectives, items spawns, zombie spawns and more is fundamental if you want to survive consistently. You'll find more info on how to better learn any map in the game in the next section: "Learning the Maps: Memorization". Learning the Maps: Memorization 📷 (SCREENSHOTS PENDING)
My original intention was to add a few sections where I discussed tricks and strategies related to each and every map in the game, both official and custom. However, I soon realized that such an endeavor would take forever to make and I would never bring myself to complete it. Basically, I'm placing my trust in that this guide will give you all the tools you need to become a great player given enough time, to the point where you can easily learn all the maps by yourself without needing a specific tutorial on each one of them. Thus, I'll be explaining only a few general guidelines that you can follow to make that learning process more focused and less tedious: - Memorize fixed and randomized items spawns:This will let you have quick access to very useful items that might not be in plain sight, such as Machetes and other powerful melee, firearms, Pills, Medkits, ammo, etc. Also, by pre-emptively finding Welders or Extinguishers, you can skip the scavenge hunt needed to complete objectives that require their use, such as in nmo_suzhou which features several of them. - Memorize all possible objectives:Since we've already agreed that Objective maps don't have any point to them other than getting extracted at the end, completing objectives quickly and consistently is key. Knowing what to do, where to go and what items to find in each level will increase your chances of success tenfold. Remember that most maps have objective variations that can vary drastically between them, so be sure to learn all of them. - Memorize fixed and randomized objective item spawns:On top of randomized objectives, one of them can have more randomness associated with it, like having to find a key that can spawn in 5 different locations or more. Learning all or at least most of the randomized spawns will improve your chances of success further. - Memorize keypad codes or where to find them:Many maps feature keypads that unlock via specific codes found in the map. Several times, these codes are relatively well hidden or not properly marked, so finding them can be a frustrating chore. To avoid this, simply try to remember the codes if there's not too many of them per map. For example, nmo_zephyr features a keypad at the start that uses three possible codes (7175, 2105, 9247), while other maps like nmo_fema have more than 10 random codes that you can access in a PC for a single keypad, making it inconvenient to learn all of them. In cases such as this one, just try to memorize where the codes actually are found. 9247 is a commonly used code in many custom maps, so try that one out first and you may get lucky. If you are having serious trouble with a particular map, turn on cheats (input "sv_cheats 1" in your console) and input the "noclip" command to quickly look for them before you do a real attempt. In general when doing this, try to memorize code locations instead of the codes themselves, as that tends to ruin the challenge of these map sections. It also just becomes cumbersome to remember so many different codes. Memorizing unique map locations instead is much more intuitive. However, if you do prefer a list of codes, there are several Steam guides that offer that. There is one that looked like it had extensive coverage of most commonly played maps, plus the author seems to update it frequently. Here's the link: https://steamcommunity.com/sharedfiles/filedetails/?id=2655035018 Again, to each their own but I personally dislike having to depend on an external guide as I'm actively completing a map. Therefore I prefer to rely on my own map knowledge or explore to find the codes if necessary. - Memorize how each extraction sequence works:In NMRiH, many escape sequences are very unforgiving to the player and vary wildly between maps. You can do everything right during the entire match to then fail because a helicopter could not wait for you for more than 40 seconds. This is why memorizing how each map deals with its extraction mechanics and points of no return is vital. For example, nmo_broadway2 has 2 separate timers, one that tells you when a bomb will go off and kill all players, and then a regular extraction timer. The latter triggers first, so you have to complete the remaining objectives to unlock the extraction, before the bomb goes off. Then, after unlocking the extraction, you have 2 possible spots, a tram on top of the train tracks or a helicopter at the basketball court. The first one is trivial because it's very close to the location where the extraction timer is triggered, but the second one gives you a very tight time to reach it, plus you have to deal with respawning Shambler hordes that block your way. If you learn all of these different behaviors, you'll drastically improve your chances of survival. - Memorize Runner spawns:Since Runners are the biggest threat when combined with a claustrophobic level geometry, learning where they spawn will help you a lot. All maps are made differently, but most of the ones that are considered well balanced, have heavy Runner spawns at fixed places but they won't respawn once they are killed. By learning these specific spots, you can plan out strategies on how to take them out efficiently and safely and also avoid getting bodyblocked when you are rushing through hordes. In the case of Survival maps, it's useful to memorize the first wave in which Runners and Kids spawn. If you do, you can prepare accordingly by distributing high tier melee to most teammates, as well as firearms with enough ammo to deal with conga lines if they get to form. - Memorize dangerous environmental hazards:Maps in NMRiH are pretty inconsistent with their environmental damage, which can occasionally screw you up with enough bad luck. Examples are: scripted explosions, fire, barbed wire and especially, infected water. If you memorize where they are and how to avoid them you'll be able to survive more consistently. Check the "Health and Damage", as well as the "Gameplay Inconsistencies" sections for more info. Learning the Maps: Memorization (cont.) 📷 (SCREENSHOTS PENDING)
- Memorize problematic chokepoints:Since zombies in this game are extremely stupid and exploitable, the difficulty comes from their pairing with tight level geometry, what I call "chokepoints". By memorizing these problematic areas (heavy zombie spawns next to tight doorways, alleyways, corridors, etc.), you'll progress much faster and much more efficiently, without wasting too much ammo. This is because you'll be able to run past it before zombies aggregate and block the way. One of the most famous examples is the bar door that leads to the street in nmo_broadway. If you rush past it fast enough, the map is basically a cakewalk from there. If you take too long you can get stuck there for a long time if you don't have a firearm and enough ammo. - Memorize escape routes to quickly exit interior sections:Sometimes, interior sections can be very challenging to navigate and progress through, especially in hard custom maps. Therefore, if you find an accessible back door out of a very claustrophobic area, it's a notable gameplay advantage. An example of this is the office building at the end of nmo_underground. You have to go in there to pick up a paint can to draw an S.O.S. sign to get rescued, but the geometry is extremely tight and Shamblers continuously respawn nearby, leading to you constantly getting stuck. However, there's a broken window in an office on the first floor, after moving past the cubicles, which allows you to exit directly to the street without having to deal with an infinite Shambler horde. This is a godsend, because the alternative path is pretty rough, especially when playing solo. - Experiment and find map exploits:Some maps, especially custom ones, can be very challenging and unforgiving but they can also become much easier to complete as well as consistent if you learn a few exploits and tricks here and there: - God Spots: These are spots where zombies cannot reach to attack you. They are generally useful as temporary safe zones that you use to wait out a timed objective, like waiting for the escape vehicle. You can also use them to attract zombies to your position in order to draw them out of the path you want to go through, like the fence gate at the beginning of nmo_quarantine. You generally need to jump on top of a zombie's head to get to them (more info in the "Movement: Advanced Techniques" section). - Spots where you can throw objective items over obstacles: These are useful because they allow you to place objective items near the spot where you have to take them to and then you can sprint there without having to carry them. In that state you are slow and vulnerable, so these are very useful. An example would be throwing all 3 jumpers over a blockade in nmo_subside to avoid having to walk all of them over a series of ramps filled to the brim with zombies. Also, on nmo_broadway, if you get the lever spawn inside the apartments, you can drop it out of the window so that you don't have to carry it indoors. This will let you sprint and get out faster to avoid getting trapped in a chokepoint. - Specific geometry that allows you to jump over zombies: There are certain spots on most maps that are not considered god spots because zombies can still kill you if you stand on them, but they allow you gain some height so that you can jump on top of incoming zombies and skate past them (for more info, check Zombie Surfing on the "Movement: Advanced Techniques" section). An example of this are the spherical stone decorations on nmo_suzhou's Old Quarter bridge. - Specific geometry that allows you to bypass chokepoints: Sometimes, generally due to oversights, maps have certain spots that you can jump on and completely skip some obstacles, either on your own, or by first jumping on top of a zombie. There's a useful skip on nmo_quarantine where you can jump on top of a burning barrel, then on top of a zombie and then on top of a fence to skip a very troublesome chokepoint right at the beginning. Also, you can skip part of the ramps inside the garage in nmo_subside to avoid several crowded corners that force you to use ammo to rush through. - Doors locked by breakable boards behind them: If you find such a door, like where the crowbar objective is in nmo_emergency_1101, you can use any weapon that fires .308 or .357 magnum ammo to break the board, since both ammo types have penetration (you can find more info on that in the "Combat: Basic Firearm Mechanics" section). This can potentially allow you to bypass several map sections, saving you time and resources. - Memorize the total amount of zombie waves in Survival mode:Knowing these numbers lets you plan out your resource use across the match, including both ammunition and traps, knowing that later waves become much more challenging as they progress. This also allows you to prepare to reach the escape vehicle in time, because Survival maps tend to be relatively open making it difficult to determine where the extraction zone actually is and the time it remains active is generally very short. - Memorize secret item stashes:Depending on map difficulty, secret stashes can completely turn the tide of an online match. Not only you can find enough items for all 8 players to stock up adequately, you can find overpowered weapons like the Chainsaw or Abrasive Saw, as well as Machetes in Runner-heavy maps. They generally need you to find hidden or unmarked props, like the key with a green glowstick in nmo_subside or the propane tank in nmo_quarantine (they both unlock very large weapon stashes). Sometimes, they require the use of a Welder or an Extinguisher, like the scattered stashes in the last section of nmo_suzhou. This map also features a broken staircase that you can jump up on if you use a Barricade Hammer and place a board high enough. Other maps like nms_campblood feature a series of stashes and easter eggs that interconnect and unlock a variety of areas. First, you have to find a ladder in zone C to get up to the roof of zone B where you'll find a Machete and a Welder. The Welder then lets you unlock several different stashes, one of which contains an improvised explosive that lets you access another hidden weapon stash. - Memorize doors or gates that cannot be opened by zeds:Occasionally, some maps can have specific doors, fence gates and similar entrances that can only be interacted by players. Normally, zombies can open doors and follow you inside buildings and such after they start targeting you, but not all of them. Examples of these are: the glass door at the diner in nmo_broadway or the black fence gate at the alley that's filled with zombies in nmo_cleopas. These doors are useful as they prevent zombies from flooding interior areas and similar chokepoints, where players are at a disadvantage since they are forced to kill zeds to move through tight spaces, where it's impossible to dodge hordes. There's no way to tell if a door has these properties, you have to experiment and observe which ones classify. More complex doors like roll-up gates and such will usually only allow players to open them, but even then, nothing is certain. Learning the Maps: Suggested Order
一旦你了解了需要记住的内容,建议按照特定的地图顺序进行游戏,这样新玩家的学习曲线就不会太陡峭。如果忽略这一点,你可能会遇到玩几分钟就被淘汰的地图,这可能会让人感到沮丧。从基础开始,坚持玩完同一类别的所有地图后再进入下一个类别。 这部分内容相对主观,但我已尝试按照难度递增的顺序进行排列(列表越靠后,地图难度越大)。我综合考虑了诸多因素,包括:平均地图总长度、场景几何结构的紧凑程度、资源数量、 choke points(瓶颈区域)的数量和密集程度、任务目标是否迫使玩家停止移动或进行防御、任务目标的变化种类、Shambler(蹒跚者)的生成密度、Runner(奔跑者)/Zombie Children(僵尸小孩)在各区域的总生成数量和密度、是否存在Runner(奔跑者)密集出现的情况、逃生序列机制的难度、是否存在跑酷环节、是否存在环境谜题、是否存在危险的环境 hazard( hazard(危险物))。 基于以上所有因素,以下是地图难度列表: ◈ 简单难度官方地图: - Toxteth - Broadway - Cabin - Chinatown - Lakeside ◈ 中等难度官方地图: - Zephyr - Cleopas - Boardwalk - Asylum - FEMA - Brooklyn - Junction ◈ 困难难度官方地图: - Quarantine - Anxiety - Underground苏州-百老汇2-避难所-海岸线-岩石坑 ◈ 困难自定义地图:毒气危机-石溪-科平斯顿-矿工绕道-控制面板-碎木场-夜森林-尖叫森林-拉文霍姆-捉鬼敢死队-瑞典-紧急事件(遗产版)-求救信号-城市危机|(v4-遗产版)-迪斯科轰鸣-蓝丝绒-眩晕-石油钻塔-断点-哈夫拉-下沉(随着我不断评估每张地图,顺序可能会发生变化)。我跳过了生存地图,因为它们在难度和玩法上都非常相似。官方地图中唯一脱颖而出的是nms_camilla,它比其他地图难度明显更高。此外,目标模式对任何玩家的要求都比生存模式更高(除非是单人游戏,因为在这种情况下NMS地图极其不平衡)。此外,我只挑选了少数高难度的自定义目标地图,因为工坊地图的质量参差不齐。我会标记出那些在我看来设计相对出色且平衡的地图。你会发现这些地图的质量差异很大,但我认为它们都达到了可接受、良好或极佳的水平。 最后,我排除了许多难度中等的自定义目标地图,例如:nmo_condemned、nmo_genex、nmo_deviation、nmo_facility、nmo_frostbite、nmo_hospitality等。这是因为这个分级列表旨在为你提供一个参考路线,避免你过早遇到难度过高的地图。当然,当你觉得准备好了,完全可以去玩这些地图,它们对大多数玩家来说都比较容易上手。 团队合作:积极互动
在在线对战中,你会遇到各种各样的随机玩家,有的技术高超,有的水平欠佳,有的能提供帮助,还有的则会想方设法给你添堵。你可以选择帮助、无视或伤害其他玩家,无论是无意之举还是故意为之,但通常情况下,如果其他玩家能帮助你生存下去,你应该有意识地尝试帮助他们。如果做不到这一点,至少不要给别人添麻烦。 对于那些没用的玩家、捣蛋鬼或恶意破坏者,你想怎么处理都可以,我这里只讨论玩家之间的互动方式,包括积极互动和消极互动。即使所有变量都偏向一个极端(所有人都充分合作)或另一个极端(混乱无序、毫无合作),你仍然有可能赢或输。因此,这些更多只是可能影响游戏的随机因素,并非成功的关键(但它们确实可能有助于成功或阻碍成功)。 根据你游玩的地图、选择的难度以及玩家数量,这些正面和负面的相互作用会对比赛进程产生不同程度的影响。通常情况下,如果大多数玩家都积极参与游戏,玩家数量越多,完成地图就越容易。然而,由于地图几何结构、目标设计、资源数量有限、狭窄通道、障碍物等因素,有些地图的玩家数量越多,难度反而会大幅增加。◈ 积极互动: • 与需要的玩家分享医疗物品:根据游戏难度和地图不同,让队友死亡可能会使对局变得更困难,因此你应该对有需要的队友慷慨且合作。赢得他们的信任是有益的,因为他们更有可能反过来帮助你。但要注意那些对整体进度毫无贡献或可能在捣乱的玩家。给他们医疗物品是浪费,还可能让他们继续做出不当行为,使对局变得不必要地困难。 • 分享你不使用的弹药或武器:将你找到的不同类型弹药分享给使用对应武器的玩家。如果每个玩家都使用9毫米弹药,这种做法会降低效率。你应该使用不同类型的弹药,比如.45 ACP、9mm、.22、12号霰弹等。留意并确认每位队友使用的武器,或者询问是否有人需要弹药。同时,也要告诉队友你当前武器所需的弹药类型。 如果你的背包还有空余空间,可以多拿一些近战武器,分享给可能需要的队友。当然,如果你必须拾取对自己重要的物品,就丢掉这些多余的武器,这只是利用闲置背包空间进行的团队协作优化。 在当前目标支持多任务处理时分配任务:在地图上散布着多个目标物品,或需要完成多个子目标的情况下(如nmo_khafre、nmo_cleopas、nmo_fema),尝试在团队内部分配任务。在生存地图中,尝试保护不同的安全区域,但前提是值得这么做。通常情况下没有必要,但有时,比如在nms_isolated地图中,保护多个区域是必须的,因为它们彼此相连。例如,失去A区域意味着你将无法进入房子的大部分区域。此外,如果你让其他区域失守,大量僵尸会涌入一个区域,就像在nms_campblood地图中那样。 保护正在完成任务的玩家:这一点之前已经提到过,但非常重要。玩家在完成任务时通常很脆弱,因此掩护他们是快速完成任务的基本要素。这既适用于进度条任务,也适用于手动携带物品的任务。• 向队友投掷近战武器或医疗物品:手持任意物品时按住G键即可将其投掷出去。如果队友需要近战武器或医疗物品,而你无法安全靠近他们,这一功能可以提供帮助。如果有人想扔东西给你,面向他们的方向并快速按E键,这样能帮助你接住物品,避免其掉落到无法触及的地方。注意,重型近战武器投掷距离不远,而灭火器或焊机等工具的投掷距离只有几厘米。这是为了避免地图软锁而设计的。 自1.12更新后,你现在还可以直接与他人分享医疗物品,方法是手持物品并在其他玩家旁边按右键。更多信息请查看【医疗物品:高效使用】部分。解救被僵尸抓住的队友
有时,当队友因反应不及被僵尸包围时,你可以出手相救。此时,最好使用一击致命的枪械(因为近战武器通常速度不够快)来消灭所有正在攻击或即将攻击他们的附近僵尸。如果能推开或杀死抓住他们的僵尸,那就赶紧行动,帮助他们在受到致命伤害前逃脱。 此外,如果幸存者被完全包围,优先攻击那些可能发动手部攻击的僵尸,而非咬人的僵尸。咬伤虽然会导致感染,但总体伤害相对较低——蹒跚者、奔跑者、爬行者的咬伤约每3秒造成15点伤害。手攻击对蹒跚者的伤害在每次攻击连击中介于15至30之间,对奔跑者则为20至80。此外,玩家没有任何无敌帧,因此可能在极短时间内持续受到大量伤害,导致无法避免的死亡。 玩家可以使用手电筒照亮黑暗区域:装备大多数单手武器(包括枪械和近战武器)时,可按F键打开手电筒,为自己和团队照亮当前路径。如果没有装备单手武器但仍需照亮道路以帮助队友,可按1键打开物品栏切换到手电筒,然后按右键打开。更多信息可在【物品:工具】部分查看。幸存者可以协同进行近战攻击连击:当玩家在狭窄走廊或隘口附近与蹒跚者战斗时,如果轮流攻击,将能更快推进。需要合适的近战武器(大锤、消防斧、镐头、砍刀等),以及正确的站位和协同移动(尽可能靠近两侧墙壁站成两排,攻击后后退,让下一名玩家上前攻击)。这种战术在nmo_vertigo、nmo_anxiety_classic等狭窄地图中非常有用,在噩梦难度下通常是必备技巧。“战斗:基础近战技巧”部分的【协同击杀蹒跚者】要点将对此进行更详细说明。• 将奔跑者的仇恨从队友身上引开:这一点将在“战斗:僵尸操控”部分(僵尸仇恨操控要点)中详细说明。不过核心思路是,如果你看到队友正被数只奔跑者追赶,可以小心靠近这群僵尸,逐个吸引它们的注意力。僵尸会开始攻击离它们最近的玩家。这样你就能安全地逐个消灭所有奔跑者,同时只要队友持续前进以躲避攻击,就能成功救下他们。 团队合作:有害行为
以下是可能对整体进度产生负面影响的玩家行为和互动列表。首先,这里所说的“行为”指的是玩家的个人行为,这些行为不一定会以物理方式直接影响其他玩家(例如堵路),但可能会使整个对局变得更困难。 【有害行为】: • 弹药/近战武器/枪械囤积:指囤积完全用不上的物品,或者不与需要这些物品以对地图进度产生更大影响的其他玩家分享。例如,囤积3把优质近战武器,而另外两名玩家完全没有近战武器;或者持有霰弹枪子弹却没有霰弹枪,而其他玩家有霰弹枪。• 无故对蹒跚者浪费弹药:我在之前的部分已经明确说明,除非蹒跚者构成直接威胁,比如你被逼入绝境或需要通过被封锁的狭窄通道,否则不要击杀它们。蹒跚者会不断重生,所以无故击杀它们纯粹是浪费资源。 • 浪费医疗物品:医疗物品有多种使用方式,但通常只有几种是最高效的。例如,医疗包可恢复30点生命值,如果你仅被僵尸小孩攻击一次(造成8点伤害)就使用医疗包,那么额外的生命值就被浪费了。正如后面将要讨论的,只有在你独自游玩且医疗包数量过剩,或者其他所有玩家都已拥有医疗包的情况下,你才应该“浪费”医疗包。这部分内容将在【医疗物品:高效使用】章节中详细说明。 • 感染者在危险区域死亡且未通知他人: 正如【玩家状态异常:感染/出血】章节中所述,当玩家处于感染状态,且并非死于爆炸或爆头时,其尸体会复活为奔跑者并开始攻击其他玩家。如果玩家因感染在黑暗区域、主任务路径附近的房间,或像nmo_anxiety_classic地图中隧道那样的狭窄空间内死亡,复活的僵尸可能会造成严重破坏,如果其他幸存者未能迅速应对,就可能被其击杀。此外,奔跑者可能会突然冲出并发动攻击。像这样被感染是很常见的情况,新手和老手都可能遇到。一般来说,如果你知道自己无法在感染中存活,你可以请求其他玩家爆头击杀你,或者递给你一把枪让你自行了断。如果这两种方法都行不通,你可以通过聊天或麦克风通知队友。这样做或许能避免后续问题(显然,在禁用全体语音的服务器上这无法实现,除非在你死亡前大多数玩家都在你附近)。 • 糟糕的站位可能会改变本可预测的蹒跚者/奔跑者/僵尸小孩的仇恨目标、移动模式或攻击方式:团队中每个玩家的位置和角色通常是不固定的,它们可能会根据情况在瞬间发生变化。例如,当面对蹒跚者时,如果有充满蹒跚者的狭窄通道(比如nmo_urbanhazard的开局),拥有重型近战武器的玩家可以带头;而如果有大量奔跑者涌来,拥有 firearms或砍刀的玩家可以站在前排。 然而,新手玩家往往不会考虑这些,他们只会随意站位,没有意识到自己的位置会对团队其他成员产生影响。例如,装备不佳的玩家拿着扳手或其他次等近战武器,却站在大量奔跑者即将冲过的前排,这将会是个问题。 这不仅可能导致他们被感染、击杀,然后变成奔跑者复活,还会让击杀那些原本的奔跑者变得更加困难。原因是僵尸AI一旦检测到另一个玩家比当前目标离自己更近,就会立即切换目标。因此,如果装备不佳的玩家站在负责击杀奔跑者的玩家前方,僵尸的仇恨就会变得不稳定且难以预测。这可能会导致其他实际在各自岗位上执行任务的玩家死亡。 • 在生存地图中过早或毫无理由地使用陷阱:
陷阱应在后期波次使用,此时蹒跚者密度极高。当周围没有僵尸或仅少量僵尸生成时使用陷阱是资源浪费。不过需要注意,在早期波次将其用作紧急手段是可行的。例如在8人团队中,第一波奔跑者出现,所有玩家阵亡,仅剩一名幸存者。在消灭所有奔跑者后,他们仍需消灭约150只或更多僵尸,这种情况下使用陷阱是完全合理的。若不需要,应节省资源,但在诸如此类的极端情况下则应大量使用。团队配合:有害互动 接下来,我所说的互动是指玩家行为会直接对周围其他玩家造成物理阻碍或伤害,降低整个团队的表现并导致队友死亡。 有害互动: • 堵路:在《求生之路:纳粹僵尸部队》中,玩家碰撞有时会显得很怪异。这些碰撞是在客户端进行处理的,这意味着当你离其他玩家太近时,游戏会对你的角色施加反向移动指令。因此,当你向前移动并“碰撞”到另一名玩家时,游戏会自动让你向后移动。这就是为什么碰撞感觉“有弹性”以及你可以穿过队友的原因。 在1.12.3版本中,碰撞机制已大幅更改,现在这种情况已不再那么令人困扰。现在,只要你保持移动,就可以穿过静止不动的玩家;如果你完全静止站立,其他玩家则无法推开你。唯一会被阻挡或推开的情况是:你在移动时与另一个同样在移动的玩家发生碰撞,或者你试图穿过并站在另一个静止队友的同一位置。 阻挡行为仍然很常见,大多数玩家都是无意识地这样做。他们通常没有恶意,只是碰巧发生而已。但总会有少数愚蠢的玩家会故意试图阻挡你,进而导致你死亡,要么是因为他们觉得这样好玩,要么是想偷你的物品。幸运的是,你可以通过避免碰撞来防止死亡。这部分内容在【移动:其他技巧】章节中有说明。 ◈ 重要提示:碰撞效果可在服务器端进行配置。这意味着服务器管理员可以调整碰撞强度,也可以完全禁用碰撞。因此,如果你在没有碰撞效果的服务器中游玩,无需担心身体阻挡问题,但穿过队友身体时仍会阻挡你的枪械射击(近战攻击可穿过队友生效,且攻击队友不会消耗耐力)。 • 团队伤害:
这通常是一个有争议的话题,但我决定将其归类为有害行为而非积极行为。事实上,被感染的玩家并不会对团队构成重大威胁。他们可能会通过突然出现的复活奔跑者造成一些伤害,比如感染一名玩家。但如果你足够擅长这款游戏,被感染的队友几乎不会影响你的决策或表现。因此,如果他们在帮助推进比赛整体进度,杀死他们实际上是个糟糕的选择。 然而,有些玩家会出于自私或缺乏经验而故意做出愚蠢的行为,在这种情况下,杀死他们会是有益的。举个例子:在感染状态下濒死时使用医疗包或基因治疗注射器等医疗物品,然后却做出像惊慌失措地到处乱跑、把奔跑者引向队友这样的愚蠢行为。他们实际上是在给其他人增加难度,所以在这种情况下杀死他们是完全合理的。 • 抢怪:
有些玩家就是贪得无厌,会试图杀死遇到的每一个僵尸,甚至包括那些正在追逐其他根本不需要帮助的玩家的僵尸。这类玩家通常是老手,要么是不信任队友能处理僵尸小孩/奔跑者,要么就是在用一种愚蠢的方式争强好胜。没人在乎你的击杀数,大家只关心你是否真的在提供帮助。这意味着有时候需要克制行动。 抢怪会导致堵路、因玩家互相卡位而错失攻击,还会让奔跑者的仇恨更难预测。所有这些情况偶尔会导致队友死亡。尽你所能就好,但不要去抢别人的活儿,尤其是当他们能比你做得更好的时候。除非队友确实能力不足,否则没必要时不要贸然介入。 • 躲避僵尸时过于贴近队友:有些玩家会紧跟在你身后,甚至开始阻挡你的移动。在躲避蹒跚者尸潮或在狭窄空间击杀奔跑者时,这会成为大问题,有时可能对双方都造成致命后果。通常,经验不足的玩家会这样做,因为他们还不知道如何躲避僵尸,所以倾向于跟随老手的脚步。当你跟随队友时,为避免这种情况,应在队友开始移动后等待半秒再跟上,与其他玩家保持至少几步的距离,并尽量与他们保持相同的移动速度。如果他们的路径无法通行,那就通过推开僵尸制造缺口,开辟自己的道路。 • 进行无用攻击:新手玩家常见的行为是在恐慌中试图攻击看到的每一个僵尸,不管自己使用的是什么武器。这通常会导致在隘口附近等区域浪费大量时间击杀僵尸。例如,一名手持【路障锤】的玩家站在前线,试图击杀【奔跑者】或【蹒跚者】,而其他玩家却拿着【大锤】或【砍刀】。在像nmo_anxiety_classic地图的隧道(僵尸会在你身后重生)或nmo_in_the_dark地图的下水道这类狭窄空间中,这种时间的浪费会变成死亡陷阱,因为本可以帮助应对局面的玩家会不断被这个无用的队友阻挡。在这些情况下,如果你不能足够快地杀死僵尸,就会被困住并死亡。 尽管这似乎只与新玩家有关,但我也见过一些老手利用这一点。他们中的一些人决定不攻击或不做任何有用的事情,只是为了捉弄新手,而另一些人则把新手当作诱饵,以便更安全地击杀奔跑者。这两种情况都同样糟糕,它们只能说明这些人是糟糕的队友,也是懦夫。• 毫无预警地将奔跑者尸群引向毫无防备的玩家:当新手玩家试图冲在前面躲避僵尸时,他们最终总会撞上后面区域刷新出来的奔跑者。如果他们没有足够的技巧或所需武器来消灭这些奔跑者,就会被奔跑者们追着形成一条长龙。接下来,当他们意识到自己的错误时,通常会试图回到落在后面的队友身边,却完全没有警告队友自己正带来的混乱。 这会导致一场突如其来的奔跑者尸群袭击,往往会团灭整个队伍。我见过很多次这种情况。一定要避免陷入这种境地,如果你打算冲在前面,就应该先消灭大部分奔跑者。不过,如果你真的遇到这种情况,要通过聊天或麦克风迅速通知队友发生了什么,这样他们才能提供帮助,而不会被你连累致死。 • 留下无法突破的奔跑者之墙:有些玩家会试图完全避开奔跑者,不去击杀它们。由于僵尸AI非常愚蠢,有时奔跑者在狭窄的走廊或门口很难跟上玩家。任何具备基本技能的玩家都可能利用这一点快速前进,不用对付任何奔跑者。 然而,这种行为对其他玩家极为不利,因为这会导致他们不得不在可能狭窄的空间里同时面对10只以上的奔跑者尸潮。这种情况对普通玩家来说,大多数时候意味着必死无疑。天啊,如果你想往前冲,至少得有风度地消灭掉你遇到的大部分(如果不是全部的话)奔跑者。谁都能躲开它们,这可不是什么技巧的体现。你只是在展示自己很懒,而且还是个糟糕的队友。 单人游玩:游戏玩法差异
Playing on your own is a very different experience compared to being part of a team. Generally, you have a lot more freedom to adapt your actions and gameplay style to tackle the map's obstacles, your deaths are entirely your own fault (except in extreme cases of bad RNG) and you can be a lot more reckless, since there's nobody you can hurt. Some people may find soloing easier, some may find it harder, that is mostly subjective to each player. Some things do objectively change for better or worse; here's a list of them: - Objectives are generally more challenging to complete:Since you don't have anyone to cover you while interacting with or carrying an item (when you are at your most vulnerable), objective completion is unavoidably harder. This is very noticeable on item-based objectives where multiple items need to be moved to a precise location or when you have to stand still interacting with an item for a very long time. Examples of this would be the scavenge hunts on nmo_cleopas or nmo_sweden1, as well as nmo_quarantine's time-consuming interaction with a valve needed to close a gate while Zombie Children spawn constantly. - It's easier to get cornered: All zombies target you, which means that you'll be constantly attracting a huge amount of Shamblers to your position, therefore, moving quickly and knowing where to go becomes a necessity. - Rushing with an objective item is harder:Since you don't have a partner clearing your way up front, moving objective items through Shambler hordes is usually a pain. - Shambler spawn density is generally higher:Since some players may lag behind in co-op, they can prevent the despawning of several groups of Shamblers. This causes the max zombie cap to be reached (around 80 zombies on Classic, 50% more on Nightmare) by having a lot of small groups of Shamblers spawned throughout the level, instead of concentrating all of them in key areas where a full group of survivors has to complete an objective. nmo_suzhou and nmo_fema are vulnerable to such exploits. - Killing Runner hordes is generally more difficult:This depends on map layout, available space and your current melee weapon, since the formation of Runner conga lines is more frequent (they all target you). Sometimes it can be easier solo, because other players can force Runners to switch aggro constantly or lure them straight in front of you without warning, making them unpredictable. - Re-routing zombie aggro is trivial:Not everything gets harder when you solo like it was mentioned before. Aggro re-routing will be explained in further detail in the "Movement: Basic Techniques" section of this guide, but I'll explain it briefly here. You can force Shamblers to follow you into precise spots so that you create a gap in the horde. After that, you have to determine if the gap is wide enough for you to move through it, then you can quickly dodge the entire horde. When there are a lot of players in the vicinity, zombies will target different players at the same time, so drawing them and forcing them to follow you where you want is very inconsistent, unless your teammates coordinate their positions with yours. Doing this solo is very easy. - Runner behavior is a lot more predictable:Same concept used in the previous title. The more players there are, the more unpredictable zombies are, since playing with other people introduces a lot more variables into the mix, even though the AI is extremely exploitable. Things can happen so fast that you are unable to react accordingly, resulting in a group of Runners punching you to death. Playing solo eliminates this randomness, you can be certain that all of them are going to target you eventually. - There are a lot of resources for only one player:All the items that would have spawned during a co-op match, will still spawn when you play solo. Item spawning doesn't change unless the map has player logic built in it, which only very few of them do. This means that you have the ammo, medical items and melee weapons designed to be used by 8 players at the same time, which is a lot. This allows you to carefully choose the melee that fits best for each map and situation, the most convenient and abundant ammunition, and you can use medical items haphazardly most of the time. Beware that even though there are a lot of resources, you can't carry even half of them, so be mindful of what lies ahead and choose the items that you should prioritize. ◈ NOTE:Maps do not change or alter their mechanics based on player count. Basically, the map you see when playing online will be the same when you play solo. There are VERY few exceptions to this rule, namely nmo_subside or nmo_mayday.In nmo_subside, you'll see things like the door next to the battery puzzle being blocked off if you're playing solo, when normally it's open and a huge amount of zombies pour in from it if you're playing with at least another player. This makes completing the truck battery puzzle a lot easier.Additionally, Runner spawners will be created dynamically according to the number of players. In nmo_mayday, the amount of objective items that need to be interacted with will change, as well as the amount of zombies that spawn during the final sequence. Health and Damage
Since NMRiH has a minimalist HUD, there is no health or stamina meter. Therefore, you need to learn a few details in order to keep track of how much HP you have. Please note that it's pretty difficult to accurately track your HP unless you really concentrate on it or you've only been attacked a couple of times during a match. The idea is to only have an approximate number in your head, there's no need for complex math. ◈ Determining your current HP on your own:The only visual indication of your current HP numbers is color de-saturation, meaning that the lower your health is, the less colors you'll see on your screen (HUD elements are not affected). The effect only becomes noticeable at 41 HP and below, so if you see your colors starting to wash out, then you know that you have around 40 HP or less. The de-saturation effect is not that useful by itself, so in order to keep track of your HP more accurately, you need to learn all the zombie damage values. You have to memorize how much damage each zombie type inflicts, which will depend on the animation. You can check all these values on the sections labeled "The Infected: ...", but the important info is: Bites from Shamblers, Crawlers or Runners inflict 15 points of damage One-handed attacks from Shamblers inflict 15 points of damage One-handed attacks from Runners inflict 20 points of damage One-handed attacks from Zombie Children inflict 8 points of damage Two-handed attacks from Shamblers inflict 15 points of damage Two-handed attacks from Runners inflict 40 points of damage After memorizing everything, you'll be able to quickly determine your current HP by subtracting the damage value that corresponds with the animation used by the zombie to attack you, from a total of 100 health points the first time you get hit. ◈ Determining your current HP with the help of other players:Sometimes it can be difficult to determine your HP levels by yourself, like in cases such as receiving several attacks at once from different zombies. Keeping track of every attack animation can be either very tough or impossible in a situation like this. Fortunately, there's two ways that other players can help you track how much HP you currently have. • Player name colors:Above each player you will see their nickname written in different colors according to their current HP numbers. It starts with GREEN at 100%, gradually shifting to YELLOW at 66% and then to RED at 33%, staying the same down to 1%. If you're not playing solo, then you can ask other players to tell you what color is your name at currently, which will give you a rough estimate of your HP level. For example, if the color is ORANGE, then you know that you're between 66 and 33 HP and, according to the color gradient, you'd know that you're around 50 HP. You can obviously also return the favor and tell someone what their current color is to let them guess their own HP number. • Spectator exclusive HP numbers:In default server configurations, spectators can see exactly what your HP number is. Therefore, if Alltalk is also enabled, you can ask any spectating player to tell you what that number is. For more info on Alltalk mode, check the "Gamemodes / Difficulties / Modifiers" section. ◈ IMPORTANT NOTE:Both of these two features can be turned off independently via commands if the server operator wishes it, therefore sometimes you won't be able to tell what your HP number is via these methods. Also, in Nightmare difficulty, player names are disabled by default, so you have to rely on the other alternatives. ◈ Damage Sources:Now, before we tackle medical items, we should focus on what are the sources of damage a player can take. Apart from zombie damage, which was explained previously, there are several other ways you can get yourself killed. Here's the complete list: • Falling:Like in most games, NMRiH has fall damage. If you fall far enough you'll take damage or die, simple as that. Also, before the 1.10 update, falling or other environmental damage could cause you to start bleeding. This has since been removed. • Drowning:Similar to other games, there's a maximum amount of time that you can remain underwater before you start taking damage (roughly 13 seconds). Peeking your head out will instantly replenish your breath and, if you took damage, your health will slowly regenerate back to the initial number. • Explosive Props:Some items that spawn in maps are explosive, or they release a pool of fire that burns zombies that touch it. These include red gas cans, explosive barrels and red propane tanks. Note that these types of props do not include objective items that trigger scripted explosions (like in nmo_junction or nmo_lakeside). Their main use is to kill zombies obviously, but you should be careful with them. They deal quite a bit of damage if you detonate them close enough to you or to an infected survivor. You can easily kill yourself or others, especially with friendly fire enabled. Additionally, Shamblers have a chance of becoming a burning Runner which can easily kill you if it catches you by surprise. Thanks to this, both explosive items and Molotovs should be used only if you can safely stop or control the possibility of burning Shamblers turning into Runners and attacking you. You'll find more info in the "Weapons: Throwables" section. • Environmental Damage:This category includes fire, barbed wire, electrified water, infected water, scripted map explosions (TNT on nmo_cleopas or nmo_toxteth, propane tank on nmo_junction, gas cans on nmo_broadway) or a few other miscellaneous damage sources like the helicopter machine gun on nmo_lakeside. Note that these sources may not deal damage on some maps. If they are not manually programmed to deal damage via hurt triggers, they won't do anything. This will be mentioned on the "Gameplay Inconsistencies" section. • Player-based Explosive or Fire Damage:Throwables like Molotovs, TNT and Grenades can deal damage to other players if they are infected, or if friendly fire is enabled. If you want to avoid this, try to let others know you're going to use a throwable, and make your actions look as obvious as possible. Grenades are pretty harmless in general because their range is incredibly small. Molotovs also have a short range, but since they deal DOT and the effects last a few seconds, you can still die if you stand too long on the fire. TNT is the most dangerous, because it deals massive damage, and its range is enormous. If you are infected, try to pay attention to other players, check if someone is about to use a TNT and run away from the blast zone as fast as you can. You can find more info in the "Weapons: Throwables" section. • Player-based Firearm / Melee Damage:Similarly to throwables, you can damage other players if they are infected or if friendly fire is enabled. This damage increases substantially when you play on Nightmare difficulty, and even more if you turn on Realism at the same time. A few stray bullets will kill you even if you are at max health. Player Afflictions: Infection / Bleeding ◈ Infection:
这种感染是《求生之路:纳粹僵尸部队》中玩家最大的弱点之一。每次被咬伤都有一定几率感染。一旦症状出现,你将在2分钟后彻底被感染。 重要提示:只有被僵尸咬伤才会感染。普通的手部攻击不会导致玩家感染。例如,僵尸小孩就永远不会让你感染。
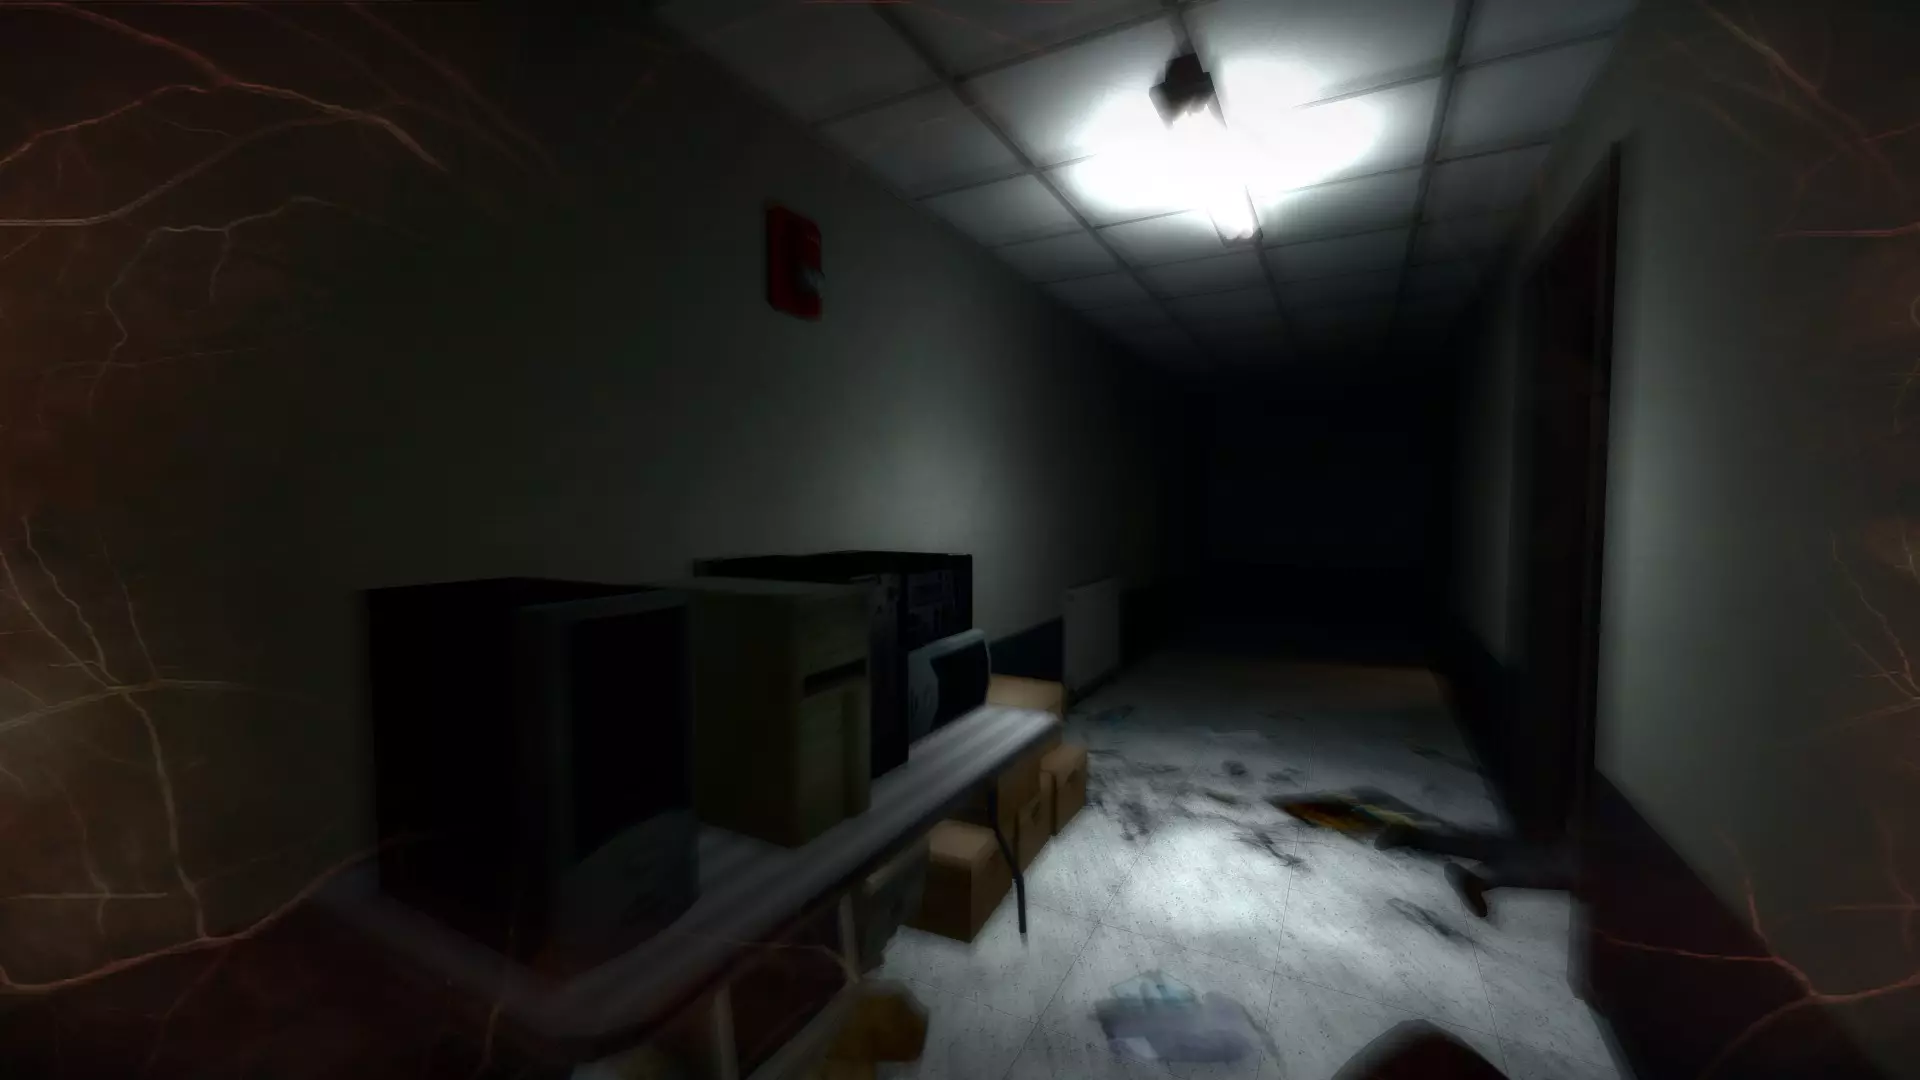
这些症状表现为屏幕角落出现一些橙色纹理,逐渐形成模糊的覆盖层。最终,你的整个视野会变成一片黑暗的虚无。之后,你会死亡,不久后以奔跑者形态复活。除非被队友爆头、使用枪械自杀或死于爆炸,否则你将始终以奔跑者形态复活。
除僵尸儿童外,所有敌人都能感染你,因此这是相当常见的情况,再加上偶尔出现的推搡/攻击判定不一致问题,情况会更糟。 在噩梦难度下尤其如此,此时感染几率会大幅提升。 以下是感染几率随游戏模式和难度变化的详细信息: • 目标模式:经典难度 在《求生之路:纳粹僵尸部队》中,感染几率会随着你的生命值降低而提高。这是一个基于随机数生成的机制,意味着即使你在100点生命值时首次被咬伤,也有2.93%的几率被感染;而在低生命值时多次被咬伤后,也有可能不被感染。当生命值约为45点时,感染几率约为50%,基本上是对半开。• 目标模式:噩梦难度 在噩梦难度下,感染概率也会随着生命值降低而上升,但现在每次被咬的基础感染概率为77.6%,而非2.93%。这意味着当生命值下降时,感染概率相比经典模式只会略微增加,因为在100生命值状态下感染概率就已经极高。 • 生存模式:经典难度 在此模式中,感染概率同样会随生命值降低而上升,但有一个额外的隐藏特性:当在经典难度下游玩生存模式时,100生命值状态下的基础感染概率(5.87%)是目标模式(2.93%)的两倍,正如我在之前章节中提到的。因此,如果你感觉在NMS地图中感染频率更高,原因就在于此。当生命值约为45时,感染概率设为100%。 - 生存模式:噩梦难度 在噩梦难度下,使用与目标模式相同的基础感染概率(77.6%),并且会随着生命值降低而提高。此前该概率为100%,现已调整。 【重要提示】:若想了解各难度/游戏模式下生命值降低时感染值的确切数值及增长方式,可使用相关工具。 关于提高感染后生存几率的注意事项:当你被感染且没有 pills(药片)或 Gene Therapy(基因治疗)注射器时,应告知队友,以便他们提供帮助。如果你不信任他们,觉得他们可能会杀你,那就干脆别告诉他们,自己继续寻找那两样物品中的任意一个。 最后,当你被感染时,千万不要站在队伍的前线,因为在队友击杀僵尸时,你很可能会被近战或火器使用者误杀。只有当你的队伍完全无法有效击杀僵尸,导致你们面临被包围的风险时,你才应该介入。 ◈ 流血:
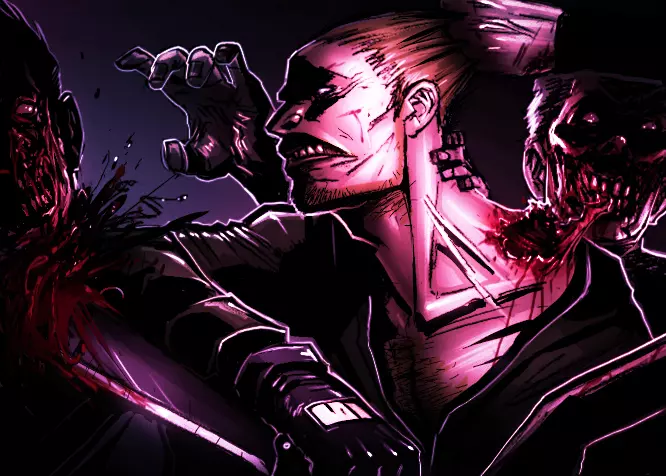
这也是另一种基于随机数生成的负面状态。每次受到任何类型僵尸的伤害时,若生命值高于45点,将有5%的几率进入流血状态;若生命值低于45点,则几率为15%。当屏幕边缘出现血迹覆盖效果时,说明你正在流血。
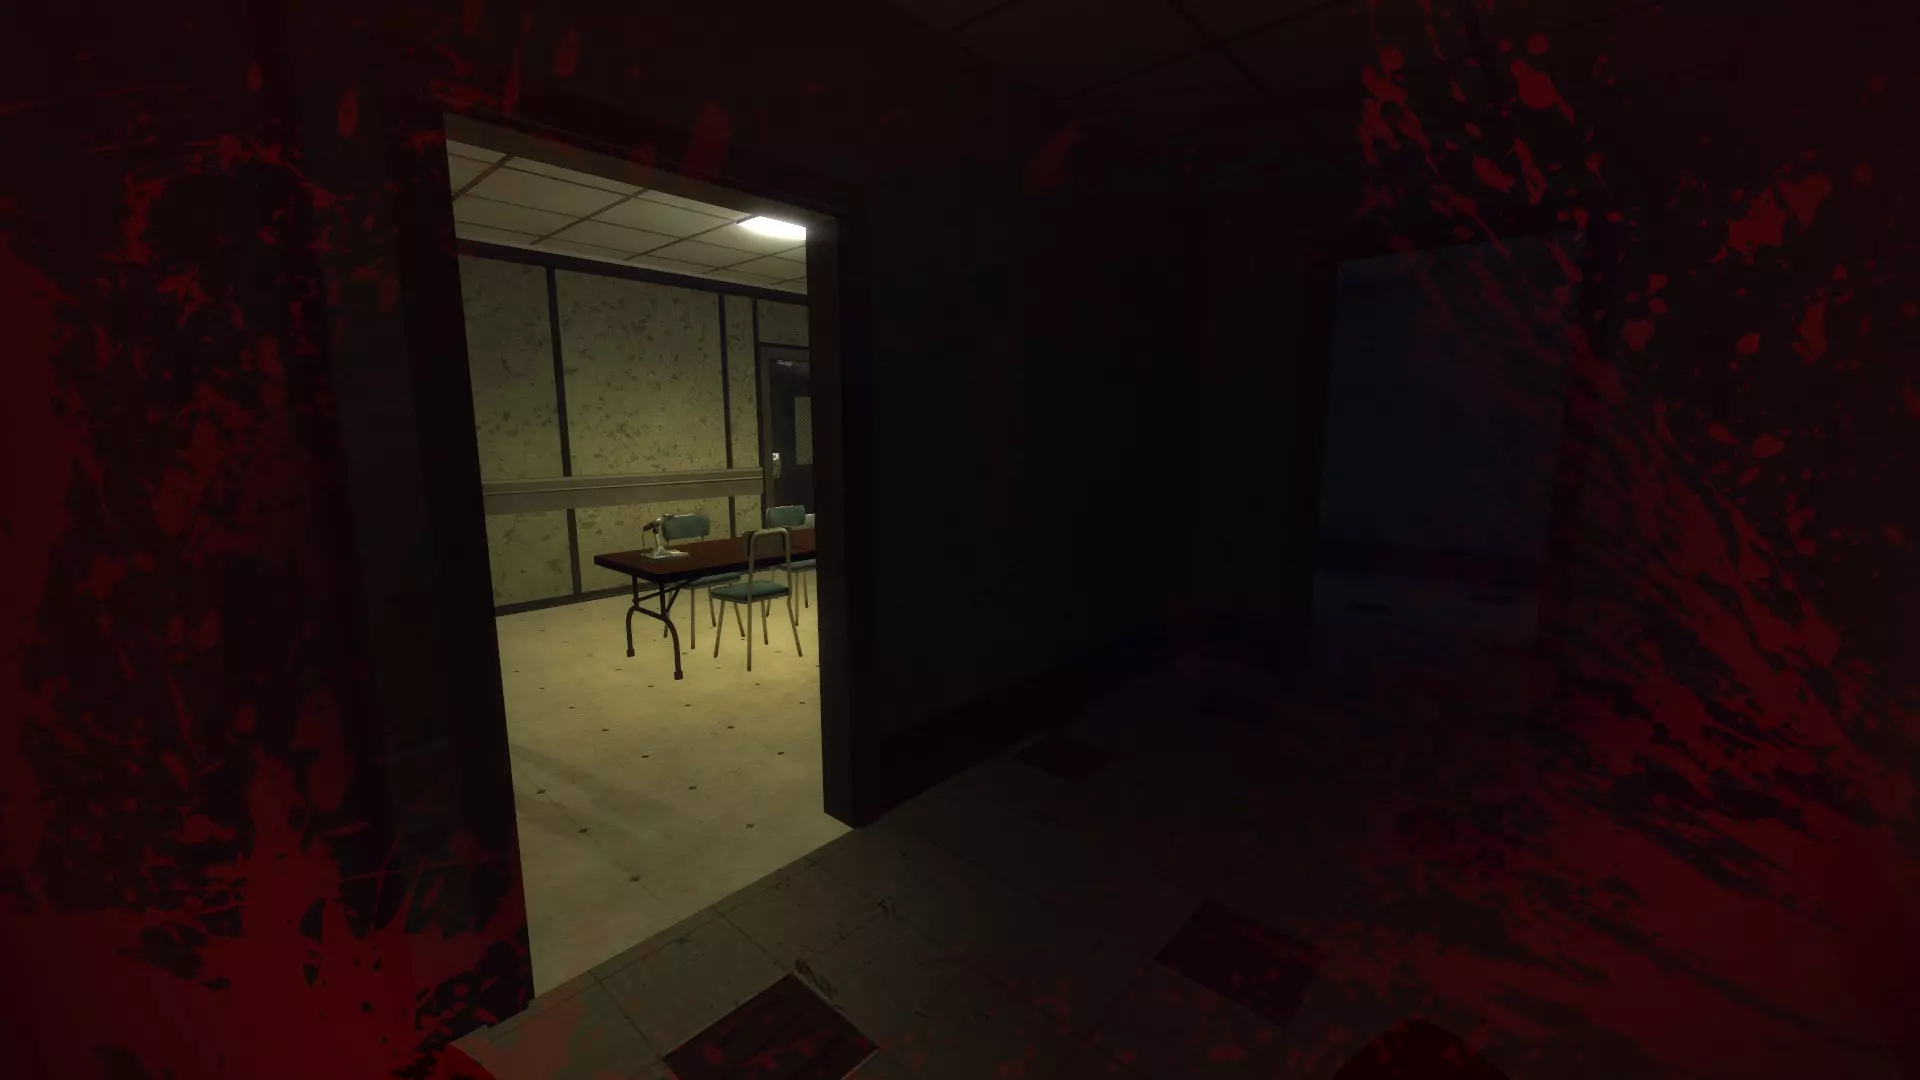
进入流血状态后,你将无法冲刺,跳跃时会消耗两倍耐力(增加100%),并且每5秒损失1点生命值。如果不停止流血,你最终会死亡。 因此,若未处于紧急状况,你需要尽快为自己包扎。 如果处于紧急状况,应先尝试应对威胁(例如无法轻松躲避或风筝的奔跑者),然后再处理流血。你可以在【医疗物品:高效使用】部分找到更多信息。 被攻击后,若想快速判断是否流血,只需低头看脚。如果看到有血液喷出,说明你正在流血。这能帮你节省时间,及时进行包扎,而不必等到屏幕出现血腥覆盖效果才采取行动。要判断其他玩家是否在流血,你可以观察是否有相同的血液喷溅效果。不过该效果持续时间不长。效果消失后,你仍能通过听到偶尔的痛苦呻吟声来判断玩家是否在流血。此外,他们行走时地面上会出现血迹。 自杀机制
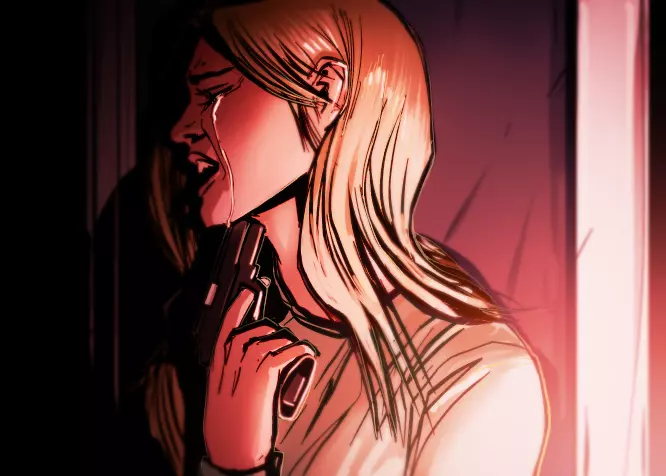
如果你持有已装填的枪械,可以通过按下K键将枪口对准头部,然后左键开火来自杀。此机制旨在用于合作模式,因为当你被感染时自杀,可以防止你复活为可能攻击并杀死队友的奔跑者。 医疗物品:高效使用
在了解所有伤害来源和玩家负面状态后,我们可以讨论使用医疗物品避免死亡和帮助其他玩家的最有效方法。 【实用信息】 - 你可以直接将医疗物品交给其他玩家,方法是装备医疗物品后,在队友附近按右键。按V键推开可取消该操作。只有当你离玩家足够近时,互动才会生效。 - 所有可装备的医疗物品都可以通过按住并释放G键扔给玩家,与其他物品操作方式相同。这能让你快速与急需医疗物品的玩家分享,或者在无法靠近他们时使用,例如你们之间有大量僵尸群。 - 急救包或医疗包:
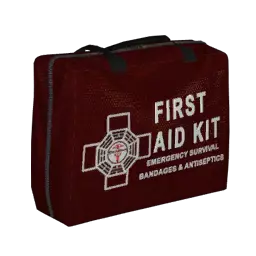
急救包是可装备的医疗物品,使用后可恢复30点生命值并停止流血状态。开始使用动画后,大约需要17秒才能完成使用,期间无法 sprint(冲刺)或使用背包中的任何物品。切换到其他物品、拾取道具或推搡都会取消动画,迫使你重新开始。如果你的生命值很低,这可能会让你丧命。 高效使用方法: - 仅在必要时使用急救包。这意味着如果你的生命值超过70点,就不要使用,因为这会造成浪费。只有当所有人都有急救包且有多余的急救包不得不留下时,才可以这样使用。这种情况在单人游戏中很常见,因为通常会有多个为8名玩家设计的急救包刷新点。在某些情况下,即使你的生命值相对较高,也应该使用医疗包。原因是生命值越低,感染几率就越高。此外,僵尸通常会造成大量伤害,尤其是奔跑者,所以如果你的生命值在40点或以下,就会变得极其脆弱。奔跑者每次攻击的伤害在20到80点之间(取决于随机播放的攻击动画),你可能会瞬间死亡。另外,当生命值低于45点时被击中,出血状态的触发几率会更高。 生命值越高,在与僵尸近距离接触时存活的几率就越大,比如当你在冲过尸群时被困在中间。你最终可能只剩下30点生命值,但至少还活着,而不是死亡。如果没有其他选择,你可以利用通过使用医疗包维持的高生命值,冒险穿过尸潮。把你的生命值看作一种可消耗资源。 - 不过,在生命值较高时选择不治疗也是一个好习惯。当你试图与其他几名玩家合作通过地图中的艰难区域时(如果独自行动可能会必死无疑),这一点就很有用。例如,保持每名玩家都有不错的生命值,能确保即使突然出现几只奔跑者发起攻击,也不会有人死亡。 - 此外,如果你没有流血,且没有绷带可用,应尽量避免使用医疗包,因为绷带同样可以止住流血状态。这能避免一些不幸的情况,比如被僵尸攻击后开始流血,却因没能及时找到绷带而死亡(记住在这种状态下你无法 sprint)。如果你确定某个位置会刷新绷带,那么即使身上没有,也可以考虑先进行治疗。如果没有绷带,你也可以救助那些生命值很低且多次被击中后流血的玩家。 • 绷带:
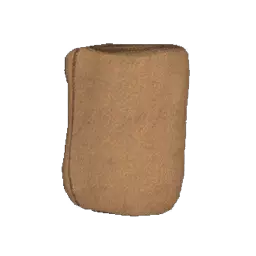
绷带是可装备物品,能治疗流血状态并在此过程中恢复15点生命值。 使用绷带大约需要6秒,且仅在流血时才能使用。与医疗包类似,中断使用动画会导致你需要重新开始。 - 高效使用:由于只能在流血时使用绷带,这限制了你的选择和策略,因此使用方面没有太多深度。如前所述,尽量优先使用绷带,因为它们使用速度更快,但通用性不如医疗包。 • 方阵药丸:
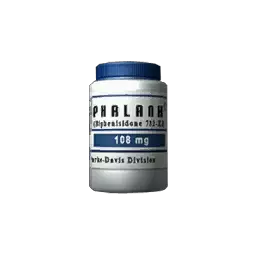
【阳具守卫药丸】是另一种可装备的生命道具。使用该道具需要5秒时间,它能重置感染症状并将其延迟200秒。当这个倒计时归零时,症状会再次出现,因此你有120秒的时间寻找并使用另一瓶药丸,否则就会死亡。 只有在你被感染并出现症状时才能使用该道具。使用时,你会被1秒的白屏致盲。 高效使用方法:尽量在屏幕几乎完全看不见的临界点再服用药丸。这样可以为你争取更多时间来尝试完成地图或寻找更多药丸。不过不要太贪心,等待太久会让你完全失明,而且使用药片需要几秒钟时间,你很容易在使用动画期间死亡。 - 有时候像这样使用药片是不可能的,因为在奔跑者从多个方向朝你袭来的情况下,近乎失明可能会成为死刑判决。你需要清晰视物才能应对他们,所以在这种情况下提前服用药片可以救你一命。你也可以像对待医疗包那样做:如果你已经有药片,并且发现另一瓶放在那里,如果你知道不会再回到那个区域,可以(仅在出现症状时)使用它。但要注意其他幸存者。你可能不是唯一被感染的人,所以先沟通(如果你能相信队友不会杀你的话),以防有人需要那个备用物品。 • 基因疗法:
基因治疗注射器是最后一种可装备的医疗物品。使用它大约需要10秒,能让你完全免疫感染。无论之前是否被感染,效果都一样。 此外,使用后有10%的几率会出现持续60秒的暂时性部分失明(屏幕变得模糊且昏暗)。但无论是否出现这种情况,你都会获得免疫,且之前的所有感染症状会立即消失。 高效使用方法:首先,如果你有基因治疗注射器,可以跳过部分使用动画,大幅加快使用过程。当你的角色刺入自己并听到“砰”的一声时,立即切换物品或推搡,即可跳过动画,因为此时注射器的效果已经生效。- 如果你找到这类注射器,除非确实被感染,否则不要急于使用。如果未被感染却使用了它,你可能会在比赛中死亡,这完全是浪费道具。即使不想分享,也要等到被感染后再使用。除非是单人游玩,否则提前使用毫无益处。 - 不过在某些情况下,比如与经验不足或能力欠佳的队友组队时,为自己囤积基因治疗剂是个好主意。这样你就可以完全不用担心被感染,专注于完成任务目标并帮助他人推进进度。换句话说,你能更稳定地带领团队赢得这一局。最后,即使你处于免疫状态或背包里有基因疗法,只要背包空间足够,遇到任何方阵药片都尽量捡起来。它们能在紧急情况下拯救被感染队友的生命。 医疗物品:高效使用(续) • 医疗站:
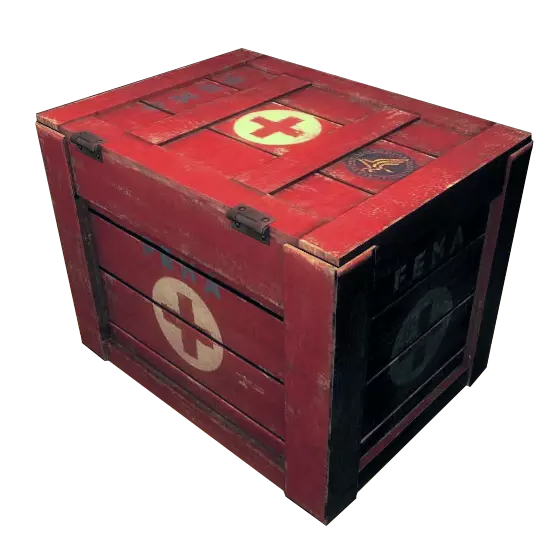
医疗站是红色箱子,在绝大多数生存地图以及部分目标地图(如nmo_suzhou)中都能找到。 你可以将其放置在医疗站位置——这些位置会显示箱子的透明图像,且固定在特定地点。一旦放置医疗站,便无法移除;当它被完全使用后会消失,且该位置无法再次使用,若想使用其他医疗站,需寻找新的位置。 医疗站可为使用它的玩家恢复总计200点生命值。使用时,按住E键,生命值计量条会开始减少,直至你完全恢复健康或松开按键。 使用医疗站还可以停止流血,只需按住E键直至生命值回满即可。如果你松开得太早,出血就不会停止;如果医疗站在你还没达到最大生命值时就被完全耗尽,出血也不会停止。 - 高效使用:在可能的情况下,医疗站应该是玩家在任务模式和生存模式中使用的首个医疗物品。这是因为它的使用受限于其固定位置的特性,如果医疗站所在的安全区被大量僵尸侵占,玩家就无法进行治疗,这种情况在一些生存地图中很常见,比如nms_favela(僵尸生成点离两个区域都非常近)。每次失去生命值时,你都应尽快使用医疗站,以降低因生命值过低而突然死亡或被感染的几率(记住,在经典难度下,生存模式的基础感染几率是目标模式的两倍,100生命值时每次被咬的感染几率为5.87%)。核心思路是囤积更多用途广泛且实用的医疗物品,以备后续可能变得棘手的波次使用,比如医疗包、药片和绷带。这是因为这些物品可以在任何地方使用,它们不会固定在可能被僵尸占领的区域地面上,从而避免出现无法使用的情况。如果在这种情况下被感染,用枪械自杀(防止你的尸体变成奔跑者)比浪费部分医疗站资源,然后因缺乏药片或基因治疗注射器而死亡要高效得多。在经典难度下,如果你有复活代币,可以快速重生(记住,噩梦难度下复活代币是禁用的)。不过,如果你是携带病毒样本的人,在这种状态下使用医疗站可能会帮助你争取时间,以便在补给箱中找到基因治疗药剂。根据团队当前情况采取相应行动。 特殊技巧: • 你可以在与显示进度条的目标互动前使用任何医疗物品,并且在进度条填充期间,使用动画不会被中断。• 你可以在过场动画开始前使用任何医疗物品,并且使用动画会在过场动画期间继续播放。这不仅能让你在过场动画结束后更早开始冲刺(因为使用动画在过场动画期间已完整播放),还能在你流血或感染且即将在过场动画开始时死亡的情况下救你一命。这显然是一个非常小众的用法,但如果你记住当前游玩地图中逃生过场动画的开始时机,它偶尔能帮你解围。一个典型例子是在nmo_zephyr的最终过场动画,该动画在玩家松开火车头内的刹车并使用无线电后触发。 耐力管理
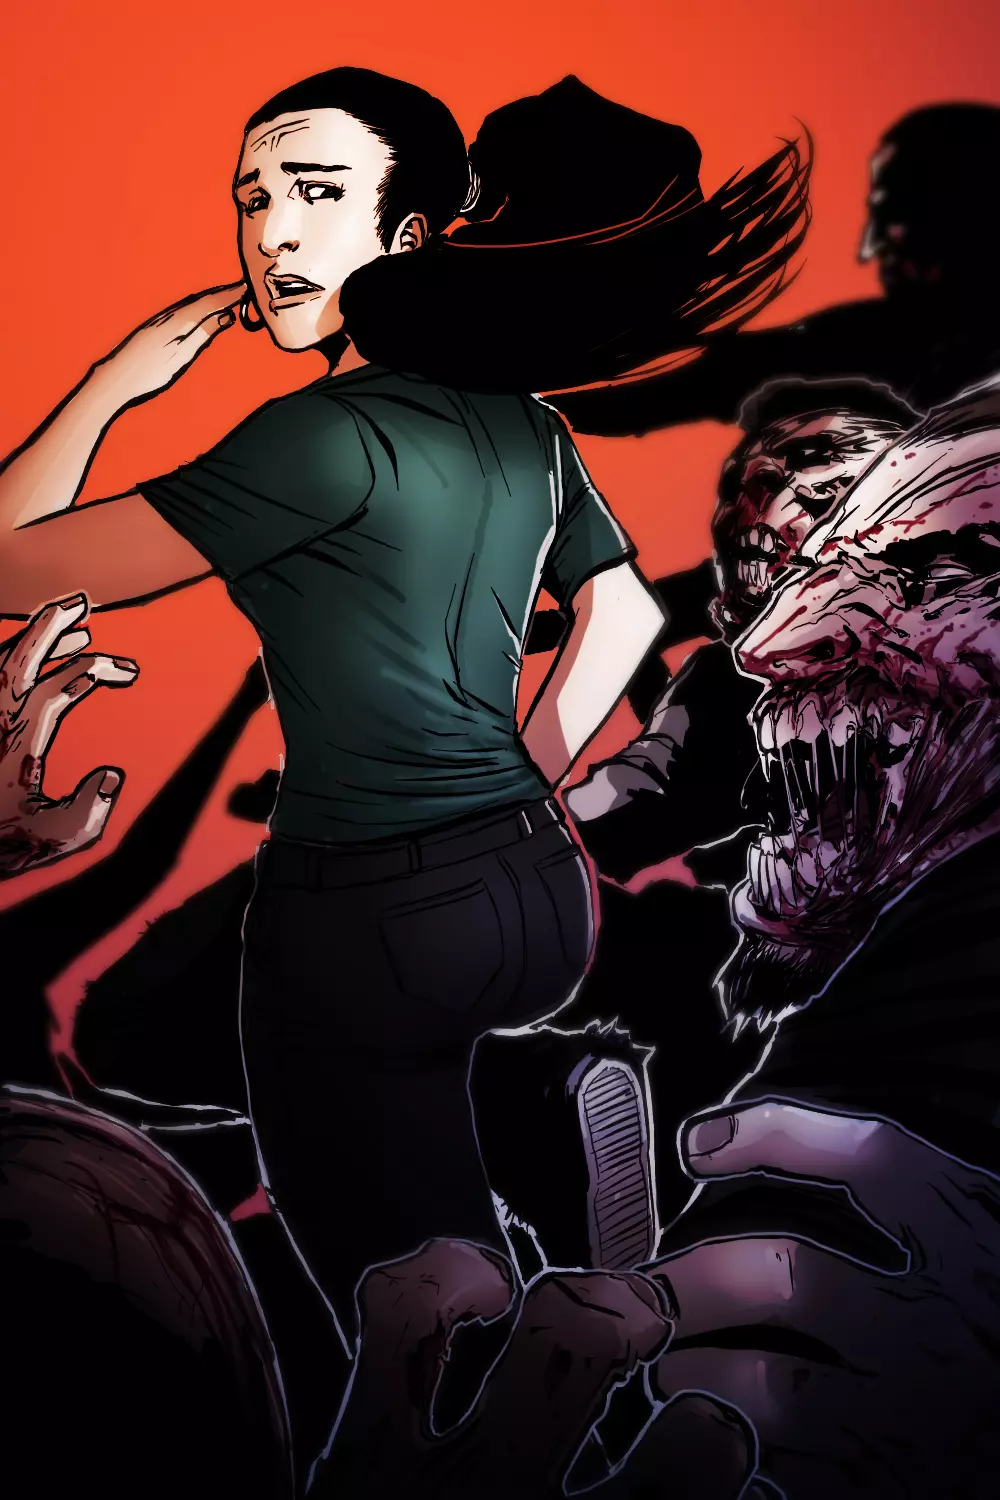
Managing your stamina is a fundamental part of NMRiH's gameplay. If you don't do this, you won't be able to attack, rush through zombie hordes or use the level geometry to your advantage and you'll be completely vulnerable against attacks. All fundamental player actions require stamina, therefore it's paramount that you learn how to manage it. Before discussing combat techniques, you need to learn this. Managing your stamina inherently minimizes the chances of you getting hurt or killed by unpredictable factors, like Runners behaving erratically or teammates that may accidentally bodyblock you. With enough stamina you can pretty much counter every single obstacle, if you are good enough. There are numeric stats like total stamina and how much of it is drained by performing the following actions. However, these numbers will only be used in an informative manner to illustrate how many actions you can do before running out of stamina. None of them are actually visible in-game. Knowing your current stamina levels:Since NMRiH has a minimalist and unobtrusive HUD, the only way to tell how much stamina you have is by listening to your character's heart rate and breathing. The lower your stamina, the louder your heartbeat will get and you'll start panting as well. Also, your viewmodel (your hands and weapons equipped) will start to move downwards on your screen once you reach 0 stamina. You'll also start to move slower and slower if you are sprinting. When you reach 0 stamina, your walking speed will decrease by 15% and if you are still sprinting when you reach 0, your speed will be reduced by roughly 60%. Additionally, you won't be able to perform any actions that use stamina if you don't have enough of it. For example, shoving uses 20 points of stamina, so if you have less than that, the game will not allow you to shove. You have a total of 130 stamina points, but there is no way to tell exactly how much you have left, so the number itself is irrelevant when playing. It will only be used here to illustrate how costly some player actions are in terms of stamina use. Actions that Consume Stamina:• Melee Attacks:Using melee weapons in all situations, except when swinging at the air, will drain your stamina in varying amounts. First, for every target you hit you will lose a fixed amount of stamina determined by the weapon used and the type of attack, light or heavy. Walls and surfaces count as a target, meaning that, for example, if you hit 3 zombies plus an adjacent wall with a light attack with a machete, you'll use 4 times the amount of stamina required for a single zombie. Additionally, charging your melee weapon increases damage but also stamina consumption. This will be discussed in more detail in the "Combat: Basic Melee Mechanics" section. • Shoving:Every time you shove a zombie, you'll use 20 points of stamina, which is a considerable amount (shoving the air, objects or surfaces will not drain your stamina). Depending on your playstyle, you will be shoving constantly or not too often, but it's something to keep in mind either way. • Jumping:This action is also costly in terms of stamina (20 points), you can jump 6 consecutive times at max stamina before you'll pretty much empty the meter. Only use jumps sparingly, like when rushing through Shambler hordes, to get over obstacles or to boost up objects or zombies. All of this will be explained in further detail in the "Movement: Advanced Techniques" section. ◈ IMPORTANT NOTE:Like it was mentioned previously, while you are bleeding, you will use 100% more stamina when jumping (twice as much). Keep this in mind to determine the appropriate time to use Bandages or a Medkit depending on your current situation. • Sprinting:When you press and hold W + Shift in order to sprint, the game will immediately take away 12 stamina points from your pool and the rest will slowly drain as you keep running. Also, while sprinting, your stamina stops regenerating completely. This means that if you want to regenerate it, you have to stop sprinting. Additionally, you should never press W + Shift repeatedly, because after around 10 presses you'll be completely out of stamina due to the initial penalty. If you want to sprint properly, just hold W + Shift and don't let go until you have to stop or you have to start walking to regenerate your stamina. A general rule of thumb of when to stop sprinting is when you can start to faintly hear your heartbeat. This way you'd be stopping well before your movement speed gets dangerously slow, which is when Shamblers will have more chances to grab you as you weave through hordes, and when after doing something like 2 quick attacks plus a shove will render you defenseless due to lack of stamina. How to regenerate your stamina:• Walking:If you don't perform any of the actions listed above and you simply walk by holding any of the movement keys you'll automatically regenerate your stamina slowly over time (6 stamina points per second). So, to go from 0 to 130 stamina, it takes roughly 22 seconds. • Crouching:When you crouch AND move, but at the same time you stop doing any of the 4 actions that use stamina, your regeneration rate will be higher than when you walk (9 stamina points per second). However, it's lower than when you're standing still (12 stamina points per second). You can use this to your advantage to increase your zombie killing capacity. We'll discuss crouching again in the "Combat: Advanced Melee Techniques" section. • Standing still:If you stand still while not performing any of the actions described in the previous section, your stamina will regenerate at a faster rate than if you were walking or crouching (12 stamina points per second). This can be useful when you need to regenerate a significant amount of stamina in a very short period of time. The disadvantage is that standing still generally leaves you vulnerable against surprise Runner attacks for example. ◈ IMPORTANT NOTE:The stamina regen bonus from standing still overrides the bonus from the crouching state, they DO NOT stack. This means that there is no difference between crouching or standing up if you are not moving your character. Movement: Basic Techniques 🎥 (VIDEOS PENDING)
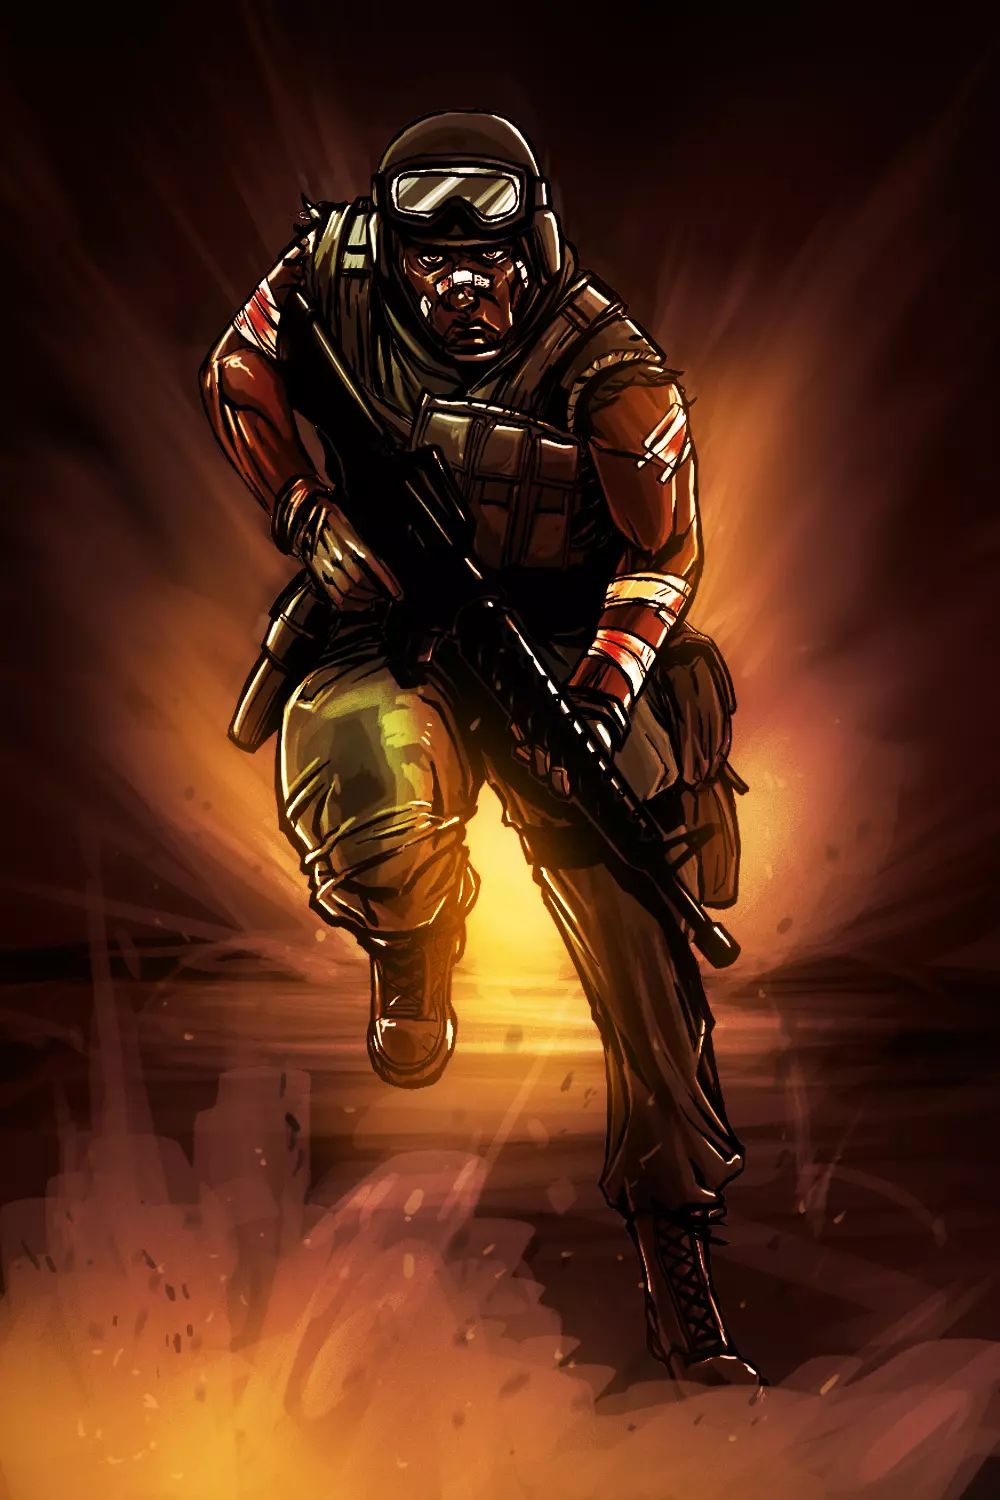
Movement in NMRiH is one of the primordial pillars of gameplay together with melee combat and efficient firearms use. With good enough movement you can bypass a lot of map obstacles, avoid having to kill zombies unnecessarily and you can get yourself out of very dangerous situations. Furthermore, these techniques are not only useful for your own benefit or survival, but can also be used to help others complete objectives, accelerate map progress and protect teammates from zombies. After you manage to master most of these techniques as well as the melee combat system and firearm techniques, Classic difficulty ceases to be a challenge for the most part. Only the hardest and most unforgiving maps can still be hard to complete. On Nightmare however, most of these techniques are mandatory in order to complete hard maps consistently, and even then nothing is guaranteed. ◈ Basic Principles of Dodging Zombies / Rushing:As mentioned previously, killing zombies on Objective maps should only be a means to an end, which is to complete the objectives and escape (any extra killing is useless). To consistently achieve this, you also need to learn how to dodge zombies and rush through hordes. The basic principle is finding "holes" in Shambler hordes where you can rush through, preferably without getting grabbed, taking damage and / or using ammunition. However, taking damage and using ammo to rush through is more than acceptable when you do it to progress further. If you do get hit, the idea is to make that HP sacrifice worth it by knowing how to complete the map from that point forward. What I mean by "holes" is: spaces between zombies that are wide enough for your character to squeeze through. It's impossible to describe via text how wide these spaces are or how they look because you can only identify them with enough experience. The only way to learn this is trying to rush as many times as you can and gradually learn how wide the zombie hitboxes are, as well as their attack / grabbing range. You may die a lot of times, but you'll get the hang of it pretty fast. There really is no way around this, it just takes time. You need visual and muscle memory to learn this. Once you do have a keen eye for recognizing which space is safe to rush through or not, you'll be able to do this automatically without thinking at all, enabling you to cruise through all easy maps. This also becomes a crucial tool when playing difficult maps. ◈ Basic Movement and Rushing Techniques / Strategies: • Detecting open spaces by sprinting perpendicularly to zed hordes:When you are standing in front of a horde and all zombies are targeting you, there may be spaces to rush through that you can't see directly. If you quickly sprint to either side of the horde you can detect these spaces, allowing you to weave through a horde in a perpendicular fashion, constantly changing directions. This also comes in handy as you're dodging. • Zombie Aggro Drawing / Manipulation:- Zombie AI: Zombies only target players via line of sight and proximity. You can abuse this to manipulate their movement to allow yourself to rush through hordes or even protect other players that may be completing an objective that leaves them vulnerable, like turning a crank. - Aggro Manipulation: First, if you want to use this to help you dodge a horde, you have to hug one of the walls closer to you or maybe a solid object that's part of the chokepoint, like a car or a tank. This way, all zombies targeting you will move directly to your position creating a small path on the opposite side. Shamblers don't move in perfect straight lines towards you because when they collide, they automatically change directions to avoid getting stuck and then they resume targeting you. So, by hugging a wall you minimize how much these Shamblers "branch out" from the main line giving you more space to go through. Obviously, you should always be vigilant and watch out for Runners or Zombie Children that may be hiding behind the horde before you dodge. • Zombie Bully Dodge:This technique is useful when the space to rush through is very tight and you are about to get surrounded (it's very useful in tight straight corridors). You have to commit to shoving a single zombie to create a path to move through. There mustn't be any zeds behind the one you chose or else it won't work. Once you choose, start shoving the zombie continuously in the same direction. This will slowly create an opening for you to rush through. Don't shove too fast though. If you do it while the zombie is stumbling, the shove won't register unless it can trigger a different stumble animation (backwards or side stumble). Time your shoves correctly so that the zombie moves back as fast as possible without ignoring your inputs. Also, make sure that you are not shoving the zombie into a wall or solid surface. Doing that will still stumble it but it won't move backwards, causing you to get surrounded. • Zombie Scrape Dodge:This technique is useful in the same scenario as the Bully Dodge. You have to again commit to shoving a single zombie to create a path to move through. There mustn't be any more zombies behind it or else it won't work. Once you take your pick, bodyblock the chosen zombie, shove them and immediately start moving forwards trying to dodge through the right or left. Your movement may become choppy as you are scraping through. If another zombie tries to grab you while you are doing this, quickly flick your camera and shove in their direction before the other zombie recovers. You can also use the Shove Cooldown Cancel exploit to make it less risky, more on that shortly. • Be mindful of Shambler variants with a faster movement speed:
蹒跚者生成时会随机选择几种移动动画。大多数蹒跚者的移动速度非常相似,但有一种变体的速度明显快于其他所有变体。当你躲避尸潮时,要留意它们,因为它们的速度很快,很容易被它们抓住。你也可以利用这一点,通过操控它们的移动来开辟冲刺的空间。 • 跳跃以避免被抓住:当你跳跃时,僵尸无法抓住你,它们只能用手攻击你。因此,如果你不确定仅靠 sprinting 能否躲避某一群僵尸,跳跃可以避免你被包围的风险(你可能只会损失一些生命值,而不是死亡)。僵尸有极小的概率会在你跳跃时抓住你并使你无法移动,但这种情况极为罕见,你可以暂时忽略。如果真的发生了,尝试通过推搡来自救。 当你携带无法 sprint(冲刺)的任务物品而导致闪避选择受限,或者试图用近战攻击摆脱排成一列追击你的奔跑者(Runner)时,这种技巧也很有用。 • 通过操控仇恨来强制僵尸向任意方向移动:只要你正对着僵尸,就只能迫使它们向后踉跄。因此,如果你想让僵尸朝特定方向移动,需要先瞄准该方向,等僵尸面向你后再进行推搡。如果你操作正确,就能将僵尸移动到任何你希望的位置,除非它们撞到墙壁、固体物体或其他僵尸。你应该触发僵尸的向后踉跄动画来实现这一点,原因是该动画比另外两种动画(侧向和向前)更快,因此你可以更快地将僵尸移动到目标位置。 移动:高级技巧 (视频待更新)
◈ Advanced Movement and Rushing Techniques: • Shove Cooldown Cancel (a.k.a. Double Shove / Multi Shove):This exploit is one of the most valuable techniques in the entire game. It's extremely useful for both dodging zombies and combat alike. As you may know already, shoving has a brief cooldown of around 1.5 seconds. However, it's possible to cancel it, allowing you to shove multiple times per second if you time it correctly. For most intents and purposes, you'll only have to do 2 to 3 shoves in quick succession, because the idea is to NOT get into really dangerous situations that require you to shove that many times in a very short period. Besides, each shove takes away 20 stamina points, meaning that doing it 6 times will drain more than 90% of your max stamina. To do it, first press the V key to shove while holding a weapon or item ➜ Press the H key to holster it ➜ Quickly press the V key again to shove a second time. Doing it too slowly is useless because the shove cooldown is not that long in the first place. Make sure your first shove registered before continuing with the trick. An alternative way is to set your fists as your last weapon used (pressing the H key and then the Q key). First, shove with the V key ➜ Press the Q key to switch to your fists ➜ Quickly shove again with the V key. This is my preferred way to do it. Using the H key is more uncomfortable but it doesn't require setting up your last weapon used, you can use it at any time to prevent a surprise Runner attack for example. Also, you can re-assign your holster action (the H key by default) to a key that you find comfortable to access. ◈ IMPORTANT NOTES:The reason that holstering is used for this is because the fists equip animation is very fast, allowing you to shove a bit earlier than with most other items. This difference is small though, you can do it effectively with any pair of items. Firearms do have a slight delay until a shove registers correctly, keep that in mind. You can tell when a shove registers this way when you see blood spurting out of the zombie (all firearms deal a bit of damage with each shove). If you perform the first shove with your fists, the next shove will not register until you wait for a fraction of a second. So, if you're going to use the fists for this, always start with your other item first and if you need to do more than 2 shoves, wait a tiny bit before performing the third one. If you perform your first shove with your Zippo Lighter (like when you don't have any items yet), your second shove using your fists will not register sometimes. You have to wait for a fraction of a second to get it to register consistently. • Zombie Boosting:You can jump on top of any zombie's head and use them as surfaces to jump onto unreachable spots. Simply position yourself so that you have enough elevation to perform a crouch jump (W + Space + Ctrl) and get on top of any zombie. Look for climbable objects or surfaces like trashcans, ledges, ladders, stairs, etc. Once you are on top of a zombie they will freeze and enter an idle state, they'll only turn to face you as you move. However, if another zombie walks over to the one you are standing on top of, both will start attacking and will easily kill you. • Zombie Surfing:This is the same concept as Zombie Boosting but the intention this time is to skip past hordes by running over the zombies' heads. Since there is a very high possibility of getting attacked while doing this, you should sprint to cover as much distance as quickly as possible and minimize or avoid damage entirely. If you also jump, you'll avoid damage completely but it will drain your stamina very quickly. • Crawler Boosting:You can jump on top of Crawlers without any help from elevated surfaces. Thanks to this, you can use them as a platform to jump on top of other zombies like Shamblers or Runners and skip past them via (Zombie Surfing) or even jump onto unreachable spots via (Zombie Boosting). Since Crawlers have a low probability to spawn and their pathfinding is inconsistent, this opportunity doesn't present itself often. However, it has saved me many times in cases where you are absolutely surrounded and you have no other options. I had this happen in one of the tunnels in nmo_underground for example. There's also a chance that the Crawler will grab you if you stand on top of it for too long, so try to avoid that. • Zombie Riding:When you are on top of a zombie, shoving them will not move them backwards, similar to shoving them against a wall. However if you jump while the zombie is starting to stumble, it will move. This way, you can use a zombie as a moving platform to reach high places. This comes in handy when you don't have a surface as a stepping stone near the place you want to jump to or if you can't find a Crawler for the same purpose. You can get on top of a Shambler and then force them to move to the spot you want to jump on. This only works if no other zombie bothers you, cause they will immediately attack if they get close to the zombie you are standing on. Therefore, having a firearm to clear out incoming infected is crucial. The most stamina-efficient way to do it is to ➜ First get on top of a Shambler ➜ Walk a couple of small steps in the direction where you want to move the zombie to (the zombie will turn to face you) ➜ Jump and don't touch any directional keys. While you are in the air, the zombie will walk towards your direction ➜ Repeat this process until the zombie is where you want it to be. Stand still as much as possible to constantly regenerate your stamina at the fastest rate. There is a quicker alternative in case you need it: Get on top of a Shambler ➜ Position yourself so that the zombie is facing the opposite direction where you want to move to ➜ Shove the Shambler with the V key ➜ Jump and hold the W key to instantly move forwards and avoid falling down. While you are in the air, the zombie will move backwards due to the stumble, which is faster than having them walk normally. This obviously uses more stamina, so try to do this while crouched because you can't really stand still while doing this. Movement: Carrying Objective Items 🎥 (VIDEOS PENDING)
The following techniques, on top of being useful on their own, can be combined with any of the advanced movement mechanics that were mentioned previously. ◈ Efficient Ways of Carrying Objective Items: • Moving objective items near chokepoints and re-routing aggro:When trying to move an objective item through a crowded chokepoint, you can place said item near the opening and then move backwards to draw the zombies away or to kill them. This allows you to rush or kill zombies without having to worry about the objective item until you are already past the chokepoint. • Moving items through doors, over fences or other chokepoints:Depending on the map played and the active objective, it may be necessary to move objective items through very tight and crowded chokepoints. However, with this simple trick, it's possible to reduce the tedium and challenge if you manage to move the objective item past the obstacle. It involves jamming the item through the corner of a doorway, sideways through a fence or over a wall for example. This puts the item past the chokepoint so you can concentrate on bypassing the zombies blocking the entrance. A couple of examples are: nmo_quarantine's graveyard and nmo_broadway2's basketball court. • Shove Stacking:If you remember what I explained in a previous section about the Zombie Bully Dodge technique, zombies will ignore shoves if they already stumbling. The only way they can be shoved while stumbling is to force them to play a different stumble animation. This is the principle of shove stacking. Shamblers and Runners have 4 different stumble animations depending on the angle from which you shove them, therefore, controlling your angle is what allows you to stack shoves. The sideways stumble animations take more time to complete, so the zombie remains incapacitated for longer. Crawlers and Zombie Children only have one stumbling animation, therefore this does not work on them. This technique is useful in a cooperative manner. If you and another player are dodging a Shambler horde, and your teammate is carrying an objective item, you can help them dodge zombies if you shove stack. This allows your teammate to follow your own rush path safely, they won't need to shove zombies back while carrying an item, which can be dangerous if they don't know how to do it properly or if there's way too many zombies. To do it, first shove the appropriate zombie with the V key ➜ Move forward in a diagonal fashion to get perpendicular to their face ➜ Shove them again with the V key before it recovers to force it into a sideways stumble animation. This will give your teammate enough time to walk through safely. • Item Rushing:As it was previously mentioned, carrying an objective item, or any item manually for that matter, will leave you vulnerable due to being unable to attack, shove, or sprint, making rushing through hordes very risky. Fortunately, this technique lets you bypass most of the danger. To do it, first move into a horde of Shamblers blocking your progress while carrying an item ➜ Let go of the item with the E key ➜ Press the V key to shove the incoming zombie ➜ Quickly flick your mouse to the ground ➜ Grab the item again with the E key. This allows you to move through while the zombie is stumbling, unable to attack. If you combine this with the Shove Cooldown Cancel technique and, if you are skilled enough, you can shove back several Shamblers in a row, letting you squeeze through what previously seemed an impenetrable wall of zombies. Make sure you have enough stamina before you start. • Flick Item Carrying (a.k.a. Dual Item Carrying):Usually, Objective maps require multiple items to progress. Therefore, if you are playing solo, item scavenge hunts can become troublesome, like in nmo_cleopas. This technique allows you to carry 2 objective items at the same time, saving you a lot of time. To do it, grab one of the items with the E key ➜ Walk forward a few steps ➜ Drop the item with the E key ➜ Flick your camera 180º ➜ Grab the second item with the E key ➜ Flick your camera back ➜ Repeat. All these last three steps must be done in one fluid motion and you also need to learn how much you can walk forwards before the item behind you is no longer reachable. Learn that maximum distance, otherwise the technique won't save you any time. Movement: Parkour Since this guide is designed to prepare you for any type of situation you can find in the game, parkour has to be brought up since it's part of several custom maps out there. It also provides a lot of utility in many instances even if its use is not a requirement. There isn't really that much to say here other than a few tips and tricks to keep in mind when you are doing parkour in a map like nmo_khafre: Always try to crouch jump like in any other Source game (press Space Bar ➜ then Ctrl in midair). It lifts your collision out of the way of obstacles to easily clear them. It's used all the time, especially for exploits like Zombie Boosting or Zombie Surfing Don't let go of the Shift key until you have jumped and you're already on the air, otherwise you'll lose your entire momentum Pressing the S key to reduce your speed will halt your entire momentum instantly. Tap it once you can visually tell that you are over the platform you are trying to jump on You can perform curved jumps by doing a 180º turn with your mouse in mid air. It's useful in a few maps but very situational Shorter jumps should be done without sprinting because it's hard to control your speed and not shoot past the platform if it's too close to you Movement: Miscellaneous Techniques 🎥 (VIDEOS PENDING)
◈ 其他移动技巧: • 避开阻挡你的队友:你可以通过蹲跳轻松越过队友来避免玩家碰撞。这需要一定的速度才能稳定生效,因此操作步骤如下:首先按住W+Shift开始 sprint(冲刺),按下空格键跳跃,然后在半空中按Ctrl键蹲下。在半空中之前不要松开Shift键,否则你的动量会大幅减少。 • 减少坠落伤害:从边缘蹲下落下,然后在半空中站立,根据原始高度的不同,可以减少或完全避免坠落伤害。这是因为站立时你的 hitbox(碰撞箱)会扩大,意味着你落到地面的时间更短,游戏会认为你是从更短的高度坠落的。不过要注意,如果你做相反的动作(空中蹲伏),会受到更多坠落伤害。 • 蹲伏时你后退得更快:这能让你在攻击僵尸时更快地向后撤退,同时略微提升耐力恢复速度。你也可以利用这一点,在持续蹲伏的状态下攻击僵尸。我们会在“战斗:高级近战技巧”部分(“蹲伏状态下的近战”要点)详细讨论这一点。 • 在低空间下 sprint 可以让你移动更快:当身处通风管道或其他类似的低空间环境时,进入后可以松开 Ctrl 键。这样你就能按住 W + Shift 进行 sprint,同时保持蹲伏状态,从而大幅提升移动速度。如果你手中拿着物品,显然无法使用此技巧,因为此时无法 sprint。 • 梯子快速攀爬:与许多其他 Source 引擎游戏类似,你可以通过按住 W + D 或 A 并向上看的方式更快地爬梯子。操作方法如下:首先直视梯子,然后向上看,按 W 键开始攀爬,接着将视角向左旋转 90 度,同时按住 W + D 继续攀爬(如果你想使用 A 键,则将视角向相反方向旋转 90 度)。 • 游泳冲刺:当你在水面上时,按住 W + Shift 可以加快游泳速度,就像在陆地上 sprint 一样。这在某些地图中非常有用,比如那些你必须承受伤害才能完成目标的地图,或者当你需要穿过受感染的水域时。例如:在nmo_bad_gas中需要寻找最后一个汽油罐的湖泊,或是在nmo_subside中获取研磨锯的迷宫。只有当你停留在水面上时才可能出现这种情况,并且这会像在陆地上 sprint 一样消耗你的耐力。 • 防止过场动画后被僵尸抓住:过场动画结束后,僵尸有时会抓住你,尤其是奔跑者,因为经常会有几只僵尸排着队追赶你。要防止这种情况,只需在过场动画播放时按住W+Shift不放。这样你就能在动画一结束就 sprint,完全避免被抓住。快速打开木板封死的入口:在《求生之路:纳粹僵尸部队》的许多地图中,存在被可破坏木板封锁的门和其他入口,例如nmo_junction地图中的玩家出生点。你打开这些入口的第一反应可能是用近战武器快速打破木板,但遗憾的是,这种方法通常极其缓慢。近战武器的轨迹弧线宽度不够宽松,因此你的视角需要处于非常特定的角度才能破坏木板。实际上,由于这种角度要求不一致,很难学习或记住。 因此,打破木板最快且最稳定的方法是用拳头,因为拳头不会产生轨迹弧线,它们只会击中你指向的任何东西(基本上是即时命中)。你永远不会打偏,也不会消耗多余的体力。这一点同样适用于生存模式和部分目标地图中使用的 barricading boards(木板 barricade)。 理论上,你可以用枪械更快地破坏它们,但这会非常浪费。只有在你的生存取决于打开一扇被木板封住的门时才这样做(而这种情况本来就不应该发生)。 战斗:基础近战机制 (视频待更新)
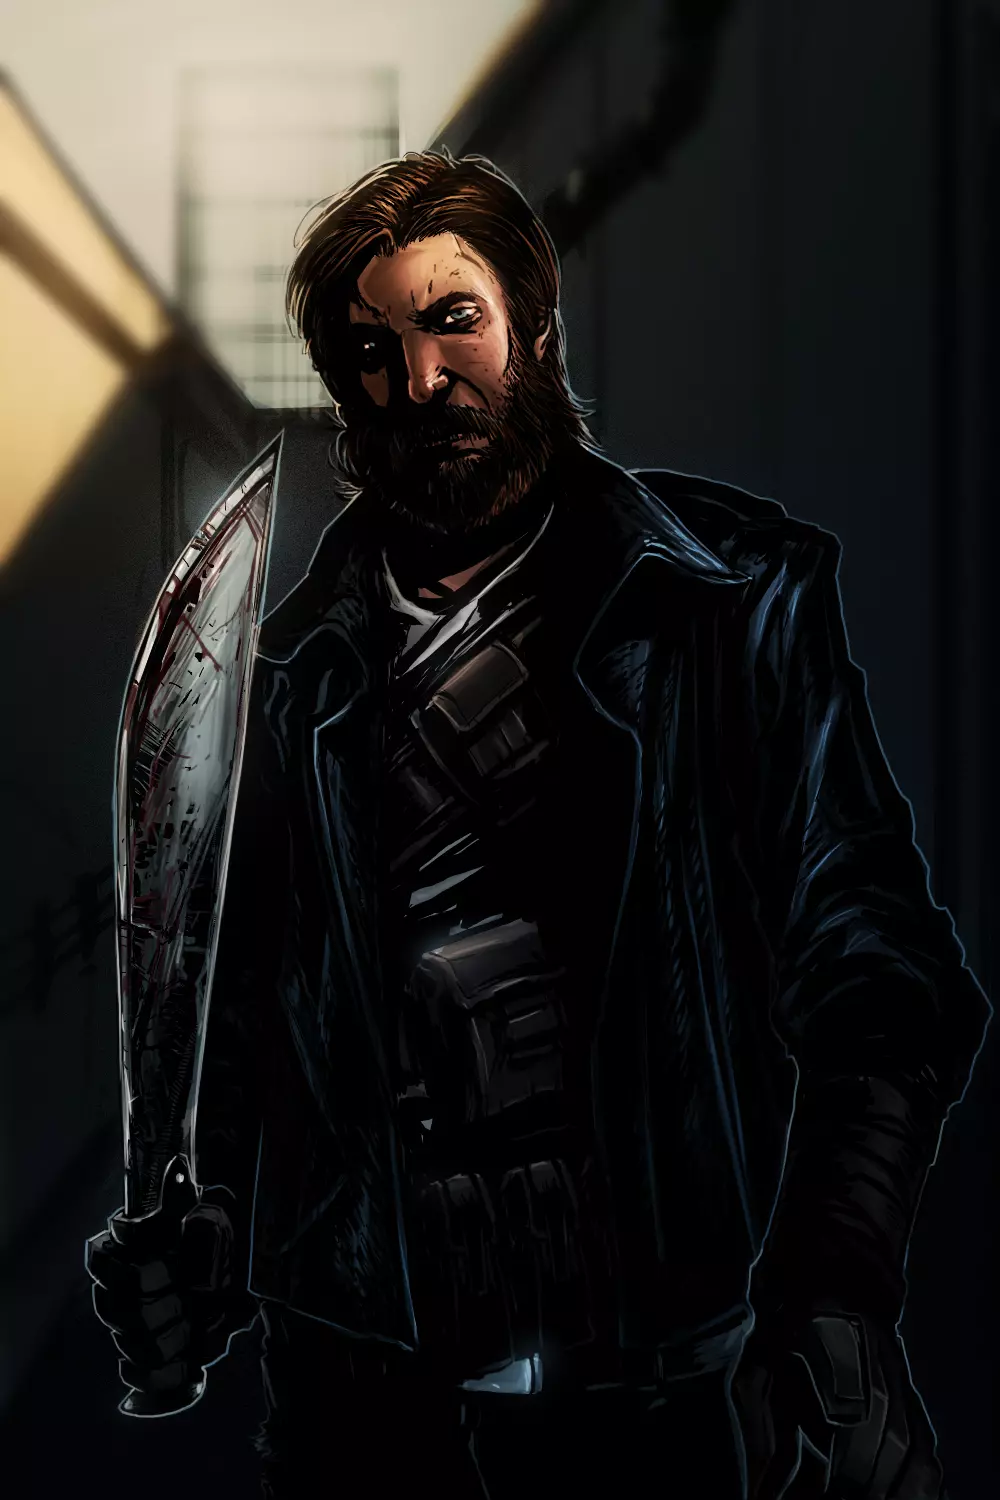
最后,我们来到本指南最重要的部分。近战是《求生之路:纳粹僵尸部队》玩法中最复杂的核心,也是最难掌握的部分。不过,你会发现它同样也是最有成就感的部分。 掌握这些技巧后,你基本上能够应对游戏中出现的几乎所有情况。你可以轻松击杀游戏中的所有敌人类型,甚至能用不需要弹药的武器来应对像奔跑者长龙这样的极端情况。 无论过程是快是慢、是繁琐还是高效,即使忽略了正确的移动方式或枪械使用,你也能挺过去并存活下来。唯一的例外是在噩梦难度下游玩某些最难的地图。显然,我并不是建议你忽略其他任何方面,它们对于完整的《求生之路:纳粹僵尸部队》体验仍然至关重要。这一切都是为了给你提供尽可能多的工具,以增加你的生存机会。 现在,让我们来了解一下近战战斗的基础知识: ◈ 近战战斗系统基础:轨迹弧线/瞄准补偿
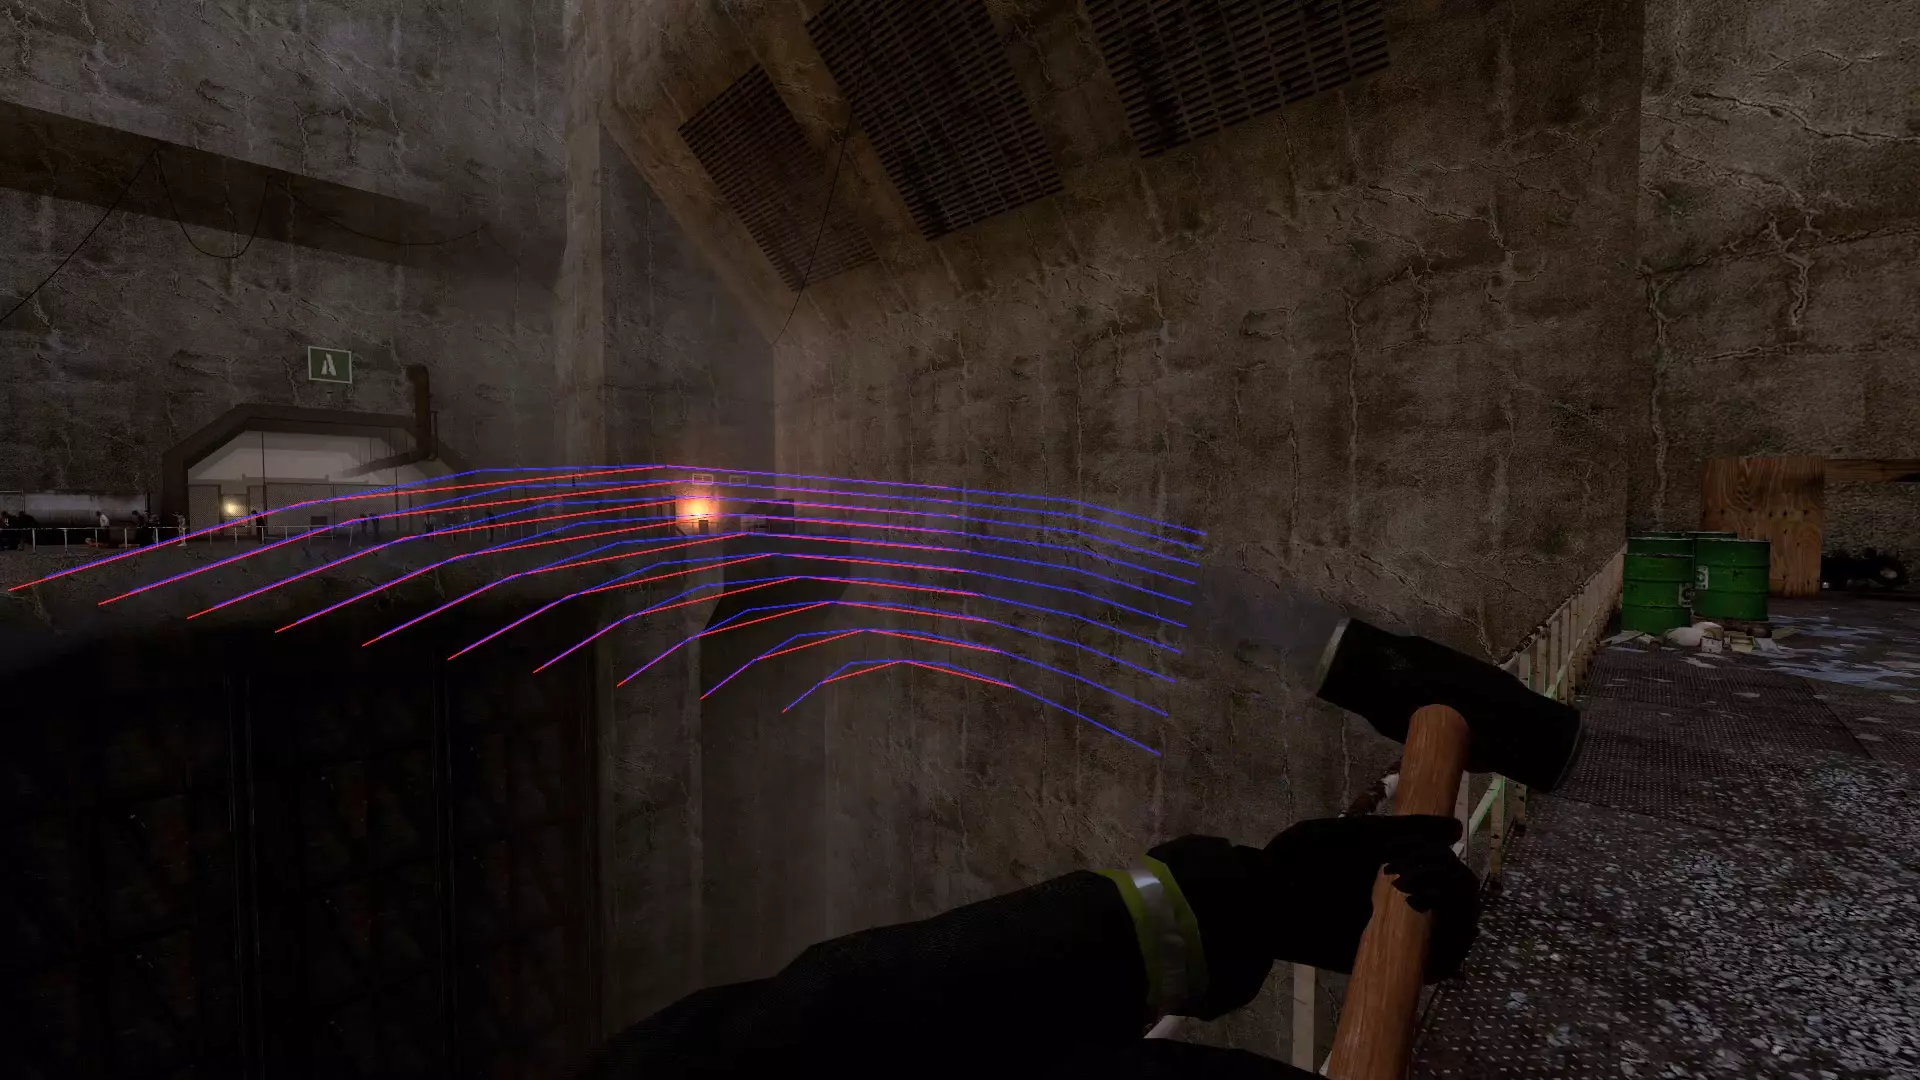
《求生之路:纳粹僵尸部队》中的近战命中判定机制与《海盗、维京与骑士2》或《骑士:中世纪战争》等游戏类似。简单来说,每次挥舞武器时,都会生成一道无形的攻击弧线,该弧线会模拟你攻击时武器的运动轨迹。当你与僵尸的碰撞箱距离足够近时,攻击弧线与其发生碰撞就会判定为命中。 这一机制让你可以通过大范围挥砍同时攻击多个敌人,也能通过适当调整瞄准来控制命中判定的速度。若想以最高效率和稳定性掌握《求生之路:纳粹僵尸部队》的近战战斗,掌握这一点极为重要。理解这一点的最佳方式是举例说明:想象你手持一把砍刀,这时有一个僵尸小孩正朝你跑来。所有人的第一反应可能都是直接瞄准它的头部进行轻攻击。然而,除非时机把握得非常完美,否则你很快就会被这个小孩击倒。这是因为小孩的攻击动画速度极快,一旦进入攻击范围,它们几乎会立即发动攻击。 避免这种情况的方法是利用近战攻击的轨迹弧度。首先,要了解你当前使用的近战武器在攻击时的具体表现。以砍刀为例,当你挥砍时,轻攻击的判定范围会从屏幕中右侧开始显示,这是命中检测弧线最早出现的位置。因此,你不应直接瞄准目标头部,而应瞄准其略微偏左的位置。这样能让你的攻击更快判定成功,从而在目标攻击到你之前将其击杀,避免之前的情况发生。为简单起见,我将此过程称为【瞄准补偿】。 这一概念有多种应用场景,例如在楼梯或不同高度的地方对抗僵尸。如果在这些情况下不进行瞄准补偿,僵尸会在你命中它们之前就对你发起攻击。我会在【战斗:基础近战技巧】部分(通过近战在不平坦表面对抗僵尸的要点)中更详细地解释这一点。 遗憾的是,尽管这个系统看起来足够简单直接,但近战战斗仍然有些不稳定。这是因为攻击弧线并不完全跟随武器的移动,而且僵尸的 hitbox 往往与其模型不同步。对此没有别的办法,通过游玩、练习和提升,你会逐渐减少被击中的次数。 ◈ 快速近战攻击和蓄力近战攻击:使用近战武器有两种方式,快速/轻攻击或蓄力/重攻击。每种攻击都有其优势、劣势和特定用途。一旦你掌握了窍门,就会有许多技巧和策略可用于高效击杀每种僵尸类型。 • 快速/轻攻击: 只需点击左键即可发动。其攻击动画和冷却时间相对较短,玩家可以快速连续挥舞数次。缺点是,除非你进行过度充能,否则它们造成的伤害较低,且比充能攻击消耗更多耐力。 • 充能/重攻击: 按住左键进行充能,然后释放即可发动。充能时间越长,伤害和耐力消耗就越高。然而,由于动画时间较长和充能时间的存在,这些攻击的准备速度也较慢。有效使用这些武器的诀窍在于,了解击杀蹒跚者所需的最低伤害量,并尽可能少地消耗耐力。我们将在即将介绍的【不间断击杀蹒跚者】要点中继续探讨这个关键话题。 ◈ 近战暴击范围及保持方法:要想在不死亡的情况下稳定地用近战击杀敌人,另一个需要练习的关键是你与僵尸之间的正确站位。 每种近战武器都有一个能有效命中的攻击范围。如果僵尸处于这个范围之外,所有攻击都将落空。此外,僵尸也有自己的攻击范围。如果你进入了这个范围,并且僵尸正在锁定你,它就会发动攻击,可能是挥拳攻击,也可能是抓取并撕咬。
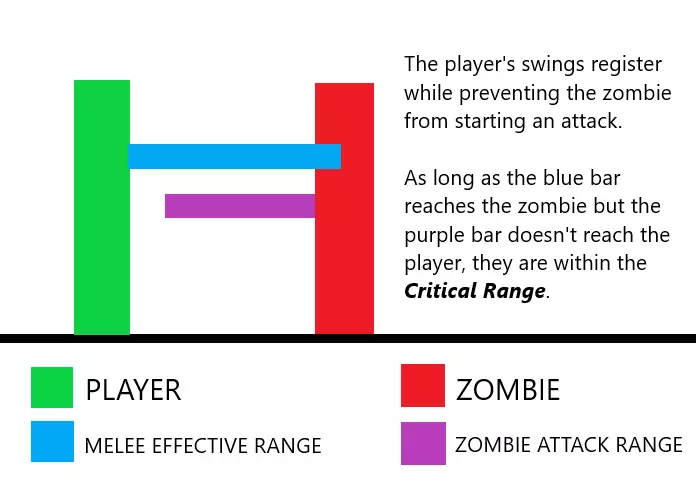
对于所有近战武器(不包括少数性能较差的近战武器),其有效攻击距离足够让玩家与僵尸保持特定距离,此时玩家的所有近战挥击都能命中,但僵尸本身不会发起任何攻击。 这就是我所定义的【临界距离】。简单来说,就是僵尸处于你的近战武器有效攻击范围内,而你处于僵尸的攻击范围之外。 不同近战武器的临界距离各不相同,因此你需要逐步熟悉所有你想熟练使用的武器的有效攻击距离。近战武器的有效攻击距离越短,其临界距离就越小,你躲避僵尸攻击的容错空间也就越少。短柄斧是近距离武器的典型代表,这使得近战极具风险,但正如我稍后会解释的(轻攻击连招),其回报也同样丰厚。这一点无法回避,你必须大量练习,才能熟悉每种武器的特性。 • 如何保持在暴击范围内:僵尸并非静止不动的生物,它们会以不同速度向你移动,因此保持在暴击范围内并非简单地站着不动。你必须不断移动,以确保攻击时处于该范围内。战斗:基础近战技巧 攻击前,先按W键靠近,直到确定僵尸处于你的有效近战范围内,然后使用轻击或重击进行攻击。一旦确认挥击命中或未命中,立即按V键推开僵尸,并按S键开始后退。重复以上步骤直至僵尸被消灭。这本质上是通过不断按W和S键来保持与僵尸的距离平衡,形成一种类似秋千摆动的效果。 (视频待更新)
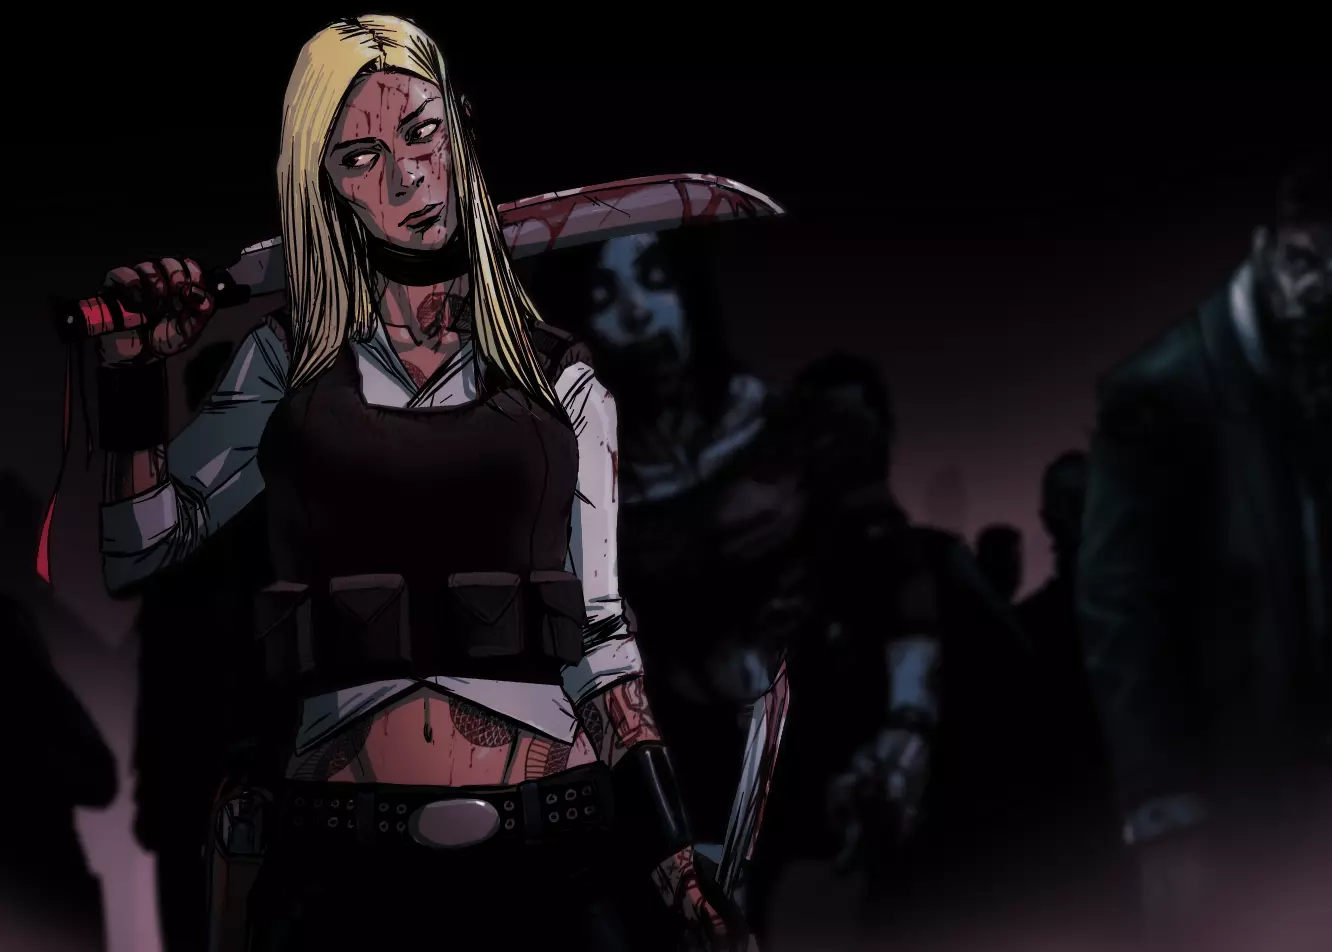
◈ Uninterrupted Shambler Killing:A fundamental gameplay loop in NMRiH is learning how to kill endless numbers of Shamblers continuously, without having to stop and regain your stamina. Since these enemies re-spawn constantly in Objective maps, and since you are forced to kill all of them in Survival maps, knowing how to deal with large crowds of them as fast and as safe as possible becomes a very useful tool. Since quick attacks have high stamina penalties and lower damage, we have to rely on charged attacks, and this means having to learn the minimum amount of charge time needed to kill Shamblers in one hit. Charged attacks not only consume less stamina if the charge time is not excessive, they reduce the amount of swings needed to kill to only 1 in most cases on Classic difficulty (Nightmare doubles that number), minimizing hit detection randomness and the amount of shoves that you need to perform to prevent possible zombie bites or attacks. Also, since charging takes time, your stamina can regenerate just enough so that it can counteract your next attack's penalty. There's no need for complex numbers here, the only important factor is to inflict enough damage to reach the one-hit-kill breakpoint. Charge time varies in each weapon due to different base damage values, but fortunately it's possible to group several of them in different categories to make it easier to remember. 5-4 seconds (most subpar melee weapons) 3 seconds (average melee weapons: Lead Pipe, Crowbar, Hatchet) 2 seconds (some high tier melee weapons: Fire Axe, Machete) 0 seconds, no hold time needed (some high tier melee: Pickaxe, Sledge)You'll find more info on the "Weapons: Melee" section. Once you learn the exact optimal charge timing for your current weapon, you can then start to kill Shamblers continuously. This will let you deal with giant hordes if you have a good enough melee weapon (such as the Pickaxe or Sledge) and enough space to backpedal and not get cornered. First, charge your weapon by holding Left Click ➜ Count to the appropriate number in seconds ➜ Let go of Left Click and direct the attack towards the nearest Shambler ➜ Shove with the V key as soon as the hit registers or fails to register to prevent attacks ➜ If you got the kill, repeat the process with the next Shambler in line. With the appropriate charge time, you can maintain this rhythm indefinitely with all decent melee weapons. ◈ An easy technique for keeping track of charge time:There are several ways to do this and none are superior to the rest, it's all personal preference. You are free to experiment and find a technique that you think is more intuitive, but this is what I personally use. First, initiate the charge by holding Left Click ➜ Wait until your weapon stops moving completely ➜ As soon as your weapon is static, start the count by saying "one" in your head ➜ Keep counting in seconds until you reach the desired number ➜ Let go of your Left Click to attack. The reasoning behind this technique is that by waiting for the weapon to stop moving, you have a consistent visual queue to count the first second, since most charge up animations take around a second to finish. Again, this is very subjective to each player, so don't do this if you find it confusing. Find what you think is the most intuitive way to achieve the same outcome: killing Shamblers in one hit with minimal stamina use. ◈ Sledgehammer / Pickaxe Charge Attack Abuse:As I mentioned in the "Weapons: Melee" section and "Uninterrupted Shambler Killing" bullet point, both the Sledge and Pickaxe don't require charged attacks to kill Shamblers, a quick attack is enough. However, they use too much stamina for sustained Shambler killing (after 2-3 quick attacks you'll completely run out). So, to counter this, it's possible to initiate a charged attack but without any actual charge time outside of the animation itself. Since the game still counts it as a charged attack, the stamina penalty will be much lower, and by the time you perform another one, your stamina will be back at full capacity. In layman's terms: you can continuously kill zombies by charging slightly and you'll NEVER run out of stamina. This technique is a game changer, because you basically can't screw it up like all other melee weapons. It also works with the FUBAR, but that's a subpar weapon, so I don't recommend it unless you don't have any other choice (check the "Weapons: Melee" section). To do it, simply hold Left Click to initiate a charge ➜ As soon as you see that your character's arms start to move, release your Left Click ➜ Aim at the zombie's head while inside the Critical Range to get the kill ➜ Repeat. ◈ When starting out, ALWAYS shove after each attack:Since you're probably already aware that NMRiH's hit detection is wonky at best, you need to minimize the chances of getting hit by zombies every time you engage with them. Therefore, you should always shove zombies back with the V key after every attack you perform, regardless of whether the zombie is already dead or not. This protects you from the randomness of melee hit detection (and your own mistakes obviously). Once you are experienced enough you can skip this and use more advanced combat techniques, such as using quick attacks with a Hatchet or Machete to quickly dispatch hordes of Shamblers (Light Attack Chains technique, check the "Combat: Advanced Melee Techniques" section). Combat: Zombie Manipulation 🎥 (VIDEOS PENDING)
◈ Zombie Manipulation and AI Exploits: • Zombie Aggro Manipulation:Like I mentioned before, zombie AI is very simplistic and exploitable. They target players based on line of sight and proximity, meaning that once they see you they will start their chase and will only switch targets if another player draws their attention by standing closer to them than you are. This allows you to manipulate aggro to get Runners off of a teammate's back for example and save them. Then, after drawing the aggro, you can easily kill them in various ways that will be discussed shortly. This is also useful to rush through hordes by forcing zombies to move to a specific location, like it was explained in the "Movement: Basic Techniques" section. Keep in mind that if you have a Runner conga line on your back and you are relatively near a teammate, if you suddenly sprint and turn a corner, you can accidentally draw the Runner aggro towards the other player, which usually leads to their death. Be very mindful of your movements when you are in extreme situations like this one. • Runner / Zombie Children Kiting:As it was stated before several times, both Runners and Zombie Children don't have attack animations when moving. Therefore, as long as you are moving fast enough they'll never be able to grab or punch you. This allows for an interesting combat technique, kiting Runners and Zombie Children indefinitely. This means that continuously walking forwards or sideways will prevent them from ever catching up to you, so you can then kill them with charged attacks with a good enough melee weapon. If your attack is too weak, possibly because the weapon needed more charge time, you run the risk of not killing the zombie that you are targeting, and then the others will punch you to death. If enough of them pile up behind you, a so called "conga line" is created, making it much harder to deal with them. This is because Runners and ZC clip into each other when chasing you, so one of them can get killed when you swing, but there'll be several more Runners behind it that will punch you to death in less than a second. Try to keep the zombie numbers at a minimum (no more than 4-5 if you don't have a firearm or a high tier melee) when doing this and you'll be able to take all of them out safely. • Runner / Zombie Children Circle Kiting:Sometimes, you will inevitably amass a huge number of Runners / Zombie Children on your back because of how most custom maps are designed. In these cases, kiting and killing them in a straight line is extremely dangerous because they clip into one another and if a ZC manages to hit you, your camera will bumble around, leading to a missed swing which in turn will let the Runners grab you and punch you to death. Circle Kiting is a way to weaken their numbers slowly by moving in circles around the conga line. Because zombies can't change directions while they are moving, they are forced to stop and turn to face you, and this is what you will take advantage of. While you move in circles, try to kill a Runner / ZC that lags slightly behind the others. Repeat this process until the total number of enemies is relatively low. Keep in mind that this technique is still dangerous, only works in big enough areas where you can move without any issues and NOT using a melee weapon that kills Runners in one quick attack (Machete, Fire Axe, Sledgehammer, Pickaxe) will make this extremely slow and more dangerous. Using quick attacks is also recommended here, as the speed at which you swing is key to killing them safely enough. Use this technique with caution, but if you manage to master it, it will save your life constantly. • Hiding to avoid targeting:Zombies need to actually engage in direct line of sight of you at least once to start their chase. This means that if you manage to visually hide from them, they won't be able to target you. This is generally useful in tough map finales where there's very heavy Runner spam, like in nmo_shelter. If you crouch and hide inside the corridor where the leaver that starts the final sequence is located, none of the zombies that spawn will chase you because they can't see you. This exploit allows you to save a lot of fuel for the Chainsaw, since you are stuck in that area for a fixed time until the door to the escape room opens. • Zombie Wall Grab (a.k.a. Corner Bug):It's possible to exploit entire zombie hordes and block their movement on narrow doorways. First, position yourself next to the door frame, then let one zombie grab you through the thin wall, it can't deal damage to you in this state. Once you achieve this, the rest of the zombies won't be able to make it through the door if it's narrow enough because they will constantly try to reposition themselves to avoid collisions, missing the doorway itself. You can then attack the other zombies that are trying to reach you once they are in range of your melee attacks, allowing you to slowly whittle down their numbers. However, this won't work if other teammates get closer to the horde as well, since they will draw their aggro away from you and help them make it through the door. This technique is useful to deal with huge Runner hordes that may end up killing you if you try to kill them via melee, cause you can slowly kill them as they get close to the zombie that's grabbing you (this is really useful in Nightmare, since Runners are extremely dangerous there). It's also useful to block the movement of Shambler hordes in a very tight area when you are about to get cornered, or avoid combat altogether if you have to hold your position until a timed objective is completed, or another teammate completes it for you while you are holding the zombies at the doorway. Combat: Basic Melee Techniques (cont.) 🎥 (VIDEOS PENDING)
◈ Combating multiple zeds close together:In NMRiH, zombies will constantly bunch up together as they target you or several players that are close to each other. This means that they will tend to clip into each other as you try to kill them via melee. To get consistent kills in these situations without getting punched to death, you can first kill a zombie ➜ then quickly flick your camera to another zombie that is very close to the one you killed ➜ Shove them with the V key before they can initiate an attack. You should do this constantly as you tackle Shambler hordes. Additionally, you can do this to more safely deal with small groups of Runners, around 2-3, without having to kite them at your back (as long as you have a high tier melee that can one-shot them without charging, like the Machete, Fire Axe, Pickaxe or Sledge). ◈ Coordinated Shambler Killing:There are many instances where players have to fight hordes of Shamblers in tight spaces such as corridors or tunnels, like in nmo_vertigo. In these cases, it's common for players to end up cornered due to bodyblocking or missed attacks if they don't cooperate properly. To counter this, a maximum of 2 players can coordinate at the front line to kill Shamblers or Runners efficiently, without bodyblocking or missed attacks. It can technically be done with any melee weapon pair, but high tier weapons are recommended, especially Sledgehammers or Pickaxes due to how efficiently they can kill Shamblers. Charged attacks are recommended, but quick attacks can be used as well. One survivor first charges up their melee by holding Left Click ➜ then attacks the zombie closest to the team ➜ As they start the attack, the second survivor starts charging their melee and gets ready to step in ➜ After killing the zombie, the first survivor proceeds to step back to make room ➜ The second survivor steps in and kills the next zombie ➜ Repeat until the horde is dealt with. It's important to note that if you fail to kill the zombie, you should still step back and let your teammate land the killing blow. This way, the two of you can maintain a steady rhythm and flow of movement so that performing the technique is more straightforward with less thought involved, more automated if you wish. ◈ Fighting zombies via melee on uneven surfaces:In many maps you'll come across sections where you have fight zombies on stairs, ramps or other similar uneven surfaces, such as in nmo_vertigo, nms_flooded or nms_isolated for example. The issue here is that because of melee trace arcs, your vertical attacks (most charged attacks have vertical swinging animations) will register too late if the zombies are at a lower height than you are, leading to you getting hit. To prevent this, you must again compensate your aim to take into account the melee trace arcs. In this case, if the zombie is lower in height, you have to compensate by aiming lower than its head, somewhere around the chest for most cases. This will help your vertical charged swings register sooner, avoiding attacks. For horizontal swings, the same principles discussed earlier still apply (compensate to the left or right of the zombie's head depending on your current melee weapon's attack animation). Additionally, if the zombie is at a higher elevation than you are, you just have to aim directly at the head in most cases, but you also need to move in closer to attack (same as when the zed is below you), otherwise your swings will likely miss due to the head being further away than normal. ◈ Charged Attack Cancel:When fighting zombies in tight corridors, you will constantly bump into other players trying to fight via melee like you. If player collisions are turned on, they can displace you when you least expect, causing missed swings and such. These swings can end up not hitting the zombie's head, missing the kill or hitting walls as well, both which can have a significant stamina cost if you're using a heavy melee like the Sledge or Pickaxe and you've been holding a charge for a couple of seconds, waiting your turn to swing. To prevent that useless loss of stamina, you can easily and quickly cancel your charged attacks by holstering with the H key ➜ then pressing the Q key to re-equip your weapon. You can also double tap the Q key. ◈ Light Melee Shambler Quick Kill:Sometimes it's possible to get cornered by Shamblers without a firearm in cramped maps, or you sometimes need to quickly go through a tight chokepoint blocked by several zeds. So, if you have at least an average melee weapon like a Crowbar, Lead Pipe or Hatchet (check the "Weapons: Melee" section for more info) you can try to get out of this situation by quickly killing 1 to 4 Shamblers in quick succession. This is a technique for emergencies though, as it will drain almost all your stamina if you kill too many zeds with it. First, get very close to a Shambler in the direction you wanna go to (preferably the direction where there's the least amount of zombies) ➜ Press Left Click to perform a quick attack ➜ Immediately shove the zombie back with the V key, regardless of whether they stumbled due to the melee knockback or not ➜ Move forward with the W key and follow that up with another quick attack (Left Click) as the Shambler is stumbling ➜ Press the V key on the next Shambler to stumble it forward ➜ Repeat the previous steps to kill as many zeds as you need to escape the horde. Do note that after around 4 kills you'll drain almost all your stamina. ◈ Heavy Melee Shambler Quick Kill:If you instead have a heavy melee weapon (Sledge or Pickaxe), you can kill Shamblers in one quick attack from the get go. If there's just one zed blocking your escape, a simple quick attack will deal with it and let you through. However if there's more, after killing the first zed, you should shove the next one with the V key so that it stumbles as your attack cooldown finishes and then follow that up with another quick attack. You can do this to kill up to 3 Shamblers in a row. After that, your stamina will run out almost completely. Combat: Dealing with Zombie Children 🎥 (VIDEOS PENDING)
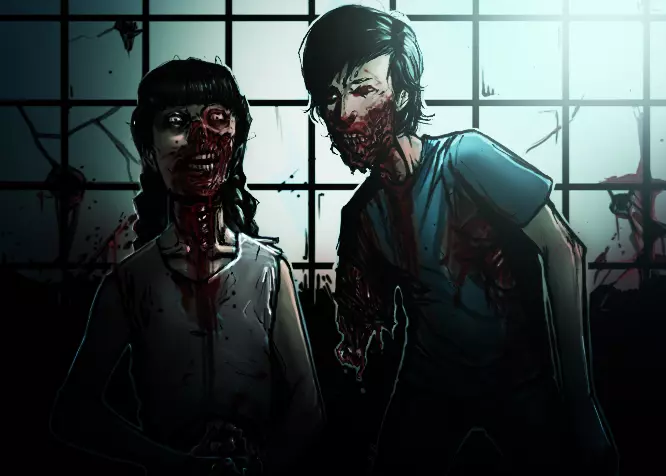
I've noticed over the years that Zombie Children in particular are notoriously infamous among rookies as well as regular players in general. Due to this, I decided to make a section dedicated to a couple of techniques and tips to help you deal with them consistently. Note that you still need to know how the basics of melee combat work, this is not a cheat sheet for Zombie Children. Reasons why you may have difficulties killing Zombie Children:First, their attack speed is extremely fast, meaning that as soon as you enter their attack range, they will pretty much smack you instantly. That smack will also push you back slightly, which in turn leads to them going outside your melee's effective range. To make matters worse, every single attack will cause your camera to start flailing, which almost completely prevents your swings from hitting their heads and your shoves from registering. ◈ Zombie Children Killing Methods: • Shoving Method:This is the basic method on how to deal with ZCs. It's much slower than the alternatives, but it's safe and consistent. It's VERY important to remember though that this only works for ONE Zombie Child at a time. If you have more than one on your tail, you have to resort to kiting techniques. First, as soon as you see a kid chasing you, move backwards in a straight line with the S key ➜ Wait until the kid is within your attack range and shove with the V key ➜ As the kid stumbles back, move forwards with the W key ➜ As soon as the kid is inside your attack range again, kill them with a quick attack by pressing Left Click. Keep in mind that some melee weapons have delayed shoving animations like the Crowbar. Therefore, this method is most effective when using weapons without such a delay, like most average or high tier melee (Machete, Fire Axe, Sledge, Lead Pipe, Hatchet, Pickaxe). Check the Weapons: Melee sections for more info. • Aim Compensation Method:The preferred method to deal with ZCs is killing them as fast as possible. To do that you simply let the kid approach you and kill them via a quick attack with aim compensation, just like it was explained in the "Combat: Basic Melee Mechanics" section. You'll find detailed info there so that you understand what aim compensation is and how to apply it. • Kiting / Circle Kiting Method:If the ZCs are coming one by one, you can use the aim compensation method in a small area without having to move. However, if they're all bunched up in a horde, you have to resort to the kiting methods that were explained in the "Combat: Zombie Manipulation" section and form a conga line to take them out (note that you should always use aim compensation in combination with every technique, as it drastically improves your effectiveness). Circle kiting in particular is more consistent in my experience at least, because having several kids clipping into each other will very likely cause you to get hit due to their attack speed. Going in circles tends to spread them out, so that you get individual kids that you can gradually pick off one by one. This is all obviously related to melee weapons. If you have a firearm and bullets to spare, you can take care of huge hordes with ease. ◈ IMPORTANT NOTES:• NEVER crouch when dealing with Zombie Children. It doesn't help in any way and it leaves you vulnerable against other ZCs or Runners that may be around. Simply aim downwards and use the technique that works best for the present situation.• Good one-handed melee weapons (Hatchet, Machete, Lead Pipe) are more effective at taking down Zombie Children than two-handed melee (Pickaxe, Sledge, Fire Axe). This is because the latter have much slower quick attack animations, forcing you to time your attacks much more carefully to avoid any incoming damage. Kids die with 1 quick attack from any of these weapons, so the extra damage is overkill. Therefore, animation speed and stamina use become much more important factors when taking out hordes of ZC. This is why it's sometimes ok to carry two melees at once, as I will explain in the Inventory: Movement Speed / Priorities section. ◈ Dealing with a Runner + Zombie Child Combo:If you have a Runner and a Zombie Kid chasing you at the same time, it can be tough to take them out because they will clip into each other. However, you can deal with them relatively consistently if you use the Circle Kiting technique ("Combat: Zombie Manipulation" section) to avoid their attacks and to separate them for short periods. Simply use Circle Kiting continuously ➜ Wait until the ZC lags behind for a brief moment ➜ Move forwards a bit to get the ZC inside your melee range and kill it ➜ Keep circling until the Runner stands still and go for the kill. If you can't reliably Circle Kite them because you're in a cramped hallway, or there's Shamblers close by which can grab you, then sprint in a straight line ➜ Quickly turn around and kill the Runner as it's sprinting towards you ➜ Finally kill the ZC. In general, if you sprint, the ZC will lag behind slightly, giving you ample room to kill the Runner first. It's important to note that you should only kill the Runner if it's currently sprinting towards you. DON'T get close to kill it if it stops moving, as the ZC will catch up and smack you, which will cause your camera to flail around, thus you will probably miss your attack or shove against the Runner. Also, please note that these techniques are only useful for a single Runner + Zombie Child combo. If there's any more of both, you'll have to rely on regular Kiting or Circle Kiting and improvise to take them all out. If you can't do any of these steps for whatever reason, then always prioritize avoiding the Runner's attack by shoving or by trying to kill it first, as it can insta-kill you under 80 HP, while the ZC will only deal 8 points of damage per attack. But you should indeed try to use these techniques constantly, as they are very consistent. Combat: Dealing with Runners 🛠️
战斗:高级近战技巧 (视频待更新)
◈ 轻攻击连击:对于部分近战武器,即砍刀和斧头,无需推搡即可通过不断衔接轻攻击快速高效地消灭小型尸潮。这有助于节省宝贵的弹药(以备后续关卡使用),同时也能快速清理挡路的小型尸群。 若采用安全策略(蓄力每次近战攻击以达到一击必杀的伤害阈值),由于这两种武器的伤害低于大锤或镐子,可能会花费过多时间。因此,这是一种高风险高回报的技巧,尤其是使用有效攻击范围极小的斧头时。要做到这一点,你需要大量练习,因为你必须仔细掌握砍刀和斧头的有效攻击范围。如果做不到,你就会被迫不断将僵尸推开,因为你会在攻击命中前就进入它们的攻击范围。这会消耗更多耐力,因此无法长时间维持这种技巧来杀死大量僵尸。只有当你失误并预判僵尸可能开始攻击时,才尝试推开它们。 ◈ 处理奔跑者长队:有时,奔跑者/僵尸小孩组成的长队会变得太大,没有枪械就难以稳定应对。这是因为僵尸会互相卡模,导致攻击落空,如果你没有足够生命值,大多数情况下这会让你丧命。若要仅通过近战来应对这些敌人,你可以找到附近的蹒跚者(Shambler)群体,然后闪避穿过它们,迫使一些奔跑者(Runner)或ZC被困在其中。当你从另一侧穿出后,很可能只会剩下几个奔跑者排成一队,这样你就能在其余敌人迂回过来之前,安全地用近战解决它们。 ◈ 镐子攻击冷却取消:尽管镐子和大锤的属性非常相似,但镐子有一个小优势。由于其拔出和蓄力动画非常快,你可以取消镐子的攻击冷却时间,比预期更早开始新的蓄力攻击。首先,按住鼠标左键为攻击充能,直到屏幕中的镐子开始移动(无需充能时间即可实现一击必杀),然后松开鼠标左键进行攻击。僵尸一死亡,立即双击Q键取消攻击冷却时间。镐子重新装备好后,立即按住鼠标左键充能下一次攻击,接着松开鼠标左键攻击,如此重复。 这能显著提高击杀蹒跚者的速度,在艰难战斗或噩梦难度下非常有帮助。注意,你也可以对大锤使用相同操作,但由于其缓慢的取出和充能动画,无法节省时间。因此,这个技巧仅对镐子有效。◈ 蹲伏状态下的近战战斗:在《求生之路:纳粹僵尸部队》中,和大多数游戏一样,蹲伏会显著降低移动速度。但后退的速度明显快于前进。你可以利用这一点,在蹲伏时与僵尸进行近战,这样能获得持续的耐力恢复加成。后退时更快的速度让你可以靠近僵尸进行爆头,然后迅速撤退,无需引诱它们攻击。 这种技巧在困境中有时能救命,比如在狭窄空间被大量蹒跚者包围且没有镐或大锤时,或者在噩梦难度中僵尸生成数量显著增加的情况下。不过,这会让瞄准头部变得更加困难,因此需要练习来掌握时机和准星的位置。 使用推击冷却取消技巧进行战斗: 取消推击冷却不仅对躲避尸潮或移动任务物品有用,还可以用于战斗。无论是使用枪械还是近战武器,在对付一群奔跑者时尤其方便。 有时,你可能会攻击落空或对它们的命中判定失败,这时你将被迫推击当前的僵尸目标。但如果你同时与多个僵尸战斗,推击冷却会使你无法在其中一个僵尸追上并试图攻击你时快速再次推击。因此,如果你使用【推击冷却取消】技巧,就能有效击退任何可能追着你、趁你不备试图抓住你的僵尸。在噩梦难度下,这简直是福音,因为通常情况下,无论是使用近战武器还是枪械,若不进行诸如蓄力近战武器或消耗宝贵弹药储备之类的准备,很难一击消灭奔跑者。你可以在【移动:高级技巧】部分找到有关此技巧的信息。 战斗:基础枪械机制 (视频待更新)

Firearms in NMRiH can be thought of as a luxury. They are a limited resource and not technically necessary to win in Classic difficulty, but they can be very helpful in many situations. Not only they'll save you time and effort, you'll also be less vulnerable to RNG. Some hard custom maps can become near impossible to complete on Nightmare difficulty if you decide not to use firearms or if you waste all your ammo when it's not needed. Improper firearm use in these cases will leave you at the mercy of your teammates' decisions and the game's randomness. Having said that, you should never forget that melee weapons will always be the reliable backbone during gameplay, because no matter how deep in the mud you are, proper melee use will very likely save your life in the vast majority of the scenarios. Now we're going to discuss several useful mechanics, techniques and strategies that you can use to increase your effectiveness with all firearms, letting you tackle extreme situations that would otherwise require a lot of effort to survive only with melee weapons. ◈ Basic Firearm Mechanics: • Basic Operation: The basics of firearm mechanics are simple. Press the R key to reload, press the U key to unload all ammo into your inventory, hold the R key to check how many bullets you have in your mag and in your ammo pool. Each weapon uses a specific ammunition type, so you must learn all the different firearm-ammo pairings. Press the X key to switch fire modes if available. Press the K key to enable the suicide animation then Left Click to fire. Press Right Click to use your sights / ironsights. They increase your accuracy (lowers weapon spread) but severely hinders your movement speed, making you vulnerable to Runner or Zombie Children attacks. Note that standing still does NOT increase your accuracy, only sights do. • Skillshot Mode: Stand completely still while using the sights (no actions other than moving the camera) for around 4 seconds to enter Skillshot mode (indicated by an amber-colored overlay on your screen), which will allow you to get a one-hit-kill with weapons that use either 9mm or .22 ammo. All other ammo types grant you a one-hit-kill right out of the gate, so you can't enter Skillshot with weapons that use them. This mechanic however is COMPLETELY useless because standing still for 4 seconds leaves you extremely vulnerable. While waiting for the effect, you can't move, shove, jump or defend yourself in any way without cancelling it altogether, in which case you'll never actually enter Skillshot mode in the vast majority of situations. Don't ever use it. • Bullet Penetration: There's two ammo types, .308 (used by snipers and the FN-FAL) and .357 Magnum (used by the S&W revolver and the Winchester) that are able to penetrate doors or props up to 3 times, allowing you to get several zombie kills with one shot as collaterals. You can also break planks behind doors to access secrets or skip part of the map layout to complete objectives. There are not too many places where you can do the latter, but it does come in handy from time to time, like the room containing the crowbar in nmo_emergency_1101. If you bring a S&W revolver to a specific door near the elevator, you can access the crowbar early by destroying a plank behind the door, saving you from dealing with several zombie hordes and obstacles. Shotguns can get you collateral zombie kills when you line them up, but the shots themselves don't penetrate walls or doors. ◈ Basic Firearm Strategies and Techniques:Always, and I mean ALWAYS, go for headshots since bodyshots deal way less damage, which amounts to a lot more shots needed to kill one zombie. Learn how the zeds move and behave to accurately score headshots on a regular basis. Always try to hipfire with any firearm. Using your sights makes you a sitting target for Runners so in the vast majority of cases, hipfire is the way to go. Firearms in NMRiH lack any meaningful recoil, so even though there are no crosshairs, aiming for the head is trivial because weapons are hitscan. Sights do have a niche use in Nightmare difficulty though, thanks to the existence of the brainstem hitbox. You can read more about this in the "Nightmare: Differences in Strategy" section. Only spam your weapon to get out of tough situations, like when there's a zombie directly attacking you, when dealing with big Runner conga lines or when you're trying to move through a very tight chokepoint where speed is crucial. Always reload your weapons after shooting unless you are directly under attack by Runners. You'll free up inventory space to pick up more ammo or other important items. Always try to reload your weapon before running out of bullets. The vast majority of tactical reloads are noticeably faster than full reloads and, obviously, there will be one more bullet loaded inside the gun. Only very few firearms, like the Beretta M9 and the Glock 17, have full and tactical reload animations with similar duration. Some guns are not affected by this at all, like the .357 Magnum due to how revolvers work. If you find a weapon that uses the same ammo type as your current gun, it's possible to do a quick ammo refill. You have to use the Unload Animation Cancel technique. Check the "Inventory: Techniques and Tricks" section to learn how to do it. Use the sights / ironsights of your weapon to line up shots on rows of Shamblers. This is useful with Shotguns or any weapon that uses a caliber with penetration to get collateral kills, saving ammo. This leaves you vulnerable though because you can't sprint and it's not really viable or useful against anything other than massive Shambler hordes. Fortunately, it's possible to avoid a surprise Runner attack from the front by simply shoving, as this will cancel the ironsight stance. Always stick to semi auto fire instead of full auto (the MP5's default fire mode is full auto, so always change it when you pick one up with the X key). This is because all weapons that have insanely high rates of fire are awkward to consistently tap fire and conserve ammo. All enemy types die within 1-2 headshots, so there's absolutely no need for full auto in this game (even in Nightmare it's unnecessary, where if you miss the brainstem hitbox you need a few more headshots to kill). Combat: Advanced Firearm Mechanics 🎥 (VIDEOS PENDING)
◈ Advanced Firearm Mechanics: Animation CancellingMost of the following techniques involve either shoving, holstering or switching weapons. Cancelling animations involves similar mechanics to the Shove Cooldown Cancel technique which was explained previously. If you haven't seen how that works, check the "Movement: Advanced Techniques" section. Here we'll make heavy use of the Q key, which switches back to the last weapon used by the player. By pressing the Q key twice quickly, you can cancel almost every animation in the game. • Ammo Check Animation Cancel: You can cancel the ammo checking animation by double tapping the Q key. This is useful because checking your ammo completely blocks your attacks until it finishes. This doesn't work if you just shove with the V key, since that will cancel the animation but your attacks will still be blocked. • Reload Animation Cancel: It's common to sometimes get caught with your pants down by a Runner when reloading. Fortunately, you can easily cancel the reload animation by shoving with the V key, or by double-tapping the Q key. You can also combine both ways to perform the Shove Cooldown Cancel technique to get two quick shoves in a row in case you get surprised by 2 Runners or more. The vast majority of firearms in NMRiH only register a reload after the complete animation plays. You can tell when a reload has been correctly registered when your character shouts out how many rounds you have left and the ammo counter on the lower-right side of your screen will appear. However, there's one exception, the Ruger 10/22 w/ Exended Mag. In this case, the empty chamber reload actually registers before the animation is completed. Therefore, you can cancel it by shoving with the V key, allowing you to start shooting sooner. In the case of shotguns, they all have partial reloads (except for the SV10 Perennia) which can be easily interrupted at any time by pressing Right Click or shoving with the V key. • Bolt / Lever / Pump Action Animation Cancel: When pumping a shotgun, pulling the bolt of a sniper rifle, or pulling the leaver of a Winchester rifle, you cannot attack or sprint, and you can only shove zeds back after a 0.5 second delay when shooting. This makes you vulnerable to Runner attacks, as you can't easily get away by sprinting and that 0.5 second delay is sometimes enough for a Runner to sneak in a hit. Luckily, it's possible to cancel those animations by holstering with the H key or tapping the Q key if your last used item is your fists. Then, this allows you to quickly shove back the incoming zombie if you miss your shot with the V key. In the case of the Sako 85 sniper rifles (normal and the ironsight variant), cancelling the bolt action animation via double-tapping the Q key will quickly re-equip the weapon, letting you fire considerably faster than just waiting for the bolt action animation to complete. These are the only weapons with this property, as pump-action shotguns, the Winchester 1892 and the JAE-700 all have slow weapon drawing animations, which don't save any time. Skipping those animations via shoving also doesn't save any time. • Unloading Animation Cancel: It's possible to cancel the weapon unloading animation to quickly pick up ammo from other firearms. First, press the U key to unload your weapon ➜ Quickly hold the 1 key to open your inventory wheel ➜ Press Right Click over the empty firearm to drop it. This will also cancel the unloading animation, allowing you to quickly pick up another gun and repeat the process. This will come up again in the "Inventory: Techniques and Tricks" section. • Sprint Firing: When shooting or attacking via melee, the game forces you to stop sprinting. However, with most firearms, you can fire a single shot while sprinting which only halts your momentum for a brief moment and then you'll start sprinting again. Simply sprint by holding W + Shift and then fire your weapon with Left Click. This is very useful because it allows you basically keep most of your momentum while rushing through hordes and firing at the same time. It also bypasses the initial 12 points of stamina penalty cost for when you start sprinting, so there's much less stamina used overall. This trick works with all firearms with the exception of shotguns (not including the SV10 Perennia and the Super X3), the Winchester, sniper rifles due to pumping and bolt action animations making the return to sprinting way too slow, and the S&W Revolver. • Sprint Reloading: It's possible to skip the sprint restriction allowing you to reload and sprint at the same time. First, start sprinting by holding the W + Shift keys ➜ Press the R key at any time ➜ You'll stop for a brief moment and then you'll resume your sprint while reloading at the same time. This trick works with all firearms with the exception of shotguns (not including the SV10 Perennia), the Winchester 1892, the FN-FAL and the MAC-10. • SKS Rifle Quick Kill: You can perform an a very fast Shambler kill if you have a Hatchet or Machete + SKS Rifle with Bayonet. First, perform a light attack with your chosen melee weapon by pressing Left Click ➜ As soon as you see blood spurting out of the zombie's head (meaning that the hit registered correctly) press the Q key ➜ Immediately after that, press the V key in quick succession while aiming for the head. This will force the shove animation with the Bayonet to play before the drawing animation of the rifle itself, effectively delaying it. This technique is useful for emergencies, like trying to go through a chokepoint to avoid being cornered. It's faster than two light attacks with either the Machete or the Hatchet, but it uses more stamina as well. As a secondary use, it can help you unlock the Stabbity Style achievement, which will be discussed in the "Problematic Achievements" section. It's important to note that this technique only works on Classic difficulty, because Nightmare doubles zombie HP. Inventory: Movement Speed / Priorities
Inventory management is crucial to NMRiH's gameplay. Failing to properly manage your inventory will likely cause situations like: - Not having the most useful items needed to consistently complete difficult maps - Being unable to grab heavy items like a Sledgehammer or an M16A4 if you are in a pinch - You may be moving slower than necessary due to excessive weight - Hoarding ammo or weapons that you may never use but could be useful to other teammates By learning a few facts and tricks, you'll be able to quickly and efficiently pick all the items you need to complete a match. That can vary between maps due to geometry, Runner spawns, etc., but all these ideas can be applied to any situation. First, let's talk about how weight affects your movement: Item Weight and Movement Speed:Your inventory has a maximum capacity of 1000 weight units. Every item has a specific weight number, like a Sledgehammer (400 units). Depending on how much of your inventory is occupied by items you've picked up, your movement speed will change: From 0% to 49%, your movement speed is kept at its default maximum value From 50% to 99%, your movement speed is reduced by 10% of the max value At 100% inventory capacity, your movement speed is reduced by 25% of the max value Note that your speed is only reduced once you cross each breakpoint, meaning that there is absolutely no difference between having 50% or 99% of your inventory taken up by items for example. Also, Runners and Zombie Children still can't attack or grab you when you are at 100% full inventory. Resource Priority and Pickup Order:The most efficient items that you can use to win will depend on which map you play. Some have a lot of melee weapons and very few firearms or vice versa, others may have plenty low-tier melee weapons to reduce your overall effectiveness against Runners. You'll have to adapt to what the map gives you. Having said this, there is a general principle you can follow. Here's what you have to find in descending priority: 1️⃣ A competent melee weapon (Machete, Fire Axe, Hatchet, Pickaxe, etc.) 2️⃣ Medical items (try to carry all of them at the same time if possible) 3️⃣ A firearm (which one you pick depends on ammo availability and your current melee) 4️⃣ As much ammo as you can fit in your remaining inventory space (pick it up last) - Melee Weapons: You should always prioritize finding a melee weapon that is as efficient as possible given the situation. For example, in tight maps like nmo_vertigo where killing Shamblers is basically mandatory for success, then focus on finding a Pickaxe / Sledgehammer if you can (Fire Axe is an acceptable alternative). If you are playing a map with a high number of Runners like nmo_rockpit, then try to find something that can kill them consistently and without too much stamina cost, like a Machete or Fire Axe. Obviously you must scale this down to whatever you can find if a map gives you limited options, like using a Hatchet to quickly kill Shambler hordes, even if it's risky. Check the "Weapons: Melee" section for detailed info on each melee weapon. This can help you decide, in your current situation, which one to keep or toss - Medical items: No matter how good you are at the game, it's almost certain that you'll eventually take some form of damage. This could be due to a small screw up from your part, bad hit / shove registration, or due to uncooperative players. Regardless of what may happen, medical items will save your life and the life of your teammates. Never, ever leave any of them behind, use them as efficiently as possible, like I explained in the "Medical Items: Efficient Use" section. - Firearms: A melee weapon grants you a way kill zombies indefinitely, which is something that firearms can't do. Having said that, finding a firearm is sometimes highly recommended since they can kill zombies quickly and safely, allowing you to outright prevent dangerous scenarios. An example of this is getting stuck in the alleyway next to the basketball court in nmo_broadway2. If you don't go through the fence fast enough, you'll get constantly assaulted by infinite Shambler and Zombie Children spawns. A simple Glock 17 with enough ammo will allow you to quickly cross the chokepoint and avoid that mess altogether. As a general rule, if you are carrying a heavy melee weapon (Pickaxe, Sledge, Fire Axe or FUBAR), you should prioritize smaller firearms (Glock 17, Colt 1911, Beretta M9 or Ruger Mark III) because otherwise you won't be able to carry enough medical items or a meaningful amount of ammo. - Ammunition: The most abundant or easily accessible type of ammo you may find in a map, as well as what melee weapon you are carrying, will determine which weapon you should pick up. Since you never know exactly how much ammo you're going to end up using, you shouldn't worry too much if you can't find enough. In most cases you don't need that many bullets to go past chokepoints or to kill all Runners. Just concentrate in finding a powerful melee that is ideal for the map you are playing. Even if you run out of ammo, don't discard your weapon if it's not an inconvenience, you may find more as you progress. This is especially true for 9mm or .22 as they are generally pretty common in most maps and National Guard zombies have a chance to drop a few 9mm bullets. Even a handful of shots can save you a lot of trouble if you focus on completing objectives, clearing obstacles and not panicking. Carrying both a heavy and a light melee weapon at the same time:If you have some spare inventory space after gearing up with a heavy melee weapon like a Pickaxe, you can decide to carry a smaller melee like a Hatchet or Machete in case Zombie Children or Runners are an issue later on. Using a light melee weapon against kids lets you kill more of them in quick succession without running out of stamina, and a Machete is the most effective weapon in the game against Runners. This is very handy in maps like nmo_broadway2, nmo_suzhou and nmo_khafre for example. Carrying two melees also has the benefit of having a backup that you can share with another survivor that couldn't find any weapons. This was explained in more detail in the "Teamplay: Positive Interactions" section. Inventory: Techniques and Tricks 🎥 (VIDEOS PENDING)
移动速度惩罚滥用:就像我之前提到的,弹药应该是你找到大部分(如果不是全部)其他优先级更高的物品后,最后拾取的东西。再加上当你的背包容量使用50%和99%时,移动速度没有差异,你可以利用这一点获得15%的速度加成。 只需在拾取所有其他重要物品后,尽可能多地拾取弹药以填满背包➜用左键发射武器的一发子弹➜按R键重新装弹。 任何装入枪械的弹药都将不再占用你的背包空间。因此,从背包中移除那一颗子弹会让你的负重从100%降至约99%,移动速度提升15%(此前你因负重受到25%的速度惩罚,移除后惩罚会降至10%)。由于无法手动丢弃单颗子弹,所以必须通过射击来处理。 卸载动画取消:若取消当前装备武器的卸载动画,你可以快速拾取已装填武器中的弹药,操作步骤如下: 1. 按U键卸载武器 2. 按住1键打开物品轮盘 3. 右键点击空武器将其丢弃 4. 松开1键关闭物品栏 5. 拾取已装填的武器并重复上述流程手动物品携带:如果你的背包已满,但仍需携带额外物品,可按E键将其像道具一样拾起并携带。这在携带大锤或电锯等占用大量背包空间的较重物品时非常有用。明显的缺点是携带时无法 sprint,需要先放下物品才能 sprint,但至少仍能使用推击,这在意外被僵尸抓住时可能救你一命。 你也可以通过“移动:携带任务物品”部分中介绍的快速物品携带技巧,同时携带最多2件物品。不过,这种操作既麻烦又令人恼火,所以尽量避免这样做,没必要依赖这么多不同的物品和武器。 注意:如果你尝试手动拾取的物品固定在地面或其他地图几何体上,那么请按以下步骤操作:清空你的背包,直到能够拾取该物品;拾取该物品;将其放下;然后重新捡起之前放下的所有物品填满背包。之后你就能手动将它带到任何你想去的地方了。 行走时将手动携带的物品放入背包:如果你正用手手动携带物品,仍然可以分别按住1键和2键来打开背包和弹药轮。随后你可以右键点击物品将其丢弃,或左键点击任意类型的弹药来丢弃几发子弹。 如果丢弃物品后你的背包空间足够,你可以快速松开1键关闭背包,然后按E键手动捡起之前携带的物品。这是一个小技巧,能让你在移动中管理背包,无需站着不动,在即将被蹒跚者包围或被奔跑者追赶时非常有用。快速物品栏选择:如果你想快速切换到物品栏中不在“最近使用武器”槽位的物品(即无法通过Q键切换的物品),就必须记住物品栏的视觉布局,这样才能快速按住1键并向正确方向滑动鼠标来选择该物品。因此,由于每次拾取或丢弃物品后物品栏布局都会改变,你需要不断记住新的布局。快速清空物品栏:如果你想快速丢弃物品栏中的多个物品或弹药,以便为像大锤或电锯这样的重型物品腾出空间,可以按住1键打开物品栏,然后右键点击所有想要丢弃的物品(按住2键可打开弹药栏进行同样操作,或者按住右键点击想要丢弃的弹药,即可一次性丢弃所有该类型弹药)。 不过,在执行此操作前,你需要按H键收枪。这是因为如果你想同时丢弃当前手持的物品,游戏会自动切换到物品栏中的其他物品,导致输入锁定,无法快速清空所有物品。收枪可以确保不会发生自动切换。噩梦:策略差异
游戏玩法不一致
由于《求生之路:纳粹僵尸部队》的开发工作由众多不同开发者在很长一段时间内共同完成,因此游戏玩法中会出现一些不一致的情况。其中有几个是地图相关的问题,尤其是社区制作的地图,还有一些则是游戏代码方面的问题。 此外,部分自定义地图的表现与官方地图完全不同。它们在游戏玩法上往往存在明显差异,这可能会导致玩家感到困惑和沮丧。对于这种情况,确实没有别的解决办法,你只能通过经常游玩这些地图来熟悉它们。 以下是游戏玩法不一致的一些情况: 【受感染水源与非受感染水源之间没有明确区分】。游戏向玩家传递这一信息的唯一方式是,有时该区域会出现涂鸦,上面写着:“水会感染人”。这种情况在对比不同地图时尤为明显,比如在nmo_chinatown地图中,下水道里的水会造成感染并致你死亡,而在nmo_fema地图中,你可以在水坑里游泳或行走,且不会受到任何影响。 挂锁有时可以被玩家的攻击(拳头、近战武器、爆炸物或枪支)破坏,而有时则需要使用焊枪才能打开。 带刺铁丝网或其他任何环境伤害源,有时会造成伤害,有时则不会。这完全取决于地图制作者是否添加了相应的伤害触发器。 一些会引发爆炸的任务物品(丙烷罐、TNT等)在nmo_broadway地图中会自动引爆,而在nmo_junction地图中则需要受到攻击才会引爆。如果你不清楚物品的使用方法,放置后尝试等待几秒。如果它没有爆炸,用枪械射击它,或者尝试用足够的力量投掷近战武器。 部分任务物品缺少发光轮廓和指南针标记,导致难以寻找。例如在nmo_subside的地铁隧道中,用于打开发电机房的蓝色钥匙就是如此。 玩家和僵尸的碰撞判定不一致。地图的某些部分,如地面或道具,有时会与你发生碰撞阻碍移动,有时则不会。有时它们的碰撞判定完全存在问题,你甚至无法跳过它们。这是地图之间常见的不一致问题,因此对于不确定能否成功的跑酷动作,永远不要赌上自己的性命。不过,花时间了解可以从哪里起跳会给你带来显著优势。这能让你更快、更省力地完成某些地图。 在一些自定义地图中,存在进度条目标本应保存进度却没有保存的情况,例如【nmo_subside】中的焊接部分,或是【nmo_night_forest】中需要焊接的围栏。 有时推搡僵尸的动作无法正确被记录。这种情况偶尔会发生,比如推搡正在通过导航跳跃攀爬物体的僵尸,或者当奔跑者停止移动并转身再次锁定你时。 总体而言,命中检测相当不稳定。 hitbox 并非十分精准,而且如果你的延迟足够高,它们还会与僵尸模型不同步。有时奔跑者不会正确锁定你。它们要么从你身边经过并无视你,要么偶尔会穿墙并进入闲置状态,在被推搡或被具有高击退几率的重型近战攻击时可能不会踉跄。 问题成就 (截图待补充) 我最初不想加入成就部分,因为它们对了解游戏核心玩法并不重要。但很多玩家在部分成就上遇到困难,所以我会提供一些快速提示,帮助你用相对简单的策略解锁它们。 请注意,我不会介绍通过社区地图(如nmo_achievement或nmo_hellgate)来刷成就的方法,因为那没有策略可言,只是单纯地击杀僵尸。我将介绍在任何官方或社区地图中,在“预期”游戏玩法范围内解锁这些内容的最不令人沮丧的方法。请注意,所有这些策略都适用于经典难度。 让你的内在之光闪耀:

信号枪的击杀很难稳定达成。原因是这把武器仅在极少数地图中出现,且弹药相当稀缺,也不会出现在补给空投里。 由于这些因素,你必须游玩那些有固定信号枪刷新点的地图,比如nmo_rockpit、nms_favela或nms_midwest。 之后,你需要找到消防斧。用消防斧对蹒跚者进行一次轻攻击,能将其生命值降至接近0,然后用信号枪对头部推击5次即可完成击杀。另外,你也可以采用“消防斧轻攻击→1次未蓄力拳击(蓄力时间尽可能短)→3次信号枪推击”的方式,这样能更快完成击杀,但切换3种不同武器需要更高的操作协调性。如果你在多场生存模式比赛中重复这个流程,最终就能解锁成就。这虽然令人沮丧且耗时,但至少不用依靠成就刷取手段就能稳定解锁。Blinded by the Light

与之前的成就概念相同。使用消防斧的一次轻攻击削弱蹒跚者,然后用手电筒对头部进行2次轻攻击将其消灭,或者你可以蓄力重攻击几秒钟来实现一击必杀。这种方法更快也更容易。 徒手搏斗:

和“Blinded by the Light”成就完全相同,但更加耗时且繁琐。蹒跚者在虚弱状态下,头部受到两次拳击就会死亡,如果你蓄力几秒钟,则只需一次。 一个能稍微加快进度的小技巧是:只用拳头击杀爬行者和僵尸小孩,它们分别只需1次和3次攻击就能被杀死。用拳头比用手电筒或信号枪容易得多。与手电筒相比,拳头的攻击范围更长,动画速度更快。此外,在近距离使用信号枪极其危险,因为会造成自身伤害。 【捅刺风格】

这个成就过去相对容易解锁。但在2015年左右的游戏更新后,刺刀不再能稳定击杀僵尸。它有时能一击致命,有时则不能,这意味着除非运气极好,否则你无法在30秒内达到击杀10只僵尸的目标。 当前版本解锁该成就的关键是使用砍刀或斧头,首选砍刀。你需要在任意地图中找到带刺刀的SKS以及上述两种近战武器之一。nmo_subside就是一个例子(从出生点获取带刺刀的SKS,继续探索地图,用绿色钥匙打开冰毒小屋左侧的秘密储藏点)。它没有发光轮廓,你必须四处搜索寻找,或者记住所有可能的刷新点。 当你拥有这两个物品后,在任何开阔区域聚集一群僵尸,然后对它们全部使用SKS快速击杀技巧。该技巧在【战斗:高级枪械机制】部分有详细说明。使用近战武器时注意不要击中超过一只僵尸,并且确保至少有10只僵尸,以免意外错过解锁成就。 Light's Out

这个成就解锁难度较高,因为早期版本的nmo_broadway地图流程更短。在火车场景加入之前,曾有一个街道直升机逃生的环节,但该成就从未针对这一改动进行更新。虽然可以单人完成,但由于任务目标的随机性,需要大量反复尝试。 如果你能找到一个靠谱的团队帮忙,那是最好的选择;不过如果你只能单人游玩,也可以尝试一些方法。这仍然需要多次尝试,但以下方法能提高你的成功率: - 重置游戏,直到离开安全屋后获得【找到前往地下室的方法】任务目标 - 通过右侧带挂锁的门离开安全屋,因为这样速度快得多 - 不要浪费时间拾取近战武器,坚持使用贝雷塔M9并谨慎使用 - 对出生点的大多数额外贝雷塔执行【换弹动画取消】操作以获取更多弹药 - 彻底熟悉地图布局,避免走任何不必要的弯路 - 记住所有三个办公室的密码,以便立即进入:6532、9247、1854 - 希望你能获得【关闭洒水器】任务目标,或者至少不是火车旁的那个拉杆 Robin in the Hood

这个成就简直就是不断尝试的代名词。没有什么捷径,你只能在足够远的地方不断向蹒跚者群射箭,直到其中一只死亡。为此,你或许可以尝试NMS地图,因为它们通常大部分时间都相当开阔,而且多亏了补给箱,你很可能会找到大量的箭。 有些地图可能会有雾效优化,这会让你看不清射击的位置。我推荐玩nms_gun_store_b7这张图。在那里的枪械商店里和补给箱中,你会找到大量的箭,而且你有足够的距离向远处的蹒跚者射击。站在街道旁的一个角落,朝着街道对面角落生成的蹒跚者开火,瞄准街道方向。 凯妮丝:

解锁该成就的一个简单方法是游玩地图nmo_shelter。出生点房间内有一个西瓜,拿起它并将其放置在二楼的钢琴旁。然后,打开秘密军械库(键盘密码为1998),获取里面的PSE弓。接下来,站在离西瓜尽可能远的直线位置并射击它,即可解锁成就。显然,你需要杀死该区域内的所有僵尸,以免它们干扰你。
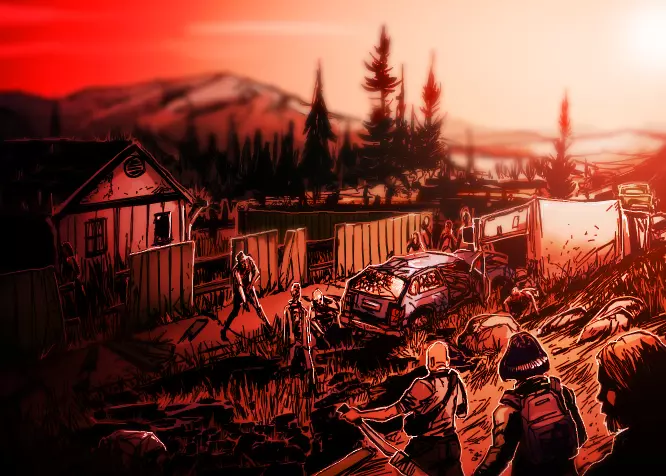
那么,在这份长篇指南的最后,首先我想感谢你抽出时间阅读我的作品,希望它能在多个方面对你有所帮助。我花了将近4年时间才完成这份指南,如今能将它分享给社区并希望它能派上用场,我感到如释重负。 《求生之路:纳粹僵尸部队》是一款很棒的游戏,但遗憾的是,随着时间的推移,它正逐渐被人们遗忘。因此,我希望这份指南至少能帮助更多人更快、更轻松地进入游戏,减少一些挫折感。这也是我在最终停止玩这款游戏后,以某种方式传递接力棒的一种方式。正如我在介绍中所说,如果你对本指南的内容有任何想讨论或补充的地方,欢迎在下方评论,我们可以一起交流,只要你能提出有礼貌且有建设性的意见。目的是完善本指南,进而让玩家体验尽可能愉快。任何问题也都非常欢迎,无论你觉得它们有多简单。
希望你度过美好的一天,享受《求生之路:纳粹僵尸部队》的精彩对局。
Graffiti by Acrilyk Special Thanks / Acknowledgements In no particular order, special thanks go to:FeelZeSchadenfreude for his fantastic Killing Floor 2 guide, inspiring me to create a similar one for NMRiH All NMRiH devs for making this great game. I wish you the best of luck with the sequel Acrilyk, Atheist, Billionlioe, Coralilac, Dr. Hammer, essbuh, Felis and Sirdoggy for fixing and improving the game in so many ways Sickjoe[www.deviantart.com]for his fantastic drawings. All the artwork used here is his work (Cards of the Dead series, plus official NMRiH stuff) My fellow tester team members for their efforts in helping fix and improve NMRiH: Dysphie, Ryan, Winning117 My dear friend Ruso for teaching me so many things and sparking my enthusiasm in NMRiH The creators of the original NMRiH Official Manual for some of the images used in this guide Community mappers for breathing new life into the game with their exciting, creative and difficult maps My fellow server owners for their dedication to provide the space for so many people to play in All the loyal players keeping this game alive after so many years Edit Log / Contributions ◈ NOTE:Only relevant information will be documented here, like changes after a game update or additions / corrections to any of the topics shown. Every contribution made by other players will be appropriately credited. Typo corrections or section re-writes to improve grammar will be ignored. 17/02/2022 ➜ Added appropriate screenshots and missing images to the Survival: General Info and Medical Items: Efficient Use sections. 18/02/2022 ➜ Added a new bullet point (Critical Range) in the Combat: Basic Melee Mechanics section with an appropriate image. Added a bullet point in Movement: Miscellaneous Techniques and a note in Heads Up Display (HUD). 22/02/2022 ➜ Added a new bullet point in Learning the Maps: Memorization (Memorize dangerous environmental hazards). 23/02/2022 ➜ Added a first draft of the Combat: Advanced Melee Techniques section and re-arranged the entire melee combat section for a more intuitive reading order. There are still basic and advanced techniques being written. 02/03/2022 ➜ Corrected inconsistencies and unintuitive nomenclature in the Uninterrupted Shambler Killing bullet point to match the info in the upcoming Weapons: Melee section. 03/03/2022 ➜ Added the Weapons: Melee section. All weapon icons contributed by Dysphie. Also, thank you Sebython for the useful info (stamina use numbers of some melee weapons). Finally, added a screenshot in the Combat: Melee Basic Mechanics section to better illustrate what melee trace arcs actually look like. 07/03/2022 ➜ Added all The Infected:... sections. Gifs pending as Steam won't let me embed imgur gifs. 09/03/2022 ➜ Added a new section called Combat: Dealing with Zombie Children, which contains tips and techniques on how to take them out efficiently. Also, added gifs for all zombie types in The Infected:... sections contributed by Infinite. 13/03/2022 ➜ Added two new techniques in Combat: Basic Melee Techniques (cont.). These are Light / Heavy Melee Shambler Quick Kill. Added the Weapons: Throwables section. 17/04/2022 ➜ Update: It's been a while since I added new content to the guide, but don't worry, as the Weapons: Firearms section is in the works, as well as the Items: Tools section. I'm going to wait until the next NMRiH update is released (which should be pretty soon), as there will be some noticeable gameplay changes that affect those two sections. 19/04/2022 ➜ Added a missing .gif image in the Movement: Basic Techniques section. Once again contributed by Infinite. 24/04/2022 ➜ Removed the "Crouch Swimming" mechanic bullet point as it doesn't seem to work anymore (or never actually did, probably a placebo of mine). 13/05/2022 ➜ Modified the Katniss achievement method so that it doesn't require a manual download of a custom map. Thanks to brekiy for sharing this method. 17/05/2022 ➜ Removed the technique to skip the E-Tool animation that switches the weapon from shovel mode to pickaxe mode, as it has been patched in the upcoming 1.12.3 update. Also changed the trace arc screenshot in Combat: Basic Melee Mechanics as hit detection has been improved in 1.12.3. Finally, added a new bullet point, Revivers (Zombie Survivors), in the Runners section to clarify that they have the exact same properties as a regular Runner. 05/06/2022 ➜ Added a new bullet point (Memorize doors or gates that cannot be opened by zeds) in the Learning the Maps: Memorization section. Also added info on zombies opening doors in The Infected: Runners section. 10/06/2022 ➜ Removed the "Fast reaction to zeds that may grab or have already grabbed you" bullet point in Movement: Basic Techniques as it's not necessary to list it as a "technique", it should rather be learned naturally while playing the game and improving. Used the remaining available text to add a few more examples of real usage of some of the other techniques in the section. 11/06/2022 ➜ Added a new bullet point: Dealing with a Runner + Zombie Child Combo, in the Combat: Dealing with Zombie Children section. 16/06/2022 ➜ Added the Items: Tools section to the guide. Also, removed the Barricade Hammer, Maglite, Welder and Extinguisher from the Weapons: Melee section as they are now detailed in Items: Tools. Thanks again to Dysphie for contributing all the item icons. 17/06/2022 ➜ Removed references to the issue where the Maglite cannot point forward when used in tandem with a one-handed melee weapon, as it has been fixed in the 1.12.3 update. Also, added a bit more info about the Crawler's grab animation, which can cause you to miss your shove (The Infected: Crawlers). 27/06/2022 ➜ Removed a redundant note in the Stamina Management section regarding subpar melee weapons and their stamina use, as that's now detailed in the Weapons: Melee section. 06/07/2022 ➜ The guide has been added to the "Survival Guide" button in the game's main menu! Thank you Felis for the opportunity and thank you all for supporting my work! 1.12.3 edits are almost done and the Weapons: Firearms section is in the works. Also, corrected lines that mention that bleeding doubles your stamina usage globally, it only affects the stamina consumed when jumping. Thank you Dysphie for pointing that out. Finally, I'm also working on a video which is meant to be used as an intro for the guide, as well as to promote it on YouTube, so that more people can find it. It's almost done, thus it should be out very soon. 02/08/2022 ➜ Added a new niche exploit in the Medical Items: Efficient Use section. 07/10/2022 ➜ Fixed erroneous zombie damage values for both Shamblers and Runners. Thank you Marksman Max for sharing the correct info! 25/10/2022 ➜ Removed the Sight-Lowering Animation skip exploit due to it no longer being necessary (you can now always shove while raising or lowering your sights). Finished up all the 1.12.3 corrections and fixed several mistakes in the Stamina Management and Combat: Advanced Firearm Mechanics sections. 31/10/2022 ➜ Small modifications to accommodate a few minor gameplay changes introduced in the 1,13 update. 21/01/2023 ➜ Added a new bullet point: "Determining your current HP with the help of other players" in the Health and Damage section. 25/05/2024 ➜ Added the Weapons: Firearm sections to the guide, as well as the new video introduction. You can check it out at the beginning of the guide or here. Thanks to Dysphie for contributing with all weapon and ammo icons. Finally! Sorry for the long hiatus, 2023 was a rough year for me but now everything's back on track! Thank you all for the continued support. 13/07/2024 ➜ Fixed many mistakes in the Weapons: Firearms sections regarding the ammo capacity of most weapons. Also, I've improved the grammar to clearly note the exact capacity of each firearm. Edit Log / Contributions (cont.) 21/10/2024 ➜ Changed the name and description of the Zombie Jitter Dodge technique to Zombie Scrape Dodge, as the visual bug that occurred while performing it (your camera would become jittery) has been fixed in the 1.14 update, which was the visual indication that you were doing the technique correctly. Now the only indication is that your forward movement may become choppy. I've also improved a few explanations on weapon comparisons in the Weapons: Firearm sections, as some were nonsensical.