MechWarrior 5: Mercenaries


To get the best out of MW5 - you need a plan I probably have 1000s of hours in all kinds of games and this allows me to see patterns and strategies in any game I play, so here is my take on MW5. I want to call out up front, I have read a lot online in Reddit, Steam and other forums, so acknowledge I am collecting ideas that are not necessarily my own and give credit to all those who shared their ideas so I could put them here. Thanks MW5 community! What I cover in the guide: What to do early Getting better Mechs Managing your Mechs Battle tactics Mods - don't leave home without them I am not going to repeat the great list of recommended mods others have complied here. I am just going to say, if you want your play through to more fun mod-up. Get the YAML stuff and all the game balance mods because you want better mechs and weapons, pilots, AI, whatever. The vanilla game basically sucks, and I got mods really early and restarted. Don't waste your time playing vanilla for a 'pure' experience, just get mods. If you don't use mods then my guide will be less valuable for you. What to do Early **Warning** - If you are using YAML check in the YAML settings and make sure tank armour is reset to the vanilla level of 1, not 3, or you will die. Try out auto centering which means your arms will always try to get back to centre when you move. You will either love it or hate. The important thing is choose early and get familiar with running your Mech with it on or off for the rest of the game. You start the campaign with one or two light Mechs and a busted up Centurion. You have two choices with the available Mechs: 1. Play the first few missions with a light Mech 2. Sit around and wait 50 days for the Centurion to be fixed Assuming you choose to go with the light Mech - refit it immediately. Choose the Mech than can carry the most armour. The most common advice online is: Remove one jump jet Max armour - especially on the front If needed, shave some off the legs (because the AI does not target legs well) Weapons - up to you - but I went with 4 x M laser Weapon groups - group 1: 2 lasers, group 2: 2 laser Why? Because you can cycle the groups and not get caught without a weapon ready to go while they recycle. You can still do a 1,2 alpha for the kill. As soon as you can, refit your Centurion Keep the A/C 10 Make sure you have an LRM 10 and 2 x M laser Learn to punch - I have a programmable 8 button mouse - put punch on a button and use it.Why? Because you need the LRM 10 to target and kill flyers and to sandpaper Mechs at a distance. The A/C 10 is your big hit. The M lasers are your shot in between while the A/C 10 recycles. Unload an alpha into the legs to slow them down and punch their lights out. That should get you through the first few missions, then get a second or third pilot ASAP. You need to run as many Mechs as you can as soon as you can. Better to run with one or two extra Mechs instead of maximising your number 1 Mech too early. More buddies on the ground is 3 to 6 more weapons shooting the enemy, and it also stops everyone shooting at you all the time. Also, don't just charge up to everyone and pound them in the face. You will just attract every Mech within shooting distance onto on you like flies. Snipe a single Mech and draw it into your kill zone, don't run into theirs. Salvage and Getting better stuff Getting better Mechs is all about Salvage and C-bills Take advantage of the Valentina spoiler to accelerate your game if you want a faster start. Have a salvage plan There are two types of salvage: Stuff you will use Stuff you will sell Stuff you will use 1. Make a shopping list - keep it on a piece of paper next to your PC Use Slavage V2 and set the salvage piece low enough for your needs - I use 3 pieces per Mech Know what you want to salvage and why and what is most important to you. Get to know your Mechs. Decide what you need next for your lance. Do you want a long range sniper, or a fast short range brawler? Do you want a Cicada A or B, Or BJ-1 or BJ-1X? Remember, you need to choose well right from the start. Some Mech variants are rare and you may only ever see 3, so choose wisely. That is why you need a shopping list you can see while in the salvage choice screen. 2. Use and manage weapon upgrades Weapons are upgraded by destroying lower tiers to build the next higher tier. The sweet spot for weapon upgrades is about Tier 3. The number of weapons to move up from tier zero to 1 to 2, then tier 3 is not too bad and the C-bill cost is not terrible. Focus on the cheaper, common weapons usable by lots of your Mechs. M laser, L laser, machine guns, LRM 10, PPC and A/C 2 are the best and most effective. You can accelerate the process by buying medium tiers at the shop for a reasonable price. A/C 5 and A/C 10 are hard to get above tier 2 and really expensive and the online wisdom is these weapons are not damage effective for the weight cost. Go for 4 x A/C 2 instead of 2 x A/C 5. Faster damage rate over time (DPS). Look it up online. 3. Engines - a powerful game changer Over the course of the game you will need engines. An newly assembled salvage Mech might have no engine, you need to supply one. You might want to upgrade or downgrade an engine in an existing Mech. Know the engine break points - look at the weight, how many additional heat sinks are needed - what speed they give you in the Mech you want to put it in. The optimum speed is around 65+ 250 is better than 245, because it has the required 10 heat sinks, not 9, and therefore more weight effective. 4. Chase down Hero mechs ASAP Hero Mechs are sold in industrial hubs (the planets connected by dotted lines), or you can get a free one with some missions. Save your C-bills and buy one, they are game changers. They are faster, harder to kill and have good weapons. Buy one to strip it and swap gear into another Mech. They have gear like double heat sink kits that you can't buy any other way early in the game. Stuff you will sell Selling trash Mechs is your path to being a C-bill millionaire. Go for as many cheap low salvage value Mechs as you can get enough to make your salvage count, assemble and sell them. Strip stuff you need like weapons or engines before you sell them. Managing your Mechs - building an effective lance What goes into fielding an effective Mech lance? 1. Your personal Mech You need to make a play style choice here. How do you like to or want to play YOUR Mech? Do you want to be a brawler and fight right up in the face of the enemy? Do you want to be a mid range generalist, or a long range sniper? This choice also feeds into your weapons upgrade strategy. It really begins to make a big difference to have all tier 3 weapons vs zero or tier 1 weapons. For example: I choose to play a brawler because so many enemy Mechs target you above your lance mates, so I need to kill them quickly. See my battle tactic section later on. Be careful if you play too many LRMs. Enemies get up in your face and you have no weapons to fire because they got inside minimum range and you die. I was really lucky and got the Hero Treb early. I refit it with a smaller engine, double heat sink kit, SRM6 x4, ML x2 for a 70+ alpha strike. This fit-out really murders lights and mediums mid game. Charger 1A1 - (don't laugh). This is probably the first assault Mech you will salvage, and everyone hates it. I love it. My build is based on filling all 7 energy slots and it is a brute early to mid game. Downgrade the engine to a 325 core to free up tonnage and move at 65 km/h. Max the armour and put ML x 7. Try it. Early in the game it has so much armour vs the OpFor it is hard to kill and one alpha can take out one leg. The MLs recycle quickly so can you take out the other leg for a dead Mech. Upgrade to LL x2 or PPCs when you can get better heat management. My Mid game fav is the Banshee 3P with 9 energy slots. I now have ER LL x 3 and ML x 6 for an 80 alpha strike with a huge amount of armour at medium speed. 2. Dumb AI buddies Mechs You need to focus. Do one thing well per Mech. Really early in the game I focus on energy builds, mostly ML with the odd LL. Jenner, Phoenix Hawk, Javelin. Easy to get from salvage, have simple but effective weapons and can be repaired / replaced pretty easily in the early game. Then look for Blackjacks and Centurions. These can be salvaged pretty early on. I ran with two Centurions and a Blackjack for ages. One had an energy fit-out, the other ballistics. The third Mech was mixed support. Either LL plus a single LRM to take out flyers or AC2s and one LRM for long range support. Read all the guides about managing buddies. Fit-out can make a difference to how they behave. Don't mix too much long and short range in the same Mech, they get confused. Mid game go for a Rifleman and a Jager. Make one a ballistics specialist with A/C2s and MLs, and the other PPC or LL plus MLs. The third Mech can be the Hero Wolverine 2 or eventually an Orion or Marauder. Keep about six Mechs in your bay. You will need to swap them in and out to manage tonnage limits. You will need to mix between 200, 230 and then 270 for quite a while. Missions How do I prepare for a mission so I have negotiated correctly? 1. Assess the mission Essentially there are a limited number of missions Kill the targets Destroy the base - consider airstrike Defend the base Go to all the locations and find stuff Beach head - satellite dishes, artillery and Mechs - consider airstrike Multi turn missions 2. What do I need to negotiate for this mission? Early on, when your lance is weaker - take damage insurance Destroy the base - take airstrike Beach head - take airstrike Go to all the locations and find stuff - go salvage or money Kill the targets - go salvage or money Defend the base - go salvage or money 3. What do I need most right now? Do I need more money Do I need more salvage - if I take extra salvage I can run over the tonnage limit for a really tough mission and balance out the over ton penalty Multi turn missionsThese are where you can make the most money. Use the mission assessment ideas above and decide what you think you need. Remember you only negotiate once, so think about mission 2 and 3 up front. Special things to note: The extra payout is for all three missions - this can mean earning 3 x the money - so go big You can't repair Mechs between missions - but you can swap for another fresh Mech without any damage Swapping a Mech that is too damaged to continue - I discovered it by accident and here is how to exploit it. In between each mission check the armour loss in each Mech to decide if you need to swap it. This allows you to make up for bad luck it one Mech go pounded. It allows you to deliberately get one Mech pounded as a damage sponge in one mission to preserve your other Mechs for later missions and swap the sponge out. Over the course of three missions you will have spread the damage across 6 Mechs, not 4 and without any single Mech losing an arm or leg. You can take damage insurance to pay for this and maximise your earnings. Battle Tactics So many people ask: How do I fight so I don't die or get smashed up? If you have spent time managing your lance correctly you will have an advantage over the enemy. Your objective is to build Mechs that outclass the enemy in every way for their weight class. You should aim to have the best balance between speed, firepower and heat. The problem early in the game is that learning how to fight is difficult. This is a hard game to learn, so give yourself a break and save often, and don't be scared to restart a mission if it all goes to crap. How to stop getting my Mechs smashed up Don't just charge up to the objectives - you will get ambushed Don't get isolated away from your lance - you will get surrounded Don't get your lance caught in open ground surrounded by enemies - use terrain cover Draw the enemy into your kill box, don't walk into theirs Learn what or who to destroy first Speed is important..........and sometimes it is not Walking towards the objectiveOn your way to an objective you will get attacked by harasser forces. These are random or placed at likely approaches to wear you down before you get there. They will be flyers, pop-up turrets, tanks and Mechs. Keep you eyes and ears open and watch your tac display for the red dots to show up. Minimise their impact by hitting them hard and fast. Flyers: your best defence is LL x 2 - this will kill most VTOLs at range. Igors are much tougher. Turrets: pop up close to you - ML x 2 or 4 will kill most of them Tanks: LRM from a distance (if you are lucky) - Chase them down, laser them to death or run over them and they get stomped. Mechs: They might be only one or two so surround and kill At the objectiveYour basic objective is to break up massed forces into smaller waves and pick them apart on your terms, not theirs. As you get near the objective you will cross a threshold or trigger point that will make the AI do something. Hidden enemies such as Mechs, flyers or tanks will spawn or artillery will start to fire. Be prepared and don't just blunder into traps. Look at the terrain around the objective and look for the approach with the most cover. It is better to walk 1000m around the back than walk in the front and get murdered. Have a fall back point. For example, there are a lot of objectives 'just over the ridge' from where you are. When you crest the ridge, bam!, 4 Mechs spawn and unload on your lance. Slow down or stop just below the ridge and creep up to the edge and pop your head over - the second they spawn punch it into reverse and disappear back over the ridge. If you are on flat ground stay behind a hill, run out towards the objective to spawn the enemy then run away back behind the hill. Have a second hill or valley to run to if they all come for you at once. . Now you know where the enemy is and what Mechs you are facing. Use your target key to identify enemies. You are in cover and can plan your attack. Wait. A group of flyers or tanks will charge you and you can handle them in isolation from the enemy Mechs. Often a light or medium Mech will break from the group and chase you . Perfect - it will run into your kill box and you can 4 on 1 or 4 on 2 kill it without facing fire from their big buddies still behind the ridge or hill. My fave tactic for tanks is to sit just below a ridge line and wait for them to cross over the top and melt them before they even get a shot at me. You can pop a UAV so LRMs can see and lock on from cover. Don't be scared to run away. Some maps and objectives are designed to punish you unfairly. Just run away and refuse to fight on their prepared ground. Learn to fight in reverse! Enemy Mech behaviourThere are basically three types - brawlers that just charge you - guys that stand their ground - snipers / retrograde LRM boats Chargers - they want to punch you or AC 20 you in the guts - fight them in reverse and target their legs to stop them closing to melee range - jump if it helps you evade melee - then take out the other leg - e.g. Centurions, Hunchbacks, Orions Standing their ground - run full speed left or right across their front and don't get too close - speed ruins their aim - circle them either taking out legs or arms to slow and weaken them e.g. big Mechs like Marauder, Banshee, Cataphract Snipers - charge them full speed - throw in some random left or right dodges to put their aim off as you close the distance - go for the legs to stop them backing away from you e.g. Blackjack, Rifleman, Jager, Catapult Artillery and satellite dishesThis is a special case. I almost always charge the artillery and take it out asap. You need a Mech speed of above 60, 70. 80 is really good for this. Look for the red marked location on your heads up display and remember, coz they often disappear. If in doubt, check the corners of the map. This is where they often hide. You will eventually learn how to avoid incoming artillery. Go max speed and dodge hard left or right, sometime you will need to slam on the brakes then run again. Do not worry about your lance being hit, they will be too slow and out of the hit zone as you get ahead of them. Next, do not go to the central base. Talk out all the satellite dishes near the edges and save the big one at the base until last. This will call in the support allies. Then mop up.

This guide is designed to explain why some 'Mech chassis just seem so much better than others. If they seem that way, they probably are. The reason lies in the ancient and esoteric Battletech Rulebook, and how 'Mechs are actually constructed. 'Mech Construction Basics This guide is designed to help players who are new or new-ish to Battletech understand how 'Mechs are designed and assembled, and what to look for in a good chassis vs a mediocre one. Fair warning, it involves math. The core concept of Battletech used to be one of decisions and compromises, before the advent of XL Engines, Double Heat Sinks, Endo Steel Internal Structure, and super light weight Clan Weapons and such. When those arrive on the scene, all of this goes out the window and the game just becomes a matter of who can pour fire the fastest. But with the original Battletech, you had to make hard decisions about how fast you wanted to go, how much protection would be enough, how many weapons you wanted to carry, and how much heat you could shed. No mech could do everything. This leads to a wide variety of usefulness among the chassis. Some are just utter garbage, like the Charger, and some really shine, like the Black Knight or Battlemaster. The reasons for that are fairly straightforward. Every 'Mech spends a fixed amount of it's maximum tonnage on three things. The Internal Structure (takes up 10% of the tonnage), the Cockpit (always 3 tons), and the Gyro (Engine Rating divided by 100 rounded up, in tons, so, for example, a 200 rated engine requires a 2-ton Gyro). These tonnage costs are paid by every mech. After that, you get to the decision points. How fast you want to move works out to the walking speed times the 'Mech's total tonnage. So, a Locust (20 tons) had a tabletop walking speed of 8 hexes (which traslates to a bit over 80kph in computer games), thus requiring a 160-rated engine. Looking at the engine chart (which you can find all over the web with a simple search for "Battletech Engine Rating Chart"), that engine weighs 6.0 tons. Thus, before weapons, armor, heat sinks, or jump jets, that Locust has used up 3 tons (cockpit) + 2 tons (internal structure) + 6 tons (engine) + 2 tons (gyro, 160/100 rounded up), or 13 tons out of it's total allotment of 20. That leaves 7 tons total for everything else...weapons, armor, heat sinks, jump jets, other specialized equipment (ECM, for example). Why is this important? Simple...because as you go up in chassis and engine size, you often get dimishing returns. Engines start going up in weight VERY fast at the higher ratings. A 400 rated engine (the largest there is) eats up 52.5 tons of that 80 ton Charger's weight, so it can move 5 (walking)/8 (running), 53-ish kph/83-ish kph in the video game. 4 tons of gyro, 8 tons of internal structure, and 3 tons of cockpit (67.5 tons), and you can see why it doesn't have any weapons. And this is the core concept we'll examine here...why certain tonnage classes of 'Mechs are simply better than others. Here's a great example. All of the 55-ton 'Mechs (Wolverine, Shadow Hawk, Dervish, Kintaro, Griffin) move 5/8, using a 275-rated engine weighing 15.5 tons. If you compare that to all of the 60 ton mechs moving at the same speed (Champion, Dragon, etc.), they require a 300-rated engine. That weighs 19 tons. They also use up a half-ton more of internal structure, so just to move the same basic speed, they use up 4 of the 5 tons that they gain over the 55-ton class. That means that more expensive 'Mech, that weighs 5 extra tons, costs more to maintain every pay cycle, and eats up more of your available drop tonnage, ONLY GETS 1 MORE TON TO PUT GEAR ON IT. The exact same thing happens at the break between light/medium (35/40 tons) and heavy/assault (75/80 tons). The extra tons you gain on the chassis weight are ALWAYS eaten up by the extra engine weight, internal structure weight, etc., assuming you wish to maintain the same speed. A 4/6 speed 75 ton 'Mech (300 engine, 19 tons, 7.5 tons IS, 3 ton Gyro) will carry the same or more goodies than an 80 ton 'Mech moving the same speed (320 engine at 22.5 tons, 8 tons IS, 4 ton Gyro). All while costing less both to buy/salvage and maintain, and using less of your alotted drop tonnage. A Maruader or Orion carries the same loadout weight as a Victor or other 80-ton 4/6 mech, and has the advantages listed (cost/drop weight). These weight advantages become ever more profound when you factor in Jump Jets. When you reach the break points for JJ weight (.5 tons for light/medium mechs, 1 ton for heavies, 2 tons for a lot of assaults), you can end up using a buch of your extra tonnage on those JJ. A 55 ton 5/8/5 (walk/run/jump) mech is only paying 18 tons total for the engine and JJ. A 60 ton mech would pay 24 tons (plus the .5 ton extra IS weight), meaning the lighter mech carries more weapons, armor, and/or heat sinks. While 1-2 tons might not seem like a lot, you should be trying to squeeze every last bit of efficiency out of your 'Mechs that you can. That extra medium laser, ton of ammo, heat sink, ton of armor, or ECM unit might just save your bacon. Of course, there are other considerations too. Maybe you just like the way certain 'Mechs look. That's cool. Maybe some of them pilot better for you, or you like the weapon types and hardpoints more, or a bunch of other factors. All of that is great...it's YOUR game, have fun with it. Sometimes you just have to take and pilot the 'Mech's the game gives you too. No helping that. But if you find yourself struggling from time to time, there are ways to drag a little bit better efficiency out of your lance. Look at a Max Drop Weight of 200 tons, for example. Would you rather send in the 3 Dragons/Champions/Whatever you bought, and have a whopping 20 tons left over to bring a sacrifical Locust, or would you rather bring 3 likely more efficient 55 ton 'Mechs and a 35 ton? Little things like that can make a big difference on the battlefield. Understanding the subtle nuances of how and why 'Mechs are the way they are is the first step in getting that efficiency out of them. Hope this helped someone out there. And, as a final note, if you every decide to play the turn-based Harebrained Schemes Battletech (fantastic game), this little article will be a goldmine for you for another reason...the initiative system. Not only does that 55 ton Mech do everything the 60 ton one does cheaper, it also moves one initiative step faster, which is a HUGE difference in turn-based. Good luck on the field.


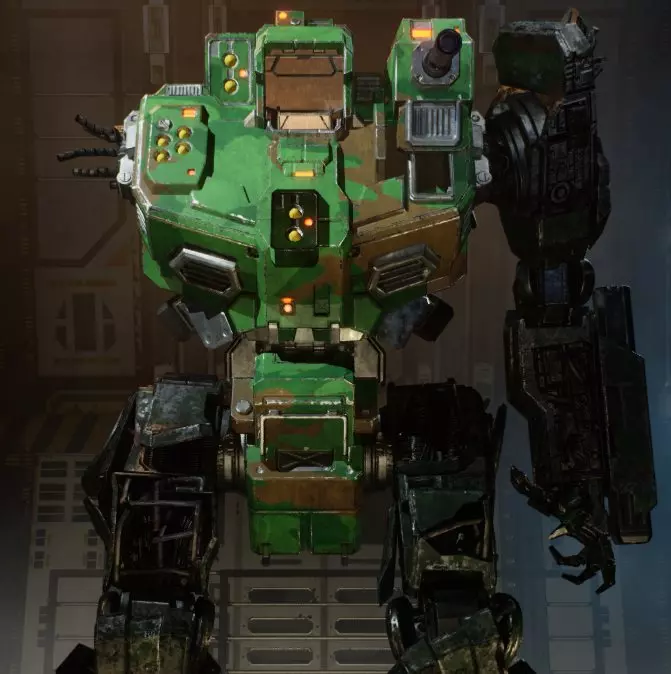
各位佣兵们,大家好! 我们很高兴地宣布,将与《雇佣钢铁》同人电影的制作方TMC再次展开合作。 这款受《雇佣钢铁》启发设计的“驼背”机甲即将加入《机甲战士5:雇佣兵 - 混沌统治》!该机甲将作为完成其中一条全新DLC任务线的奖励。 此外,发布日期和时间详情如下: 《机甲战士5:雇佣兵 - 混沌统治》将于以下平台同步上线: Steam、GOG、Epic Games Store、微软商店(PC/Xbox)以及PlayStation。 上线时间为:5月13日上午11:00(太平洋时间) 《机甲战士Online》玩家的额外福利! 《机甲战士Online》的玩家同样有机会获得这款受《雇佣钢铁》启发的“驼背”英雄机甲!如何获得资格: 在5月4日00:00 UTC前,在你偏好的平台上将《Chaos Reign》加入愿望单 在官方MWO论坛主题帖中发帖确认你已加入愿望单 符合条件的玩家将在5月更新后自动获得英雄机甲 重要说明: 需要拥有MWO账号 MWO要求在游戏中完成25场对战后才能回复论坛帖子 论坛主题帖将于5月4日00:00 UTC关闭 受《Hired Steel》启发的驼背英雄机甲将在5月更新中添加 感谢Hired Steel TMC团队提供的灵感!

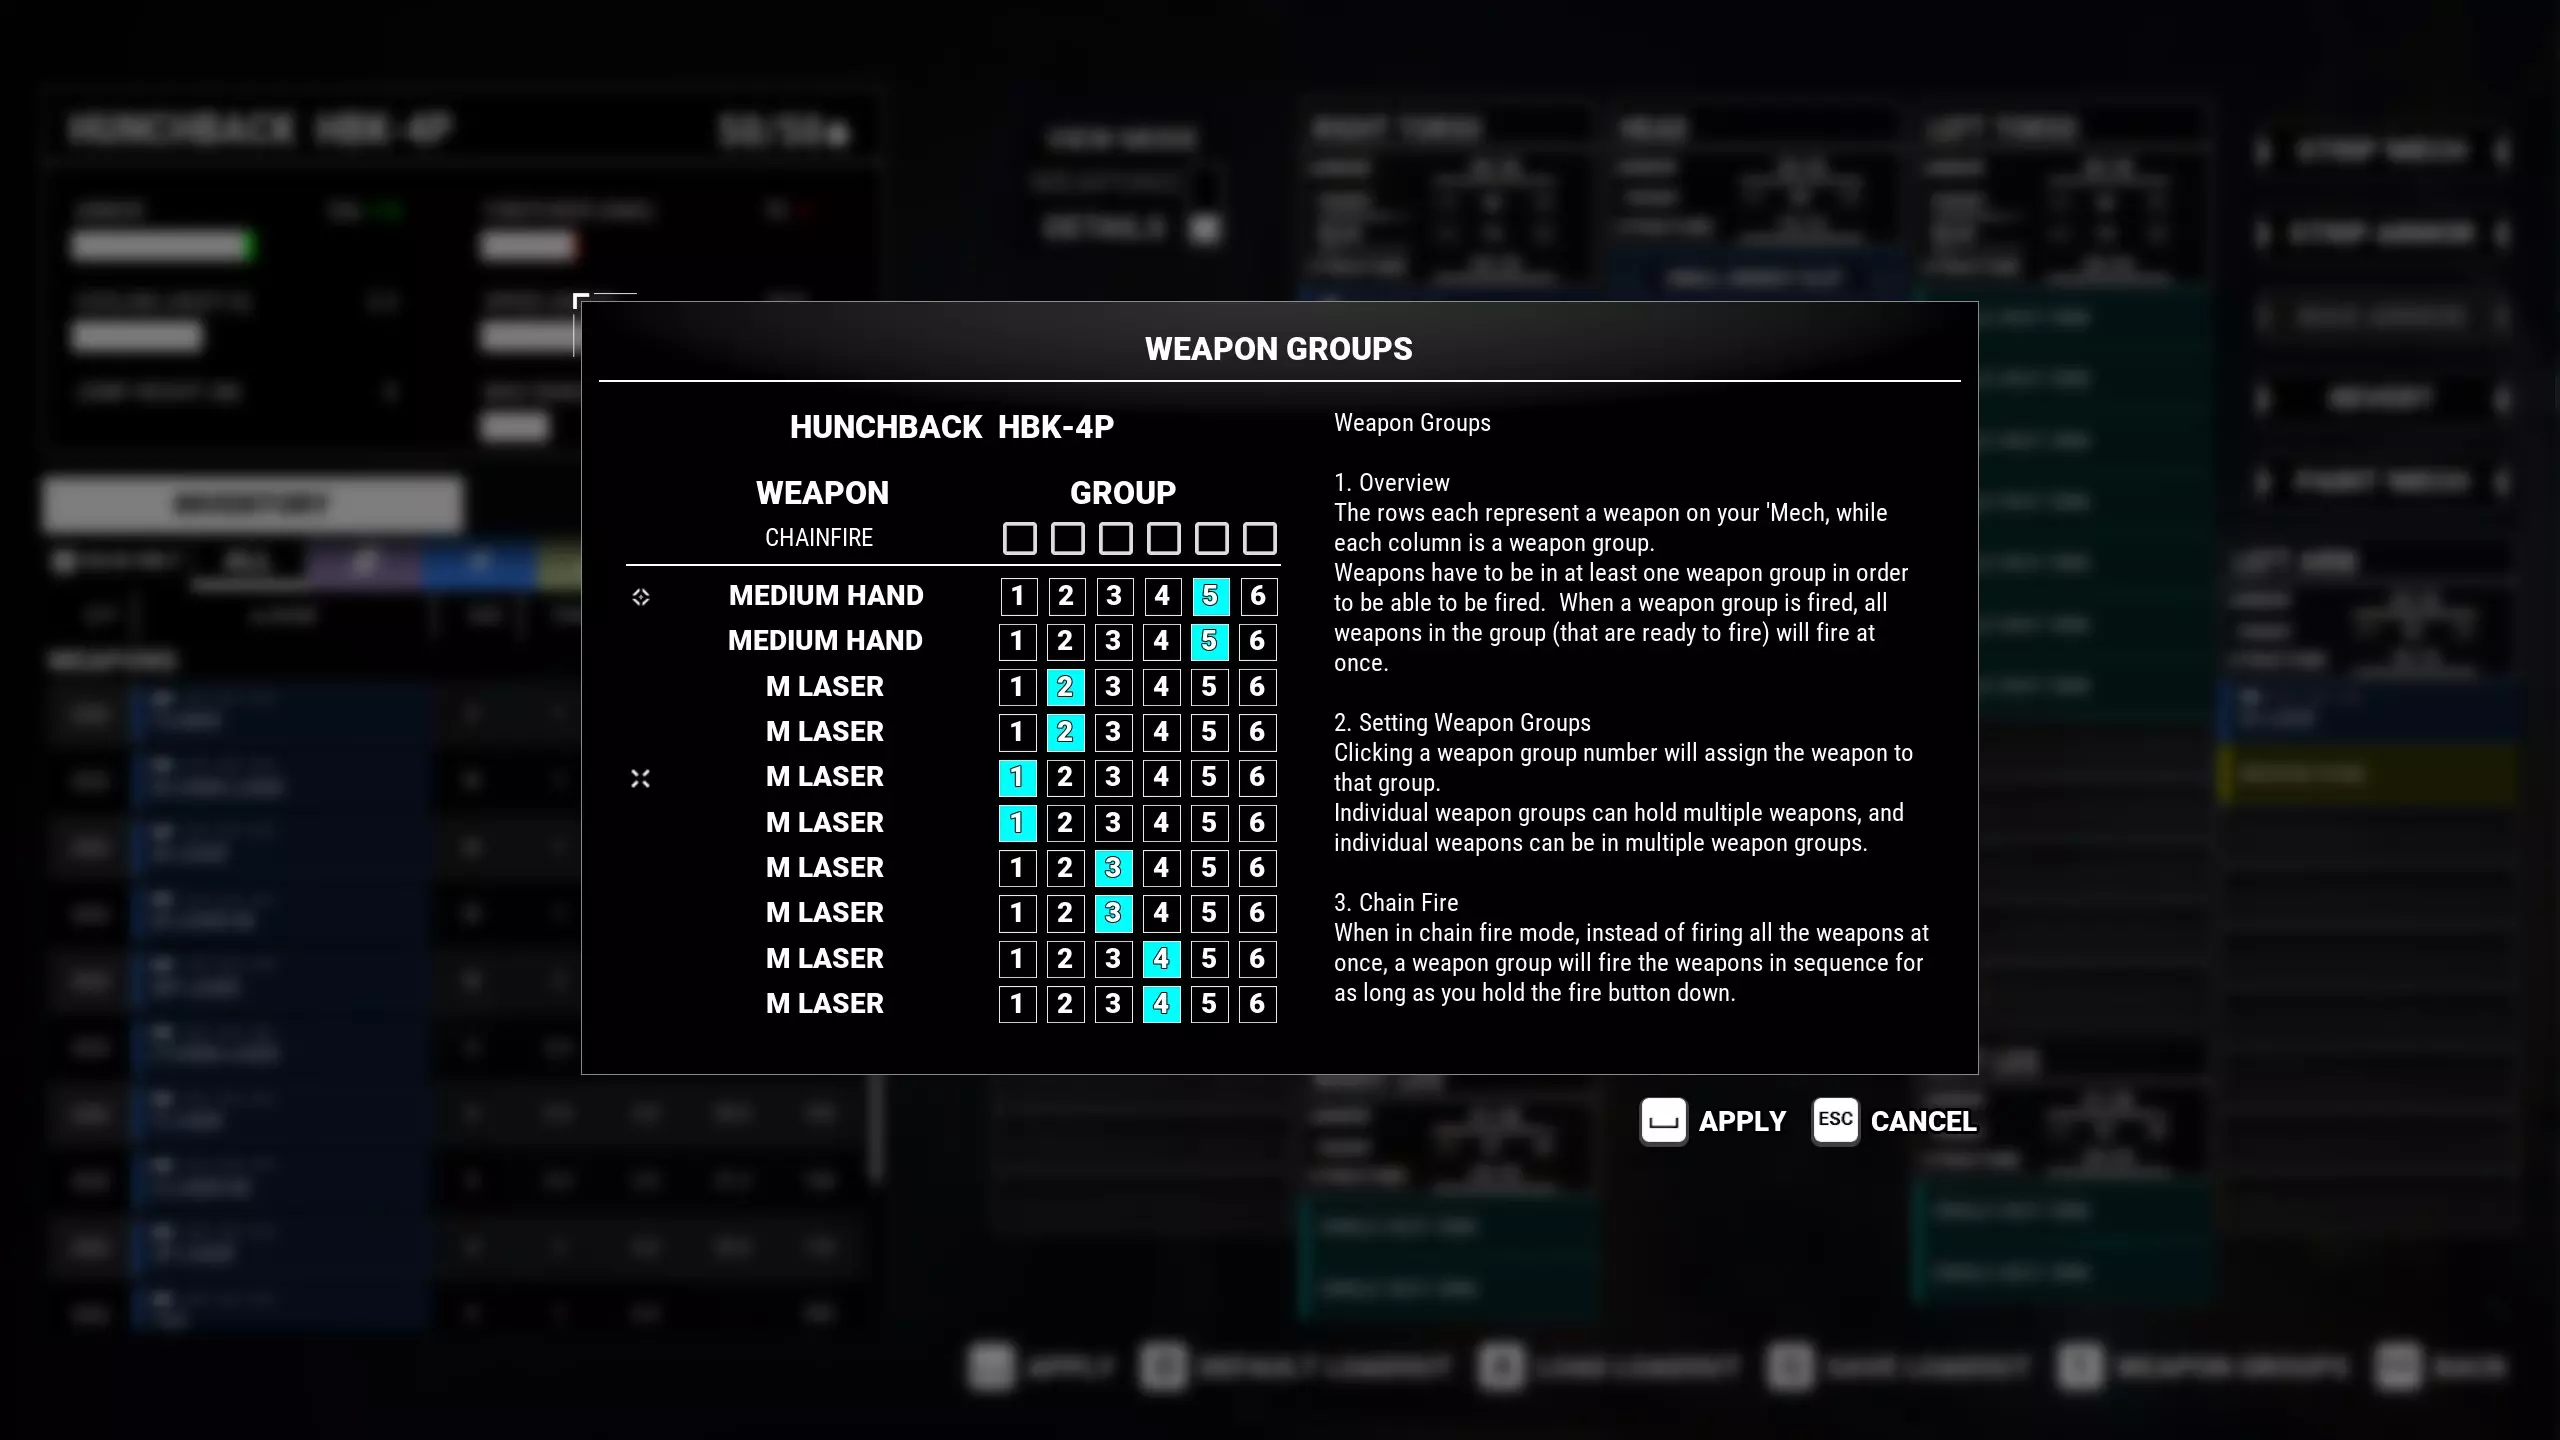
Provides players with an in-depth guide on game progression while keeping up with time sensitive campaigns. Players can expect to build up their lances from the ground up and progress & complete the game with relative ease. Introduction & DLC Requirements Greetings Mechwarrior, this guide will provide you with the knowledge required to progress the game rapidly with the goal of competing the main campaign and major DLC content. This guide is written with VANILLA/UNMODDED GAMEPLAY in mind. If you use mods, you can probably follow it for the most part. For this guide, you need the following DLCs. If you are playing Co-op, only the host requires these DLCs. Required DLC: Heros of the Inner Sphere Legend of the Kestrel Lancers Recommended DLC: Rise of Rasalhague - Adds Crusader mechs, Rasalhague campaign & Bounty Hunter Dragon's Gambit - Adds Kurita campaign & interesting loot/rewards Non-essential/Optional: Solaris Showdown - Beware, adding this DLC enables PPC-X loadouts on enemy mechs. Expect increased difficulty especially at the start of the game. Call to Arms - IMO this is the worst DLC. Shadow of Kerensky - Currently listed as optional until I do a full playthrough from a new campaign. The following content will be SKIPPED. Those in Need - (Rewards are too insignificant) Dire Circumstances (Too far out, rewards are too insignificant) Tributes for the Imperator (Too far out, rewards are too insignificant) Optional (For Best Solo Start & Coop/Multiplayer) If you plan to have the most perfect start or are playing with friends, I recommend installing YAML mod after getting reputation lv5 to get Goblin & his hero phoenix hawk, Kobold. You can uninstall YAML after receiving Goblin's transmission if you want to have an unmodded experience. WARNING: Phoenix Hawk Kobold cannot be re-obtained if you choose to sell this mech. For Coop/Multiplayer: This provides your team with more mechs to work with so that you dont have to fight over the free Razer branded wolverine you get from Valentina system. For Best Solo Start: This provides you with more mechs and AI pilots to work with & makes the early grind alot easier. Due to the recent addition of more devastating mech variants with alternate loadouts such as PPC-X, having Goblin & Kobold will greatly improve the early grind when starting out. https://steamcommunity.com/sharedfiles/filedetails/?id=2549720490&searchtext=yaml Overall Progression NOTICE: Updates are currently in progress. This section will look weird until I'm done. Some changes are still being made. This is only a general recommendation for starting a new main campaign. Expect spoilers if you continue reading. You will need to salvage some mechs. Try to damage the enemy mech until it's salvage point requirements are low enough for you before proceeding to headshot the enemy mech. You will likely need to max salvage points for those few missions. You may need to refer to my other guide on salvage for this part. Unfortunately, there's too much info to condense into a single guide. https://steamcommunity.com/sharedfiles/filedetails/?id=2951028714 Reputation Management for steps 1-10 Keep Independents at atleast +2 rep Do not go below -2 rep for Steiner & Kurita For step 5, get atleast +2 rep for Liao. Arena Fame does not add to your Mercenary Level. Do not spend too much time in Arenas. Reputation Management for steps 17 Onwards Get Rasalhague rep to +3 Get Independents to +3 or +4 rep Guide: 1) Grind for 30-40 Million Cbills & collect the free Wolverine @ Valentina system 2) Go to Terra or Steiner territory & buy any two heavy mechs from this list. Sell mechs as needed but keep a light mech for infiltration missions. Any combination eg: 2 Archer 2S, 1 each etc, are all acceptable. Archer 2S (Excellent firepower, mobility & compatible w AI, better in early game) Crusader 2R (Agincourt but 5T lighter. Remove mg if you intend to pass it to AI, better in mid-late game) Black Knight 6B (4 med pulse lasers + 3 med lasers in arms, rest to armour n heatsinks. The 4th med pulse is from the valentina wolverine) Black Knight 6 (2 large sb, rest to med lasers, heatsinks and armour)4) Play "First Strike" for Warhammer 6R quest reward 5) Do missions for Liao and get atleast +2 rep 6) Complete Hazing of the Weak, get the following mechs: Black Knight 6 (Mission 2) Highlander 732B or 2nd Black Knight 6 (Mission 3. put 1 Jump Jet on highlander this for Tikonov Final Mission) Stalker 3Fb (Final Mission, outfit w ppc-x & med sb lasers, SRM 6) Orion-YAJ (Final Mission, 2 large sb lasers, ppc-x & 2 SRM6)7) Head over to Marik/Steiner border, get the following mechs: Get 2 Battlemaster 1G (From Dire Circumstances main quest & save scum while in steiner territory to purchase it) Get 2 Stalker 3F (Save scum while in steiner territory to purchase)8) In Kurita territory. get the the following mechs 2 Atlas RS (Obtained from Deliverance Main Campaign Mission & Rise of Black Dragon Mission 1. Outfit them with AC5BF, Large sb lasers & srm4/6) Banshee 3P (Charity Case Final Mission, outfit w ppc-x & med lasers)9) Complete Main Campaign by end of 3024 Get Banshee 3S (Crucible mission, replaces an Atlas RS)10) Get the following mechs: Cataphract 0X & Raven 1X* (Eyes On Democracy Final Mission) Archer Agincourt & 2 Charger 1A5 (Bow & Arrow missions)*Raven 1x can be purchased from Liao & Davion spaces 11) Complete Kestrel Lancer Campaign Highlander 732B from step 4 (put 1 Jump Jet on this for Tikonov Final Mission. You can toss this mech in cold storage after completing Kestral campaign) Place Cataphract 0X at 4th position to minimise damage, provide ecm support & counter enemy ecm) All Charger 1A5, ECM/EW Ravens/Cataphracts in Kestral campaign cannot be salvaged. Charger 1A5 & Raven 1X are obtainable via a few quest lines. Most notably Bow & Arrow for charger 1A5 & Eyes On Democracy (ECM/EW Ravens/Cataphracts). If you only bought base game, Heros of the Inner Sphere & Kestrel Lancers, the following content may not apply to you. The game is mostly complete and you can pretty much treat it as a sandbox and wander the galaxy as you like. To avoid replaying the game, make a save here so that you can add on DLC as you like. 12) Run Cantina Missions & bounty hunter rep 13) Complete Rise of Rasalhague & salvage the following mechs: Banshee 3S (Gunsberg Mission 3, replaces Atlas RS)15) Complete "Stop the Launch" for King Crab Carapace & salvage all the T5 weapons. This is very tight on schedule and might be difficult to pull off. Outfit Carapace with four AC5 BF, 2 LRM 10. AI is an effective fire support platform & damage sponge with this loadout. 15) Complete Dragon's Gambit, Get Mauler 2P & MX90S. Replace Charger 1A5 w 3KS. Replace Battlemaster 1G with 1G-S variants. 16) Buy Atlas II from Romulus 17) Complete X marks the Spot Get Corsair PVT, outfit with 2x Gauss, Large SB Lasers & LRM 10 Salvage Banshee 3P from final mission, outfit with MASC V, 1 Large pulse, 4 med lasers 18) Complete Solaris Showdown 19) Grind Independents rep to +4, Rasahalgue rep to +3 & try to complete the bounty hunter grind/quest. Another Banshee 3S spawns during this quest but its unlikely you'll have enough points20) Complete Shadow of Kerensky Max out cockpit armour, elementals will target cockpits (shame there's no animation to rip you out) During this quest line, its unlikely you'll have time to use salvaged clan mechs against the clans Bring a mech with ECM to counter ECM on every mission Bring atleast 1 mech with gauss or heavy rifiles Some maps are long and windy. Consider bringing 64kmph mechs. Consider upgrading your current mechs with clan tech instead. This will save time and still yield results. Consider salvaging atleast 2-3 Nova Primes for the 12 ER Medium Lasers they carry. Its a very quick and effective way to gain clan tech for your mechs. Aim to collect approx 30-40 clan med lasers, 10-20 clan med pulse, 8-10 clan mgs and 2 clan gauss over the course of this campaign. Destroying atleast 1 leg and centre torso seems to be an effective way to keep salvage costs down. Only problem is the lower probability for the mech to appear as salvage. Salvage Direwolf Prime and atleast 1 Hellbringer Prime. Both mechs carry alot of fire power. Hellbringer Prime can replace the Cataphract 1x from step 11. In the campaign, with proper preparation, it is possible to steamroll the clanners. In normal missions, vs clan missions are alot more difficult. It is reccomended to being atleast 2-3 assault lances when heading out to fight clans. That’s 8-12 assault mechs, minimum. Non-Hero/Rare Mech Market Resetting/Save Scumming To purchase two Archer 2S or Crusader 2R, you will need to abuse the following steps to get the mechs to appear in the mech markets. Crusader 2R has a chance to spawn as a damaged mech on Terra. Archer 2S has a chance to spawn on any steiner owned industrial hub. 1) Save your game some distance away from the industrial hubs. You must not be able to see the various features that are available (eg: cantina, rare weapons/mechs) 2) Jump to a system near to your desired mech's spawn system (You should now be able to see if there are hero or rare item/mech on the market) 3A) If a hero mech or rare item/mech has spawned on your desired system. load your save from step 1 & repeat. 3B) If no hero mech or rare items have spawned on your desired system, save & start jumping/reloading until your desired mech appears. Target Priority (WIP) These are targets you should generally prioritise. Tanks & VTOLs Generally easy to kill but potentially dish out lots of damage. It might be easier/faster for you to kill them on your own instead of ordering your lance mates. SRM20/40/60 carriers have some chance of instantly killing you via headshot. Partisans/Patton/Demolishers/Igors are heavily armoured and deal alot of damage. Do note that a crashing VTOL still damages you and can kill you if you have lost your cockpit armour & structure. Heavy Hitters Mechs that carry hard hitting weapons such as but not limited to, AC10/20, multiple SRM 6s, Gauss, PPCs & heavy rifles are a threat due to their high damage on a single component. Eg: Hunchbacks, Charger 1A5, Atlas, urbanmech, etc. Long Range Support & LRM Support These mechs deal alot of damage over time. Fortunately, these mechs are often "balanced" by having less armour or larger torsos which makes it easier for you & AI to kill. Torso twist if you are in the open and move to cover. You can also command your lance to attack to draw the heat off of you. Eg: Rifleman, Longbow & Catapult Melee Specialists These are mechs with melee weapons. Technically, they are often at the bottom of this list. Most melee specialists arent a problem until they get close enough. Do not let them close the distance! Why Buy Crusader 2R or Archer 2S? Similarities: Both store most of their firepower in the torsos Both can be built into SRM brawlers Both can be built into LRM boats for late game Archer 2S Advantages: More armour than Crusader 2R More room for heatsinks (Especially in early game) Usually Cheaper (About 8mill) Nothing important in arms Can be used by players & AI Crusader 2R Advantages Better than Archer 2S in late game due to more missile slots Can be built for either player or player & AI use Weighs 5 tons less while carrying more firepower Early game builds for each mech: Archer 2S: 4x Medium Lasers 4x SRM4 + 2.5T ammo Max Armour, rest to heatsinks Crusader 2R: 4x SRM4 in torsos +2.5T Ammo 2x SRM2 in arms 2x Medium Lasers Max Armour, rest to heatsinks Late Game Player Builds for Crusader 2R: 4x SRM4 in torsos +2.5T Ammo 2x T2 SRM4 in arms 2x T2 Machine guns 2x T2 Medium Lasers Max Armour, rest to double heatsinks Why Stalker 3F Stalker 3F is cheap, has 4 missile slots and 6 laser hardpoints. This gives the stalker one of the highest alpha strikes in vanilla gameplay. Both players and AI can make good use of this mech. Brawler: 6x Medium Lasers 4x SRM6 LRM support: 4x LRM10-ST 5 Med Lasers + TAG or 6 Med Lasers Both builds are equally viable. However, I generally prefer to leave LRM support to the Fb variant due to ECM compatibility. Stalker 3Fb vs Cyclops 11P Stalker 3Fb + Available from the start of the game as a rare mech in pristine condition. + ECM Capable + Alot of free tonnage +Can be setup for either long range, mid range or brawling. - Slow moving assault @ 48kmph Cyclops 11P +Rare mech available from 3045, most notably obtained from Will of Kali final mission. +ECM Capable +Fast Moving Assault @ 64kmph +Can be used as a long ranged sniper or upfront brawler -Lack of tonnage reduces weapon loadouts -Often have to choose between armour, weapons/ammo and equipment Recommendation: Stalker 3Fb In my first release of this guide, I used to use the cyclops 11P as a sniper in the 4th slot with 3 Med Laseers + 2 Heavy Rifles, max ballsistic velocity upgrades. It served as an ecm capable sniper and early game Sleipnir. However, after multiple play throughs, I've found that the Stalker 3Fb is a much more versatile mech and can be deployed in a wider range of roles. I can confirm that the stalker 3Fb is a much more well rounded option. As of Solaris, the Stalker 3FB serves as a very potent upfront brawler with 2x PPC-X. 2 SRM6 and 4 medium lasers. Maps that were a bit of a slugfest are alot easier with the 3Fb in the brawling role. Why use Atlas RS over Atlas D? Atlas RS has overall better balance than Atlas D in weapon loadouts. Additionally, the role of close combat brawler is easily filled by the Stalker 3F for 15 tons less. Suggested Atlas RS Loadout: SRM6+ART SRM4+ART UAC5 or AC5 BF 2x Large SB Laser Weapon Groups for Player: SRMs to group 1, chain fire. UAC5 & Large Lasers to group 2 UAC5, Large Lasers & SRMs to group 6 or alpha strike Chainfire SRM gives you better control over SRM ammo usage. UAC5 & Large SB lasers provides continuous long range fire support All weapons in alpha strike should be used only when the target is close and cant avoid your fire. Due to the sheer number of heatainks you can mount, you’ll have continuou/sustained dps on nearby targets. Weapon Groups for AI SRM4+ART to group1 SRM6+ART to group 2 UAC5 to group 3 Large SB to group 4 This reduces the likelihood of AI over-aggroing enemy mechs while keeping DPS. Double Heatsink Farming Hero light mechs (eg: Commando TDK & Urbanmech K9) & some rare star league era mechs (eg: Crab 27b) are cheap and carry multiple double heatsinks (DHS). You can use these mechs to collect double heatsinks before the technology is widespread/available. 1) Check the number of DHS in the mech to see if its worth buying 2) If you have funds to spare, & it holds a good number of DHS, purchase the mech 3) Place the mech in cold storage This will remove all weapons/equipment, including DHS from the mech4) Sell away the mech to recover some funds Hero mechs will eventually respawn again in the future with DHS Rare mechs such as Crab 27b will reappear randomly throughout the game5) Install DHS on your mechs & continue with the game Pilot Traits (WIP) Looking into re-grouping this due to Shadow of Kerensky and possibly changing to table format. Info in this section has not been fully tested. AI Pilots have a maximum of 3 traits. I do not have the means to test these traits and lance AI fire groups are currently bugged at the point of writing this section. Assuming that the descriptions are as accurate as claimed, here is a rough guide on which traits to nab or avoid. Desirable Traits: These traits are desirable because of how versatile or effective they are. Precise (Priority) Pilots with this trait tend to target a single part of the enemy mech. This is useful as your lance mates are more likely to target a single part of the enemy mech and possibly maim or reduce its firepower/cooling. Scrapper (Priority) Gives you 3 more points of salvage. Great for when you want to salvage mechs in missions. According to online discussions, 3 AI pilots with Scrapper gives you an additional 9 points of salvage. This further stacks with some faction specific bonuses for more loot when fighting for a specific faction. Arena Specialist Pilots with this trait have less spread with a wide range of weapons. Theoretically it should work best with Precise. Good To Have Traits: Weapon Type Traits Eg: SRM Specialist, Autocanon specialist, Laser Specialist Improves accuracy/spread/damage with these types of weapons. Its good to have but not a must have. Heavy or Assault Mech Specialist Most of your end game roster will consist of heavy or assault mechs. Generally speaking, I prefer to put them in assault mechs to improve survival. Try not to have both heavy and assault specialist on the same pilot. Its a waste of trait slots. Bulwark Mech takes 5% less damage. Survivor Pilots with this trait are more likely to survive when their mechs are destroyed. Technically you can do without this trait as you can always replay the mission to avoid losing your lance mate. As there is alot of save scumming involved in this guide, I hope to save you some trouble with this trait. It might be good for clan mechs as their cockpit armour is low. Con Man Increases money earned from missions. I've yet to confirm this. I intend to test this during future play throughs as it can be a pain to earn money to maintain mechs. Acceptable Traits: These traits are acceptable. They arent bad but there are better traits if you can afford to hire a better pilot. Hardy Pilots with this trait have shorter recovery time Same as Survivor, you could do without it by hiring more pilots or save scum. Usually, I have about 6-7 pilots in my roster as I draw most of the fire and they seldom get injured. House Specific Traits Untested but I'll put it here for now as it seems useful. Hands-On Learner Pilot levels up faster, Untested but I'll put it here for now as it seems useful. Traits to Avoid Weapon Specific Traits Eg: SRM2 Specialist, AC2 Specialist, etc. This trait is a bit too niche unless you have several mechs with those specific weapons Mech Specific Specialist Too niche and therefore a waste of trait slots. Light/Medium Mech Specialist Most of your end game roster will consist of heavy or assault mechs. Try to avoid having light or medium mechs. Negative Traits Eg: Greedy, Frail, Hypochrondriac etc. For obvious reasons, these traits are derimental. Avoid them! Weapons Guide & Grouping (WIP) The following is a simple guide on which weapons to place on the same firing group. You will still need to decide how to group your weapons for your playstyle. Looking into re-grouping this due to Shadow of Kerensky and possibly changing to table format. Energy Weapons: Tag: Pairs well with SSRM, AC5BF, UAC5, medium/large lasers & SB variants. LanceAI have an increased chance of targeting mechs you tag. Ideally your lance should have a LRM carrier but it's fine if you dont have one. Flamers: Generally, avoid using these. AI may use only flamers if enemies get too close & ignore all other equipped weapons. Alternatively, Get a mech with many flamers and overheat enemy AI to death. Pretty boring imo but dont let me stop you. Small: Skip unless you're on a light mech. Range is too short & AI does not work well with small lasers. AI may use only small lasers if enemies get too close & ignore all other equipped weapons. Medium & Medium SB: Pairs well with AC5BF, UAC5 & SSRM Large: Pairs well with AC5BF & UAC5. I personally prefer large SB due to shorter burn times. Large SB: Pairs well with AC5BF, UAC5 & Gauss Large Pulse: Pairs well with medium & medium SB lasers. PPC: Pairs well with PPC due to zero projectile drop. However, large lasers are 1 ton lighter and generate less heat, making large lasers generally more efficient and attractive options. ER-PPC: Pairs with ER-PPC due to zero projectile drop. Again, I prefer large/large sb lasers or gauss. PPC-X: Energy based shotgun. Pairs with LBX10 or SRMs at close enough ranges. Be careful not to stack too many PPC-X & LBX10 or the game wont be able to calculate the damage dealt. Any damage not calculated does 0 damage to target. Clan ER Small Lasers: Pair best with med pulse and clan er small lasers. Clan Small Pulse: Pairs with Clan Small Pulse Lasers Clan ER Medium Lasers: Pairs best with IS Large Pulse Lasers, Clan Large Pulse, Clan ER Medium Lasers Clan Med Pulse Lasers: Pairs best with Clan Med Pulse Lasers and IS Large Pulse Lasers Clan Large ER Lasers: Pairs best with Gauss, Clan Gauss, Clan Large ER Lasers Clan Large Pulse: Pairs best with Clan Large Pulse and ER Medium Lasers. Ballistic Weapons: Machine Guns & Clan Machine Guns: Generally, avoid using these. AI may use only machine guns if enemies get too close & ignore all other equipped weapons. Exception to this rule is MX90S with 6 machine guns, for player use only. AC2 & AC2 BF: Too little damage for the weight. Skip them. AC5 & AC5 BF: Decent range. Personally I prefer AC5 BF due to the higher ROF. Best paired with medium lasers and more AC5 or AC5 BF. UAC5: Best paired with medium lasers and more UAC5. AC10: A bit too heavy. I generally skip these. LBX10: 1 ton lighter than AC10 but not good enough. LBX10 SLD: 1 ton lighter than AC10 and faster projectile speed. Best paired with med lasers and more LBX10 SLD AC20: Best paired with SRM/SRM+ART and light rifles Rapid Fire Autocannons (eg: AC2RF): Generally avoid using these weapons due to high/uncontrollable recoil. Light Rifle: Pairs well with AC20 & SRMs due to similar range and projectile speeds. Medium Rifles: Skip these. They dont do enough damage and are too heavy. Heavy Rifles: Heavy rifles pair best with MORE HEAVY RIFLES. Upgrade your mechs with projectile & ballistic speed and you'll have a gauss rifle for half the tonnage. If you fancy a challenge, try to headshot targets outside of your effective range. Higher projectile velocity results in flatter trajectory and seems to improve AI's accuracy. Gauss: Pairs best with Gauss & Large SB Lasers due to minimal projectile drop and similar ranges. Missiles: SSRM: Pairs best with tag & med lasers. It will fire once you have a lock and has a chance to target the most damaged part of the enemy mech. Great against light mechs. SRM & SRM+ART: Pairs best with AC20 & light rifles. SRM4 has a tight enough spread if you need to save weight. SRM-ST: Avoid using these. The damage spread and odd tracking makes it difficult to concentrate damage. LRM & LRM-ST: Pairs best with tag Setting up your lance This is a general guide/layout for your lance. As you progress in the game, you will likely find yourself mixing and matching as needed. Heavy Assault Lance: (48km/h) Purpose: Battlefield/Defence/Assassination Player Mech: Atlas RS, Mauler 2P or Stalker 3F AI Mech 2: King Crab Carapace or Banshee 3S AI Mech 3: Corsair or Banshee 3S AI Mech 4: Stalker 3Fb (Guardian ECM + LRM) Fast Assault Lance: (64km/h) Purpose: Demolition/Raid/Assassination Player Mech: Mauler MX90-S, Banshee 3P AI Mech 2: Battlemaster 1G/3M or Charger 1A5 AI Mech 3: Battlemaster 1G/3M or Charger 1A5 AI Mech 4: Battlemaster 1P (Guardian ECM) Heavy Lance: (64km/h) Purpose: For lower tonnage missions. Player Mech: Archer 2S, Agincourt, Crusader 2R AI Mech 2: Archer 2S, Black Knight 6/6B or Charger 1A5 AI mech 3: Archer 2S, Black Knight 6/6B or Charger 1A5 AI mech 4: Cataphract 0X or Raven 1X/3L (Guardian ECM) Infiltration: Player Mech: Raven 1X/3L w BAP & ECM AI Mech 2: Heaviest possible without exceeding tonnage limits AI Mech 3: Heaviest possible without exceeding tonnage limits AI Mech 4: Preferably ecm capable without exceeding tonnage limits Reason: This is due to some infiltration missions requiring you to break stealth. You'll need your AI lance's firepower to delay enemies while you provide ECM cover to the retreating mech. ECM, how it works & where to buy? All enemy mechs within an allied mech’s ECM range will suffer penalties to accuracy. Similarly, allied mech in the presence of enemy ECM will have a decrease to accuracy. Allied ECM can be toggled to disable enemy ECM. This helps during several missions such as Tikonov & Sarna (Kestrel Lancers) & Bounty Hunter’s mission. By disabling enemy ecm, your lance & allied mechs regain their original accuracy and will be less likely to miss their targets. Another note is the position your ECM enabled mech takes in the field. As Guardian ECM modules are quite difficult to come by, I recommend placing ECM mechs in the 4th lancemate position. This gives you ECM coverage and reduces aggro on the ECM mech as AI in the 4th slot are more passive. Where to buy ECM Modules? Black Market ECM - 5m Radius, provides coverage only for the mech it is equipped to Guardian ECM Best place to “buy” Guardian ECM is Terra. Several ECM capable mechs may spawn in Terra, regardless of your reputation with Comstar. Simply save some distance away from terra and travel there. Check for mechs with Guardian ECM, buy & toss into storage. Q & A Do you use mods? This guide is written with vanilla gameplay in mind but you can follow most of it even if you use YAML, etc. I occasionally use mods when I want a change of pace but wont use them for this guide. Are there mods that keep the vanilla experience but improve quality of life? Sure there are. I'm admittedly not done testing them and might make a section for this in future. No promises though. Why do you seldom mention hero mechs? Hero mechs are very RNG reliant. As much as I would love to have Golden Boy, Slepnir and Skokomish in my roster, there have been play throughs where I complete the campaigns and dont encounter these mechs until year 3060+. Do you use hero mechs? Mostly heros earned as quest rewards. If I'm lucky enough, I will replace my roster with some hero mechs. Eg: Battlemaster 1G replaced by Battlemaster Hellslinger. Why are you over preparing us? To cater to a wider range of players’ capabilities and keep things simple. Hero mechs will spawn if you keep buying them. Stop selling them back to get more Double Heatsinks. I rather have a full, fully functional roster of mechs with DHS than to have 1 good hero mech and 11 overheating mechs. Kintaro 18 has similar firepower to the Archer 2S while weighing less. Why not use the Kintaro? I feel that medium mechs generally dont have enough armour. Having more armour improves overall survival & mission success. You can SKIP medium mechs by buying two archer 2S and have an overall easier time completing missions. Can you share a bit more about your mech builds? There are many guides available. General rule of thumb is to max out armour and deduct from arms/legs/head. Head/cockpit should preferably be maxed out or close to max. Torsos should have most of the armour in front Eg: 5-10 back armour & rest to front. I'm taking alot of damage but the rest of my lance hardly takes a scratch. Why is this happening? Enemy AI is currently coded to take on the enemies that deal the most damage/kills. That often means the player is going to soak most of the damage. Additionally, AI will target more damaged parts of the mech. IMO, its usually better for 1 mech to be down for repairs than all 4 mechs. Why do you put lower tier weapons in the arms? Torso twisting is essential for spreading the damage and minimising loss of parts/equipment. Placing cheap Tier 0~2 weapons in arms gives you the option to sacrifice that arm. Its sometimes better or more efficient to lose an arm. (Eg: If I lose an arm & a few T2 weapons but am able to salvage a Banshee 3S, its well worth it.) Why does your early game focus on Liao? Hazing of the weak offers us a quick path to quickly obtain heavy and assault mechs to give us momentum. Black Knight 6B and stalker 3Fb are essential to our progression in game. Why are you not guiding us as much for step 12 onwards? By this point, you should be mostly self sufficient. DLC 3 to DLC 6 isnt much of a challenge for your ridiculous arsenal of mechs at your disposal. Will you be making a similar guide for MW5 Clans? No. Clans is pretty straightforward and linear compared to Mercs. If you really need help, check the builds and play throughs by TTB or Baradul. When will you be updating this guide for DLC 7 Shadow of Kerensky? Work is in progress. For now its an interim update so that you roughly know what to do.


各位雇佣兵们,大家好! Piranha Games很高兴地宣布《机甲战士5:雇佣兵》的全新扩展包——【混沌统治】。 自ComStar在 tukayyid 取得胜利并与氏族达成休战协议以来,已经过去了三年。即便如此,整个宇宙仍随时可能爆发混乱。 ComStar的背叛以及Archon Melissa Steiner遇刺事件,威胁着内天体的脆弱团结。 随着紧张局势升级,雇佣兵指挥官Jake Mason希望为一批可能改变战争走向的关键氏族情报找到买家。
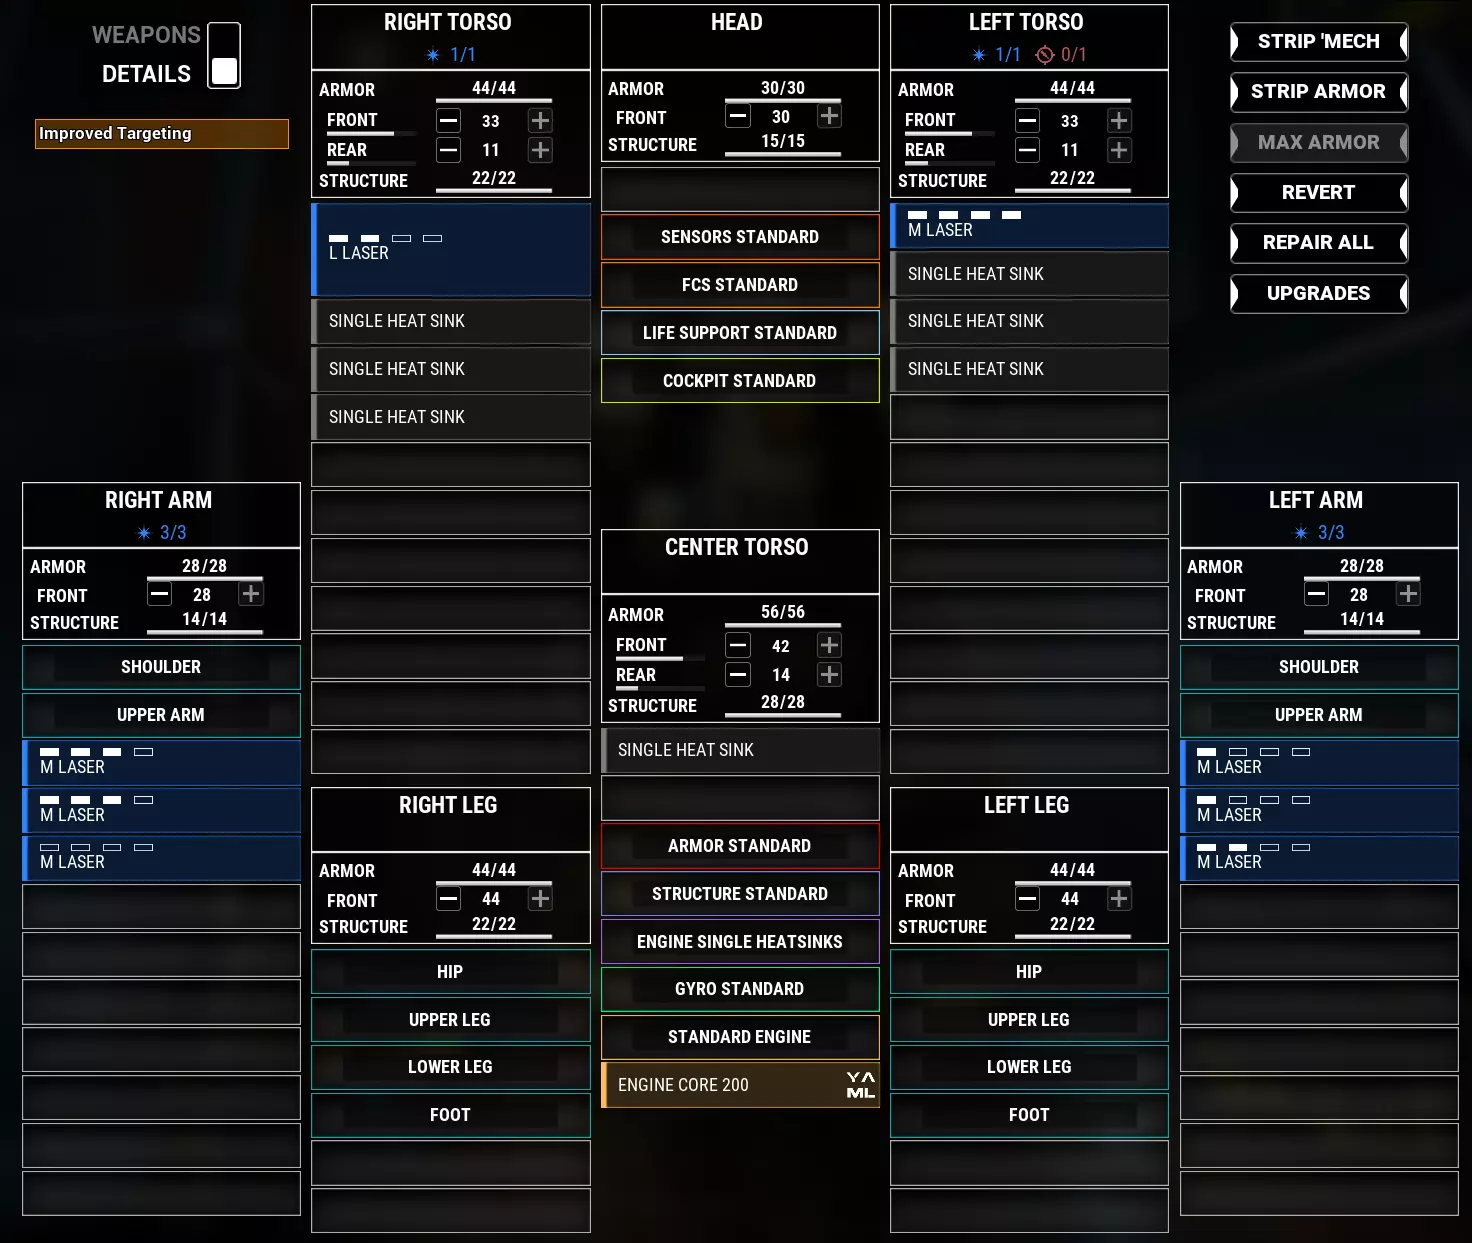
This guide will hopefully show you how to get the most out of your AI pilots, i.e. the Three Stooges. It's not the last word in AI mech design, as I am sure there are more advanced strategies that could be employed, but this should help you get the most bang for your buck, with the least hassle. Authors Note: This guide is old, and was written before some of the DLCs. That said, its knowledge pulled out of the forums from players with tons of experience as well as people digging into the code to create mods. It's still largely valid, but there may be points here and there that have been superseded by the most recent DLCs. Also, it's my views on how to get the most out of the game and your pilots without obsessing over every detail. Your own opinions or experiences may differ, but a lot of people have been helped by the tips here. Enjoy. K.I.S.S. K.I.S.S. Keep It Simple, Stupid. This has to be your mantra when choosing and outfitting mechs for your AI pilots to use. Why? Because the term "Artificial Intelligence" is used very loosely here. They're dumb as a sack of hammers. If you've played for any time at all, or noticed the innumerable threads in discussion about it, you realize that. It's why you're here, reading this. The "Intelligence" has been programmed with a few basic rules that include getting into optimal range for EVERY weapon you give them, running through their assigned weapon groups in order, and not overheating. They can't simply be given any mech that YOU would pilot, and expect to be able to use it. You have to tailor their load outs around these constraints. Please note at this point: This is NOT a definitive, last-word guide on how to perfect the AI in this game. Nor is it about AI mods, such as TT_Rulez AI mod (although it will probably still apply, because those mods usually just add more behavioral rules; the basics still apply). That said, the second disclaimer: you WILL have to babysit your AI lance mates all the time, regardless. Go here. Follow me. Shoot that. Stay there. That's not going to change. This guide is to help you make good mechs for them to pilot, do acceptable damage, and come back with all their parts. Remember...YOU are playing this game, not the AI. It's not designed for you to sit back and watch them win for you. Weapon Selection So, let's be blunt. Some of the most interesting, fun, and potent weapons in this game, i.e. LRM's, are also the hardest to use consistently and effectively. Between waiting for Target Lock, losing that Lock when the target steps behind a bush or rock, maps that often don't give you good opportunites for long-range fire, and the inability to use those high-tonnage weapons at all in brawling range, they're tough to get the absolute most out of. So, how do you think three braindead morons are going to fare with them? I'll give you a hint. Not well. First rule: Forget about LRM's on your AI-piloted mechs. Can it be done? Sure. If you go out of your way to specifically build a late-game lance with dedicated LRM boats and other mechs with TAG and such, it can be made functional. What a pain in the ASS, that only works on half or less of the maps. Remember the first rule, which is forget about LRM's. Second rule: Pretend Small Lasers and Machine Guns don't exist. Remember when I said the AI is programmed to get in optimal range for EVERY weapon it carries? Guess what giving them a Small Laser or Machine Gun basically is? It's an order to fix bayonets and charge! Don't fire until you see the whites of their eyes! This is NOT ideal. Don't do it. Third rule: Limited weapons in limited groups. K.I.S.S. The AI will do MUCH better with hard-hitting larger weapons backed up by banks of Medium Lasers than it will with a bunch of random nonsense from all over the weapons list. Ideally, you will have one or two "big gunz," such as A/Cs, Heavy Rifles, PPC's, Large Pulse Lasers, etc., and then a bunch of Medium Lasers, and POSSIBLY, if you still have tons left over, an SRM. It's often worth leaving the SRM's off, though, for a few reasons. --Short Range --High Heat --Extra Weapons Group --Ammo (more on this on later) Put the "big gunz" in the first and/or second Group, the ML's into groups 3 (and 4, split up, if you have a bunch of them). Remember, the AI looks at the total heat output of a Group to decide if it can fire it or not, so lumping all of your Medium Lasers into a single group can be a bad idea. Chain Fire won't help you here, the AI doesn't care. just the total heat output of the Group. This should cause the AI to cycle through the "big gunz," and while they are recharging/reloading, start firing the lasers. This is where big, hard-hitting, slow weapons really shine, The Heavy Rifle is a favorite weapon of mine to put on Medium and Heavy mechs for the AI. It hits like a ton of bricks, and is slow enough that they'll cycle through all the other weapons too while it reloads. If you give your AI mechs A/C2 BF's, expect them to always be shooting those fast-firing weapons. You might as well skip other weapons. That's not 100% true, but it's close enough. Heavy/Medium Rifles, PPC's, Large Lasers, and regular A/Cs (not Burst Fire) seem to work the best, especially if you can back them up with fast-firing Short Burst Medium Lasers in the later weapons Groups. You'll actually see the AI using it's weapons! What a novel concept! Speaking of which, Fourth rule: Plenty of heat sinks. The AI won't shoot something if it's going to overheat. It's often worth limiting the weapon selection to add extra heat sinks to their mech, because adding extra weapons doesn't help if they're never going to shoot them. This is especially true on all-energy chassis and chassis with nothing but energy and missiles. Skip a weapon or two (especially missiles) to make them run cooler. They'll perform better overall. Remember, the AI doesn't aim at specific locations, and it doesn't Alpha Strike. It cycles through the groups (so it WILL Alpha Strike if you put all the weapons in ONE group AND have enough heat dissipation for it to shoot it, but that's not going to happen on anything over 50 tons), and spreads the damage out all over the enemy. Make sure it can shoot constantly by giving it lots of heat shedding ability. Those are the big ones, as far as rules go. Let's recap: 1. Forget about LRM's. 2. Forget about Small Lasers and Machine Guns. 3. Limited weapons in limited groups. Preferably a couple big, hard-hitting guns. 4. Make it run cool. Onto mech chassis selection and thoughts. Mech Chassis So, what makes a good AI mech chassis? A few things, really. I'll spell them out, and detail them after: 1. Proper hard point types. 2. Proper hard point locations. 3. Proper ammo storage locations. 4. Bonuses such as Engine Heat Sink and ECM slots. So, in more detail: 1. Hard Point types. Very simple. If you want to use a big AC or Rifle, or a PPC or Large Laser, well, you have to have a place to slot it on the mech. If all your mech has is places for missile and Medium Lasers (like an Archer), it's probably not a good AI mech. Kind of a "duh" moment, but one that needs to be said out loud. 2. Hard Point locations. This is important. Unlike the player (I LOVE arm-mounted weapons), the AI doesn't take good advantage of being able to torso-twist on the run, look almost behind you, fire off some arm-mounted weapons, shoot almost straight up at annoying VTOL's, etc. Putting weapons in the arms of AI mechs, while often NECESSARY (due to limited chassis selection), is not IDEAL. It's fine to throw the Medium Lasers out in the arms, for example, but expect to lose them from time to time. Putting the "big gunz" in the arms is asking for trouble. It's not the end of the world, but expect to come home missing those weapons sometimes. A good chassis has all of the heavy-hitters in the torsos, and the peripheral weapons, i.e. the Medium Lasers, in the arms. A GREAT chassis has everything in the torsos. An acceptable chassis has a mix...maybe one big gun in an arm, the other in the torso (there are a lot of mechs that fit this description). Empty arms means fewer weapons lost, more damage done, and cheaper repairs at the end (arms are cheap and fast to fix). Side note: If you're running some complete overhaul mod that lets you put anything anywhere (boring, in my opinion), this section becomes stupidly easy. Put on the right weapons in the torsos, and boom, done. 3. Ammo storage. Remember last section when I said i'd touch on this? Here it is. I have a hard and fast rule about my AI-run mechs. No more than 5 tons of ammo, ever. 4 tons in the legs, and, IF you need another ton, put it in the head (if the head gets blown off, having ammo there hardly matters. I've never seen it happen). Putting ammo in the torsos is a recipe for disaster. If you have so many ammo-hungry weapons you need more than 5 tons, or you can't put it in the legs (because they're filled with stupid Jump Jet slots), pick a different chassis. Use that one yourself...hopefully you're smart enough to know when you've taken too much damage to an ammo-storage location and compensate for that. The AI isn't. A note on Jump Jets: they're worthless wasted tonnage for the AI. It doesn't help them, because they're too stupid to use them. Maybe if you are running a bunch of AI mods it might be worth it, but those same mods also have to modify the enemy AI so that they aren't just programmed to hit at certain intervals regardless of where their target is. 4. Bonus slots. It's cool, but not a requirement, to have bonus slots on a mech chassis. Never underestimate a Guardian ECM suite, and AMS system, or even just "free" critical space slots for Engine Heatsinks, that you can fill up with heat sinks that will last forever (barring the mech getting cored or something). ECM and AMS systems are big umbrellas that limit the amount of damage your mechs take. If you can find them, use them. Skip Beagle Active Probes, though. Wasted tons on an AI mech. Closing thoughts and examples. So, there you have the "wisdom" (a term lightly used) of my few hundred hours of playing this game, and also what I've gleaned from other people on the discussion boards and such. Will this make your AI team an unstoppable force to be feared and respected throughout the Inner Sphere? No. Laughable as a very concept. But it's really helped mine to go from a bunch of losers who spent their time looking down the barrels of their own guns and watching me do 2 times the damage of all three of them put together to a semi-useful group who, in the after action report, usually each do at least half of my own damage. A definite improvement. They also come back with most of their parts still attached, since they aren't using a bunch of arm-mounted weapons and are actually killing the enemy BEFORE they take a ton of damage. I'm not sure I could ever really expect more out of the basic AI for this game. I'm sure there will be differing opinions from people who consider themselves "experts" at this game, but, frankly, it's a game. I want to have my teammates be competent without having to have a PhD in their AI coding or how to build the exact right mech for each member. I have better things to do with my time, like actually play. So, use this information as you see fit. If you follow it, you'll likely see a marked increase in the usefulness of your Stooges, both in damage output and survival. If you want to delve deeper, experiment with other things, get down right into the nuts and bolts, DO IT. It's your game, have fun with it. Enjoy. Now, as a final bit, one last rule and a couple examples. Last Rule: MAXIMUM ARMOR. This should go without saying, but for any mech you use (either for the AI or yourself), it's really helpful to do a few steps in the Mechlab: 1. Strip Mech. 2. Maximum Armor. 3. Balance the armor. If you're really close to a half-ton break, drop a few points here and there to get to exactly XX.5 tons. If you're up around XX.8 or XX.9 or whatever, probably don't worry about it. Remember that it's better to have the extra armor than tack on one more weapon that the AI probably isn't going to use anyway. As far as torso armor, I usually do a 75/25 split between front and back, or somewhere close. 80/20 is ok too. Remember, they're stupid, and the enemy WILL get behind them, usually with something hideous like a Javelin with a pair of SRM-6's. Have some armor on their asses. So, what are some of my favorite AI-piloted mech chassis? For Light mechs, the aforementioned Javelin is a good one, although the one with 4 Medium Lasers has more amour, heat dissipation, and staying power. The Wolfhound can also be a real winner...max armor, all lasers, decent speed. Even with the Large Laser in the arm. On the other hand, I've had bad luck with things like Jenners. They usually come home missing at least one arm, and thus half their weapons. Panthers are hit or miss...they're slow with a big gun, so the other lance mates usually outpace them and draw away the enemy attention, meaning they usually come home with all their parts, but also don't end up doing as much damage as everyone else. On the Medium side, well, most of them have the problem of having the biggest boom stick arm-mounted, and usually being a bit slow on top of that. Or they are absolute missile boats, i.e. the Kintaro, Trebuchet, and Dervish. Lackluster at best. Oddly, the much-maligned Shadow Hawk can prove to be a winner, if you get the Variant that has extra hard points. It can field a decent torso-mounted AC or Rifle, a pair of Medium Lasers in the arms, and tack on an SRM rack in the torso. Or skip the SRM's and put a Heavy Rifle on it. Big badda-boom. Compare that to, say, a Wolverine, which has basically the same weapons, but the big gun is in the arm. I prefer that as a player, but not for an AI mech. With the Lights and the Mediums, you tend to be making the best of a bad situation. Most of the chassis just don't pan out well for the rules I've laid out. Some do, or specific variants will, but if you don't have access to those (and you might not in the early parts of a game), just do the best you can do with what you have. The Heavy mechs are where this really starts to come into play. If you read my other guide, you might remember I hate 60-ton 80KPH mechs, for myself to pilot. I'm here to tell you, one of the very best AI mechs I have found is exactly in this category. The Champion. Ugly as sin. Like a wingless airplane with legs and winches for hands. Terrible weapon placement for my preferences as a player. But...damn. For the AI? Each of the variants (1N, 2N, 1N2) can mount a Heavy Rifle (up to 23 damage at range and speed each shot), 4 tons of ammo for it in the legs, and 4 Medium Lasers, all in the torsos. Plus, the 2N and 1N2 save a ton or two of armor by using Ferro-Fibrous, so have an extra Heat Sink or two. Max armor, and they can keep up with everything I'm piloting. These things were ALWAYS putting out at least half my damage each, every mission, and never coming back worse off than missing an empty arm. They were by bread-and-butter AI mechs for many, many hours of my playthroughs. I had trouble giving them up even when tonnage creep started and I was getting bigger mechs. I'd find myself picking the mech I wanted to pilot, then slotting in three Champions, and going in 50+ tons light sometimes, just because I knew we could get the job done. As opposed to bringing a Dragon, Rifleman, or Victor or something and losing valuable weapons and firepower halfway through a mission. The Champion is the "Prototype Example" of the AI mech strategy I laid out in this guide. Sort of the gold standard I judge other AI mechs by. Fortunately a lot of the Heavy and Assault mechs follow a similar pattern, with big A/C's and such in the torsos. Some do not. I'm looking at YOU, Warhammer, Marauder, King Crab, etc. Those are mechs I can pilot competently, but I keep them out of the hands of idiots. Anyway, I hope this helps someone, somewhere have a better experience with this game, and more fun playing it as opposed to screaming at their monitor about how stupid and useless the AI is. Happy hunting.

I will keep it short and simple. 1) Press "+" on your numpad to deactivate the constant throttle. 2) Press and hold "F" while you maneuver to align your legs with your torso. That way you can easily walk towards where you aim. The game doesn´t tell you this, so I hope this helps. Beginners Guide to maneuver your mech properly I will keep it short and simple. 1) Press "+" on your numpad to deactivate the constant throttle. It will be much easier and precise to operate your mech now. You will have to do this in every battle once at the beginning. Alternative (credit for this useful advice goes to "Swumprat"): If you go into Settings>Gameplay and look at the list of toggles there are two of note. One is "Enable Throttle Decay" which will make point 1 moot as you won't have to toggle it every match. The other is "Enable Crosshair cooldown pips" which shows which weapon groups are ready to fire by, well showing pips around the crosshair. 2) Press and hold "F" while you maneuver to align your legs with your torso. That way you can easily walk towards where you aim. This is very convenient when walking from checkpoint to checkpoint and especially helpful in battle when you need to turn fast but also have to keep focused on your target. The game doesn´t tell you this, so I hope this helps. About your teammates You will need to constantly order your mates around, otherwise they won´t do much. Press F1 to activate all of them and F1 again to have them engage your target. Afterwards, activate all of them again and press F2 to make them follow you, otherwise they will often walk off towards the map edge. This should be enough knowledge to get you through the first battles and gain some experience. Max out your armor! The mech design capabilities are very limited in this game because hard points are mostly fixed, but it is absolutely important that you max out your armor! Take out ammo or an entire weapon system and max out the armor, you will need around 70-80% front armor and 20-30% back armor on all your mechs to survive. A free mech in Valentina system When you are free in the beginning, you should go to a system called "Valentina". It will be north of your position in a red area. You can get a Wolverine hero mech there for free. How to get more credits and mechs - multiple mission contracts The real money-maker in this game are multiple-mission contracts. Any unspent salvage points will be carried over to the next mission. If you have 15 salvage points and use only 5 on your first mission, you will end up with 15 + 10 = 25 salvage points for your next mission, so you will be able to salvage whole mechs. They also give a negotiation bonus for more credits. They are more difficult than single missions, because you cannot repair mechs inbetween missions and you might have to field damaged mechs. How to estimate if a mech you plan to buy is good or not - weapon hardpoints Take a look at the weapon hardpoints of mechs you plan to buy. The more the better! Mechs with only 3 weapon hardpoints (e.g. 1 laser, 1 ballistic, 1 missile) will have a lower performance than mechs with 6 weapon hardpoints (e.g. 4 laser, 2 ballistic). You don´t have to use all of the hardpoints, often it is better to sacrifice missiles for armor and heat sinks and run with one or two weapon types only. Heavier mechs are better armored but they might lack fire power, so look for mechs with lots of weapons! General combat tipps 1) ABM, always be moving! Credit goes to my lance mate ForteDS for this valuable advice. 2) If you get targeted (you see laser lights towards you and hear bullets swiping by), use your jump jets or try to get behind cover. Jump jets are activated with "space bar". 3) Focus fire on the center torso or the legs. 4) Keep your laser beam on the target the whole time it fires. Laser fire lasts longer than your mouse click, so keep that beam on the target for full effect. 5) You can switch and take over your AI lance mates mech by pressing "Z" ("y" on german keyboard). This is helpful if your lance mate gets stuck or your mech is close to destruction. Heat management - chain fire is your friend If your mech produces too much heat, use the option to chain fire weapons. You can do this in battle by selecting weapon groups with "arrow keys" and then press "backspace". Or you do it in the mech lab prior to battle in the weapons group tab by selecting "chain fire". Medium lasers can be fired simultaneously, large lasers will need "chain fire"! Later in game, you will get your hands on double heat sinks. They take up more space, so put them into the "engine heat sink compartment" in your center torso. How to estimate mission difficulty You will come to a point where missions get too difficult, even though you have the same reputation level than the mission. A good indicator is the tonnage limit. If you are severely undertonned, it means the mission will be difficult for now. You will need to field heavier mechs to stand your ground here. Heavier mechs can be found in industrial hubs near higher-reputation areas. There is no shame in relocating your dropship to a lower-reputation area and take on multiple-mission-contracts there, so you can go on a shopping tour for heavier mechs. You are in it for the credits, not the fame, mercenary!


A compilation of mods that work together to make MW5 look, run & play slightly better, without any significant gameplay changes. Use this guide as a starting point for your own personal collection of mods, or use it as it is for a near vanilla experience. This list is obviously subjective and because of PGI, all mods are prone to breaking with any patch so if something isnt working (or gets fixed) leave a comment. Core Workshop Mods These are all available on the Steam Workshop. TechnicalRemove JumpShip Animation This mod does what it says on the tin, it removes the lengthy scene that plays of your Leopard attaching to a Jumpship so you only see the default loading scene where your Leopard flys through space, which can speed up the game if you have a fast PC, but its not updated so you will still see this scene during DLC events like the FedCom Wargame Campaign journey. XenoPax Art Optimizer 1.99a XenoPax Optimize 2.99a Two mods that tidy up the code of the game to theoretically have it run a little better. AudioKh0rnes Sound Mod The definitive mod for improving audio across the entire game without taking things too far. There are other versions of this mod, this one is my personal preference. MW2 Betty Ultimate Any excuse to remove the default voice lines in MW5 is a good thing, and what better way to do that than reintroducing something from a classic. GameplayStar Map Mouse Over This mod lets you see a tooltip when hovering over a system that shows what missions are there and who the involved factions are, the difficulty of the mission and the drop weight. QOL Upgrades 2 - Thermals and Headlights This is a very useful mod that primarily adds working thermal vision and external lights to your mechs, and has some useful options through Mod Options such as customising the salvage chances, but is a rip from YAML so dont use the two together as it says in its description. VisualNiagaraMG Replaces the MG bullet effect with a particular effect technique that is meant to be more light weight, and produces a distinct visual as it turns MG tracers into actual light effects. Core Nexus Mods For these mods you will need to download them from Nexus Mods and then you can either just manually install them or you can use their mod manager Vortex. A quick guide to using Vortex: After installing Vortex, you download the mods you want from Nexus Mods, then inside Vortex after setting up MW5 as a game it manages and that you have selected, in the "Mods" section you have a button to install mods from a file, you do that for each mod you download, then you click "Deploy Mods" and if there are no permissions issues it should show that its doing something and return back to normal, now if you done it correctly when you load up MW5 you will see those mods and you will always have the convenience of Vortex to keep the mods up to date and quickly find their pages on Nexus Mods if you need to. If you cant get the mods to show up in MW5 using Vortex, use the manual installation method, unzip the mods and drop the contained folder into " MechWarrior 5 Mercenaries MW5Mercs Mods". TechnicalMW5 Mod Compatibility Pack[www.nexusmods.com] "Community driven package that enables increased compatibility between mods". Some mods benefit from this to play nice together, not the ones currently recommended here though. In The Pit[www.nexusmods.com] This mod fixes some camera positioning issues as well as some bugs in the game, along with some support for some displays, check the Nexus page for details if thats you. Mod Options[www.nexusmods.com] "A mod that allows configuring options for my other mods, because MW5 modding." MultiplayerCo-op Rewards[www.nexusmods.com] "Gives rewards to clients in co-op." GameplayEnhanced Cooldown Pips[www.nexusmods.com] This mod allows you to customise the cooldown pips for weapons around your reticle if you have them enabled. It works on a scale like the heat bar, so my advice is to set your optimal and minimum ranges to neutral colours like white and/or black, so that theres a clear distinction between being in range and not, but otherwise very useful and a feature of older MW games. TTRulez_AIMod2[www.nexusmods.com] This improves the AI, even though it might not address your personal gripes with specific aspects of the AI in MW5, and if you get the version that comes with Lancemates_Orderz, that doesnt seem to work all the time, so IMO this mod is a little hit and miss but theres no currently working alternative. VisualImproved Laser Beams[www.nexusmods.com] This makes lasers brighter and more solid, which is useful in snow maps and otherwise is a visual preference. Improved Mech Shader[www.nexusmods.com] "Tweaks the material of all the mech paint to less uniform more dirty and the metal darker like in MWO. Also does small changes to the weapons material. (You will need Ultra Visual and Weather and Source HD Textures to get the best effect)" I personally recommend the "Dull" file pack. Source HD Textures[www.nexusmods.com] This is a collection of HD Texture packs for different aspects of the game. The files we are interested in are: Cockpit HD MechNormal_HD (or) MechWear_HD (but not both, I prefer Wear) MechNormal_HD_DLC (or) MechWear_HD_DLC (but not both, I prefer Wear) Ultra Visual and Weather[www.nexusmods.com] "Improvements to the lighting and various visual elements (Volumetric fog, AO, shadow, and post processing, skybox...)" Other Mods These mods dont currently work. VisualPrecision Sights[www.nexusmods.com] This replaces the sight/reticle with one that obscures your target less, if you find the default one is too obtrusive. This mod is broken, it crashes your game if you change to an AI mech. Remove Green Pickup Zone Ring Doesnt hurt your game but doesnt currently do anything. GameplayBetter Spawns 2 Classic[www.nexusmods.com] Better Spawns updated implementation[www.nexusmods.com] Better Spawns 3[www.nexusmods.com] Fixes enemies and vehicles spawning out of thin air, but unfortunately none of them work well currently. If these did actually work, you would only use one of them, they all aim to do the same thing but seem effectively abandoned unfortunately. DIY Mods Sometimes theres no decent mod that does what you need, maybe specifically because its so easy to do that everyone else does it themselves. No Intro Quick StartRemoving the opening videos when starting the game: 1. Navigate to the games install folder. 2. Navigate to " MechWarrior 5 Mercenaries MW5Mercs Content Movies". 3. Make a new folder and call it something easy to understand and notice like "DISABLED". 4. Move all of the "legalsplash...", and "piranha-logo..." files from Movies to your new folder, 4 files in all currently. You can also remove any other videos you like, and if you change your mind or move the wrong file you can just return the files to where they originally where, which is why were not deleting them entirely. Keep in mind that editing these kinds of files like this is something that can be easily undone unintentionally by Steam through regular patching or definitely if you ever verify the game through Steam.