换一换
换一换 


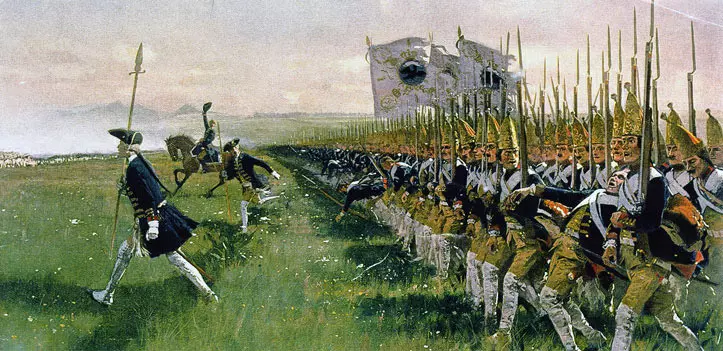
This guide provides an exhaustive overview of how the various unit abilities, formations and weapons work in Empire Total War and how to use them best. Introduction This guide aims to give an overview of all of the aspects which affect the usage and performance of land units in Empire Total War. At the beginning of the campaign, units have few capabilities, faction rosters are limited and melee units still exist. Over the course of the campaign, research and building advances unlock newer units and many capabilities that drastically affect the way battles play out. In particular the key European unit type in this era - Line Infantry - sees significant improvement in performance and flexibility. Devising tactics to get the most out of these changes is a key part of the game. It is not the goal of this guide to provide these tactics or army compositions, only to provide research into the effect of weapons, stats and abilities. Armour and Shields Protective gear in this game is primarily effective against melee and non-gunpowder missiles. As such, it is mainly equipped by units whose primary role is to be in melee. In game, the armour and shield values are aggregated into a single defence value, however it can be seen if there is a large difference between two otherwise comparable units or there is visual evidence. Armour cannot be upgraded. ArmourArmour defence values range from 0 to 10, and the table below is a rough description of each level. Armour values above 4 are predominantly the domain of heavier cavalry units. Armour Value Description 0 Naked 1 Civilian clothes 2 Light/Informal uniform 3 Heavy military uniform 4 Partial armour/Buff coat 5 Light Mail 6 Heavy Mail 7 Cuirass/Breastplate 8 Full eastern armour 10 Winged Hussar Full Plate ShieldsAs this is an era of gunpowder, very few units have shields, only eight in total. Mounted shields provide 4 defence, while infantry shields provide 7 defence. In what seems like an error, the Death’s Head Hussars have shields with value 7. Speed and Mass An important factor in battles is the speed of the units as positioning is critical and artillery has a very long effective range. It is more relevant to cavalry who play more of a supporting role to infantry in this era, and are more melee oriented. Mass determines the impact of charges on the receiving unit. InfantryThere are three infantry weights: light, medium and heavy. Lighter troops run faster and heavier troops have an advantage when charging and in melee. The Light category typically includes light infantry, riflemen, light dragoons, skirmishers, irregulars and peasant mobs. The Heavy category typically includes elite infantry, grenadiers and melee infantry. All other infantry units are Medium. Type Run Speed Mass Light 4.05 80 Medium 3.51 90 Heavy 3.15 100 MountedThere are five mounted weights: light, medium, heavy, camel and elephant. Light typically includes lancers, hussars, light cavalry, missile cavalry and light dragoons. Medium includes provincial cavalry, regiment of horse and dragoons. Heavy typically includes cuirassiers, heavy and guard cavalry and general’s bodyguard. There are only two camel units and three elephant units. Heavy cavalry and elephants have a significant mass which helps with charge impact compared to infantry. However they tire easily and should not run except when needed. Light cavalry is ideal for flanking and attacking artillery or light infantry, but generally does not have the mass to do much damage to regular infantry units. Light cavalry often has Good Stamina which means it can do a lot of running and not get exhausted. Camels low speed means that they do not do as well on the charge as medium cavalry and are typically best used as anti-cavalry units rather than anti-infantry. Type Run Speed Mass Light 11.7 450 Medium 9.9 600 Heavy 8.1 750 Camel 6.3 600 Elephant 4.5 5000 Discipline and Training DisciplineDiscipline is a binary status, and its presence is represented by the phrase “Resistant to morale shocks”. This means that the unit is less affected by morale impacting events like the death of a general or routing friends. Line infantry, grenadiers and elite/guard infantry are disciplined, and therefore are useful on the flanks of your line. TrainingTraining is an indication of how well the unit forms up and ranges from rabble, mob, poorly trained, trained, well trained to elite. The higher the level, the tighter the formation, and the quicker they reform which can be important for line infantry tactics. The majority of units are trained, well trained or elite. Irregulars, militia and mobs tend to be in the lower bands of discipline. Stamina and Fatigue Resistance Stamina and Fatigue Resistance are two separate but related attributes. A unit with Good Stamina takes longer to get tired, while Resistance to Cold/Heat Fatigue means that a unit is less affected by the fatiguing effects of the relevant climates. Fatigue resistance is a factor when moving between strategic areas especially as a European faction since a lot of colonial areas are hot and therefore homegrown units will suffer. For this is the reason Colonial or Company versions of units exist as locally recruited units that are resistant to the effects of climate. Formations Some units have the ability to operate in different formations, many of which are unlocked by technology research. Wedge/DiamondThe advantage of the standard cavalry formation is that it is fast to move around in, and maximises the contact point with the enemy in a frontal charge. Disadvantages are the troopers tend to get caught more as they stop to fight anyone in contact. This can make disengagement hard. Also, the looseness can mean that in the course of battle you need to stop the unit to reform so that charges are effective. Wedge and Diamond have two main effects: a) tightening up the formation so stragglers are less likely and the unit maintains cohesion and b) makes the unit push further into an enemy unit before stopping. The trade off is reduced speed and less contact on the charge. They allow the cavalry unit to pierce through an infantry unit, splitting it in half and being able to continue through without getting caught due to fewer cavalrymen making contact with the enemy. Not as effective in terms of straight up damage as a line formation, it can weaken the morale of the enemy (who tend to suffer flank/rear attack penalties due to the split) and allows cavalry to get to rear units (generals and artillery) more quickly than flanking. In terms of handling, these two formations seem to leave fewer stragglers behind after impact and therefore provide more reliable control during combat including follow on charges. Stuck horsemen tend to bring the whole unit back and this is less likely to occur when in these formations. Due to the speed reduction, these formations should only be engaged when near to the enemy. Diamond narrows the formation more than Wedge and is therefore more effective at getting through without excessive contact, and seems to maintain tightness of formation better during maneuvre as the wide tail of the wedge is quite unwieldy. Diamond also seems to allow for better charges at off angles to the current facing. These formations are available to the vast majority of cavalry; missile cavalry do not have access to them as a rule. Light Infantry TacticsThis formation sees the unit spread out and crouch to reduce their profile. The trade off is that it increases the footprint and makes them more vulnerable to melee and generally more difficult to maneuvre. In this mode, the units will take fewer casualties from missile fire but as they have a bigger footprint they can be more likely to be caught in melee. This can allow units to be placed in front of regular units who shoot standing up, as the crouching pose means they are unlikely to suffer friendly fire. Be aware that they stand up to move they can be hit, which can be an issue if skirmish mode is enabled. SquareThis formation gives infantry a bonus versus cavalry and allows for 360 degree fire. It is unilaterally beneficial against cavalry and detrimental versus infantry and artillery fire. It is ideal for the flanks of the battle line to force flanking cavalry to stay away. The formation is only available to Line and Elite Infantry. Pike Wall and Pike SquareThese two formations are available to both of the two pike units (Pikemen and Zamindari Pikemen). Both formations are stationary and the only way for the units to use their pikes (they use swords otherwise). The pike square formation is essentially the precursor of the line infantry square - use to ward off cavalry attacks on the flanks or near artillery. Pike wall is useful against melee infantry attacks and cavalry where the unit is not easily flanked. Abilities SkirmishThis ability makes the unit retreat automatically when an enemy tries to engage it in melee. It is most effective on missile cavalry who are generally faster than most melee cavalry. However, it is also worthwhile to have enabled for infantry that have the ability, usually irregulars, light infantry and skirmishers, as they are not meant for melee and it gives them more time to get assistance from other infantry. GuardThis mode makes the unit remain in one spot regardless of whether its target moves of range. In melee it ensures the unit does not pursue a routed enemy. This is useful on the defensive and for generally maintaining a cohesive battle line. Typically only available to infantry. Wooden StakesSome troops have the ability to place wooden stakes during the battle which will kill any cavalry unit the contacts them frontally. The width of the unit determines whether the stakes are placed in a long single line or a deeper formation. Since the stakes are broken when used you may opt for narrower and deeper rather than a single row. Friendly stakes can be passed through safely at any speed, enemy stakes cannot. Fougasse/Improved FougasseA fougasse is an explosive that can be placed before the battle by light infantry. It is automatically triggered when enemy units enter the relevant zone (indicated in red). Use as a defensive measure. The basic Fougasse showers an arc with shrapnel, while the Improved version lobs grenades as well so there is a secondary set of explosions in the target area. These tools are typically only available to Light Infantry and Riflemen when an army has remained stationary on the campaign map long enough to dig in (denoted by the stakes around the figure). Defensive Positions: Earthworks, Chevaux de Frise and GabionadesWhen defending in a dug in position, units have the option to be placed behind defensive positions in the deployment phase. Infantry units have two options: Earthworks and Chevaus de Frise. The first is an above ground trench which provides protection against missile fire, while the latter are anti cavalry defences. Neither is movable once the battle starts. Artillery can deploy within Gabionades which provide significant protection against artillery fire, however they narrow the field of fire and remove the ability for the artillery to relimber and move. DismountDragoons are cavalry units that can dismount and operate as a small infantry unit. This allows them to get to the flank or rear and cause morale hits or simply inflict casualties on a vulnerable unit. It is best to dismount some distance from the enemy so the unit has time to form up at the front of its horses before engaging. This ability is useful as it allows a cavalry unit to play more flexible roles in sieges, such as mounting walls in defence, climbing up a wall in assault or occupying a building. Note that if the horses are killed while the unit is dismounted, those men left without horses will walk when they remount! Psychology Inspire alliesThis attribute provides a passive morale boost to nearby friendly units. Generally elite infantry, elite cavalry and general units inspire allies. These units should be placed to maximise their inspiration effect as much as their direct combat abilities. Scares Enemies/HorsesElephants scare all enemy units and this provides a passive morale penalty to all nearby. Camels scare all cavalry units in the same way. These units therefore can provide more than their combat stats, and if applied at the right time can cause a large enemy rout. Hiding, Spotting, Stalking and Sniping Visibility is a key element of the battlefield. There are two sides to this aspect: hiding and spotting. Can hide in woodland/light scrub/long grass/buildingsBy default, units are visible at any range so for example, Cuirassiers cannot hide even in woodland. Units with a hide attribute will disappear from view when stationary in the relevant terrain. Hierarchically, woods is the easiest outdoor terrain to hide in, while long grass are the most difficult, so the further along the spectrum the more stealthy the units. Buildings are able to be hidden in by a subset of those who can hide in long grass. Most battlefields are covered by long grass, so stealthy units can play a factor in most battles. The ability to hide in long grass is limited to light infantry, irregulars and skirmishers plus a handful of native units. A handful of cavalry and most elite infantry, grenadiers and melee infantry can hide in light scrub, while only the heavy cavalry and generals cannot hide in woodland. Typically units where the stealth is driven by wilderness familiarity cannot hide in buildings - most skirmishers and a few local irregulars or melee units. Remains hidden while walkingThis attribute allows the unit to remain hidden while walking in whatever terrain they can hide within. Running units are never hidden. A relatively rare attribute, mainly held by some irregulars and a few skirmishers. SniperThis attribute is not made visible on the unit information screens. Three units can remain hidden even while shooting: Windbuchse Jaegers, Bowmen and Native Bowmen Auxiliary. Spotting DistanceAnother hidden attribute, each unit has a range at which it will spot hidden units in woodland, light scrub and long grass. There are two schemes with distances for each of those three terrain respectively either 50/75/100 or 50/100/150. For infantry, those units with good hiding ability generally have the longer spotting range. Most light cavalry and missile cavalry also have the good spotting range which gives them additional benefits over simple movement speed compared to medium cavalry such as Provincial or Regiments of Horse. It is worth noting that light units with long range muskets or rifles will out range the sight range of most normal units when hidden. Of course, firing reveals the hidden unit so it only has an impact to the first volley. Also, spotting units hidden in woodland is hard for all units so even Line Infantry can use it to tactical effect. Firing Drills Across the various unit types, differences in the way they fire provides tactical variations that must be kept in mind. This has the greatest impact for Line Infantry, Dragoons, Grenadiers and Elite Infantry, who by default only fire from the first rank. In this case the width of the formation has a big impact on fire output. The following drills apply to these units. One behaviour to note, when firing on cavalry, regardless of the level of drill available the units will revert to only the front rank firing. Missile cavalry, Irregulars, Light Infantry, Light Dragoons and Skirmishers fire as a group, with all members of the unit firing regardless of the formation. These units do not obtain (or need) fire drills. Fire by RankThis drill enables the first three ranks to fire in succession with one rank reloading while the next ones fire. It works well in no more than three ranks as the subsequent ranks add no value. Periodically, the unit will pause to re-form once losses have accrued. With small units like grenadiers and dragoons this provides a nimble tight formation that can deliver a large degree of fire in a short period of time. Units need a few moments to commence the drill so the best situation is for a prepared enemy to come into the fire arc of a stationary unit. Platoon FireThis drill makes the fire go along the rank in small groups and continuing from the start of the line once the end is reached. This provides continuous fire and morale penalty to enemy units, but is not as fast as rank fire for delivering the first full volley. However, units in this mode seem to reload very quickly which means that for small units they’ll fire very rapidly. The bigger the unit, the longer it takes to get ready because all the men spread out, overlapping other units if placed flush in a line. For this reason, units with this ability are best used is a more spaced formation or at the ends of a row of line infantry. Fire and AdvanceThis drill makes the ranks of the unit leapfrog each other as they fire, allowing it to get closer to the enemy while still firing. The drill is quite slow, however it is a way to move closer to the enemy and by spreading out the unit it reduces casualties; the unit can then charge or simply increase accuracy. It is generally available to line and elite infantry but not grenadiers. Its purpose is to provide some means for line infantry to counter the light infantry and skirmishers of the late game, by minimising losses while closing with them to charge range before driving them off. This works because the reload times for light infantry muskets and rifles is considerably longer than flintlocks so by closing while firing, the long reload time can be used to charge from a closer distance. Campaign Abilities While these abilities do not help on the battle, they drive the recruitment of some units and so will be covered for completeness. Paths seldom trodUnits with this ability can remain hidden on the map, allowing for stealth raids of enemy towns as well as ambush battles. This is generally available to light and missile cavalry, skirmishers as well as many native or regional units. Infantry units with this ability are often good at hiding on the battlefield too. Small armies of these units can be useful in large provinces that have many valuable resources to sabotage. This a) reduces the owning faction's income and b) can draw out small detachments of unit that can be ambushed. Garrison policing bonusSome units provide double the usual policing bonus when garrisoned in cities. This means that a smaller number of units can maintain order, and as a result these units may find themselves in battles more often. All dragoons have this ability as well as the Russian Viborniye Streltsy and Gorodskiye Streltsy. Combat Attributes Each unit has a set of attributes that determine its performance in combat. Some of these are self-explanatory but some are poorly explained. Melee AttackHow likely the unit is to score a hit in melee combat. Charge BonusA bonus that is given to the melee attack while the unit is charging, leading to more hits on the charge. DefenceHow likely to the unit is to defend a hit from melee or missiles. This is actually a composite of three values: Melee Defence, Armour and Shield Bonus. The main difference between them is that the first only applies to melee while the latter two apply to melee and missiles. In practice, heavier armour is a straight addition to a base unit type, for example Prussia's Garde du Corps have 4 more defence than Household Cavalry due to the breastplate armour. MoraleThis value represents the normal morale level. When morale drops too low, the unit routs. Factors that affect morale are fixed in value so the higher the value the greater the amount of morale penalties they can take before routing. Higher morale units should therefore be in key positions. AccuracyThis represents the hit chance for missiles fired by the unit, and the higher the value the better. Accuracy seems higher the closer the target so what range this value applies at is not clear but it seems to be a percentage. Reloading SkillThis value represents the skill of the unit at reloading. It is a % reduction of the base weapon reloading time - which is not visible in the game. As a result, it is only directly useful across units with identical weapons. This has the most importance for units that will form the line of battle. As an example, if a unit's weapon has a base reload time of 20 seconds, and that unit has a reloading skill of 25, the actual reloading time for that unit will be 15 seconds: 20 x (1 - 0.25). As it increases linearly, the impact on rate of fire is exponential (see table below): Skill 0 = 20 seconds (3 shots per minute) Skill 25 = 15 seconds (4 shots per minute) Skill 50 = 10 seconds (6 shots per minute) Skill 75 = 5 seconds (12 shots per minute) Unit Experience As a unit gains experience, it receives bonuses to its statistics. The table below shows the specifics of the bonuses Experience LevelMelee AttackMelee DefenceReloading SkillMoraleAccuracyFatigue Rate0000000111212022241403336260444828055510310-166612312-177714414-288816416-299918518-3 Infantry: Bow The simple bow is used by a handful of units: Armenian Archers, Bhumiya Bowmen, Bowmen/Native Bowmen Auxiliary. It is an inaccurate weapon with fast reload times that is used in a skirmishing style. Very fast reload: 8s Medium range: 70 How to useThe whole unit fires not just the first rank, and combined with a fast reload rate, these units can defeat lower grade muskets. Accuracy is on the poor side. Use to harass unarmoured infantry, especially the ones that can snipe (fire hidden). What to avoidLight infantry or high quality line troops will decimate these units, as typically will cavalry. Ratings Poor: 20 Accuracy and 0 Reload skill (8s) Good: 30 Accuracy and 10 Reload skill (7.2s) Excellent: 40 Accuracy and 15 Reload skill (6.8s) Infantry: Line Firing Gunpowder
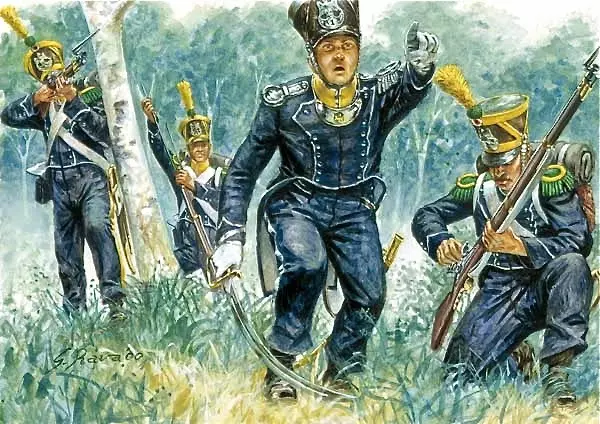
这些武器的使用取决于部队中士兵的射击位置和射击训练水平。阵型深度和朝向对其使用有重要影响。这类武器通常是核心部队的装备。该类别包括:火绳枪、燧发枪和卡宾枪。 变种火绳枪:由民兵和东方部队使用,基础装填时间24秒,射程70,受潮湿天气影响较大。 燧发枪:由线列步兵、掷弹兵和精锐部队使用,基础装填时间20秒,射程70。 轻型卡宾枪:由龙骑兵使用,基础装填时间20秒,射程70。 使用方法:装备这些武器的部队将构成战斗线的核心,需要采用相对静止的战术。部队通常要求所有成员都进入正确位置后才能开火,因此最好先就位并等待敌人进入其射击弧线,而不是直接命令他们向特定敌人开火。 如果没有【排枪射击】或【队列射击】战术,部队会在较宽的阵型中发挥更强火力,但机动性会很差,且更容易受到骑兵冲锋的攻击。随着这些战术训练的出现,三列横队成为了标准阵型。 这一类型部队的关键因素是火力输出。精英步兵的装填时间约为8秒,而民兵则需要约20秒。结合射击训练和更高的准确性,高素质步兵每分钟能造成的命中次数非常可观。正是由于这个原因,护卫步兵是游戏中最昂贵的单位。 该类别下的单位大致分为三类:民兵、常规线列步兵和精英部队。民兵可能配备刺刀,但通常没有射击训练或方阵 formation,因此必须以薄线列部署以最大化火力。当线列步兵获得“排枪射击”训练后,民兵在经济上就成为了一个糟糕的选择,因为两者的成本并没有显著差距。 常规线列步兵包括线列步兵、一些特殊单位(如爱尔兰旅)以及龙骑兵,这些单位通常配备刺刀、方阵 formation、排枪射击和行进射击(但没有分段射击)。它们构成了战斗线的核心,在研究完成“排枪射击”后可以部署为三列横队。单位往往倾向于拥有更强的射击能力或近战能力,因此要注意正面交锋的兵种搭配,例如俄罗斯线列步兵擅长近战,英国线列步兵则擅长射击。 精英单位包括掷弹兵以及精英/近卫军步兵,他们掌握所有训练技能,包括排枪齐射,同时具备强大的近战能力。其较高的训练度和射击属性使他们在战斗中更加灵活,可以突破敌方阵线或摧毁侧翼。使用排枪齐射时,将他们部署为两列能发挥最佳效果。精英单位的火力输出明显高于民兵或常规部队。 需要避免的操作:避免在单位交火时移动,因为他们需要很长时间才能重新列队并开始射击。此外,与其命令部队攻击敌方单位,不如将其部署在射击弧线能覆盖敌人的位置。当被指示攻击某个单位时,部队会浪费时间调整自身朝向,而且如果全程遭受火力压制,可能还没怎么开火就溃败了。另外,最好等部队完成装填后再移动。 轻装部队是这类(重火力)单位的克星,它们拥有更远的射程、更快的移动速度和更分散的阵型。虽然“边打边进”战术能在一定程度上应对这种情况,但骑兵支援才是最佳的反制手段。 骑兵冲击正在交火的战线侧翼和后方也是常见情况。面对骑兵时,无论训练水平如何,只有第一排会进行射击。这些武器是唯一能组成方阵的武器,因此它们将是抵御骑兵的重要防御手段。注意,在标准阵型中,无论是否进行过训练,只有第一排会对骑兵开火;而在方阵中,两排都会开火。 密集的阵型和中到慢的移动速度使这些单位成为炮兵的良好目标,尤其是昂贵的近卫军。尽可能利用掩护推进。 评级: 民兵(较差):25精准度/10装填速度(21.6秒)。成本范围500-700。 线列步兵(中等):40精准度/25装填速度(15秒)。成本范围750-1450。 掷弹兵(良好):45精准度/35装填速度(13秒)。成本范围810-1200。 近卫军(优秀):50精准度/55装填速度(9秒)。成本范围1140-1700。 步兵:齐射火药武器
These weapons are those where every man in the unit fires regardless of position. As a result they have no need for firing drills. These tend to used by sharpshooter units and the later units represent a transition from lines of battle to more modern battle tactics. They can start to form large proportions of late game armies. The category includes: Light Carbines, Light Infantry Flintlocks, Rifles. Variants Light Carbine: used by Light Dragoons - base reload time of 20s, range of 70 Light Infantry Flintlock: used by light infantry, skirmishers and irregulars - base reload time of 25s, range of 90 Rifle: used by riflemen and skirmishers - base reload time of 40s, range of 125 How to UseThese units have multiple uses: standing in the line of battle, skirmishing ahead of the line of battle or operating on the flanks and taking out rear units like artillery or generals. The rate of fire for these units will be slower than elite line infantry but the increase in accuracy and mass firing means they can out shoot many militia or line infantry units. If the enemy has no cavalry left, then these units can inflict a lot of casualties on an enemy army, especially line infantry, if positioned well to let them fire as much as possible. Some of these units can stand in close order and placed between line infantry adding a decent effectiveness but bear in mind that their reload rate is lower than elites and grenadiers. In deep formations, the rear ranks will not all be able to fire due to the men in front obstructing. Light Dragoons shoot at the same range as line infantry, but mass firing allows them to unleash a full volley and retire before full retaliation. Light Infantry Tactics can be used to place these units in front of line infantry adding an extra layer of firepower against enemy units. The crouching reduces the instances of friendly fire. Otherwise LIT should be used when fighting other light forces to reduce casualties. It also ensures that all members of the unit will fire compared to close formation. Also, many units in this category have good spotting range and hiding ability as well as decent stamina. They're suited to scouting roles, moving through cover to find enemy units, and quickly moving to new positions. What to avoidThese units have long reload times, and typically poor melee and morale stats so cavalry and melee infantry can hurt them heavily. Stakes if available are great for cavalry protection and skirmish mode is useful against infantry. Green Jackets and Legion of the United States are the only units in this category with bayonets and decent defence stats so these can give cavalry a blood nose. Rifles have the longest reload times in the game, and therefore become very vulnerable once they have fired a volley. Make sure that they use their volleys on valuable targets. Ratings Irregulars (Average): 35 Accuracy / 10 Reload (22.5s). Cost range 580 - 990 Light Infantry (Good): 55 Accuracy / 30 Reload (17.5s). Cost range 720 - 1260 Riflemen (Excellent): 70 Accuracy / 35 Reload (26s). Cost range 960 - 1040 Infantry: Grenade Grenades are used by two methods: hand thrown by grenadiers who also wield muskets and fired by the grenade launchers of Russian and Ottoman Hand Mortar units. Variants Hand thrown - special reload time, range approx. 40 Grenade launcher - reload time 20s, range: 70 How to useHand thrown grenades are a high risk, high reward play. Your troops have to be close to the enemy to use them meaning they’ll take more casualties from fire, but they have the potential to instantly halve the opposing unit and rout them. This creates a gap in the enemy line which can then be exploited. The advantage of the Hand Mortars is that they can have the same impact without the risk of closing range. Best used on stationary units. What to avoidMoving units, especially melee and cavalry units. It is highly likely that an advancing or fast moving unit will pass under the grenades and suffering no casualties. It also seems that grenade tossing causes the unit to have to reload their musket so it is best to follow up the grenade with a charge into combat if the target did not rout. Infantry: Unique Missile Weapons A handful of weapons are only used by one unit available to a single faction, so their tactics are quite specialised. The Blunderbuss of the Libyan Kuloglu (Ottoman) is unique weapon (range 35) that shoots 8 rounds in one blast. In return it has a high base reload time of 30 seconds, 21s when the unit’s reloading skill is factored in. With such a short range, this weapon needs to operate on the flanks or rear of enemy units, or against artillery crews. The Double Flintlock of the Grenzers (Austria) is a light infantry flintlock (range 90) which shoots two barrels at once. The base reload time is higher at 30 seconds, 18s when the unit’s reloading skill is factored in. Use this unit as you would any light infantry. The Breechloading Rifle of Ferguson’s Rifles (England) is a rifle (range 125) with a base reloading time of 13 seconds, 8.5s when the unit’s skill is factored in. This is very fast, as fast as elite infantry with the shorter range muskets and means this unit can be used much more aggressively than normal slow-reloading rifles. The Airgun of the Windbüchse Jaegers (Austria) is a silent rifle (range 125) with an extremely fast base reloading time of 7 seconds, 4.5s when the unit’s skill is factored in. They have the stalk and snipe skills which means they can shoot hidden, even in long grass. A smaller unit size than normal rifles, the fast reload speed means that they can quickly run out of ammunition. Infantry: Melee Generally speaking the melee performance of units is governed by the stats rather than the specific weapon. However, there is some correlation between weapon type and stats which can be used to give some rules of thumb. Pikes Used by Pikemen and the non-playable Zamindari Pikemen when they enable the pike wall or pike square formation. Units with this weapon have a significant bonus versus cavalry. The unit will fight with swords when not in that formation although the data files do not list a secondary weapon so it is possible that the stats for the pike still apply. Useful for flank and cannon protection before line infantry get bayonets and square formation. Can be used as assault melee infantry against early militias and line infantry, but these units have limited lifespan. Rifle Butt When a unit has no melee weapon or bayonet they use their musket or rifle directly. Used by light infantry and militia who generally have poor melee stats, and line infantry before the advent of bayonets. If the unit fights with its rifle butt then it isn't meant to be in melee at all! Two units fight with their weapon butts but have the strong stats of grenadiers and need to considered exceptions to this class: Hand Mortar Company and Janissary Hand Mortar Bölük Melee Attack: 2-8 Charge Bonus: 2-8 Melee Defence: 3-8 Bayonet Used by most line infantry, elite infantry and grenadiers, the bayonet is the result of technology research. The bayonet adds 3 to the original melee attack value and further research adds 3 to the charge bonus for units with these weapons. In combination with higher base melee stats, units with these weapons will outclass those fighting with their rifle butts, so an example militias will be soundly defeated by line infantry with bayonets. Generally, units fighting with bayonets have a moderate Melee Attack attribute, high Melee Defence and Charge Bonus. This makes them effective at fending off cavalry attacks, and reasonable as assault troops but not effective killers in sustained melee. These units should be used defensively when up against better melee infantry. When fighting cavalry, use square when available as it gives melee boosts. As the bayonet is one of the most widely used infantry weapons the statistics vary greatly. Generally speaking, Militia are poor and are best limited to self defence, Line Infantry are decent at defence but generally not strong in attack. Grenadiers and Guards have comparable stats with the former being slightly better in attack and the latter having some of the highest infantry defence values. As Guard units can typically only be recruited in home regions, Grenadiers will be the go to units for the assault role in remote regions. Melee Attack: 4-13 (+3) Charge Bonus: 8-19 (+3) Melee Defence: 7-17 Sword/Sabre These weapons are used by Irregulars, Ottoman elites and Eastern melee units. Sword unit statistics tend to feature high Melee Attack, moderate Charge Bonus and poor Melee Defence. These units are not great on the defensive and should be used to assault. In the campaign, Ottoman elite units have an early melee advantage because their swords give them good stats without technological advances, but over time this diminishes as bayonets improve. Irregulars gain a slight multi-role nature with these weapons, especially as they tend to have low reload skill meaning that they'll only fire a few shots before an enemy unit is upon them. Melee Attack: 7-15 Charge Bonus: 7-12 Melee Defence: 0-10 Axe/TomahawkUsed by native Americans and Russian militia, these tend to be strong assault units. Excluding the Bowmen/Native Bowmen Auxiliary militia-tier unit, these units have moderate Melee Attack, moderate Charge Bonus and poor Melee Defence. Early in the campaign these units are comparatively strong in melee but as technology unlocks better bayonets and units they'll be outclassed. These tend to be good flanking units as they don't have the defence to take a charge and the native units tend to be light and fast. Melee Attack: 6-12 Charge Bonus: 5-12 Melee Defence: 2-10 Mounted: Bow Mounted bows are the same weapon used by infantry and are used by a handful of units: Tatars, Kalmuks and Zamindari Horsemen. It is an inaccurate weapon with fast reload times. Very fast reload: 8s Medium range: 70 How to useThe whole unit fires not just the first rank, and combined with a fast reload rate, these units can be useful for taking out enemy cavalry who tend to be without missiles. All units wielding this weapon are Light so are fast and therefore useful in a harassing role and chasing routers. What to avoidDo not try to oppose musket-armed or well-armoured units with these as the inaccuracy and lack of armour penetration will make these ineffective. Ratings Accuracy: 20-30 Reload Skill: 5-15 (6.8s - 7.6s) Mounted: Gunpowder This covers Carbines, Light Carbines, Camel guns and the Matchlocks and Flintlocks that are carried and fired on horseback. These units fire as a group and can reload while they're moving, even running. Statistics-wise these units never reach the reload rate of elite infantry instead relying on their mobility to move in and fire then retreat to reload. Variants Carbine/Light Carbine: used by Light Dragoons, Carabineers and other European light cavalry - base reload time of 20s, range of 70 Flintlock/Matchlock: used by native American and eastern missile units - base reload time of 20s/24s, range of 70 Camel Gun: Shaturnal Camel Gunners - base reload time of 28s, range of 90 How to useThese units can only fire forward, but can reload on the move. Can be used at a pinch in a melee capacity but not their strong suit. Best use is against melee cavalry who are typically slower and fewer in number than infantry. Also good to run up the flanks of infantry lines and shoot the side or rear of units to trigger morale hits, or take out artillery. Most units in this category are light cavalry so they're quick and not that strong on the charge. Use them for typical light cavalry duties like scouting and chasing routers. Skirmishing is available for missile cavalry, at the expense of wedge or diamond formation - this can be useful when facing heavy cavalry. Camel Gunners have a range advantage against all missile cavalry and many infantry units. The extra height of the camel also means that they can safely shoot over the heads of line infantry adding an extra layer of firepower. AvoidShooting matches with infantry should be avoided due to the number disadvantage. Typically mounted gun units are poor in melee so avoid this with other cavalry or infantry. Their reload skill is never be high enough for them to face off against gunpowder infantry. RatingsThere isn't a wide range of quality of these units. 35-50 accuracy, 10-30 reload skill (14-22s) Mounted: Melee
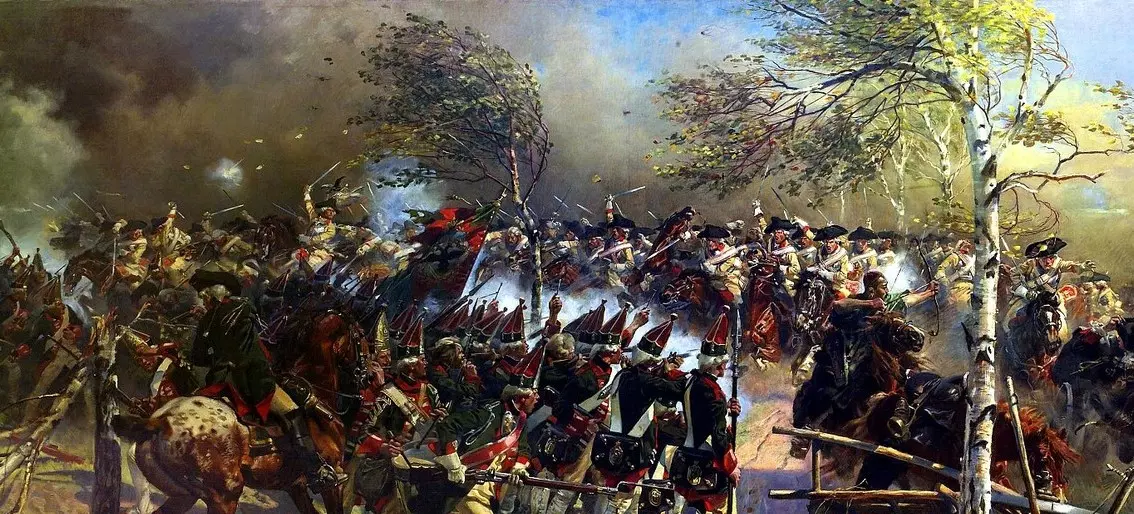
这包括剑、军刀、弯刀、斧头和战斧,是骑兵单位中最大的类别。 剑类变体:由低端和高端欧洲骑兵使用。通常具有冲锋导向的属性,适合攻击步兵。 军刀/弯刀:由中等水平的欧洲骑兵和大多数东方骑兵使用。通常具有近战导向的属性,适合与骑兵作战。 斧头/战斧:由美洲原住民单位和一种东方单位使用。通常具有更通用的属性,在任何方面都不突出。 使用方法:对抗步兵时,最佳用法是进行一次出色的冲锋,因为骑兵拥有极高的质量,冲锋能造成大部分伤害。由于数量有限且战斗节奏缓慢,即使是高端的这类单位在持续近战中表现也不佳。冲锋时,宽阔的浅纵深阵型能带来最大冲击力。楔形或菱形阵型可用于突破敌军阵线,在敌军被击退时切入其后方。总体而言,冲锋的目标应是通过冲锋震慑击溃敌军单位,而非杀伤大量士兵——若未能实现击溃,应选择撤退,或在安全情况下突破敌军。 从后方冲击正在交火的敌军阵线,可给予其额外的士气惩罚并促成溃败,但需注意友军误伤。以楔形或菱形阵型从斜角冲锋,能减少友军误伤并让更多骑兵投入战斗。轻装单位适合追击散兵、溃兵或猎杀炮兵。 对抗骑兵时,由于敌方单位更为密集,冲锋的冲击力会减弱,此时近战数据将决定战局。重骑兵(胸甲骑兵、重骑兵、近卫军等)应当压制轻骑兵。 总体而言,这些单位最好保持在预备队中,直到步兵阵线被削弱,他们才能实现击溃敌人的目标。 此类别的许多轻型单位拥有良好的视野范围,因此可以作为快速侦察兵来寻找隐藏的部队。 避免与步兵进行长时间近战,骑兵单位很少能在此类战斗中获胜。他们的数量较少,这意味着其抗损耗能力较低,且容易受到士气惩罚。避免正面冲击远程步兵,因为骑兵速度不足以在未被射击的情况下接近目标。在任何情况下都不要冲击方阵 formation 的步兵。重骑兵容易疲劳,在疲惫前可能只有一次有效的冲锋机会,因此要尽量减少接战前的奔跑。 火炮对骑兵阵型影响很大,因为马匹体型较大,需警惕炮火狙击。 骑兵评分: - 远程骑兵(较差):近战攻击5-7,冲锋7-10,近战防御2-6 - 轻骑兵/行省骑兵/皇家骑兵(中等):近战攻击9-11,冲锋11-15,近战防御3-8 - 重骑兵(良好):近战攻击16,冲锋14,近战防御5-8 - 近卫骑兵(优秀):近战攻击19-21,冲锋17-19,近战防御10-12 坐骑: lance

A handful of cavalry units are armed with a lance, and they come in two forms: light (i.e. fast) which can be used for the usual roles like chasing routers or neutralising artillery, or heavy (i.e. decent in melee) who are used to break the main enemy line. How to useThese units are all about the charge, and generally are not suited to prolonged melee as their melee defence skills do not give them great survivability. Their charge value doesn't vary much across the quality range. Light lancers need to avoid melee as they can even lose to skirmishers as their melee skills are so low and they have a numerical disadvantage. Used at a critical moment they can break wavering infantry quickly and weaken a flank. These units will take losses quickly so expect to end battles with many casualties. Heavy lancers have good melee attack but poor defence so they won’t fare well in prolonged melee but they can follow up the initial charge with some muscle. They won’t match up well to good melee cavalry but can stick around longer against infantry after the charge. Slow like other heavy cavalry these are not for flanking, but for deploying to the main line at a critical point to turn a battle. AvoidMelee cavalry will dominate these units so they should avoid cavalry engagements. They are primarily anti-infantry units. Ratings Natives (Average): Melee Attack 5, Charge 24, Melee Defence 0 Lancers (Good): Melee Attack 7-9, Charge 25-29, Melee Defence 2-6 Sipahis/Winged Hussars/Ahadis (Excellent): Melee Attack 14-16, Charge 23-25, Melee Defence 5-7 Artillery: Cannon Cannons include the following units: Fixed (4 guns): Sakers/Guns, Demi-Cannons/Cannons, 64lb Siege Cannon Foot (3 guns): Foot: 12lb, 18lb, 24lb, 24lb Guard Horse (3 guns): 3lb, 6lb, 18lb Guard Shot Types Shot: range 400, reload 30s, +25 accuracy skill Canister: range 125, reload 30s Shrapnel: range 350, reload 40s (30s for 3lb & 6lb)Note that the 64lb Siege Cannon varies in that it does not have canister shot, can shoot Round Shot to 600 and Shrapnel Shot to 400. How to UseAll artillery inflict morale penalties upon units struck by projectiles, and they can be used either by right-clicking on an enemy unit or at a spot on the ground. Cannons fire on a low trajectory and have no minimum range. Artillery have unlimited ammunition and gun crews can operate abandoned enemy artillery pieces of the same specific type (i.e. Foot Artillery or Horse Artillery). Through the campaign, a region will only have one size of Foot and Horse artillery available - large pieces replace the smaller ones. Round shot bounces and therefore can hit multiple units in a line so look for groups of units to target, especially at oblique angles. Round shot is more accurate than the other shot types, so it is better for sniping generals or cavalry units. It also is the only shot type suitable for damaging buildings or walls and does equivalent damage to a howitzer of the same poundage. The larger the cannon, the greater the damage inflicted and the higher the accuracy typically. Canister is the second shot type, unlocked by technology. It is a short range anti-personnel weapon with the range of rifles (125) that is like a shotgun blast. When you aim the cannons at a unit, they will target the ends of the enemy unit rather than the centre so manually targeting a location can more suitable at close ranges. Shrapnel is the final shot type, and it is a combination of the first two - a projectile that explodes into shot at long range. Like canister it is anti-personnel but with a longer range. Against infantry it is preferred until the unit reaches canister range due to the slightly longer reload time. On uneven ground it can be less effective than round shot as it doesn’t bounce. Foot artillery move at the speed of walking infantry, while horse artillery can run and move faster than infantry. When engaged in melee, the horses that pull the artillery will flee meaning that the pieces can not be moved for the rest of the battle. French Guard Artillery has high stats and inspires nearby troops. AvoidAll artillery units have small crews and fare badly under fire or melee. Watch out for enemy cavalry and guard the units with some infantry. The geography is important as the low trajectory of cannons can mean they can be easily blocked. Be wary of leaving units on fire at will with canister shot as friendly fire can be dangerous. At this range you probably want to have full control over their firing. Artillery: Howitzer There are two types of howitzer, both foot (3 guns): 12lb, 24lb. Shot Type Shot: range 350, reload 30s, +25 accuracy skill Carcass: range 350, reload 40s Quicklime (replaces Carcass): range 350, reload 40s Explosive Shell: range 350, reload 40s, -50 accuracy skill Percussive Shell (replaces Explosive): range 350, reload 40s, -50 accuracy skill All shot types have a minimum range of 100 How to UseAll artillery inflict morale penalties upon units struck by projectiles, and they can be used either by right-clicking on an enemy unit or at a spot on the ground. Howitzers fire on a higher trajectory to cannons and can be placed behind friendly units. Through the campaign, a region will only have one size of Howitzer artillery available - large pieces replace the smaller ones. Round shot in howitzers bounce less than cannons so are not as effective against massed units. Round shot is more accurate than the other shot types, so it is better for sniping generals, artillery or cavalry units. It also is the only shot type suitable for damaging buildings or walls and does equivalent damage to a cannon of the same poundage. Larger howitzers are less accurate but do more damage. Carcass Shot and Quicklime Shot (which replaces it) are anti-personnel weapons that are more effective against stationary and emplaced enemies (behind trenches, in buildings or on walls). This is due to the fact that they do not inflict much damage on impact, but unleash an after effect that does all the work. Moving targets will often have moved past the point of impact and not be affected. It can be used by manually targeting the ground in front of advancing enemies but this is more labour intensive. Explosive Shell and Percussion Shell (which replaces it) are anti-personnel weapons that do more damage in impact and therefore are better against moving targets and less effective against emplaced enemies. Percussion shells can cause damage to lighter structures but the lower accuracy means Round Shot would be better. They are a good all round shot type to utilise. Howitzers are a bit of an all-round artillery piece, combining the high arc of a mortar with the directness and mobility of a cannon at the cost of a slightly higher price. They won’t be as effective in close as the cannons so it may be worth having both of them in an army. The shorter maximum range of the howitzer means it needs to be used more aggressively than cannons or mortars. AvoidAll artillery units have small crews and fare badly under fire or melee. Watch out for enemy cavalry and guard the units with some infantry. Given that howitzers can be placed behind your infantry line, care needs to be taken to avoid friendly fire when the enemy closes, especially with the anti-personnel weapons. Artillery: Mortar There are two mortar units, 4in and 8in, also known as Mortars and Bombardment Mortars. They are fixed and have 4 guns. Shot Type Shot: range 750, reload 45s, +100 accuracy skill Carcass: range 750, reload 50s Quicklime (replaces Carcass): range 750, reload 50s Explosive Shell: range 750, reload 50s Percussive Shell (replaces Explosive): range 750, reload 50s All shot types have a minimum range of 200/250 for 4in/8in respectively How to UseAll artillery inflict morale penalties upon units struck by projectiles, and they can be used either by right-clicking on an enemy unit or at a spot on the ground. Mortars fire on a very high trajectory to great ranges so can be placed behind friendly units. They will also be more useful in uneven battlefields where cannons will struggle for line of sight. Round shot in mortars do not bounce so are not as effective against massed units. Round shot is more accurate than the other shot types, so it is better for sniping generals, artillery or cavalry units. It also is the only shot type suitable for damaging buildings or walls and does equivalent damage to a cannon of the same poundage. Larger mortars are less accurate but do more damage, overall more damaging than cannons. Carcass Shot and Quicklime Shot (which replaces it) are anti-personnel weapons that are more effective against stationary and emplaced enemies (behind trenches, in buildings or on walls). This is due to the fact that they do not inflict much damage on impact, but unleash an after effect that does all the work. Moving targets will often have moved past the point of impact and not be affected. It can be used by manually targeting the ground in front of advancing enemies but this is more labour intensive. There will be less momentum in the spread due to the higher arc travelled. Note that kills due to the effect do not count towards the unit's experience. Explosive Shell and Percussion Shell (which replaces it) are anti-personnel weapons that do more damage in impact and therefore are better against moving targets and less effective against emplaced enemies. Percussion shells can also be used against structures as effectively as Round Shot. They are a good all round shot type to utilise. Mortars are effective in defensive sieges due to their high range and trajectory. Placed within the walls they are safe from non-mortar fire, and can be used to counter-attack artillery. In general mortars are good against enemy artillery as they will destroy the guns. They are more expensive than cannons and howitzers. AvoidAll artillery units have small crews and fare badly under fire or melee. Watch out for enemy cavalry and guard the units with some infantry. Given that mortars can be placed behind your infantry line, care needs to be taken to avoid friendly fire when the enemy closes, especially with the anti-personnel weapons. Artillery: Special This includes the Puckle Gun, the Organ Gun and the Rocket Troop/Band. Weapons Puckle Gun: range 150, reload 6s Organ Gun: range 400, reload 60s, +75 accuracy skill Rockets: range 750 (min 150), reload 40s Puckle GunPuckle Guns are short range anti-personnel foot artillery, relatively straightforward to use. Place in the line of battle and let it fire. Its rate of fire is high and as an artillery piece it causes morale penalties so its power will most likely come from routing the enemy quicker once engaged with your infantry. The larger round and long range makes it useful against large targets like cavalry and elephants. Cheaper than a unit of line infantry it is useful in town defence where the narrow streets reduce the room for infantry to form up. Organ GunOrgan guns are fixed multi-barrelled cannons which fire 12 projectiles in a single volley with a deep spread. They can damage structures or units equally well, suffering only a long reload time. Recruitable early they are a unique unit for the Ottomans which is quite flexible but doesn't get exotic shot types. RocketsRockets are fixed anti-personnel artillery, spreading over a large arc up to a long range. They are particularly effective against cavalry and infantry lines, more so as the range closes. Comparable to a mortar but without the anti-artillery capability, but with greater morale impact. They do not damage structures, but can be useful in sieges in an anti-personnel capacity due to the fact they out range most artillery. Appendix Other Relevant Guides https://steamcommunity.com/sharedfiles/filedetails/?id=132880446 https://steamcommunity.com/sharedfiles/filedetails/?id=268922133 https://steamcommunity.com/sharedfiles/filedetails/?id=152205008 https://steamcommunity.com/sharedfiles/filedetails/?id=1194131295